VERSION EN ESPAÑOL
Buenos días a todos los amigos de la comunidad. Y sobre todo a los que se les ha despertado el interés por iniciarse en el hermoso camino de las artes plásticas a través del género del dibujo y sus múltiples posibilidades técnicas.
En el post anterior expuse en síntesis una reseña de los tipos de línea. Y sus funciones en la estructura de un dibujo.
Hoy aclaro que hay dos tipos de dibujos. El que se realiza para hacer la arquitectura de una obra, para pintar, y el dibujo como obra en sí. Cómo trabajo definitivo.
También en el escrito anterior les anuncié que íbamos a aprender a dibujar a través de un sencillo método figuras de objetos y cosas. Para lo que lo haremos desde las más sencillas y después ir complejizando las composiciones.
UN ENUNCIADO
Todos los elementos de la naturaleza están contenidos en figuras geométricas.
Puedes comprobarlo ahí mismo en la vida real. Mira cada objeto o cosa y descubre la forma geométricas dominantes. Y ya eso es un poderoso avance en tu propósito de ser artista.
Si no es una figura geométrica, entonces es la combinación de varias. Pero así funciona.
EL PROCESO TEÓRICO
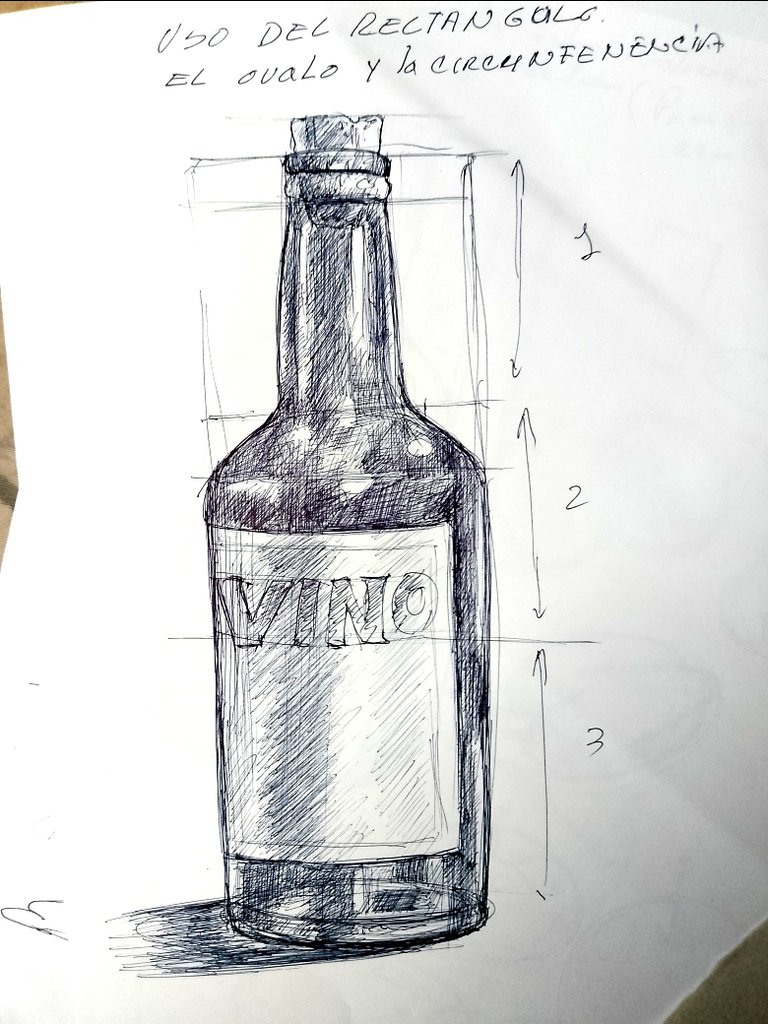
Entonces apoyados en este concepto. Vamos, a realizar el dibujo de una botella… encuentra ahí cualquier tipo de botella. La que mejor estime y póngala a una distancia prudente y observé la forma geométrica que domina. Bien, con un rectángulo se puede trabajar.
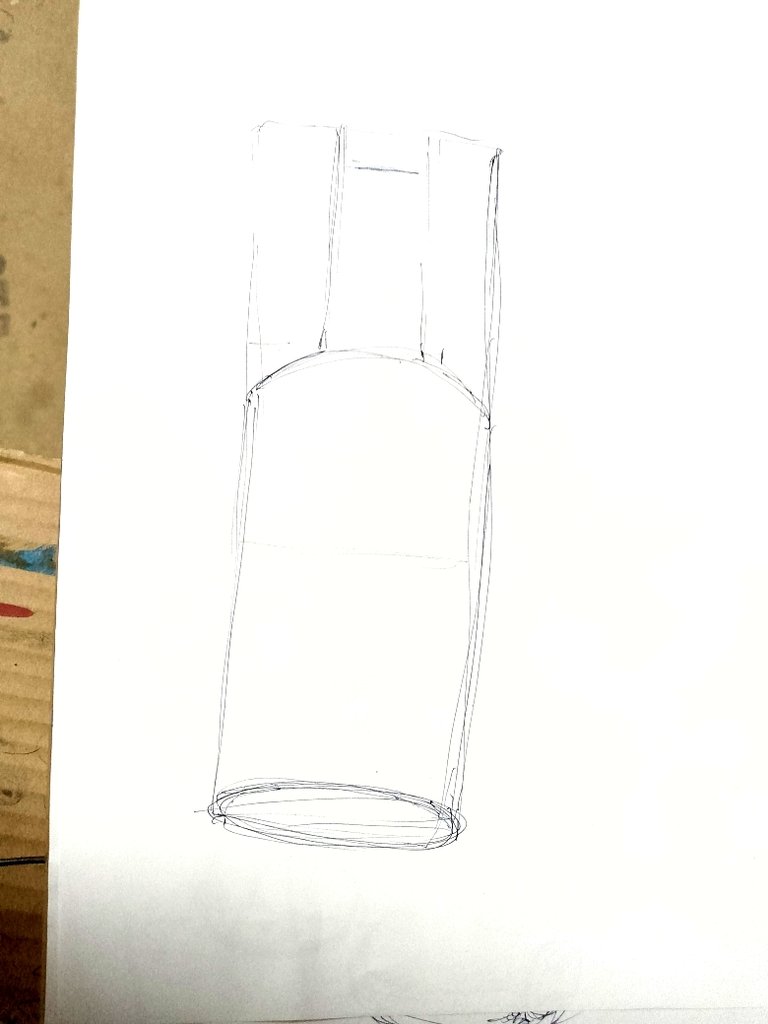
Ese rectángulo en vertical lo dividimos en tres partes iguales. En la base del tercio superior. Marcamos dos puntos a la misma distancia de las líneas laterales y lo mismo en la parte superior y alzando dos líneas se obtiene un nuevo rectángulo, pero más estrecho que será la parte del cuello
Después venimos a la base del rectángulo superior, trazamos un círculo o un semicírculo. Que servirá para los hombros del objeto.
En la parte inferior del triángulo total trazamos un óvalo y obtenemos lo que será el fondo de la botella.
Todo este proceso debe haberse con líneas casi imperceptibles, las que se irán integrando al resultado final. Por eso es que al dibujante no se le admite gomas en el proceso de aprendizaje
Si nos fijamos bien. Ya tenemos el cuerpo general de la botella solo utilizando las figuras geométricas.
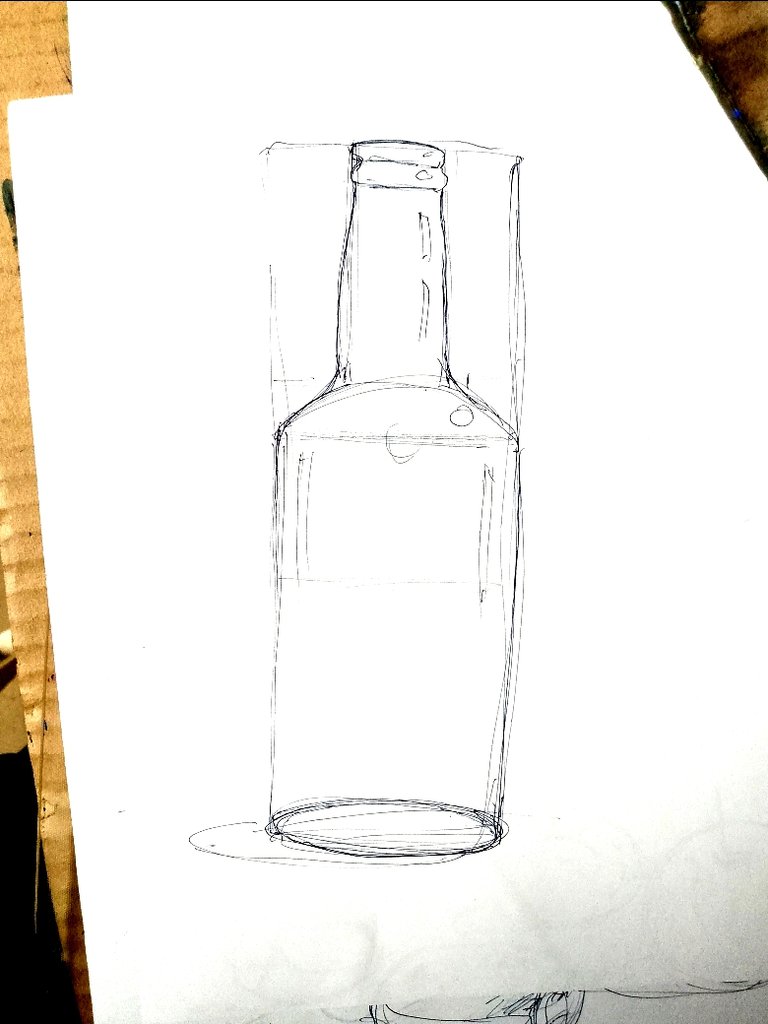
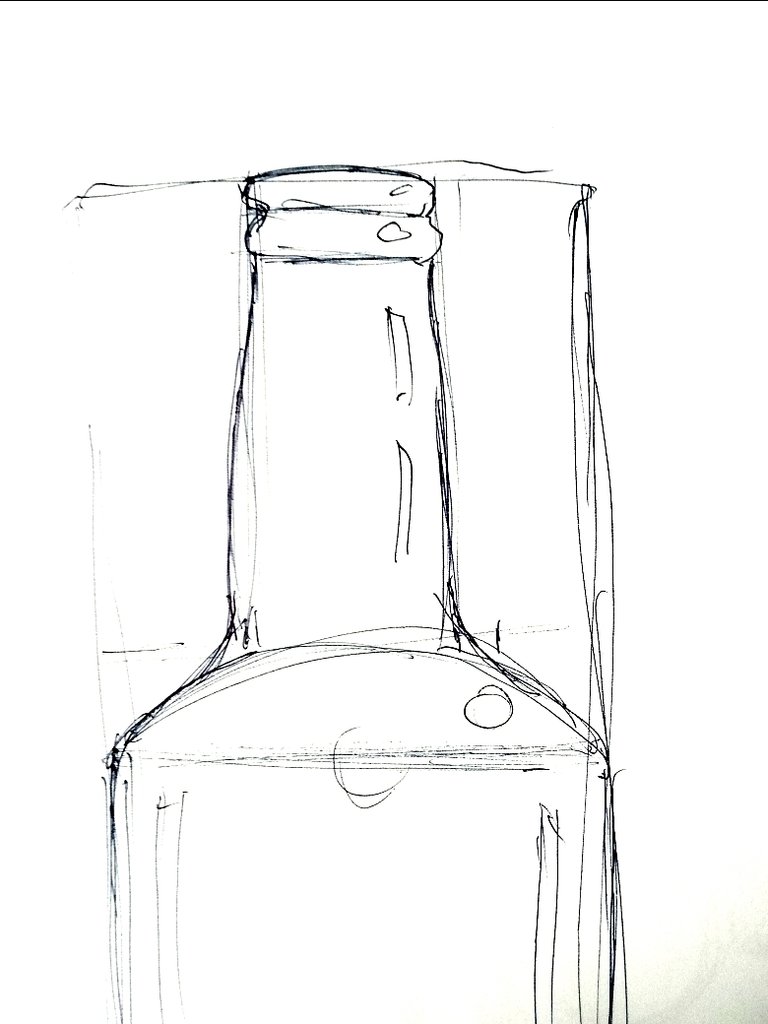
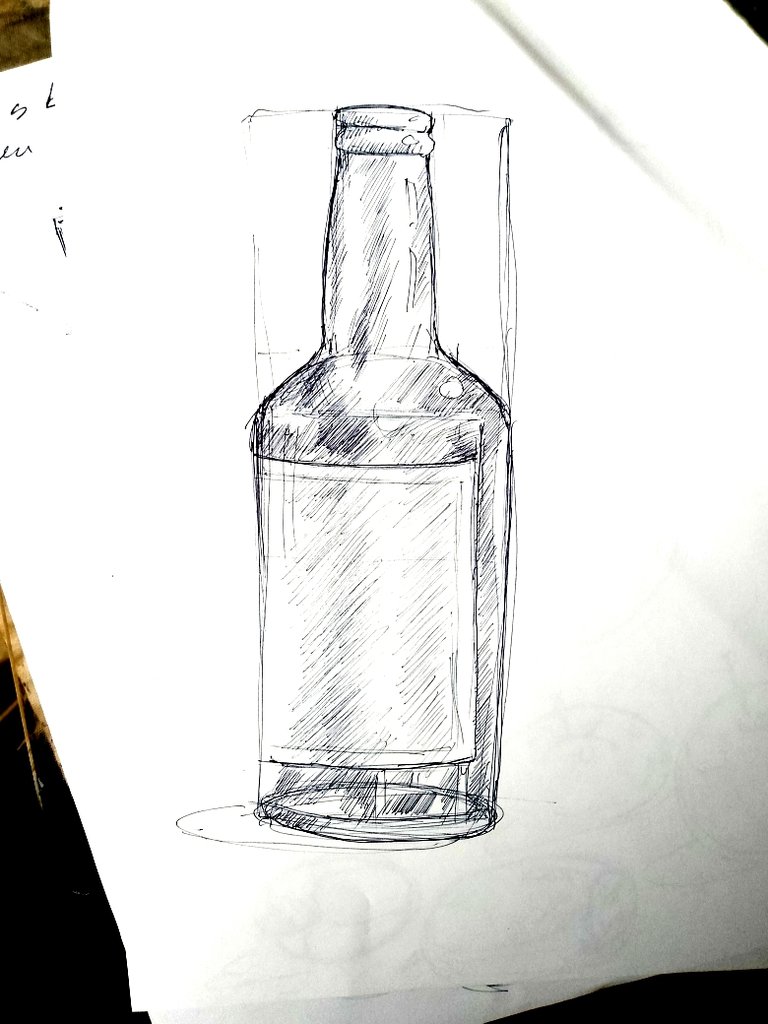
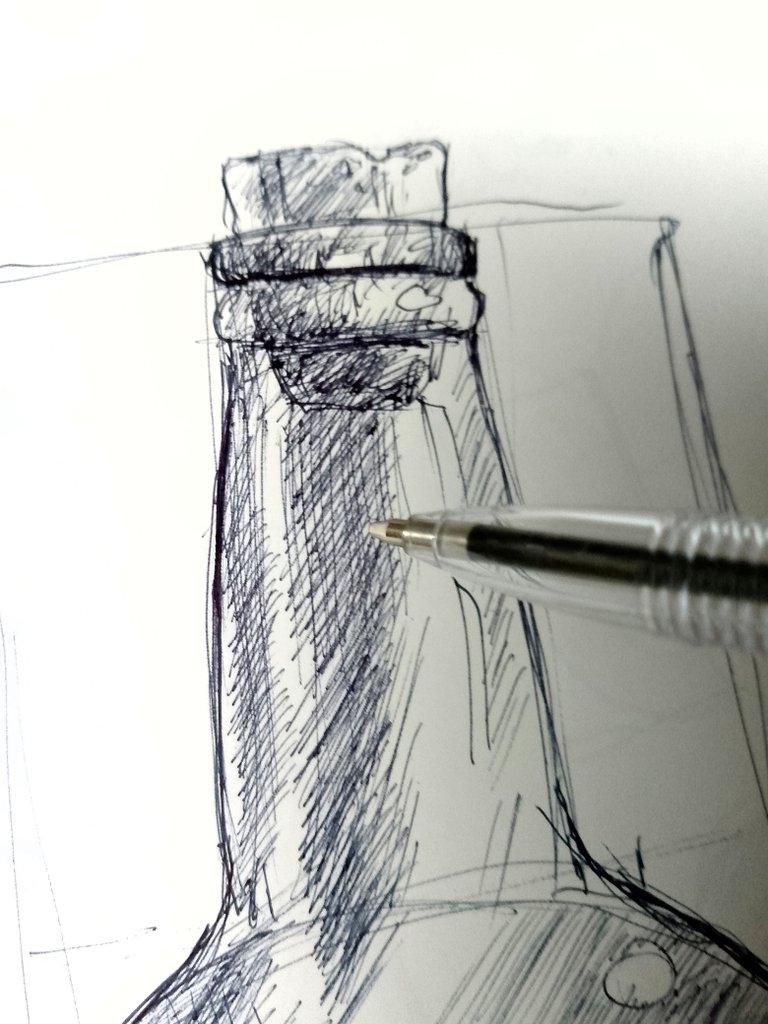
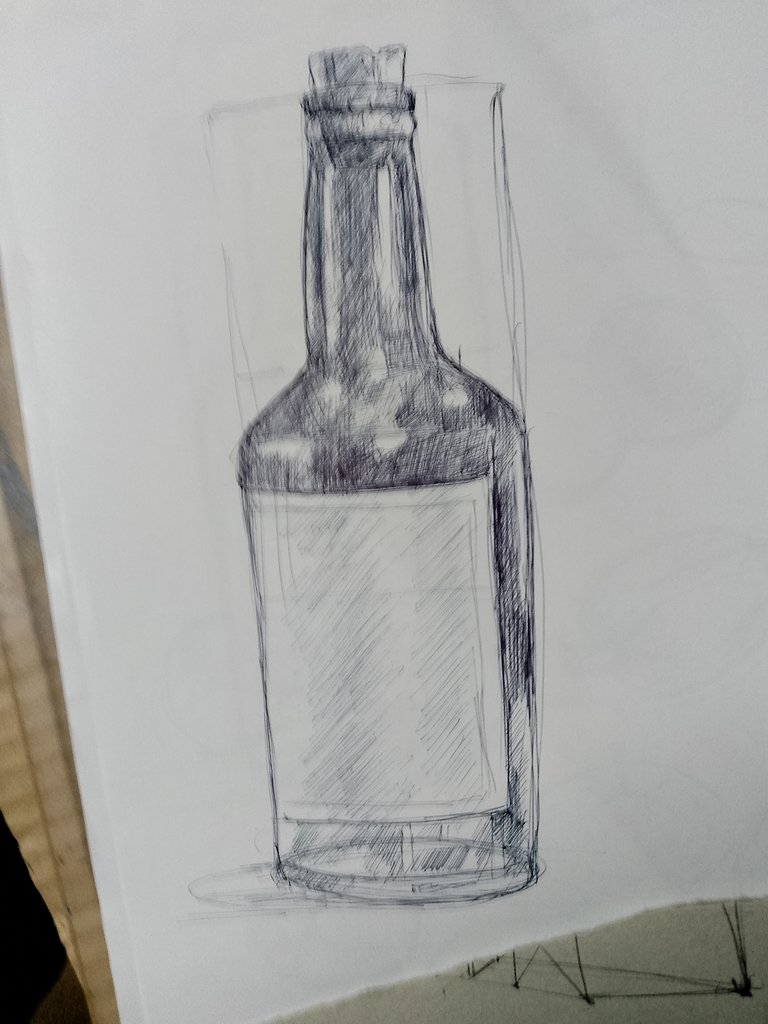
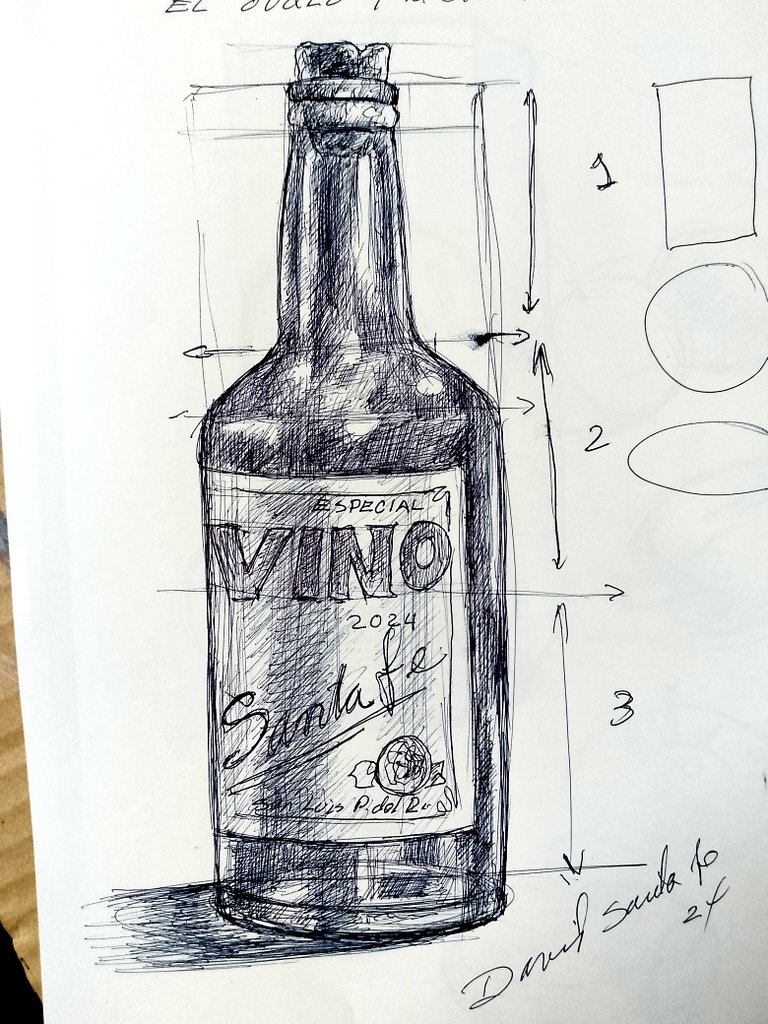
Ahora vamos a dar un poco de contorno y a darle forma definitiva a la botella. Redondeando los hombros y los lados del cuello, además de las roscas. Además, adicionamos dos elementos accesorios como son las etiqueta y el corcho y ya el compromiso del post está logrado. Construir un objeto aplicando el método de las figuras geométricas.
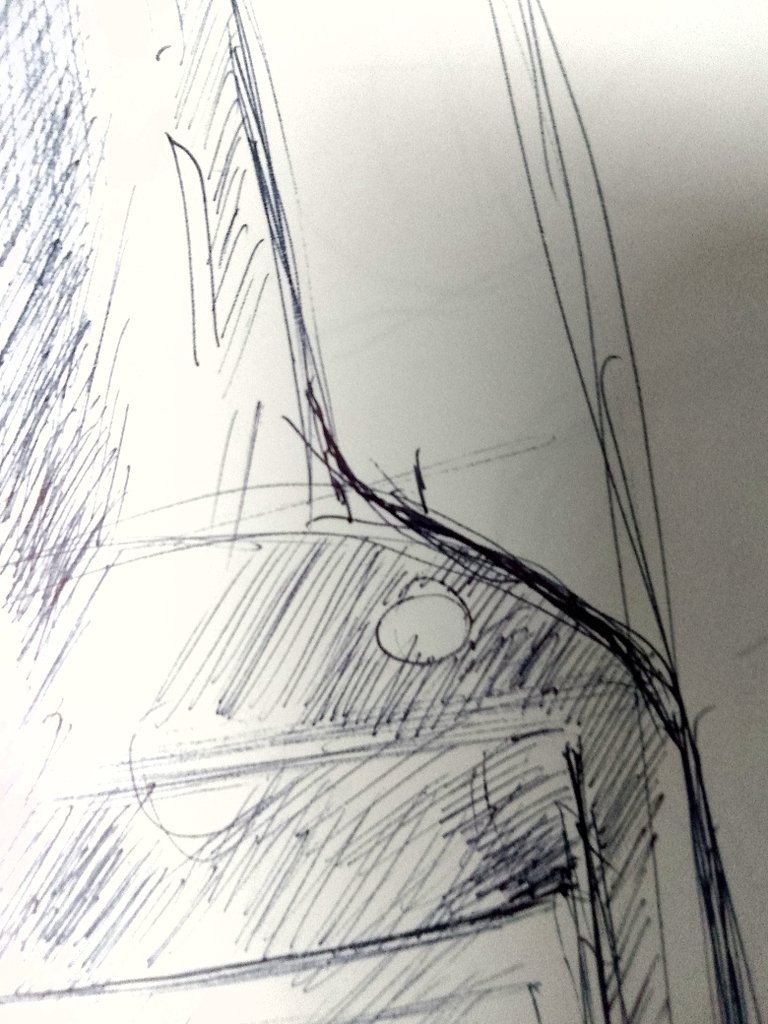
Pero, aunque es parte de un post posterior, vamos a avanzar un poquito más y marcamos los bloques de luz, sombra y brillo, y los diferenciamos haciendo un leve rayado en diagonal. Para después ir avanzando en la aplicación del claroscuro y el encuentro con los detalles y el acabado final.
Este proceso lo he hecho con un bolígrafo. Pero les recomiendo que lo hagan con lápiz grafito. Y que repitan el ejercicio tantas veces que lo necesiten, hasta dominarlo. Si utilizar gomas. Ya cuando sean profesionales les pueden dar el uso que quieran o no dárselo
Me gustaría saber sus opiniones y sugerencias sobre el contenido de este post. Para perfeccionar la idea principal. Que es crear habilidades técnicas en los nuevos dibujantes de la comunidad
Gracias por acompañarme.
Texto traducido con Deelp traductor,
Fotos tomadas con mi Tecno Spark.
🎨🖌️PROCESO PRACTICO🎨


ENGLISH VERSION
Good morning to all the friends of the community. And especially to those who have awakened the interest to start on the beautiful path of the plastic arts through the genre of drawing and its many technical possibilities.
In the previous post I exposed in synthesis a review of the types of line. And their functions in the structure of a drawing.
Today I clarify that there are two types of drawings. The one that is made to make the architecture of a work, to paint, and the drawing as a work itself. As a definitive work.
Also in the previous writing I announced that we were going to learn to draw through a simple method figures of objects and things. For what we will do it from the simplest ones and then to go complexing the compositions.
AN ENUNCIATION
All the elements of nature are contained in geometric figures.
You can check it out right there in real life. Look at every object or thing and discover the dominant geometric shape. And that's already a powerful breakthrough in your purpose of being an artist.
If it is not a geometric figure, then it is the combination of several. But that's how it works.
THE THEORETICAL PROCESS
So based on this concept. Let's draw a picture of a bottle... find any kind of bottle. The one that best suits you and place it at a prudent distance and observe the geometric shape that dominates. Well, with a rectangle you can work.
That rectangle vertically we divide it into three equal parts. At the base of the upper third. We mark two points at the same distance from the side lines and the same at the top and lifting two lines we get a new rectangle, but narrower which will be the part of the neck.
Then we come to the base of the upper rectangle, we draw a circle or a semicircle. That will serve for the shoulders of the object.
At the bottom of the total triangle we draw an oval and get what will be the bottom of the bottle.
All this process must be done with almost imperceptible lines, which will be integrated to the final result. That is why the draftsman is not allowed to use erasers in the learning process.
If we look closely. We already have the general body of the bottle just using the geometric figures.
Now we are going to give a little contour and give the bottle its final shape. Rounding the shoulders and the sides of the neck, as well as the threads. In addition, we add two accessory elements such as the label and the cork and the commitment of the post is achieved. Building an object by applying the method of geometric figures.
Now we are going to give a little contour and final shape to the bottle. Rounding the shoulders and the sides of the neck, as well as the threads. In addition, we add two accessory elements such as the label and the cork and the commitment of the post is achieved. Building an object by applying the geometric figures method.
But, although it is part of a later post, let's go a little further and mark the blocks of light, shadow and brightness, and differentiate them by making a slight diagonal line.
Then we will advance in the application of the chiaroscuro and the meeting with the details and the final finish.
I have done this process with a ballpoint pen. But I recommend that you do it with a graphite pencil.
And repeat the exercise as many times as you need, until you master it. Without using erasers. When they are professionals they can use them as they want or not use them at all.
I would like to know your opinions and suggestions about the content of this post. To perfect the main idea. Which is to create technical skills in the new draftsmen of the community.
Thanks for joining me.
Text translated with Deelp translator,
Photos taken with my Tecno Spark.