Hello everyone... ✨
Hello to my dear Hivers and the dear community of artists #Jewelry, as always very pleased and excited to be here again, showing you my work made with love and especially for you.
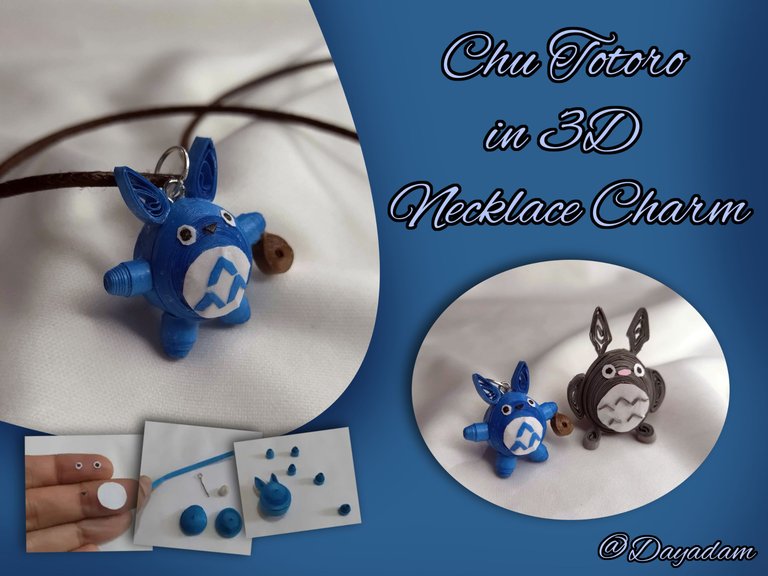
A few days ago I made a little Totoro in 3D in the Kawai theme using the quilling technique, this is a character that many people know, he is very cute and loved.
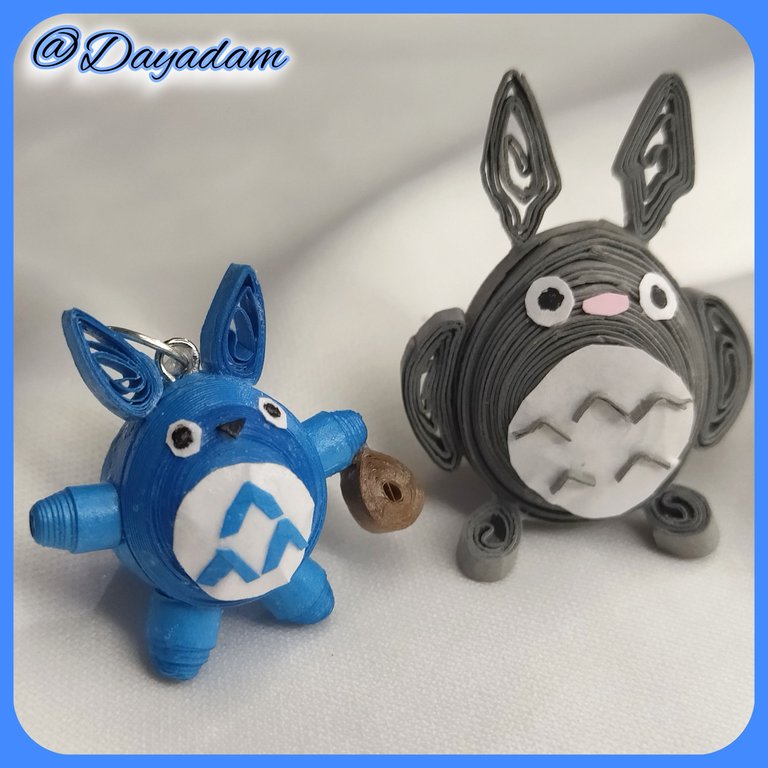
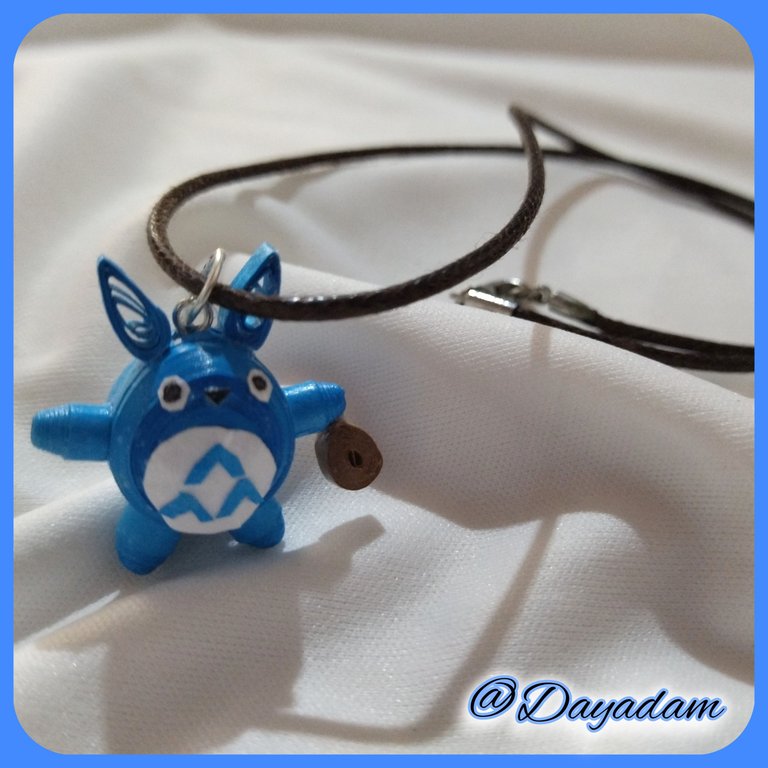
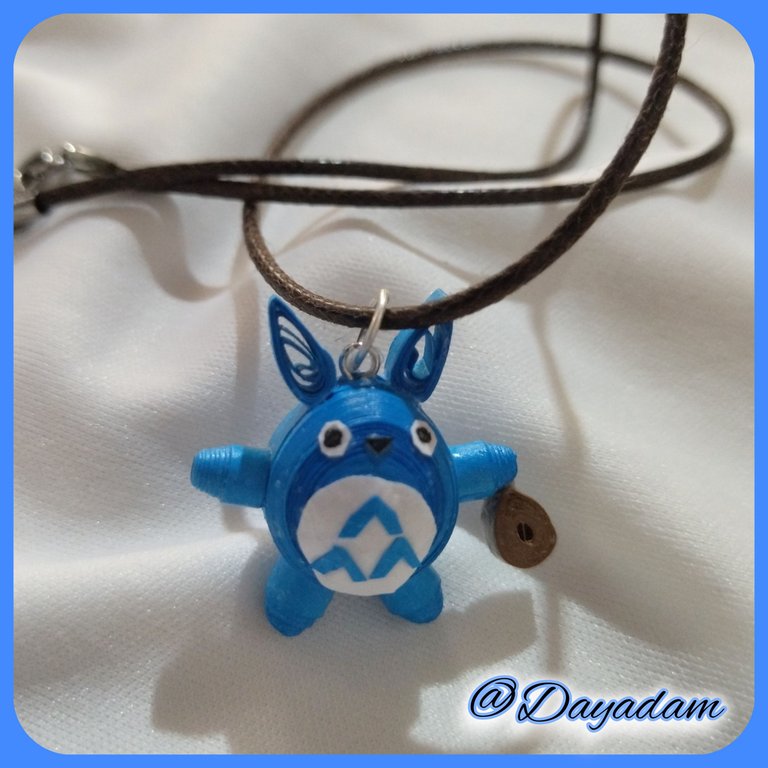
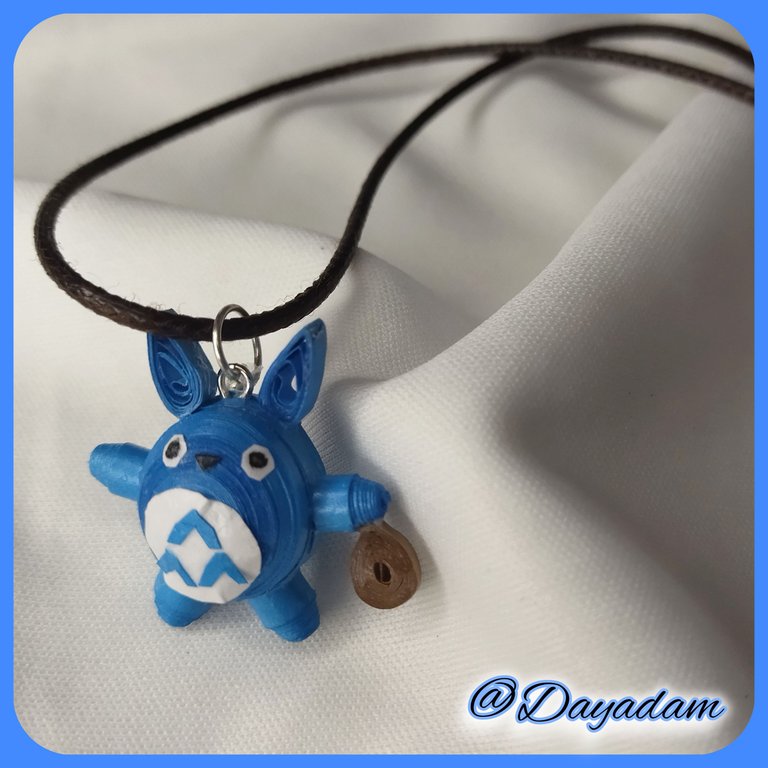
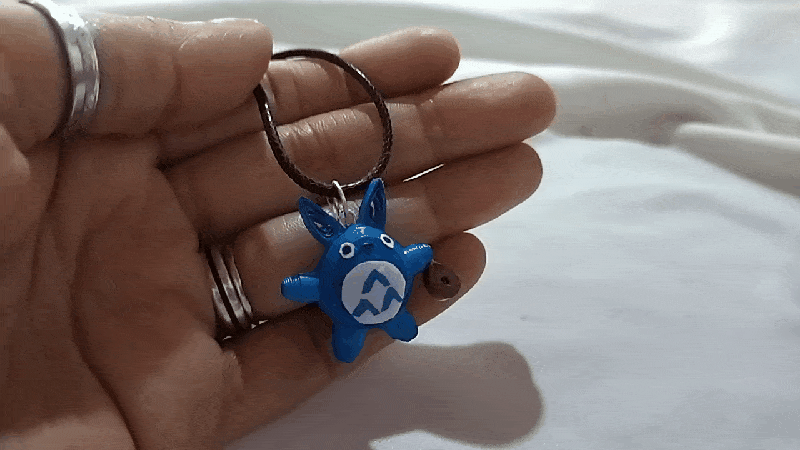
Totoro is a spirit that lives in a tree and next to him, there are 2 more totoros, I decided to carry out the collection in different ways and for this reason, today I leave you the second one called "Chu Totoro or Blue Totoro ” materialized in a pendant for necklace in 3D in the quilling technique.
If you want to see the first Totoro that I materialize here I leave the link, I will be glad to read your appreciations: https://peakd.com/hive-130560/@dayadam/totoro-in-3d-quilling-technique-engesp-h26
I hope you like the work, join me in this creative process.
Let's get started:😃

Hola a Todos... ✨
Hola a mis queridos Hivers y a la querida comunidad de artistas #Jewelry, como siempre muy complacida y emocionada de encontrarme por acá nuevamente, mostrándole mi trabajo hecho con mucho amor y especialmente para ustedes.
Hace unos dias lleve a cabo bajo la temática Kawai un pequeño Totoro en 3D en la tecnica de quilling, este es un personaje que muchos conocen, es muy tierno y querido.
Totoro es un espíritu que habita en un árbol y junto a el, hay 2 totoros mas, decidi llevar a cabo la colección de diversas maneras y por esto, hoy les dejo el segundo llamado "Chu Totoro o Totoro Azul" materializado en un dije para collar en 3D en la tecnica de quilling.
Si desean ver el primer Totoro que materialice por aca les dejo el link, con gusto leeré sus apreciaciones: https://peakd.com/hive-130560/@dayadam/totoro-in-3d-quilling-technique-engesp-h26
Espero sea de su agrado el trabajo, acompáñenme en este proceso creativo.
Comencemos:😃

• Cintas de quilling de diversos colores.
• Aguja para quilling.
• Hoja blanca.
• Lápiz de color negro.
• Plantilla para moldear círculos.
• Pega blanca extra fuerte (de carpintería).
• Argolla de bisutería mediana.
• Pincel.
• Pinza punta fina.
• Alicate punta fina.
• Collar de tu preferencia.
- Quilling ribbons of different colors.
- Quilling needle.
- White sheet.
- Black pencil.
- Template to mold circles.
- Extra strong white glue (carpentry glue).
- Medium size jewelry ring.
- Brush.
- Fine tip tweezers.
- Fine nose pliers.
- Necklace of your choice.

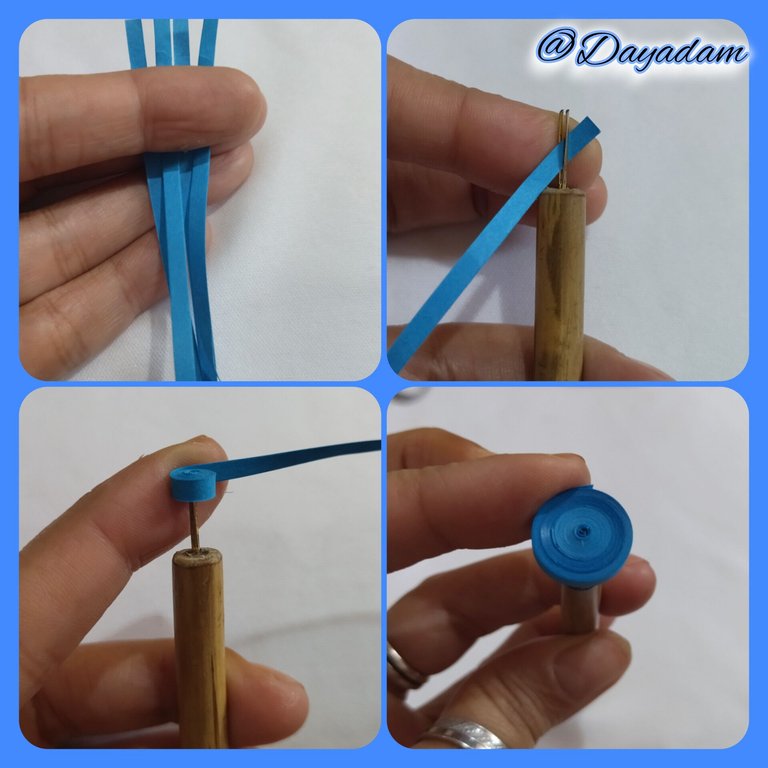
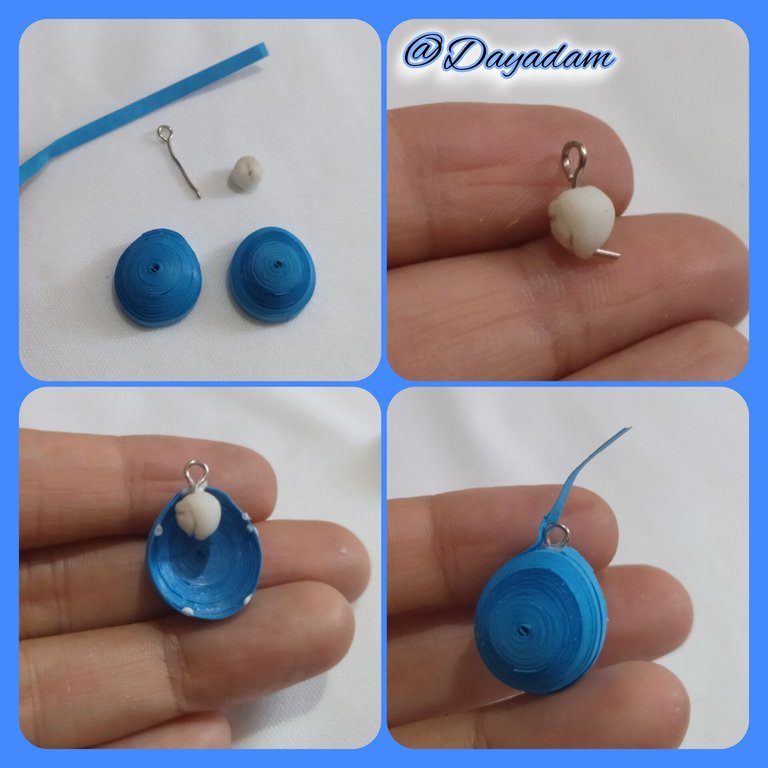
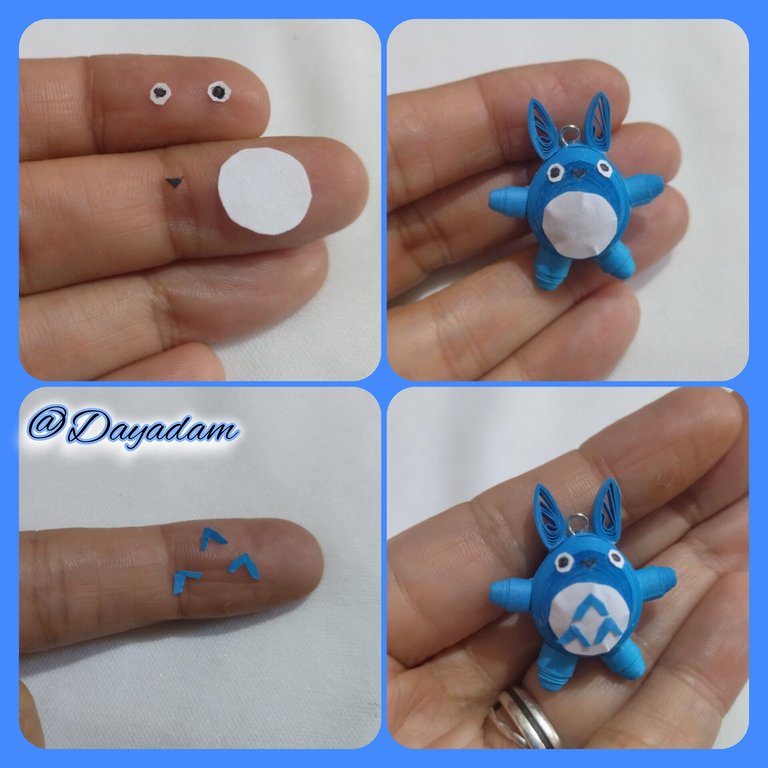
- Start by taking 3mm wide blue quilling tape, with the quilling needle we are going to roll until we reach the end of the tape, take it out of the needle and seal it with extra strong white glue. We will obtain a closed circle, like this we will need 2 equal ones.
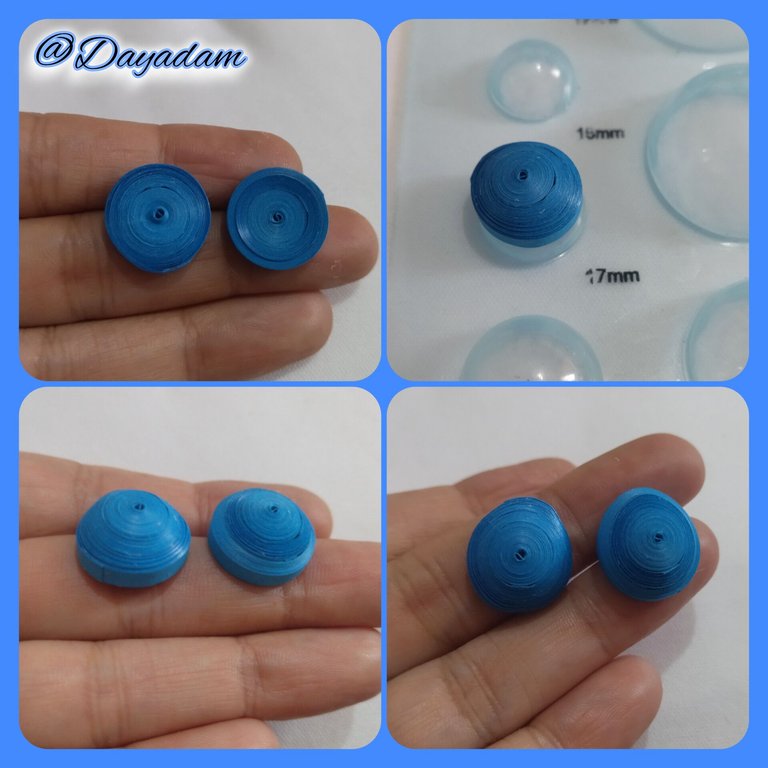
- We will mold the closed circles in a template to mold circles, in the measure number 17mm, we will do this with both circles, we take out of the mold and apply extra strong white glue on the inside, to prevent the pieces from moving or deforming, we will let them dry very well.
- Once the circles are dry, I proceeded to mold them with my fingers to give them a more elongated shape.
- I proceeded to take a costume jewelry pin and a piece of flexible dough, which I placed in the center of the pin, then I placed in one of the previously molded pieces and proceeded to close it with the other piece applying glue and a piece of tape around it.
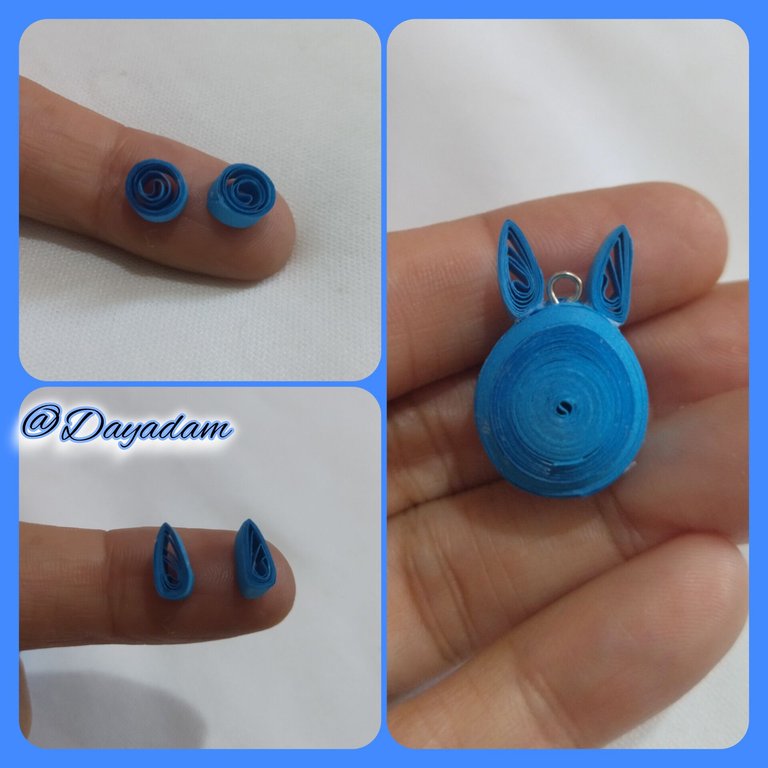
- To make the ears, take 3mm wide blue quilling tape and use it to make two open circles, which I molded in the shape of a kind of elongated drop, glue it on the top of the previous piece.

• Comenzamos tomando cinta para quilling de color azul de 3mm de ancho, con la aguja para quilling vamos a enrollar hasta llegar al final de la cinta, sacamos de la aguja y sellamos con pega blanca extra fuerte. Vamos a obtener un círculo cerrado, como este necesitaremos 2 iguales.
• Moldearemos los círculos cerrados en una plantilla para moldear círculos, en la medida numero 17mm, esto lo haremos con ambos círculos, sacamos del molde y aplicaremos pega blanca extra fuerte en la parte interna, para evitar que se muevan o deformen las piezas, dejaremos secar muy bien.
• Secos los círculos procedi a moldearlos con los dedos para darle una forma mas alargada.
• Procedí a tomar un alfiler de bisutería y un trozo de masa flexible, el cual coloque en el centro del alfiler, luego coloque en una de las piezas moldeadas con anterioridad y procedi a cerrarla con la otra pieza aplicando pega y un trozo de cinta a su alrededor.
• Para realizar las orejas tome cinta para quilling de color azul de 3mm de ancho con la cual realice dos círculos abiertos, los cuales moldee en forma de una especie de gota alargada, pegue en la parte de arriba de la pieza anterior.
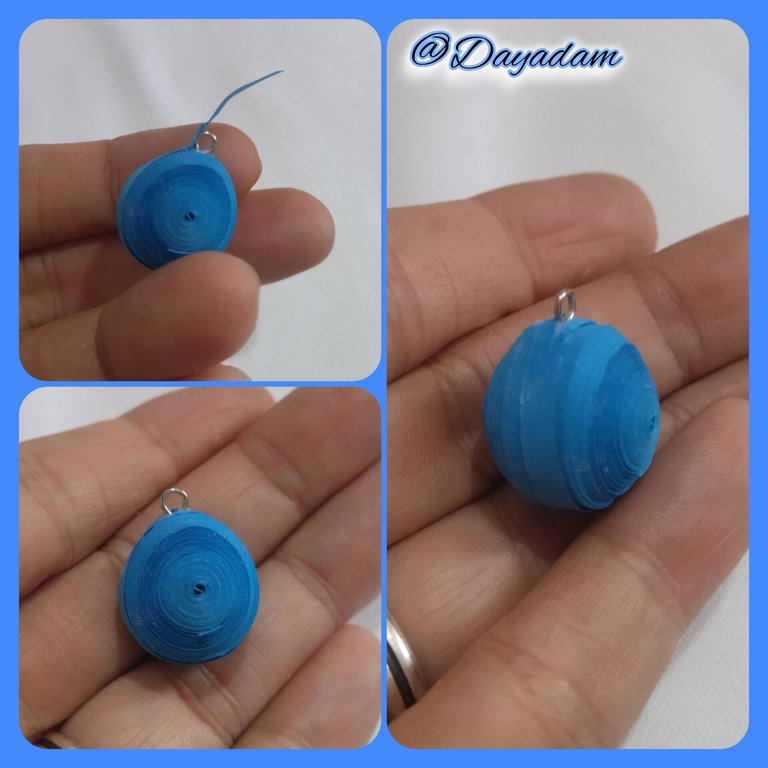
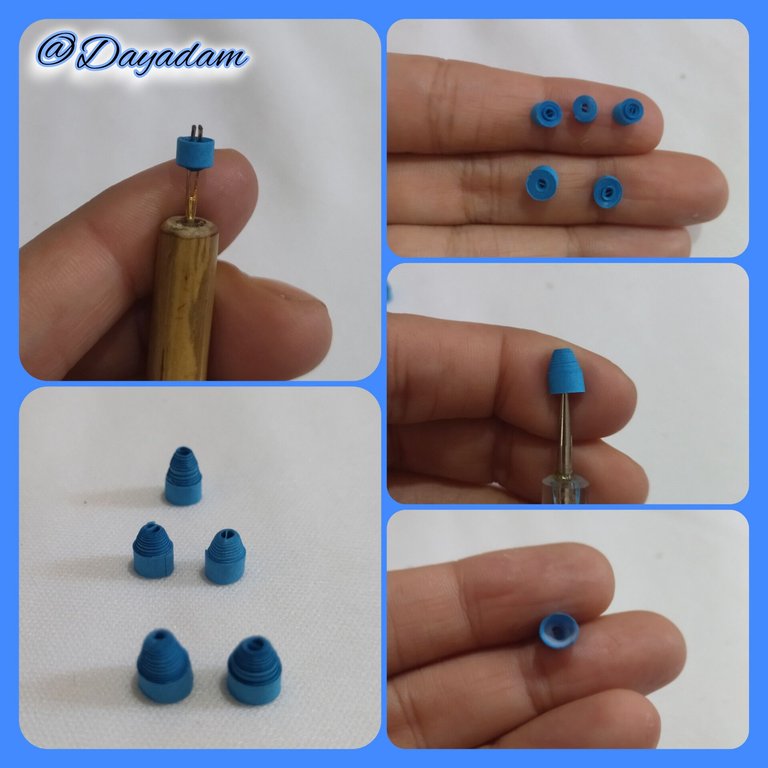
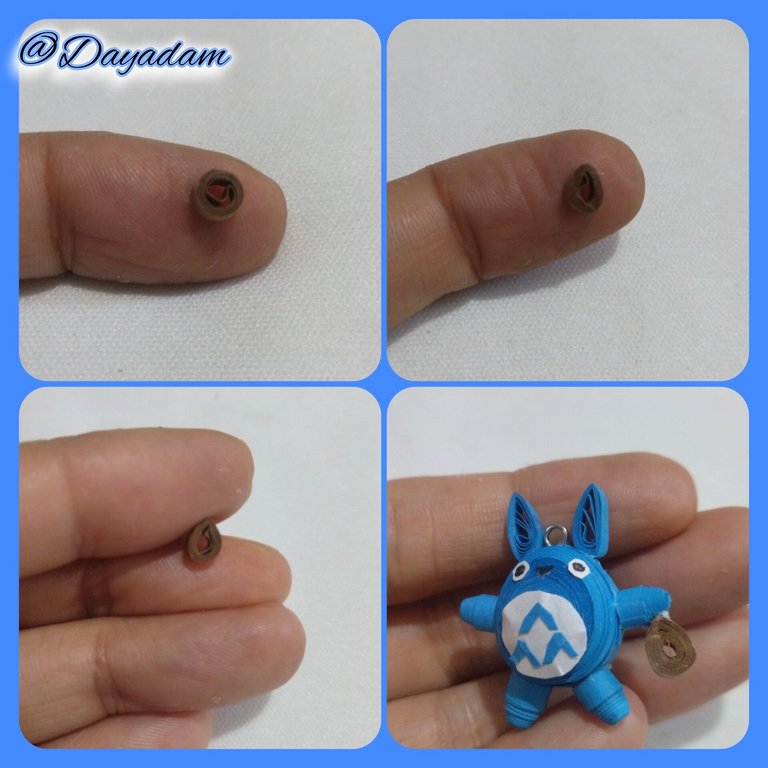
- To make the arms, feet and tail, we will make 5 circles closed with 3mm wide blue quilling tape, ready the circles with an embosser proceed to push them out, apply glue on the inside of each one to prevent them from moving or deforming and let them dry very well.
- Glue arms, feet and tail in the corresponding place, as you can see in the pictures.
- For the eyes and belly cut out some circles from a white sheet, for the nose cut out a triangle from a piece of black quilling, paint the point of the eye with a black pencil, cut out the small V's of the belly from blue quilling, at the end glue everything in a harmonic way on the piece.
- With brown quilling make a small drop, which I glued on one of the arms of the totoro, this will serve as a bag that he carries in his hand.
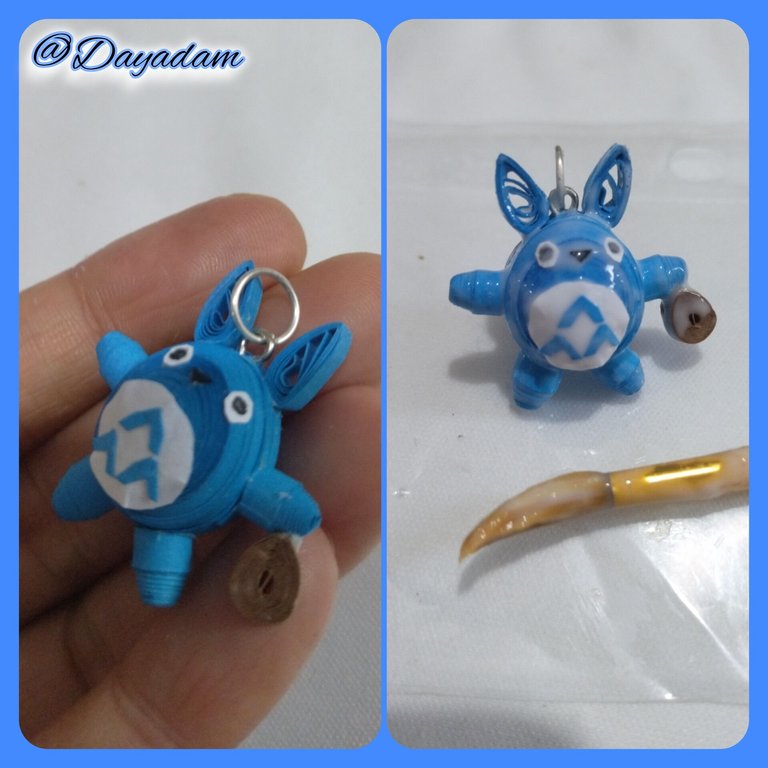
- Finally, place a medium size costume jewelry ring in the hole of the pin, and apply several layers of extra strong white glue, letting it dry between each layer to give plasticity, shine and protection to the charm.
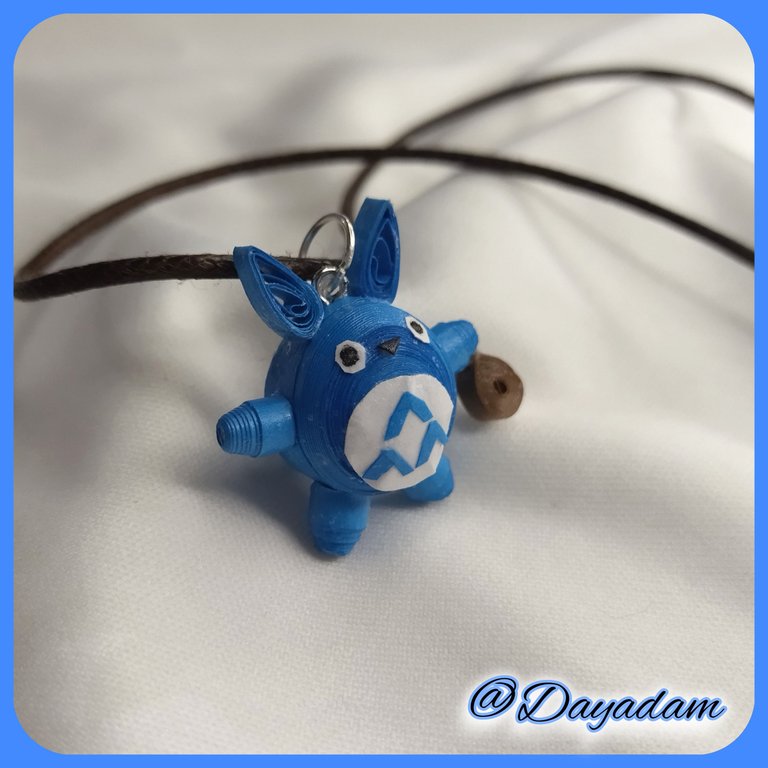
This way we have this Chu Totoro necklace charm in 3D in the quilling technique,
• Para realizar los brazos, pies y cola, realizaremos 5 circulo cerrados con cinta para quilling de 3mm de ancho color azul, listos los círculos con repujador procedi a empujar hacia afuera, aplique pega por la parte interna de cada uno para evitar que se muevan o deformen y deje secar muy bien.
• Pegue brazos, pies y cola en el sitio correspondiente, como pueden observar en las imágenes.
• Para los ojos y barriga recorte unos círculos de una hoja blanca, para la nariz recorte un triangulo de un trozo de quilling color negro, el punto del ojo lo pinte con un lápiz de color negro, las pequeñas V de la barriga las recorte de quilling color azul, al finalizar pegue todo de manera armónica en la pieza.
• Con quilling de color marrón realice una pequeña gota, la cual pegue en uno de los brazos del totoro, esto hará las veces de una bolsa que lleva en su mano.
• Para finalizar coloque una argolla mediana de bisutería en el agujero del alfiler, y aplique varias capas de pega blanca extra fuerte dejando secar entre una capa y otra para darle plasticidad, brillo y protección al dije.
De esta manera tenemos este dije para collar de Chu Totoro en 3D en la técnica de quilling,


What did you think, did you like it?
I hope you did, I hope you liked my explanation, procedure and photos, I made them with love for you.
"Let out that muse that inspires you, and let your imagination fly".
Thank you all, see you next time...
¿Que les pareció, les gustó?
Espero que sí, que les haya gustado mi explicación, procedimiento y fotos, los hice con mucho cariño por y para ustedes.
"Deja salir esa musa que te inspira, y deja volar tu imaginación".
Gracias a todos, nos vemos en la próxima.
Todas las fotos usadas en este post son de mi autoría y han sido sacadas en mi celular personal un Redmi 9T y editadas en Canva y en Inshot Banner y separador hecho por mí en Canva Traducido con la ayuda de DeepL

