Hello everyone... 🥑
Hello to my dear Hivers and the dear community of artists #Jewelry, as always very pleased and excited to be here again, showing you my work made with love and especially for you.
A few days ago was born a new community of games and entertainment in our beloved Hive called rcreationalgames, I invite you to join and review what it is about to encourage you to participate, the first publication that I saw was from my dear @equipodelta where she told us how she met with the great team that makes up the community and enjoyed a great game of Pool, where my pretty @yorimarag proved to be a master in the game like other participants.
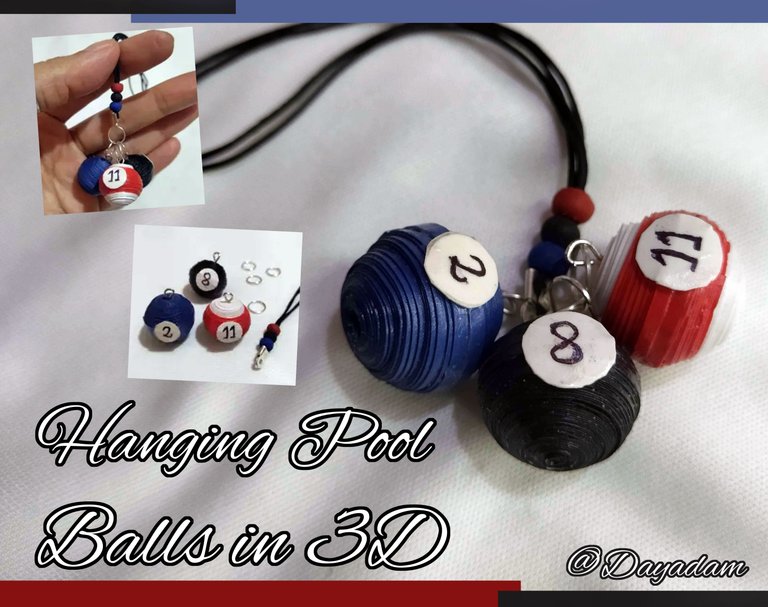
As you can see from there I derived this idea of making a 3D pendant with 3 small Pool balls in the quilling technique, soon will come some other accessories as I have more things in mind, this goes for you friends.
I hope you like the work, join me in this creative process.
Let's get started:😃

Hola a Todos... 🥑
Hola a mis queridos Hivers y a la querida comunidad de artistas #Jewelry, como siempre muy complacida y emocionada de encontrarme por acá nuevamente, mostrándole mi trabajo hecho con mucho amor y especialmente para ustedes.
Hace pocos días nació una nueva comunidad de juegos y entreteniemiento en nuestro querido Hive llamada rcreationalgames, los invito a unirse y revisar de que se trata para que se animen a participar, la primera publicación que aprecie fue de mi querida @equipodelta donde nos hablaba de como se reunió con el gran equipo que conforma la comunidad y disfrutaron de un grandioso juego de Pool, donde mi linda @yorimarag demostró ser una maestra en el juego al igual que otros participantes.
Como verán de allí derivo esta idea de elaborar un colgante en 3D con 3 pequeñas bolas de Pool en la tecnica de quilling, pronto vendrán algunos otos accesorios ya que tengo mas cosas en mente, esto va para ustedes amigas.
Espero sea de su agrado el trabajo, acompáñenme en este proceso creativo.
Comencemos:😃

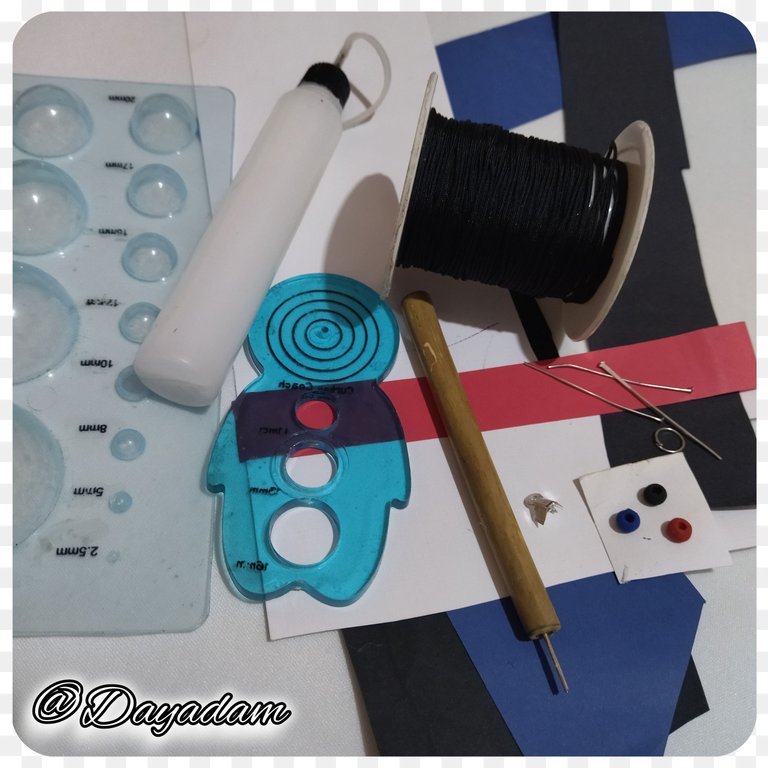
• Cartulina de diversos colores.
• Aguja para quilling.
• Molde para círculos.
• Plantilla para círculos.
• Lápiz y bolígrafo.
• Pega blanca extra fuerte (de carpintería).
• Tijera.
• Argollas de bisutería medianas.
• Hilo chino fino de color negro.
• Perla de madera medianas.
• Pinturas al frió.
• Tapa nudos de bisutería.
• Masa flexible.
• Alfileres de bisutería.
• Pincel.
• Pinza punta fina.
• Alicate punta fina.
- Cardboard of different colors.
- Quilling needle.
- Mold for circles.
- Template for circles.
- Pencil and pen.
- Extra strong white glue (carpentry glue).
- Scissors.
- Medium bijouterie rings.
- Fine black Chinese thread.
- Medium wooden beads.
- Cold paints.
- Jewelry knots cover.
- Flexible dough.
- Fashion jewelry pins.
- Brush.
- Fine tip tweezers.
- Fine point pliers.

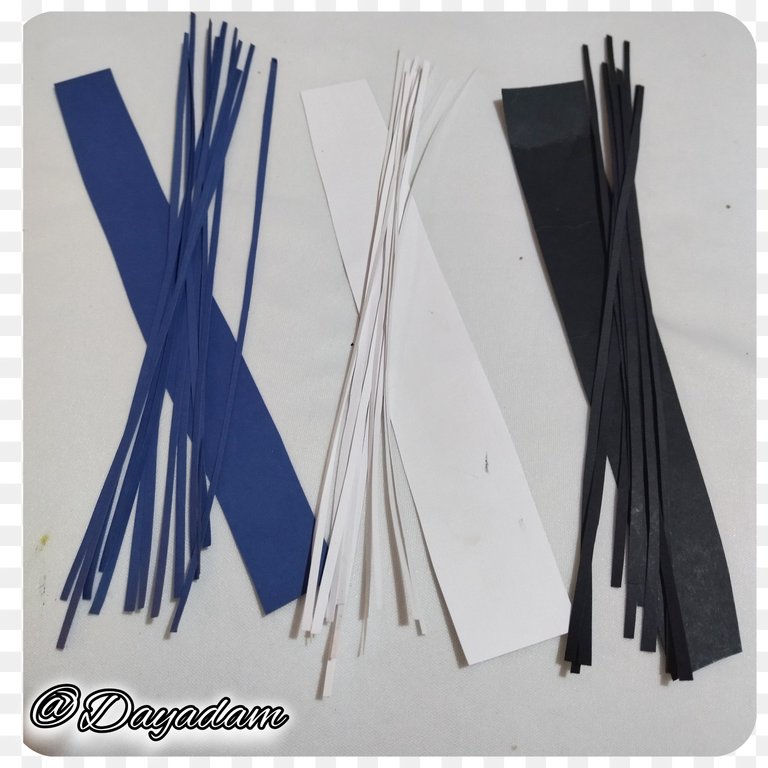
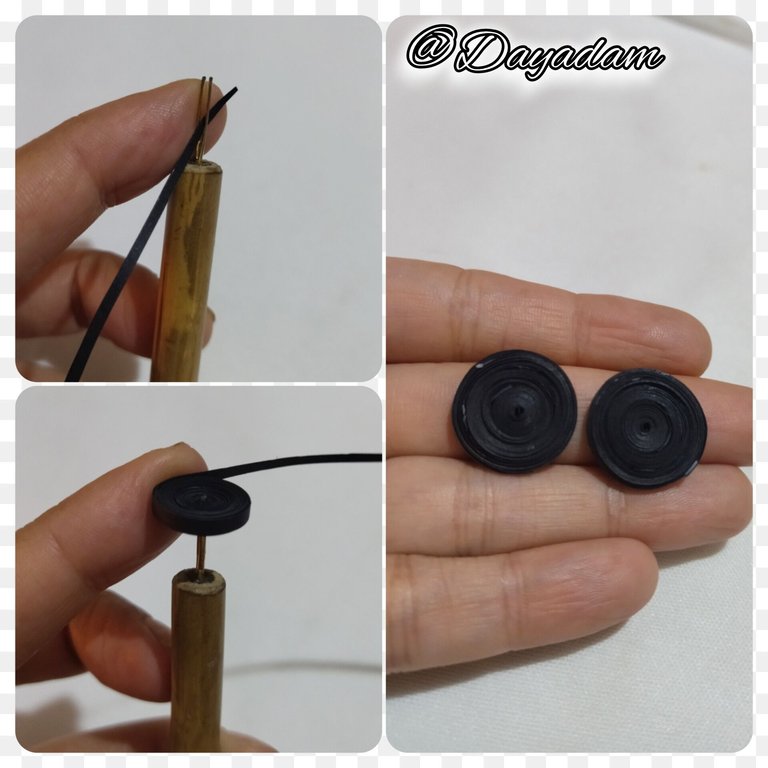
- I usually use quilling strips already cut, but this time to make the work more resistant, I decided to use some pieces of cardboard that I had to recycle since they are thicker.
- A piece of blue, white and black cardboard of the same length, from each one I cut 12 strips of 3mm wide x 40cms long.
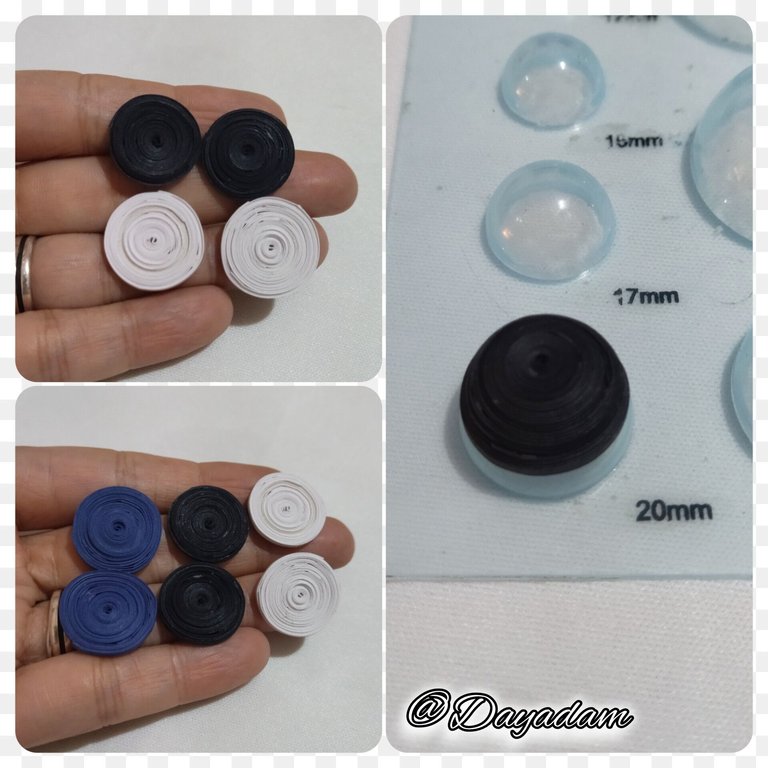
- Take 6 strips of each color and glue them together to form a single strip and with the help of a quilling needle roll them up to the end of the strip, seal with glue, remove from the needle to obtain a closed circle. We will need 2 closed circles of each color.
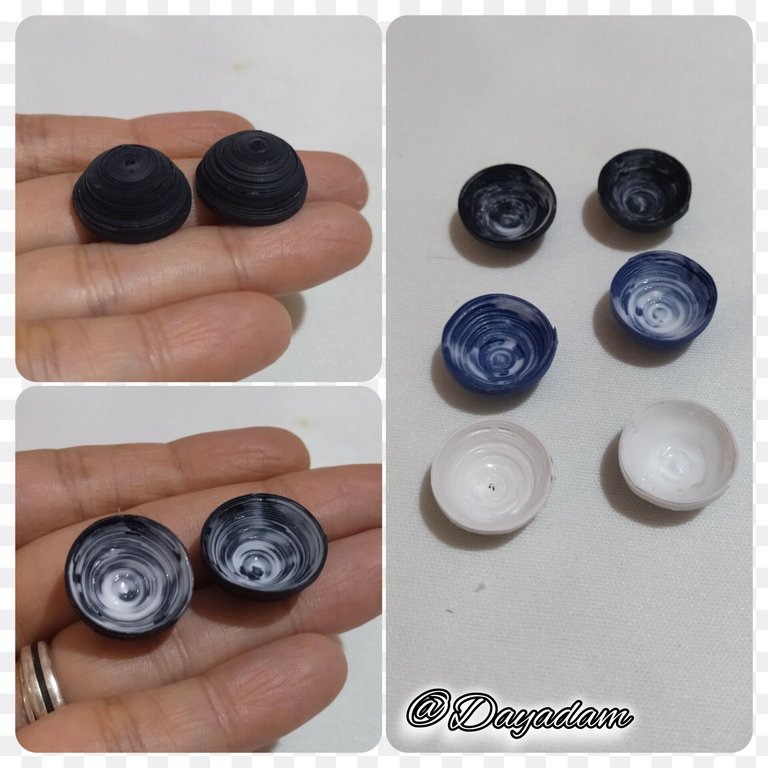
- Once the closed circles are ready, mold them in a template for circles in the numbered size 20, remove from the template, apply extra strong white glue on the inside and let dry very well to prevent the pieces from deforming.
- Once the half circles are dry, I incorporated a costume jewelry pin in the middle of one of each color, take a piece of flexible dough and place it with glue so that the pin is fixed in place.

• Suelo usar tiras para quilling ya cortadas, pero en esta oportunidad para hacer el trabajo mas resistente, decidí utilizar algunos trozos de cartulinas que tenia para reciclar dado que son mas gruesas.
• Un pedazo de cartulina azul, blanca y negra del mismo largo, de cada una recorte 12 tiras de 3mm de ancho x 40cms de largo.
• Tome 6 tiras de cada color las uní con pega para formar una sola y con la ayuda de la aguja para quilling enrolle hasta finalizar con la tira, selle con pega, saque de la aguja para obtener un circulo cerrado. Necesitaremos 2 círculos cerrados de cada color.
• Una vez listos los círculos cerrados, los moldee en una plantilla para círculos en la medida numero 20, sacamos de la plantilla aplicamos pega blanca extra fuerte en la parte interna y dejamos secar muy bien para evitar que las piezas se deformen.
• Secos los semi círculos le incorpore un alfiler de bisutería en el medio a uno de cada color, tome un trozo de masa flexible y se lo coloque con pega para que el alfiler quede fijo en el sitio.
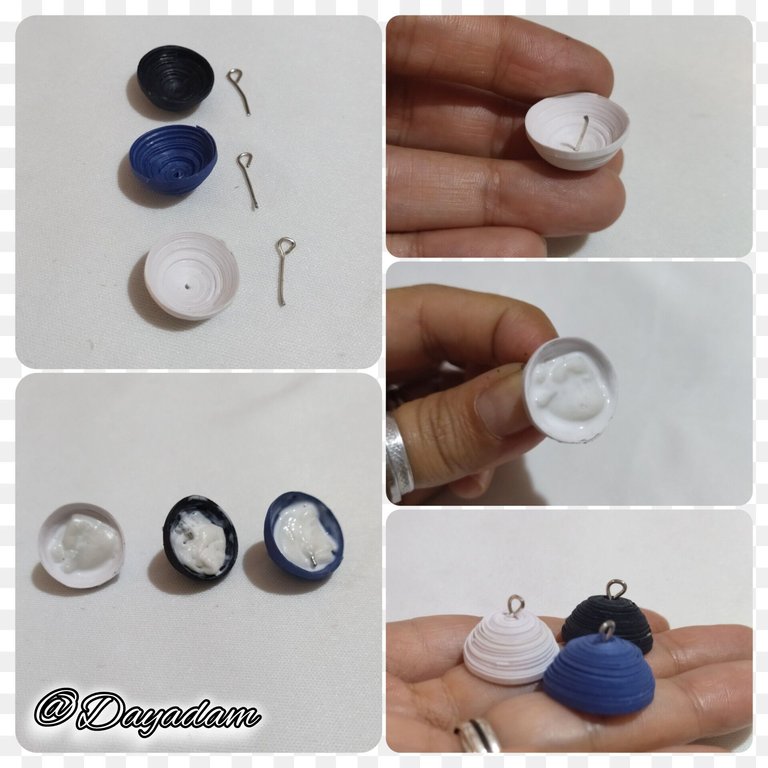
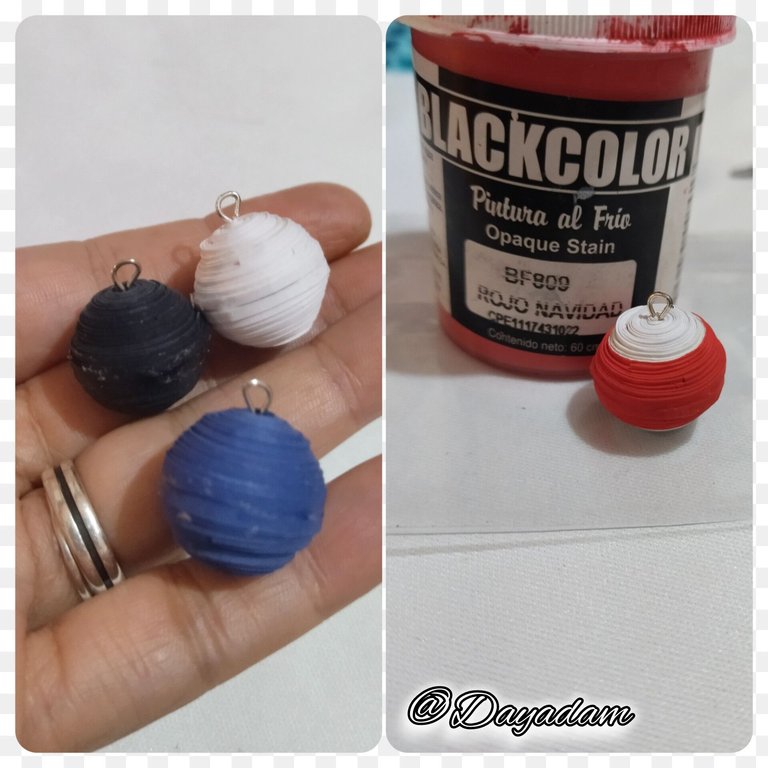
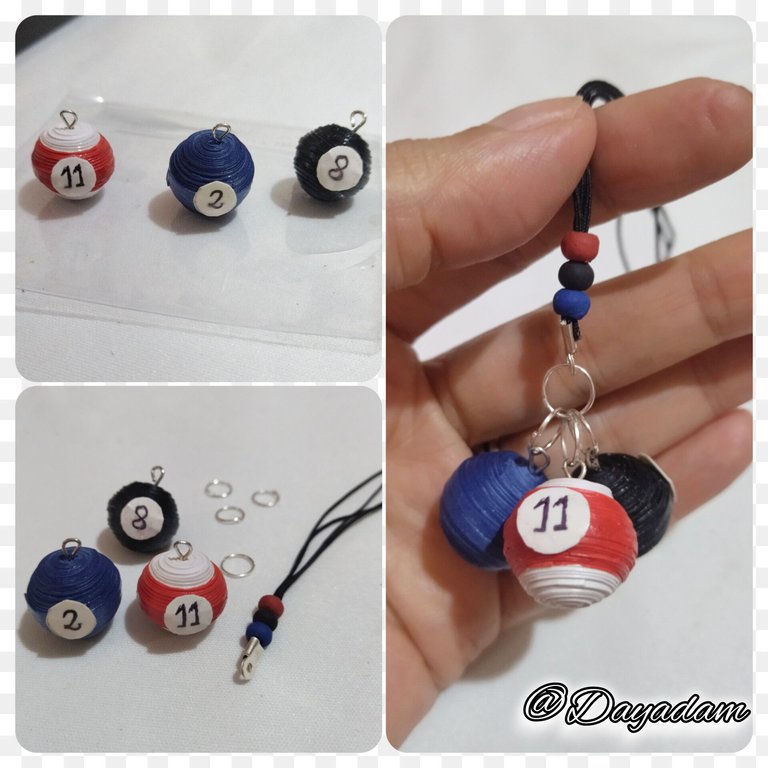
- Finally we join each half circle with its respective color adding glue around it, let it dry very well, so we will obtain each small circular ball.
- To the white sphere I painted a stripe with red cold paint.
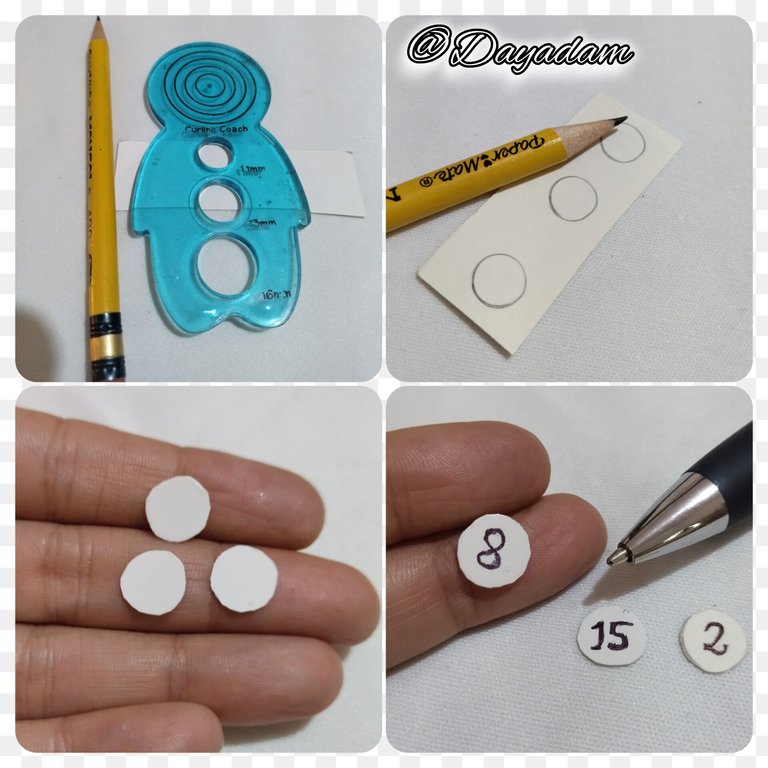
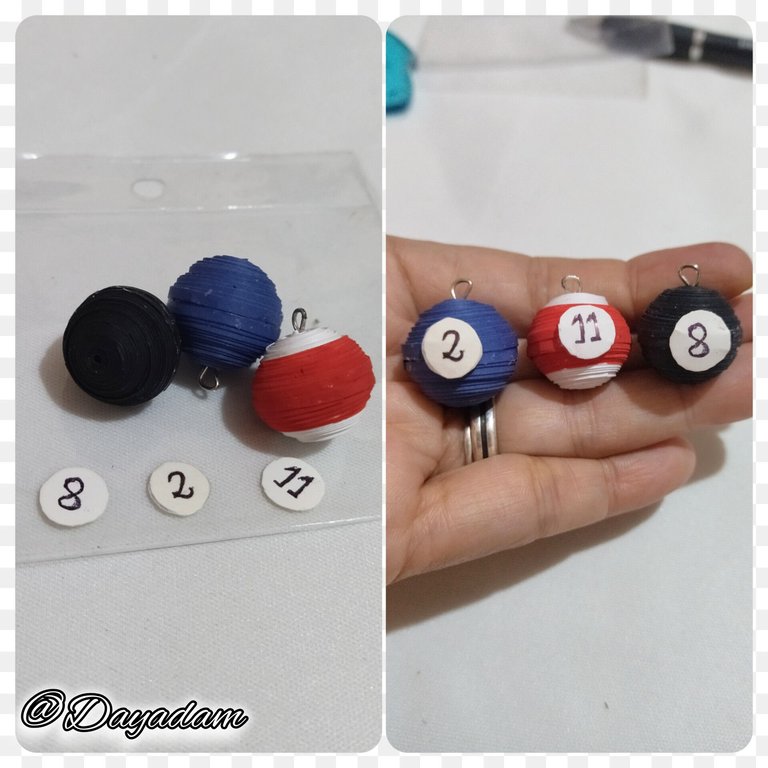
- To make the circles in the center, take a template for circles and with a pencil draw on a piece of white cardboard, cut out, once ready I wrote the respective number with a black pen, finally glue the respective ball.
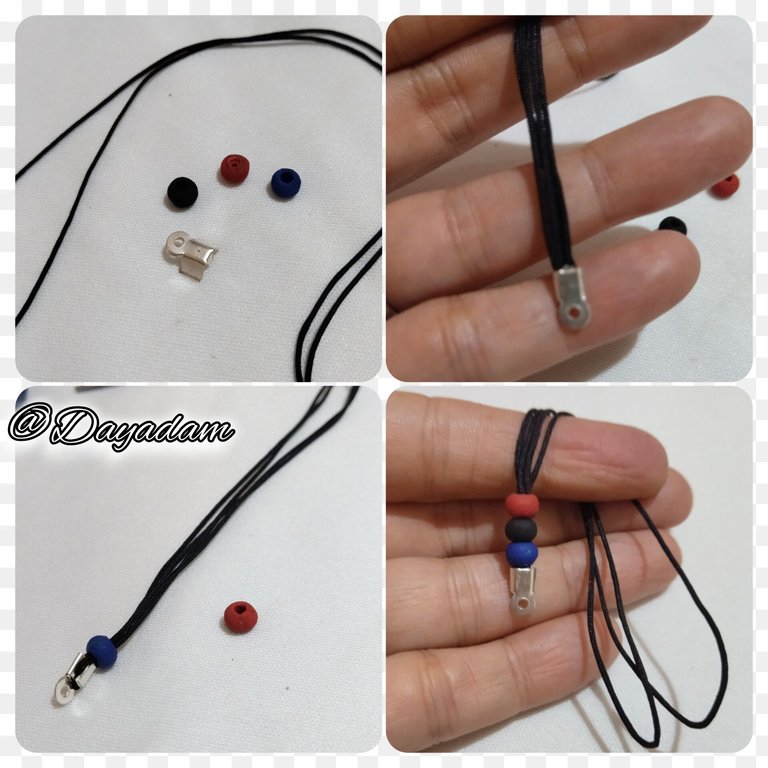
- Cut a string of black Chinese thread, fold it in half and put a knot cover, then incorporate 3 wooden beads which I previously painted the color of each of the spheres with cold paint, in this case, black, blue and red.
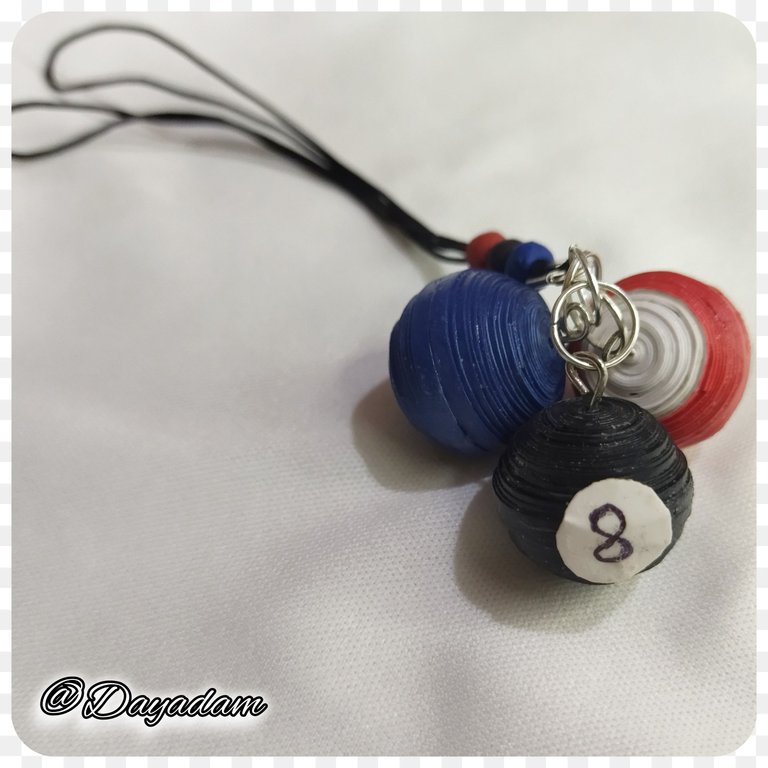
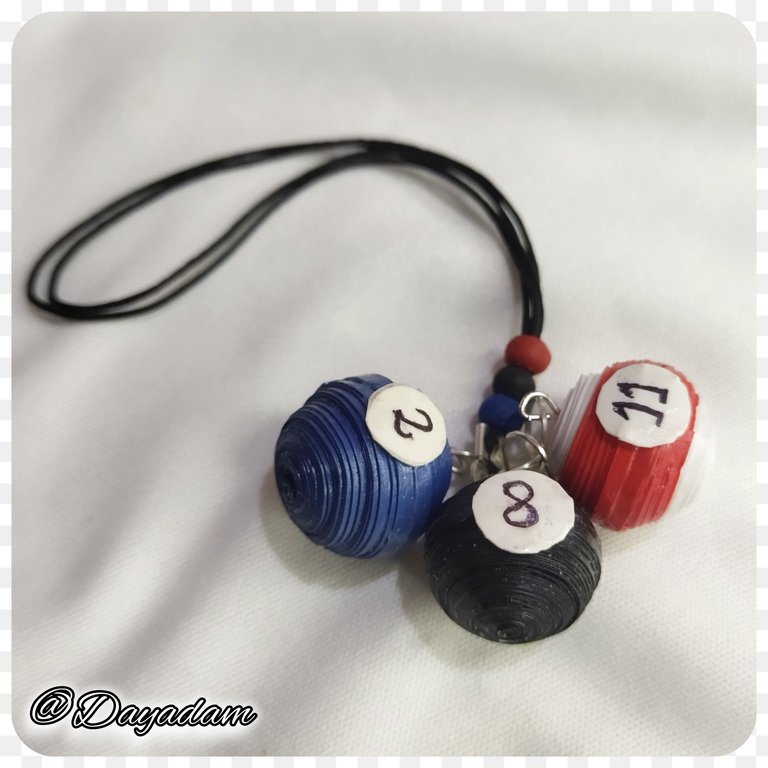
- Finally I assembled my pendant with the charms, placing medium size bijouterie rings to my liking, and applied several layers of extra strong white glue, letting dry between one layer and another, this to give protection, brightness and plasticity to the small Pool beads.
So this way we have this pendant inspired by 3D Pool balls in the Quilling Technique.
• Por ultimo unimos cada semi circulo con sus respectivo color añadiendo pega alrededor, dejamos secar muy bien, así obtendremos cada pequeña bola circular.
• A la esfera de color blanco le pinte una franja con pintura al frió color roja.
• Para hacer los círculos del centro, tome una plantilla para círculos y con un lápiz dibuje en un trozo de cartulina blanca, recorte, una vez listos escribí el numero respectivo con un bolígrafo color negro, por ultimo pegue de la bola respectiva.
• Corte un cordón de hilo chino color negro, lo doble a la mitad y le coloque un tapa nudos, luego incorpore 3 perlas de madera las cuales pinte previamente del color de cada una de las esferas con pintura al frió, en este caso, negro, azul y rojo.
• Para finalizar ensamble mi colgante junto a los dijes, colocando argollas de bisutería mediana a mi gusto, y aplique varias capas de pega blanca extra fuerte dejando secar entre una capa y otra, esto para darle protección, brillo y plasticidad a las pequeñas bolas de Pool.
Pues de esta manera tenemos este Colgante inspirado en bolas de Pool en 3D en la Técnica de Quilling.


What did you think, did you like it?
I hope you did, I hope you liked my explanation, procedure and photos, I made them with love for you.
"Let out that muse that inspires you, and let your imagination fly".
Thank you all, see you next time.
¿Que les pareció, les gustó?
Espero que sí, que les haya gustado mi explicación, procedimiento y fotos, los hice con mucho cariño por y para ustedes.
"Deja salir esa musa que te inspira, y deja volar tu imaginación".
Gracias a todos, nos vemos en la próxima.
Todas las fotos usadas en este post son de mi autoría y han sido sacadas en mi celular personal un Redmi 9T y editadas en Canva y en Inshot Banner y separador hecho por mí en Canva Traducido con la ayuda de DeepL

Posted Using InLeo Alpha