Hello everyone... ✨
Hello to my dear Hivers and the dear community of artists #Jewelry, as always very pleased and excited to be here again, showing you my work made with love and especially for you.
Greetings to the Splinterlands community, and everyone who lives there, I'm here to join the Splinterlands Social Media Challenge!
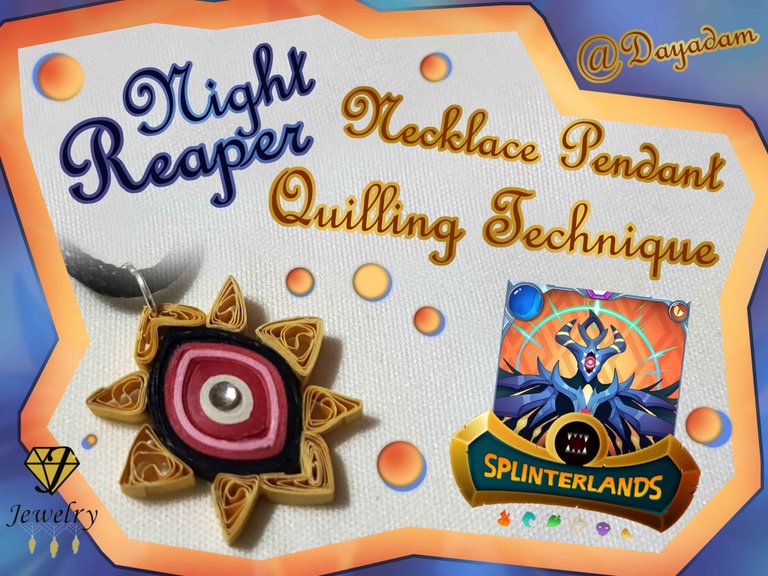
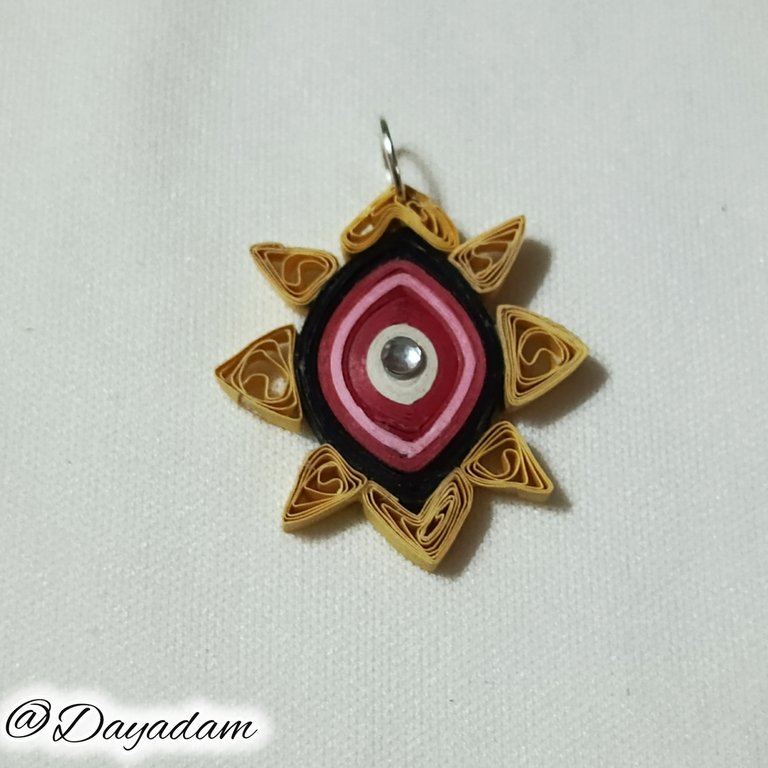
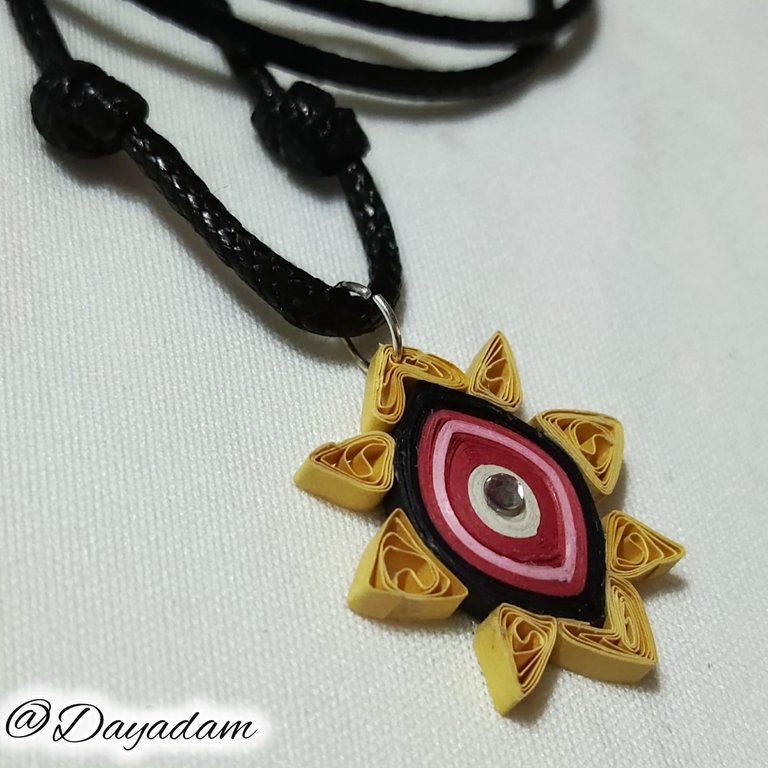
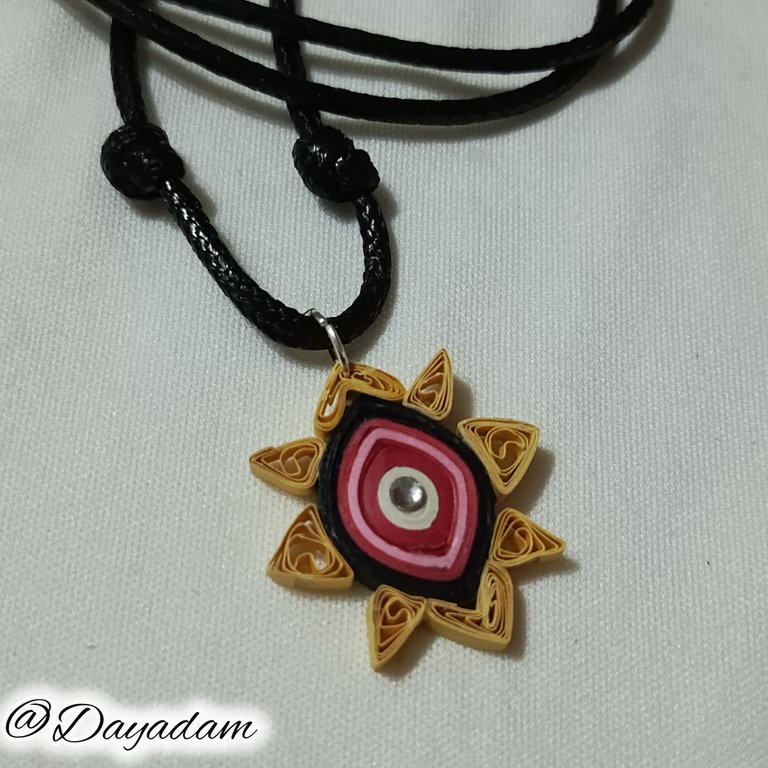
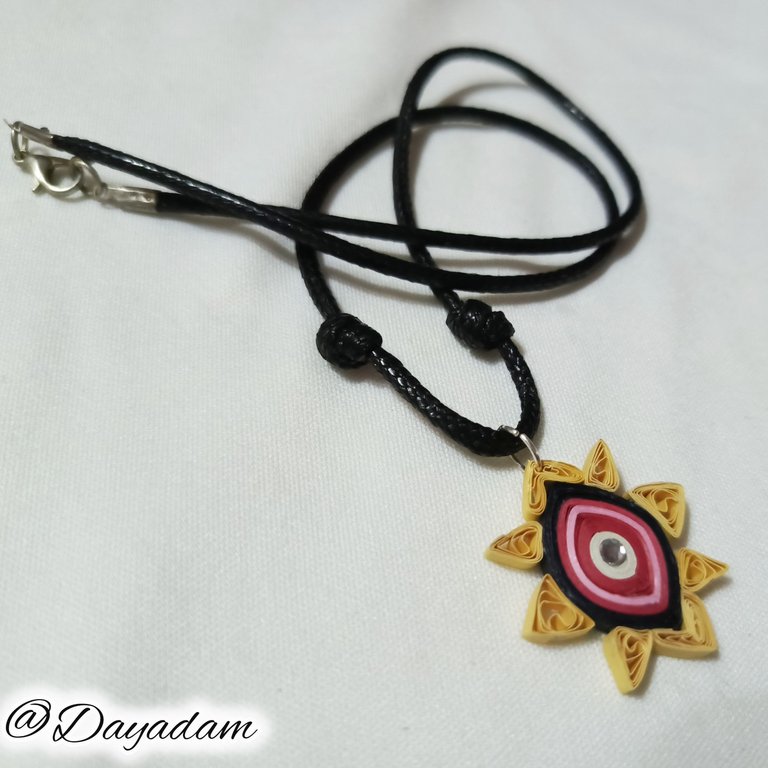
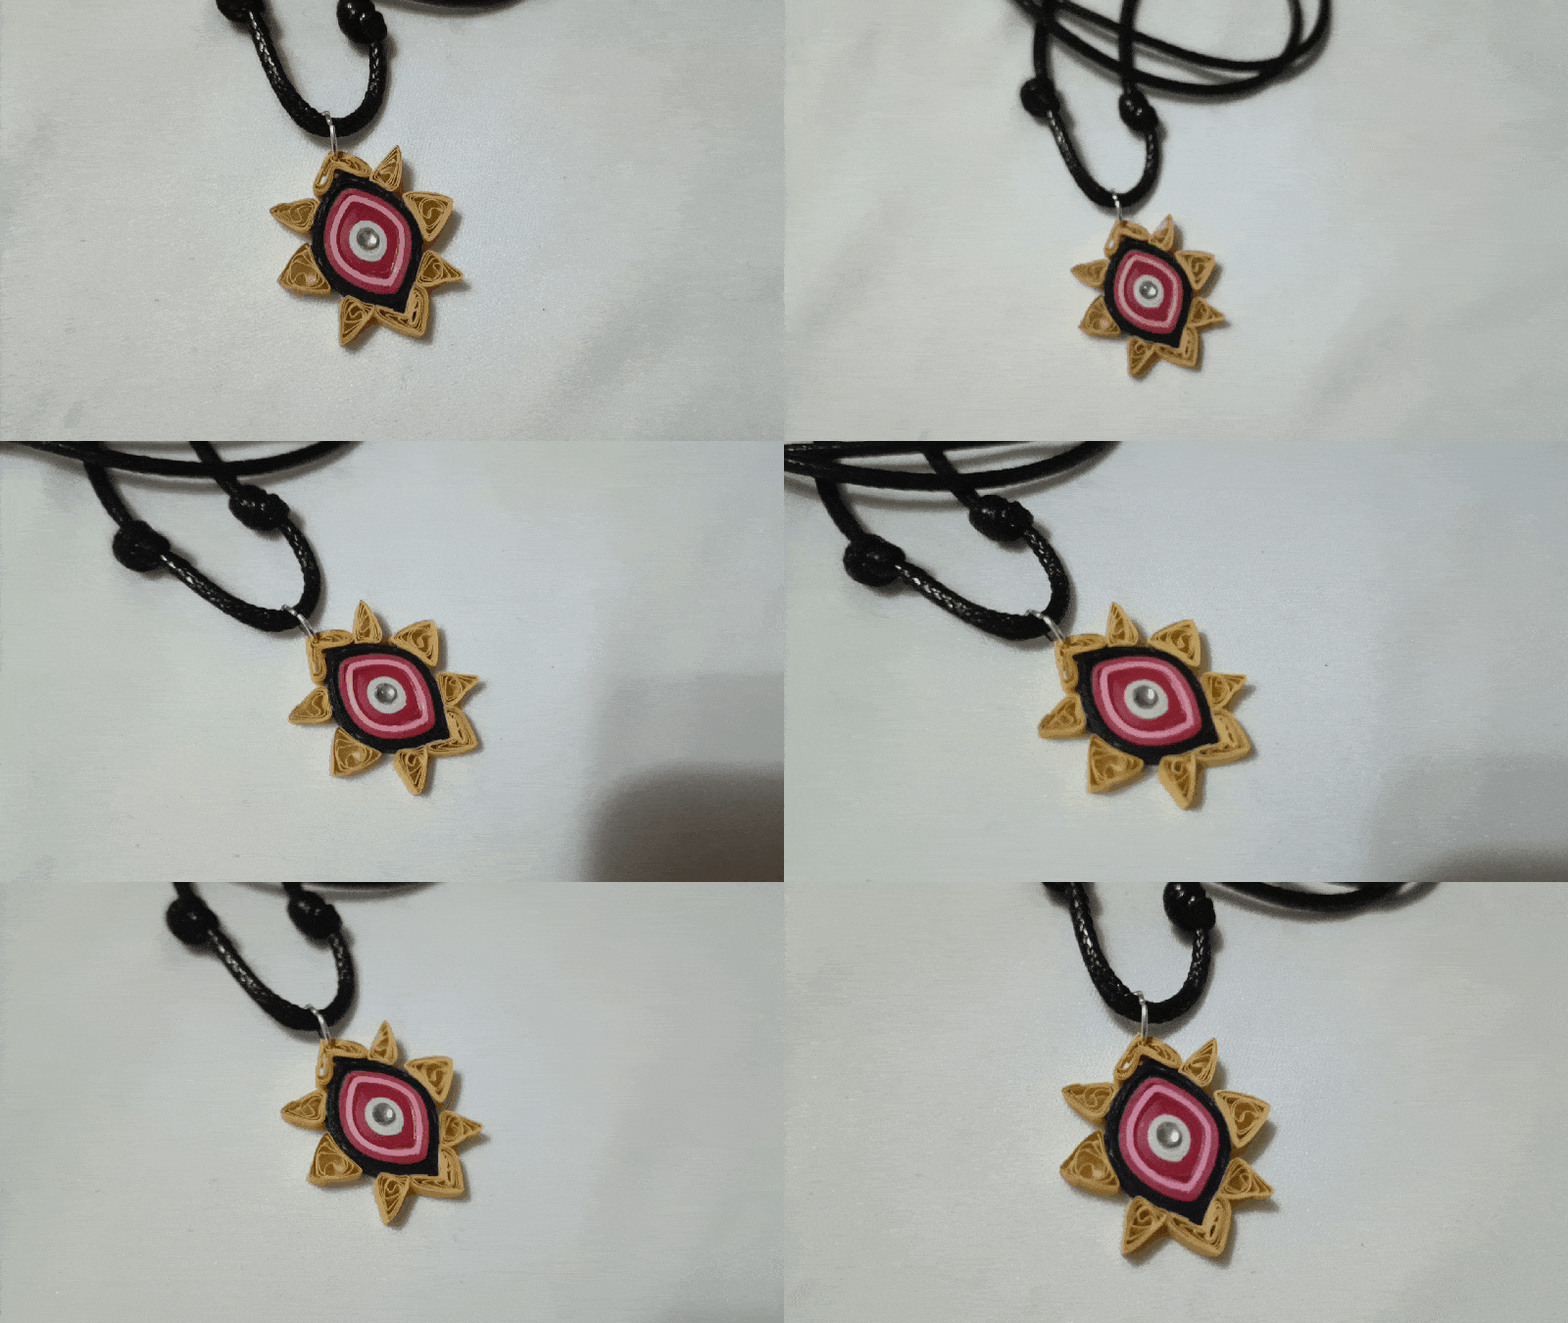
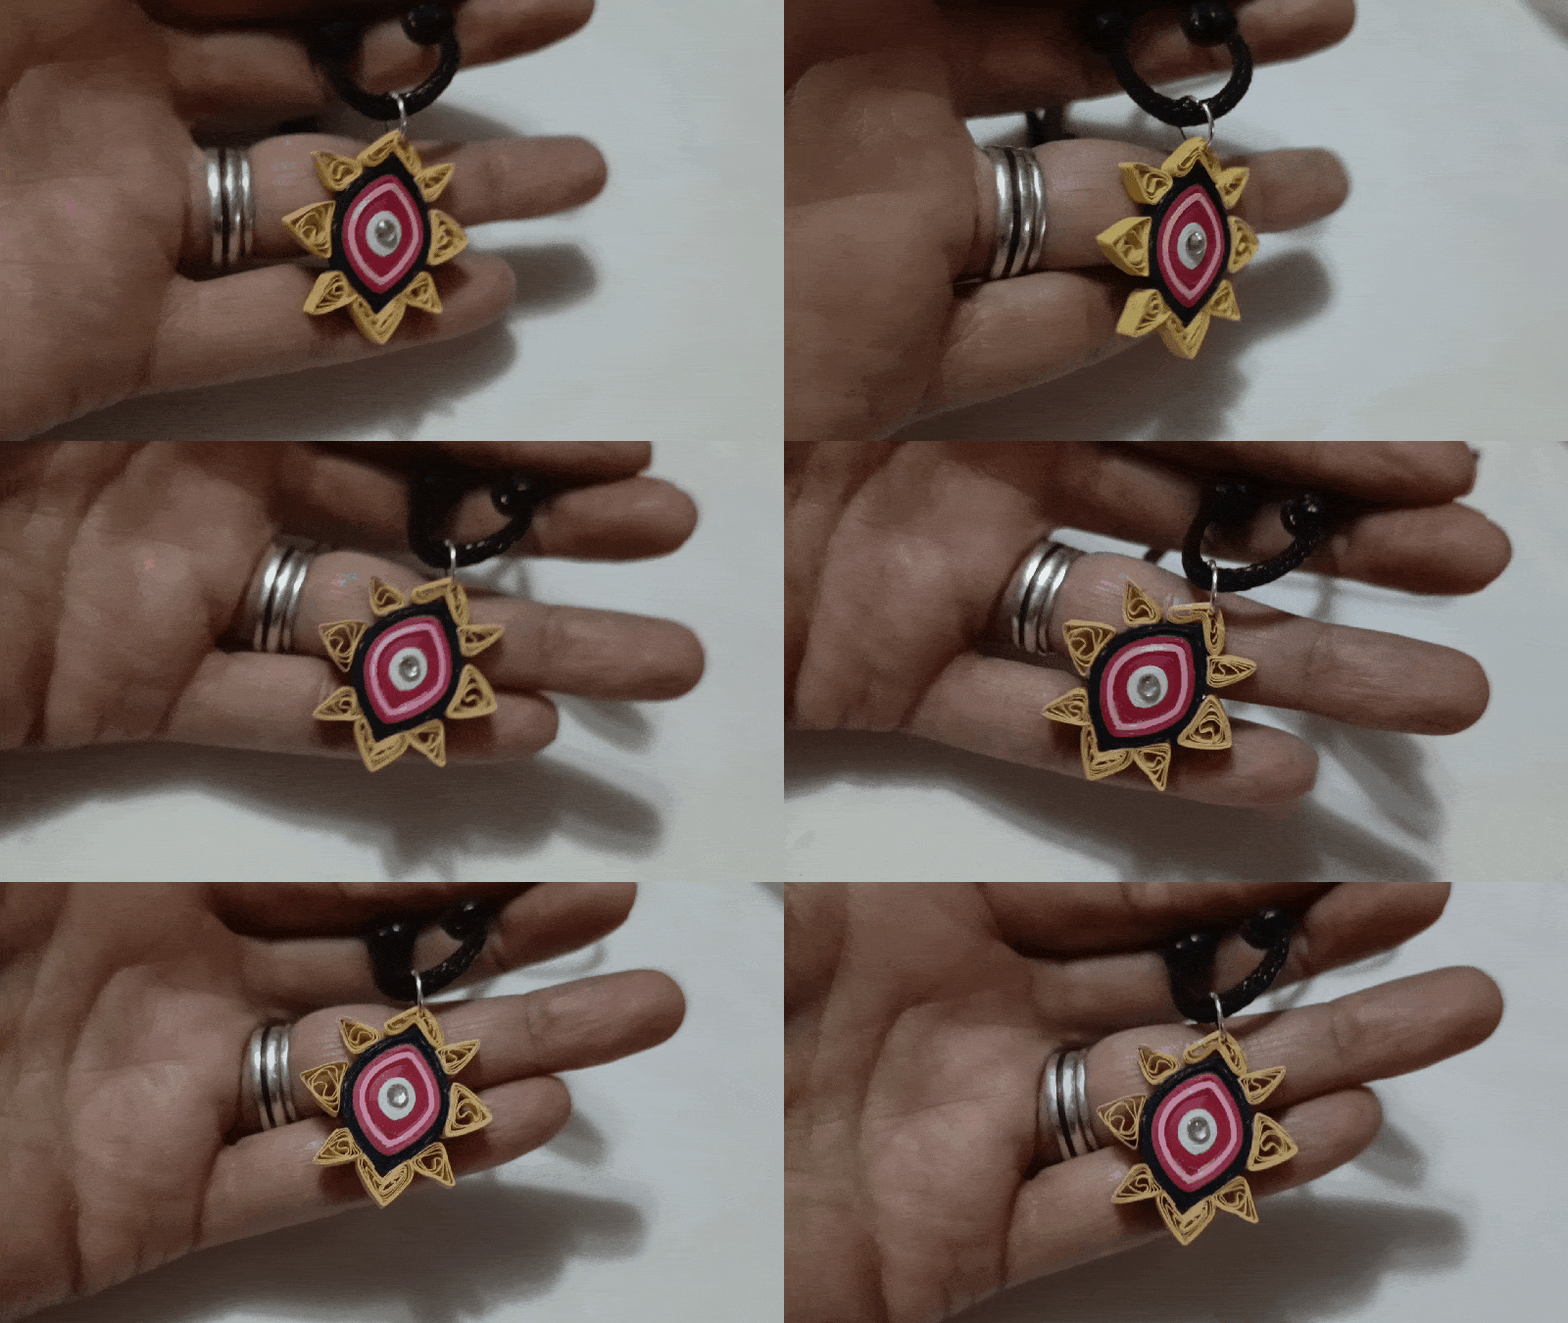
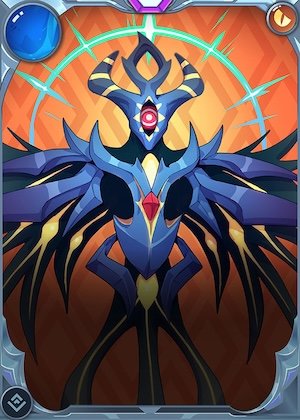
For this week I present a work inspired by the Rebellion letter of the character "Night Reaper " in which I materialized a pendant for necklace, of the mystical eye that possesses the same one in the technique of quilling.
If you want to know more about the game, I leave you my reference link to enter it and navigate through this wonderful world: https://splinterlands.com?ref=dayadam
Hoping you like my work, without further ado, I leave you with my creative process.
Let's start:😃

Hola a Todos...✨
Hola a mis queridos Hivers y a la querida comunidad de artistas #Jewelry, como siempre muy complacida y emocionada de encontrarme por acá nuevamente, mostrándole mi trabajo hecho con mucho amor y especialmente para ustedes.
Un saludo para la comunidad de Splinterlands, y todos los que hacen vida por allí, estoy por acá para unirme al reto Splinterlands Social Media Challenge!.
Para esta semana les presento un trabajo inspirado en la carta de Rebellion del personaje "Night Reaper" en el cual materialice un dije para collar, del ojo místico que posee el mismo en la técnica de quilling.
Si quieren saber más con respecto al juego les dejo mi enlace de referencia para que ingresen en él, y naveguen por este maravilloso mundo: https://splinterlands.com?ref=dayadam
Esperando les guste mi trabajo, sin más preámbulos, les dejo mi proceso creativo.
Comencemos:😃

• Cintas de quilling.
• Argolla de bisutería.
• Cristal de bisutería.
• Pega blanca extra fuerte (de carpintería).
• Tijera.
• Pincel.
• Alicate.
• Pinza punta fina.
- Quilling ribbons.
- Jewelry ring.
- Costume jewelry glass.
- Extra strong white glue (carpentry glue).
- Scissors.
- Paintbrush.
- Pliers.
- Fine tip tweezers.

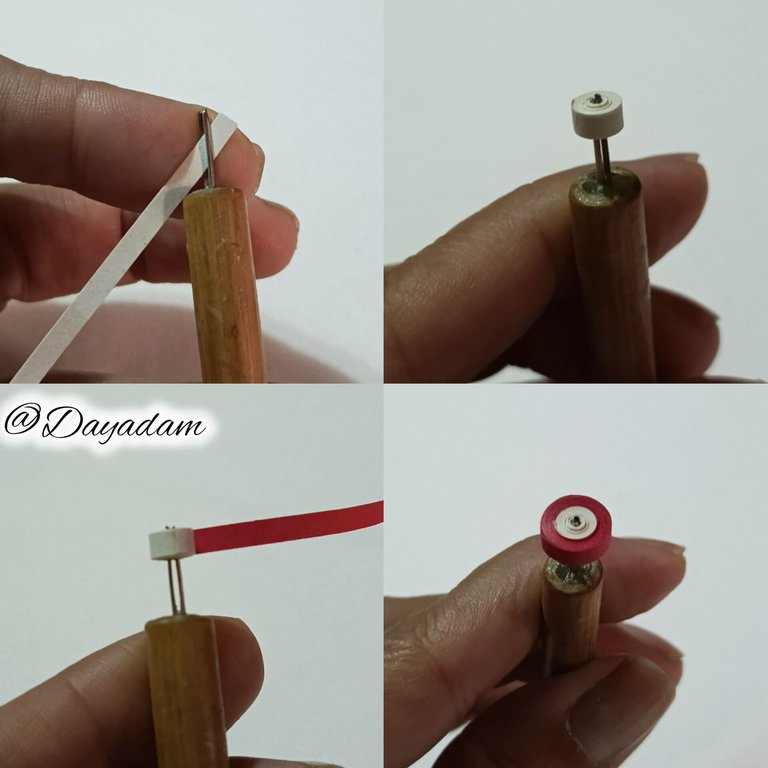
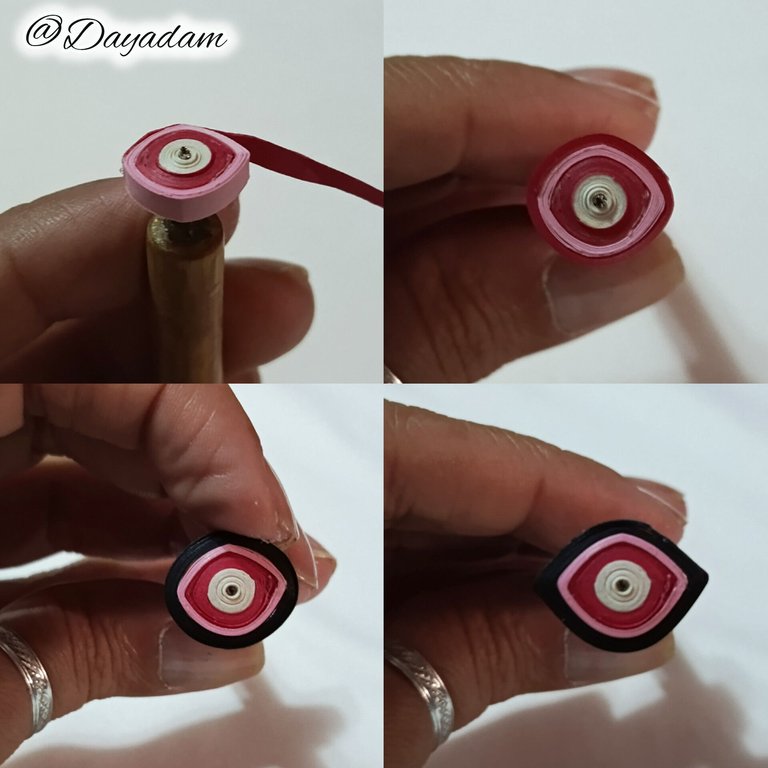
- We start by taking a piece of white quilling ribbon 3mm wide, with the help of the quilling needle we will roll until we reach the end of the ribbon, seal with extra strong white glue.
- Now we will take a piece of red ribbon we are going to glue the white circle that we previously made, we roll until we reach the end of the ribbon, we seal with glue, without removing the needle we will pinch with our fingers at both ends, to make an eye shape.
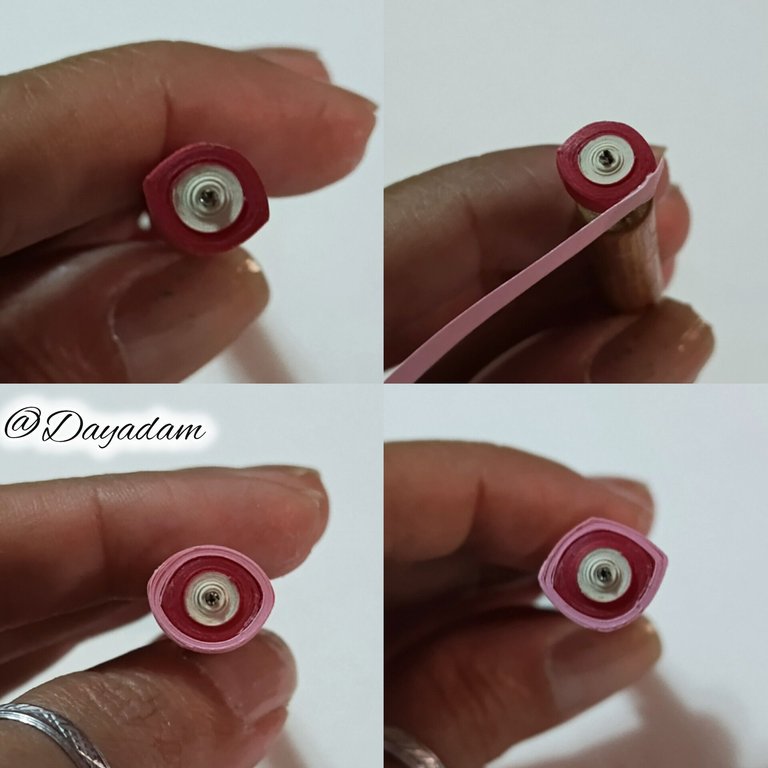
- Then we will repeat the process with a piece of pink ribbon, at the end we will continue with another piece of red ribbon, and finally we will do it with another piece of black ribbon.

• Comenzamos tomando un trozo de cinta para quilling de color blanca de 3mm de ancho, con la ayuda de la aguja para quilling vamos a enrollar hasta llegar al final de la cinta, sellamos con pega blanca extra fuerte.
• Ahora tomaremos un trozo de cinta de color roja vamos a pegar del círculo blanco que hicimos previamente enrollamos hasta llegar al final de la cinta sellamos con pega, sin sacar de la aguja vamos a pellizcar con los dedos en los dos extremos, para hacer una forma de ojo.
• A continuación repetiremos el proceso con un trozo de cinta rosada, al finalizar continuaremos con otro trozo de cinta roja, y para finalizar lo haremos con otro trozo de cinta color negro.
 |  |  |
|---|
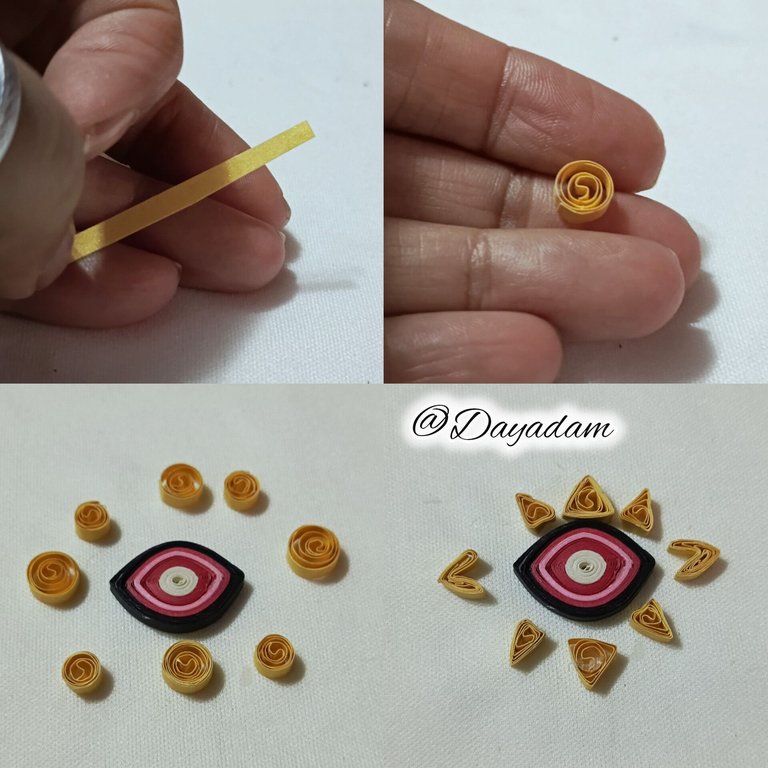
- Now we will take gold-colored ribbon with it We will make several open circles of various sizes. There will be a total of 8 circles.
- Once all the circles are ready, we will proceed to mold them in the shape of triangles as you can see in the images, except for the two at the ends, which we will mold into a kind of beak.
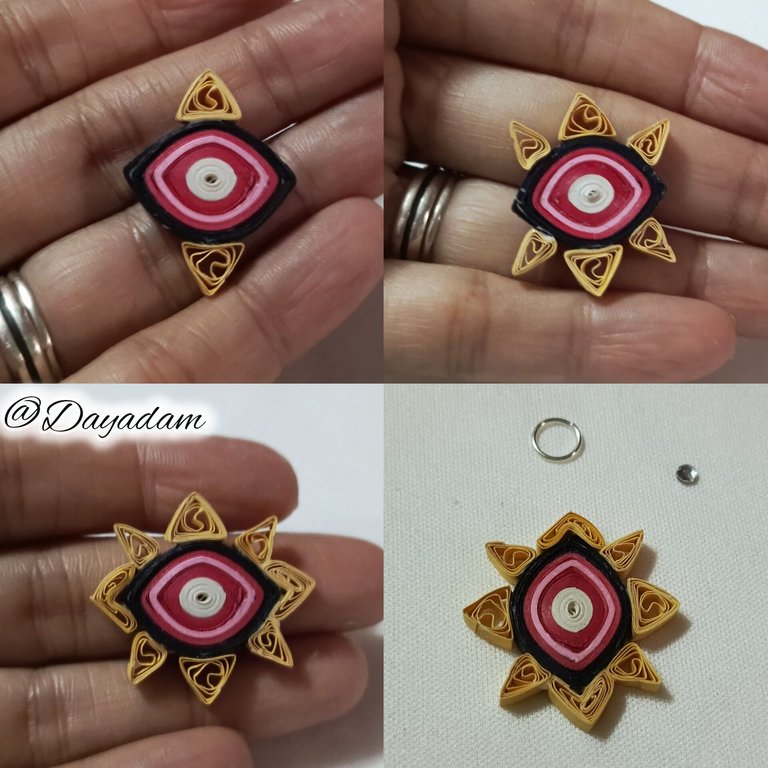
- We will pay the pieces around the eye in a harmonic way as you can see in the images.
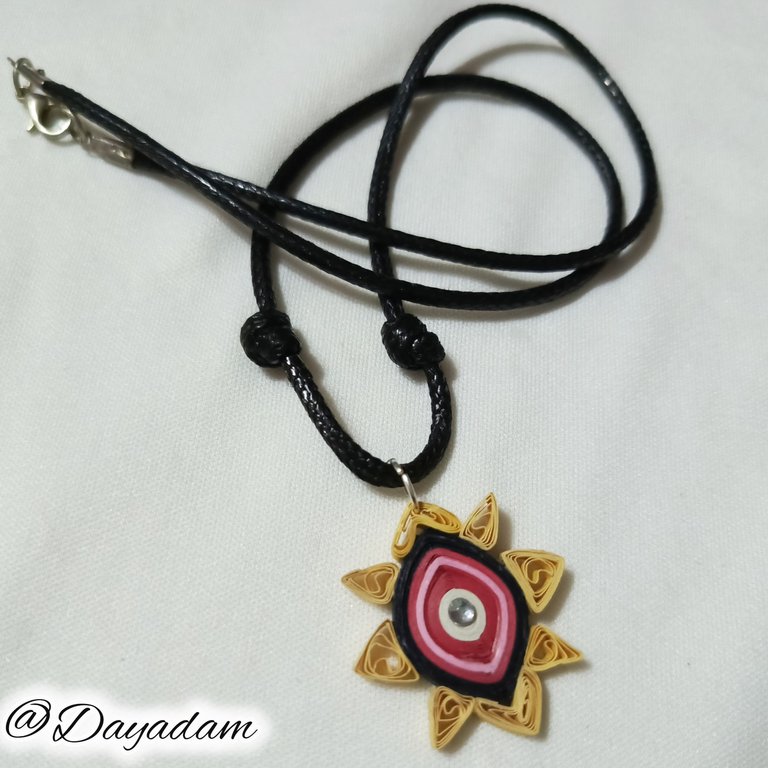
- To finish we will place a costume jewelry crystal in the center of the eye to give it more showiness, and in the upper part we will place a medium size costume jewelry ring.
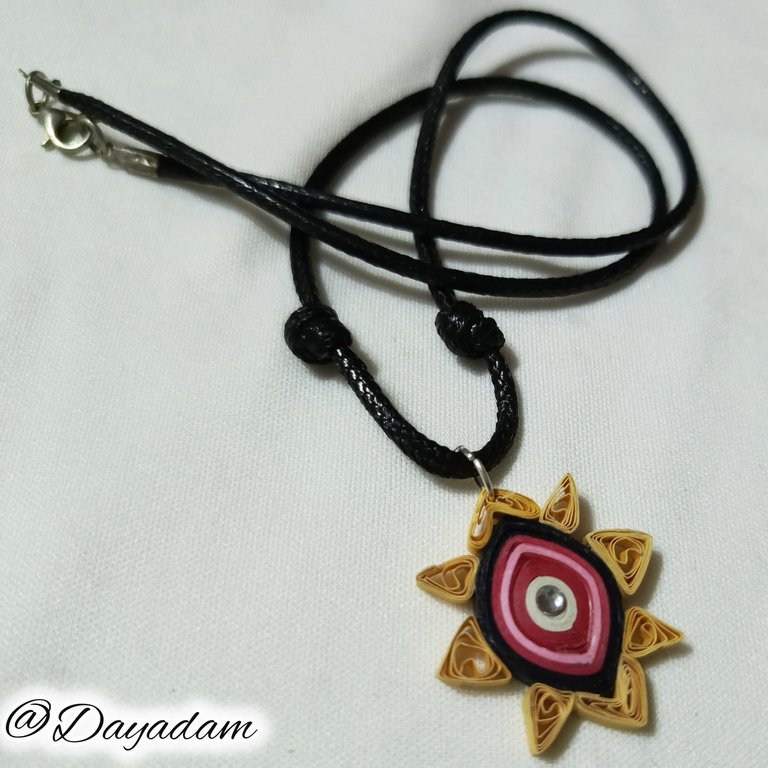
- In this way we have ready this pendant for necklace, that I materialized inspired again in the letter "Night Reaper ".

• A continuación tomaremos cinta de color dorada con ella Vamos a hacer varios círculos abiertos de diversos tamaños. Serán un total de 8 círculos.
• Listos todos los círculos vamos a proceder a moldear en forma de triángulos tal como pueden ver en las imágenes a excepción de los dos que van en los extremos, que los moldearemos formando una especie de picos.
• Pagaremos las piezas alrededor del ojo de forma armónica tal como pueden apreciar en las imágenes.
• Para finalizar colocaremos un cristal de bisutería en el centro del ojo para darle mayor vistosidad, y en la parte de arriba una argolla mediana de bisutería.
• De esta manera tenemos listo este colgante, que materialice inspirado nuevamente en la carta "Night Reaper".
 |  |
|---|

What did you think, did you like it?
I hope you did, I hope you liked my explanation, procedure and photos, I made them with love for you.
"Let out that muse that inspires you, and let your imagination fly".
Thank you all, see you next time.

¿Que les pareció, les gustó?
Espero que sí, que les haya gustado mi explicación, procedimiento y fotos, los hice con mucho cariño por y para ustedes.
"Deja salir esa musa que te inspira, y deja volar tu imaginación".
Gracias a todos, nos vemos en la próxima.

Banner y separador hecho por mí en Canva

 Follow
