Hello everyone... 🐱
Hello to my dear Hivers and the dear community of Holozing, very pleased and excited to be here to show you a very simple work made with much love and especially for you.
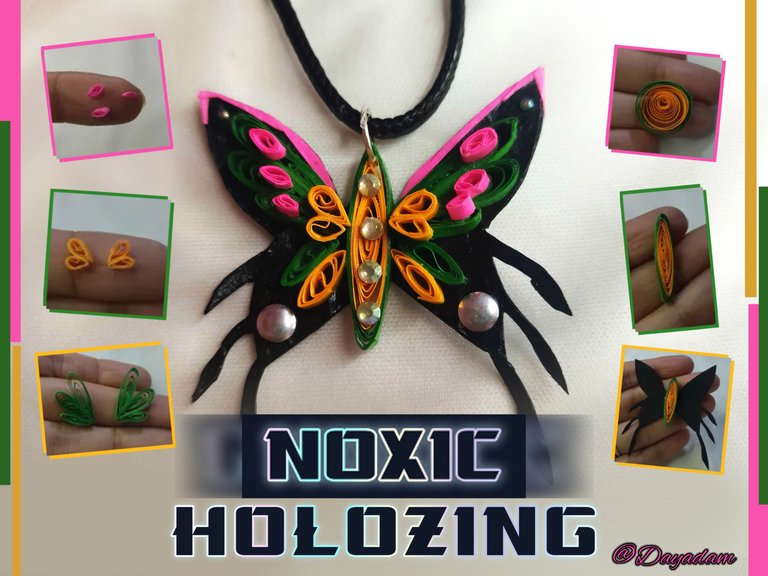
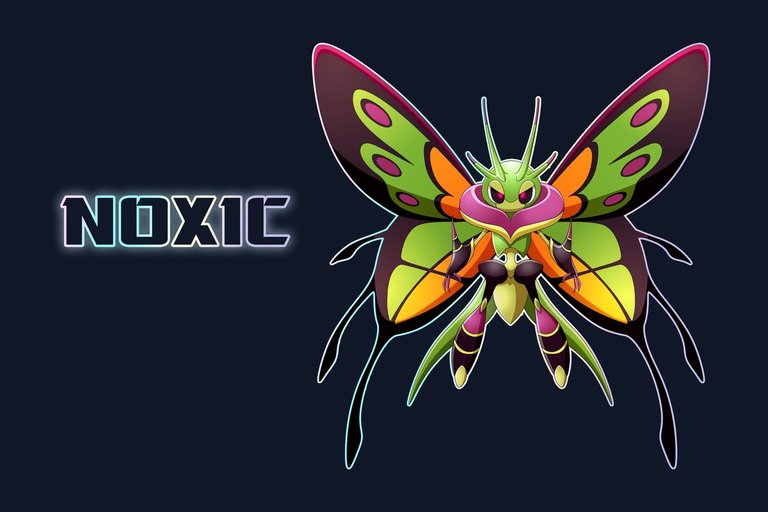
For today in this new reward update, following with my art, I decided to make a 2D necklace charm in the quilling technique combined with cardboard, materializing the spectacular new creature presented for the project in its evolution version as it is Noxic.
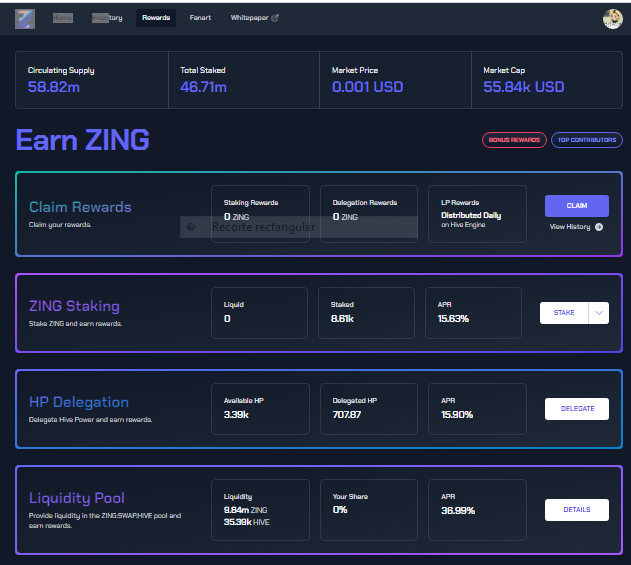
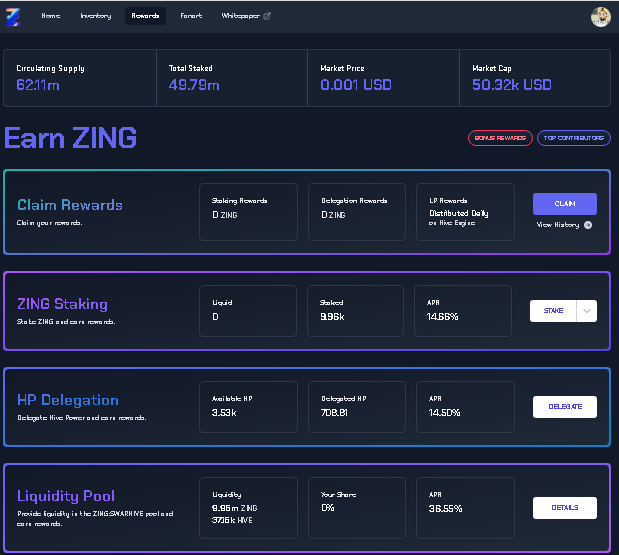
I attach images of my progress claiming the rewards for my delegation to Holozing which so far are 708.81HP, and I have an accumulated Stake of 9,961.92 tokens $ZING.
I hope you like my work, join me in this short creative process.
Let's begin:😃

Hola a Todos... 🐱
Hola a mis queridos Hivers y a la querida comunidad de Holozing, muy complacida y emocionada de encontrarme por acá para mostrarles un trabajo muy sencillo hecho con mucho amor y especialmente para ustedes.
Para hoy en esta nueva actualización de recompensas siguiendo con mi arte, decidí realizar un dije para collar en 2D en la técnica de quilling combinada con cartonaje, materializando la espectacular nueva criatura presentadas para el proyecto en su versión de evolución como lo es Noxic.
Les adjunto imágenes de lo que ha sido mi progreso reclamando las recompensas por mi delegación a Holozing que hasta ahora son 708.81HP, y llevo un acumulado en Stake de 9,961.92 tokens $ZING.
Espero sea de su agrado mi trabajo, acompáñenme en este corto proceso creativo.
Comencemos:😃

• Cintas de quilling de diversos colores.
• Aguja para quilling.
• Lápiz.
• Cartulina negra.
• Argolla de bisutería.
• Cristales y otros apliques de bisutería.
• Pega blanca extra fuerte (de carpintería).
• Tijera.
- Quilling ribbons of different colors.
- Quilling needle.
- Pencil.
- Black cardboard.
- Jewelry ring.
- Crystals and other costume jewelry appliqués.
- Extra strong white glue (carpentry glue).
- Scissors.

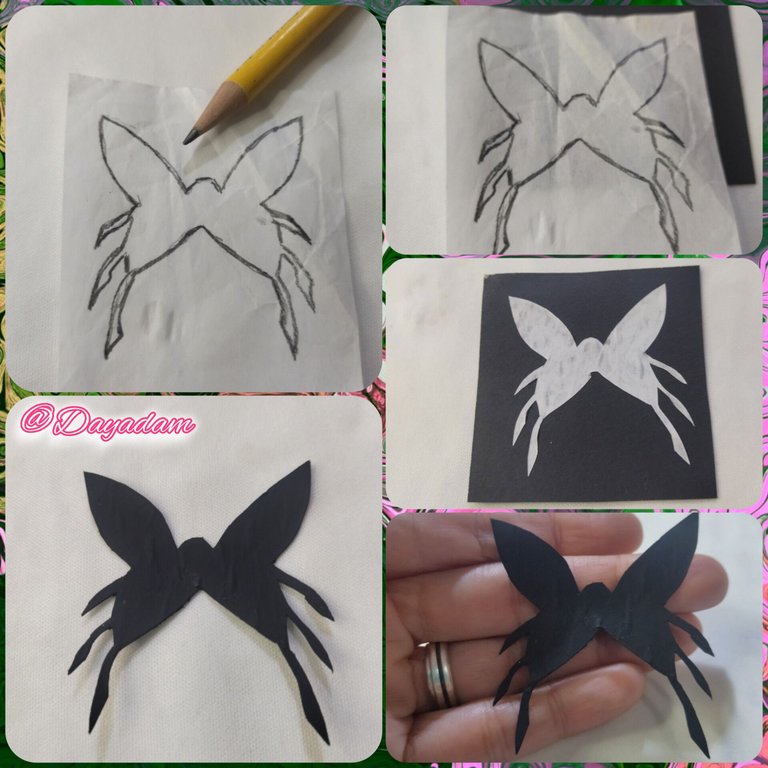
- We started by making a pencil sketch of the figure that I am going to make, then I proceeded to cut it out with a scissors and transfer it to a thick black cardboard, in which I cut out the figure in the same way. This will be the base of the pendant.
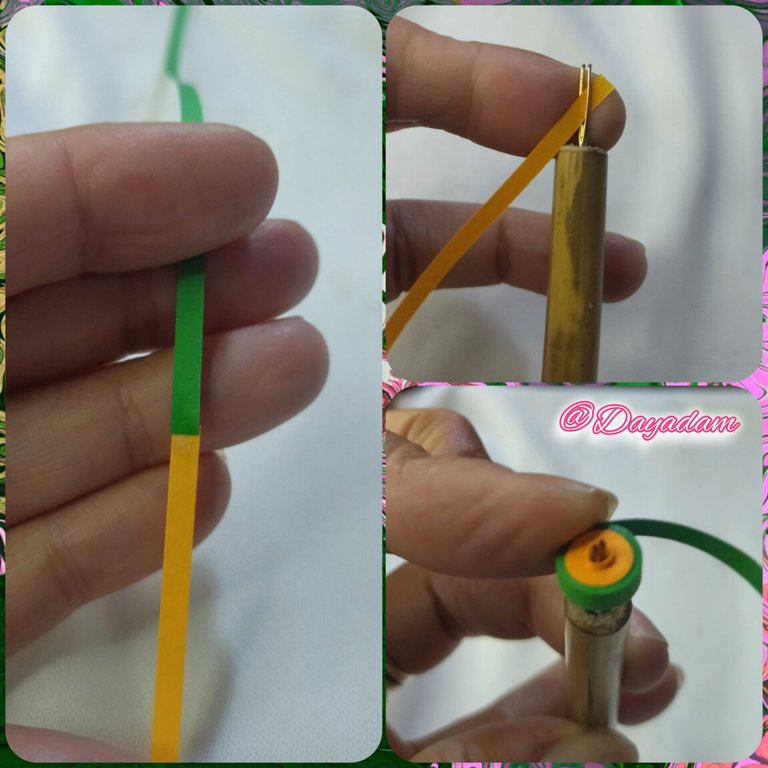
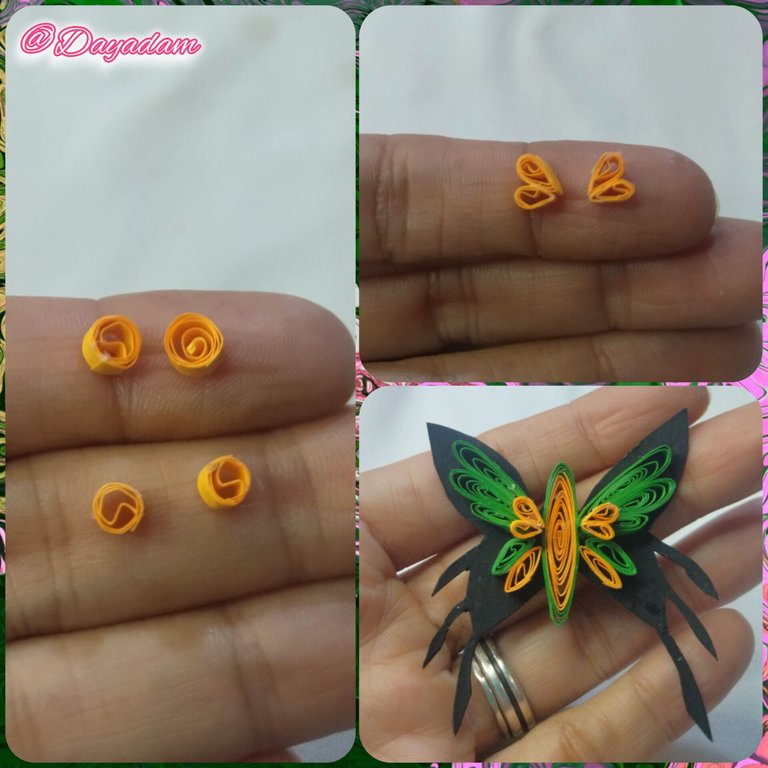
- To make the body of the Butterfly, I joined 2 pieces of green and orange quilling ribbon forming a single ribbon, then with the quilling needle I rolled starting with the orange side until the end with the green ribbon, remove from the needle seal with glue, release a little to get a combined open circle.
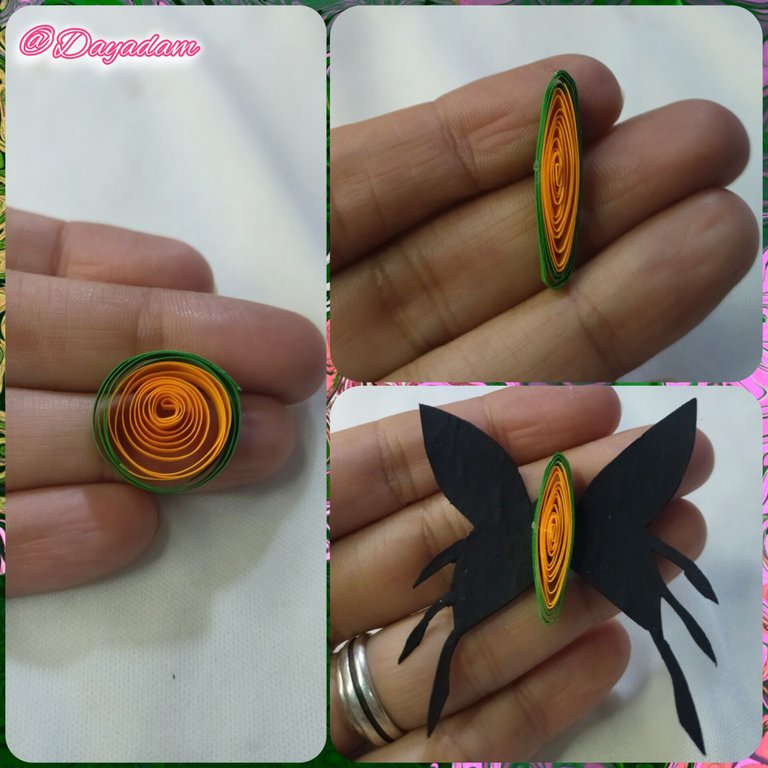
- I molded the circle into a flattened shape, and proceeded to glue it in the middle of the base of the pendant that I made with black cardboard.

• Comencé realizando un boceto a lápiz de la figura que voy a realizar, luego procedi a recortarla con una tijera y traspasarla a una cartulina de color negro gruesa, en la cual de igual manera recorte la figura. Está será la base del dije.
• Para realizar el cuerpo de la Mariposa, uni 2 trozos de cinta para quilling verde y naranja formando una sola cinta, luego con la aguja para quilling enrolle empezando por el lado naranja hasta finalizar con la cinta verde, saque de la aguja selle con pega, solté un poco hasta conseguir un círculo abierto combinado.
• Listo el círculo moldee en forma aplanada, y procedi a pegarlo en el medio de la base del dije que realice con cartón negro.
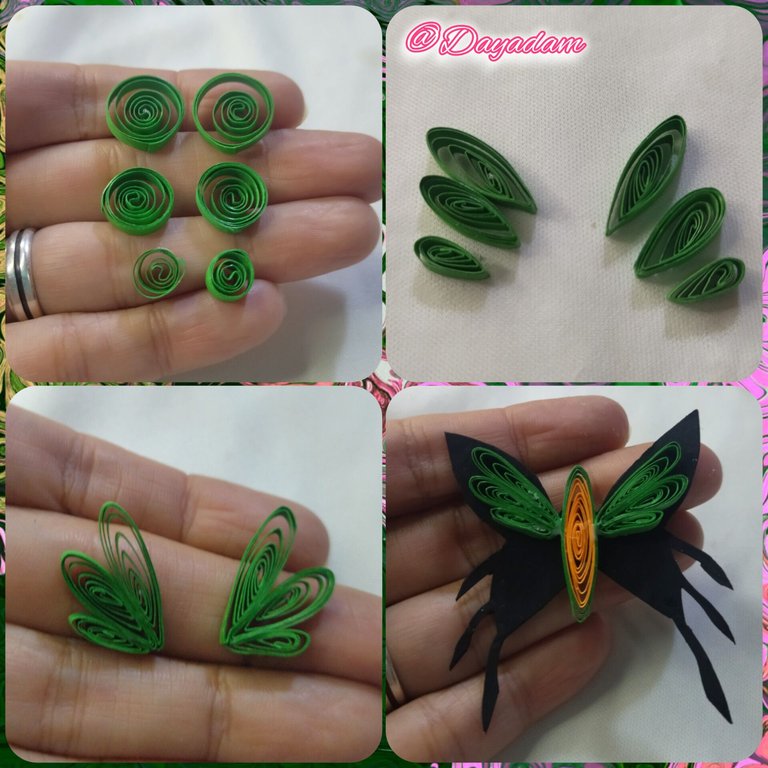
- For the 2D decoration of the wings start by making 6 open circles with 3mm wide green ribbon, 2 large, 2 medium and 2 smaller.
- Mold the circles in the shape of leaves, then join them in groups of 3, and glue on the top of the wings.
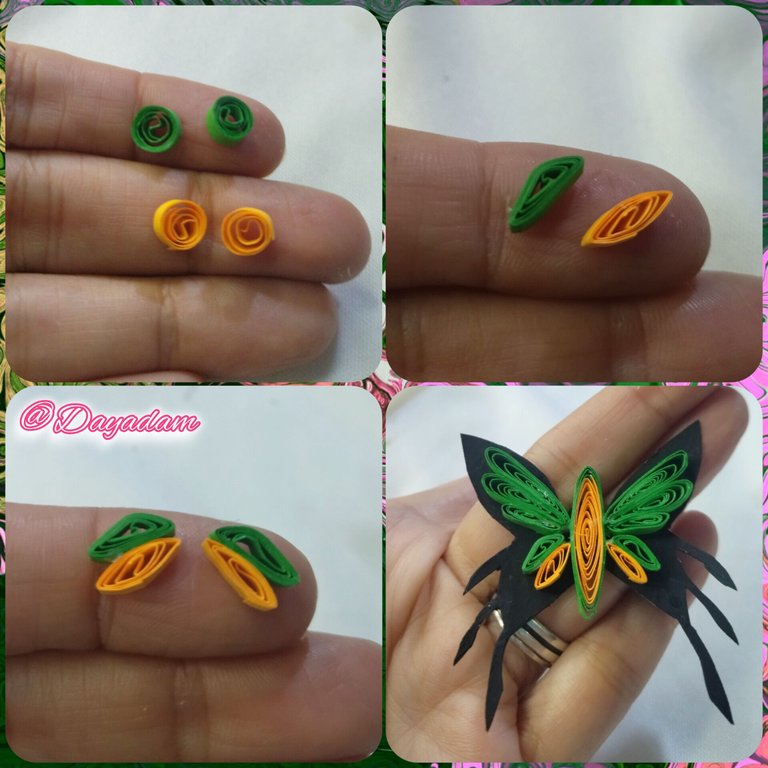
- For the bottom wings make 2 small circles with green and orange quilling 3mm wide, which I molded, attached and then glued on the wings.
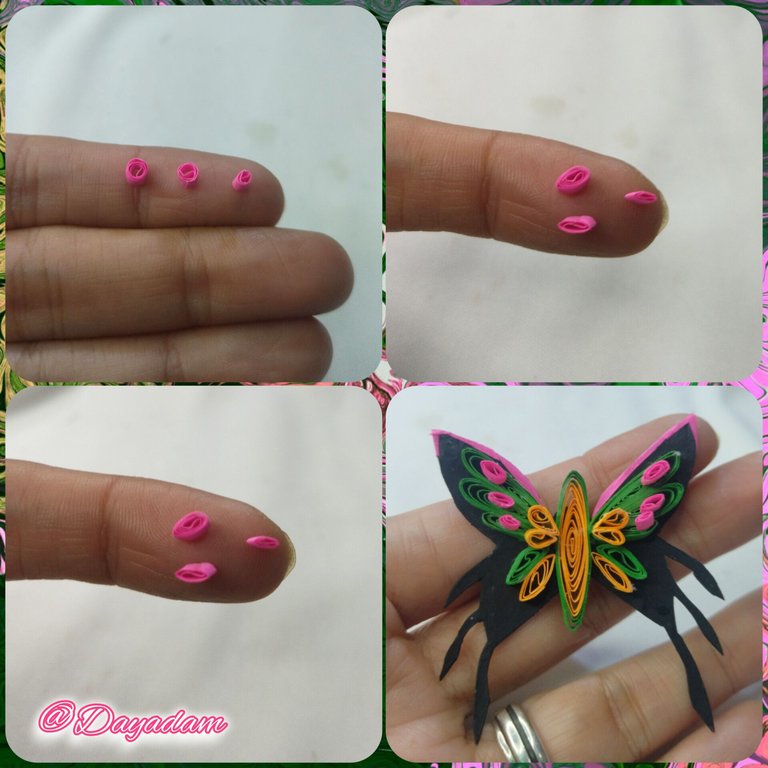
- I made additional circles for the top wing with orange ribbon, which I molded into a teardrop shape, attached and glued on the wing.
- I made other small fuchsia circles, which I flattened a little with my fingers and glued on both wings.
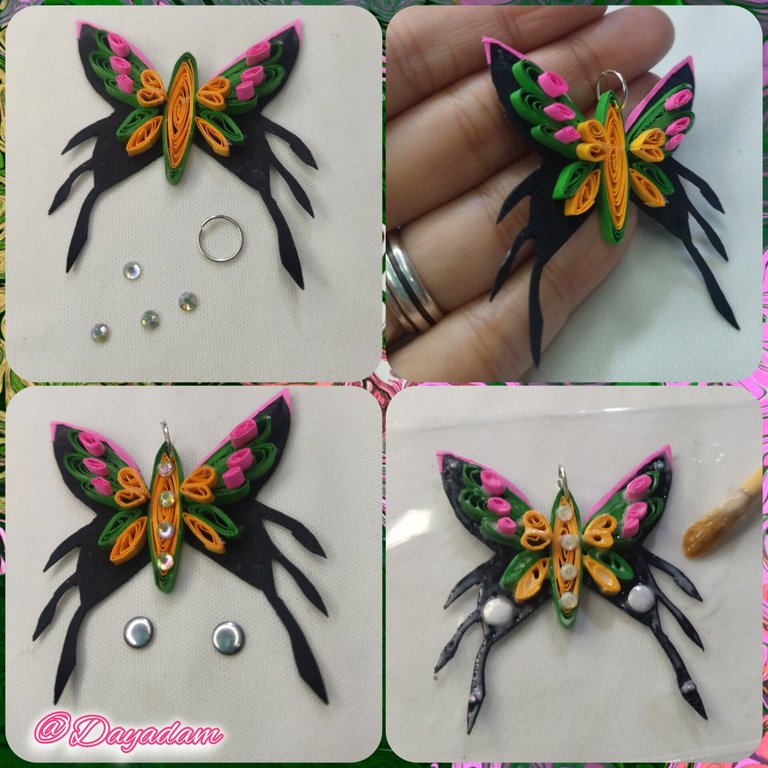
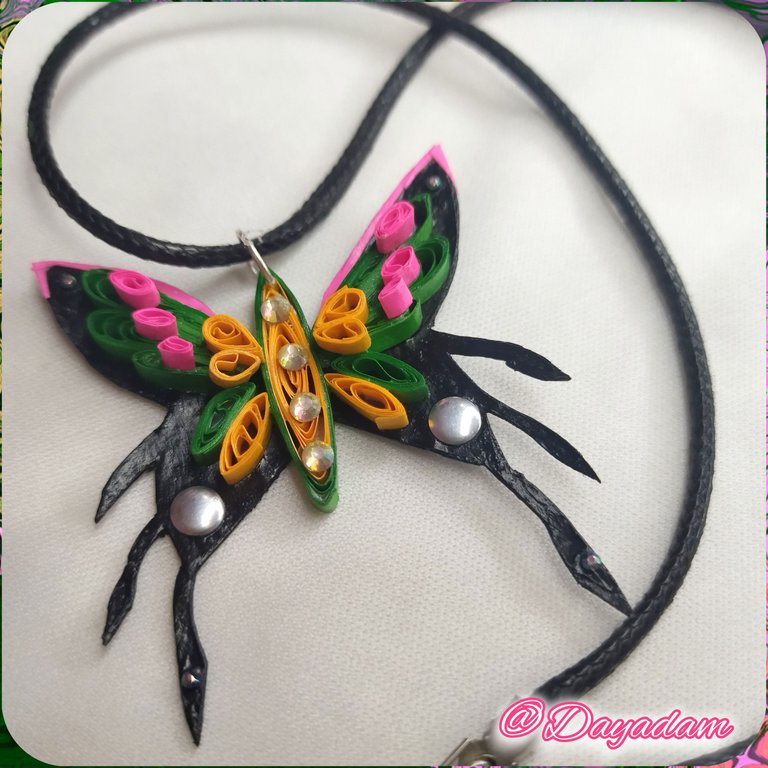
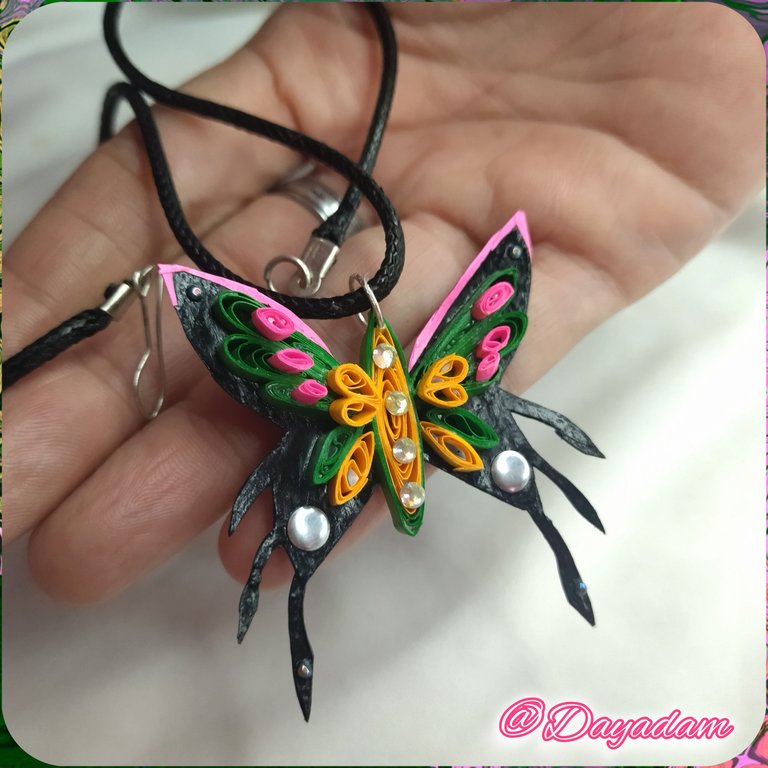
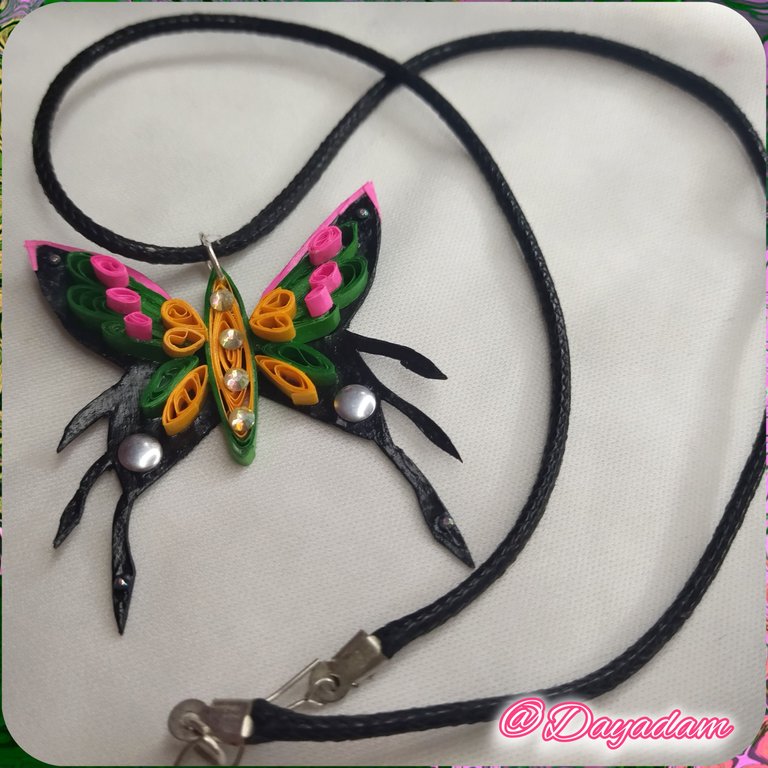
- Take crystals and various appliqués to decorate the butterfly, and place a medium-sized costume jewelry ring on the top of the body.
- To finish and protect the pendant, apply several coats of extra strong white glue, and let it dry between coats.
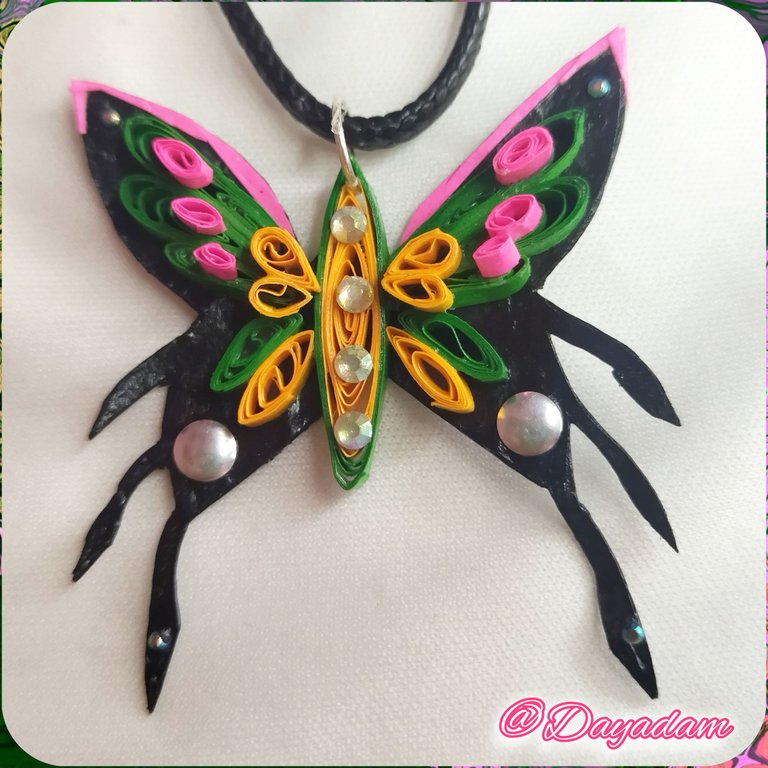
This way this pendant for the necklace I made of the beautiful creature "Noxic" is ready.
• Para la decoración en 2D de las alas inicie realizando 6 círculos abiertos con cinta verde de 3mm de ancho, 2 grandes, 2 medianos y 2 más pequeños.
• Moldee los círculos en forma de hojas, luego los uni en grupos de 3, y pegue en la parte de arriba de las alas.
• Para las alas de abajo realice 2 pequeños círculos con quilling color verde y naranja de 3mm de ancho, los cuales moldee, uni y luego pegue en las mismas.
• Realice otros círculos adicionales para el ala de arriba con cinta de color naranja, los cuales moldee en forma de gota, uni y pegue en el ala.
• Hice otros pequeños círculos de color fucsia, los cuales aplane un poco con los dedos pegue en ambas alas.
• Tome cristales y apliques diversos para decorar la mariposa, y coloque una argolla mediana de bisutería en la parte de arriba del cuerpo.
• Para finalizar y proteger el dije, aplique varias capas de pega blanca extra fuerte, la cual deje secar entre una capa y otra.
De esta manera esta listo este dije para collar que realice de la bonita criatura "Noxic".

What did you think, did you like it?
I hope you did, I hope you liked my explanation, procedure and photos, I made them with love for you.
"Let out that muse that inspires you, and let your imagination fly".
Thank you all, see you next time.🐱

¿Qué les pareció, les gustó?
Espero que sí, que les haya gustado mi explicación, procedimiento y fotos, los hice con mucho cariño por y para ustedes.
"Deja salir esa musa que te inspira, y deja volar tu imaginación".
Gracias a todos, nos vemos en la próxima.🐱