Hello everyone... ✨
Hello to my dear Hivers and the dear community of artists #Jewelry, as always very pleased and excited to be here again, showing you my work made with love and especially for you.
Greetings to the Splinterlands community, and everyone who lives there, I'm here to join the Splinterlands Social Media Challenge!
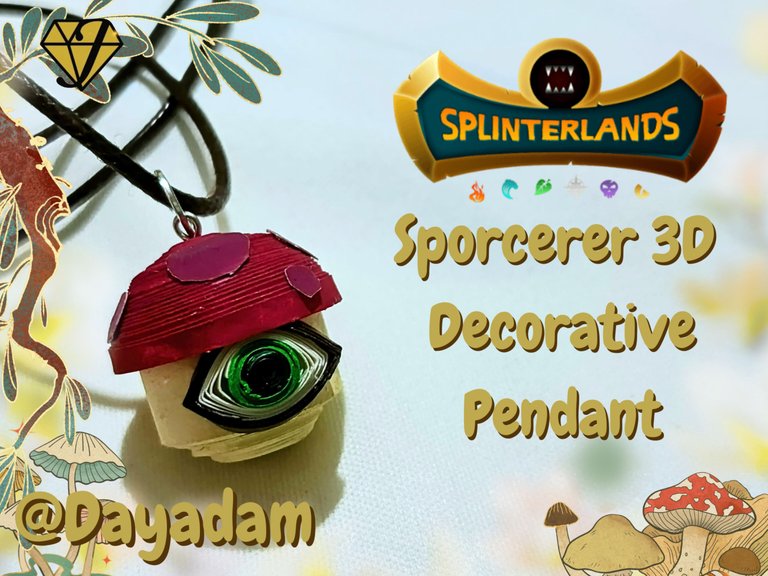
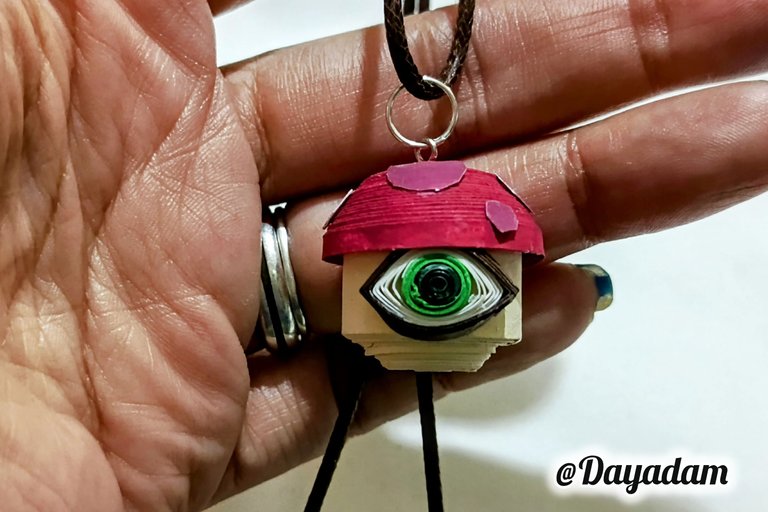
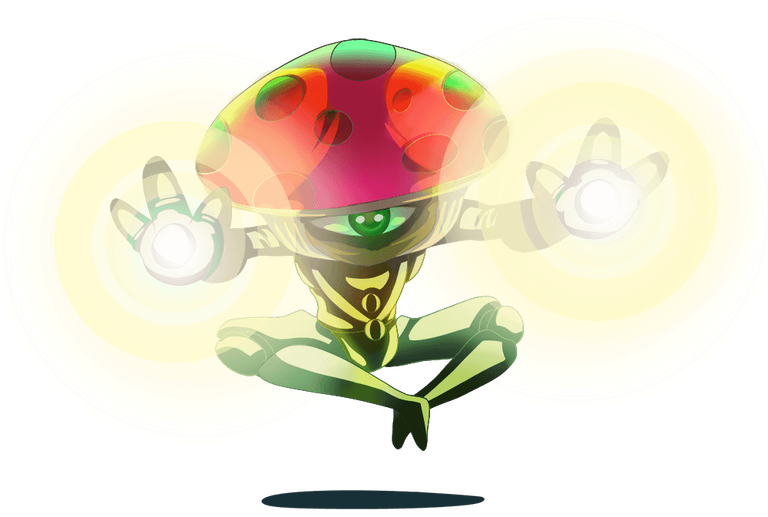
For this week I present a work inspired by the letter of the character "Sporcerer ", from which I materialized a 3D pendant, in the quilling technique.
If you want to know more about the game, I leave you my reference link to enter it and navigate through this wonderful world: https://splinterlands.com?ref=dayadam
Hoping you like my work, without further ado, I leave you with my creative process.
Let's start:😃

Hola a Todos...✨
Hola a mis queridos Hivers y a la querida comunidad de artistas #Jewelry, como siempre muy complacida y emocionada de encontrarme por acá nuevamente, mostrándole mi trabajo hecho con mucho amor y especialmente para ustedes.
Un saludo para la comunidad de Splinterlands, y todos los que hacen vida por allí, estoy por acá para unirme al reto Splinterlands Social Media Challenge!.
Para esta semana les presento un trabajo inspirado en la carta del personaje "Sporcerer", del cual materialice un colgante en 3D, en la técnica de quilling.
Si quieren saber más con respecto al juego les dejo mi enlace de referencia para que ingresen en él, y naveguen por este maravilloso mundo: https://splinterlands.com?ref=dayadam
Esperando les guste mi trabajo, sin más preámbulos, les dejo mi proceso creativo.
Comencemos:😃
 |

• Cintas de quilling de diversos colores.
• Cartulina Blanca.
• Guillotina.
• Alfiler de bisutería.
• Argolla de bisutería.
• Molde para círculos.
• Pinturas al frio.
• Pega blanca extra fuerte (de carpintería).
• Tijera.
• Pincel.
• Alicate.
• Pinza punta fina.
• Collar de tu preferencia.
- Quilling ribbons of different colors.
- White cardboard.
- Guillotine.
- Fashion jewelry pin.
- Jewelry ring.
- Mold for circles.
- Cold paints.
- Extra strong white glue (carpentry).
- Scissors.
- Brush.
- Pliers.
- Fine tip tweezers.
- Necklace of your choice.

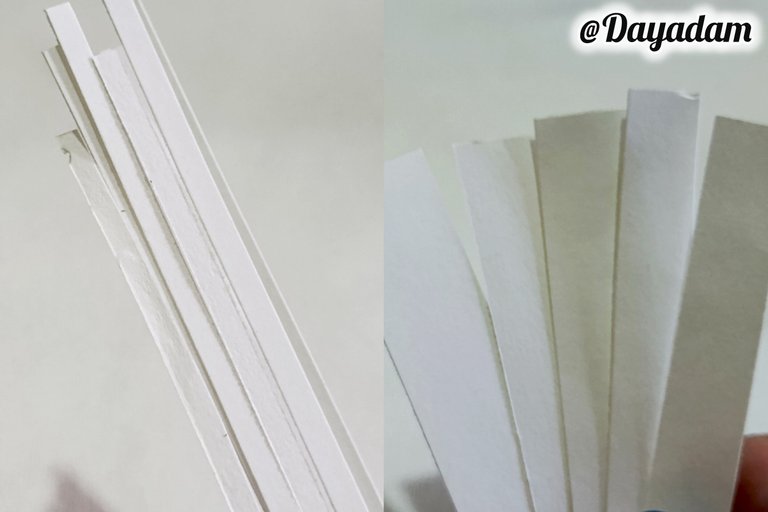
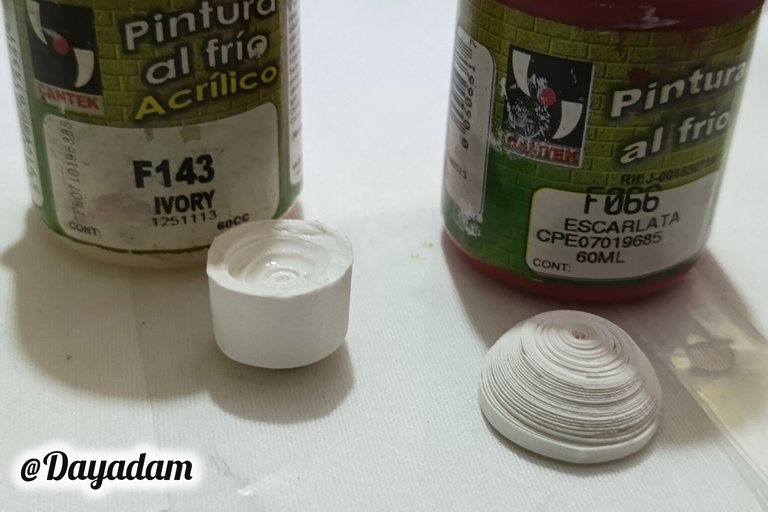
- I started by cutting with a guillotine of white cardboard, several strips of 3mm wide and other strips of 9mm wide.
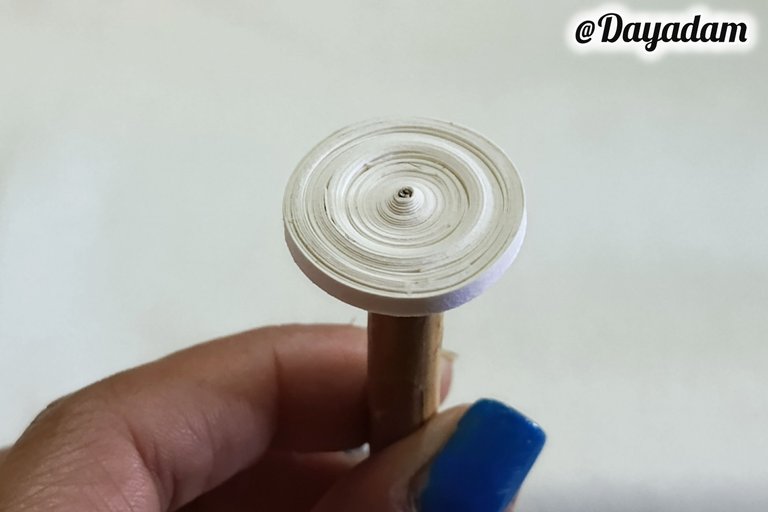
- With the quilling needle I proceeded to make first a closed circle with the 3mm ribbon.
- With the 9mm tape I proceeded to make another closed circle a little smaller than the previous one.
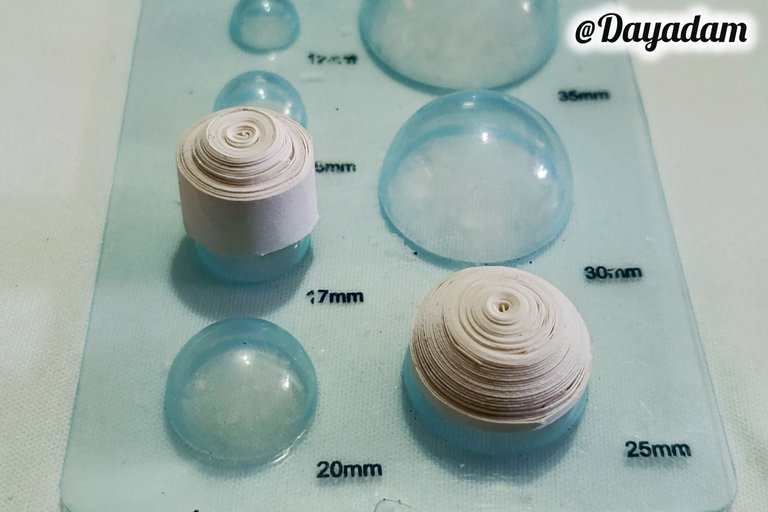
- Once the circles were ready I proceeded to mold them in a template to mold circles, in different sizes as you can see in the image, I applied extra strong white glue on the inside to prevent them from moving or deforming, let them dry very well.

• Comencé picando con una guillotina de cartulina de color blanco, varias tiras de 3mm de ancho y otras tiras de 9mm de ancho.
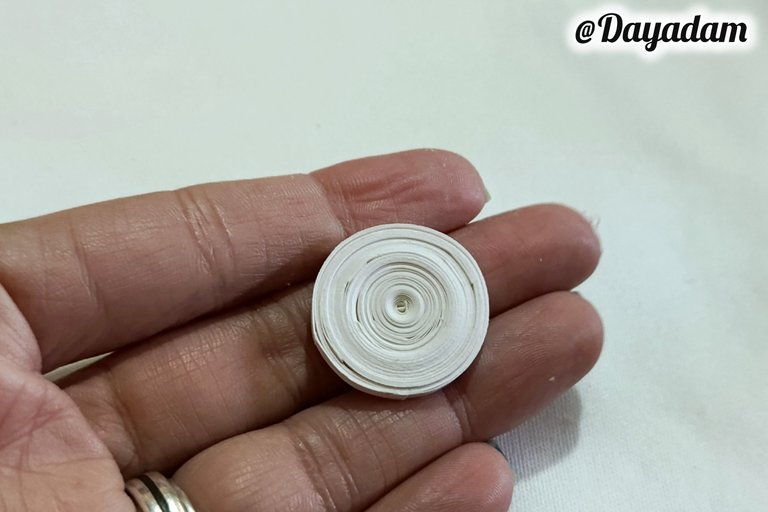
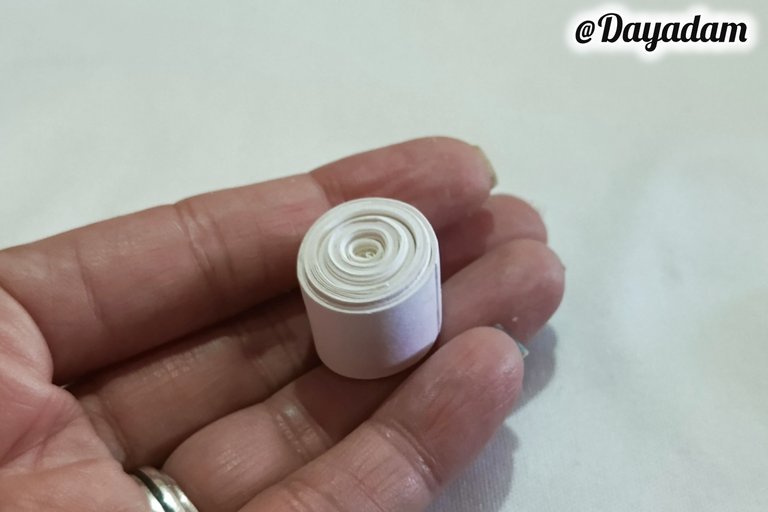
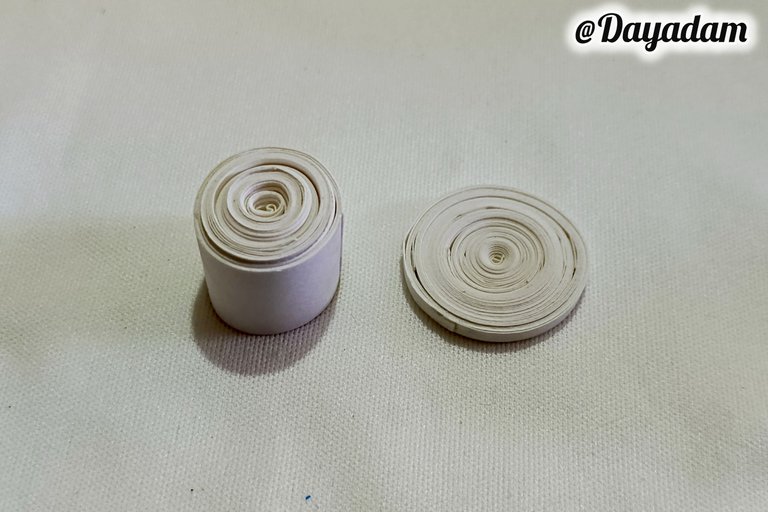
• Con la aguja para quilling procedí a realizar primero un círculo cerrado con la cinta de 3 mm.
• Con la cinta de 9mm procedí a realizar otro círculo cerrado un poco más pequeño que el anterior.
• Listos los círculos procedía a moldearlos en una plantilla para moldear círculos, en distintas medidas tal como pueden ver en la imagen, apliqué pega blanca extra fuerte por su parte interna para evitar que los mismos se muevan o se deformen, deje secar muy bien.
 |  |  |
 |  |  |
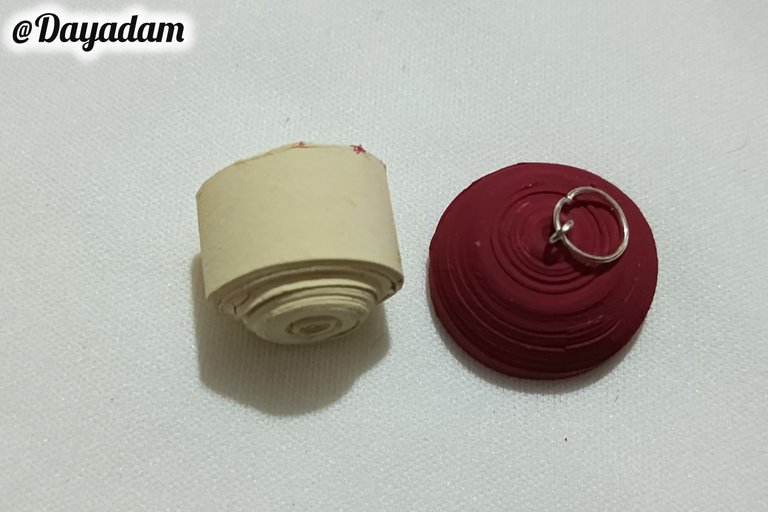
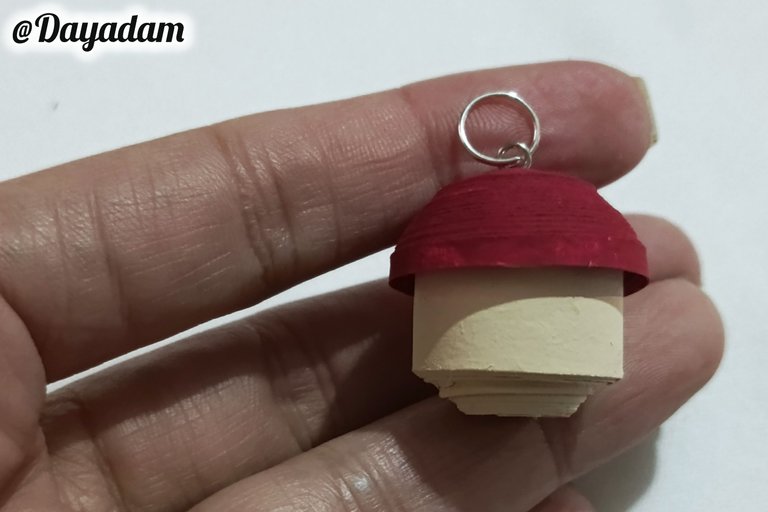
- I took some cold water paint, with scarlet color I proceeded to paint the piece I made with 3mm ribbons, and with ivory color I painted the piece I made of 9mm, I let both dry very well.
- With red wine color paint, I painted a piece of white cardboard.
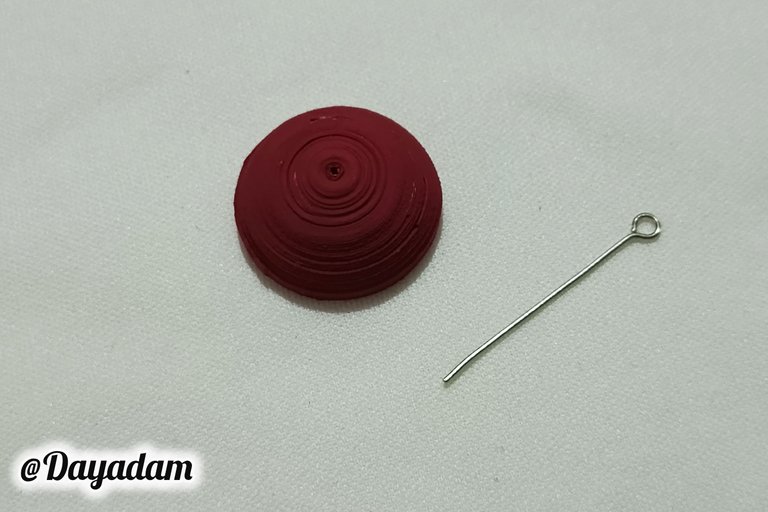
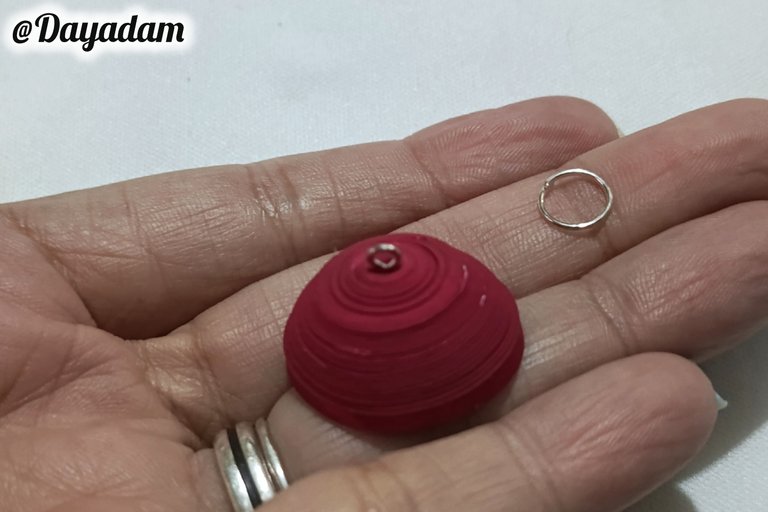
- To the scarlet piece, I placed a costume jewelry pin and a medium size ring, then I proceeded to glue both pieces one on top of the other.
• Tomé pintura al agua al frío, con color escarlata procedí a pintar la pieza que realicé con cintas de 3mm, y con color ivory pinte la pieza que realice de 9mm, deje secar ambas muy bien.
• Con pintura color vino tinto, pinté un trozo de cartulina color blanco.
• A la pieza color escarlata, le coloque un alfiler de bisutería y una argolla mediana, luego procedí a pegar ambas piezas una encima de otra.
 |  |  |
 |  |  |
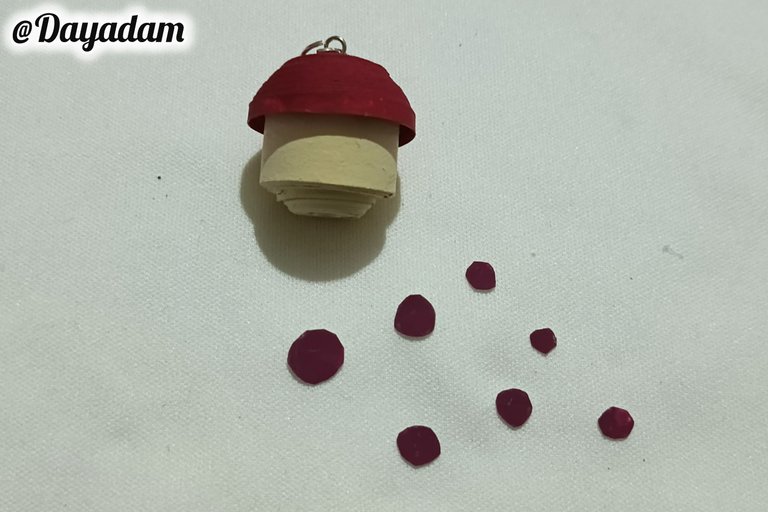
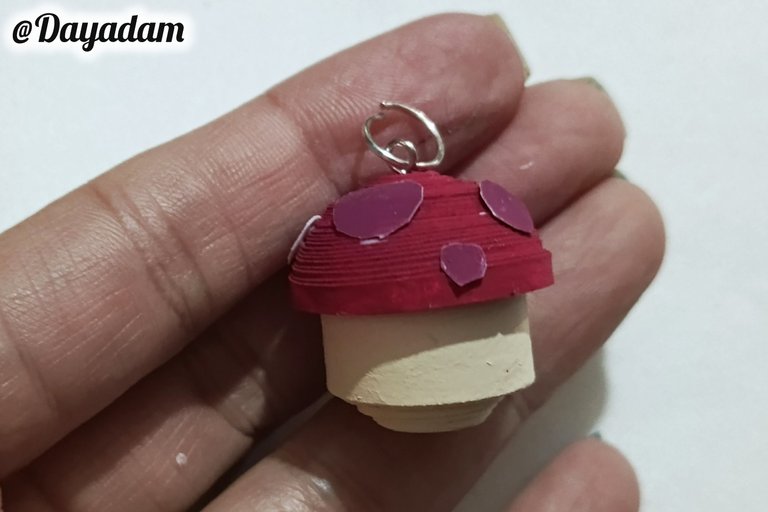
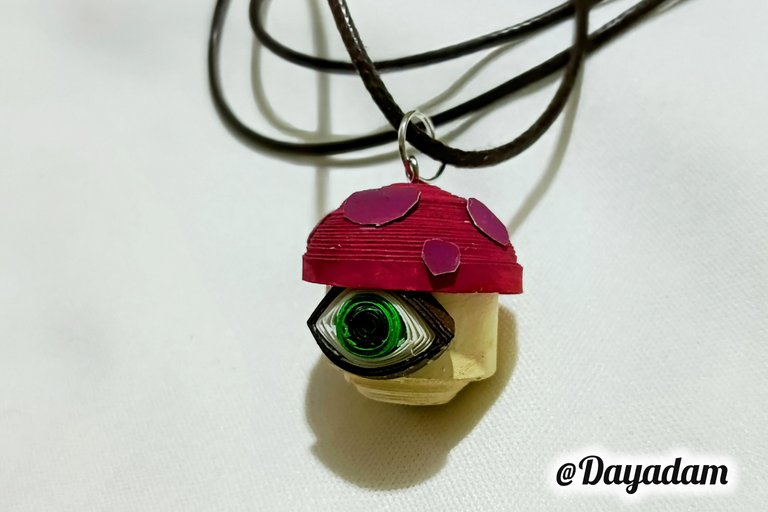
With the piece of red wine cardboard that I painted previously, I cut out several circles of different sizes and glued them on the scarlet colored piece above, at different points of the same.
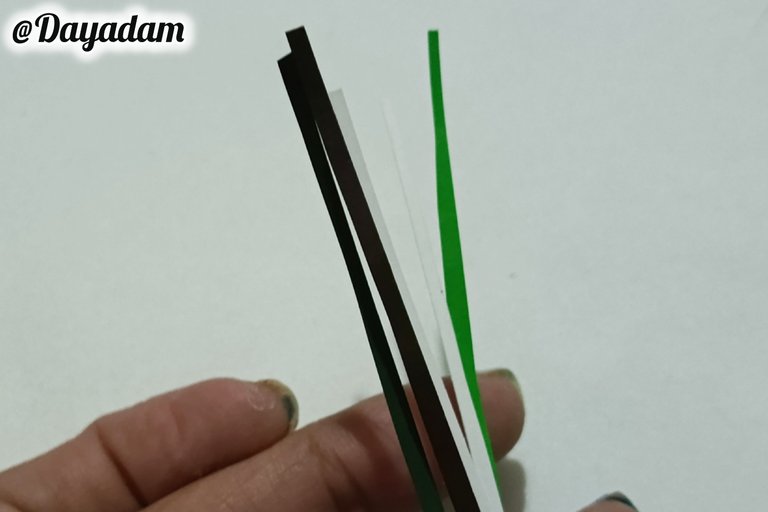
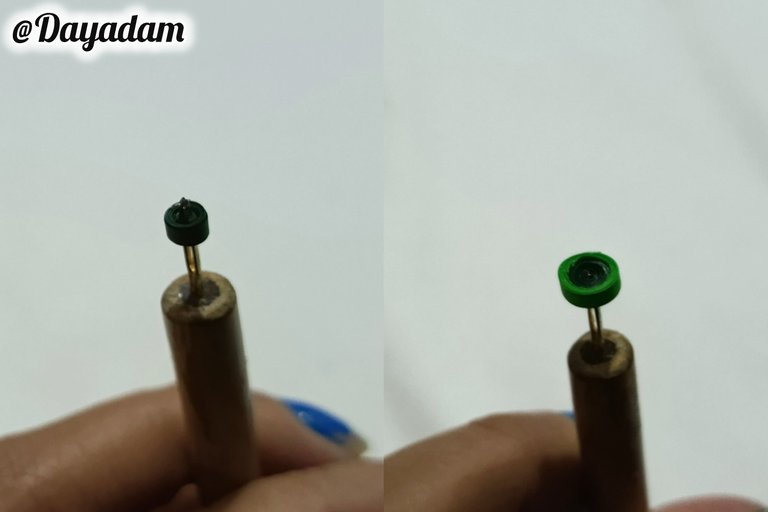
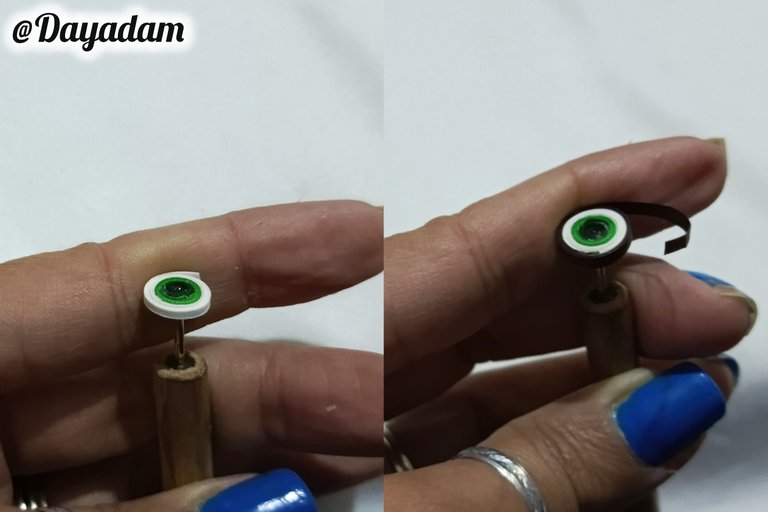
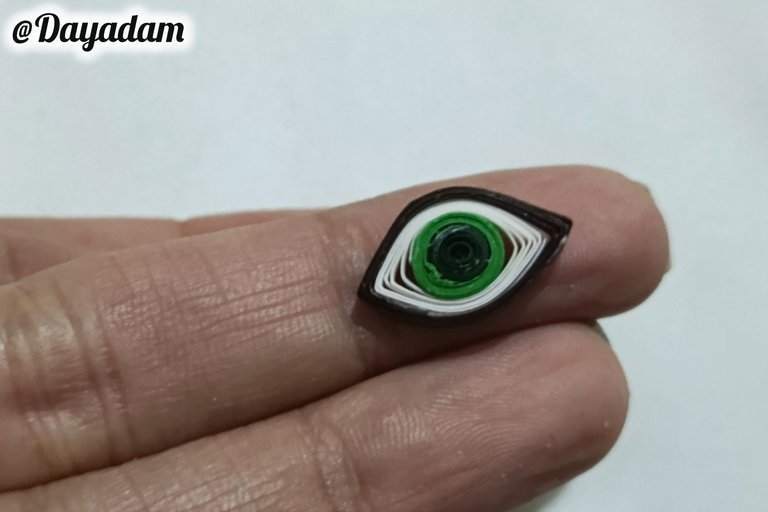
To make the eye, I took dark green quilling tape, I began to roll a small piece with the needle, sealed with white glue, then incorporate lighter green tape and rolled until I got a small strip sealed with glue, then continue taking a piece of white tape and another brown tape these rolled them to finish with the same, take out of the needle I released a little circle and sealed with white glue, then molded into a leaf shape, glue on the piece to finish the job.
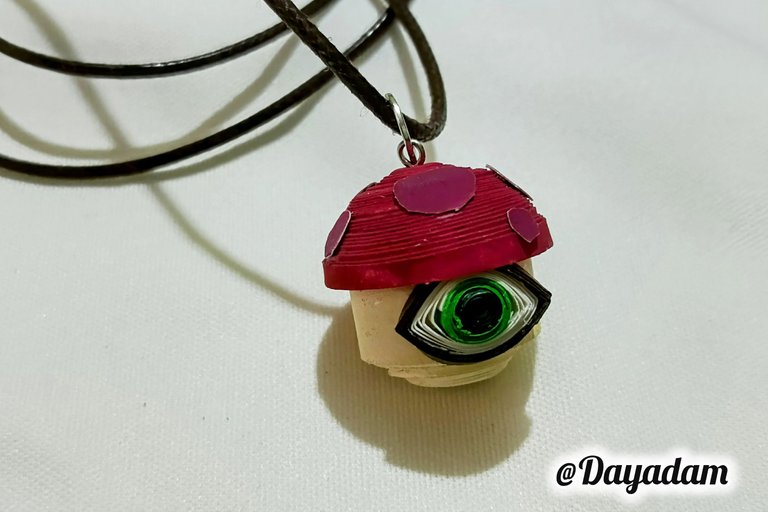
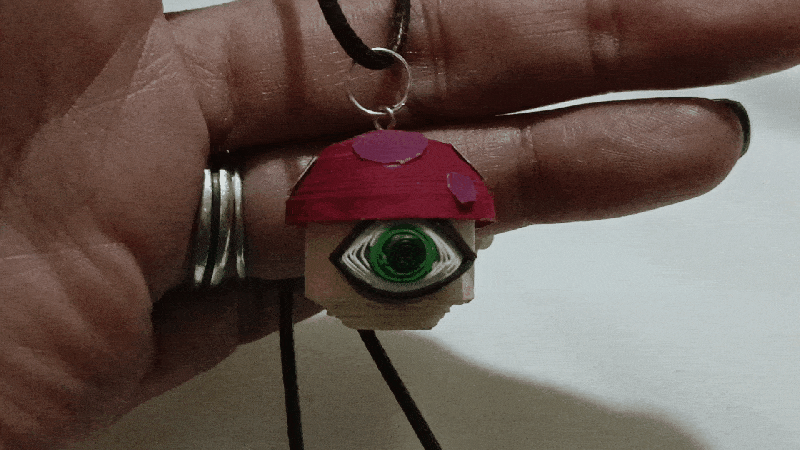
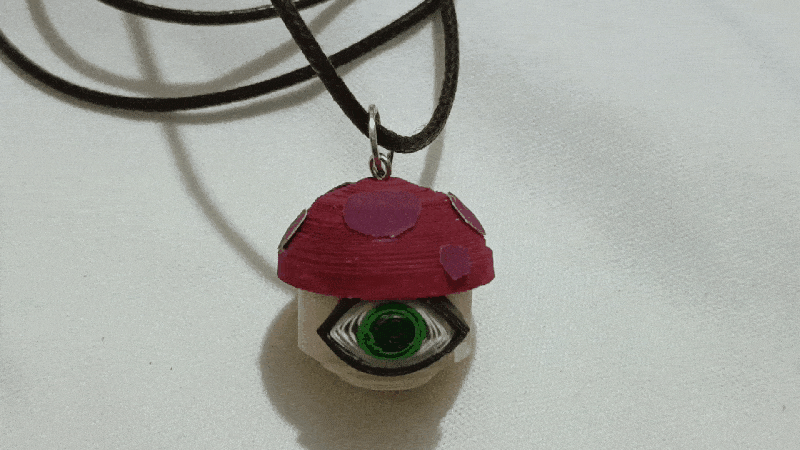
- This way we have ready this 3D pendant, which materializes inspired by the letter "Sporcerer "..
• Con el trozo de cartulina vino tinto que pinte previamente, recorte varios círculos de diversas medidas esto los pegué en la pieza de arriba colores escarlata, en diversos puntos de la misma.
• Para realizar el ojo, tomé cinta para quilling de color verde oscuro, comencé a enrollar un pequeño trozo con la aguja, sellé con pega blanca, luego incorpore cinta de color verde más claro y enrollé hasta conseguir una pequeña franja selle con pega, luego continúe tomando un trozo de cinta blanca y otro de cinta marrón estos los enrollé hasta finalizar con la misma, saque de la aguja solté un poco el círculo y sellé con pega blanca, luego moldee en forma de hoja, pegue en la pieza para finalizar con el trabajo.
• De esta manera tenemos listo este colgante en 3D, que materialice inspirada en la carta "Sporcerer".
 |  |
 |  |  |  |

|
 |
 |
 |
 |
 |
What did you think, did you like it?
I hope you did, I hope you liked my explanation, procedure and photos, I made them with love for you.
"Let out that muse that inspires you, and let your imagination fly".
Thank you all, see you next time.
¿Que les pareció, les gustó?
Espero que sí, que les haya gustado mi explicación, procedimiento y fotos, los hice con mucho cariño por y para ustedes.
"Deja salir esa musa que te inspira, y deja volar tu imaginación".
Gracias a todos, nos vemos en la próxima.
Banner y separador hecho por mí en Canva