Hello everyone... ✨
Hello to my dear Hivers and the dear community of NFTGameLatino, as always very pleased and excited to be here again, showing you my work made with love and especially for you.
Greetings to the Splinterlands community, and everyone who lives there, I'm here to join the Splinterlands Social Media Challenge!
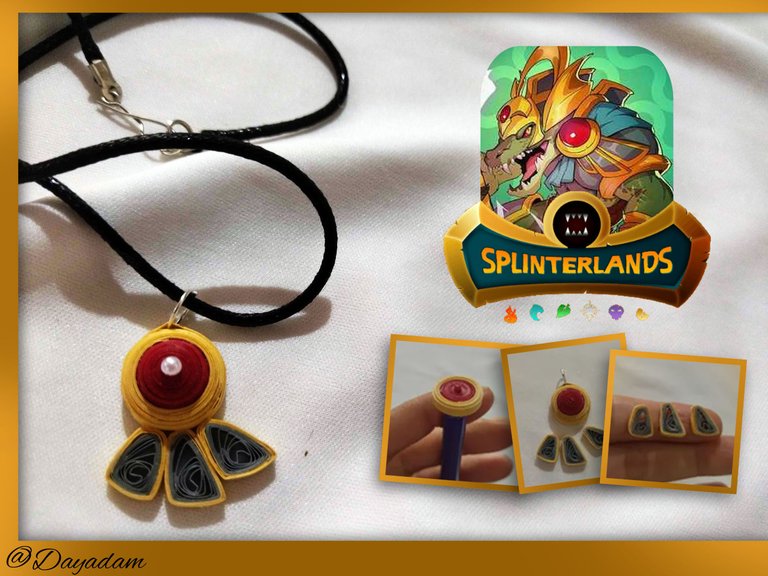
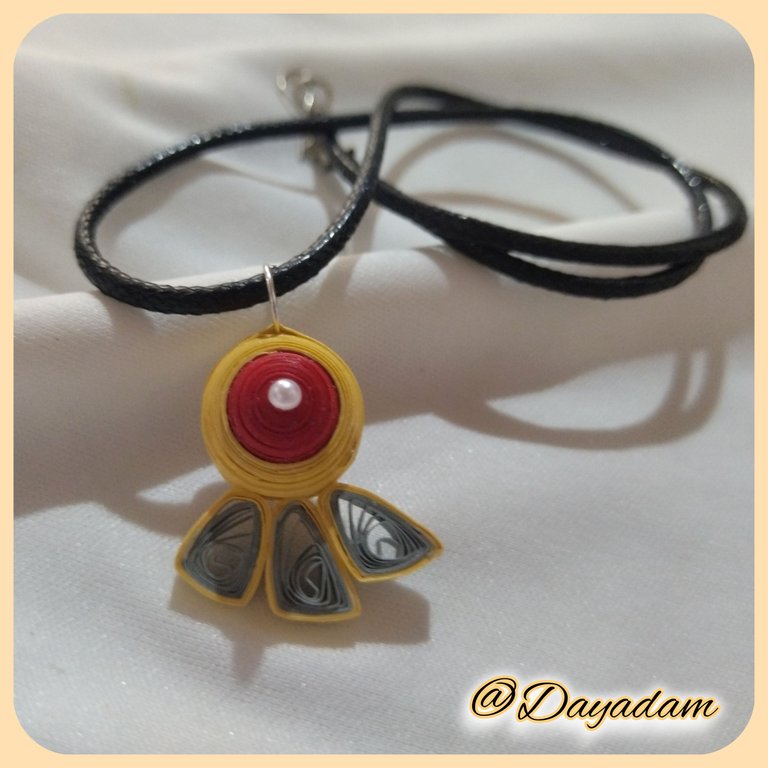
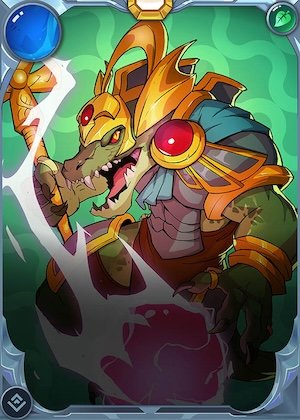
For today I bring you a simple and easy to materialize work, this time I was inspired by an imposing letter of Rebellion from which I took a very visible element in it that is in the clothing as part of the attire of the character "Zebajin ”, I made a pendant for necklace with a 3D effect in the quilling technique.
If you want to know more about the game, I leave you my reference link to enter it and navigate through this wonderful world: https://splinterlands.com?ref=dayadam
Hoping you like my work, without further ado, I leave you with my creative process.
Let's start:😃

Hola a Todos...✨
Hola a mis queridos Hivers y a la querida comunidad de NFTGameLatino, muy complacida y emocionada de encontrarme por acá para mostrárles un trabajo hecho con mucho amor y especialmente para ustedes.
Un saludo para la comunidad de Splinterlands, y todos los que hacen vida por allí, estoy por acá para unirme al reto Splinterlands Social Media Challenge!.
Para hoy les traigo un trabajo sencillo y fácil de materializar, esta vez me inspire en una imponente carta de Rebellion de la cual tome un elemento bastante visible en ella que se encuentra en la vestimenta como parte del atuendo del personaje "Zebajin", realice un dije para collar con un efecto 3D en la tecnica de quilling.
Si quieren saber más con respecto al juego les dejo mi enlace de referencia para que ingresen en él, y naveguen por este maravilloso mundo: https://splinterlands.com?ref=dayadam
Esperando les guste mi trabajo, sin más preámbulos, les dejo mi proceso creativo.
Comencemos:😃

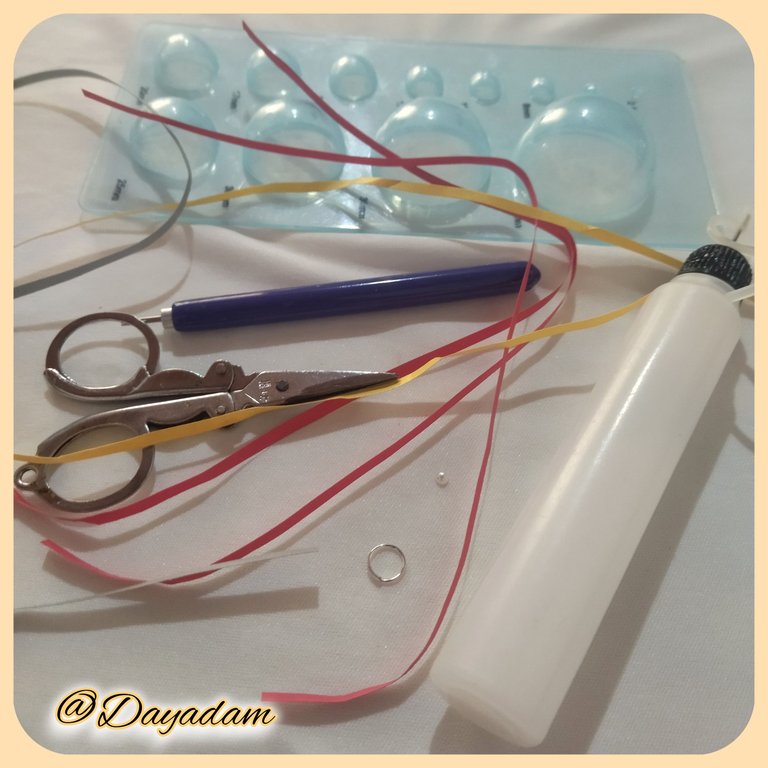
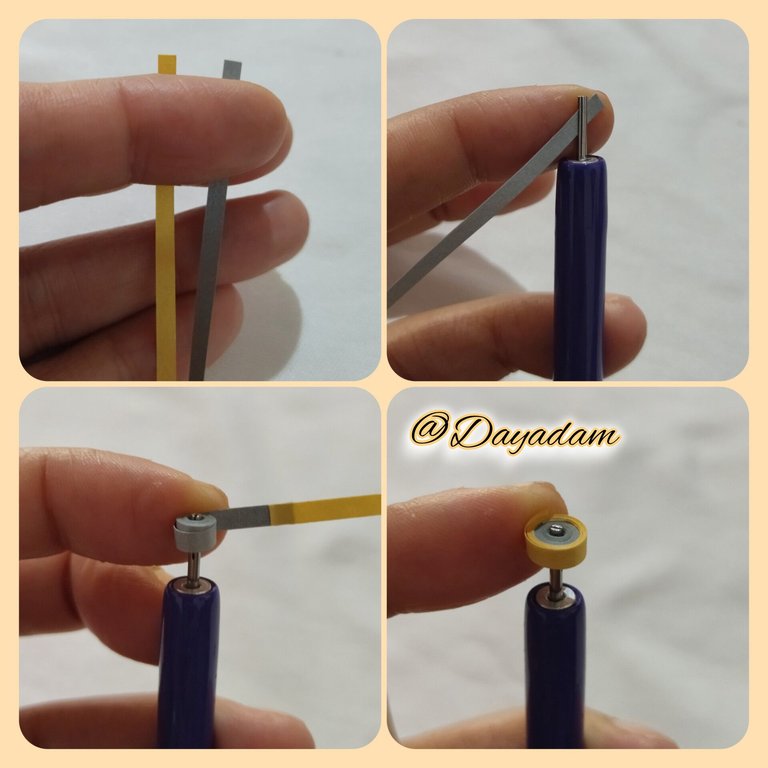
• Cintas de quilling, rojas, plateadas y doradas.
• Aguja para quilling.
• Plantilla para moldear círculos.
• Media perla blanca de bisuteria.
• Pega blanca extra fuerte (de carpintería).
• Tijera.
• Pincel.
• Argolla de bisutería.
• Pinza punta fina.
- Quilling ribbons, red, silver and gold.
- Quilling needle.
- Template to mold circles.
- White half pearl of costume jewelry.
- Extra strong white glue (carpentry glue).
- Scissors.
- Brush.
- Jewelry ring.
- Fine tip tweezers.

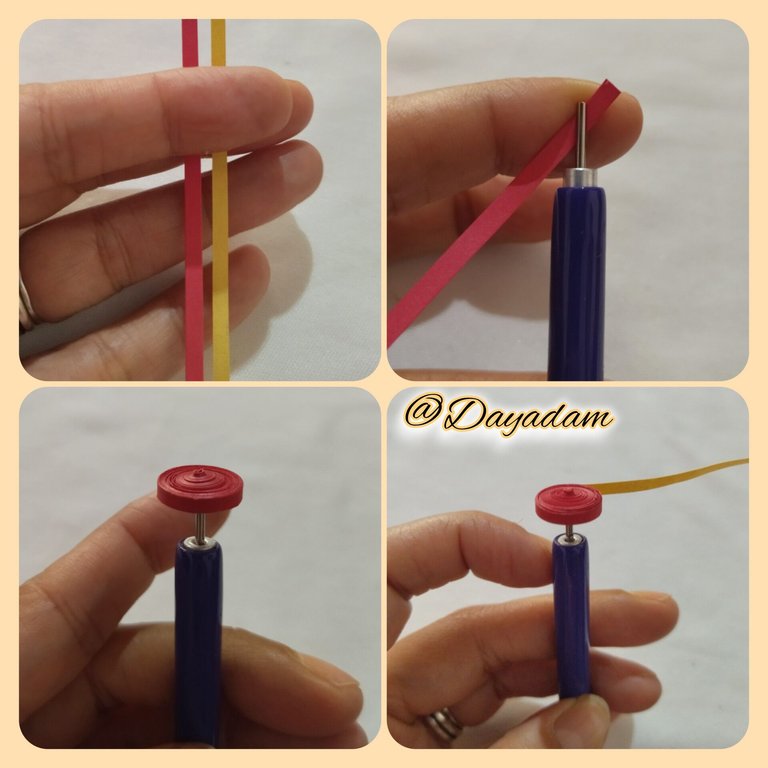
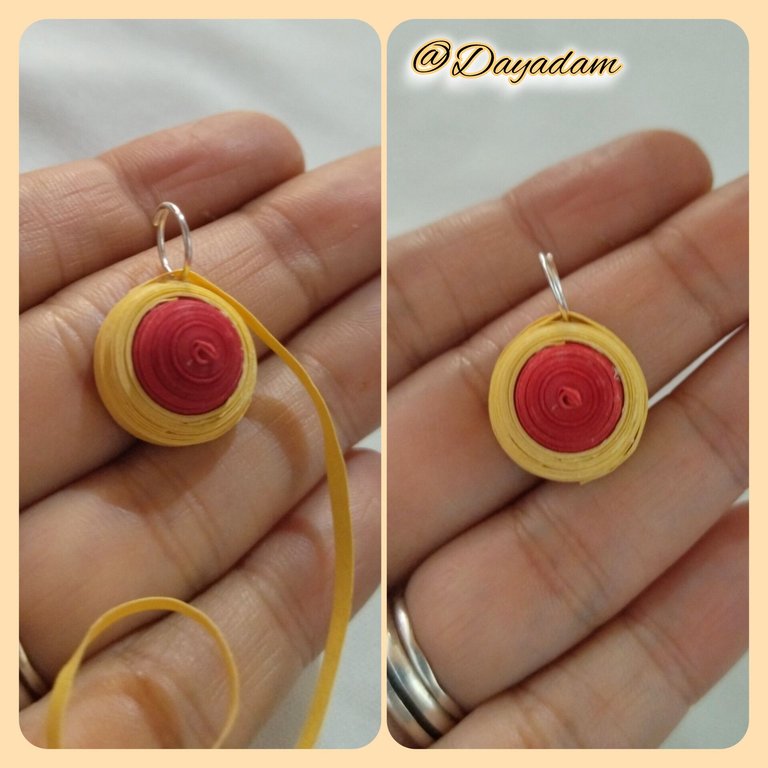
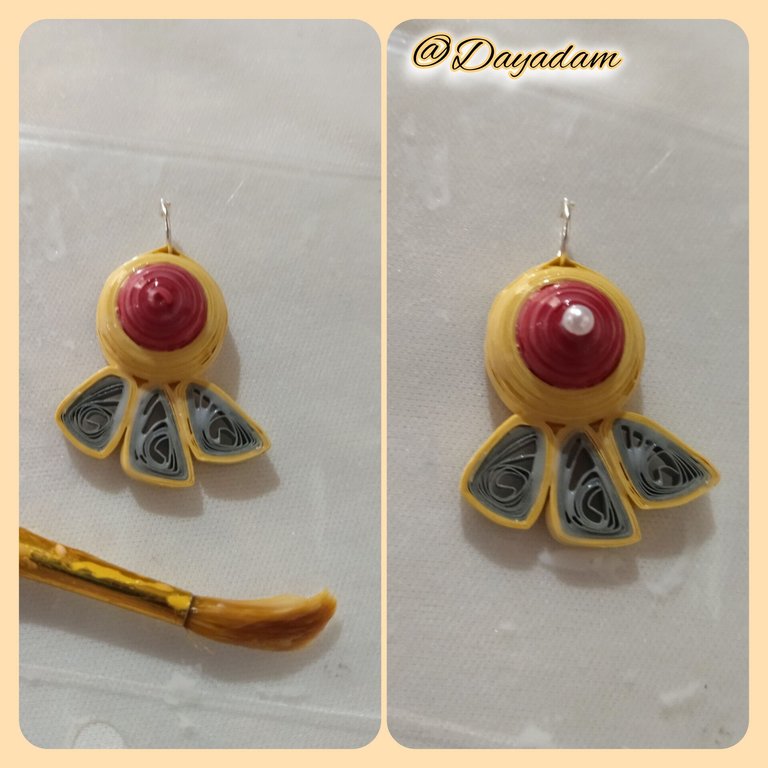
- I started by taking a 3mm wide red quilling tape, with the help of the quilling needle I rolled up to finish with all the tape, seal with extra strong white glue, then take a piece of gold colored tape 3mm wide and glue the circle even without removing the needle, continue rolling up to make a border of adequate thickness to materialize the element of the letter, seal with white glue and remove from the needle, here we obtained a closed circuit,
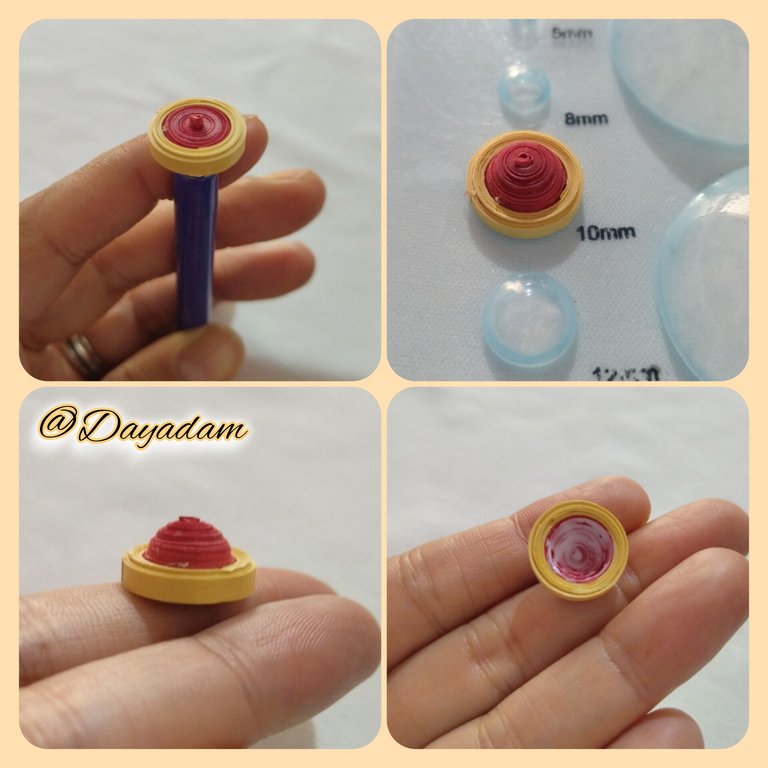
- Then take a template to mold circles and place in the measure number 10mm, this only to remove the red part of the piece and protrude as a circle in 3D red color, remove from the mold and apply glue on the inside of red, to prevent it from moving or deforming.
- Once dry place again in the template for circles in the measure number 17mm this to remove a little golden part, remove from the template and apply glue on the back of golden color.
- Take a piece of gold colored ribbon 3mm wide and a costume jewelry ring, wrap it around the piece you made and incorporate the ring, as you can see in the image.

• Comencé tomando cinta para quilling de color roja de 3mm de ancho, con la ayuda de la aguja para quilling enrolle hasta terminar con toda la cinta selle con pega blanca extra fuerte, luego tome un trozo de cinta color dorada de 3mm de ancho y pegue del circulo aun sin sacar de la aguja, continúe enrollando hasta realizar un borde del grosor adecuado para materializar el elemento de la carta, selle con pega blanca y saque de la aguja, aquí obtuvimos un circuito cerrado,
• Luego tome una plantilla para moldear círculos y coloque en la medida número 10mm, esto solo para sacar la parte roja de la pieza y que sobresalga como un circulo en 3D color rojo, retire del molde y aplique pega en la parte interna de roja, para evitar que se mueva o deforme.
• Una vez seca coloque nuevamente en la plantilla para circulos en la medida numero 17mm esto para sacar un poco la parte dorada, retire de la plantilla y aplique pega en la parte de atrás de color dorado.
• Tome un trozo de cinta de color dorado de 3mm de ancho y una argolla de bisutería, enrolle alrededor de la pieza que realice e incorpore la argolla, tal como pueden ver en la imagen.

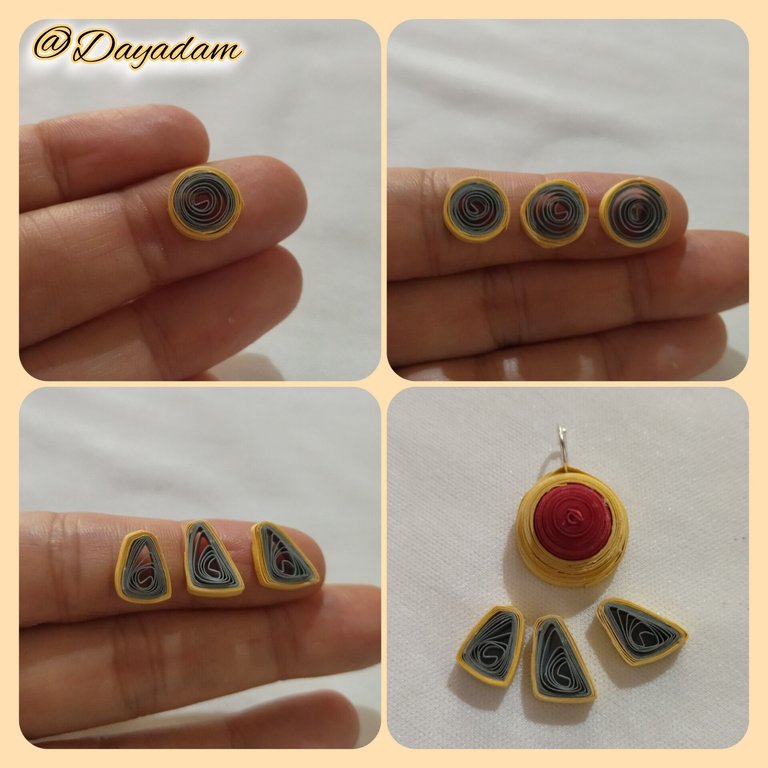
- To make the remaining details I took gold and silver color ribbon, I joined both colors to form a single ribbon, I did this with three pieces of the same size, then I began to roll the silver side with the quilling needle until I finished with the gold part, I took out the needle, loosened a little and sealed with glue, we obtained an open circle.
- Repeat the same step above with the other two pieces of ribbon as we will need 2 more circles, but we will make each one a little bigger than the other.
- At this point we proceed to mold the circles according to the element we are looking for in the card.
- Once the circles are molded, we will glue them harmoniously to the piece we made previously.
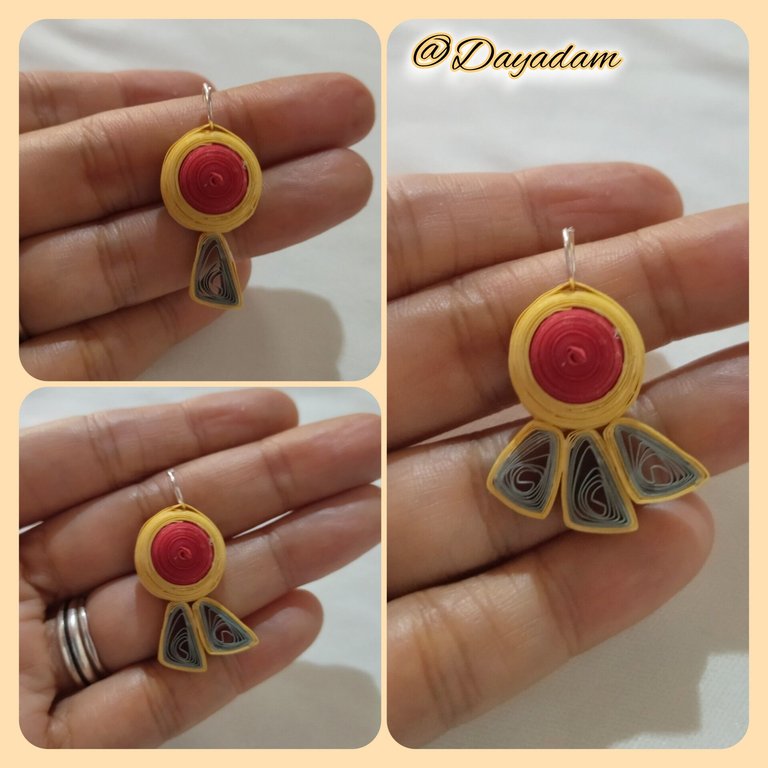
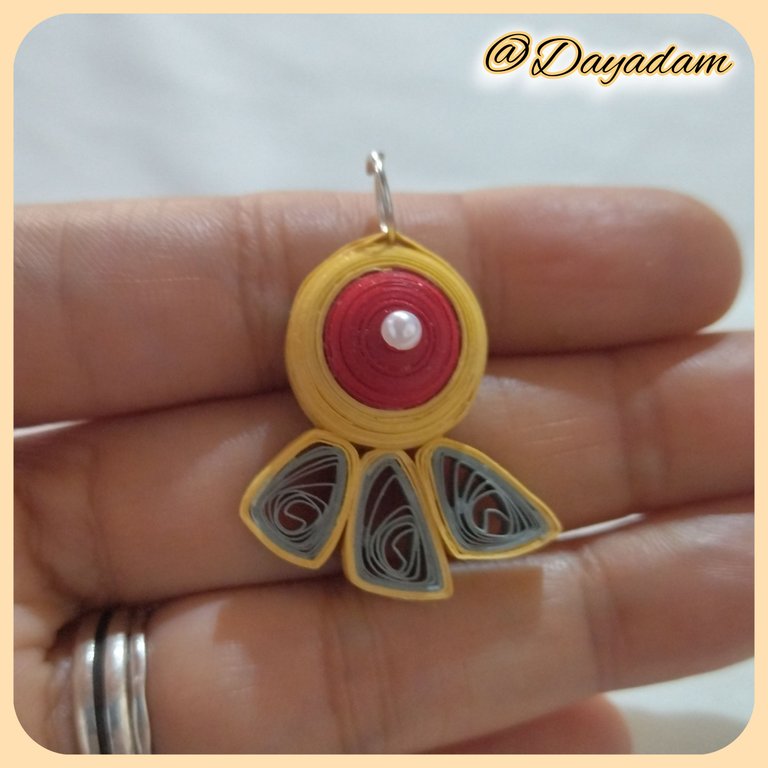
- To finish we will apply several layers of glue leaving to dry between one layer and another, this to give protection, plasticized and brightness to the piece, we take advantage of being still with wet glue the piece to place a half pearl as a detail in the central part of the red circle.
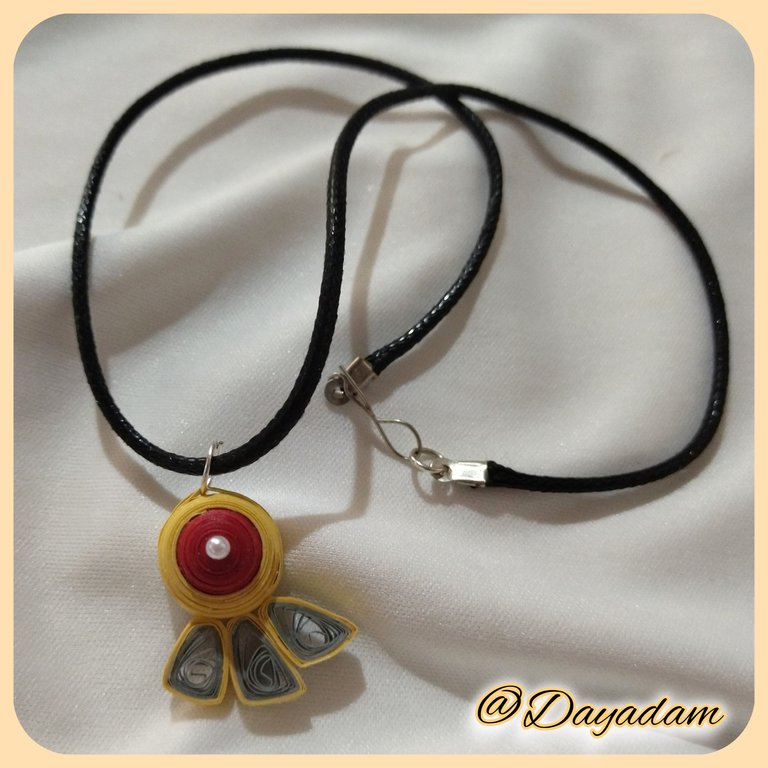
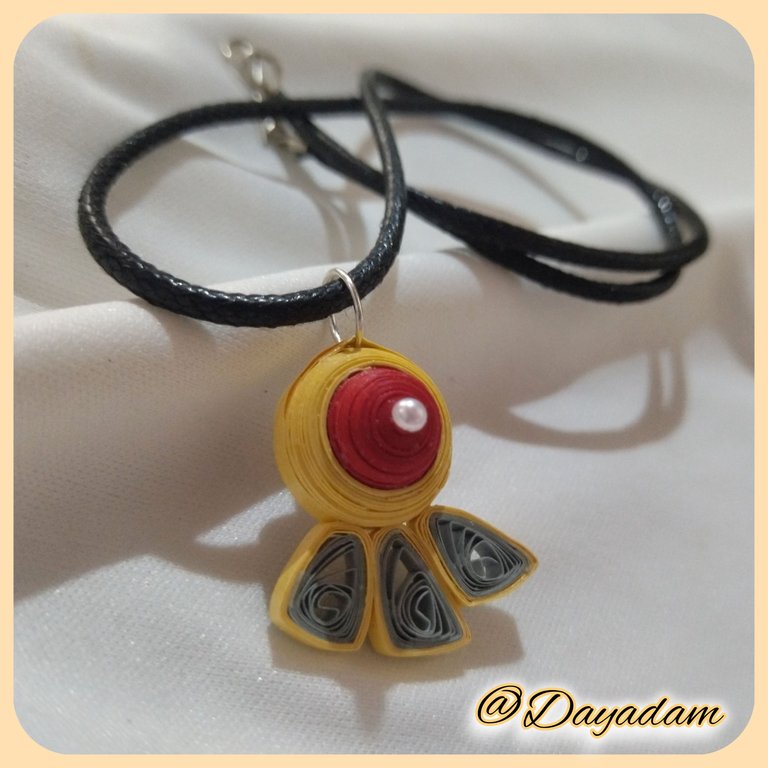
- In this way we have ready this pendant for necklace, that I materialized inspired by the letter "Zebajin ”.
• Para hacer los detalles restantes tome cinta de color dorada y plateada, uni ambos colores para formar una sola cinta, esto lo hice con tres pedazos de la misma medida, luego comencé a enrollar por el lado plateado con la aguja para quilling hasta finalizar con la parte dorada, saque de la aguja solté un poco y selle con pega, obtuvimos un círculo abierto.
• Repetimos el mismo paso anterior con los otros dos trozos de cinta ya que necesitaremos 2 circulos mas, pero estos los haremos cada uno un poco más grande que el otro.
• En este punto procedemos a moldear los círculos acorde l elemento que buscamos de la carta.
• Una vez moldeados pegaremos de manera armónica de la pieza que realizamos con anterioridad.
• Para finalizar aplicaremos varias capas de pega dejando secar entre una capa y otra,m esto para darle protección, plastificado y brillo a la pieza, aprovechamos estando aun con pega húmeda la pieza para colocar una media perla como detalle en la parte central del círculo rojo.
• De esta manera tenemos listo este dije para collar, que materialice inspirado en la carta "Zebajin".


What did you think, did you like it?
I hope you did, I hope you liked my explanation, procedure and photos, I made them with love for you.
"Let out that muse that inspires you, and let your imagination fly".
Thank you all, see you next time.
¿Que les pareció, les gustó?
Espero que sí, que les haya gustado mi explicación, procedimiento y fotos, los hice con mucho cariño por y para ustedes.
"Deja salir esa musa que te inspira, y deja volar tu imaginación".
Gracias a todos, nos vemos en la próxima.


