Saludos y bienvenidos sean todos a mi espacio.
Cómo están?
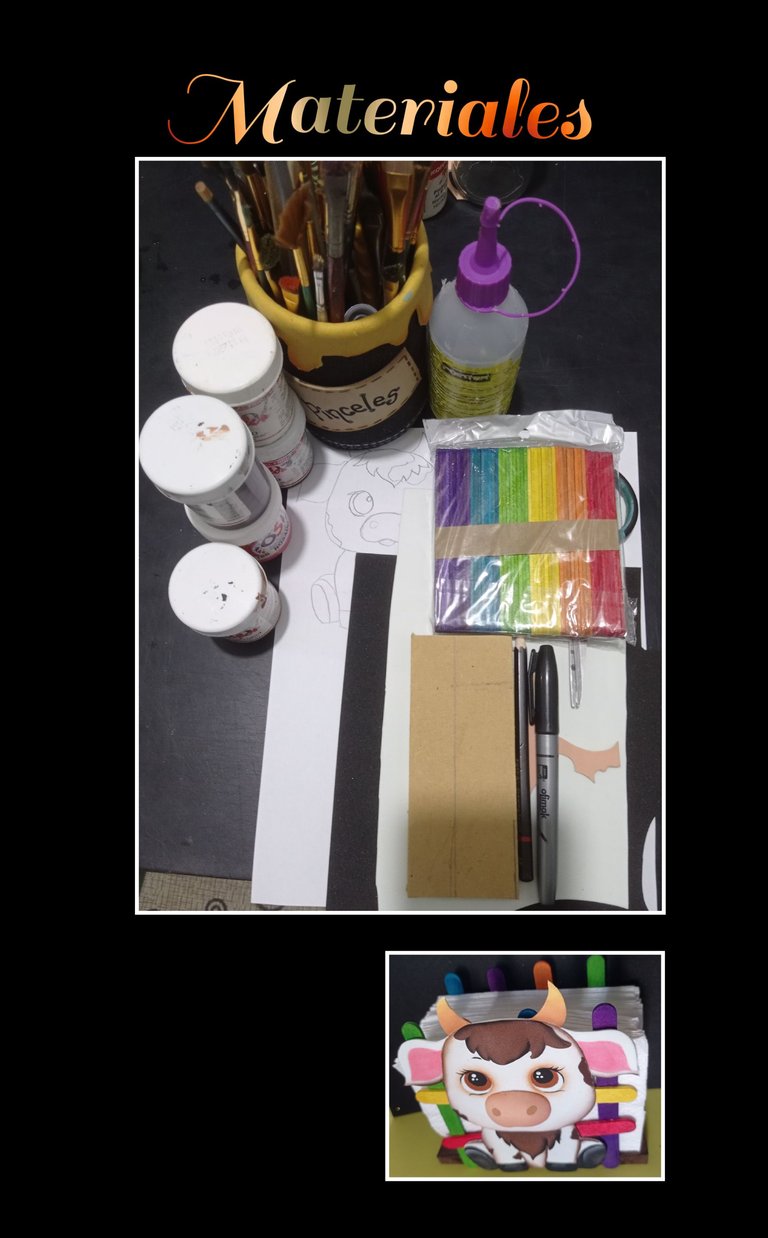
Paletas de colores
Retazos de foami mate
Sobrante de MDF ó cartón de cajas.
Pinturas y pinceles
Tijera, lápiz y marcador
Silicón plancha eléctrica
Dibujo (vaquita) Servilletas.
Paso 1
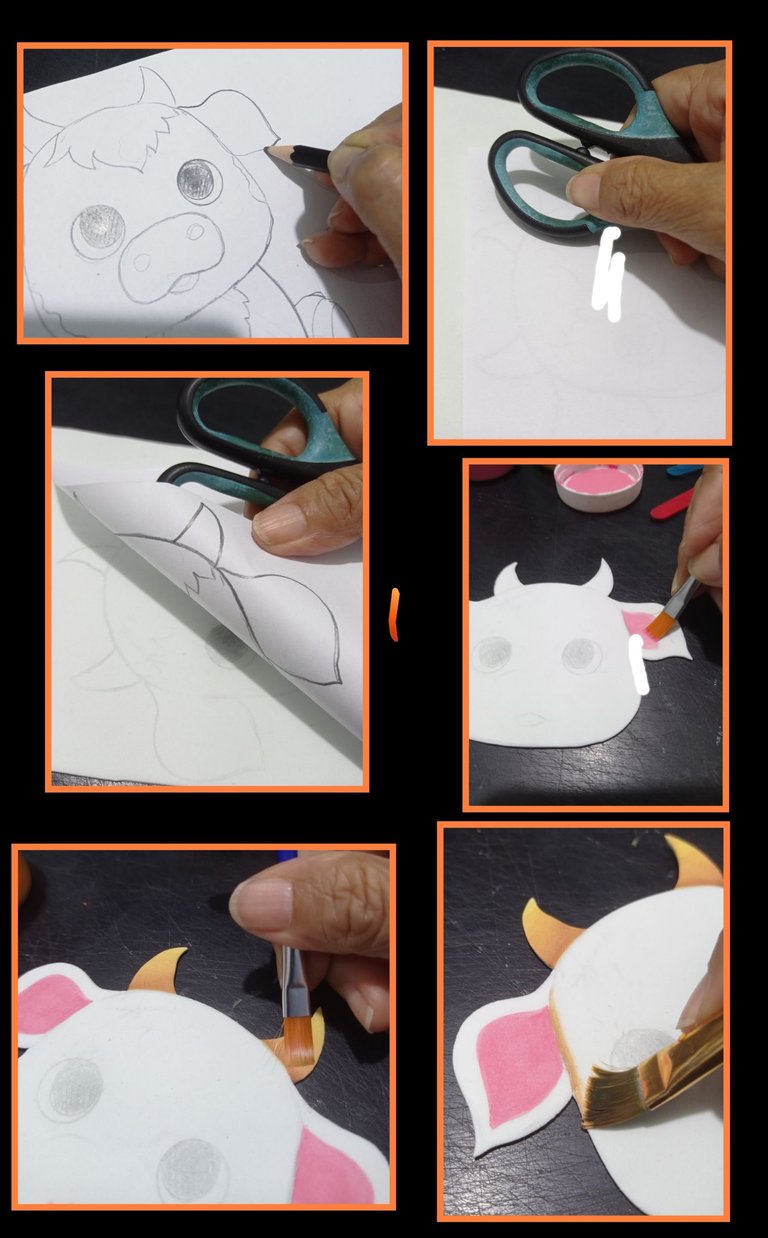
- Remarca el dibujo o la impresión con un lápiz de mina blanda (3B, 4B ó 6B) ya que su mina despega fácilmente.
- Coloca el dibujo sobre el foami y comienza a frotar con la tijera para transferir el dibujo y aseguraté levantando de un lado el papel que esté todo marcado, así harás con todas las piezas y luego recorta todo el borde.
- Ahora comienza rellenando con pintura las orejas y cuernos, después moja solo la punta del pincel en pintura y pinta el borde.
Paso 2
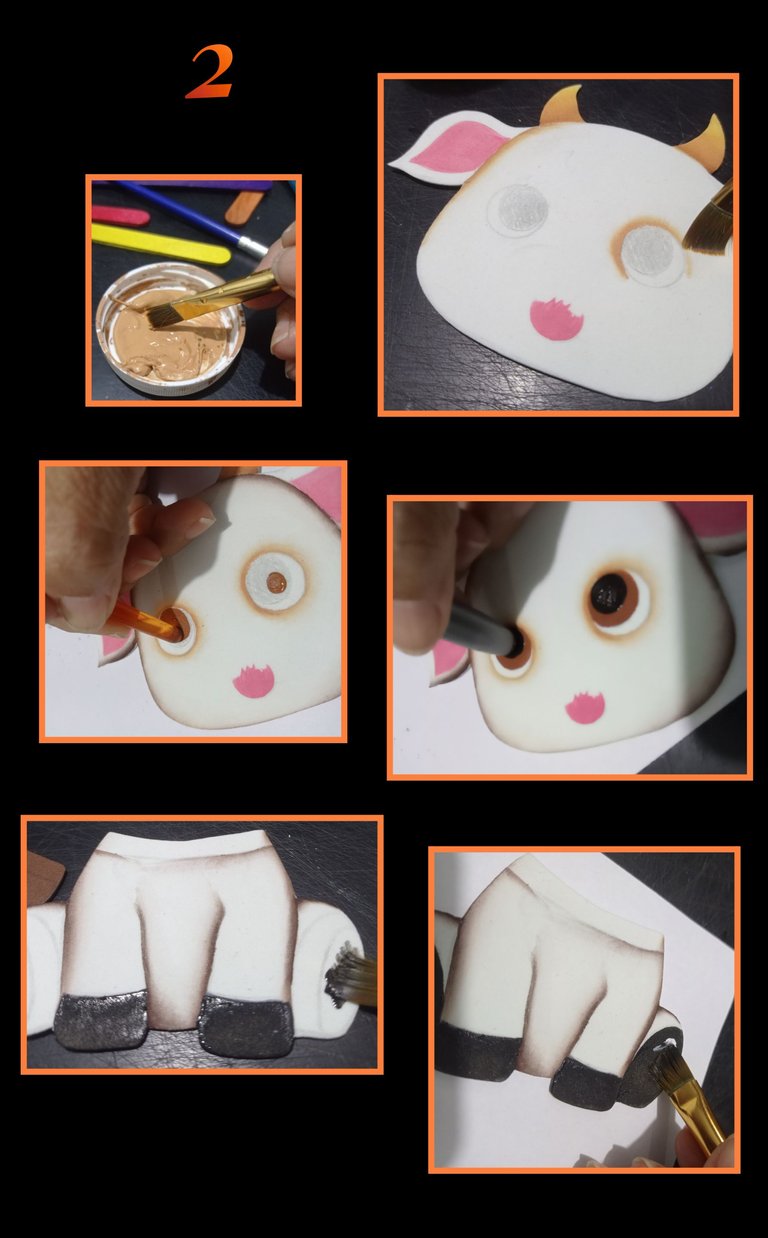
- Lava el pincel y luego vuelve a mojar la punta en pintura y pasa por el borde de los ojos, después con la parte trasera del pincel, moja en pintura y pasa en forma redondeada hasta rellenar. deja secar y luego moja en pintura negra y pinta el centro del ojo.
- Sigue pintando el resto de las piezas con los colores que te agraden, pinté con negro y luego le dí un poco de luz a los cascos con pintura blanca.
Paso 3:
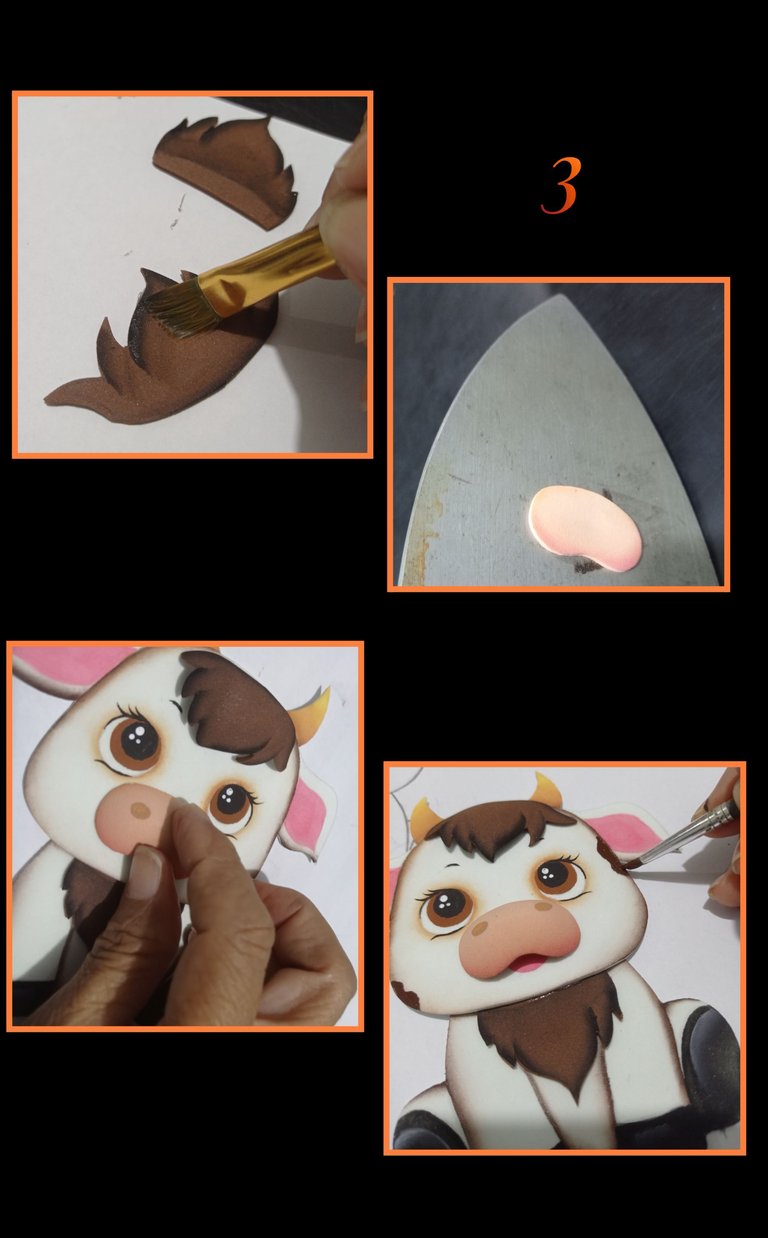
Sigue pintando las orillas de las piezas como te indique, también con un pincel fino o marcador punta fina, pinta el borde de los ojos, pestañas, cejas y luego calienta la plancha, coloca la nariz hasta que tome forma después aplica por el borde silicón y comienza a armar la vaquita.
Para terminarla, pinta manchas en la cara y cuerpo.
Paso 4
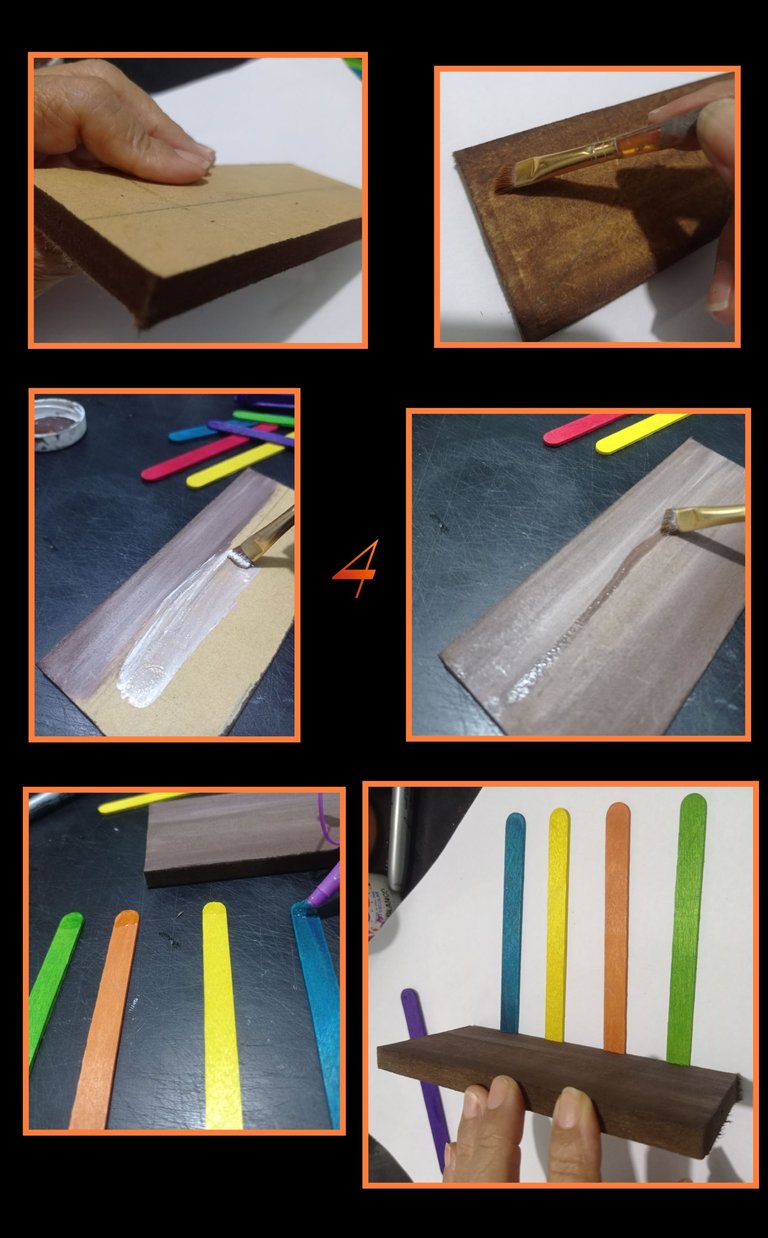
- Pinta el pedazo de MDF y si quieres le puedes hacer betas o pintarla unicolor y deja secar, luego aplica silicón en un de los extremos de las paletas y pega al MDF, puedes colocarlas unicolor o multicolor como yo lo hice.
Paso 5
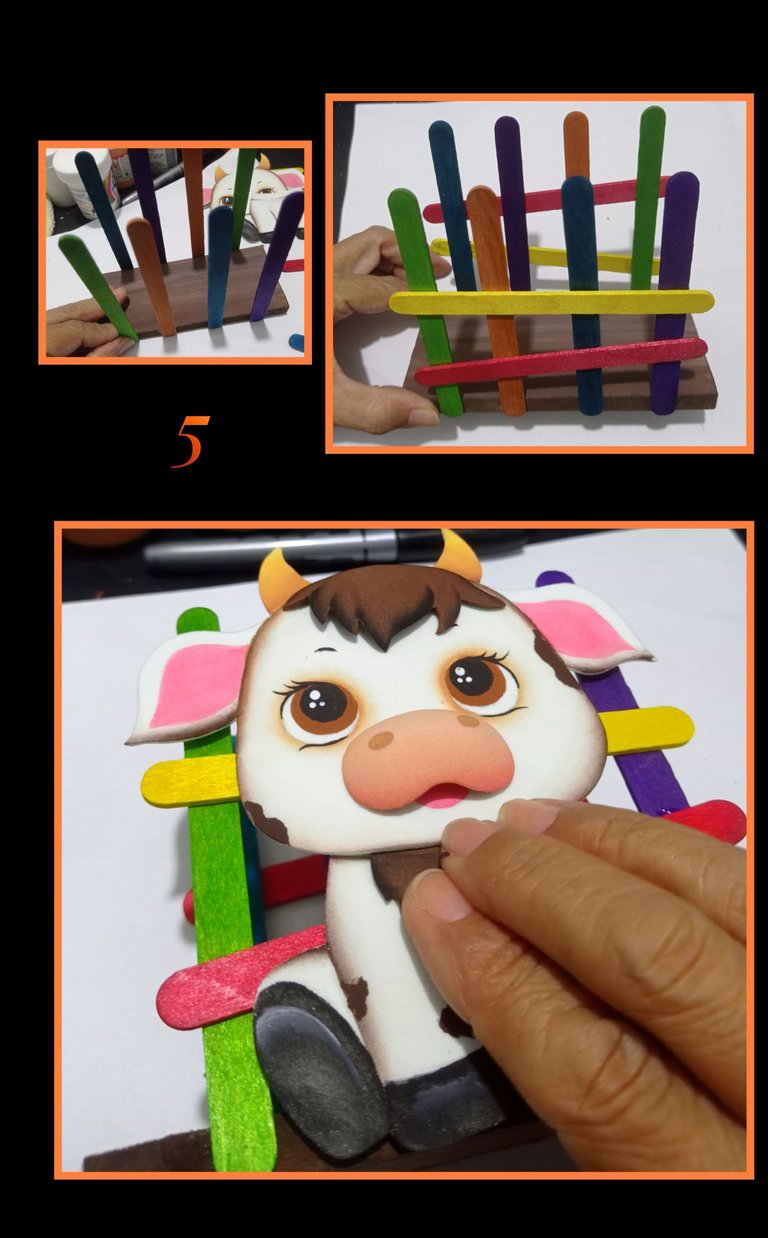
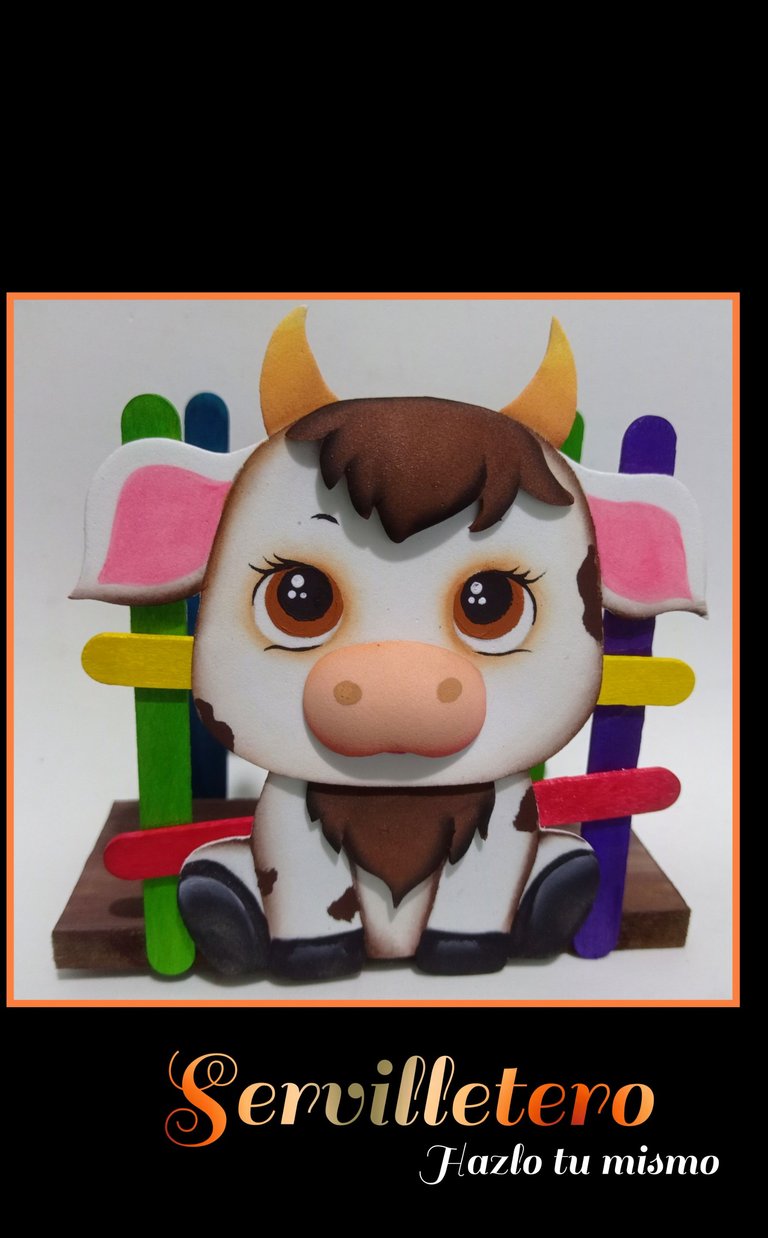
- Pega a ambos lados las paletas de forma vertical y luego pega dos de forma horizontal.
- Por último pega en uno de los lados la vaquita , haz un poco de presión y así quedará listo este lindo Servilletero.

Editada con Etiquetas HTML
Las fotos capturadas con mi Redmi Note 9
Editadas con GridArt.
Fuente:
https://es.pinterest.com/pin/476255729362277339/
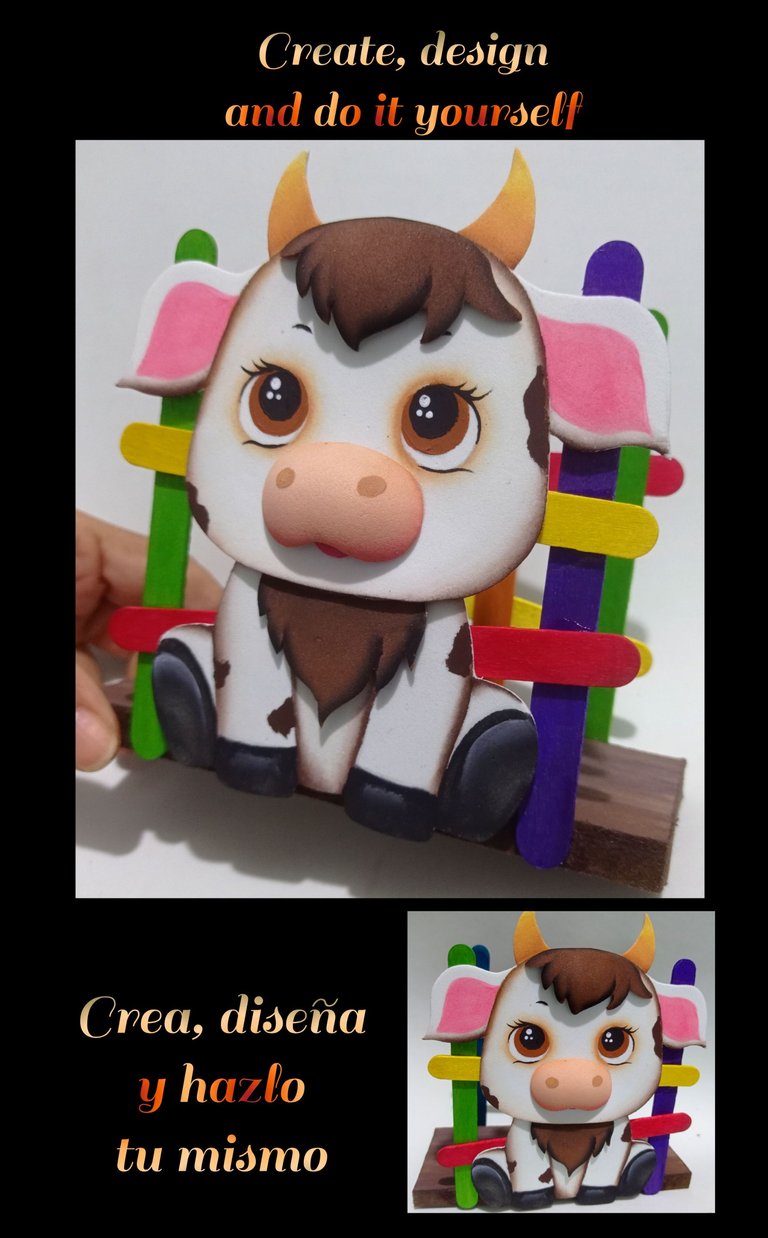
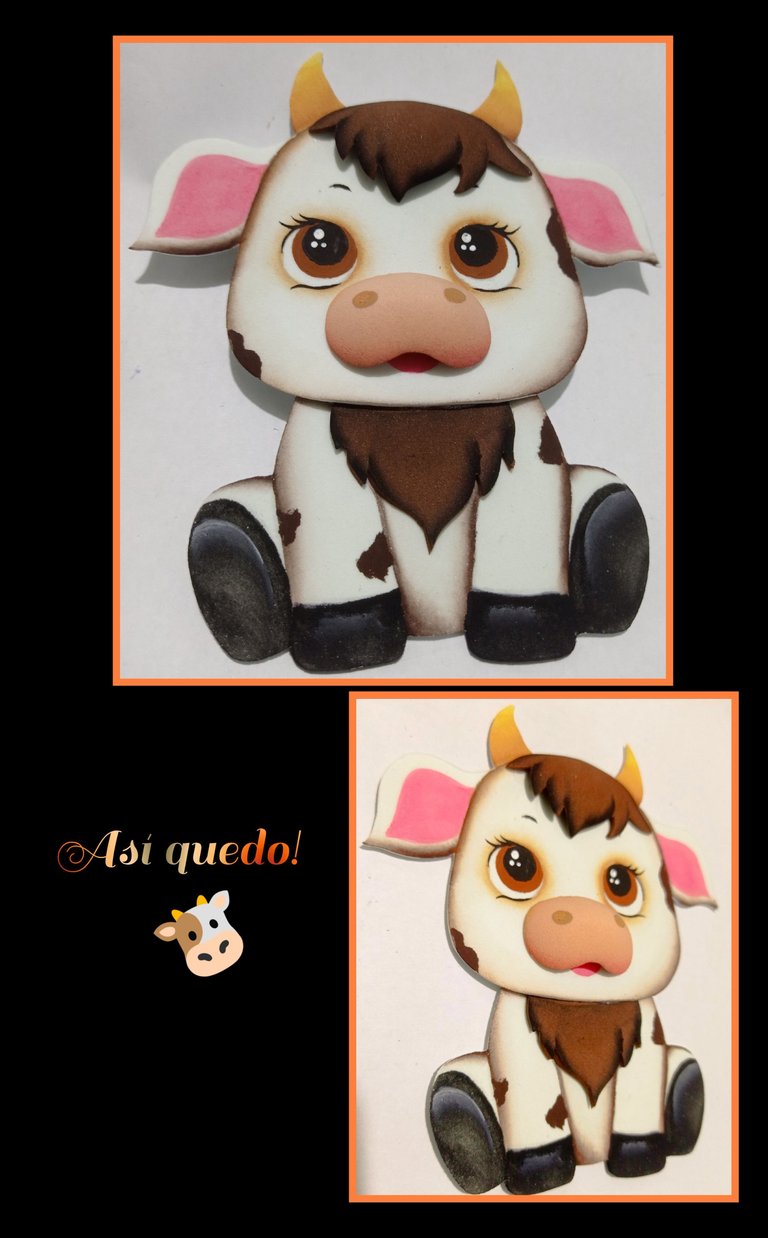
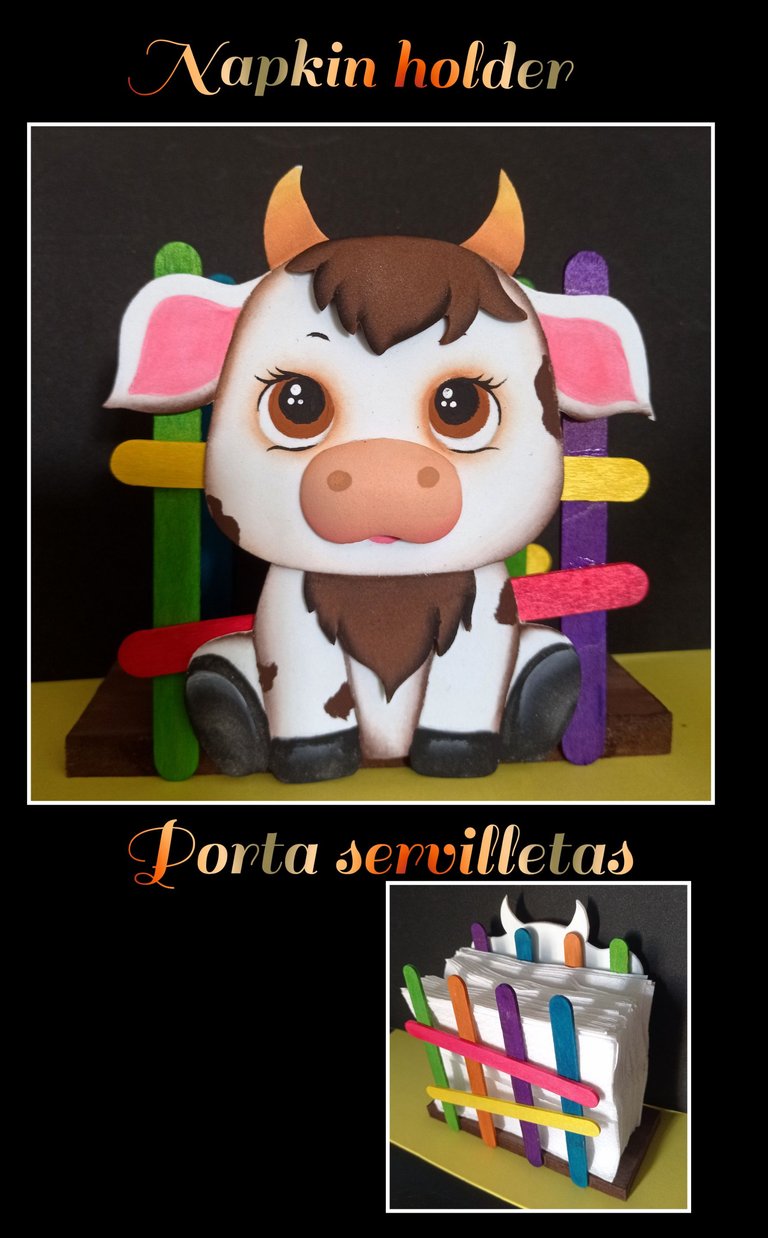
Ahora te mostraré como luce este Servilletero de Paletas!
Me llegó la hora de despedirme deseando y esperando te guste mi tutorial de hoy.
Muchas gracias por tu visita y si te gustó me encantará ver tu comentario.
Saludos y gracias por tu apoyo.
English
Greetings and welcome to my space.
How are you?
So join me to watch and learn!
Color palettes
Matte foami scraps
Leftover MDF or cardboard from boxes.
Paints and brushes
Scissors, pencil and marker
Silicone electric iron
Drawing (cowboy) Napkins.
Step 1
- Outline the drawing or print with a soft lead pencil (3B, 4B or 6B) as its lead easily peels off.
- Place the drawing on the foami and start rubbing with the scissors to transfer the drawing and make sure that it is all marked on one side of the paper, this is how you will do with all the pieces and then cut out the entire edge.
- Now start by filling in the ears and horns with paint, then dip just the tip of the brush in paint and paint the edge.
Step 2
- Wash the brush and then dip the tip of the brush in paint again and go around the edge of the eyes, then with the back of the brush, dip in paint and go in a rounded shape until filled in. let dry and then dip in black paint and paint the center of the eye.
- Continue painting the rest of the pieces with the colors you like, I painted with black and then gave a little light to the helmets with white paint.
Step 3
Continue painting the edges of the pieces as I indicated, also with a fine brush or fine tip marker, paint the edge of the eyes, eyelashes, eyebrows and then heat the iron, place the nose until it takes shape then apply silicone on the edge and begin to assemble the cow.
To finish, paint spots on the face and body.
Step 4
- Paint the piece of MDF and if you want you can make betas or paint it unicolor and let it dry, then apply silicone on one of the ends of the pallets and glue to the MDF, you can place them unicolor or multicolor as I did.
Step 5
- Glue the pallets vertically on both sides and then glue two horizontally.
- Finally glue on one of the sides the little cow, do a little pressure and this is how this cute napkin holder will be ready.
Edited with HTML Tags
Photos captured with my Redmi Note 9
Edited with GridArt.
Source:
https://es.pinterest.com/pin/476255729362277339/
Now I'll show you what this Popsicle Napkin Holder looks like!!!
It's time for me to say goodbye wishing and hoping you like my tutorial today.
Thank you very much for your visit and if you liked it I will love to see your comment.
Greetings and thank you for your support.


