
feliz y bendecido día tengan todos ustedes mis amigos el día de hoy tengo gran placer de visitar esta hermosa comunidad para compartir con todos, unos hermoso diseño de zarcillos super fáciles y sencillos de elaborar además se necesita muy pocos materiales. Es un diseño que podemos elaborar lo en casa con mucha facilidad así no tengamos mucha experiencia con la técnica del alambrismo pues son súper fáciles, por ello quiero invitarlos acompañarme este sencillo tutorial donde eres mostraré como tener este hermoso resultado.
Happy and blessed day to all of you my friends, today I have great pleasure in visiting this beautiful community to share with everyone, some beautiful tendril design that is super easy and simple to make and very few materials are needed.
It is a design that we can make at home very easily even if we do not have much experience with the wiring technique because they are super easy, that is why I want to invite you to join me in this simple tutorial where I will show you how to have this beautiful result.
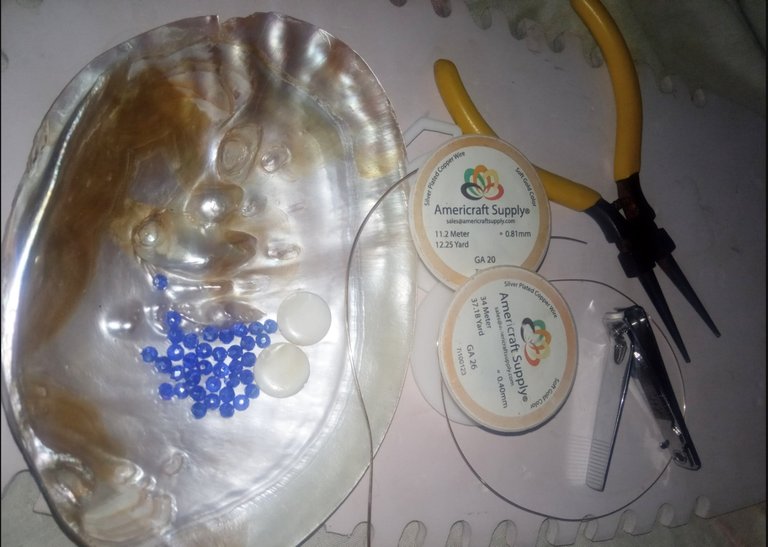
- alambre de bisutería calibre 20.
- alambre de bisutería calibre 26.
- piedras cristales color azul tornasol.
- piedras de nácar planas.
- pinza de bisutería.
- 20 gauge jewelry wire.
- 26 gauge jewelry wire.
- iridescent blue crystal stones.
- flat mother-of-pearl stones.
- jewelry clamp.
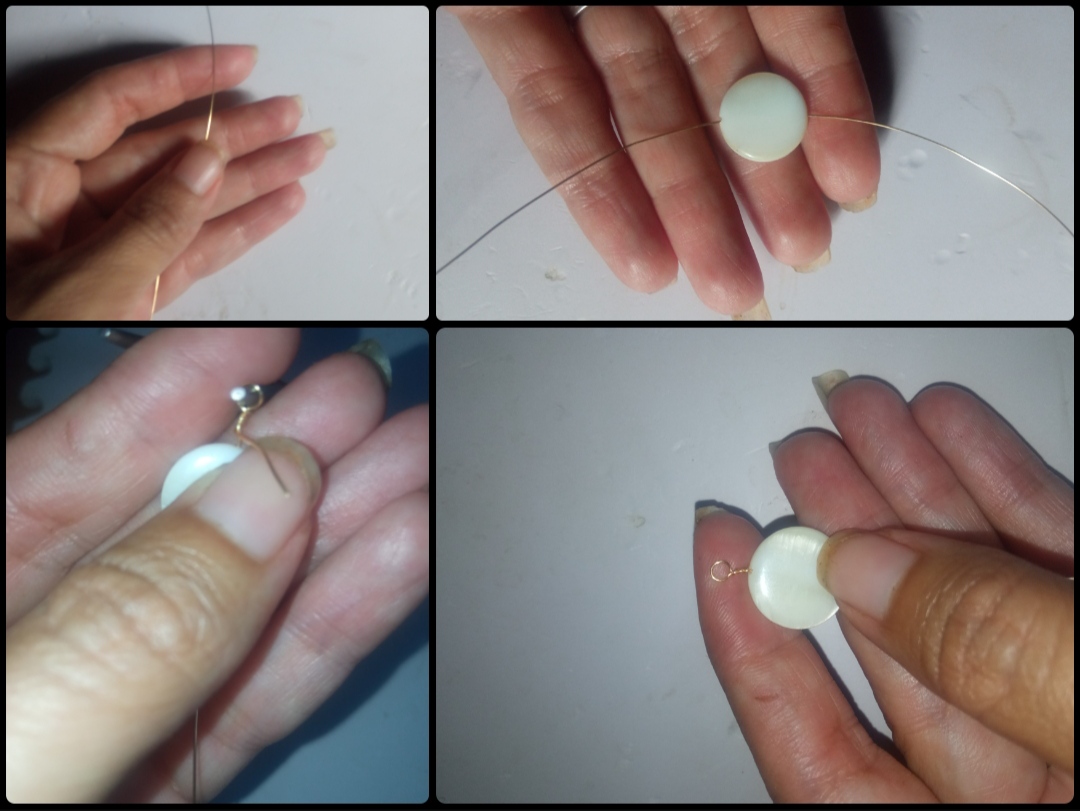
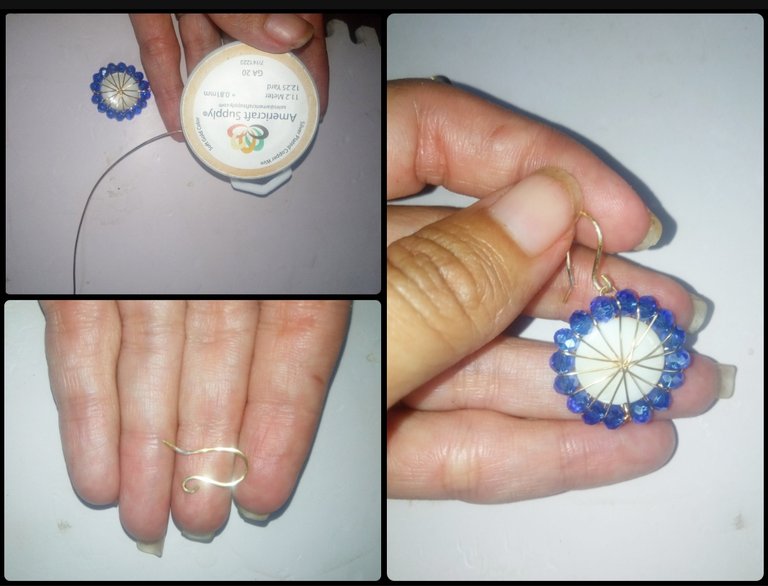
⭐ Paso 1: para iniciar la elaboración de este hermoso diseño lo primero que vamos a realizar thomas un pedazo de 30 centímetros aproximadamente de alambre bisutería calibre 26 por el cual introducir mala piedra de nácar circular plana y luego con ayuda de la pinza en una de las puntas o extremo del alambre elaboraremos una pequeña argollas circular tal cual pueden ser bar en las siguientes imágenes y subiremos la piedra hasta pegar con esta pequeña argolla.
⭐ Step 1: to begin the elaboration of this beautiful design, the first thing we are going to do is to make a piece of approximately 30 centimeters of 26 gauge jewelry wire through which to insert a flat circular mother-of-pearl stone and then with the help of the tweezers At one of the tips or end of the wire we will make a small circular ring as they can be in the following images and we will raise the stone until it hits this small ring.
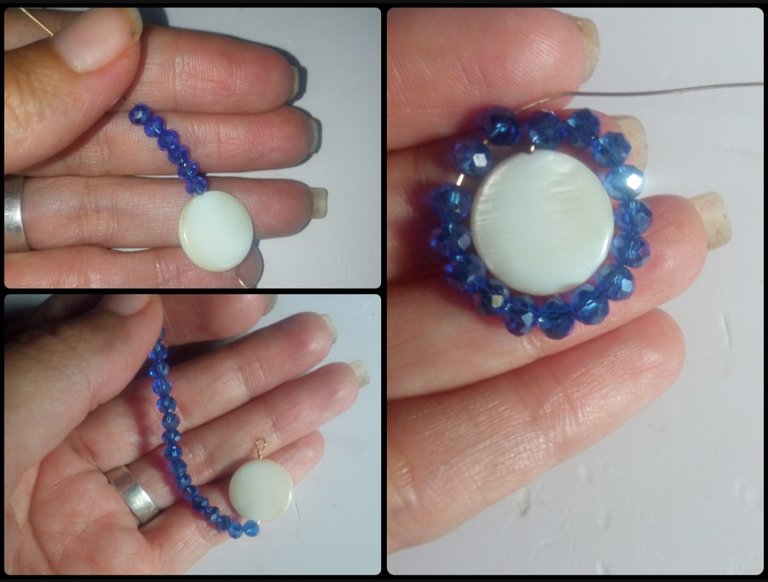
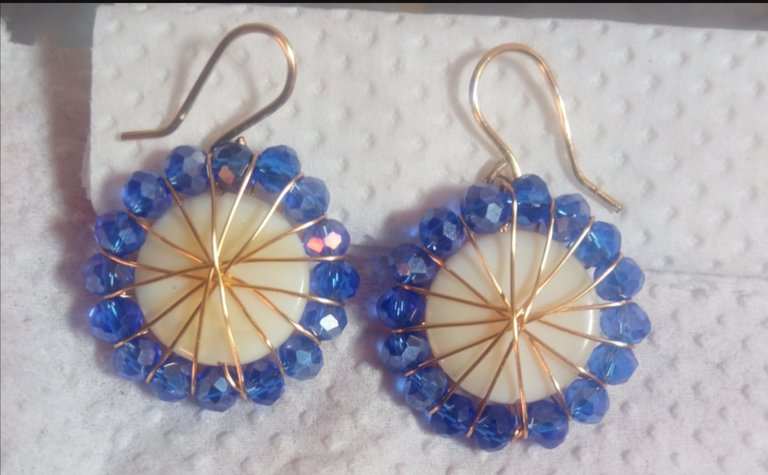
⭐ Paso 2: a continuación tomaremos el exceso de alambre que nos queda por debajo de la piedra y comenzaremos a introducir las piedras de cristales color azul tornasol una a una, hasta lograr la cantidad que nos permita rodear la piedra de nacar. Para este elaboración yo utilice 16 piedras o cristales color azul, una vez tengamos la cantidad de cristales que necesitamos vamos a rodear en forma circular la piedra de nácar y la punta de alambre la introduciremos por el dobles donde inicia la primera piedra de cristal para así unir los extremos con piedra de cristal y que nos quede la piedra de nacar totalmente cubierta a su alrededor de cristales.
⭐ Step 2: next we will take the excess wire that remains below the stone and we will begin to introduce the iridescent blue crystal stones one by one, until we achieve the amount that allows us to surround the mother-of-pearl stone.
For this elaboration I used 16 blue stones or crystals. Once we have the amount of crystals we need, we will surround the mother-of-pearl stone in a circular shape and we will insert the wire tip through the double where the first crystal stone begins, thus Join the ends with crystal stone and leave the mother-of-pearl stone completely covered with crystals around it.
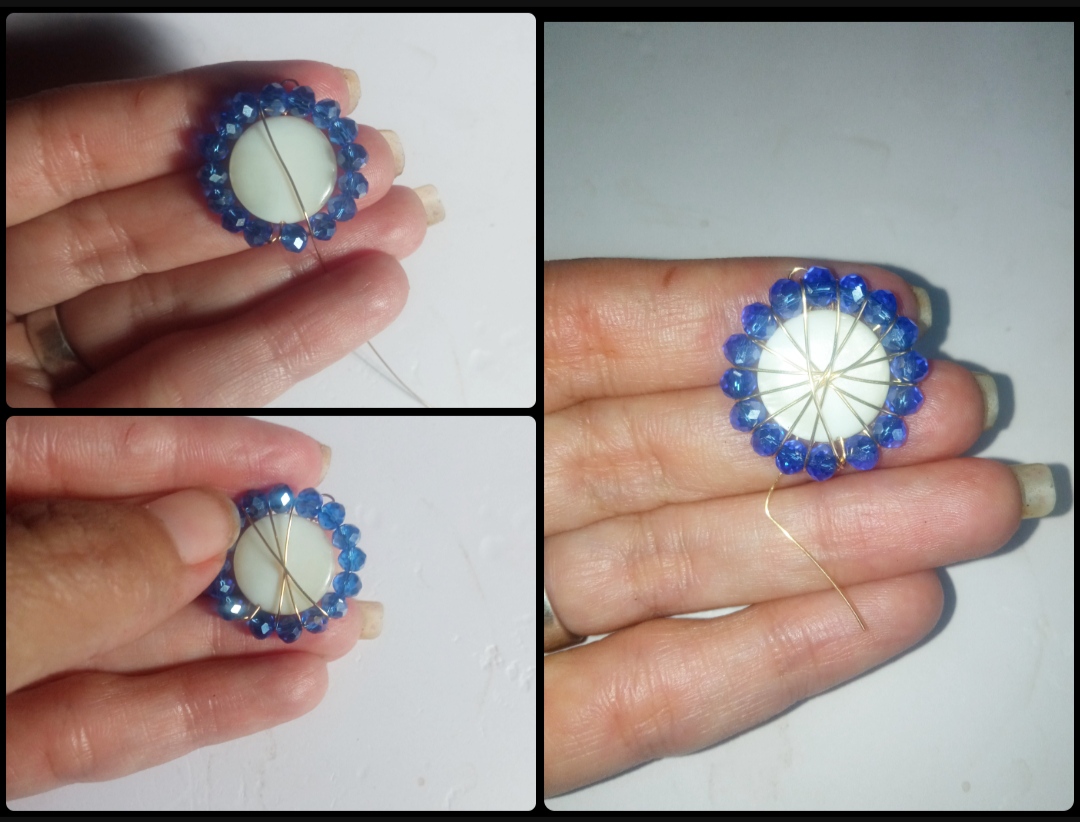
⭐ Paso 3: con el mismo alambre calibre 26 que venimos utilizando lo tomaremos y cruzaremos por la parte de atrás de la piedra de nácar hacia la parte de arriba y la subiremos intercalandola entre los dos primeros cristales a la izquierda de la argollita superior, cruzaremos el alambre por encima de la piedra de nácar y lo cruzaremos por el primer cristal al lado derecho del centro de abajo, ya si en forma cruzada pasando alambres por la parte de atrás para subirlo hasta los cristales superiores y bajando la por la parte frontal poco a poco realizaremos este bello cruce de alambre por todo la parte central de la piedra de nacar nos quedara está hermosa presentación. Y una vez hayamos pasado por cada uno de los intermedios de los cristales el alambre que nos quede por la parte atrás realizaremos un pequeño dobles para sí sostener el alambre y cortaremos el exceso del mismo.
⭐ Step 3: with the same 26 gauge wire that we have been using, we will take it and cross the back of the mother-of-pearl stone towards the top and we will raise it, sandwiching it between the first two crystals to the left of the ring top, we will cross the wire over the mother-of-pearl stone and we will cross it through the first crystal on the right side of the center below, already in a crossed way, passing wires through the back to raise it to the upper crystals and lowering it through the front part little by little we will make this beautiful wire crossing throughout the central part of the mother-of-pearl stone we will have this beautiful presentation. And once we have passed the remaining wire on the back through each of the glass gaps, we will make a small bend to hold the wire and we will cut off the excess.
⭐ Paso 4: por último tomaremos un pedazo de alambre de bisutería calibre 20 y con ayuda de la pinza realizaremos un pequeño anzuelo para guindar el zarcillo y está pieza la uniremos a nuestra elaboracion introduciendo el ganchito del anzuelo por la pequeña argollita que realizamos en el primer paso.
⭐ Step 4: finally we will take a piece of 20 gauge jewelry wire and with the help of the tweezers we will make a small hook to secure the earring and we will attach this piece to our creation by introducing the hook of the hook through the small ring that we do in the first step.
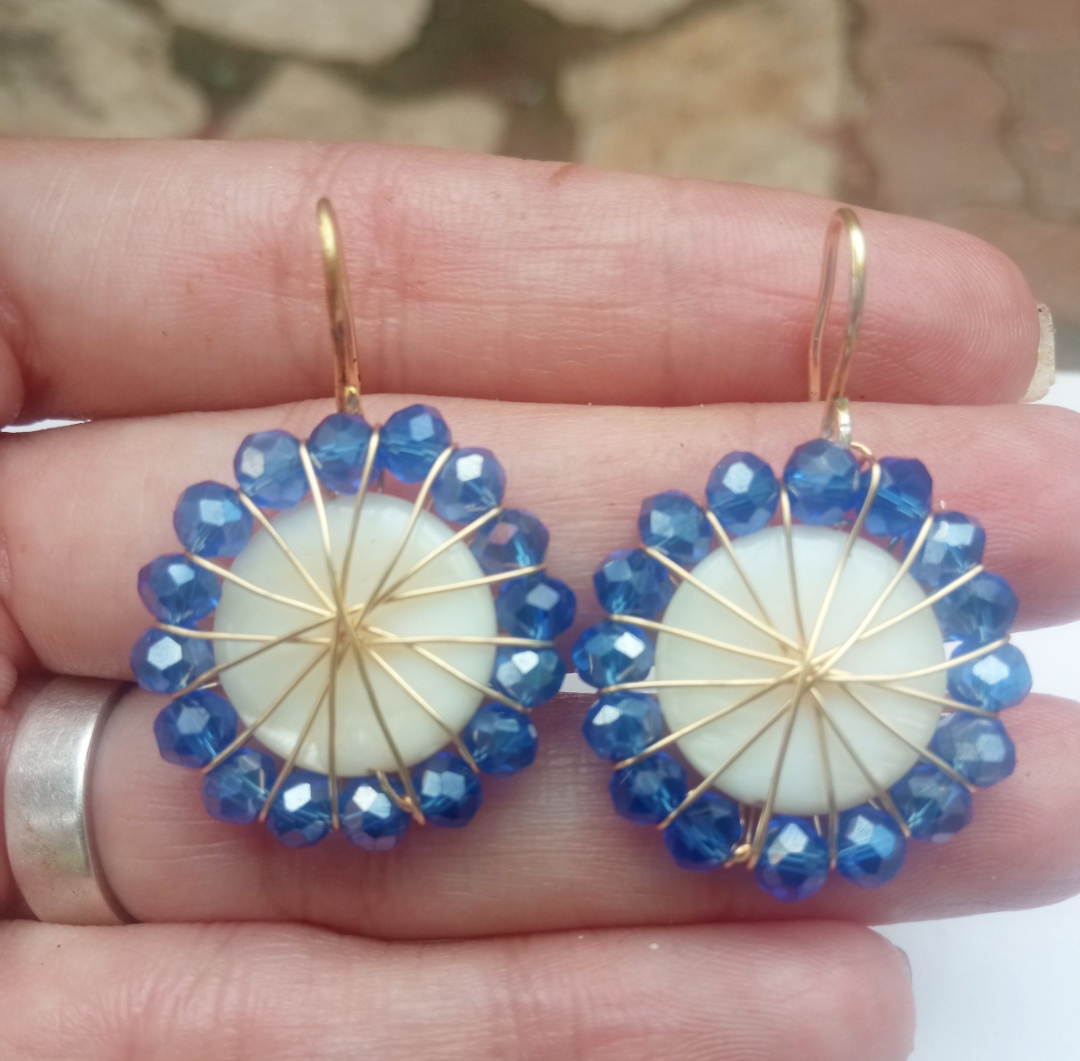
Todas las Fotos son de mi autoría y fueron tomadas con mi Celular Redmi 9.And so in a very simple way we can make a very beautiful design of earrings ideal to wear on any occasion, you can also make them in your preferred color since the mother of pearl being cream colored allows us to combine it with the color of crystals that you want. Well, my dear and appreciated friends, this has been my preparation today for all of you, I say goodbye hoping that this simple design has been to your liking.
All Photos are my authorship and were taken with my Redmi 9 Cellphone