And since not everything is diet, today I bring you something different, something to sweeten our lives, this week was celebrated the teacher's day, and I wanted to have a little detail with all these teachers who every day help Mathias in his work, so, I wanted to prepare a delicious cake, I was between preparing it with candied fruits or oranges, chocolate or marble, but, what I had very clear was that I wanted it to look beautiful when I cut it, at the moment I remembered some very famous cakes that my mother used to buy me when I was little, and I remembered that the attraction of them was the shapes that were made in the center of it with the chocolate dough, the other thing was that peculiar flavor, that those who have tasted it once, know how delicious it is.
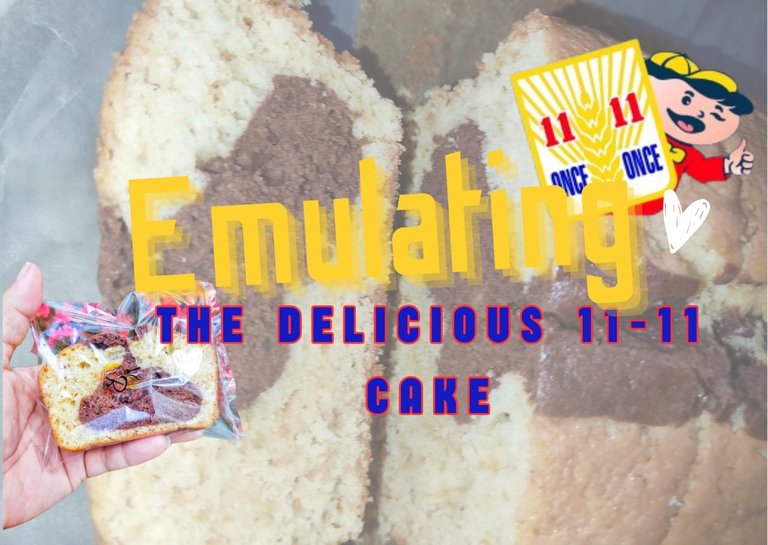
The Once-Once brand cake has been present for many years in the snacks of many, and its flavor is really delicious, so I wanted to emulate that delicious flavor and texture, and one of the secrets to achieve that particular flavor, is to make an infusion of orange peel and milk, this infusion is particularly delicious, and this time taking advantage that I had at home some buttermilk, I wanted to use it, as it gives a fluffier and softer texture to the crumb of the cake. A good cocoa for the chocolate mixture is vital in this preparation, this is also something to keep in mind.
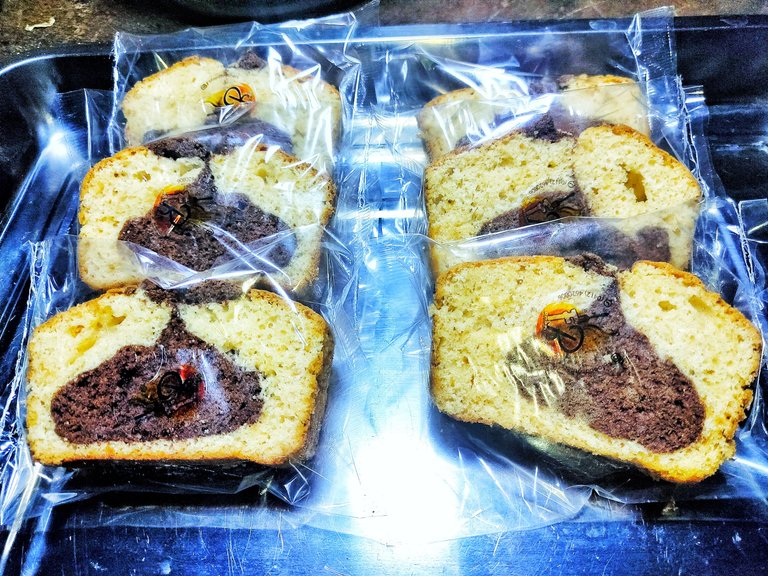
The step by step of this recipe, I have applied it before to other cake recipes, however, I show them again and a little tip to achieve the little figures in the center of the cake. Join me and I'll show you how to prepare it.

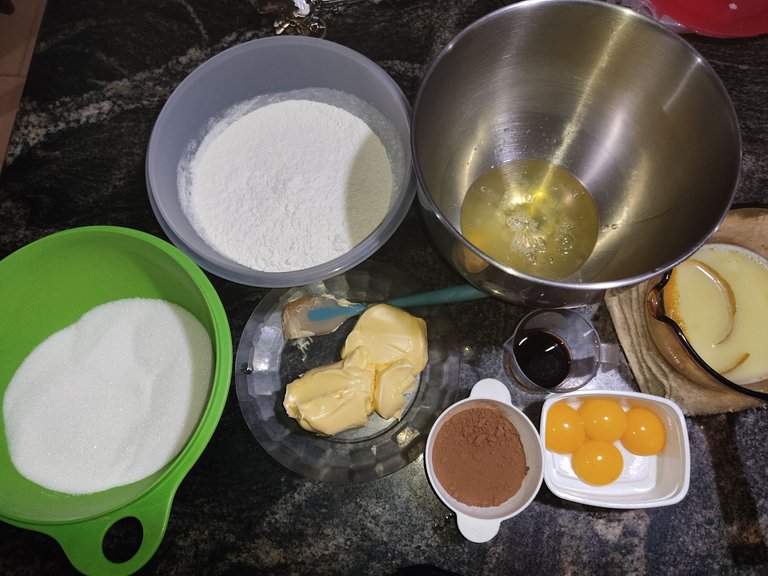

As I mentioned before, we must make the infusion with the orange peel, for this we take the milk or in this case the whey over medium heat, with the orange peel, and let it boil for about 3 minutes, cover and turn off the heat, take about 50 ml to infuse the cocoa powder and let it cool, while we bring the egg whites with half of the sugar to stiff peaks.

Reserve the beaten egg whites and beat the butter, wheat flour and the cream and vanilla essences, the mixture of these two essences, with the orange rind, will result in the flavor we are looking for, trust the process, continue beating and add the egg yolks, one at a time until everything is well integrated, to continue adding the wheat flour, alternating with the rest of the infused whey.
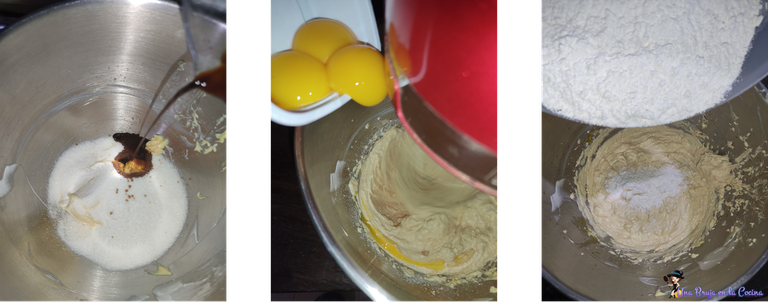
Once the wheat flour mixture is ready, add the beaten egg whites with the help of a paddle and enveloping movements, continue taking a small portion of the mixture and mix with the hydrated cocoa, then add about 500 gr of cocoa mixture.
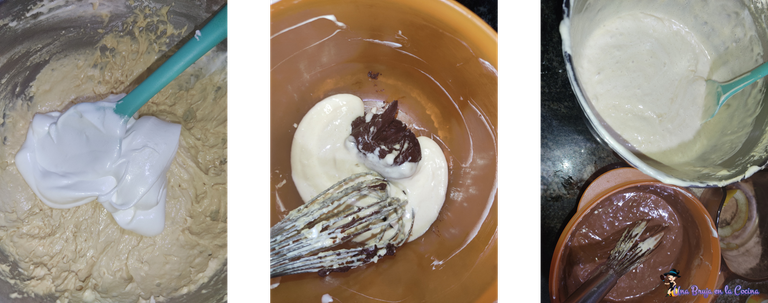
In a bundt cake molds, add the vanilla mixture and then add a portion of the chocolate mixture, arranged along the molds, the last piece of information that helps us to form the chocolate shapes, is to add along the mold and in the middle of the mixture, a path of melted butter, take it to a preheated oven at 180 °C for approximately 30 minutes or until a toothpick comes out clean.

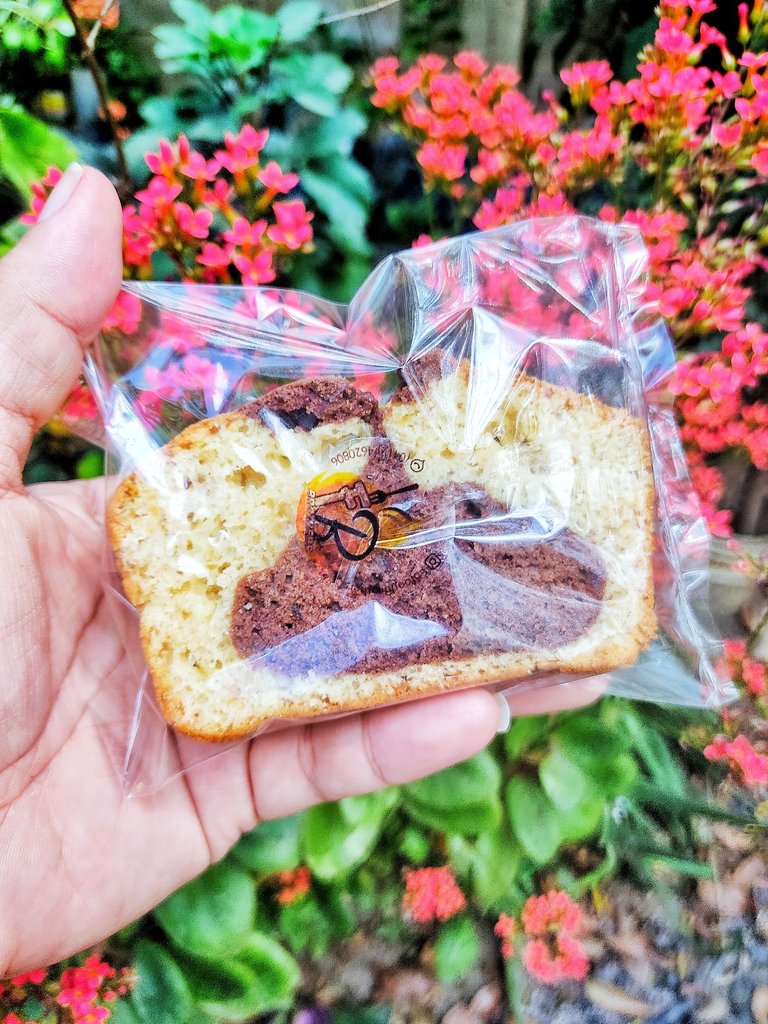
With these quantities I obtained 3 molds of 11*22 cm, making this also an option to undertake, as we get good performance of it, cut the cakes once cold and arranged in bags for my son to give them to their teachers, I will not lie, try a couple of portions, it was impossible not to, the smell of these was intoxicating, and also had to verify that I got the flavor and texture I was looking for, and indeed I think I did it.
Images of my property, taken with the camera of my Xiaomi Redmi Note 9S Edited with Snapseed
Thank you for taking the time to read this post, if you have any questions, criticisms, or suggestions, I would appreciate it if you would put them in the comment box, and remember, you too can make magic in the kitchen wherever you go!


The Once-Once brand cake has been present for many years in the snacks of many, and its flavor is really delicious, so I wanted to emulate that delicious flavor and texture, and one of the secrets to achieve that particular flavor, is to make an infusion of orange peel and milk, this infusion is particularly delicious, and this time taking advantage that I had at home some buttermilk, I wanted to use it, as it gives a fluffier and softer texture to the crumb of the cake. A good cocoa for the chocolate mixture is vital in this preparation, this is also something to keep in mind.

The step by step of this recipe, I have applied it before to other cake recipes, however, I show them again and a little tip to achieve the little figures in the center of the cake. Join me and I'll show you how to prepare it.

Ingredients

| 500 gr | Rising wheat flour | 400 gr | Sugar |
| 300 ml | Whey or whole milk | 300 gr | Butter |
| 30 gr | Unsweetened cocoa powder | 1 tsp | Vanilla essence |
| 1 tsp | Cream essence | 4 | Eggs (whites and yolks separated) |

As I mentioned before, we must make the infusion with the orange peel, for this we take the milk or in this case the whey over medium heat, with the orange peel, and let it boil for about 3 minutes, cover and turn off the heat, take about 50 ml to infuse the cocoa powder and let it cool, while we bring the egg whites with half of the sugar to stiff peaks.

Reserve the beaten egg whites and beat the butter, wheat flour and the cream and vanilla essences, the mixture of these two essences, with the orange rind, will result in the flavor we are looking for, trust the process, continue beating and add the egg yolks, one at a time until everything is well integrated, to continue adding the wheat flour, alternating with the rest of the infused whey.

Once the wheat flour mixture is ready, add the beaten egg whites with the help of a paddle and enveloping movements, continue taking a small portion of the mixture and mix with the hydrated cocoa, then add about 500 gr of cocoa mixture.

In a bundt cake molds, add the vanilla mixture and then add a portion of the chocolate mixture, arranged along the molds, the last piece of information that helps us to form the chocolate shapes, is to add along the mold and in the middle of the mixture, a path of melted butter, take it to a preheated oven at 180 °C for approximately 30 minutes or until a toothpick comes out clean.

With these quantities I obtained 3 molds of 11*22 cm, making this also an option to undertake, as we get good performance of it, cut the cakes once cold and arranged in bags for my son to give them to their teachers, I will not lie, try a couple of portions, it was impossible not to, the smell of these was intoxicating, and also had to verify that I got the flavor and texture I was looking for, and indeed I think I did it.


Thank you for taking the time to read this post, if you have any questions, criticisms, or suggestions, I would appreciate it if you would put them in the comment box, and remember, you too can make magic in the kitchen wherever you go!

[ES]

Y como no todo es dieta, hoy les traigo algo diferente, algo para endulzarnos la vida, esta semana se celebró el día del maestro, y quise tener un pequeño detalle con todos estos maestros que día a día ayudan a Mathias en sus labores, así que, quise prepararles un delicioso ponqué, estaba entre prepararlo con frutas o naranjas confitadas, chocolate o marmolado, pero, lo que si tenía muy claro es que, deseaba que se viera hermoso al cortarlo, de momento recordé unos muy famosos ponqués que mi madre me compraba cuando estaba pequeña, y recordé que la atracción de ellos era las formas que se hacían en el centro del mismo con la masa de chocolate, lo otro, era ese peculiar sabor, que los que lo han probado alguna vez, saben lo delicioso que es.

El ponqué de la marca Once-Once, ha estado presente por muchos años en las meriendas de muchos, y su sabor es realmente delicioso, por lo que quise emular ese delicioso sabor y textura, y uno de los secretos para lograr ese sabor particular, es realizar una infusión de piel de naranja y leche, esta infusión es particularmente deliciosa, y en esta oportunidad aprovechando que tenía en casa algo de suero lácteo, quise utilizarlo, ya que le aporta una textura más esponjosa y suave a la miga de la torta. Un buen cacao para la mezcla de chocolate es vital en esta preparación, esto es algo también a tener en cuenta.

El paso a paso de esta receta, lo he aplicado antes a otras recetas de tortas, sin embargo, se los muestro de nuevo y un pequeño dato para lograr las figuritas en el centro del ponqué. Acompáñame y te muestro como la prepare.


Como lo mencione antes, debemos hacer la infusión con la piel de naranja, para ello llevamos la leche o en este caso el suero lácteo a fuego medio, con la corteza de naranja, y dejamos hervir unos 3 minutos, tapamos y apagamos el fuego, tomamos unos 50 ml para infusionar el cacao en polvo y dejamos enfriar, mientras llevamos a punto de nieve las claras de huevo con la mitad del azúcar.

Reservamos las claras batidas y batimos, la mantequilla, harina de trigo y las esencias de nata y vainilla, la mezcla de estas dos esencias, con la corteza de naranja, nos dará como resultado el sabor que estamos buscando, confía en el proceso, continuamos batiendo y adicionamos las yemas de huevo, de una en una hasta integrar todo muy bien, para continuar agregando la harina de trigo, alternando con el resto del suero infusionado.

Una vez lista la mezcla con la harina de trigo, agregamos las claras batidas con ayuda de una paleta y movimientos envolventes, continuamos tomando una pequeña porción de mezcla y mezclamos con el cacao hidratado, para luego agregar unos 500 gr de mezcla al cacao.

En unos moldes para bund cake, agregamos la mezcla de vainilla para luego agregar una porción de la mezcla de chocolate, dispuesta a lo largo de los moldes, el último dato que es el que nos ayuda a que se formen las formas de chocolate, es agregar a lo largo del molde y en el medio de la mezcla, un camino de mantequilla derretida, llevamos a un horno pre calentado a 180 °C por aproximadamente 30 minutos o hasta que al introducir un palillo este salga limpio.

Con estas cantidades obtuve 3 moldes de 11*22 cm, haciendo de esta, también una opción para emprender, ya que obtenemos buen rendimiento de la misma, corte los ponqués una vez fríos y dispuse en bolsitas para que mi hijo se las entregara a sus maestros, no voy a mentir, probe un par de porciones, era imposible no hacerlo, el olor de estas era embriagante, y además, debía constatar que logre el sabor y la textura que estaba buscando, y en efecto creo haberlo logrado.

Imágenes de mi propiedad, tomadas con la cámara de mi Xiaomi Redmi Note 9S Editadas con Snapseed
Gracias por tomarse el tiempo de leer esta publicación, si tiene alguna pregunta, crítica o sugerencia, la agradecería que la pusiera en la caja de comentarios, y recuerda, ¡Tú también puedes hacer magia en la cocina ya dondequiera que vayas!


Created by @robinsonlgil


Created by @derangedvisions

El ponqué de la marca Once-Once, ha estado presente por muchos años en las meriendas de muchos, y su sabor es realmente delicioso, por lo que quise emular ese delicioso sabor y textura, y uno de los secretos para lograr ese sabor particular, es realizar una infusión de piel de naranja y leche, esta infusión es particularmente deliciosa, y en esta oportunidad aprovechando que tenía en casa algo de suero lácteo, quise utilizarlo, ya que le aporta una textura más esponjosa y suave a la miga de la torta. Un buen cacao para la mezcla de chocolate es vital en esta preparación, esto es algo también a tener en cuenta.

El paso a paso de esta receta, lo he aplicado antes a otras recetas de tortas, sin embargo, se los muestro de nuevo y un pequeño dato para lograr las figuritas en el centro del ponqué. Acompáñame y te muestro como la prepare.

Ingredientes

| 500 gr | Harina de trigo leudante | 400 gr | Azúcar |
| 300 ml | Suero de leche o leche completa | 300 gr | Mantequilla |
| 30 gr | Cacao en polvo sin azucar | 1 Cdta | Esencia de vainilla |
| 1 Cdta | Esencia de nata | 4 | Huevos (separadas claras y yemas) |

Como lo mencione antes, debemos hacer la infusión con la piel de naranja, para ello llevamos la leche o en este caso el suero lácteo a fuego medio, con la corteza de naranja, y dejamos hervir unos 3 minutos, tapamos y apagamos el fuego, tomamos unos 50 ml para infusionar el cacao en polvo y dejamos enfriar, mientras llevamos a punto de nieve las claras de huevo con la mitad del azúcar.

Reservamos las claras batidas y batimos, la mantequilla, harina de trigo y las esencias de nata y vainilla, la mezcla de estas dos esencias, con la corteza de naranja, nos dará como resultado el sabor que estamos buscando, confía en el proceso, continuamos batiendo y adicionamos las yemas de huevo, de una en una hasta integrar todo muy bien, para continuar agregando la harina de trigo, alternando con el resto del suero infusionado.

Una vez lista la mezcla con la harina de trigo, agregamos las claras batidas con ayuda de una paleta y movimientos envolventes, continuamos tomando una pequeña porción de mezcla y mezclamos con el cacao hidratado, para luego agregar unos 500 gr de mezcla al cacao.

En unos moldes para bund cake, agregamos la mezcla de vainilla para luego agregar una porción de la mezcla de chocolate, dispuesta a lo largo de los moldes, el último dato que es el que nos ayuda a que se formen las formas de chocolate, es agregar a lo largo del molde y en el medio de la mezcla, un camino de mantequilla derretida, llevamos a un horno pre calentado a 180 °C por aproximadamente 30 minutos o hasta que al introducir un palillo este salga limpio.

Con estas cantidades obtuve 3 moldes de 11*22 cm, haciendo de esta, también una opción para emprender, ya que obtenemos buen rendimiento de la misma, corte los ponqués una vez fríos y dispuse en bolsitas para que mi hijo se las entregara a sus maestros, no voy a mentir, probe un par de porciones, era imposible no hacerlo, el olor de estas era embriagante, y además, debía constatar que logre el sabor y la textura que estaba buscando, y en efecto creo haberlo logrado.


Gracias por tomarse el tiempo de leer esta publicación, si tiene alguna pregunta, crítica o sugerencia, la agradecería que la pusiera en la caja de comentarios, y recuerda, ¡Tú también puedes hacer magia en la cocina ya dondequiera que vayas!


