De pequeña siempre huia de los cintillos de plástico porque me hacían doler la cabeza, sentía que literalmente me estaban traspasando el cráneo 😁. No fue sino hasta ahorita de adulta que no se si fue que aprendí a ponermelos o tengo una capa de grasa detrás de las orejas que me permite tolerarlos por más tiempo.
Lo cierto es que... Me entraron ganas de hacer uno. Y aunque es cierto que puedo fácilmente comprarlo hecho porque no son costosos, no hay nada más satisfactorio que crear con tus manos lo que a tu imaginación se le ocurre 🤩✨.
Siempre hago accesorios para mí hija, pero está vez creé este para mí. (Aunque Estoy segura que también lo usará ella) 😁.
Fue muy sencillo de elaborar, lo único que lamento es que no haya sido más ancho. Me habría gustado un poco más de grosor. Sin embargo no me quejo, el resultado me gustó.
Aquí les muestro el paso a paso... Escogí decorarlo en amarillo porque es uno de mis colores favoritos 💛.
When I was little I always ran away from plastic headbands because they made my head hurt, I felt like they were literally piercing my skull 😁. It wasn't until now as an adult that I don't know if it was because I learned to wear them or if I have a layer of fat behind my ears that allows me to tolerate them for a longer time.
The truth is that... I felt like making one. And while it's true that I can easily buy it made because they are inexpensive, there is nothing more satisfying than creating with your hands what your imagination comes up with 🤩✨.
I always make accessories for my daughter, but this time I created this one for me (although I'm sure she will use it too) 😁.
It was very simple to make, my only regret is that it wasn't wider. I would have liked a little more thickness. However I'm not complaining, I liked the result.
Here I show you the step by step.... I chose to decorate it in yellow because it is one of my favorite colors 💛.

💛 Cintillo de plástico.
💛 Tela de Trapillo.
💛 Silicón.
💛 Hilo y aguja.
💛 Perlas (Opcional)
PROCESO
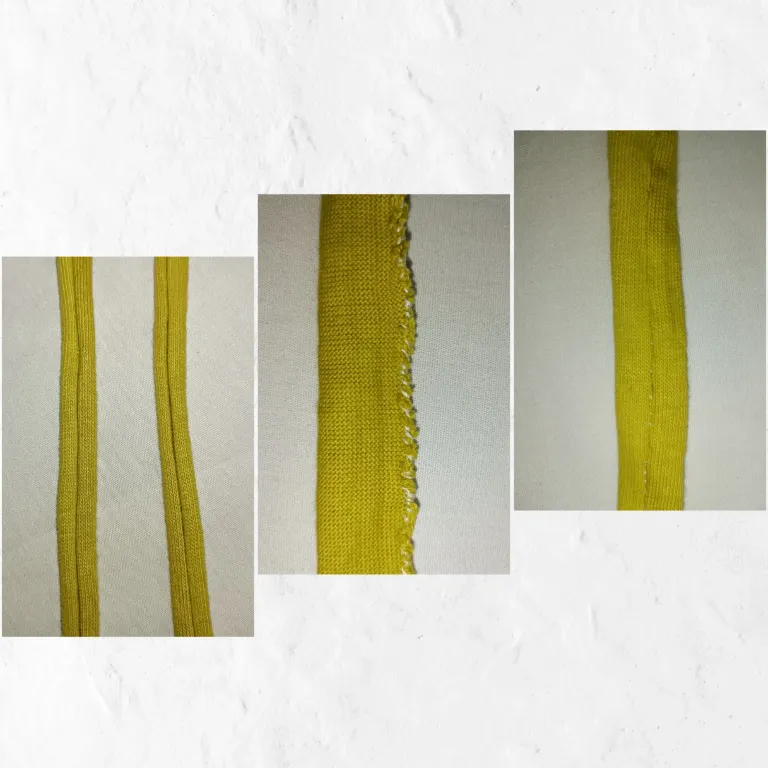
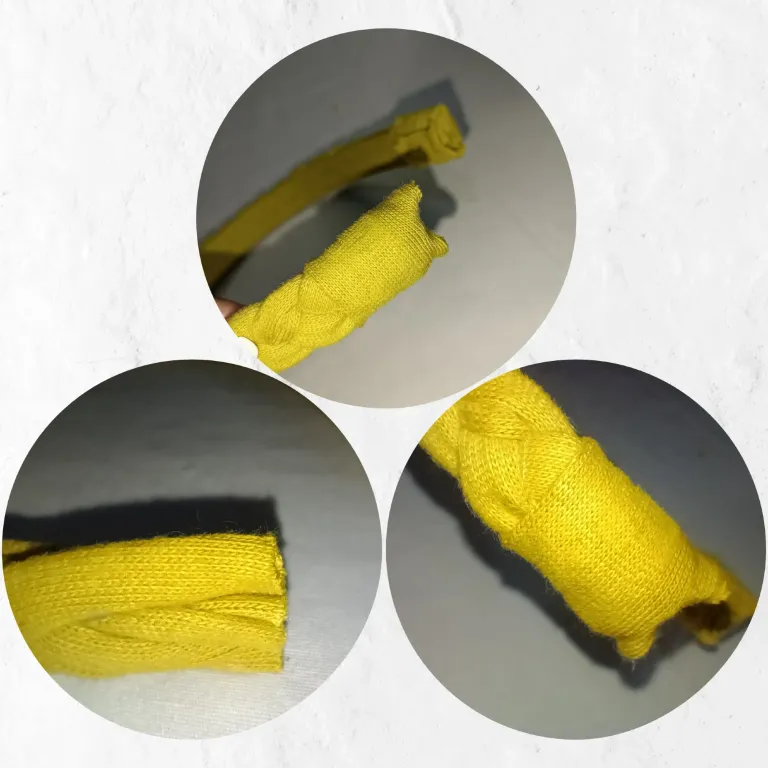
Lo bueno de trabajar con el Trapillo es que tiene una medida estándar en cuanto al ancho de la tira, así que yo solamente doble y con hilo y aguja cosi por todo el borde uniendo los 2 extremos. Cabe resaltar que esto lo cosi y luego les dí la vuelta para que la costura quedara interna y no se notara.
La medida de largo para esta tira fue de medio metro.
💛 Plastic headband.
💛 Rag cloth.
💛 Silicone.
💛 Thread and needle.
💛 Pearls (Optional).
PROCESS
The good thing about working with Trapillo is that it has a standard measurement for the width of the strip, so I just folded and with thread and needle I sewed all around the edge joining the two ends. It should be noted that I sewed this and then turned them over so that the seam would be inside and not be noticeable.
The length measurement for this strip was half a meter.
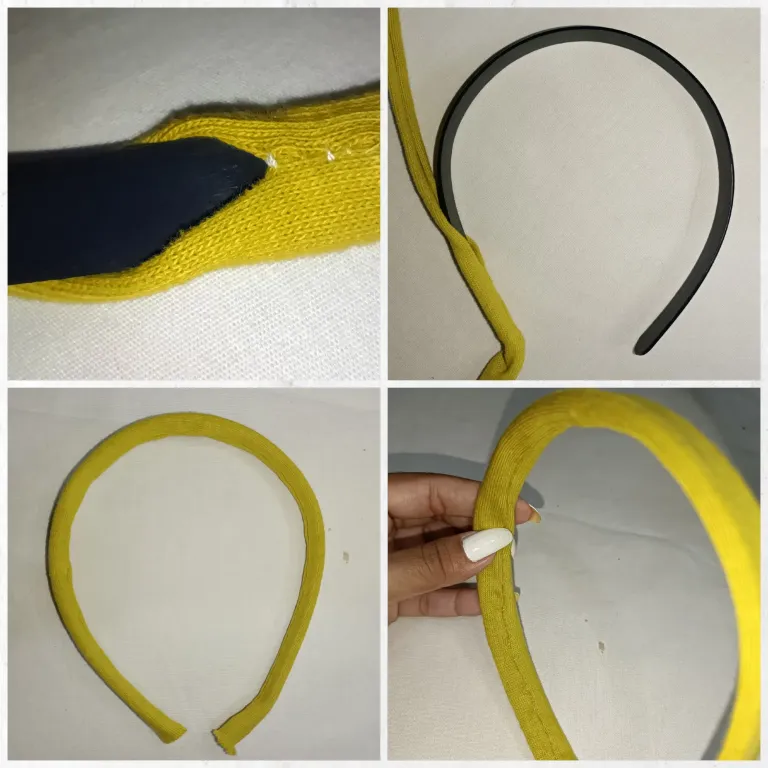
El siguiente paso era forrar el cintillo, una vez que ya estaba punteado con hilo y aguja y le escondí las costuras, le introduje por una de las aberturas el Cintillo.
Una vez completado este paso, rodé la cinta de tal manera que la costura quedara hacia arriba y no quedara visible cuando pegara los posteriores detalles.
The next step was to line the headband, once it was already stitched with thread and needle and I hid the seams, I inserted the headband through one of the openings.
Once this step was completed, I rolled the ribbon in such a way that the seam was facing up and would not be visible when I glued the later details.
Quería hacer un trenzado. Para ello use 3 tiras largas de 1 metro cada una, del mismo Trapillo amarillo y empecé a tejer la trenza tradicional de 3.
Una vez la tuve lista, con delicadeza la pegué al cintillo, con la ayuda de silicón caliente y corté el excedente de material en ambos extremos.
I wanted to make a braid. For this I used 3 long strips of 1 meter each, of the same yellow rag and started weaving the traditional braid of 3.
Once I had it ready, I delicately glued it to the headband with the help of hot silicone and cut off the excess material at both ends.

Esta última parte si me comió un poquito 😁, no quería dejar esos extremos feos a la vista, pero también me era difícil encontrar la manera de dar un buen acabado.
Así que como pude, con la misma cinta de Trapillo cerré esta parte del cintillo. A mí juicio no quedó tan prolijo como me habría gustado pero estoy segura que el próximo me quedara mejor 😁.
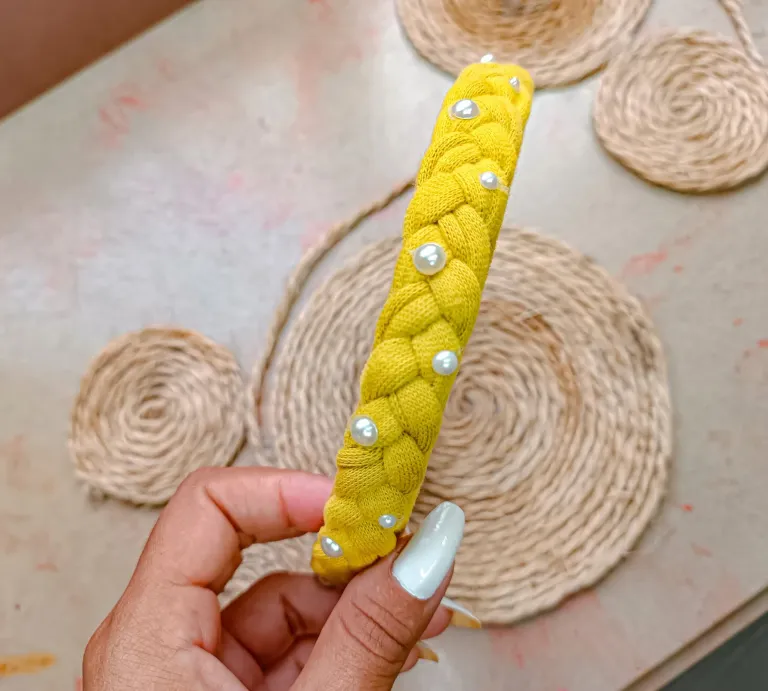
Por último sólo quise agregar unos detallitos y pegué unas media perlitas con silicón a todo el ancho de la trenza superior del cintillo para darle un aspecto más Cuchi... Y el resultado me pareció fascinante! 😍💛
This last part did eat me a little bit 😁, I didn't want to leave those ugly ends in sight, but it was also difficult to find a way to give a good finish.
So as I could, with the same Trapillo tape I closed this part of the headband. In my opinion it didn't look as neat as I would have liked but I'm sure the next one will look better 😁.
Finally I just wanted to add a few details and I glued some half pearls with silicone to the whole width of the upper braid of the headband to give it a more Cuchi look... And I found the result fascinating! 😍💛
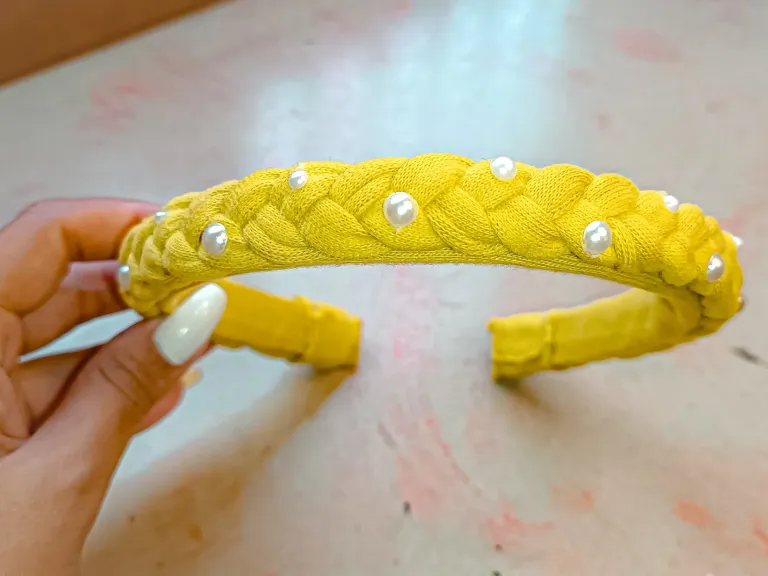
RESULTS // RESULTADO


El cabello es uno de los accesorios naturales más increíbles que poseemos y cuando nos valemos de detalles de este tipo como cintillos o diademas podemos elevar nuestro estilo a otro nivel.
Antes creía que el color amarillo era algo difícil de combinar, sin embargo hoy día tengo un concepto totalmente diferente.
Estoy ansiosa de usarlo pronto para alguna salida casual!😍✨
Espero les haya resultado útil este pequeño tutorial, me despido con cariño hasta un próximo post!
Hair is one of the most amazing natural accessories we have and when we use details like headbands or headbands we can elevate our style to another level.
I used to think that yellow was a difficult color to match, but today I have a totally different concept.
I can't wait to wear it soon for a casual outing!
I hope you found this little tutorial useful, I bid you a fond farewell until a next post!

For the best experience view this post on Liketu
