Greetings to all. Today I want to show you how to make a small construction machine in cold porcelain, it is specifically a roller compactor. These I made as a souvenir/gift for the jurors and tutor of my thesis. I won't lie to you, this craft has its level of difficulty, but when you manage to finish it you feel really satisfied. Besides, it was the first time I made a figure of this kind, so I will share with you the challenges I faced and how I solved them, with all the mistakes (laughs). Keep reading and don't miss any of the process.
Versión Español
Un saludo a todos. Hoy quiero mostrarles cómo hacer una pequeña máquina de construcción en porcelana fría, se trata específicamente de un rodillo compactador. Estos los hice como recuerdo/obsequio para los jurados y el tutor de mi tesis. No les mentiré, esta artesanía tiene su nivel de dificultad, pero cuando logras terminarla te sientes realmente satisfecho. Además, fue la primera vez que hice una figura de este tipo, así que les compartiré los retos que se me presentaron y cómo los resolví, con todo y los desaciertos (risas). Sigue leyendo y no te pierdas nada del proceso.
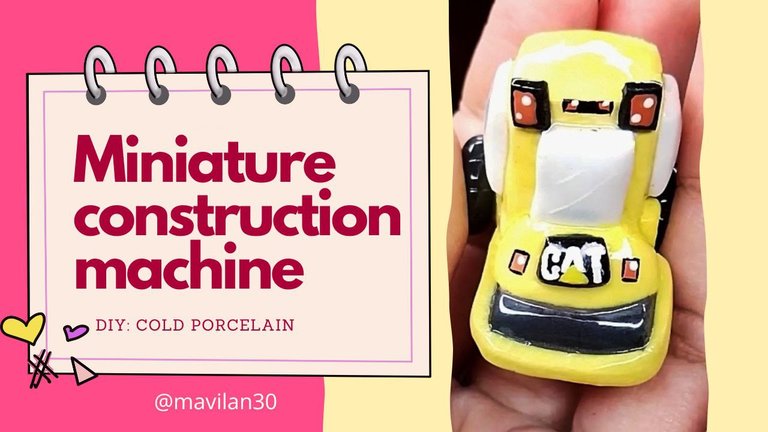
Imagen creada por mí en Canva / Image created by me in Canva
Materials:
- Cold porcelain.
- Cold paint (yellow, black, blue, white, red, blue, white, red)
- Scissors
- Cutter
- Acetate
- White glue (school glue)
- Brushes
- Ruler
- Pencil
- Paper
Process:
I started by creating a pencil sketch in my trusty notebook, in this, I broke down the pieces I had to create and the order in which I would elaborate them to later assemble them, I also established the approximate size of each one. Remember that this is a fantasy machine, so it is not exact to the one in real life, but a model adapted to make it look nice and fun.
Versión EspañolMateriales:
- Porcelana fría
- Pintura al frío (amarillo, negro, azul, blanco, rojo)
- Tijeras
- Cúter
- Acetato
- Pegamento blanco (escolar)
- Pinceles
- Regla
- Lápiz
- Papel
Proceso:
Inicié creando un boceto a lápiz en mi confiable cuaderno, en éste, desglosé las piezas que debía crear y el orden en que las elaboraría para posteriormente ensamblarlas, también establecí el tamaño aproximado de cada una. Recuerden que esta es una máquina de fantasía, por lo que no es exacta a la de la vida real, si no un modelo adaptado para que se vea bonito y divertido.
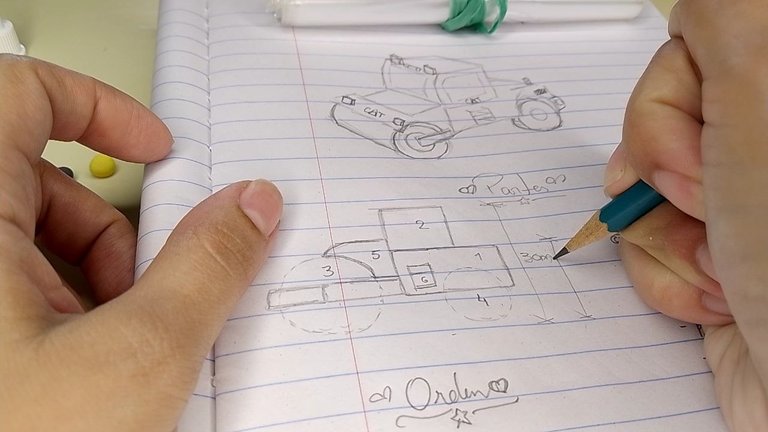
Boceto / Sketch
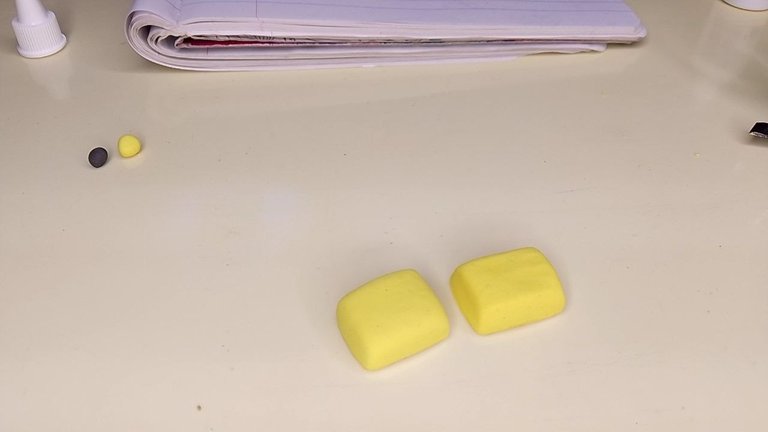
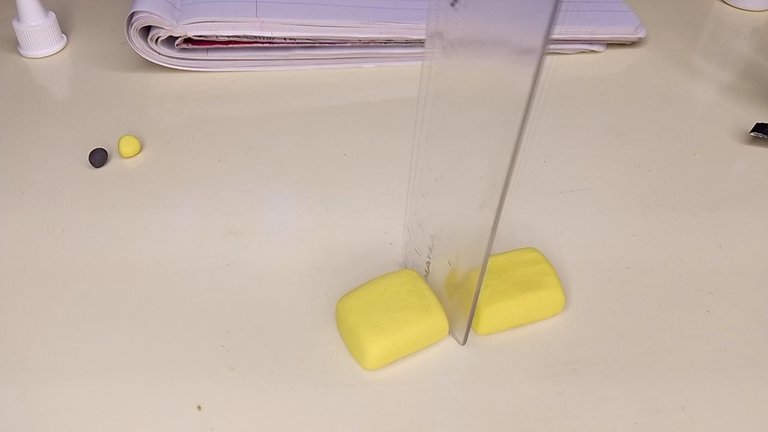
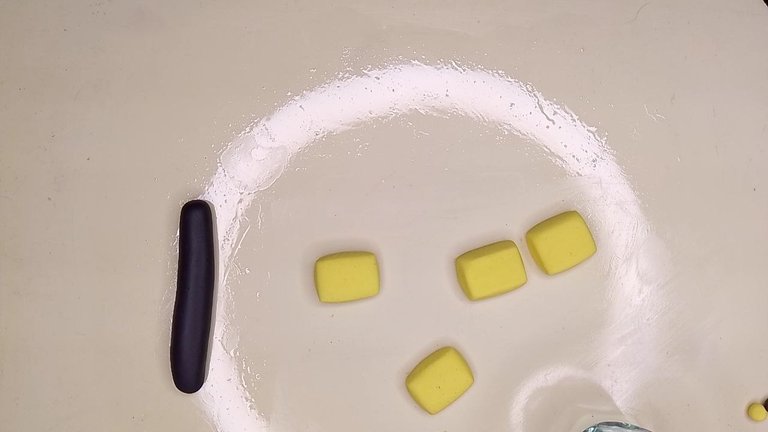
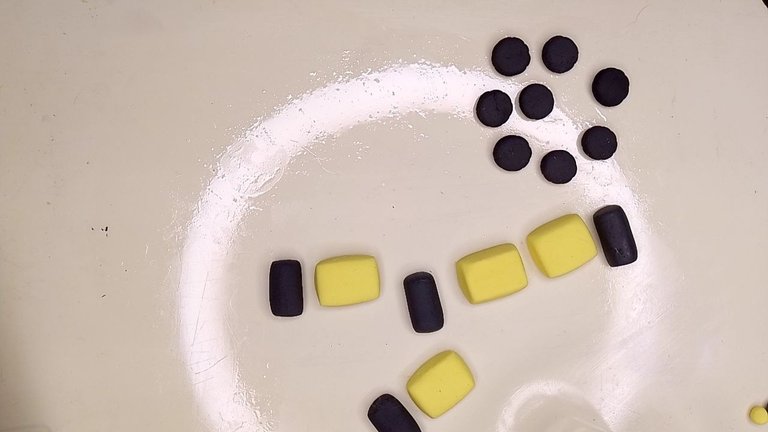
With the flexible dough already dyed one part in yellow and the other in very dark gray (I painted them with cold paint), I shape the piece that will be the lower part of the body of the machine, a not very tall rectangle. With the help of a ruler I make sure that the sides are as straight as possible. It should be noted that I'm not looking for the shapes to be perfectly straight, because I really like rounded shapes. We will make four rectangles.
Versión Español
Ya con la masa flexible teñida una parte en amarillo y otra en gris muy oscuro (las pinté con pintura al frío), doy forma a la pieza que será la parte baja del cuerpo de la máquina, un rectángulo no muy alto. Con ayuda de una regla me aseguro de que los lados queden lo más rectos posibles. Cabe acotar que no estoy buscando que las formas sean perfectamente rectas, porque la verdad me gustan las formas un tanto redondeadas. Haremos cuatro rectángulos.
 |  |
|---|
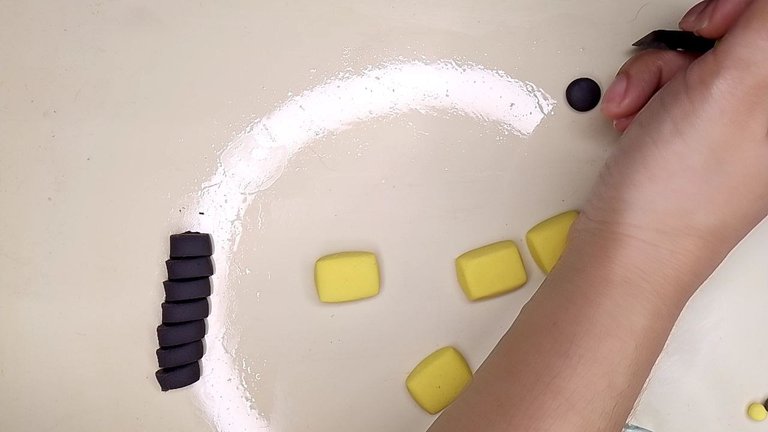
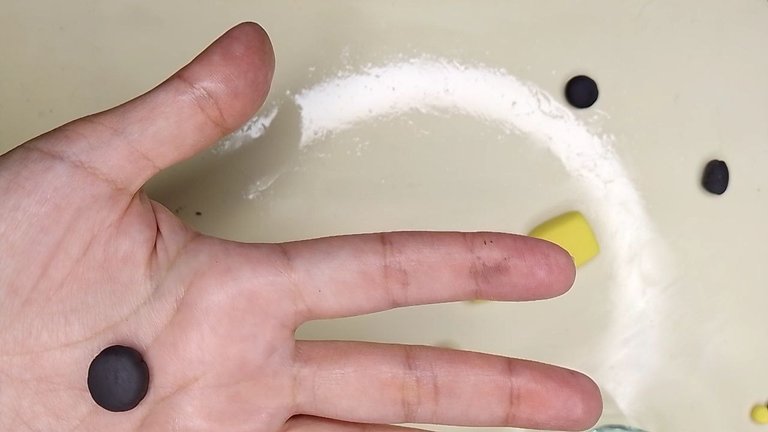
Now, we will form a gray cylinder, its diameter should be the one that will have the rear wheels of the machine and proceed to cut the wheels as if they were slices, of course with a thickness according to the design. Once we have the “slices”, we will finish shaping them with our fingers so that they are well rounded and also, with the cutter, we will make some superficial notches that will give texture to them. There will be a total of eight wheels.
Versión Español
Ahora, formaremos un cilindro gris, su diámetro debe ser el que tendrán las ruedas traseras de la máquina y procedemos a cortar las ruedas como si fueran rebanadas, por supuesto con un grosor acorde al del diseño. Ya teniendo las “rebanadas”, les terminaremos de dar forma con nuestros dedos para que queden bien redonditas y además, con el cúter, haremos unas muescas superficiales que le aportarán textura a las mismas. Serán en total ocho ruedas.
 |  |  |
|---|
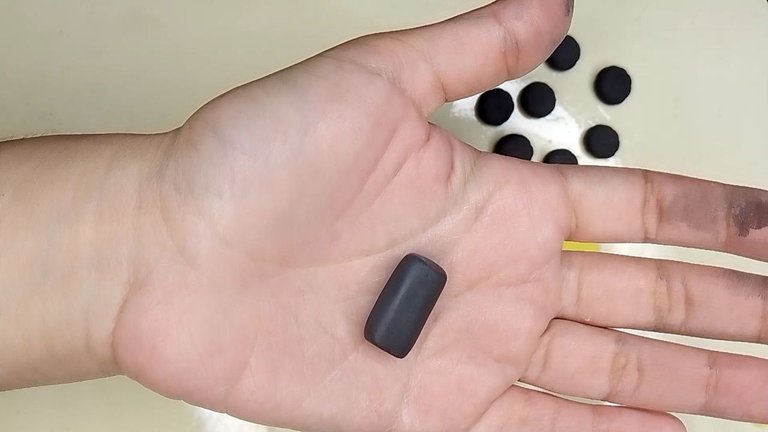
It is then time to make the rollers as such, for this, just make a cylinder again, but this time of the required height for the roller and a length no longer than the front of the machine. There will be four rollers in total.
Versión Español
Es momento entonces de hacer los rodillos como tal, para ello, basta con hacer nuevamente un cilindro, pero esta vez de la altura requerida para el rodillo y una longitud no mayor a la parte frontal de la máquina. Serán cuatro rodillos en total.
 |  |
|---|
I did these pieces first to let them dry so they would keep their shape and at this point, I continued with the next piece.
Versión Español
Estas piezas las hice de primeras para dejarlas secar y así mantuvieran su forma y en este punto, seguí con la siguiente pieza.
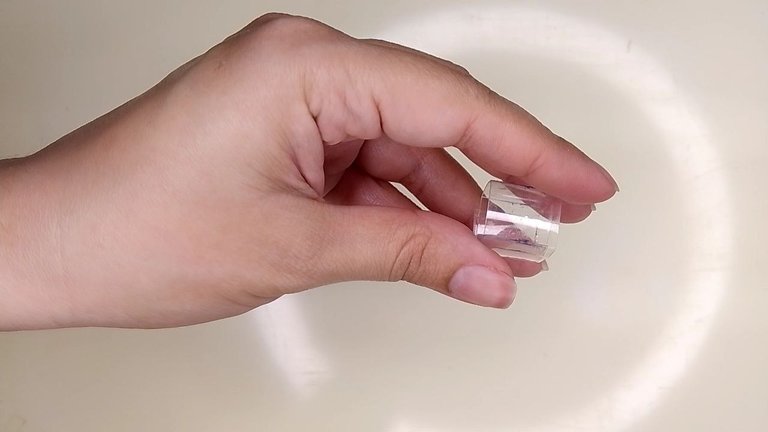
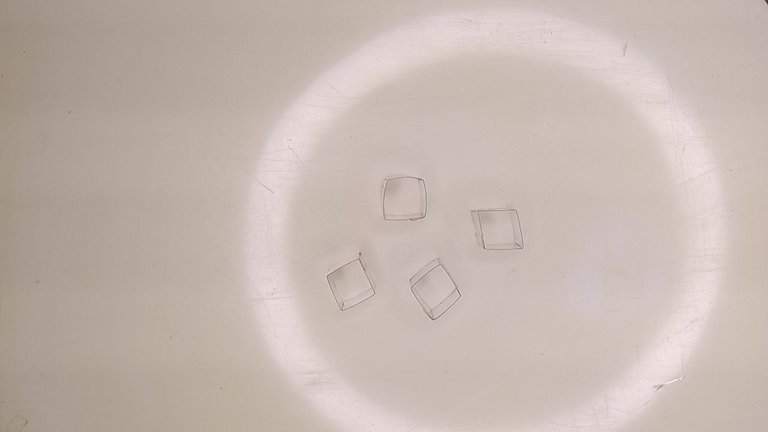
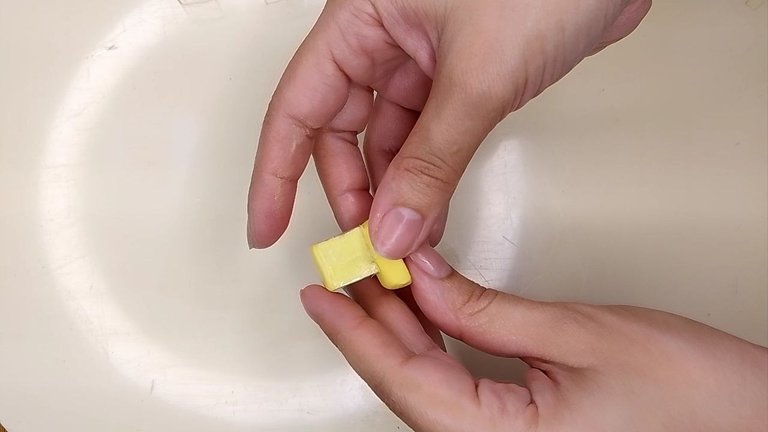
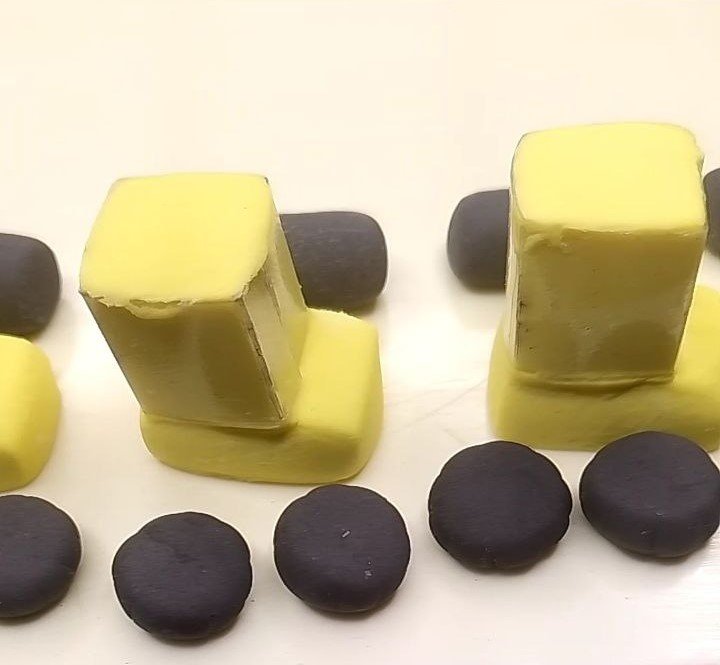
It is time to form the cube that corresponds to the operator's cab and here is a challenge, since the structure is very high and the dough I used gave way under its own weight, so it did not keep the cube shape as I wanted, so I decided to make some molds with acetate. I cut it out with scissors to the size of the sides of the cube and secured it with transparent adhesive tape. I made four molds to work simultaneously with all the pieces.
Versión Español
Es momento de formar el cubo que corresponde a la cabina del operador y aquí se presenta un reto, puesto que la estructura es muy alta y la masa que usé cedía por su propio peso, por lo que no se mantenía la forma de cubo como yo deseaba, por lo que decidí hacer unos moldes con acetato. El mismo lo recorté con una tijera, con la medida de los lados del cubo y lo aseguré con cinta adhesiva transparente. Formé cuatro moldes para trabajar en simultáneo todas las piezas.
 |  |
|---|
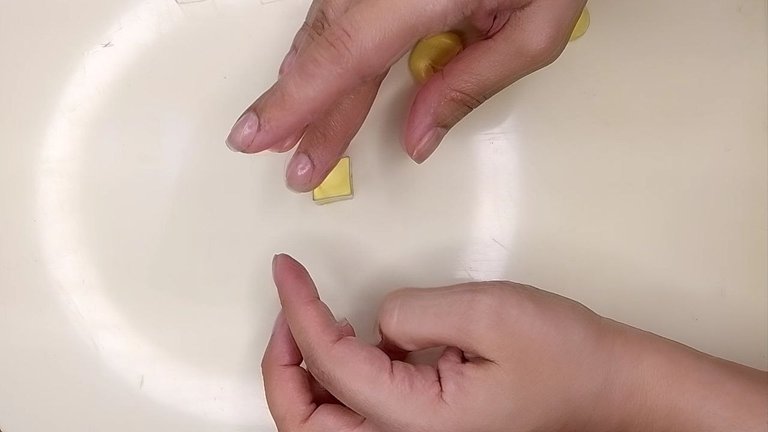
So I filled each cube with yellow cold porcelain, added some white glue to the rectangle at the end where the booth goes and adhered both pieces. I let it dry for a couple of days.
Versión Español
Así que rellené cada cubo con porcelana fría color amarillo, agregué un poco de pegamento blanco al rectángulo en el extremo donde va la cabina y adherí ambas piezas. Lo dejé secar un par de días.
 |  |  |
|---|
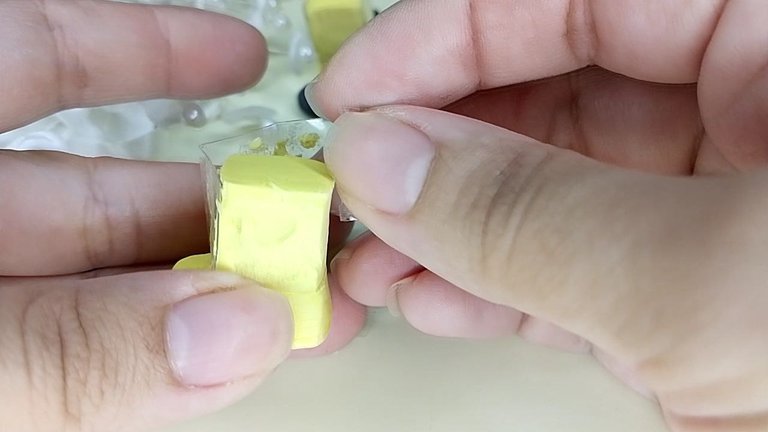
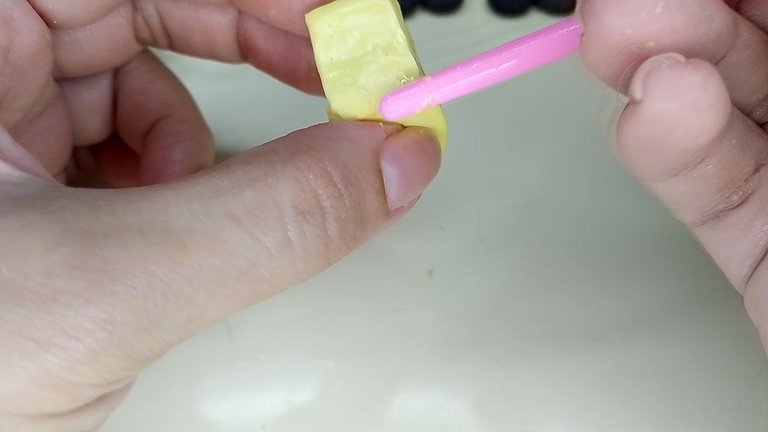
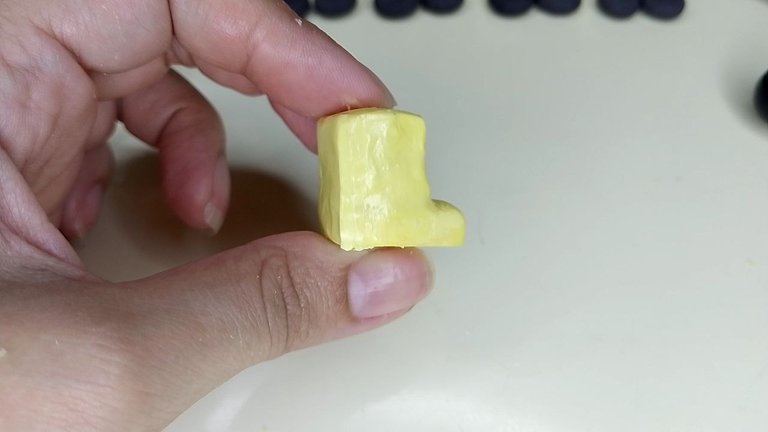
When I unmolded the second problem arose, when I placed the dough inside, some air remained, bubbles that were not noticeable until the piece dried and I could see the circular voids. Of course, here we did not panic, but we looked for solutions and so I just covered the spaces with glue and filled with more porcelain, pressed well this time using tools such as the handle of the brush for example and repaired all the gaps and cracks.
Versión Español
Cuando desmoldé se presentó el segundo inconveniente, cuando coloqué la masa dentro, quedó algo de aire, burbujas que no se notaron hasta que se secó la pieza y pude ver los vacíos circulares. Por supuesto, aquí no entramos en pánico, si no que buscamos soluciones y pues solo cubrí los espacios con pegamento y rellené con más porcelana, presioné bien esta vez apoyándome de herramientas como el mango del pincel por ejemplo y reparé todos los vacíos y grietas.
 |  |  |
|---|
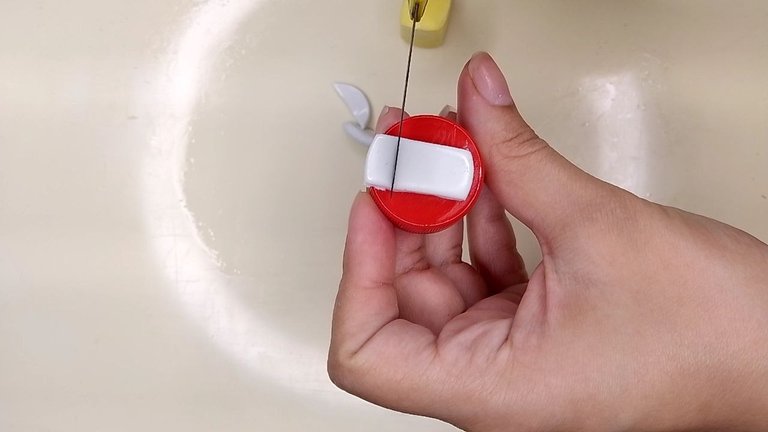
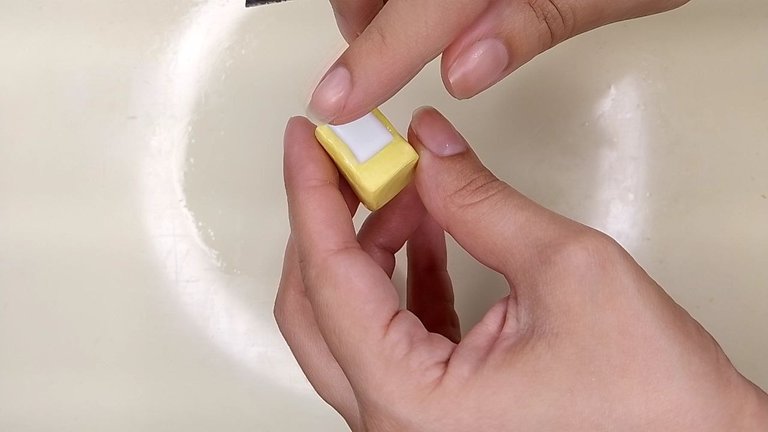
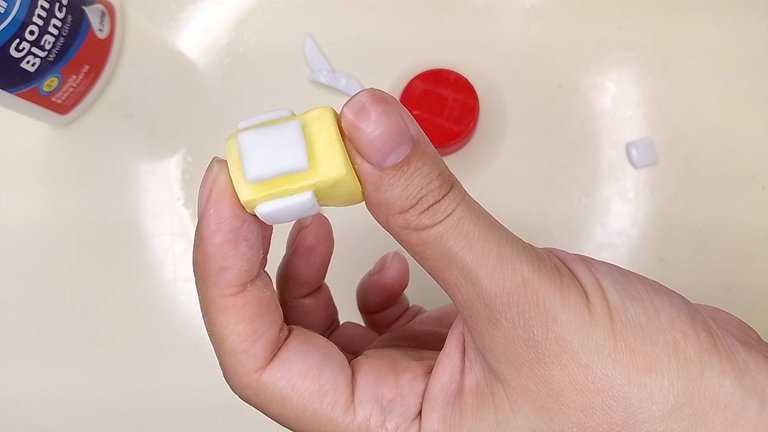
At this point, I decided to add the windows of the cabin, for this, I dyed a portion of dough a super pale blue, with a lid of some juice or soda container, I leaned to flatten the dough and also to cut the shape on it with the cutter. Remember that we must oil the surfaces we use so that the dough can take off. To adhere the windows to the cabin I used white glue again.
Versión Español
En este punto, decidí añadir las ventanas de la cabina, para ello, teñí de un azul súper pálido una porción de masa, con una tapa de algún envase de jugo o refresco, me apoyé para aplanar la masa y también para cortar la forma sobre ella con el cúter. Recuerden que debemos enaceitar las superficies que utilizamos para que pueda despegar la masa. Para adherir las ventanas a la cabina usé nuevamente pegamento blanco.
 |  |  |
|---|
Here I was already getting very excited because I could see the shape (laughs). I let it dry for a day so I could handle the piece safely the next day.
Versión Español
Aquí ya me estaba emocionando mucho porque se le estaba viendo forma (risas). Dejé secar un día para poder manipular la pieza con seguridad al día siguiente.
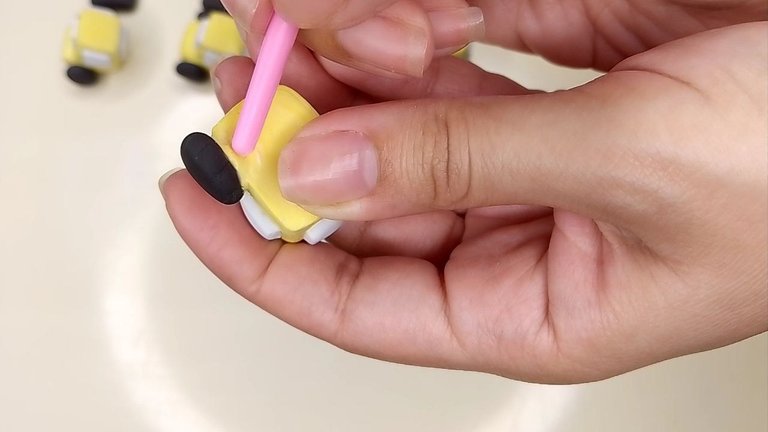
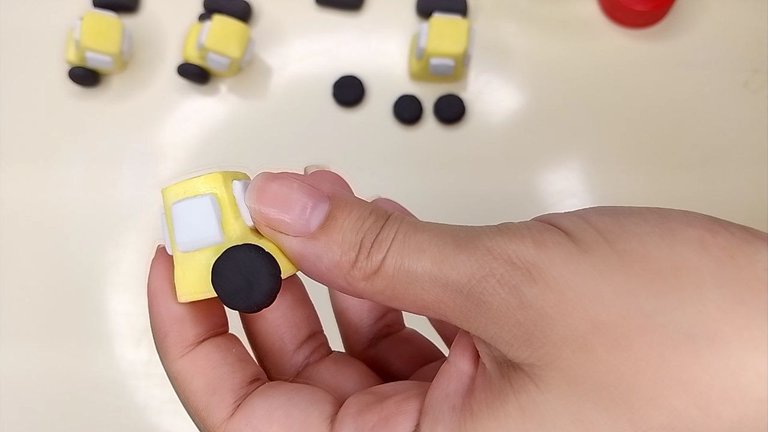
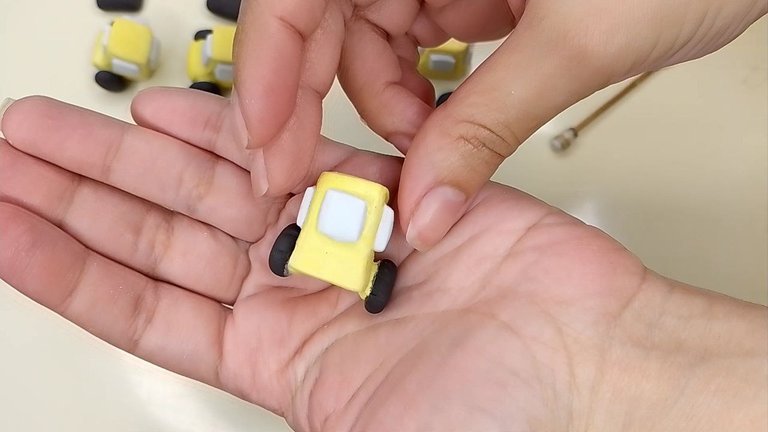
The time has come to glue the wheels (yes, yes, yes, yes, yes!). For this task, add a little glue to the place where the wheel will go, spread it evenly with the help of a brush, add a little glue to the inner side of the wheel and to finally join both pieces, use a small amount of yellow dough. Once it is well positioned and having pressed to fix it, we proceed to remove any excess yellow dough and leave the surface neat with a fine tool (in my case the end of the brush), since the space is small and it is difficult to use your fingers.
Versión Español
Ha llegado la hora de pegar las ruedas (¡sííííííííííííí!). Para esta tarea se debe agregar un poco de pegamento en el lugar donde va la rueda, esparcirla uniformemente con ayuda de un pincel, igualmente, agregar un poco de pegamento al lado interno de la rueda y para finalmente unir amabas piezas, emplear una pequeña cantidad de masa color amarillo. Una vez que ya esté bien posicionada y habiendo presionado para fijarla, procedemos a retirar cualquier excedente de masa amarilla exagerado y a dejar la superficie prolija con una herramienta fina (en mi caso el extremo del pincel), ya que el espacio es reducido y es difícil usar los dedos.
 |  |  |
|---|
Now, it is the turn of the front piece, the one that joins the cabin with the roller, so we will add glue to the lower part of the front and a little underneath as well and we will adhere a yellow porcelain cylinder, this should be more or less the same size of the front of the machine and not too thick.
Versión Español
Ahora, es turno de la pieza delantera, esa que une a la cabina con el rodillo, por lo que agregaremos pegamento a la parte inferior del frente y un poco debajo también y adheriremos un cilindro de porcelana amarilla, éste debe ser de más o menos el mismo tamaño del frente de la máquina y no muy grueso.
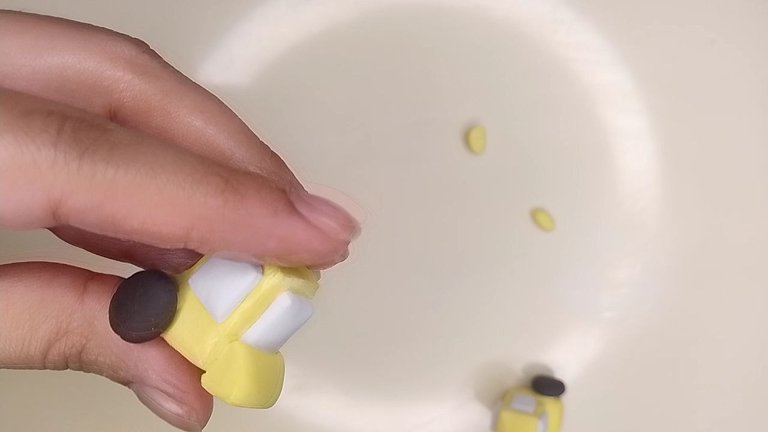
Pieza delantera / Front piece
With a curved tool or even with our fingers, we will sink a little bit into the lower part of the yellow cylinder to make room for the roller.
Versión Español
Con alguna herramienta curva o incluso con nuestros dedos, hundiremos un poco en la parte inferior del cilindro amarillo para dar lugar al rodillo.
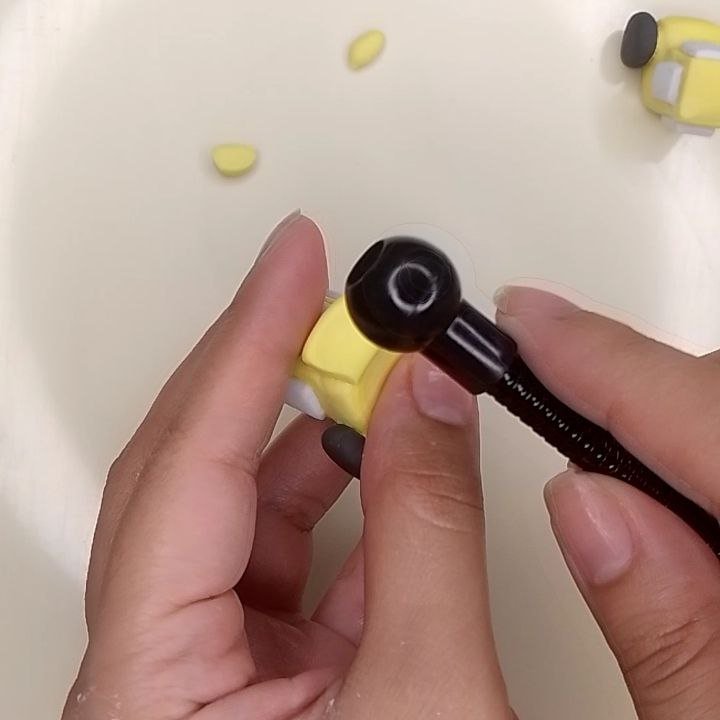
Ahuecando la pieza / Hollowing out the part
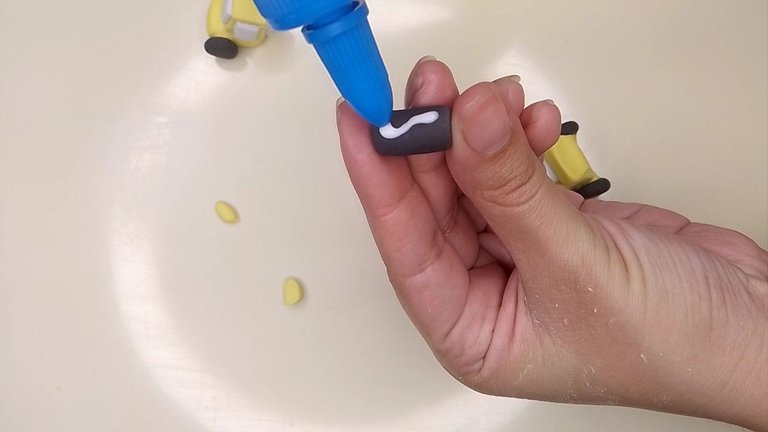
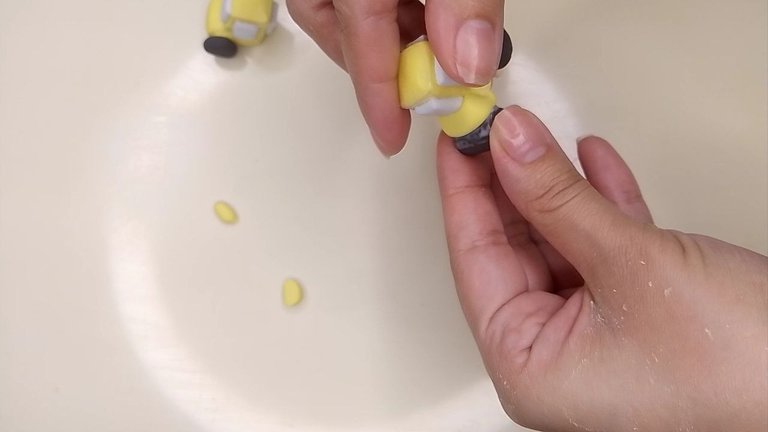
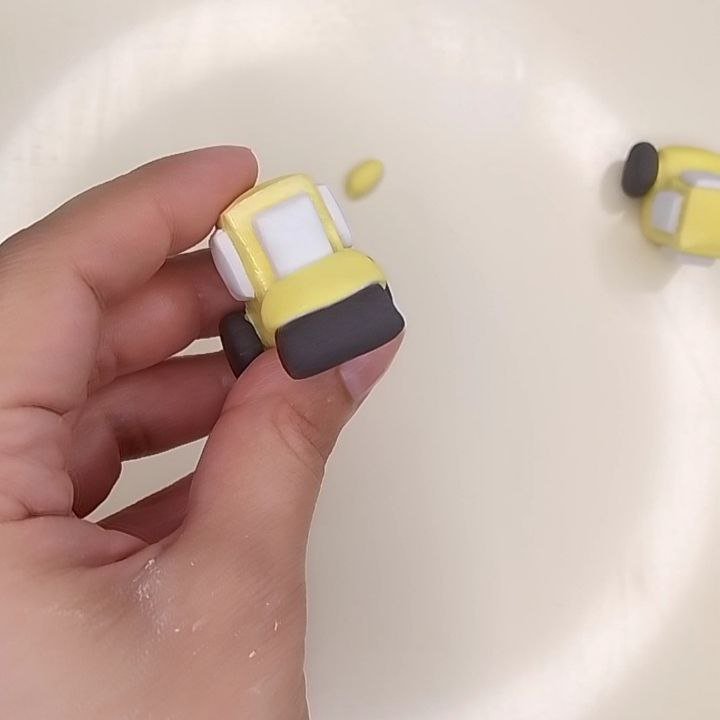
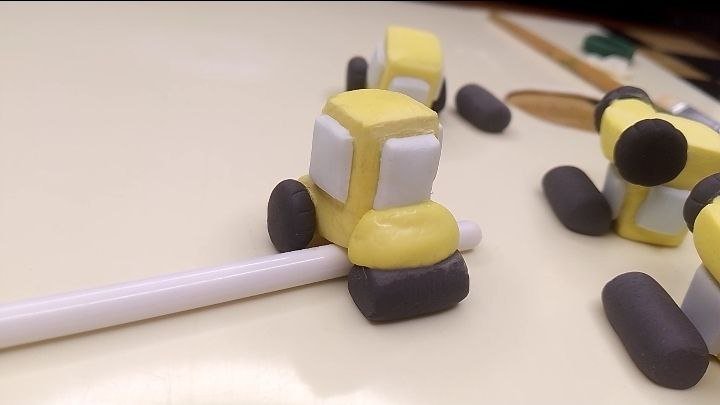
So we'll add glue to the roller and fit it into the space we formed earlier. Since I needed it to stay in that position and not give way under its own weight, I placed one of my makeup brushes in the void below, because the diameter worked perfect.
Versión Español
Así que añadiremos pegamento al rodillo y lo encajaremos en el espacio que formamos antes. Como necesitaba que se mantuviera en esa posición y que no cediera por su propio peso, coloqué en el vació de abajo uno de mis pinceles de maquillaje, porque el diámetro funcionaba perfecto.
 |  |  |  |
|---|
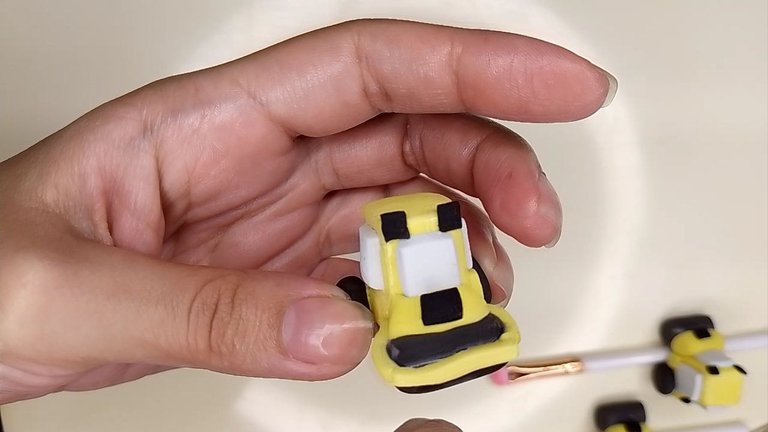
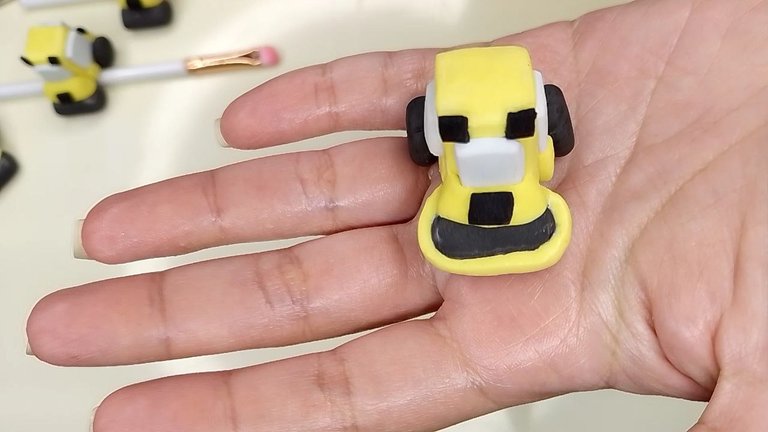
There are only a few details left that I made with some black flexible dough, for the plates, and the top lights, plus the yellow piece that finishes joining the roller with the rest of the machine.
Versión Español
Solo restan algunos detalles que hice con un poco de masa flexible color negro, para las placas, y faros de arriba, además de la pieza amarilla que termina de unir al rodillo con el resto de la máquina.
 |  |
|---|
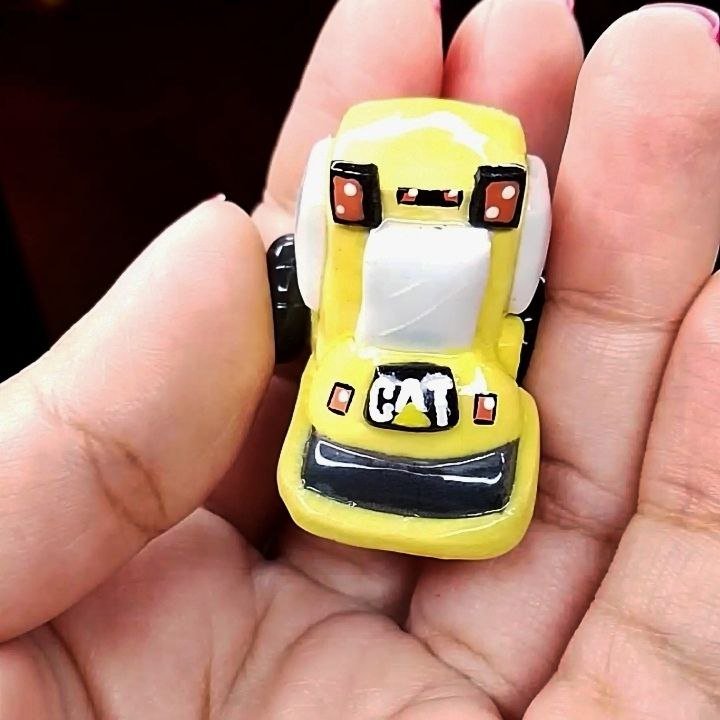
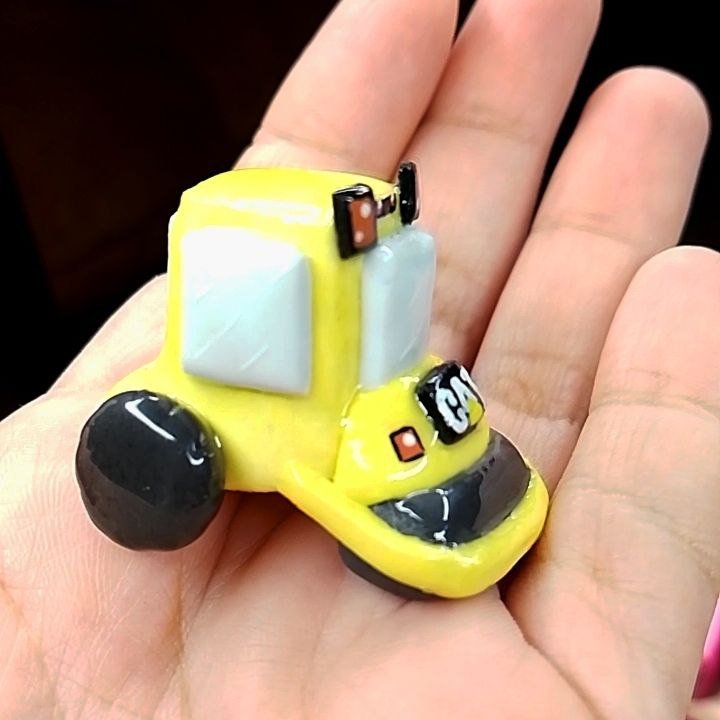
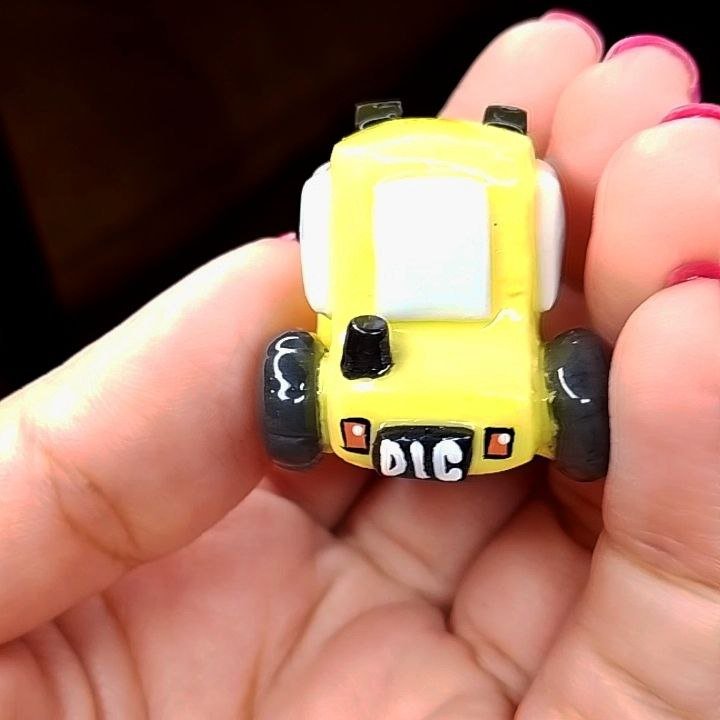
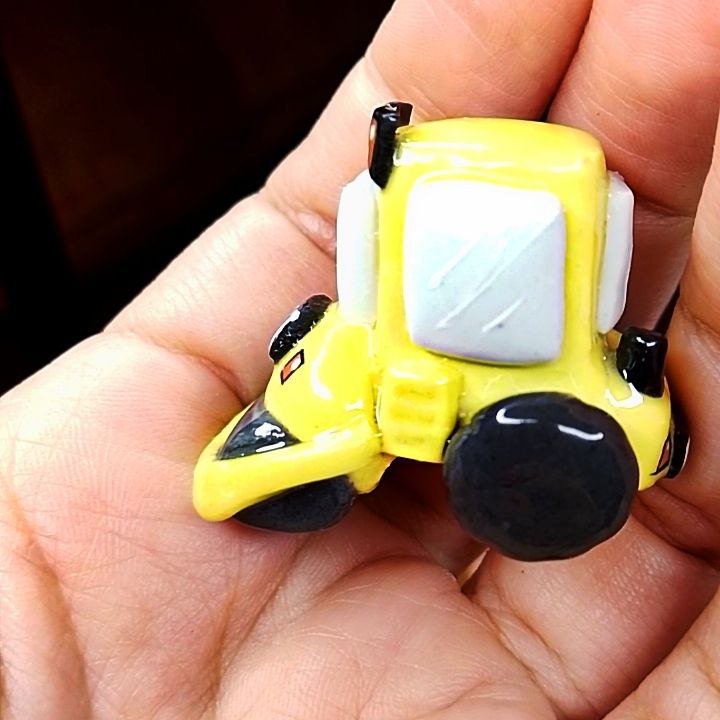
Finally, I did the painting details, such as the Caterpillar logo, the lights, the reflections on the cabin windows and the plate with the initials DIC (Dean of Civil Engineering). And to seal it and give it a glossy finish I used top coat (yes, the one for semi-permanent nails) and cured it in a lamp and that's it.
Versión Español
Finalmente, hice los detalles de pintura, como el logo de la Caterpillar, las luces, los reflejos en las ventanas de la cabina y la placa con las siglas DIC (Decanato de Ingeniería Civil). Y para sellarlo y darle un acabado brillante he usado top coat (sí, el de uñas semipermanentes) y lo curé en lámpara y listo.
 |  |  |  |
|---|
This was a laborious design but one that I would do again without hesitation, I loved every step and every detail, it made me really happy.
Versión Español
Este fue un diseño laborioso pero que volvería a hacer sin dudarlo, amé cada paso y cada detalle, me hizo realmente feliz.
¡Muchas gracias por leerme!
Thank you so much for reading me!
Own photographs, taken with my Tecno Spark 10C.
Translated to English with DeepL. Versión Español
Fotografías propias, tomadas con mi Tecno Spark 10C.
Traducido al inglés con DeepL.

Banner creado por mí en Canva / Banner made by me in Canva


