Heeeyho Readers! A pocket-knife is going to Australia!
Restoring and modifying pocket-knives has always been a hobby. Working on them is a great way to develop new skills while it brings back to life those neglected knives. Each new project tells a story that, one day in the future, I'll look back and think: "Oh, wow! Look how far we've got."
The other day, however, a friend from Australia reached me out eager to buy one of my knives. His enthusiasm caught me by surprise because never before have I thought my crafts had any commercial value. As a successful entrepreneur himself, he surely wanted to prove me wrong. Problem is — selling a knife from my personal collection is out of question. No way, Jose. Negotiations went back and fourth. Finally, I offered to customize a brand new knife and make it unique. He agreed.
The challenge
We picked a quite decent Brazilian-made pocket-knife produced by Tramontina — a classic design that's produced the same way for many decades. The blade is stainless steel, which is not super unique like damasco, for example. It's good enough. What make these knives cheap are certainly the plastic scales imitating (very badly) deer antler.
Here's the picture before stripping the thing apart.
Yes, the scales look cheap and certainly don't do the blade any justice. The first step is to remove the rivets to evaluate the rest. Mass-produced knives, although decent, tend to have evidence pointing at where the manufacturer cut on costs.
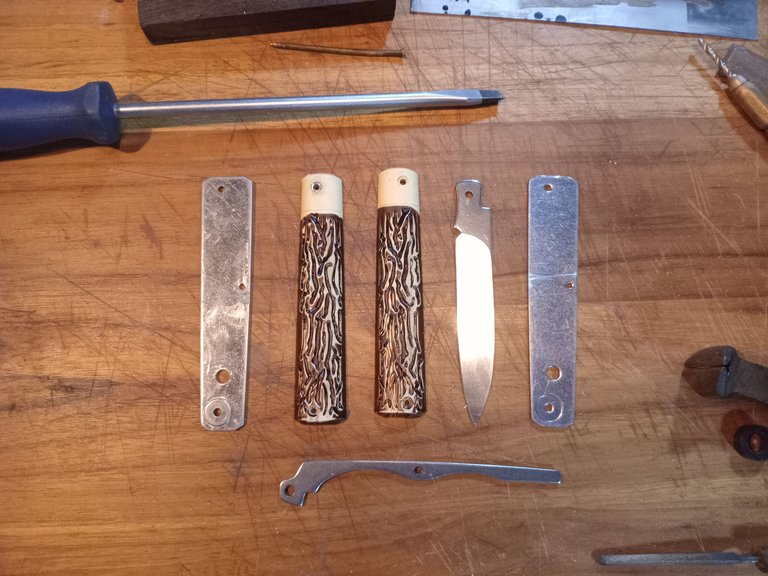
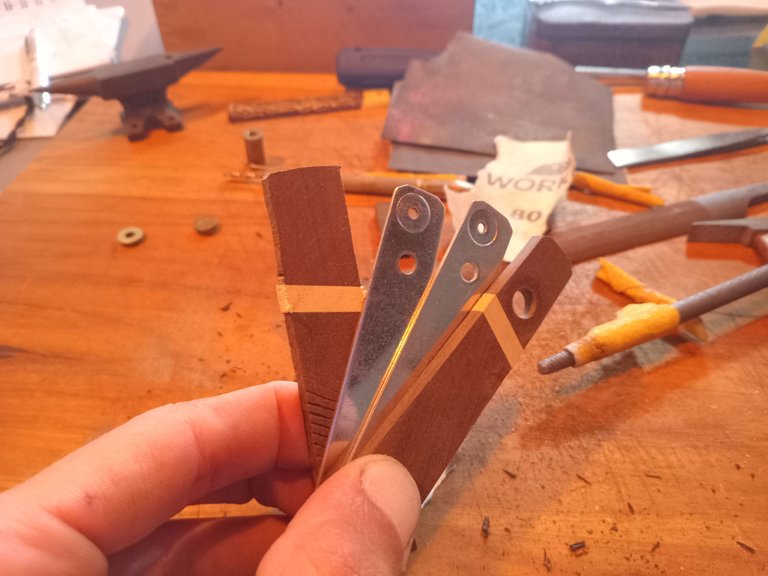
The anatomy of a single-bladed pocket-knife is pretty simple: two scales, two liners, a blade and spring all riveted together. The spring and liners do have stamping marks at the edges (expected), presumably because they press dozens of pieces in one punch without giving any finishing afterwards. We shall rectify that.
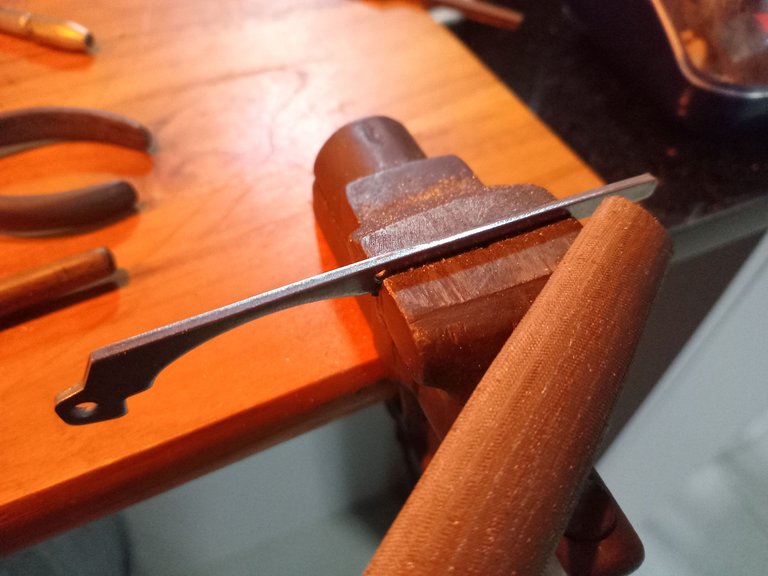
I bring the spring to the vise to file the edges, then sandpaper down to 1200 grit to create that super smooth edge we see on higher end knives.
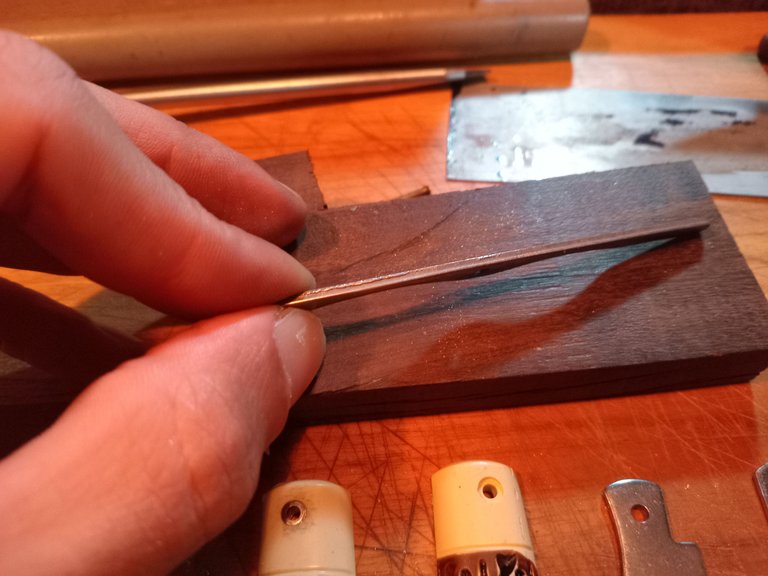
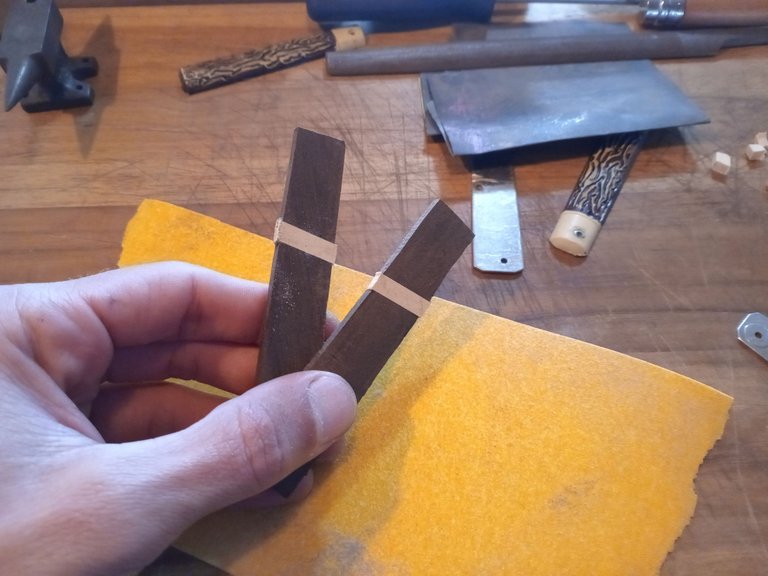
With that out of the way, the fun begins. More careful readers are aware of the insane amount of sandpapering that goes on to make wooden scales, so I'll skip the details.
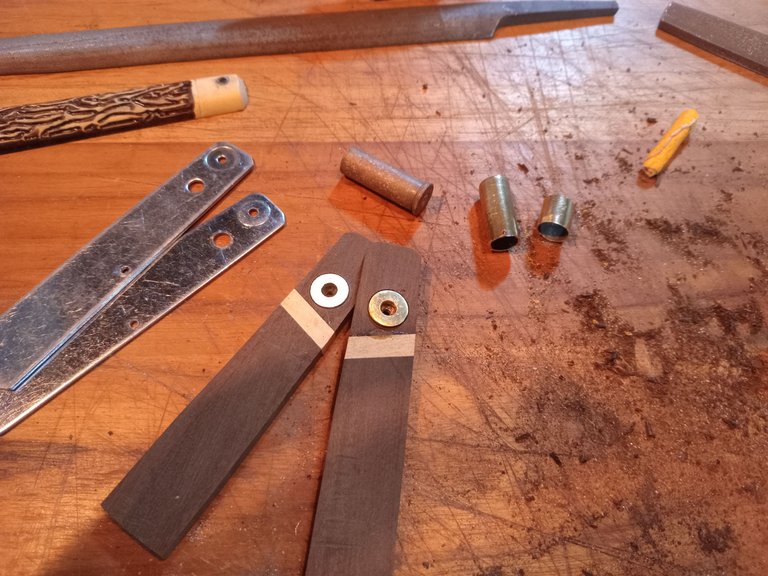
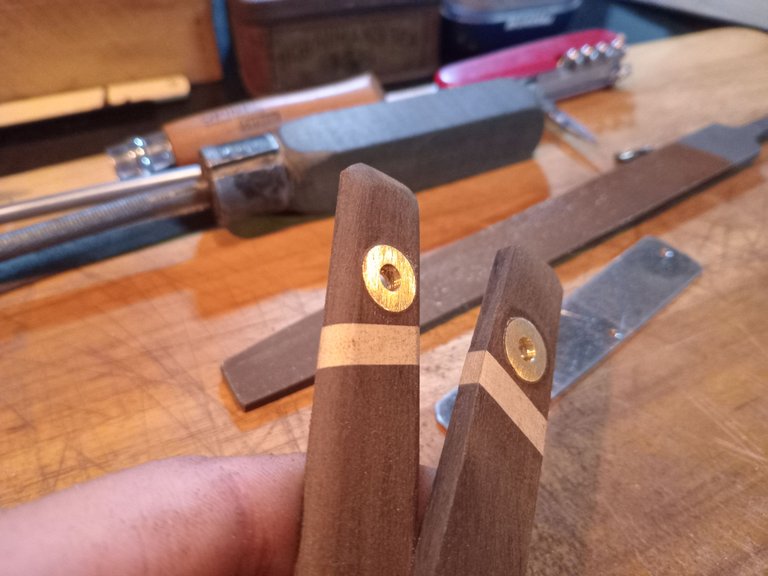
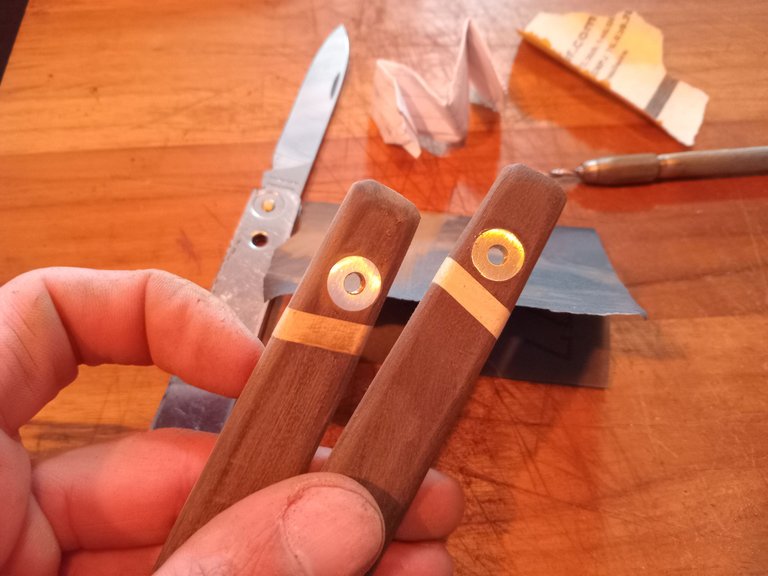
I'm using the same type of wood as the other projects because that is what I have at home, unfortunately. This time, however, I envision a brass detail made of upcycled brass cartridges. No idea if the concept will work at this point.

Do you see the tiny crack on the wood? Yup, that forces me to add a cross section to join multiple pieces together to make a scale. In other words: I couldn't cut the scales in one single piece because of a series of internal cracks in the block of wood. Sometimes we gotta adapt along the way.
Shaping is the hardest part. One mistake here ruins the entire work, so better take it slowly. I keep on working a little bit each day as an exercise to control anxiety. Are you anxious too? One great exercise that is, leaving stuff to 'continue tomorrow' not procrastination. Either that or I end up entering a weird hyper focus state that'll make me work non-stop until it's finished, which is not healthy at all.
I'll let the pictures tell the story.
Later, my friend and I engaged in a conversation about the value of a handcrafted item. For some reason I felt weird to charge for my work from a dear friend (I'd rather gift him the knife). But he insisted.
We both agreed that, even if I copied the exact same design, the two knives would never be equal given recreating the same lines by hand is virtually impossible. More or less like a brushstroke on canvas won't ever be equal. "Charge for the uniqueness", he said. In the end, I concluded that he was not simply purchasing a knife from me, but was indeed planting a seed in my mind.
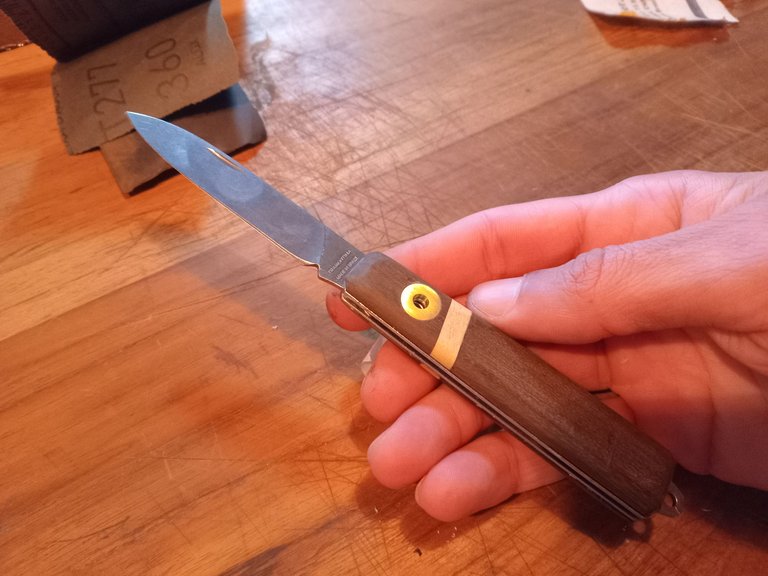
Fourteen hours of labor later and the scales are finally in place. Final steps involve a bit of... guess what?! More glorious sanding. I decide to hydrate the wood with machine oil instead of cyanoacrylate (super glue). There are many ways to finish wooden scales. Very thin machine oil seems to work on this particular wood and should be available anywhere in case my friend has to bump the finish in the future. Other oils, such as tung, linseed, olive, walnut, etc work too. Machine oil doesn't make the scales super duper shiny as something like bee's wax would, but I don't have any wax to try out.
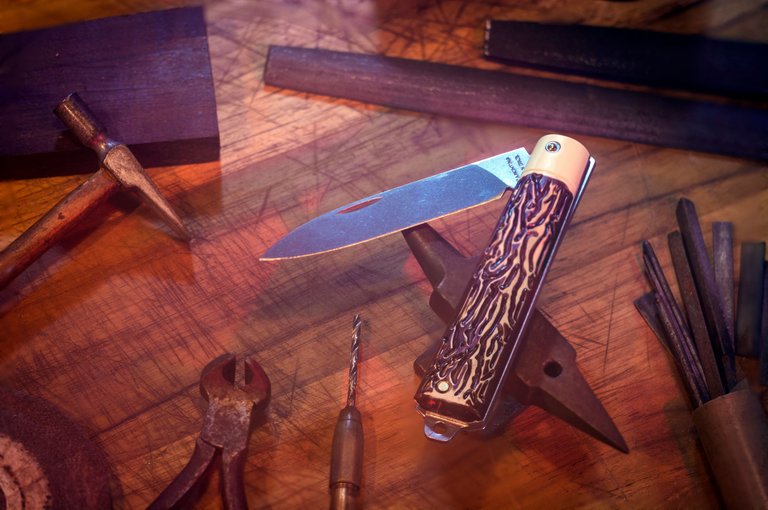
The end result is shown below. There's room for improvement, as always. The darker colour after applying machine oil looks amazingly smooth. I like it.
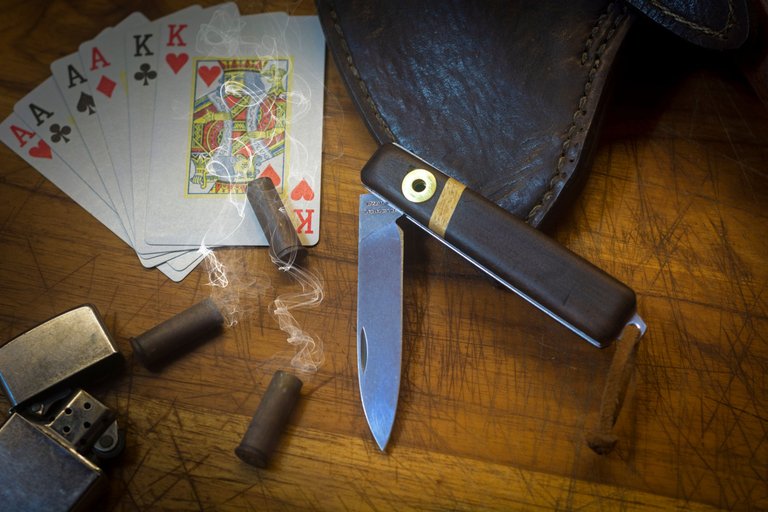
A piece of leather is arriving on Friday. Let's see if I manage to make a pouch for this knife. It'll be my first time working with leather, so wish me luck.
**Are you into handcrafted stuff? What attracts you to that kind of product over some other commertial ones? How do you evaluate suck work?
Your insight is very much appreciated.
Peace.
If you enjoyed this post consider leaving your upvote for a hot coffee.
Find me on Twitter: https://twitter.com/mrprofessor_
~Love ya all,
Disclaimer: The author of this post is a convict broke backpacker, who has travelled more than 10.000 km hitchhiking and more than 5.000 km cycling. Following him may cause severe problems of wanderlust and inquietud. You've been warned.