So, I'm sure we've all seen folks with fancy tables that have TVs and/or giant monitors recessed inside them, acting as digital battle maps, but I'm not that rich.
What I do have is a bunch of ink, a bunch of printer paper, and a printer.
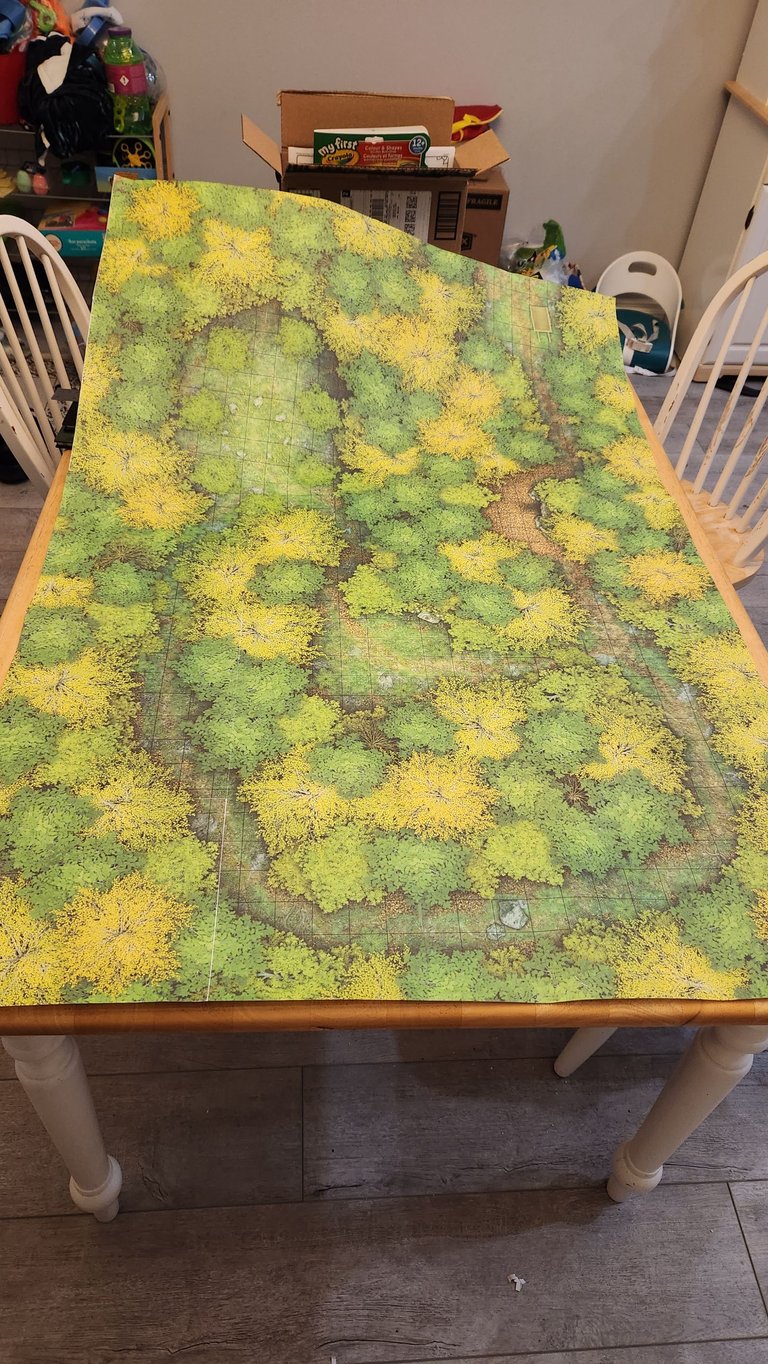
This Sunday was the last D&D session we could fit in prior to my wife's due date for our baby, and I wanted it to be extra cool, which is part of why I went to the effort to assemble this behemoth.
Put together, it spread across almost the entire surface area of my table, and I think it looked pretty great. I got a lot of compliments on this, and the game itself was a ton of fun for everyone, but I'll talk about that in a different post. This is about making cool maps!
If you've tried to print battle maps yourself, you know first-hand how much of a pain in the rear it can be. They just do not print well if you take a pdf or jpg and hit 'print' without some fiddling about.
How I did it
So, how'd I manage this? Let me walk you through it!
For some images, you'll have to manually adjust the scale. I thankfully didn't have to do that, but if you do, you would want to open GIMP, Photoshop, or your image manipulator of choice, and select Scale Image.
Because battle maps are typically a 1-inch grid, you'll want to set the Units to "Inches" and then you can basically count the squares for Length and Width, and set the values appropriately.

With that done, you can save the image as a PDF. This is crucial - I have tried a bunch of times to avoid making these into PDFs and so far they've all failed. PDF is king for what we're about to do.
With our image sized correctly and converted into a PDF, it's time to dance with the devil and download Adobe Acrobat Reader. It's possible if you have another dedicated PDF Reader you could get away with that, but I know for certain that the browser-based options don't cut it. We need the additional options that Acrobat provides.
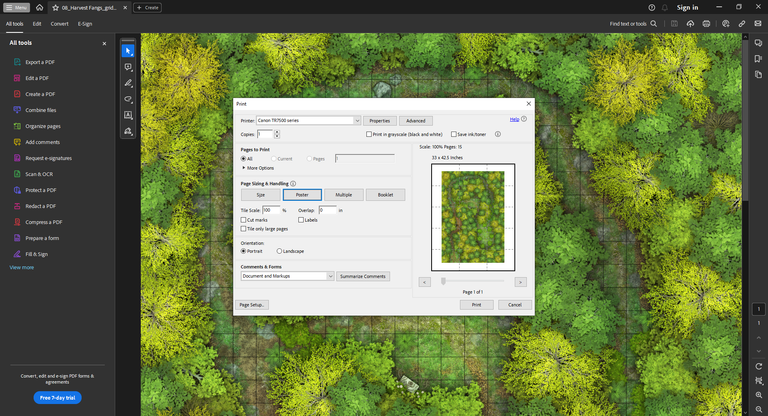
In Acrobat Reader's print options, we have a handy "Poster" option, which is going to cut the PDF image into page-sized sections and add some 'cut' and 'paste' text to help you re-assemble them. In this case, it claims we'll be using 16 pages to complete the posterization. I found that to be a lie. My printout for this was a total of 30 pages, so keep in mind that this is a 'best estimate' and you might find the actual print job is larger than you expect.
Once you have finished the print however, you'll be left with a bunch of pages that you can then assemble together into a coherent image.
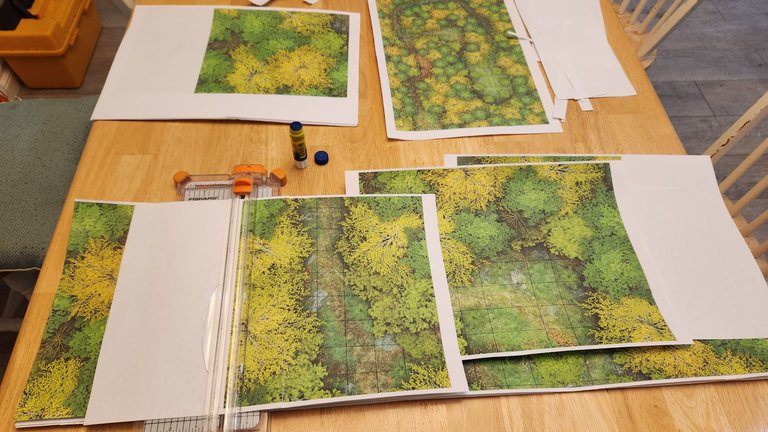
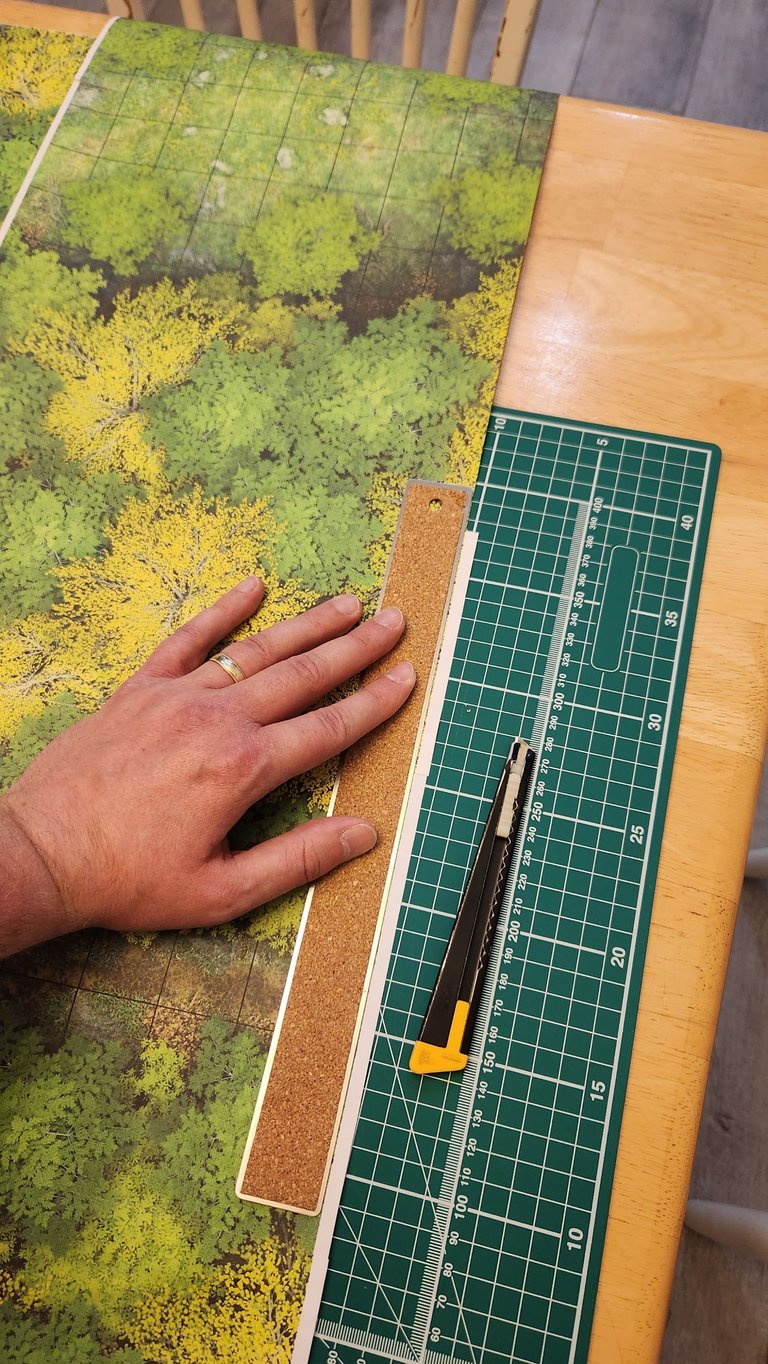
I very highly recommend the ubiquitous paper/photo cutter that you can find on amazon, but in a pinch a utility knife, a ruler, and something to cut on works just as well... and depending on how well you plan ahead, you might end up needing those tools anyhow.
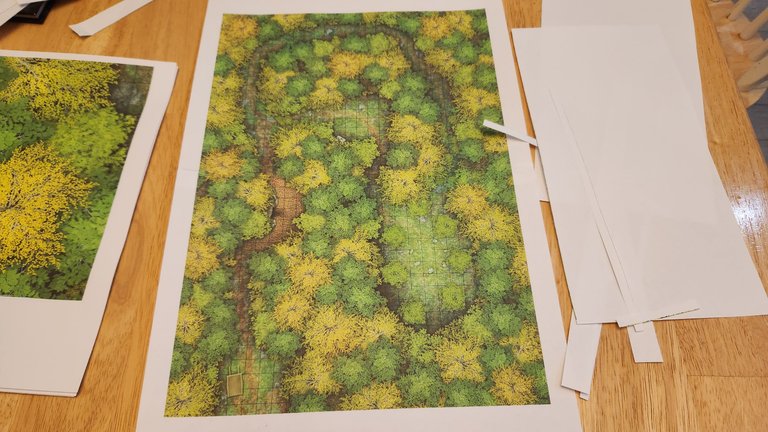
The process here is pretty simple. Because it chopped my image into 5 pages per row and 6 rows, I just had to cut off the excess paper on the right side of every page. The white lip on the left of all but the first page is needed to glue onto.
Which ends up making you strips of the image like you see at the top of this photo:
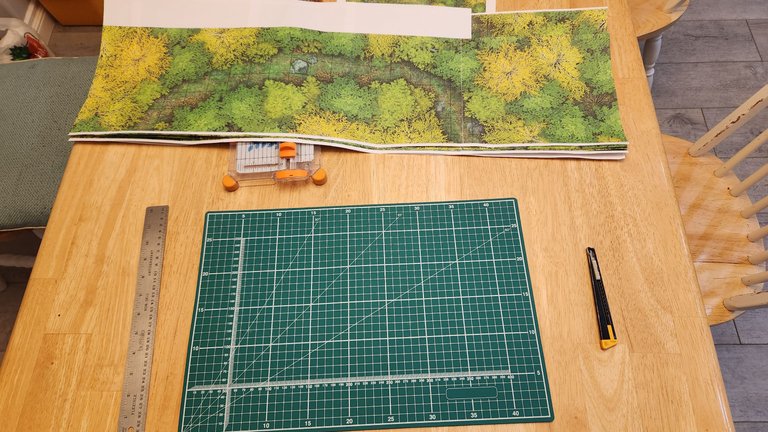
My five pieces of paper, trimmed and glued, assemble a single band of the overall image.
With my rows assembled, it was time to now stitch them together. I had a pretty small band to glue on, so this was a point of weakness that I ended up having to support on the non-printed side with some extra strips of paper and tape.
The first step was to trim the bottom white band, which I did with a utility knife and a ruler.
I did a smaller posterized printout too, which was just two pages that I had to stitch together so I had a reference to look at when I was rebuilding the image. This was super handy, since at first I had no idea what part of the map I was looking at when I went to start creating my rows. Definitely recommend having something like this on hand (and it worked great for DM notes)!
All assembled, it was a gigantic battle map and it honestly worked great at the table and looked really nice! It was a lot of work cutting down the 30 pages, but having done it once I think I could probably do it in half the time for future assemblies. It took about 3 hours total for the entire project, from getting the image, ensuring it was sized correctly, getting Acrobat Reader, printing it, cutting, and gluing. Not bad, and I had some great tunes and fun with the kids while I was doing it.
Will I do this again?
Yeah! Almost certainly! I don't think I'll print quite as big of a map next time... but I really loved how this turned out and it was a lot of fun to make. I'm also a big fan of the traditional Chessex Mat with a bit of marker - it doesn't always need to be fancy - but I think there's a lot of potential here and some reusability if you plan it out well.
I honestly think that the next thing I print like this might be a small building or group of buildings... as that would let me cut them out individually, stick them on some construction paper for a bit more solid of a base... and then move those around anywhere I need them to be.
If you try this out, please let me know how it goes for you! I've found that most of the maps I've bought recently have been already sized correctly so that makes this a pretty easy job... but your mileage may vary so I'd be really interested to hear about anyone else's experiences with this!


Join the Worldbuilding Community!