Good day dear mates with this post I'd like to open series about CI/CD, IAC and server related topics which I've already mentioned in my post about my New Year's resolutions Of course maybe not all of my posts will go in timeline order or from easy to hard order but all of them I'll put in the tail at the bottom of this series posts.

Also please consider that most of this let's call it tutorials will be created using mostly Yandex cloud and other availiable for me platforms. And please remember that in current moment ASW,Azure, Google cloud are mostly unavailable for me.
Another one important point that if you have suggestions or critic for steps in this series I'll be glad if you add them in comment section and I'll of course change or update posts if it'll be necessary. The next one important thing that steps from this tutorial you can repeat with VPS created on any other available for you service! And yes I remember about security but for more clearance I'll show some private keys and creds which were created for showcase.
Intro
In first post I'd like to write just a simple example of CI/CD pipline with gitlab. Here I think that it's needed to separate tutorial for several sections.
It's creating gitlab project where will be highlighted not only just a simple creation of project but registration of gitlab runner.
In other one section I'd like to describe how to create VM - virtual mashine on Yandex cloud ( for example) adding ssh keys to it.
Another one section to create simple .gitlab-ci.yaml file. And just an example files of index.html and Dockerfile.
And of course I'll describe how to add variables to gitlab pipeline settings.
So let's start!
Creating VMs on Yandex cloud and adding ssh keys
For this post where I describe how to implement CI-CD for us will be needed two VPS. First of them we'll use as a Gitlab runner and the second one we'll use to deploy example app.
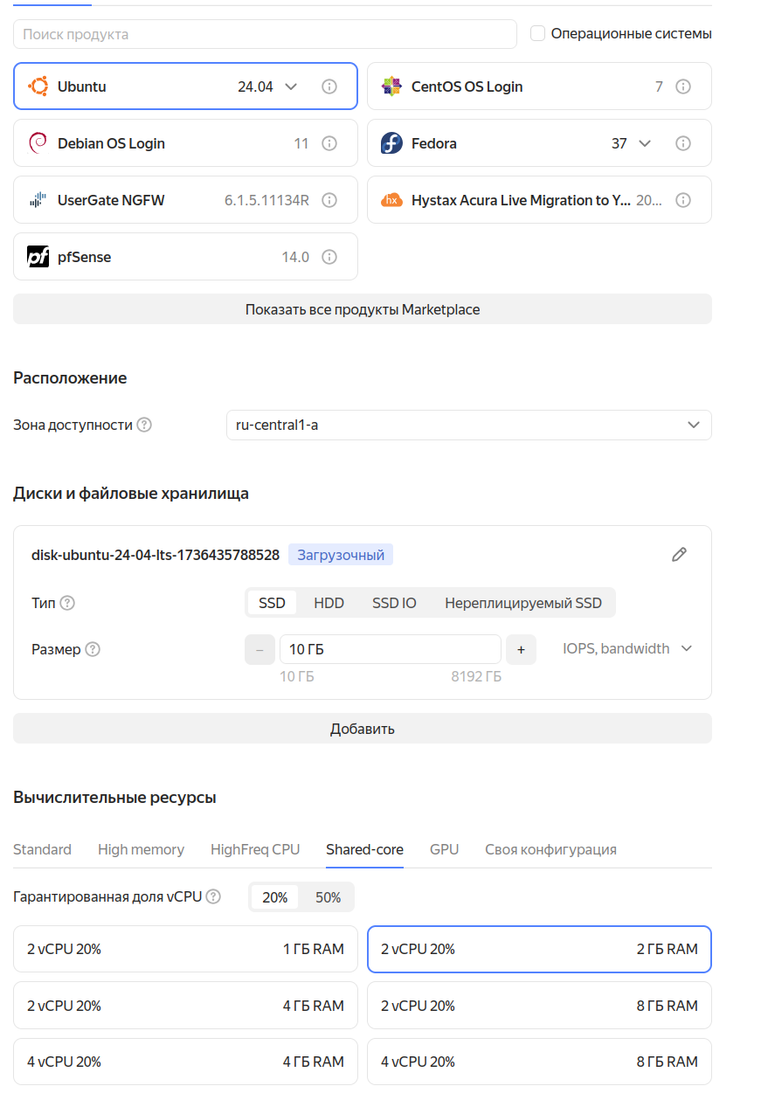
As so as I use for it Yandex cloud to creat VPS I'll describe some steps more detail. So you need to select Create virtual server Then needed to choose OS, zone of availability, type of hard disk.To reduce cost it's better to take HDD coz it's not critical for Gitlab runner. At resource section you can choose Shared-core and minimize availability to 20% or 50% and number of CPU and RAM.
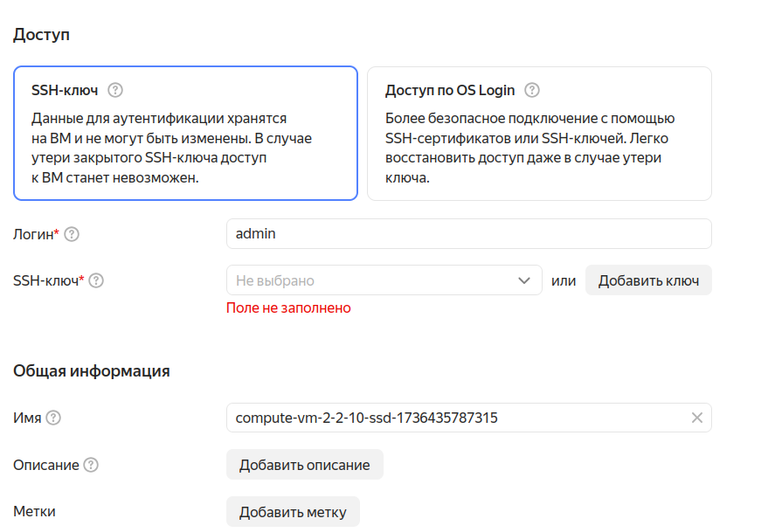
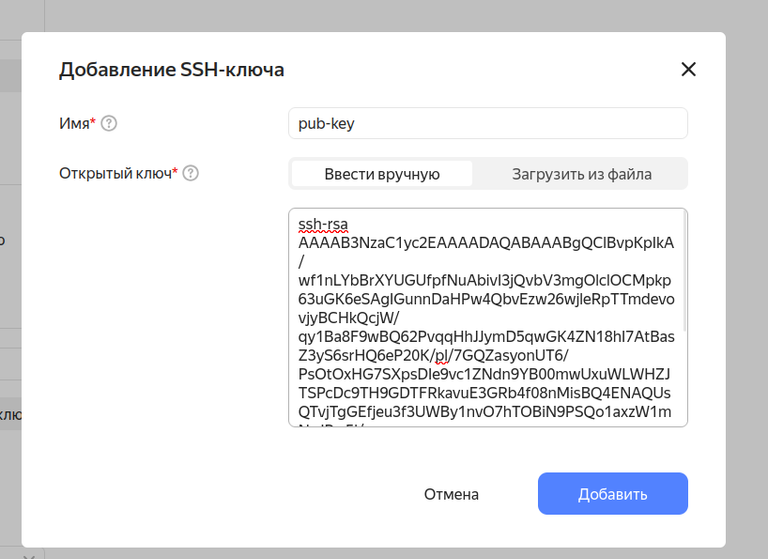
Then choose access via ssh-key. After what add username which you'll use to login and public part of shh-key which can be get with command
cat ~/.ssh/id_rsa.pub
Then push create VM and whait until provisioning will be finished.

Copy ip addres and with command shown bellow you can get access to your VM via ssh.
ssh -l admin 84.252.129.182
The same algorithm you can use to create second Virtual Machine for deploy our example app.
Creating Gitlab project
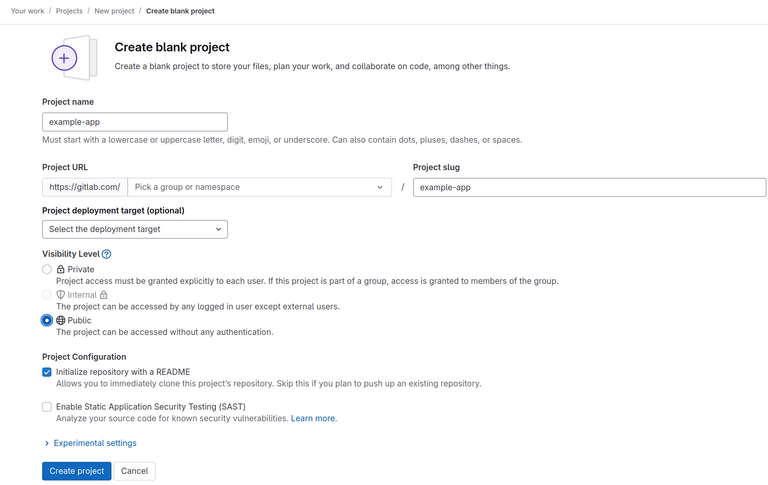
Now let's create new Gitlab project for our app. For it login to your Gitlab account. And push on the left side + and choose New project.

After what select Blanck project.

Then fulfill name of your project and choose private or public project you want to create.
And then you'll get new repository for our example app. Next you'll need to add files to our repo, for it just push +

Registration of Gitlab runner on Yandex cloud VPS
Navigae at the left side menu to Settings.
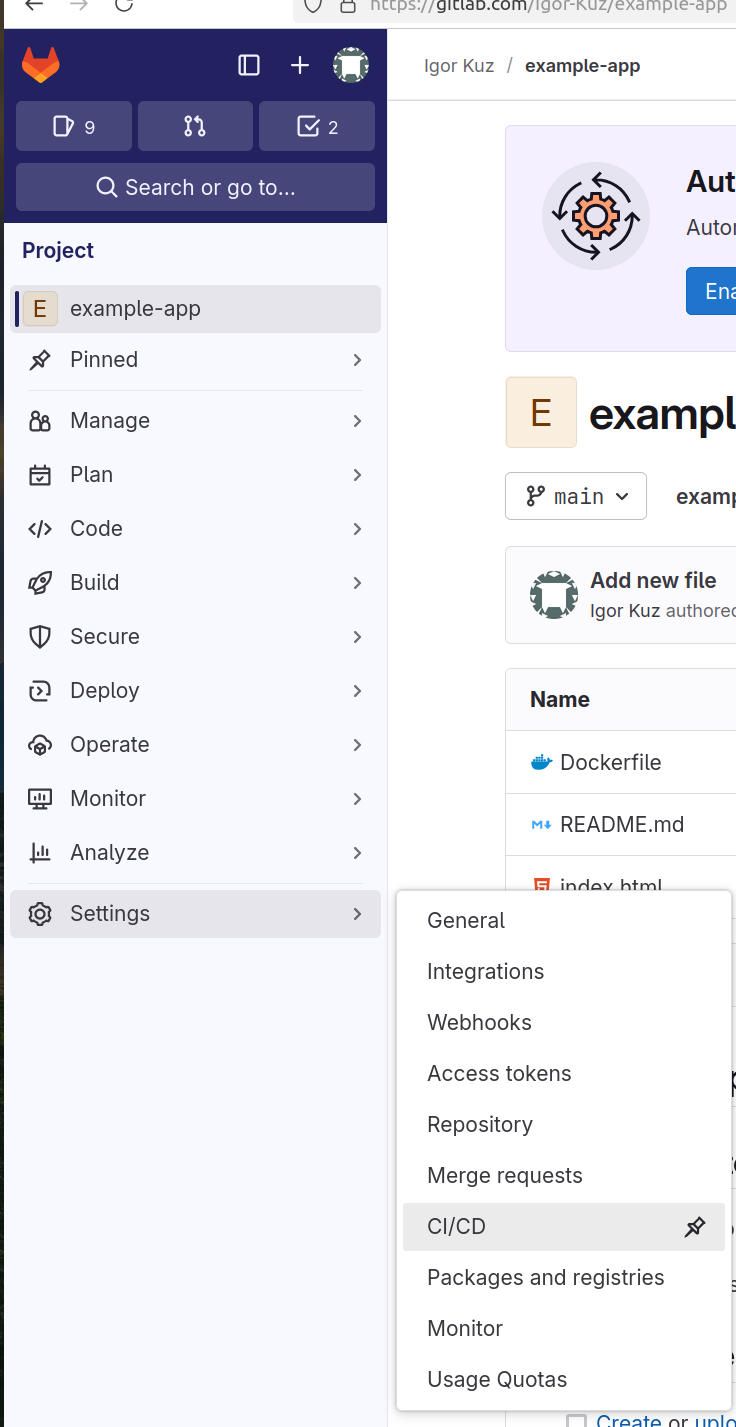
Choose there RUNNERS

and then New project runner
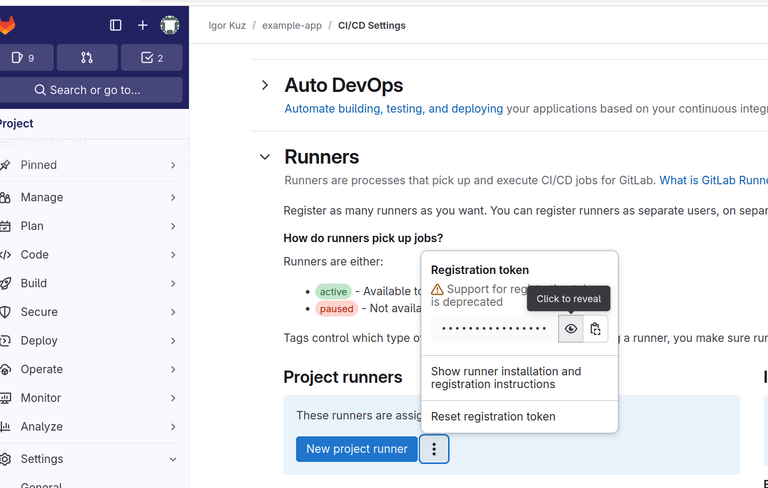
Now about creation of runners. You can create it by following Gitlab docs and create it containers. But I'll use simple runner. For it possible to follow runner installation and registration instructions or just use simple command which you'll find in HINT section at the end of this paragraph.
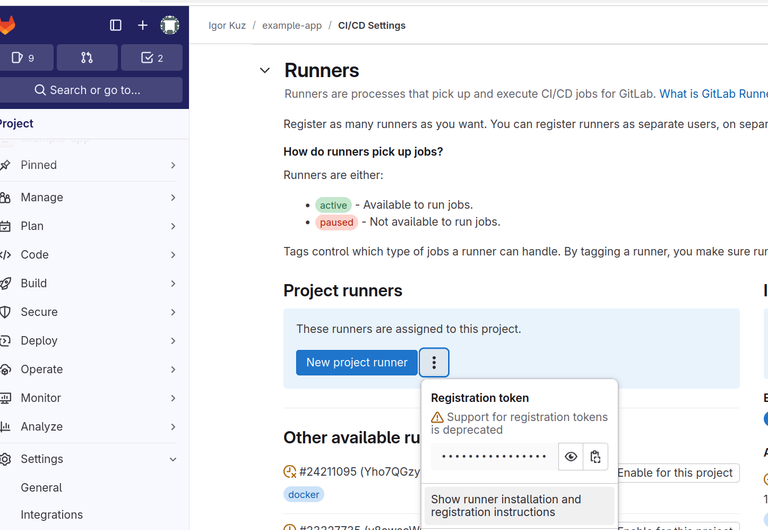
Push Show runner installation and registration instructions
And you'll see instructions how to register new runner for your project.
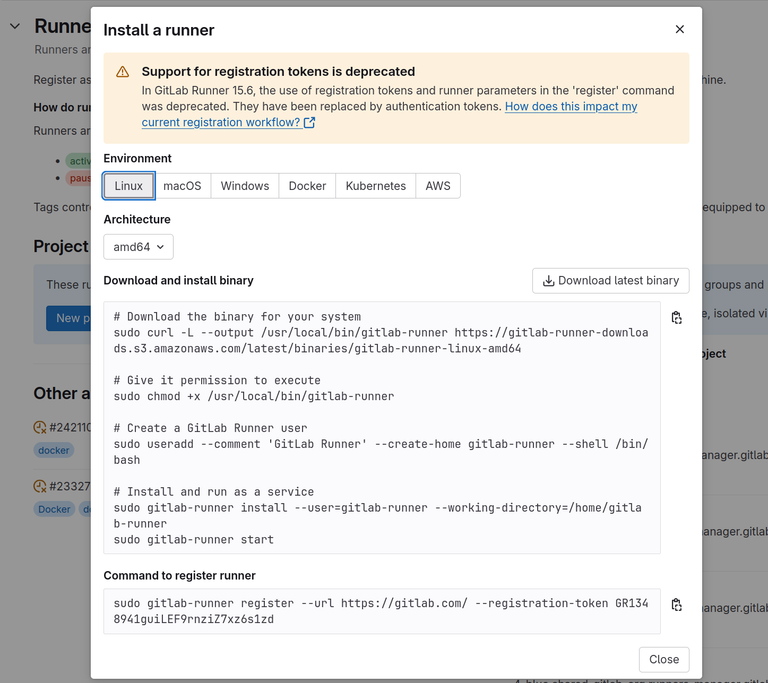
First of all you need to login via ssh to our VPS with command
ssh -l admin 84.252.129.182
Update it, remember we created new VPS.
Download the binary for your system
sudo curl -L --output /usr/local/bin/gitlab-runner https://gitlab-runner-downloads.s3.amazonaws.com/latest/binaries/gitlab-runner-linux-amd64
Give it permission to execute
sudo useradd --comment 'GitLab Runner' --create-home gitlab-runner --shell /bin/bash
Create a GitLab Runner user
sudo useradd --comment 'GitLab Runner' --create-home gitlab-runner --shell /bin/bash
Install and run as a service
sudo gitlab-runner install --user=gitlab-runner --working-directory=/home/gitlab-runner
sudo gitlab-runner start

Check status of gitlab-runner
systemctl status gitlab-runner

Command to register runner
sudo gitlab-runner register --url https://gitlab.com/ --registration-token GR1348941guiLEF9rnziZ7xz6s1zd

Also then you'll need to enter additional info like address of gitlab - https://gitlab.com/, registration-token GR1348941guiLEF9rnziZ7xz6s1zd , type of executor docker name of image
stable

example of config runner file you can find in /etc/gitlab-runner/config.toml

HINT
curl -L "https://packages.gitlab.com/install/repositories/runner/gitlab-runner/script.deb.sh" | sudo bash
sudo apt-get install gitlab-runner
systemctl status gitlab-runner
sudo gitlab-runner register --name My_demo_runner --url https://gitlab.com --token GR1348941guiLEF9rnziZ7xz6s1zd --executor docker --description "Deployment Runner" --docker-image docker:stable --non-interactive
Also you can add to command options --tag-list option and --docker-privileged and it'll looks like
sudo gitlab-runner register --name My_demo_runner --url https://gitlab.com --token GR1348941guiLEF9rnziZ7xz6s1zd --executor docker --description "Deployment Runner" --docker-image docker:stable --tag-list deployment --docker-privileged --non-interactive
Config of registered Gitlab runner you can find at
/etc/gitlab-runner/config.toml
Index.html & Dockerfile
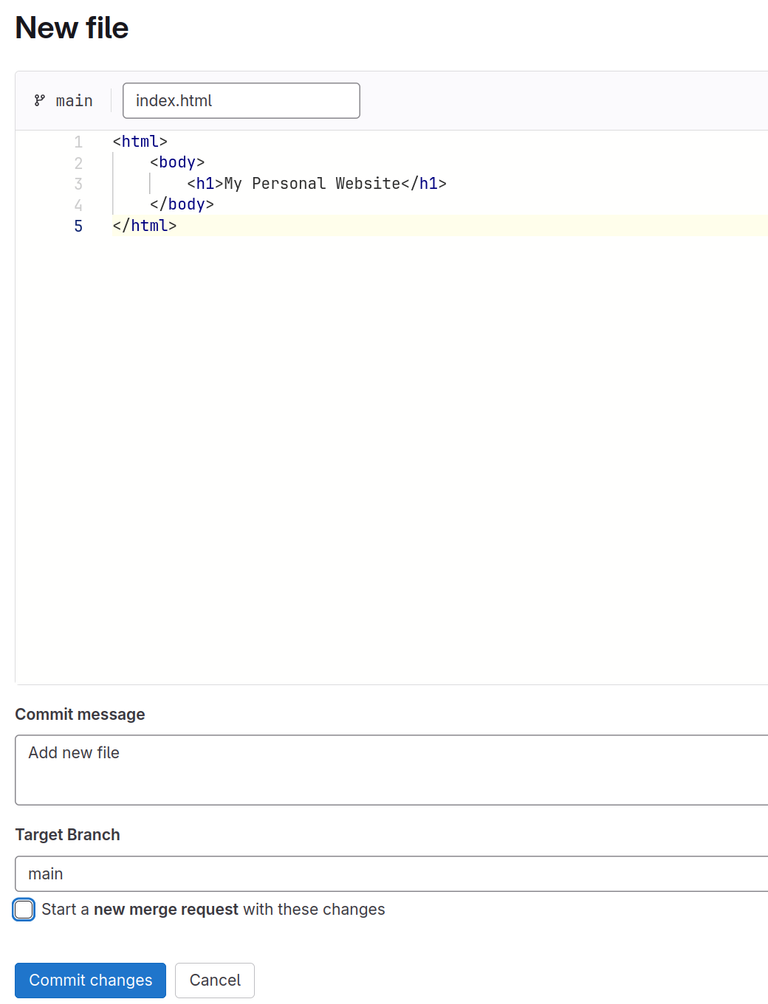
In index.html I just put simple html code for this tutorial
<html>
    <body>
        <h1>My Personal Website</h1>
    </body>
</html>
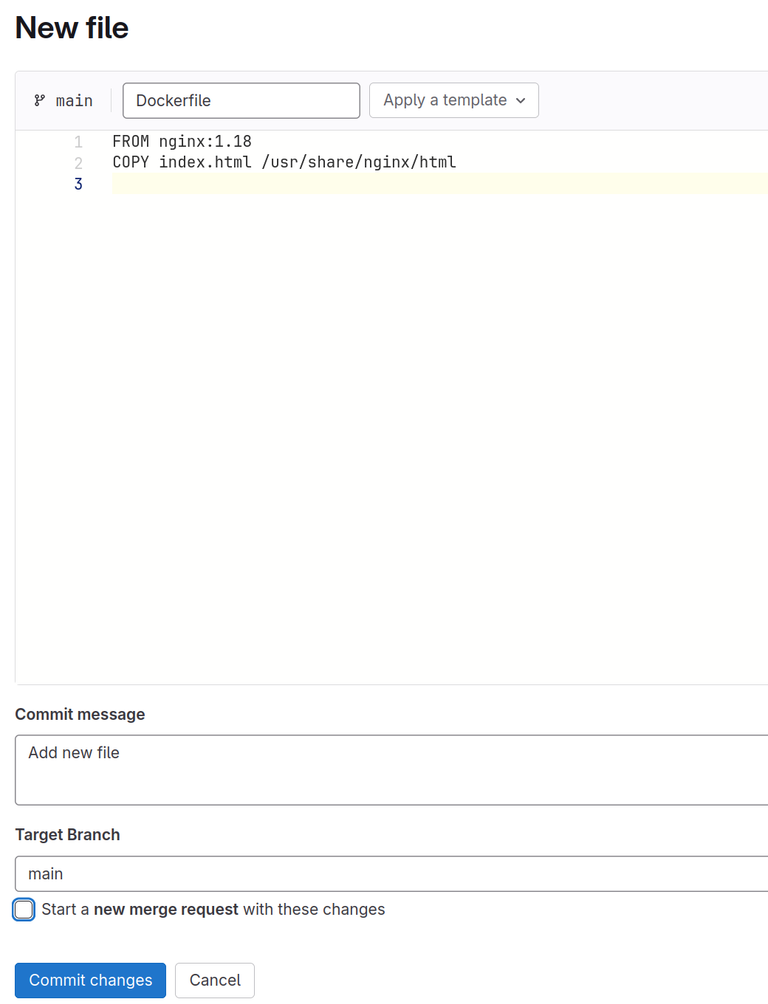
And just a simple Dockerfile for simplifying it consists of 2 strings where The FROM instruction determinates the image to inherit from in our case it's nginx server with tag 1.18 image version. Also if you'd like you can use a latest tag what references the latest Nginx release.
The COPY instruction copies index.html file to /usr/share/nginx/html in the Docker image. This is the directory where Nginx stores static HTML content.
FROM nginx:1.18
COPY index.html /usr/share/nginx/html
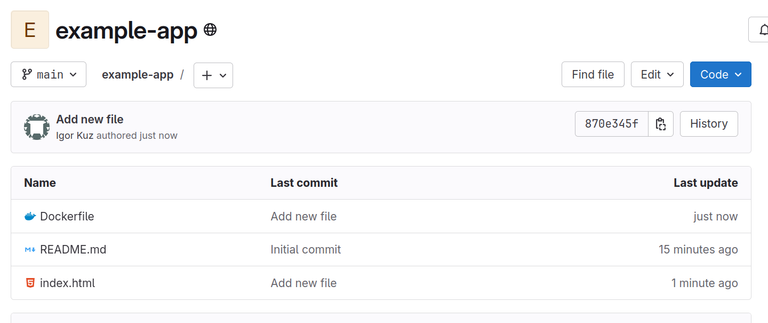
As a result we'll have index.html file, Dockerfile, and Readme.MD
Then we need to add .gitlab-ci.yaml file.
.gitlab-ci.yaml file
In this section you'll find example of simple .gitlab-ci.yaml file where we have just two stages. First of them just build the Docker image and push it to container register. And another one log in to our VPS and deploy there our index.html page.
stages:
  - build
  - deploy

variables:
  TAG_LATEST: $CI_REGISTRY_IMAGE/$CI_COMMIT_REF_NAME:latest
  TAG_COMMIT: $CI_REGISTRY_IMAGE/$CI_COMMIT_REF_NAME:$CI_COMMIT_SHORT_SHA

publish:
  image: docker:latest
  stage: publish
  services:
    - docker:dind
  script:
    - docker build -t $TAG_COMMIT -t $TAG_LATEST .
    - docker login -u gitlab-ci-token -p $CI_JOB_TOKEN $CI_REGISTRY
    - docker push $TAG_COMMIT
    - docker push $TAG_LATEST

deploy:
  image: alpine:latest
  stage: deploy
  #tags:
  #  - deployment
  script:
    - chmod og= $ID_RSA
    - apk update && apk add openssh-client
    - ssh -i $ID_RSA -o StrictHostKeyChecking=no $SERVER_USER@$SERVER_IP "docker login -u gitlab-ci-token -p $CI_JOB_TOKEN $CI_REGISTRY"
    - ssh -i $ID_RSA -o StrictHostKeyChecking=no $SERVER_USER@$SERVER_IP "docker container rm -f my-app || true"
    - ssh -i $ID_RSA -o StrictHostKeyChecking=no $SERVER_USER@$SERVER_IP "docker run -d -p 80:80 --name example-app $TAG_COMMIT"
  environment:
    name: production
    url: http://51.250.7.160
  only:
    - main
Heere I commented tags section coz it's not needed now for but you can untag it if you want to make some more settings for your pipieline.
Installing Docker on VPS
As so as I choose VPS with preinstalled Ubuntu OS I used this commands which i took from official site to install Docker on VPS. And here is the address for reference https://docs.docker.com/engine/install/ubuntu/
# Add Docker's official GPG key:
sudo apt-get update
sudo apt-get install ca-certificates curl
sudo install -m 0755 -d /etc/apt/keyrings
sudo curl -fsSL https://download.docker.com/linux/ubuntu/gpg -o /etc/apt/keyrings/docker.asc
sudo chmod a+r /etc/apt/keyrings/docker.asc

# Add the repository to Apt sources:
echo \
  "deb [arch=$(dpkg --print-architecture) signed-by=/etc/apt/keyrings/docker.asc] https://download.docker.com/linux/ubuntu \
  $(. /etc/os-release && echo "$VERSION_CODENAME") stable" | \
  sudo tee /etc/apt/sources.list.d/docker.list > /dev/null
sudo apt-get update
Install latest version
sudo apt-get install docker-ce docker-ce-cli containerd.io docker-buildx-plugin docker-compose-plugin
Also you'll need to add user to docker. To create the docker group and add your user.
First create the docker group.
sudo groupadd docker
Add your user to the docker group you can via one of this commands
sudo usermod -aG docker admin
or
sudo usermod -aG docker ${USER}
then
su -s ${USER}
Hint
This permits admin user to execute the docker command, which is required to perform the deployment.
Adding a user to the Docker group, grants privileges equivalent to the root user. For more details on how this has an impact on security in your system, see Docker Daemon Attack Surface.
Adding variables
To deploy our app to the second VPS we'll need private part of ssh-key, ip address of VPS and name which we'll use to login.
Navigate to SETTINGS -> CI/CD -> Variables And Add variable SERVER_IP with type Variable, Key: SERVER_IP Value: 51.250.7.160(change for your server IP) Environment scope: All (default) Protect variable: Checked Mask variable: Checked or for example I put it Visible.
Also you need to add Variable
Key: ID_RSA
Value: Paste your SSH private key from your clipboard (including a line break at the end) /n
Type: File
Environment Scope: All (default)
Protect variable: Checked
Mask variable: Unchecked
-----BEGIN OPENSSH PRIVATE KEY-----
your_private_key
-----END OPENSSH PRIVATE KEY-----
/n
Get private part of your ssh- key you can with:
cat ~/.ssh/id_rsa
And finally we need to add a variable with the login user
Key: SERVER_USER
Value: admin
Type: Variable
Environment scope: All (default)
Protect variable: Checked
Mask variable: Checked
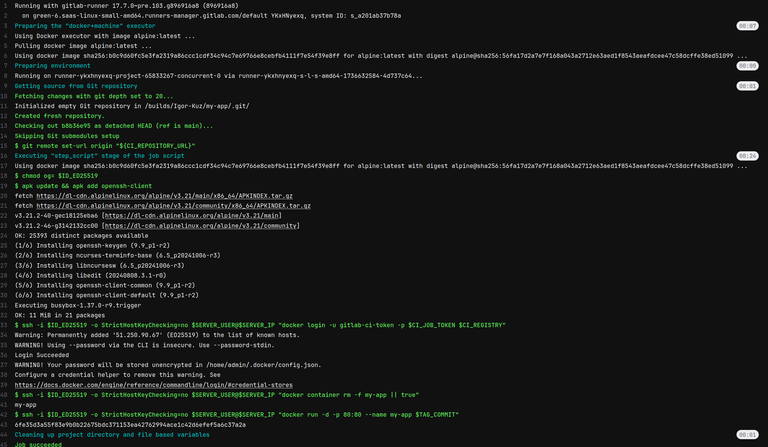
When all is ready you just need to commit some changes in your code for example in index.html and push them to gitlab after what pipiline will start automatically and you see new jobs in Build -> Jobs You can move inside Job and if all was done correctly you'll see that jood was succeed!
Fix possible errors
In my case when I tryed to start pipline first time on new VPS I got error like
admin@51.250.7.67: Permission denied (publickey)

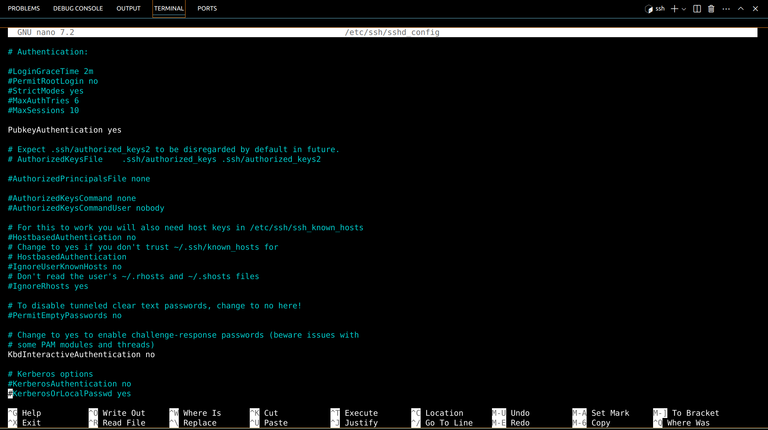
Top fix it I changed parameter PubkeyAuthentication to yes in sshd_config file wih command
sudo nano /etc/ssh/sshd_config
And then after saved it restarted sshd
sudo systemctl restart sshd
So that's all for now. Stay tuned! Yours @travoved