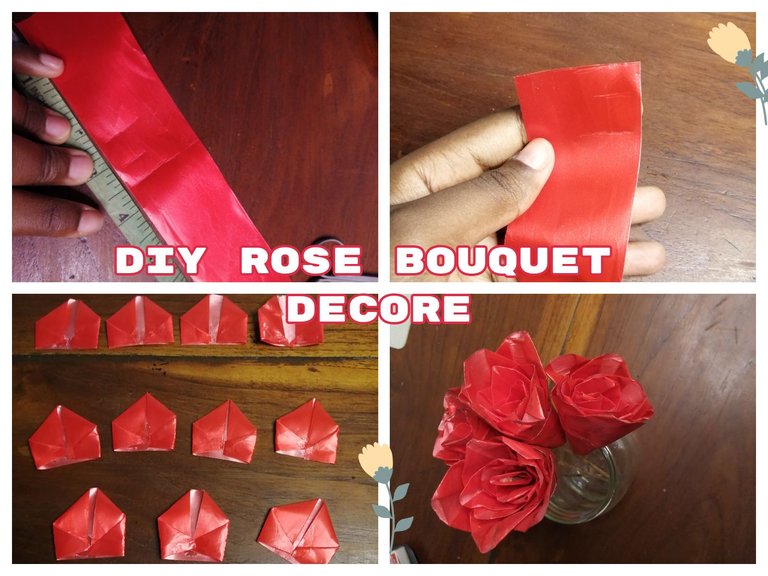
Hola!! to everyone in the creative community, welcome to another post today as i share with you all a go-to home decor and glamour creative process , showing you the step by step method to achieving a last minute bouquete, as you may have sen th rose bouquet has been trending a lot for the birthday photoshoot , this is is inspired by that and could be a way to get a personalized version last minute for your shoot too.
Spanish- Hola!! to everyone in the creative community, welcome to another post today as i share with you all a go-to home decor and glamour creative process , showing you the step by step method to achieving a last minute bouquete, as you may have sen th rose bouquet has been trending a lot for the birthday photoshoot , this is is inspired by that and could be a way to get a personalized version last minute for your shoot too.
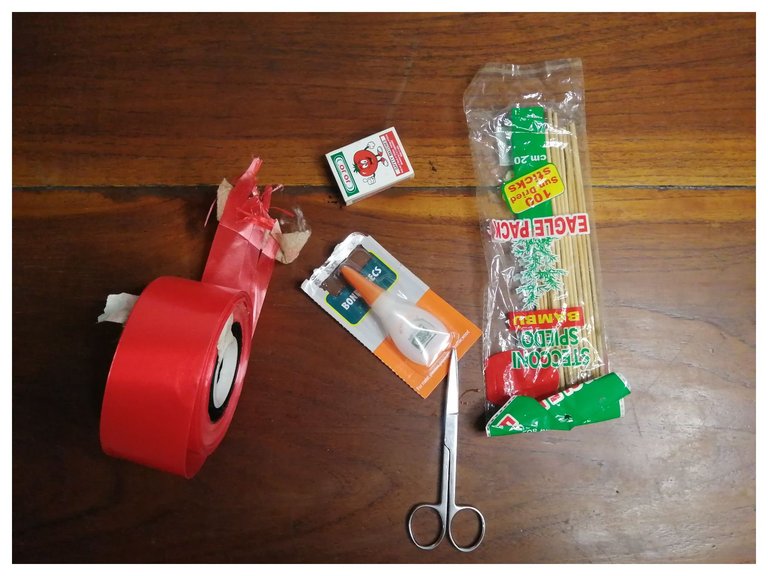
Materials Used
red ribbon {colour of your choice}
super glue
taperule
barbecue sticks
Spansih
Materiales utilizados
Materials Used
red ribbon {colour of your choic}
super glue
taperule
barbecue sticks
STEP-BY-STEP PROCESS
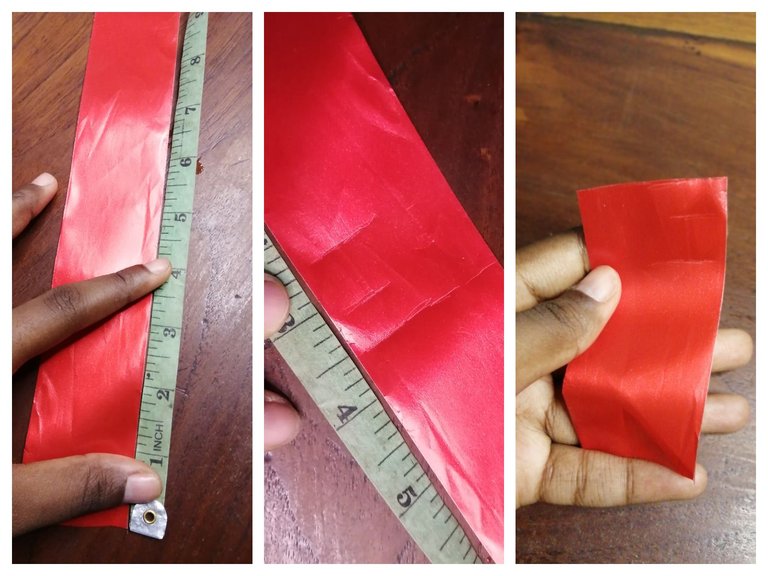
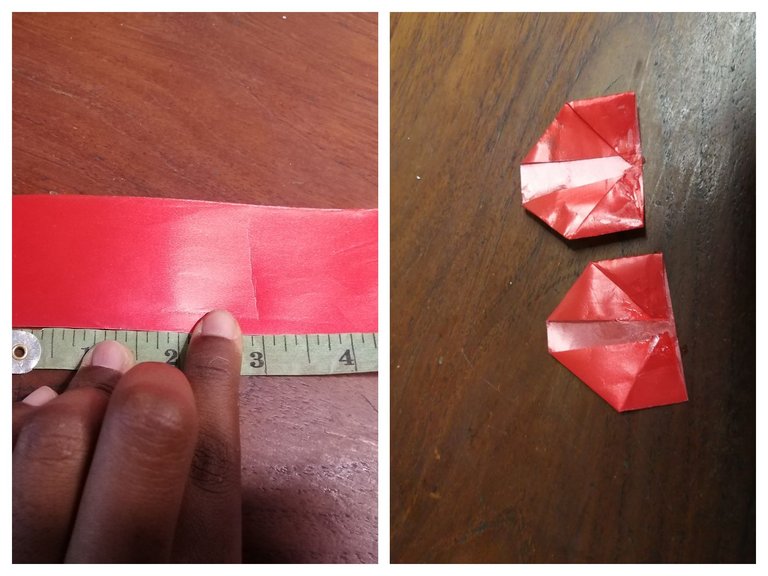
- i first start off with measuring the lenghts of the ribbon i want to use th create the petals, they are going to be of different lengths to acheive the perfect size for the layering, i measure 3.5 inches unto the ribbibon a n cut out about 5 pices, {this lenght is oing to be for the bigger petals} the smaller petals ribbon measure 3 inches in lenght.
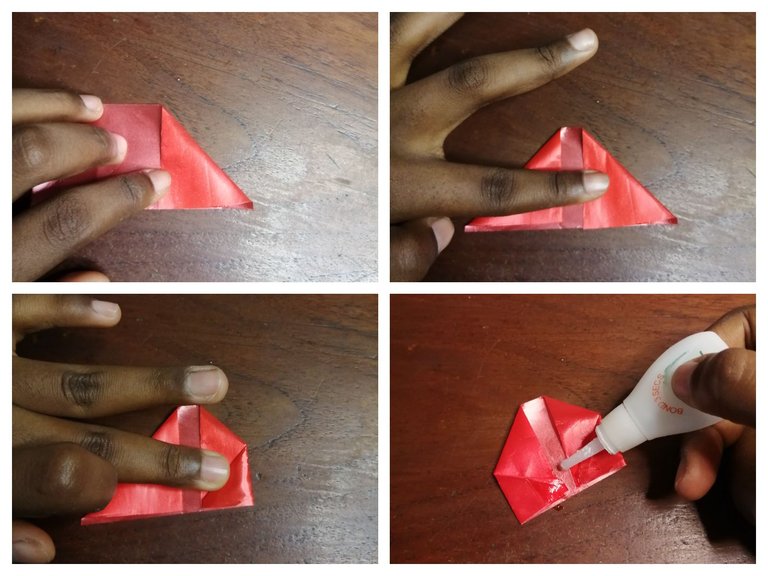
- in my next step i start with the folding of the ribbon to form a petal, starting with the edge of both sides i bend to create righ angle and further bend again to make another right angle at the tip, to secure my fold i use the super glue.
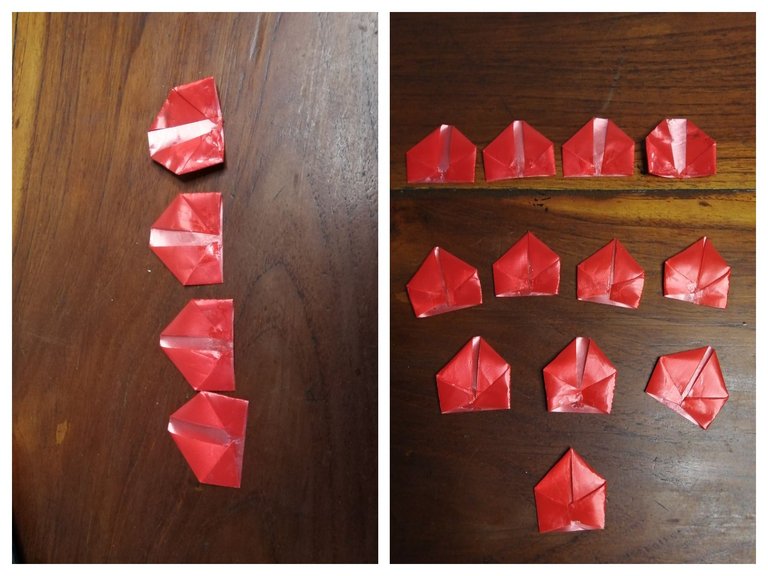
here is a look of the folded petals, consisting of 4 3.5 inch ribbon and 8 pieces of the 3 inches ribbon.

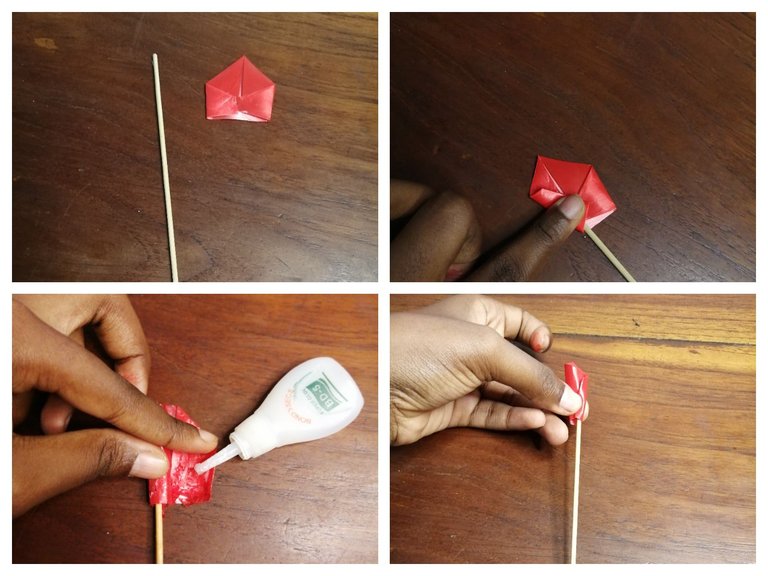
3.after that i began layerig the petals unto the barbeque stick , taking the barbecue stick a tae the 3 inch ribbon and start wrapping unto the stick securing my wrap with glue after each wrap of each petal.

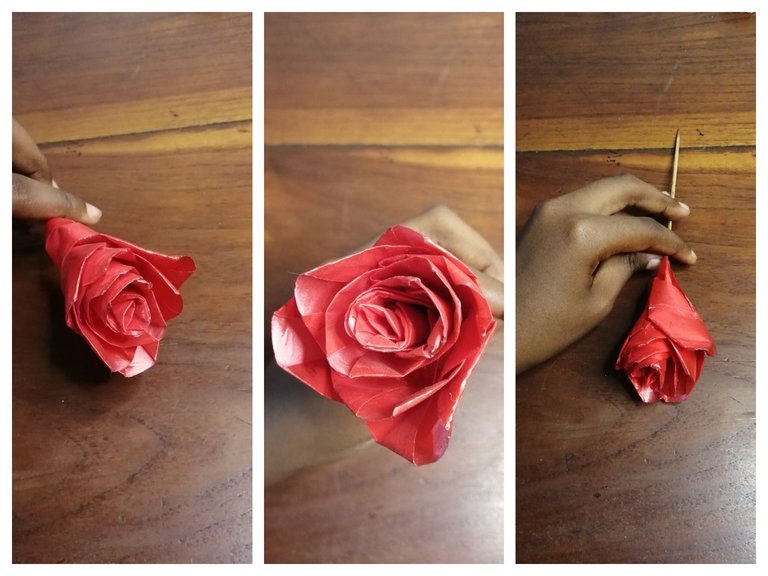
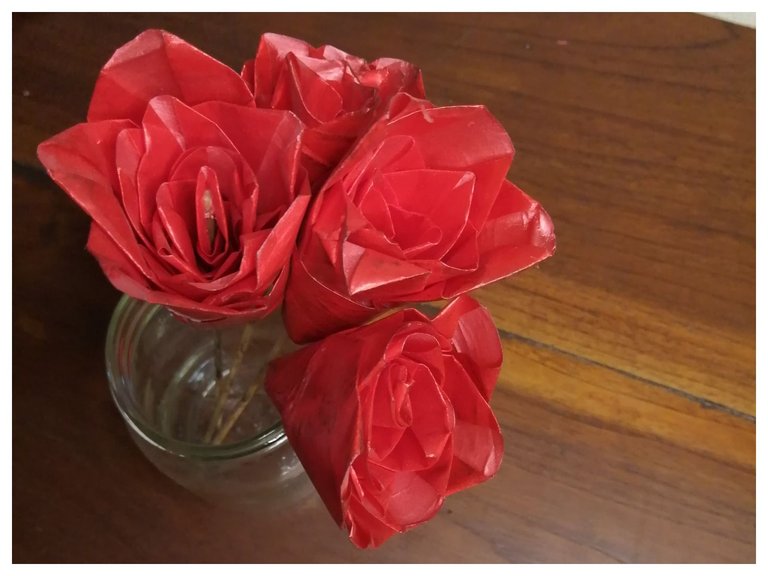
i continue to wrap until my flower is getting bigger with each layer of the petal. i went ahead to make more of my flower using the same method and achieve my final result of the small bouquete in a glass jar.
Final look!

spanish version
PROCESO PASO A PASO
- primero empiezo midiendo la longitud de la cinta que quiero usar para crear los pétalos, van a ser de diferentes longitudes para lograr el tamaño perfecto para la superposición, mido 3.5 pulgadas de la cinta y corto alrededor de 5 piezas, (esta longitud es para los pétalos más grandes) los pétalos más pequeños miden 3 pulgadas de largo.
- en mi siguiente paso comienzo con el plegado de la cinta para formar un pétalo, comenzando con el borde de ambos lados me doblo para crear ángulo recto y doblar de nuevo para hacer otro ángulo recto en la punta, para asegurar mi pliegue utilizo el pegamento estupendo.
aquí está una mirada de los pétalos doblados, que consta de 4 3,5 pulgadas de cinta y 8 piezas de la cinta de 3 pulgadas.
- después de que empecé layerig los pétalos en el palo de la barbacoa, teniendo el palo de la barbacoa a tae la cinta de 3 pulgadas y empezar a envolver en el palo de asegurar mi envoltura con pegamento después de cada envoltura de cada pétalo quid removedor de esmalte para revivir mi paint.i hacer un tono rosa más oscuro para crear una transición en la parte inferior de los pétalos
sigo envolviendo hasta que mi flor es cada vez más grande con cada capa del pétalo. seguí adelante para hacer más de mi flor utilizando el mismo método y lograr mi resultado final de la pequeña bouquete en un frasco de vidrio.
¡look final!
Thanks for stopping by my post today , i hope this diy craft inspires you to make your rose bouquet, leave me your thoughts in comment section below.. and see you next time guys.
Gracias por pasarte por mi post de hoy, espero que esta manualidad te inspire para hacer tu ramo de rosas, déjame tu opinión en la sección de comentarios más abajo... y hasta la próxima chicos.
Traducción realizada con la versión gratuita del traductor DeepL.com