
El asado no solo es un tipo de comida, un modo de cocinar un corte particular de carne (preferentemente vacuna) en una parrilla y a las brasas. Es mucho más que eso. Es un identificativo cultural con el cual implícitamente se designa a un habitante del Río de La Plata (o al menos así era conocido en el siglo XVIII cuando estas colonias dependían de España). Hoy se habla de argentinos y uruguayos.
La cocina no es mi especialidad ni mucho menos (a propósito no logro convencer a mi esposa, estupenda cocinera con experiencia en Europa y especialmente en Italia) a abrir un blog en #HIVE para deliciarnos con sus recetas. Pero yo persevero. Tal vez algún día mis esfuerzos se vean coronados por el éxito. Volviendo al inicio del párrafo decía que mi especialidad no es la cocina. Sin embargo hoy, sin delantal y sin el clásico gorro de chef quiero compartir con todos los #hivers de @HiveFood los secretos -si así se pueden llamar- para lograr hacer un buen asado, con el punto justo de cocción, el tiempo justo y la cantidad de leña y carbón también justos.
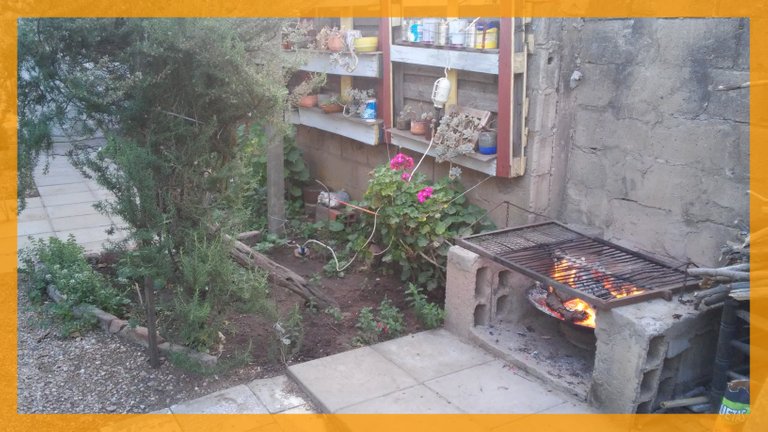
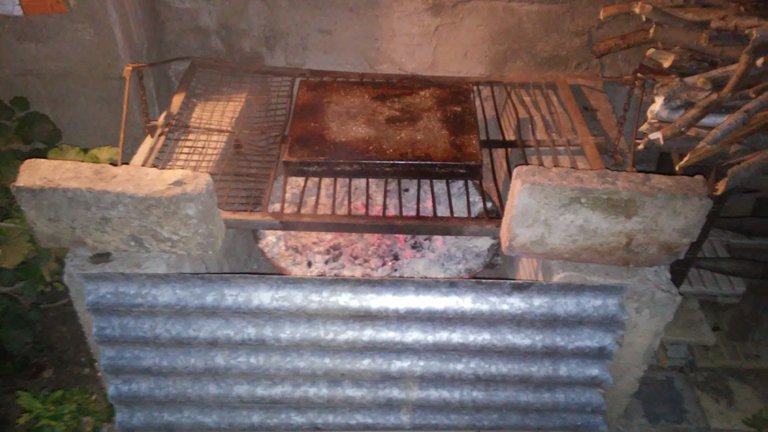
En el patio de mi jardín tengo una parrilla, aunque darle tal nombre es un poco excesivo. Simplemente coloque un par de blocs en forma vertical en el único lugar en el que no había plantas, recupere una parrilla de la casa que era de mis padres y de la que les hable en este post, hice una miniplataforma de cemento para evitar el contacto de la carne con el polvo de la tierra y la transformé en un primitivo barbecue que uso de vez en cuando. No somos fanáticos de la carne, pero de vez en cuando nos deleitamos con cualquier tipo de carne hecha a las brasas.
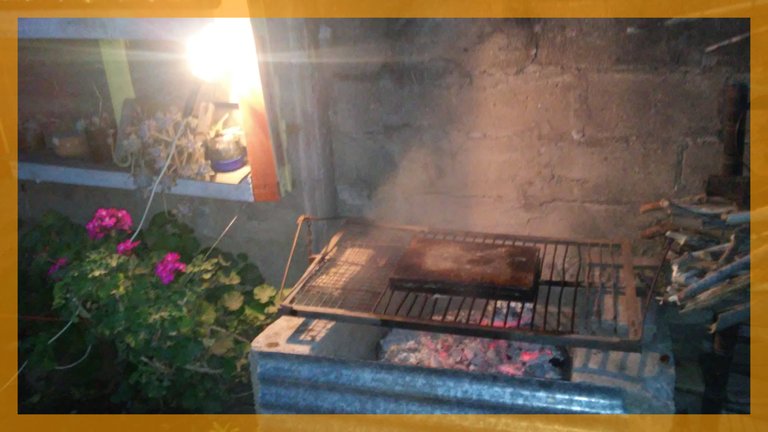
Esta vez decidimos hacer un verdadero asado. Invitamos a nuestra hija y a nuestro yerno, que me habian agasajo el día de mi cumpleaños como les conté en este post y me puse manos a obra. A veces obtener un asado rico y sabroso depende más de como lo hemos preparado, como hemos hecho el fuego y las brasas que del resto. Todo lo que he aprendido sobre los asados en estos años quiero compartirlo con todos los #hivers de esta comunidad. En una parrilla rústica y alumbrado por una lámpara portátil cuando las tinieblas de la noche absorbieron por completo la luz natural.

La carne destinada al asado es la clásica "tira de asado" un corte centenario que se usa solo en esta parte del mundo y en el que cada trozo de hueso del costillar es acompañado por un trozo de carne. De esta manera al cocinarse el hueso le va transmitiendo de a poco todo el sabor a la carne. Me gusta que la "tira de asado" sea ancha, no obstante pude conseguir solo una ancha y una angosta. Paciencia. No es solo un capricho, simplemente una cuestión de comodidad, ya que inicialmente el asado se debe cocinar el 60-70% de su tiempo, es decir unos 40-45 minutos del lado del hueso y al ser la tira ancha queda perfectamente en equilibrio, algo que no se puede lograr con la tira angosta.
El único condimento que le puse fue sal grueso. Se frota la carne con sal gruesa unas horas antes, se coloca en una fuente, se cubre y se deja reposar en la reposera. Un par de horas antes de colocar la carne en la parrilla se retira de la heladera para que no esté demasiado fría. Algunos asadores le ponen otros tipos de ingredientes como salmuera (ajo, sal, agua y perejil), otros el clásico “chimichurri” una salsa similar a la salmuera, líquida, que contiene varios ingredientes más como pimienta, pimentón, etc. Yo uso el sistema clásico que se usaba hace un par de siglos atrás.
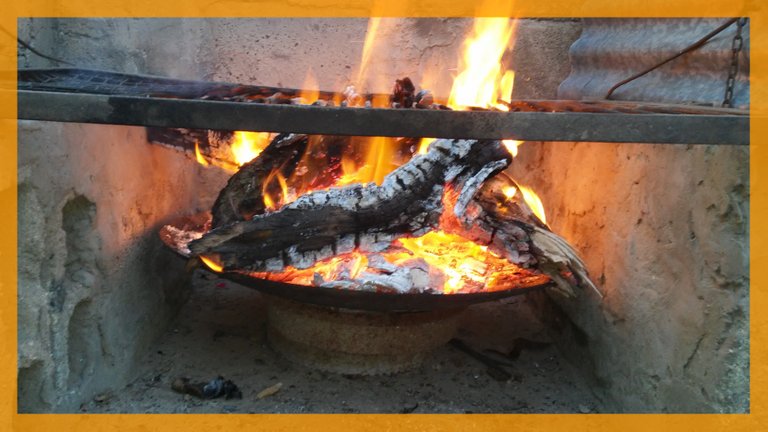
El siguiente paso es preparar la leña para hacer las brasas. Trato de conseguir leña natural (recojo bastante leña cuando salimos a caminar por la campaña) y cuando ya esté medianamente encendida le agrego un poco de carbón vegetal que s epuede encontrar en cualquier negocio. El asado hecho con carbón solo no me gusta porque suele despedir algunos gases si el carbón no ha sido bien hecho que luego se transmiten a la carne.
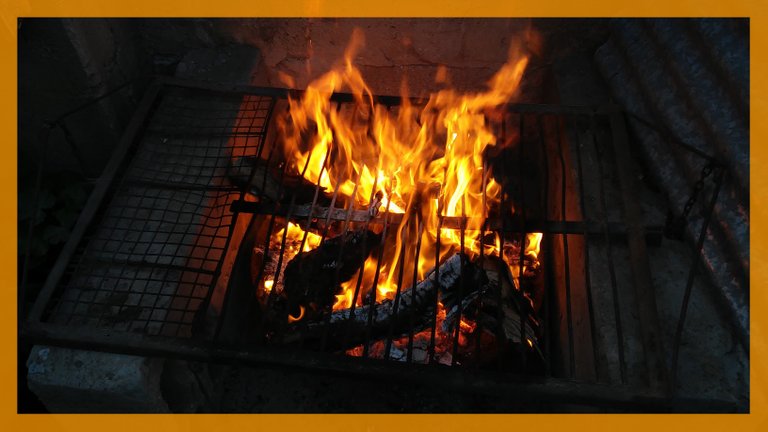
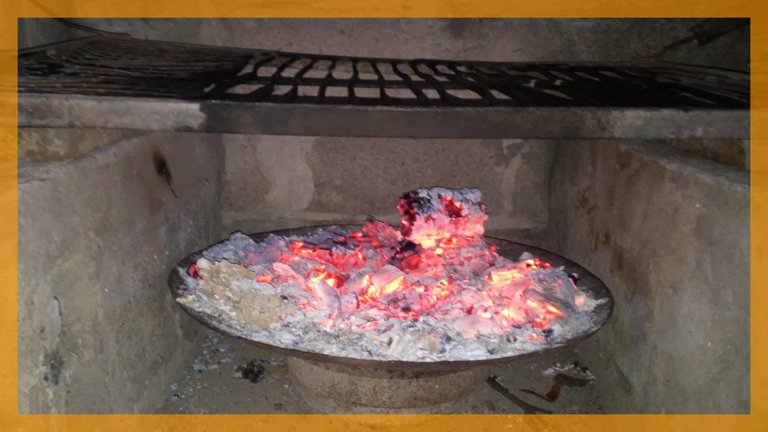
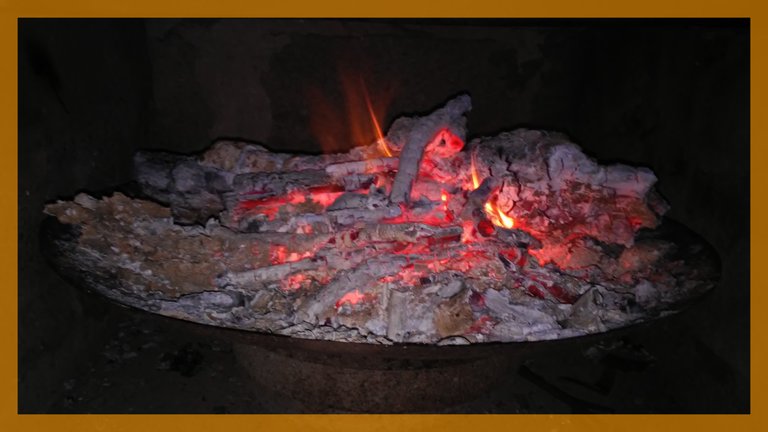
Las brasas deben estar perfectamente hechas, es decir al rojo vivo, ya sea leña o carbón. De ahí la importancia de agregar el carbón a las llamas de la leña para que no quede nada a medio quemar porque en este caso el humo se traslada a la carne y se siente en seguida en el sabor de la misma. Como pueden ver hay algunos trozos de leña que todavía no se han transformado en brasas, al igual que algunos carbones. Sigo alimentando el fuego con leña pequeña hasta que toda la base de la parrilla (un disco de hierro de esos que se usan para las labranzas agrícolas) es de un rojo intenso y uniforme.
Usar este tipo de discos de hierro es positivo, ya que el calor va en seguida hacia arriba en alto en dirección a la parrilla y al asado y por lo tanto se necesita mucho menos consumo de leña que en una parrilla con el piso de cemento. El único problema, en mi caso, es que debo estar atento con el tiempo, ya que no tengo lugar donde seguir preparando el fuego y haciendo las brasas. Lo que tengo en el fondo del disco me tiene que alcanzar para hacer el asado. Hay otras parrillas en cambio que tienen lugar para preparar la leña y para hacer el asado. Son de dimensiones considerables y, sobre todo, son muy caras.
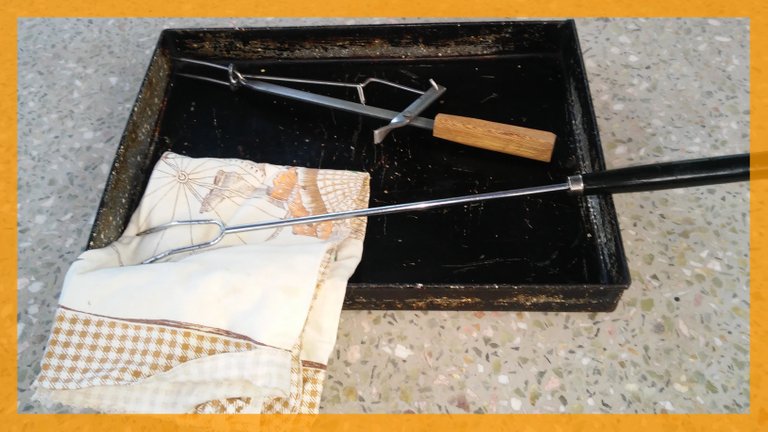
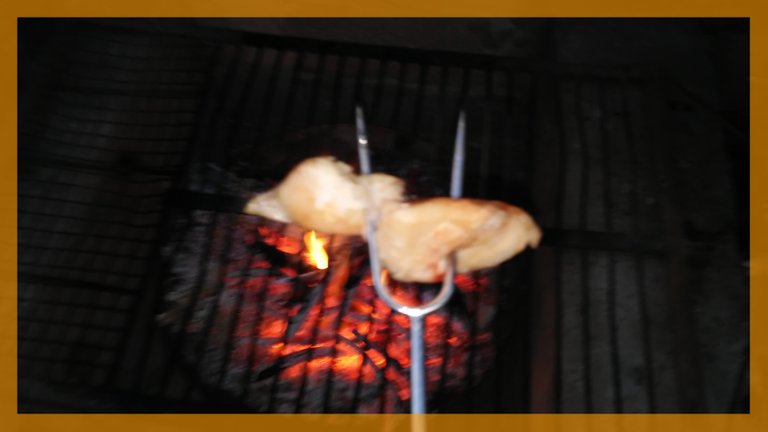
Arriba de la mesa de jardín he dispuesto junto al asado los instrumentos que necesitaré para completar mi trabajo. Un tenedor de considerables dimensiones que usaré para limpiar la parrilla, encastrando un trozo de grasa entre sus dientes y pasándolo repetidamente por los hierros de la parrilla hasta que estos estén perfectamente limpios. La acción purificadora del fuego -en este momento al nivel de la parrilla y con las llamas debajo, habré no menos de 250-300 grados de calor toda la parrilla queda perfectamente higienizada. El tenedor más pequeño es un regalo de mi yerno y es para controlar la cocción de la carne.
Verificación preliminar completada. Brasas hechas. Parrilla perfectamente limpia. He realzado la misma para que el calor no sea tan intenso los minutos iniciales. En este caso el asado se quema por fuera y por dentro queda crudo. Como los elementos de que gozo son bastante precarios he levantado la parrilla con dos ladrillos. Si fuera una construcción de las anteriormente citadas, la parrilla se alzaría y bajaría con un sistema de corona y manija similar a la que mueve las ruedas de la bicicleta y en la que van apoyados los pedales, para entendernos.
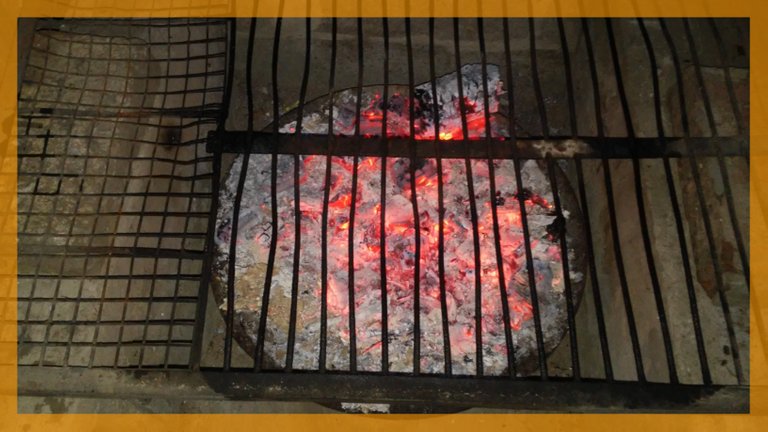
Repito, este un asado como si tomáramos una máquina del tiempo y volviéramos hacia atrás en el pasado, al menos de un siglo. Sería suficiente recordar la clásica pelicula con Michael Fox y Christopher Lloyd donde un joven Fox volvía continuamente al pasado en un ambiente tan distinto como maravilloso. En algunos lugares todavía se hace el asado de esta manera, pero cada vez quedan menos.
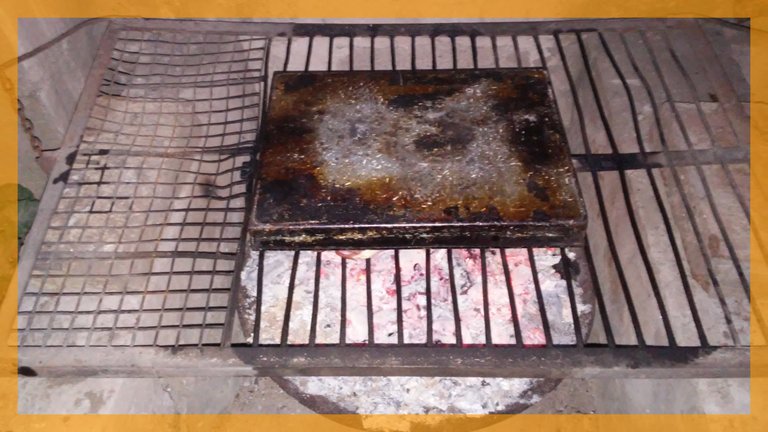
Retiramos la carne de la bandeja y la colocamos sobre la parrilla siempre del lado del hueso, en forma vertical con la carne hacia arriba. El fuego se tiene que cocinar bien -no quemar- debe quedar de un color marrón oscuro intenso como el que vemos en la foto. De vez en cuando el asador debe controlar como va el asado. Dejarlo que se haga por su cuenta, en estas condiciones, es una utopía. El calor inicialmente es alto. Por esta razón la carne debe estar alejada de las brasas no menos de 25-30 cms. Si podemos alzar y bajar la parrilla con un sistema como el descrito anteriormente será mucho más fácil. En mi caso debo controlar atentamente el calor y girar la carne en continuación para evitar que se queme.

Las brasas tienen que ser movidas en continuación para dirigir el calor a las zonas donde la carne está menos cocida, máxime teniendo en cuenta que la base de mi parrilla es cóncava y no plana, por la forma del disco. Las brasas cercanas a los bordes están mucho más cerca de la carne que las brasas del fondo. Que, no obstante esta aparente dificultad, irradian más calor, ya que toda la intensidad del fuego se ha concentrado en la zona baja.
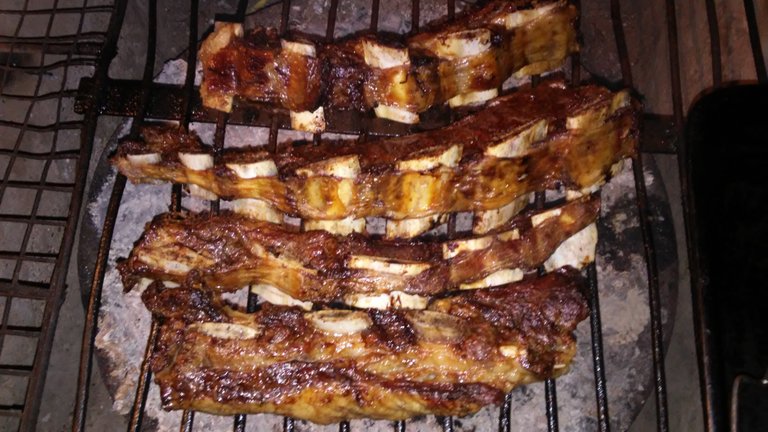
Controlando y verificando en continuación llega el momento de considerar que el hueso está lo suficientemente cocido como para seguir con el resto de la "tira de asado". En este caso la dispongo horizontalmente como cualquier otro tipo de carne, teniendo mucho cuidado porque ya hay partes de la carne cocidas y otras que a pesar de estar crudas han concentrado en su interior una temperatura alta. Esto hará que con un poco del calor de las brasas terminen de cocinarse, tenemos que estar muy atentos siempre a evitar que la carne se queme. Es preferible girarla y darla vuelta varias veces antes que dejarla estacionada y olvidada en la parrilla para dedicarnos a otras cosas. Un mínimo descuido y todo el trabajo estará arruinado.
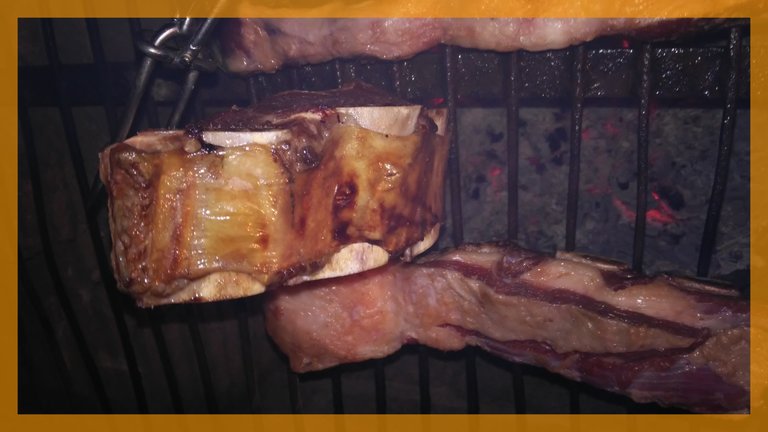
Retiro finalmente los bloques que había usado para alzar la parrilla y evitar un calor inicial excesivo, dispongo las tiras de asado de acuerdo a la cocción que presenten en las zonas de más o menos calor, moviendo en continuación las brasas que, a este punto, ya se van cubriendo de una ceniza gris. Al moverlas esta ceniza, que obstaculiza la salida del calor, se cae y el calor se reaviva. De ahora en más se trata de un trabajo de control y mantenimiento. Como han visto desde el inicio he cubierto la carne con una fuente porque siempre al hacer un asado al aire libre hay partículas de polvo que pueden posarse sobre la carne. Si hacemos la carne en una linda parrilla cubierta en un espacio cerrado seguramente no tendremos este problema.
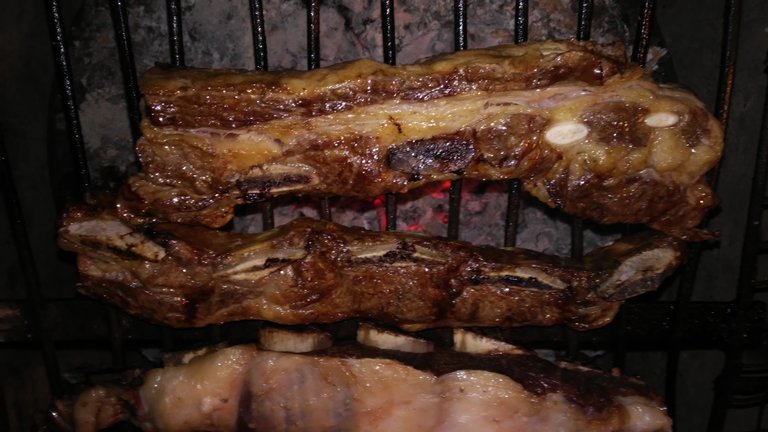
Cada 4-5 minutos retiro la fuente, giro la carne, controlo que la cocción se vaya desarrollando normalmente, reavivo las brasas y comienzo a tener las dudas universales de cada asador: me alcanzaran las brasas para terminar de hacer el asado? Es una inquietud que le he encontrado siempre en todos los asadores. Algunos más expertos la esconden y no la manifiestan. Los más inexpertos lo decimos claramente y comenzamos a preocuparnos. Sin embargo a este punto, la carne todavía no cocida totalmente, tiene una temperatura tan alta dentro de la misma que con una mínima dosis de calor podremos ver coronados nuestros esfuerzos.
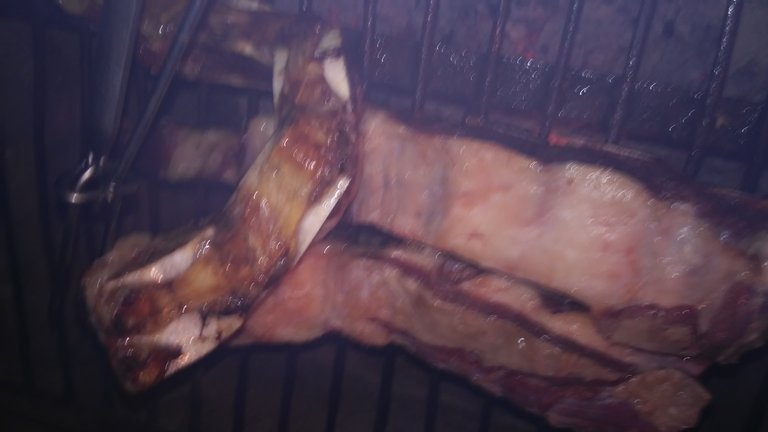
Rumores de voces inconfundibles. Mi hija, mi yerno y mis nietos. Es hora de controlar que todo marche bien para no hacer papelones. Una última mirada a la carne y veo que todavía faltan especialmente en la tira del asado más grande, algunos minutos. El resto está pronto para ser degustado. El tiempo necesario para preparar un rápido aperitivo y luego si, a hacerle el merecido homenaje a nuestro asado. Acompañado por una ensalada y trozos de zapallo al horno proveniente todo de nuestra huerta.
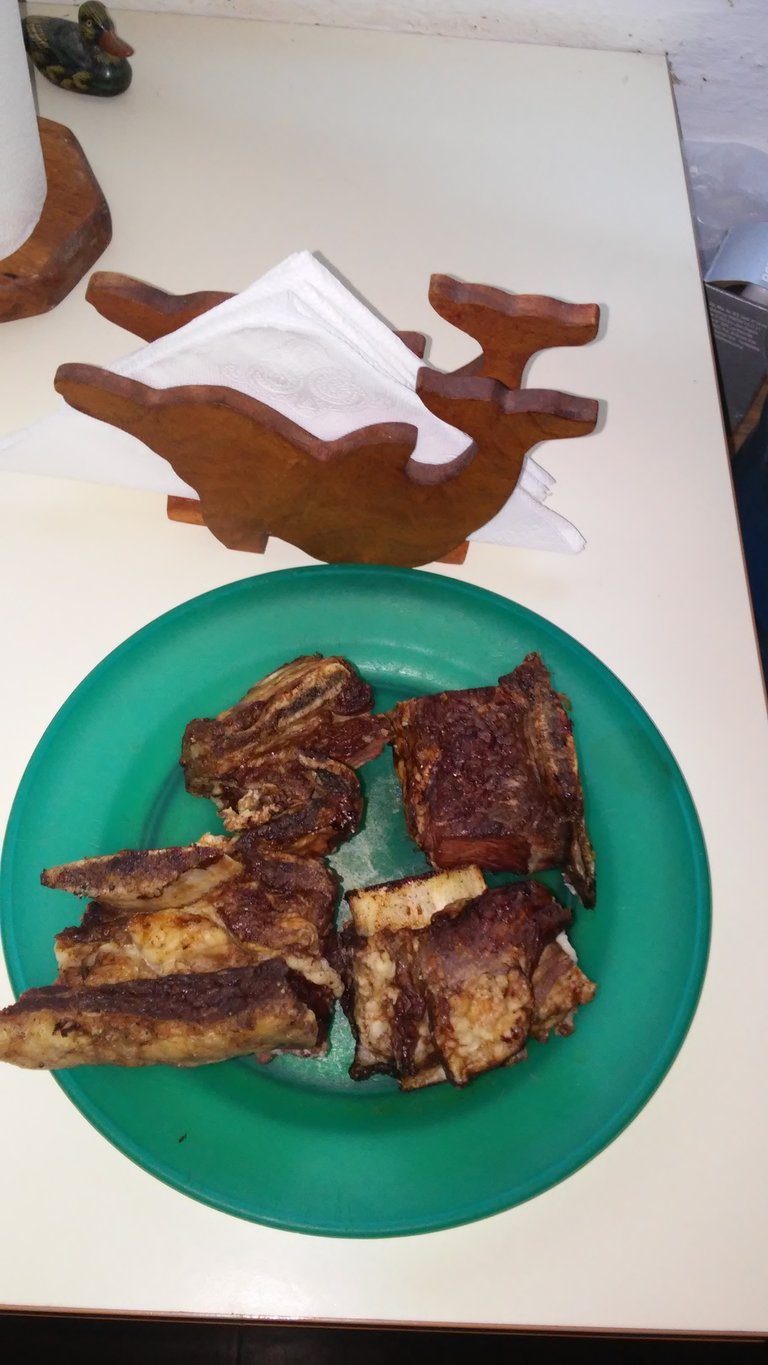
A juicio de los comensales el asado estaba exquisito, dicho por mi hija por ejemplo que no come demasiada carne. O por mi esposa que no me hizo ninguna crítica. Mi yerno, una estupenda persona con quien tengo una excelente relacion, come desde la otra punta de la mesa y me hace seña con el pulgar hacia arriba. Todo lo que quedo es lo que ven en el plato. Una linda reunión en familia y un rico asado: que más puedo pedir a esta altura de mi vida?
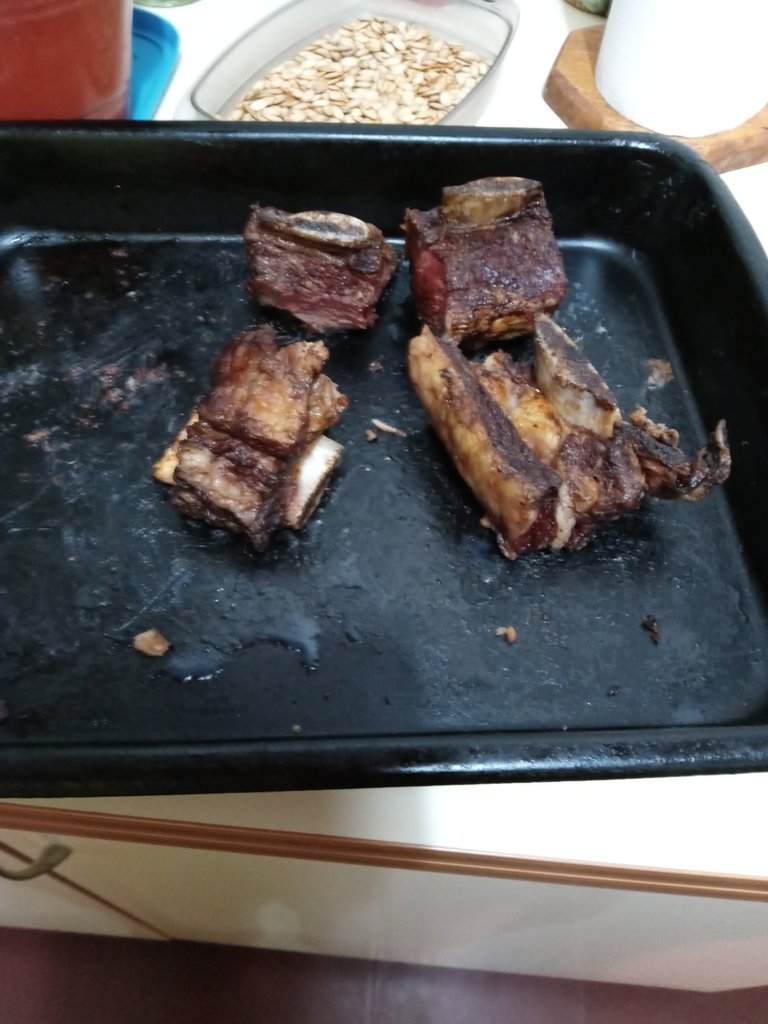
Ah, me olvidaba de comentarles: esto es todo lo que quedó.

The asado is not only a type of food, it is a way of cooking a particular cut of meat (preferably beef) on a grill and over the embers. It's much more than that. It is a cultural identifier with which an inhabitant of the Río de La Plata is implicitly designated (or at least that is how it was known in the 18th century when these colonies depended on Spain). Today we speak of Argentines and Uruguayans.
Cooking is not my specialty at all (by the way I can't convince my wife, a wonderful cook with experience in Europe and especially in Italy) to open a blog on #HIVE to delight us with her recipes. But I persevere. Perhaps one day my efforts will be crowned with success. Returning to the beginning of the paragraph, I said that my specialty is not cooking. However, today, without an apron and without the classic chef's hat, I want to share with all the #hivers of @HiveFood the secrets -if that's what they can be called- to make a good barbecue, with the right degree of cooking, the right time and the amount of firewood and charcoal also fair.
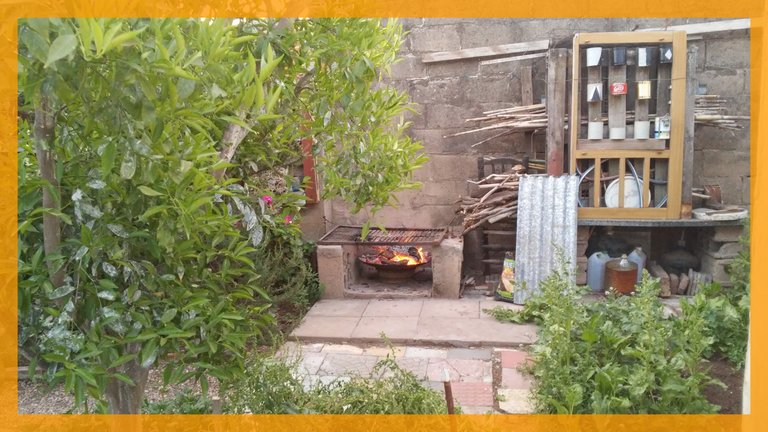
In my garden patio I have a grill, although giving it that name is a bit excessive. Simply place a couple of pads vertically in the only place where there were no plants, recover a grill from the house that belonged to my parents and that I told you about in this post, I made a mini cement platform to avoid the contact of the meat with the dust of the earth and I transformed it into a primitive barbecue that I use from time to time. We are not fans of meat, but from time to time we delight ourselves with any type of grilled meat.
This time we decided to do a real barbecue. We invited our daughter and son-in-law, who had entertained me on my birthday as I told you in this post, and I got down to work. Sometimes obtaining a rich and tasty roast depends more on how we have prepared it, how we have made the fire and the embers than on the rest. I want to share everything I've learned about barbecues over the years with all the #hivers in this community. On a rustic grill and lit by a portable lamp when the darkness of the night completely absorbed the natural light.

The meat intended for roasting is the classic "roast strip", a century-old cut that is used only in this part of the world and in which each piece of rib bone is accompanied by a piece of meat. In this way, when the bone is cooked, it gradually transmits all the flavor to the meat. I like that the "roast strip" is wide, however I was able to get only one wide and one narrow. Patience. It is not just a whim, simply a matter of comfort, since initially the roast should be cooked 60-70% of its time, that is, about 40-45 minutes on the bone side and, being the wide strip, it is perfectly balanced , something that cannot be achieved with the narrow strip.
The only seasoning I put on it was coarse salt. The meat is rubbed with coarse salt a few hours before, placed in a bowl, covered and left to rest on the deckchair. A couple of hours before placing the meat on the grill, remove it from the refrigerator so that it is not too cold. Some grills put other types of ingredients such as brine (garlic, salt, water and parsley), others the classic "chimichurri" a sauce similar to brine, liquid, which contains several other ingredients such as pepper, paprika, etc. I use the classic system that was used a couple of centuries ago.
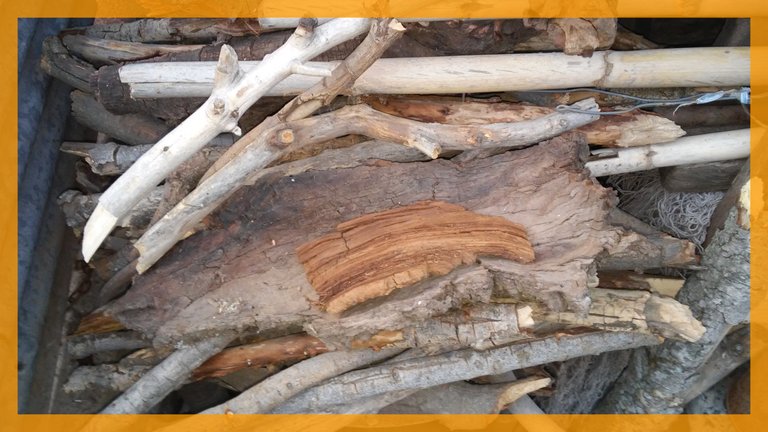
The next step is to prepare the firewood to make the coals. I try to get natural firewood (I collect a lot of firewood when we go out for a walk in the countryside) and when it is halfway lit I add a little charcoal that can be found in any store. I don't like the roast made with charcoal alone because it tends to give off some gases if the charcoal hasn't been done well, which are then transmitted to the meat.
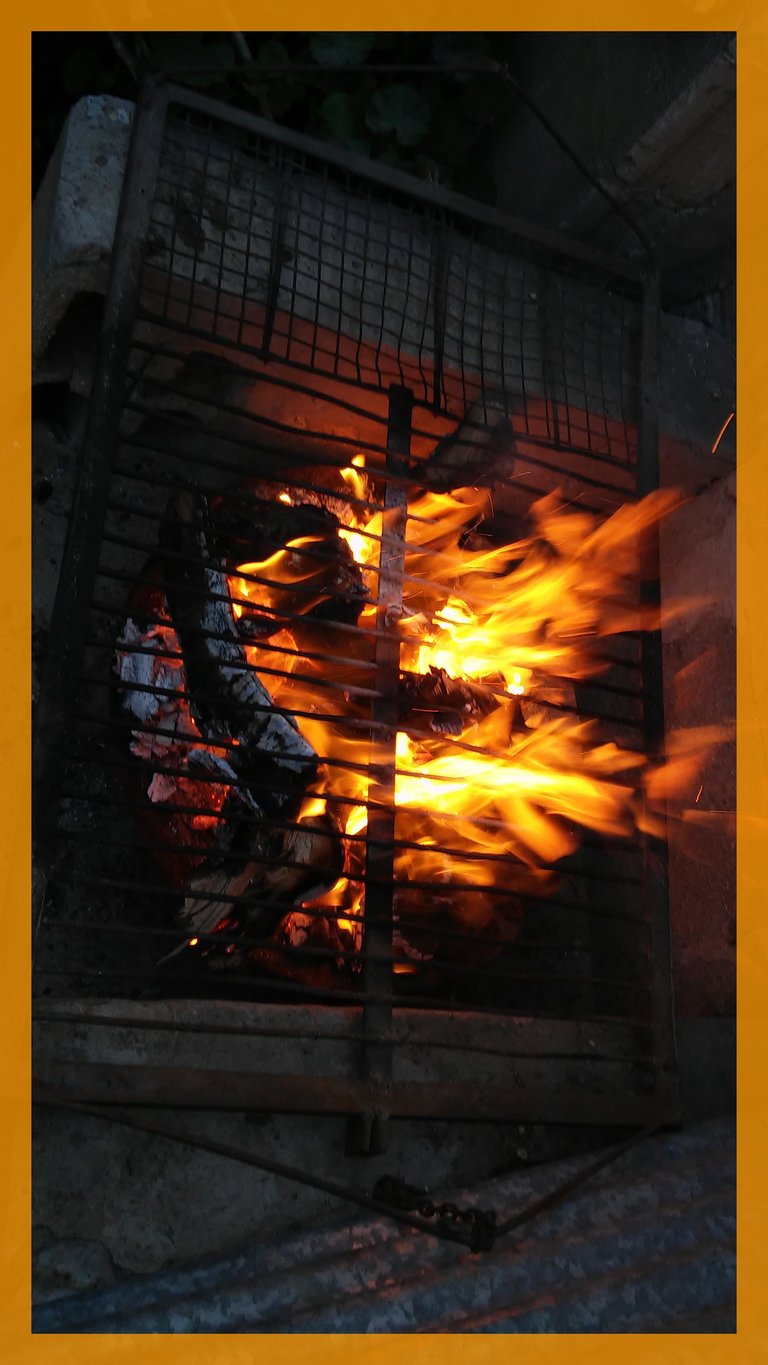
The embers must be perfectly done, that is, red hot, whether it is firewood or charcoal. Hence the importance of adding the charcoal to the flames of the wood so that nothing is left half-burned because in this case the smoke moves to the meat and is immediately felt in its flavor. As you can see there are some pieces of firewood that have not yet been transformed into embers, as well as some coals. I keep feeding the fire with small wood until the entire base of the grill (an iron disc of the kind used for farming) is a deep, uniform red.
Using this type of iron discs is positive, since the heat goes straight up in the direction of the grill and the roast and therefore much less consumption of wood is needed than in a grill with a cement floor. The only problem, in my case, is that I have to be careful with time, since I have no place to continue preparing the fire and making the embers. What I have at the bottom of the disc has to be enough for me to make the roast. There are other grills instead that have a place to prepare the firewood and to make the barbecue. They are of considerable dimensions and, above all, they are very expensive.
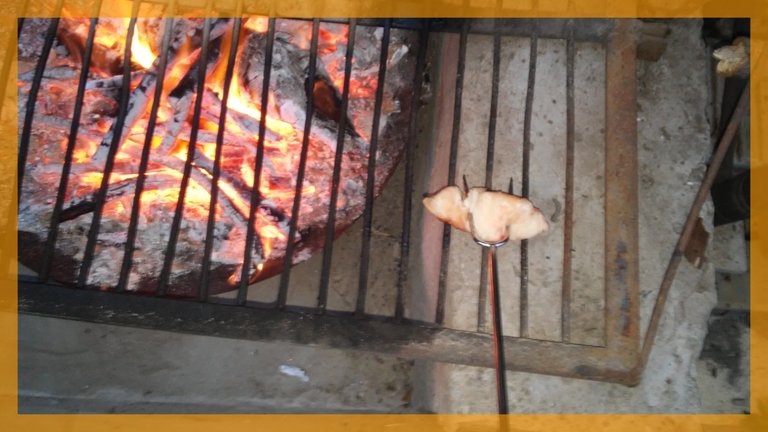
On top of the garden table I have arranged next to the barbecue the instruments that I will need to complete my work. A fork of considerable dimensions that I will use to clean the grill, inserting a piece of fat between its teeth and repeatedly passing it through the grill irons until they are perfectly clean. The purifying action of the fire - at this moment at the level of the grill and with the flames below, there will be no less than 250-300 degrees of heat, the entire grill is perfectly sanitized. The smaller fork is a gift from my son-in-law and is to check the doneness of the meat.

Preflight completed. Embers done. Perfectly clean grill. I have enhanced it so that the heat is not so intense in the initial minutes. In this case, the roast burns on the outside and remains raw on the inside. As the elements that I enjoy are quite precarious, I have raised the grill with two bricks. If it were a construction of the aforementioned, the grill would rise and fall with a crown and handle system similar to the one that moves the wheels of the bicycle and on which the pedals are supported, to understand us.
I repeat, this is a barbecue as if we took a time machine and went back in time, at least a century. It would be enough to remember the classic movie with Michael Fox and Christopher Lloyd where a young Fox continually returned to the past in an environment as different as it is wonderful. In some places, roasting is still done this way, but there are fewer and fewer.
Remove the meat from the tray and place it on the grill always on the bone side, vertically with the meat facing up. The fire has to cook well -not burn- it should be an intense dark brown color like the one we see in the photo. From time to time the asador must control how the roast is going. Letting him do it on his own, under these conditions, is a utopia. The heat is initially high. For this reason the meat must be away from the coals no less than 25-30 cm. If we can raise and lower the grill with a system like the one described above, it will be much easier. In my case I have to carefully control the heat and turn the meat over to prevent it from burning.
The coals have to be moved continuously to direct the heat to the areas where the meat is less cooked, especially considering that the base of my grill is concave and not flat, due to the shape of the disk. The coals near the edges are much closer to the meat than the coals at the bottom. Despite this apparent difficulty, they radiate more heat, since all the intensity of the fire has been concentrated in the lower area.
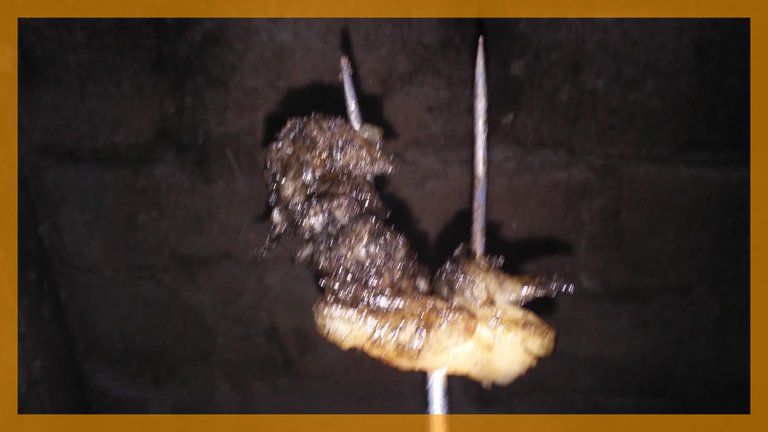
Controlling and verifying next, it is time to consider that the bone is cooked enough to continue with the rest of the "roast strip". In this case, I arrange it horizontally like any other type of meat, being very careful because there are already parts of the meat that are cooked and others that, despite being raw, have concentrated a high temperature inside. This will make them finish cooking with a little of the heat from the embers, we always have to be very careful to prevent the meat from burning. It is preferable to turn it and turn it several times before leaving it parked and forgotten on the grill to dedicate ourselves to other things. A little oversight and the whole job will be ruined.
Finally, I remove the blocks that I had used to raise the grill and avoid excessive initial heat, I arrange the roast strips according to how cooked they are in the areas of more or less heat, moving the embers which, at this point, They are already covered with a gray ash. By moving them this ash, which hinders the exit of heat, falls and the heat is revived. From now on it is a control and maintenance job. As you have seen from the beginning, I have covered the meat with a dish because when roasting outdoors there are always dust particles that can settle on the meat. If we cook the meat on a nice covered grill in a closed space, we will surely not have this problem.
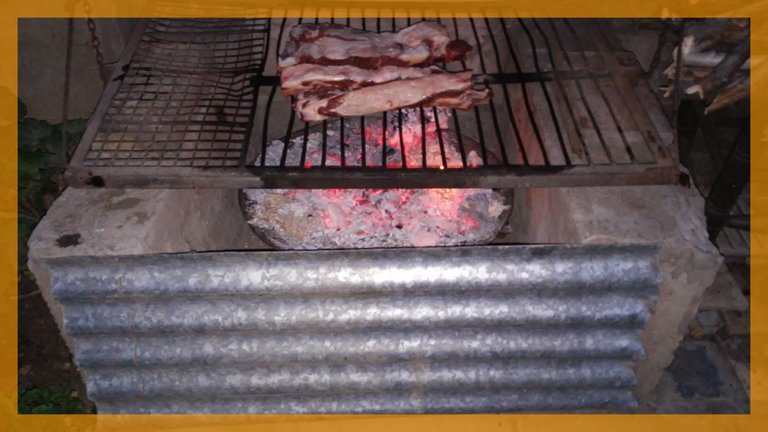
Every 4-5 minutes I remove the source, turn the meat, check that the cooking is proceeding normally, rekindle the embers and begin to have the universal doubts of every grill: will I have enough embers to finish the roast? It is a concern that I have always found in all the grills. Some more experts hide it and do not show it. The most inexperienced say it clearly and begin to worry. However, at this point, the meat is not yet fully cooked, it has such a high temperature inside it that with a minimum dose of heat we can see our crowns crowned.
Rumors of unmistakable voices. My daughter, my son-in-law and my grandchildren. It is time to check that everything is going well so as not to make papers. One last look at the meat and I see that there are still a few minutes to go, especially in the strip of the largest roast. The rest is ready to be tasted. The time needed to prepare a quick appetizer and then yes, to pay the well-deserved tribute to our roast. Accompanied by a salad and pieces of baked pumpkin from our garden.
In the opinion of the diners, the roast was exquisite, said by my daughter, for example, that she does not eat too much meat. Or for my wife who did not criticize me. My son-in-law, a wonderful person with whom I have a great relationship, eats from across the table and gives me a thumbs up. All that's left is what they see on the plate. A nice family reunion and a delicious barbecue: what more can I ask for at this point in my life?
Separador de texto / Divider text: The Peak Studio.