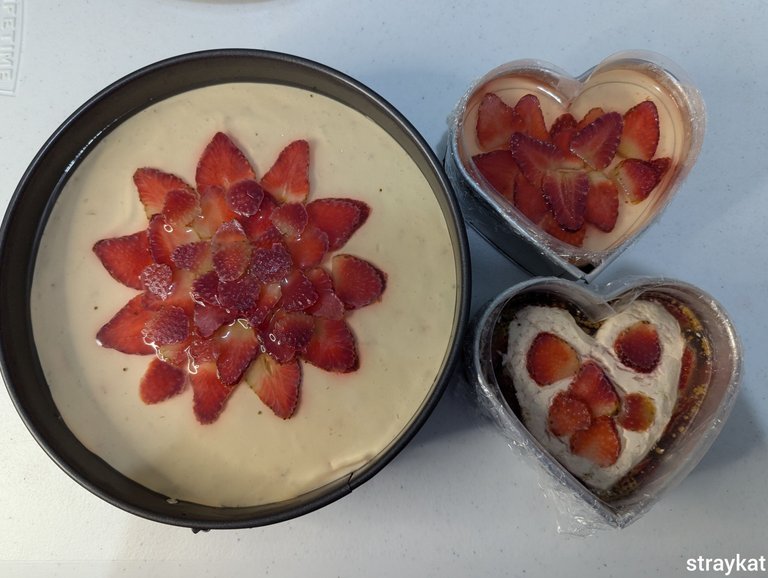
Hello, February! A month that's special for me, not because of Valentine's Day, but because it's my birth month. And to celebrate February, I made strawberry cheesecake!
Here's a little story of why I made a cheesecake. I have tried making blueberry and peach cheesecake already, and strawberry cheesecake is one that I also wish to try making. However, strawberries are rarely sold here. If there is, it's no longer fresh. And just last week, one of my friends posted strawberries for sale and I tried to order two packs, but she only gave me one because the other pack was sold while I was still deciding to purchase it.
I saw this as a chance to finally make the strawberry cheesecake which was a reason for me to go to the grocery as well last Lunar New Year before going to the baking store.
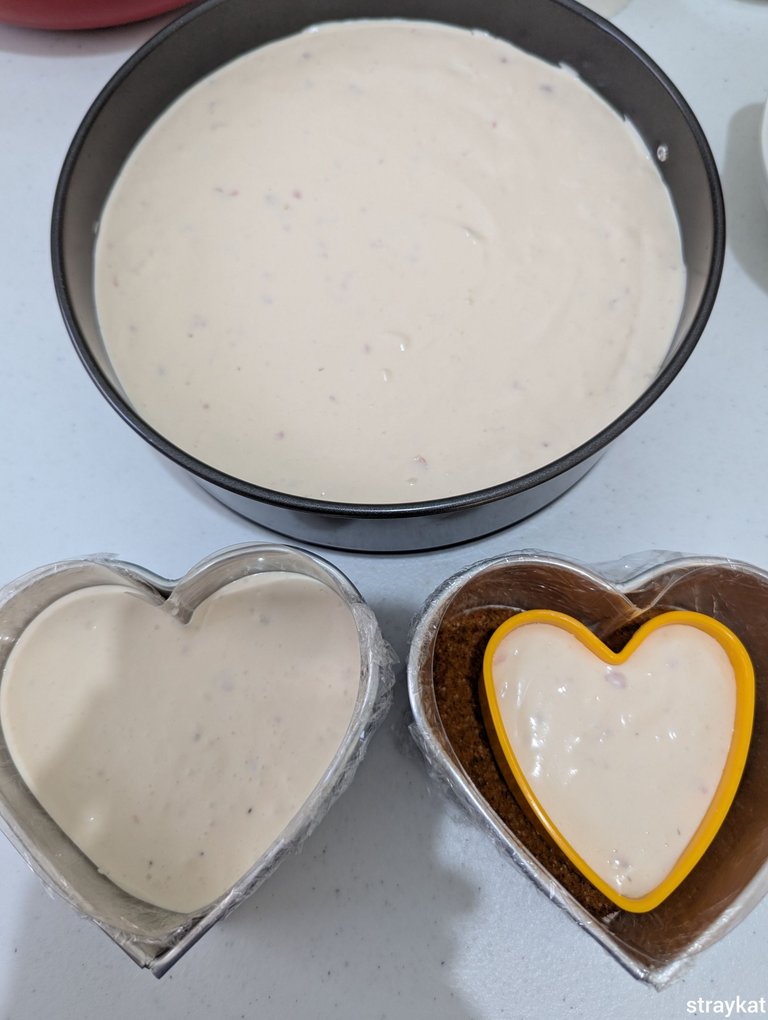
Making a no-bake cheesecake is surprisingly easy! The first time I made one was for my birthday last year and the other for Mother's Day. I only used a circle mold for the past cheesecakes that I made. This time, I tried to make the cheesecake on one circle mold and two small heart-shaped mold. I was hoping I can sell it too but I failed on making the design I want and it's difficult if you're not using the right mold for cheesecake so these will be for personal consumption for now.
I am also going to teach you a technique on how to use a mold with non-removable bottom for cheesecake so keep reading!
Materials You'll Need:
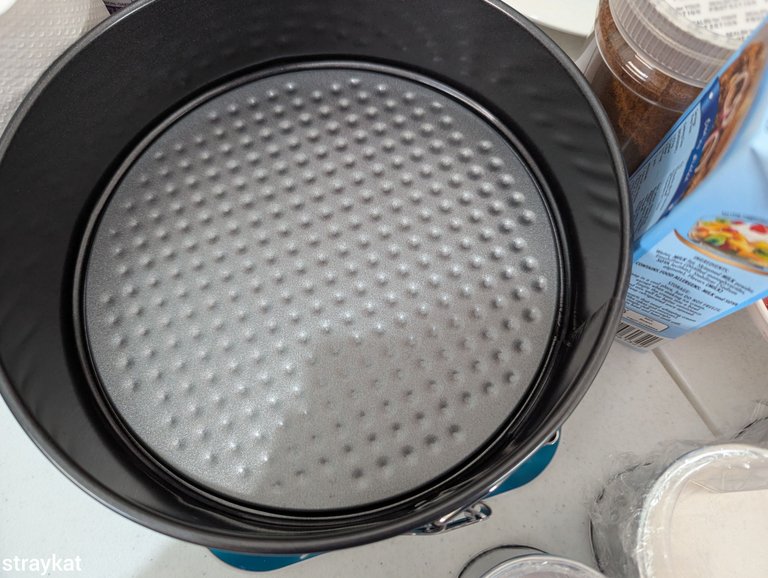
● 8 inches round springform pan
● Two 4x2 inches heart-shaped mold
● Cling wrap
● Cake acetate sheet or cake collar
● Heart-shaped cookie cutter (optional)
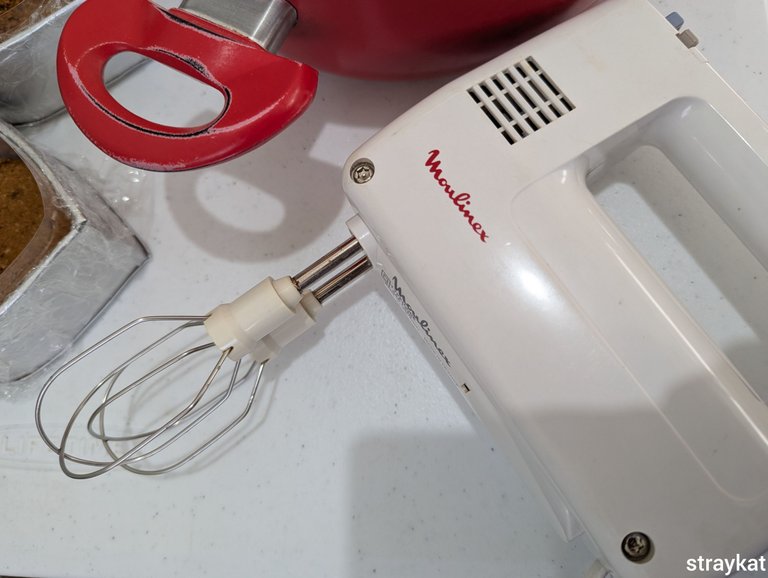
● Hand mixer

INGREDIENTS:
1 1/4 Cups crushed grahams 3/4 Tsp. Cinnamon powder 2 1/2 Tbsps. White sugar 75 grams melted butter
250 ml All purpose cream (chilled) 225 grams Cream cheese 60 grams White sugar 60 ml Water 10 grams unflavored gelatine powder 1/3 Cup minced strawberries
🩷 TOPPINGS:
Strawberries (sliced)
300 ml Water
60 grams White sugar
20 grams unflavored gelatine powder
PROCEDURE
Now let's start making it!
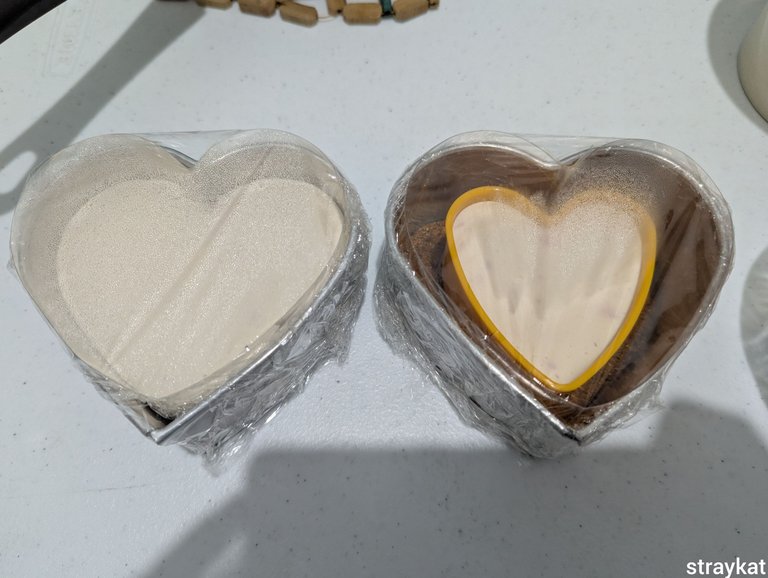
(1) Prepare the springform pan and heart-shaped molds. Since the heart molds don't have a removable bottom, I improvised by wrapping the inside with cling wrap then adding an acetate sheet. I shaped the sheet into a heart as well. The added an acetate sheet to make the edge of the cake smooth and the cling wrap to easily pull out the cake later on. Make sure the cling wrap is long enough and the ends go out of the mold so you can have something hold unto when pulling it.
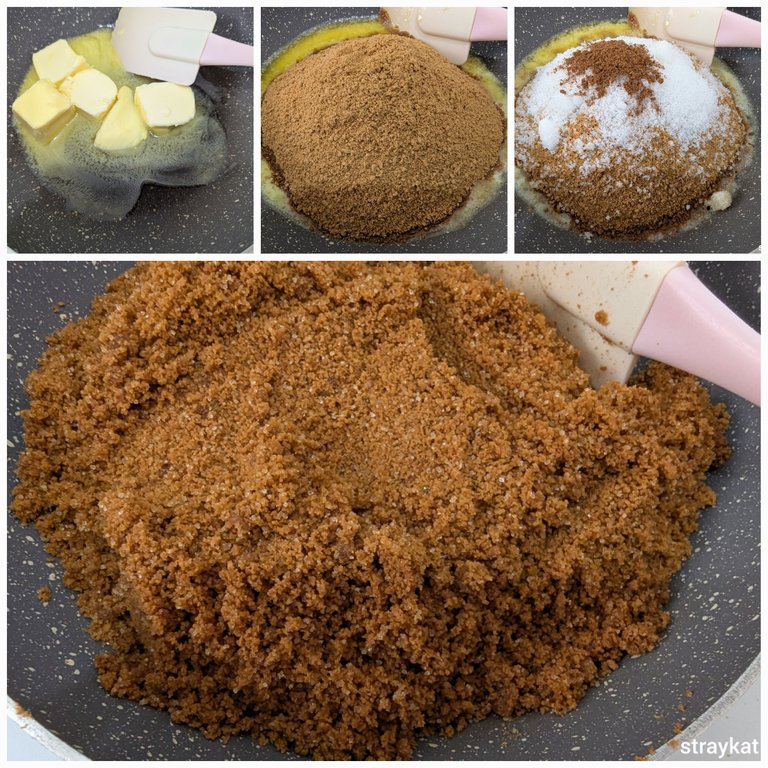
(2) Now let's proceed making the crust! On a pan, melt the butter and add the crushed grahams, sugar, and cinnamon powder. Mix until all ingredients are combined and begins to give off a nice toasted smell.
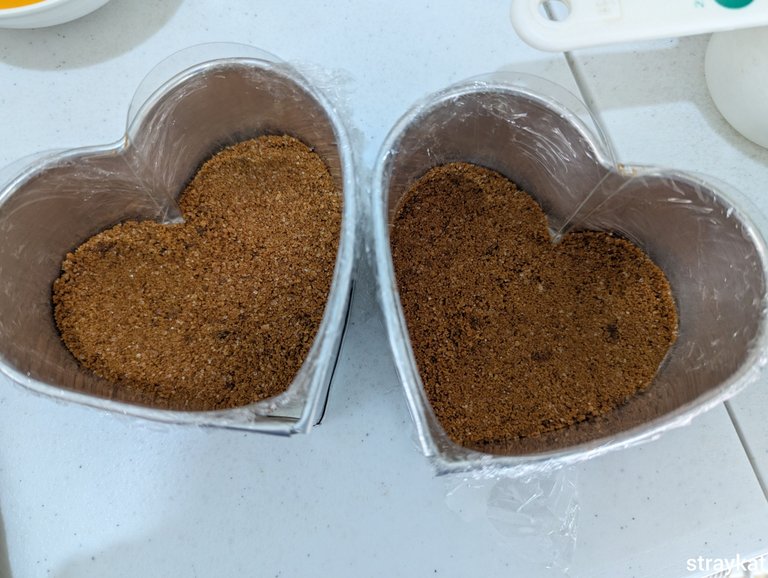
(3) Put the graham crust into the molds, about a centimeter thick and press down gently with a spatula or spoon.
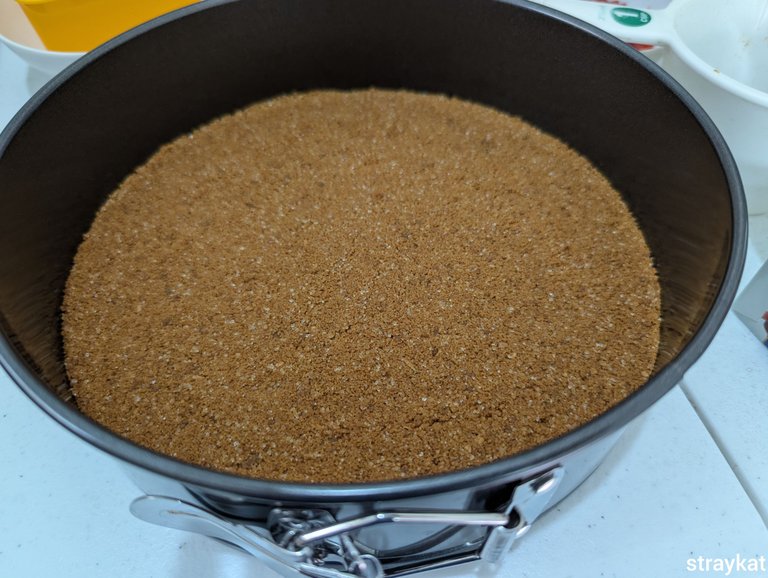
We're done with the crust! Next, we'll make the cheesecake
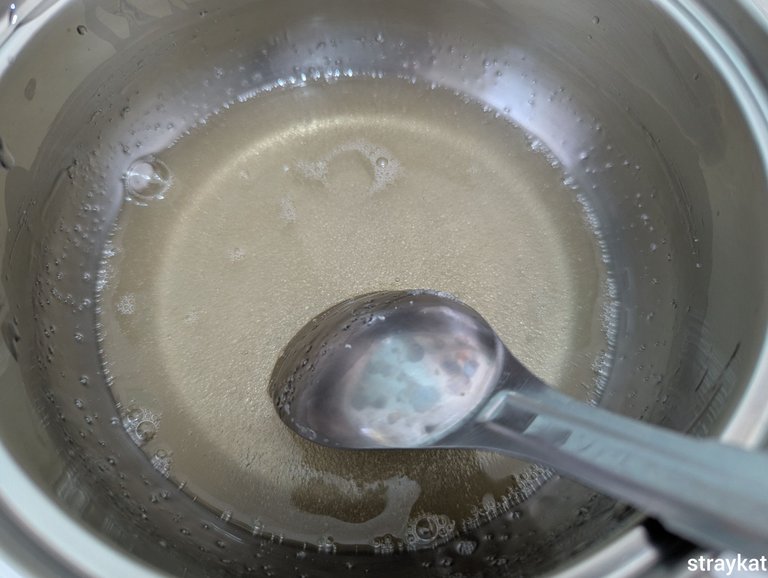
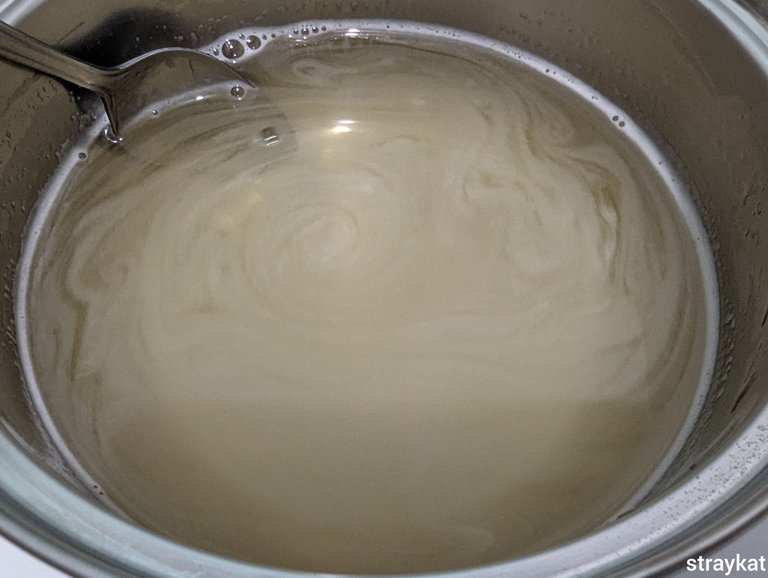
(4) On another pan, put water, sugar, and gelatine. Mix continuously until it gets warm. Remove before it boils. Set aside.
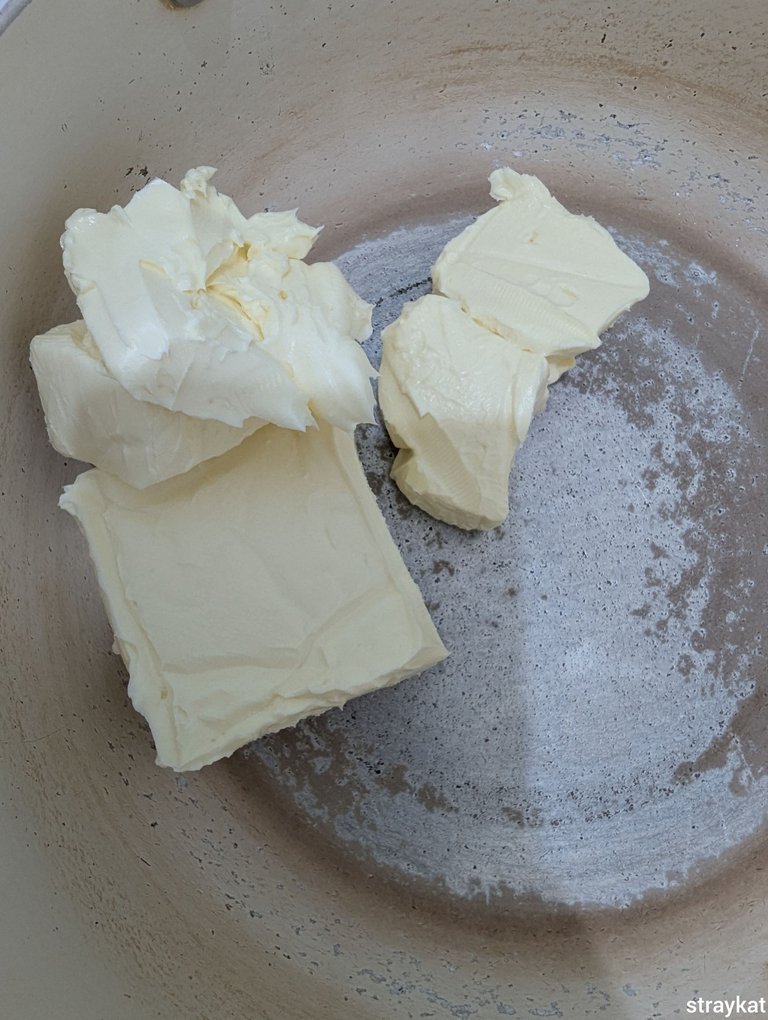
(5) Then on a pot, put the cream cheese and soften with the hand mixer.
(6) Add the chilled all purpose cream next and continue mixing with the hand mixer. It is best the chill the all purpose cream overnight.
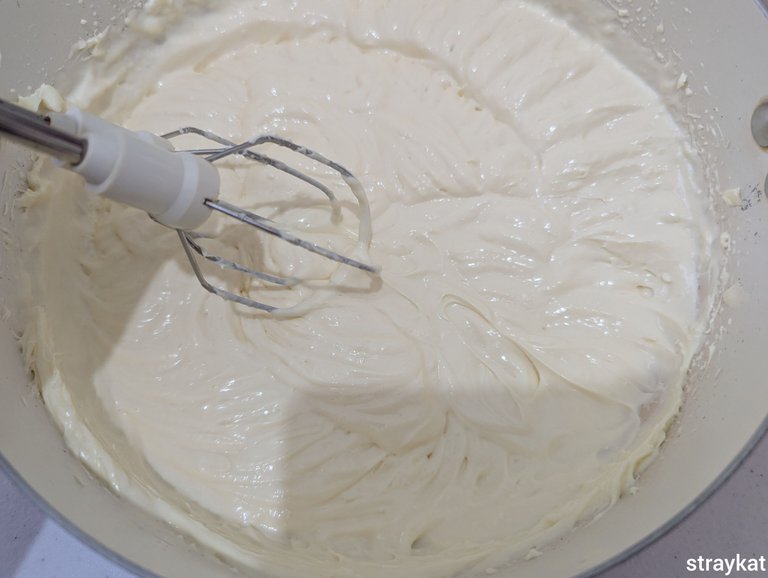
I remember my mama told me before that this hand mixer is older than me. And I still use it today!
(7) Since we're making strawberry cheesecake, we're adding some bits of strawberries. Put it into the mixture and continue mixing.
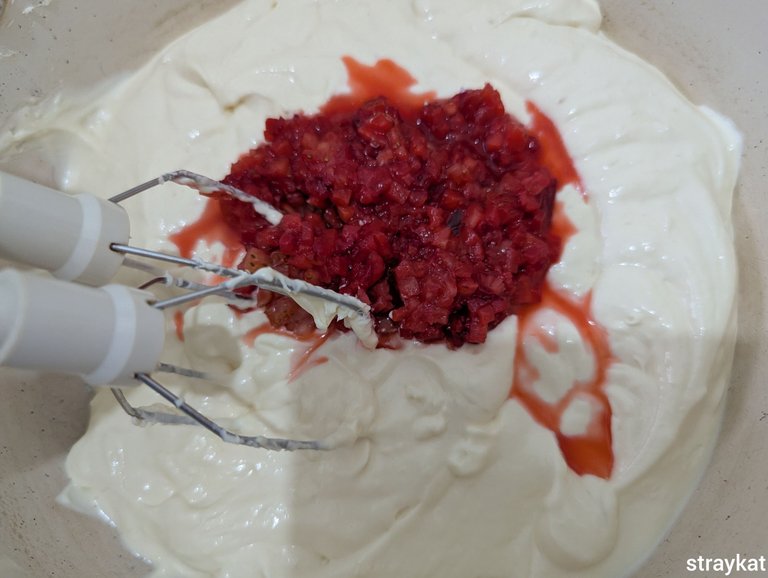
(8) Then finally add the gelatine mixture we made earlier. Make sure we make the cheesecake mixture quick or else the gelatine mixture will set before we can add it into the cheesecake mixture. Continue mixing until all ingredients are well-combined.
(9) Pour into molds. Give the molds a few taps on the table to remove the air bubbles and to help the surface to flatten. Wrap with cling wrap and chill overnight,
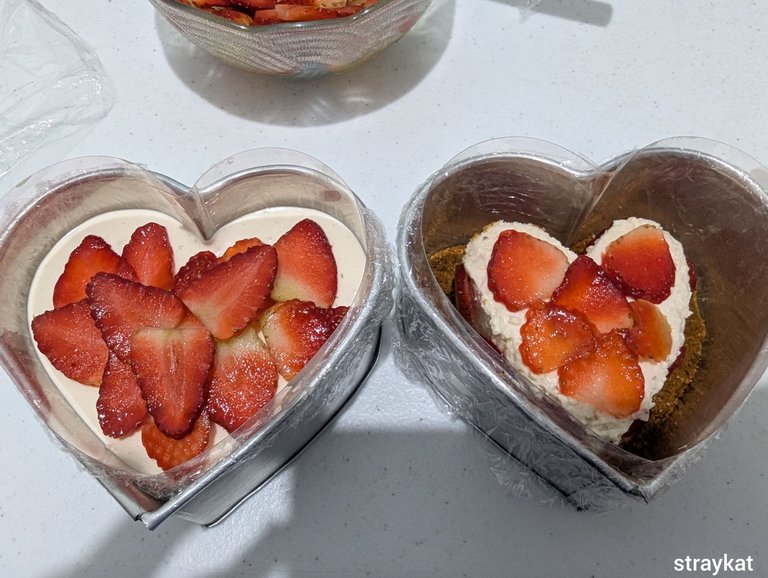
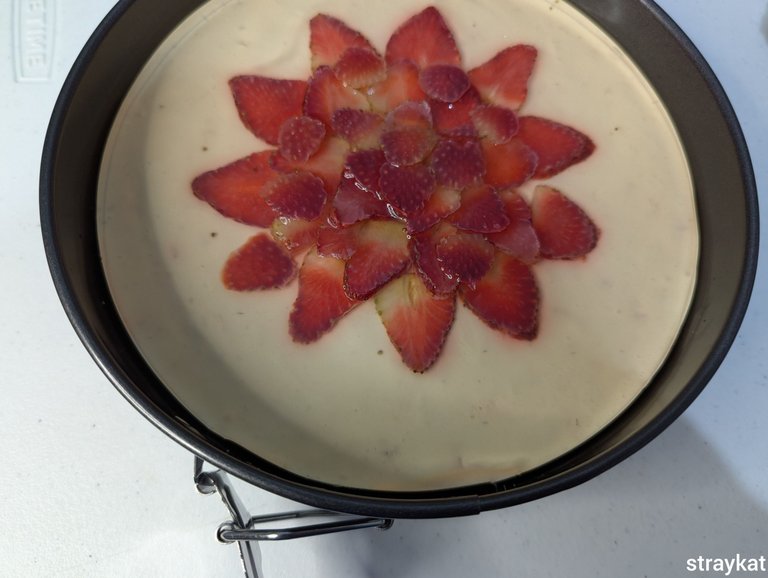
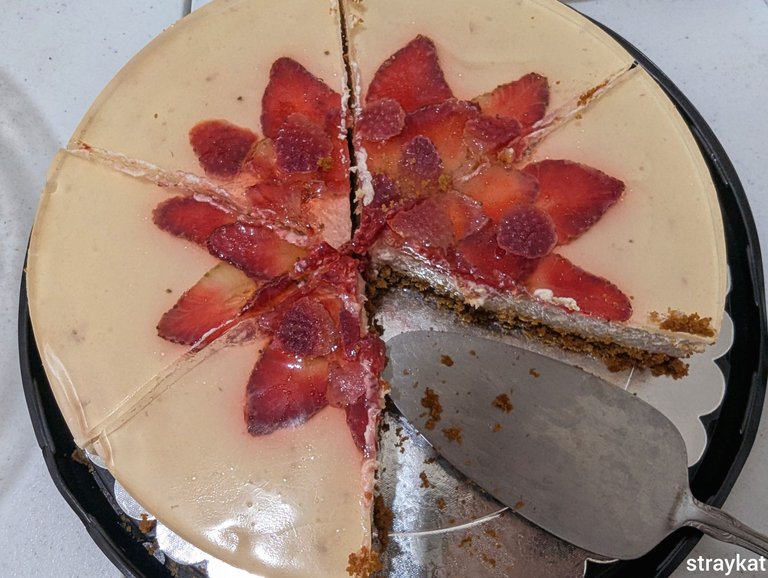
(10) For the final step (which will be made the following day), slice some strawberries and place it on the chilled cheesecake mixture.
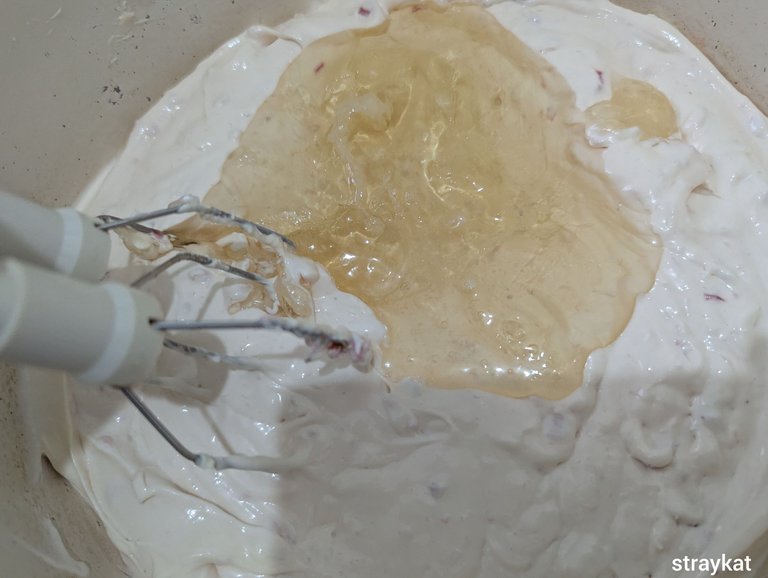
(11) To make the gelatine topping, continuously mix water, sugar, and unflavored gelatin on a small pan until mixture is warm.
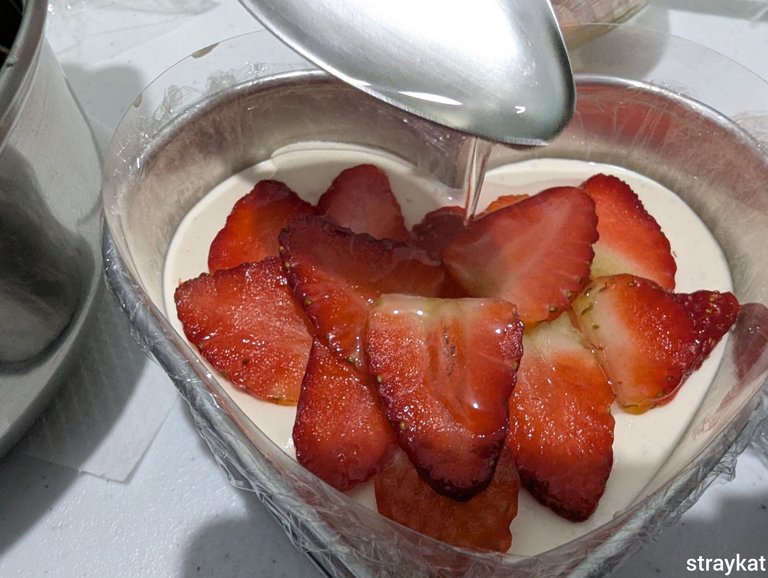
(12) Pour on into the chilled cheesecake mixture and wait for it to set a little before putting it back into the fridge. Chill it again overnight or at least half day.
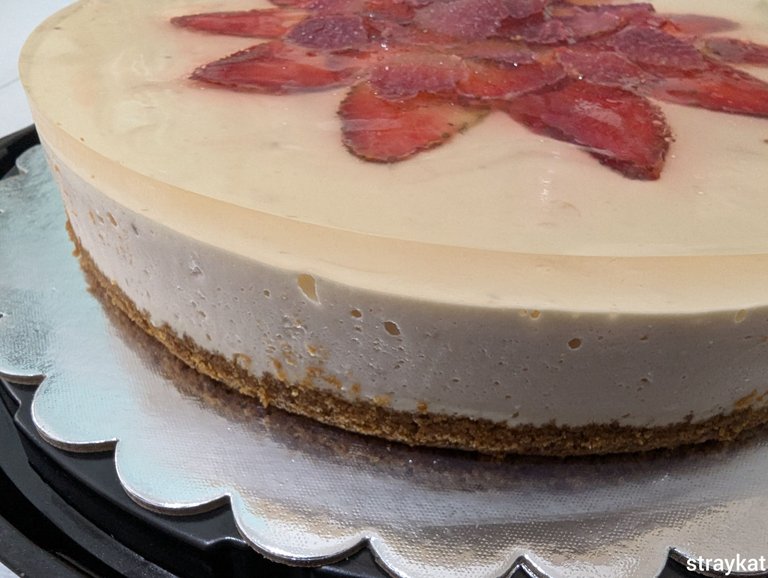
Time to Remove from The Pan!
Removing it from the pan is easy. The first step is to gently pull the edges of gelatine topping inward to detach it from the mold before opening the springform mold. Then use a cake server to nudge the bottom and slowly slide it on a plate or cake board.
For the heart-shaped molds, just pull the cling wrap out carefully and trasfer it into a plate or any container you like. Gently remove the cling wrap. You can actually lift the cake by gently holding the acetate sheet to easily remove the cling wrap on the bottom part. Don't worry because the graham crust won't easily crumble. Just be extra careful.

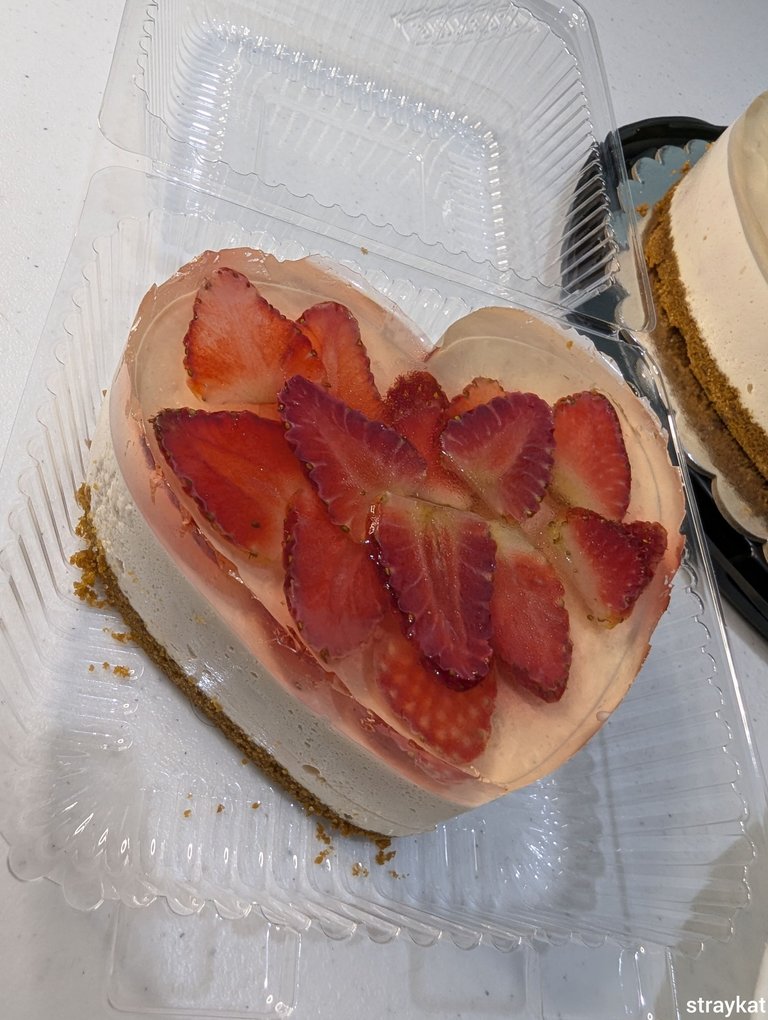
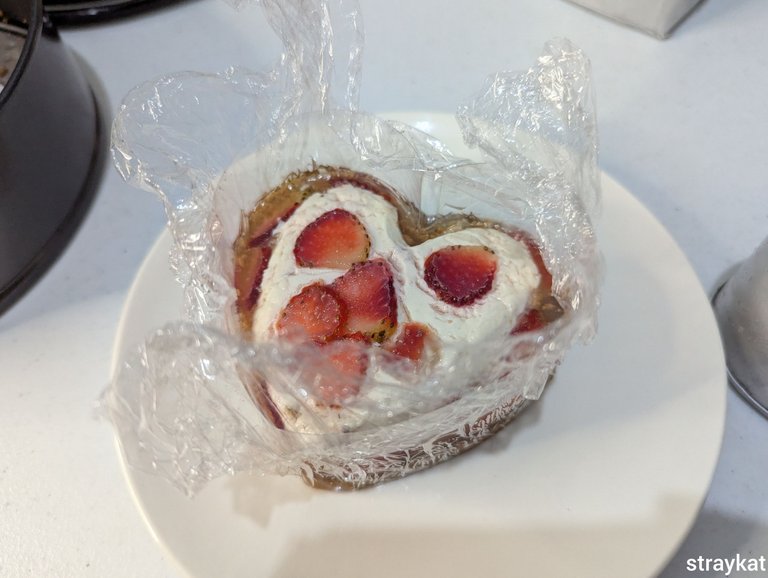
Put it back on a flat surface and pull the edges of the gelatine inwards to separate from the acetate sheet. Carefully lift the acetate sheet. There's a bit of resistance so be patient or you can also use a bread knife to help separate the edges.
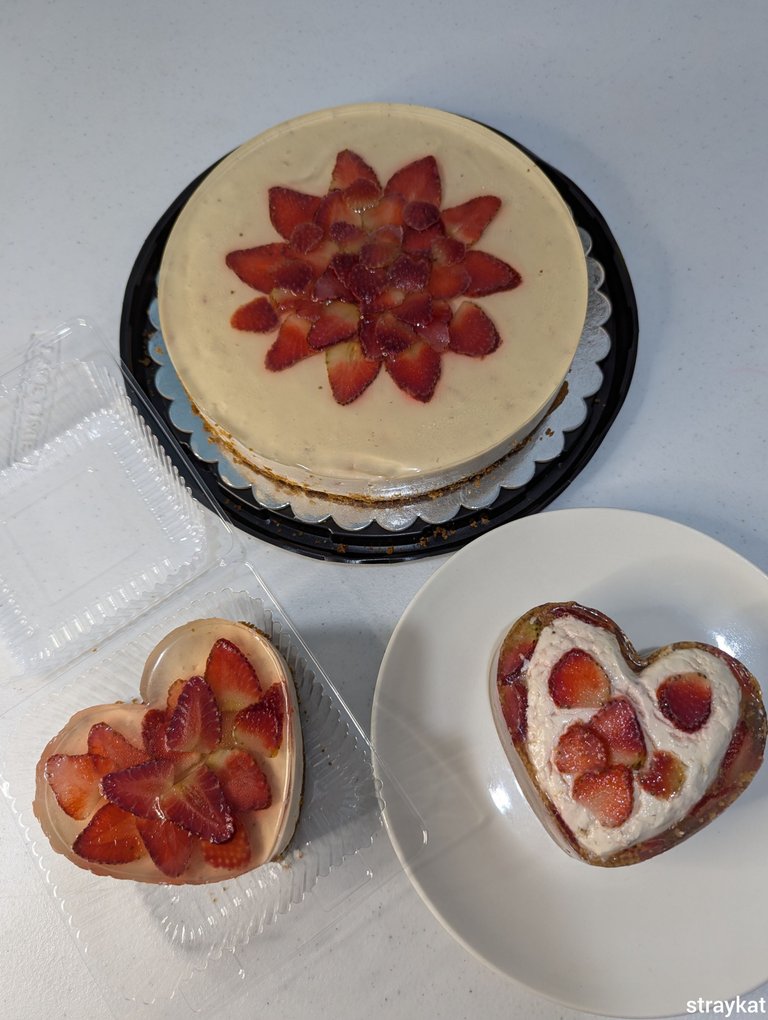
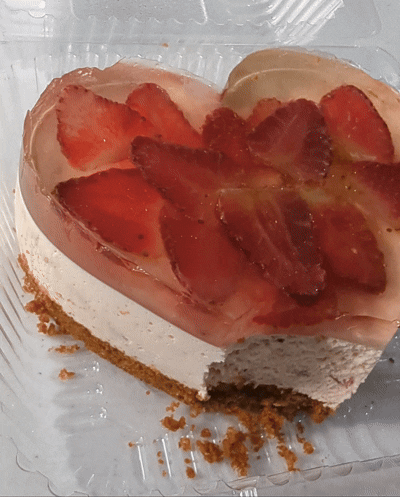
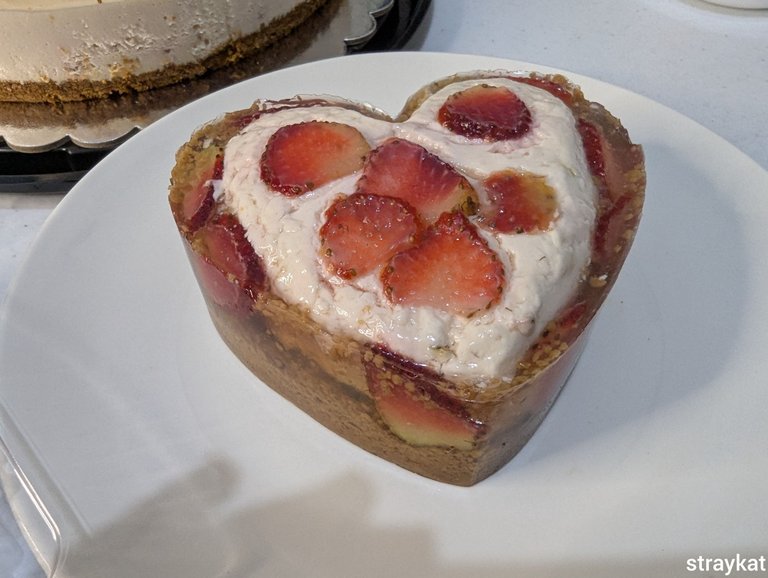
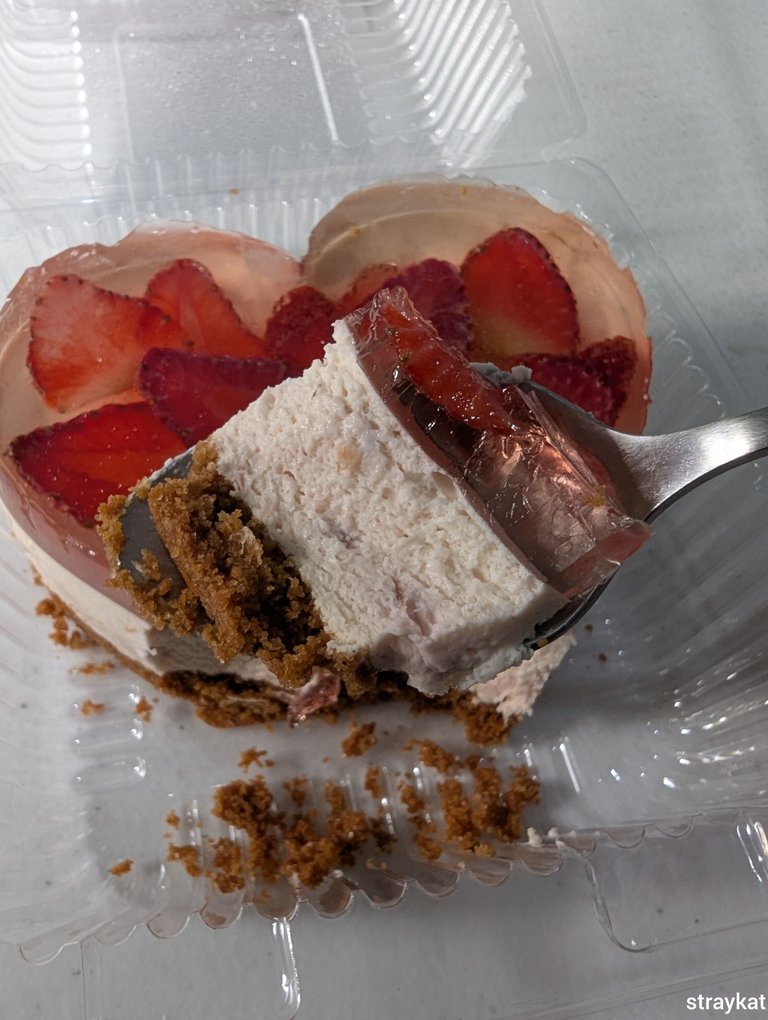
And there you go!!! Now you have your homemade strawberry cheesecake!
The taste is good but I suggest you add more cream cheese if you want the cream cheese taste to be more dominant.
Also, the reason I can't sell cheesecakes is that the fruits on the topping get swept away when I pour the gelatine mixture and it doesn't look aesthethic. Strawberries are also difficult to find in my area and they're expensive.
Just look how terrible this one turned out. Lol. Bits of grahams and cheesecake even floated which made the cake look messy.
The cheesecake on the middle even floated that's why it created an embossed effect. The slices of strawberries also went on different directions after pouring the gelatine.
Anyway, this is good for personal consumption or as a gift. For sure the person receiving it will appreciate it.
Taste is good and okay to satisfy your cheesecake craving. In fact, I still haven't bought cheesecake since I learned how easy it is to make. And I still haven't found one in my area who makes cheesecake with gelatin on top. It's my favorite! Especially the peach cheesecake! Yum!
I still have other flavors to try and maybe I'll share them again in the future!
Thanks for reading! 💚