Hello to all my dear #Hive 🤗 friends, especially to the #HiveMotors 🔧 community. Receive a warm greeting today and welcome to my new post. Folks, at home we have been making improvements to many of the little details that almost no one notices, but are important to make our home look nicer 🏠. We started by cleaning and changing some outlets, some sockets, changing light bulbs and placing others in areas where lighting was needed 💡. It should be noted that this is not a tutorial, I will simply tell you my experience as a novice in what was the change of this device 😊.
Hola a todos mis queridos amigos de #Hive 🤗, en especial a la comunidad de #HiveMotors 🔧. Reciban hoy un cordial saludo y bienvenidos a mi nuevo post. Amigos, en casa hemos estado realizando mejoras a muchos de los pequeños detalles que casi nadie nota, pero son importantes para hacer ver nuestra casa más bonita 🏠. Comenzamos limpiando y cambiando algunos enchufes, algunos sócates, cambiando bombillos y colocando otros en zonas donde hacía falta la iluminación 💡. Cabe destacar que esto no es un tutorial, simplemente les contaré mi experiencia como novato en lo que fue el cambio de este dispositivo 😊.
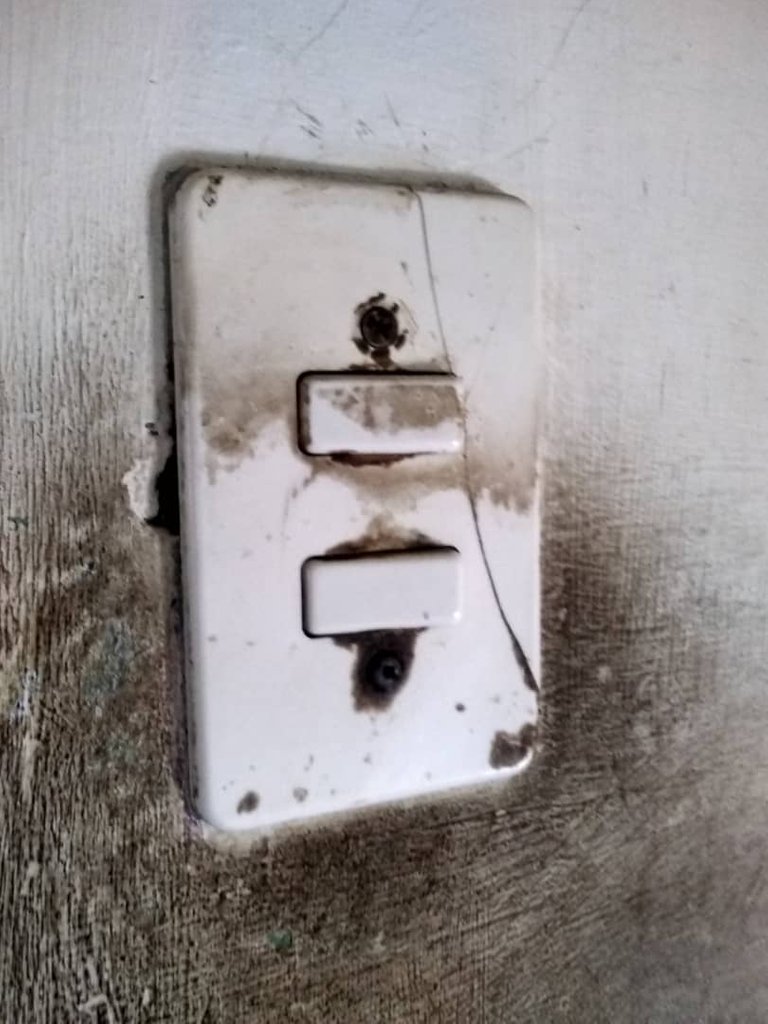
So this time I have come to bring you what it was like for me to change this switch that turns on both the bathroom light and the hallway light 😁. This one was all dirty and damaged. Only 1 of its buttons would turn on. Said switch also had a flaw which was that when the bathroom light came on, inside it made a spark, which was indicative that something was wrong ✨. I would recommend turning off the power before doing any work with electricity, as it can be very dangerous to tamper with it without prior knowledge ❗.
Así que en esta oportunidad les he venido a traer lo que fue para mí cambiar este interruptor que enciende tanto la luz del baño como la del pasillo 😁. Este estaba todo sucio y dañado. Solamente 1 de sus botones encendía. Dicho interruptor también tenía una falla que era que cuando se encendía la luz del baño, dentro de él hacía una chispa, lo cual era indicativo de que algo estaba mal ✨. Recomendaría cortar la luz antes de realizar cualquier trabajo con electricidad, ya que puede ser muy peligroso manipularla sin el conocimiento previo ❗.
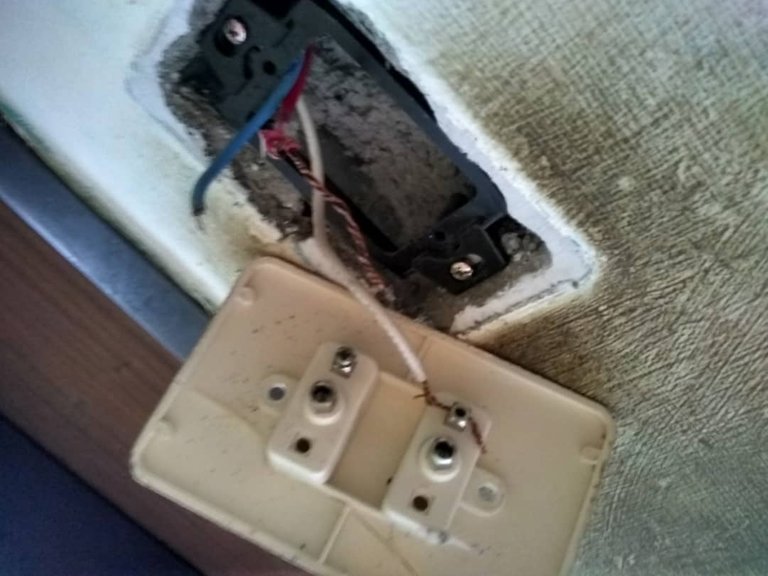
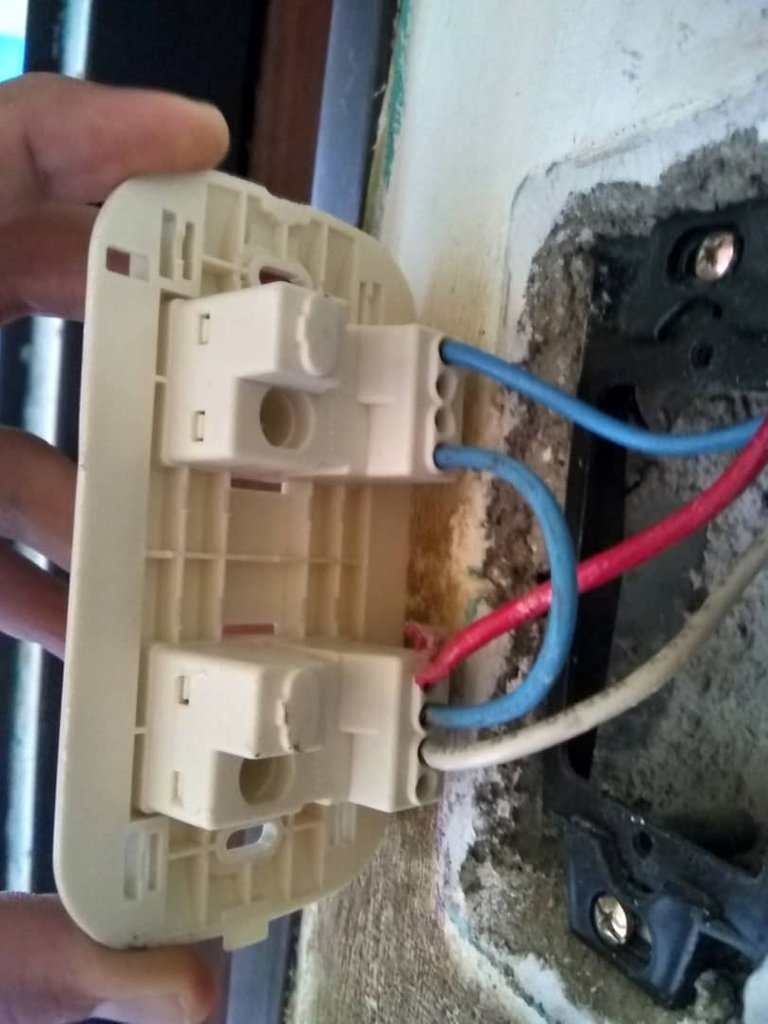
To replace it we bought a new and slightly more modern switch. These switches behind the buttons have 4 inputs 👨🏻🔧. In addition to this we used a screwdriver to remove the screws that held the old switch to the wall and some wire cutters to remove the insulation from the ends of the wires thus exposing the copper that we are going to wind ✂. The first thing I did was to take the red wire and place it in input 1 of the bottom button and the blue wire in input 1 of the top button. To give it electricity, the white wire I placed it in input 3 of the bottom button, but as I noticed at the time that with the same button I turned on both the bathroom and hallway lights 💡.
Para reemplazarlo compramos un interruptor nuevo y un poco más moderno. Estos interruptores detrás de los botones cuentan con 4 entradas 👨🏻🔧. Además de esto utilizamos un destornillador para retirar los tornillos que mantenía fijado el antiguo interruptor a la pared y unos corta cables para retirar el aislante de las puntas de los cables exponiendo de esta manera el cobre que vamos a enrollar ✂. Lo primero que hice fue tomar el cable rojo y colocarlo en la entrada 1 del botón de abajo y el azul en la entrada 1 del botón de arriba. Para darle electricidad, el cable blanco lo coloqué en la entrada 3 del botón de abajo, pero como noté en ese momento que con un mismo botón encendía ambas luces, tanto la del baño como la del pasillo 💡.
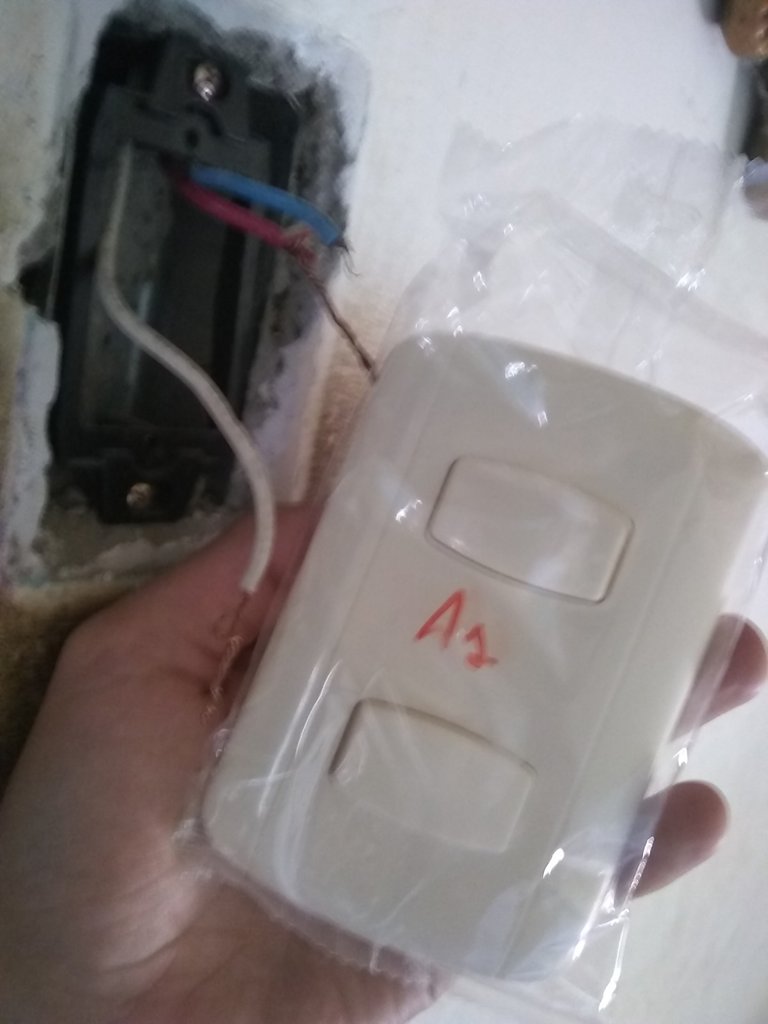
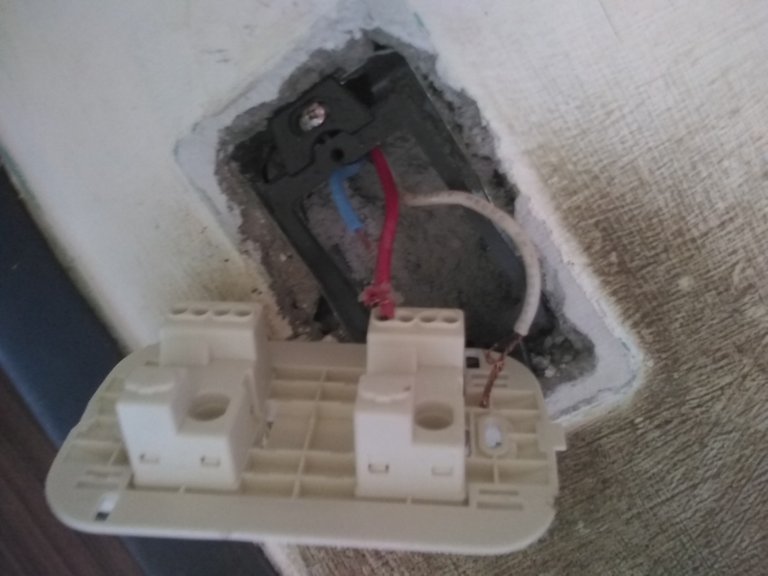
How could I make only 1 of the 2 buttons control only 1 of the lights 🤔 Then it occurred to me with some blue wire, to make a jumper connecting from port or input 2 of the bottom button to input 4 of the top button and so I managed to make it work 👨🏻🔧. Not bad for an inexperienced person, I thought, ha ha ha ha. Although I took my time mostly with that bridge to see where I could place it and that it would be useful to what I wanted to achieve. By the way, if you see in the pictures that the black base is still screwed to the wall, I forgot to remove it while I was doing the whole process ha, ha, ha, ha 🤦🏻♂️. At the end I had to unscrew it and take it off as it should have been done in the beginning ha, ha, ha, ha 🤣
¿Cómo podría hacer que solamente 1 de los 2 botones controlase solamente 1 de las luces? 🤔 Entonces se me ocurrió con un poco de cable azul, hacer un puente que conectara del puerto o entrada 2 del botón de abajo a la entrada 4 del botón de arriba y así logré hacer que funcionase 👨🏻🔧. Nada mal para una persona inexperta, pensé, ja, ja, ja. Aunque me tomé mi tiempo más que todo con ese puente para ver donde podría colocarlo y que me fuese útil a lo que quería lograr. Por cierto, si ven en las fotos que aún está atornillada la base negra a la pared es que me olvidé de retirarla mientras estaba haciendo todo el proceso ja, ja, ja 🤦🏻♂️. Al finalizar tuve que desatornillarla y sacarla como se debió de hacer en el principio ja, ja, ja 🤣
The truth is that the goal was achieved and now we have a new, beautiful and functional switch 😊. My mom was super happy because for a long time she wanted to bring back lighting to this area of the house 👩🏻. And today she can now enjoy the lighting in this area. Without more to add, I hope you liked my post, liked my story about how we changed the switch for lighting in a hallway and bathroom 🤭💡.
Lo cierto es que se logró el objetivo y ahora contamos con un interruptor nuevo, bonito y funcional 😊. Mi mamá estaba supercontenta porque desde hace mucho tiempo que quería devolver la iluminación a esta área de la casa 👩🏻. Y hoy en día ya puede disfrutar de la iluminación en esta zona. Sin más que agregar, espero que les haya gustado mi publicación, les haya gustado mi relato sobre como cambiamos el interruptor para la iluminación de un pasillo y un baño 🤭💡.
Gracias por leer mi post 😁, Feliz y bendecido día. 😉Saludos y hasta la próxima.
Fotos de mi autoria usando mi Motorola MotoE5 Play, edición realizada con Canva. Texto de mi autoría, traducido con DeepL, Publicación realizada con Pc Desktop.
