
🇺🇸ENGLISH🇺🇸
¡Hello Hive Motors community I hope everyone is well!
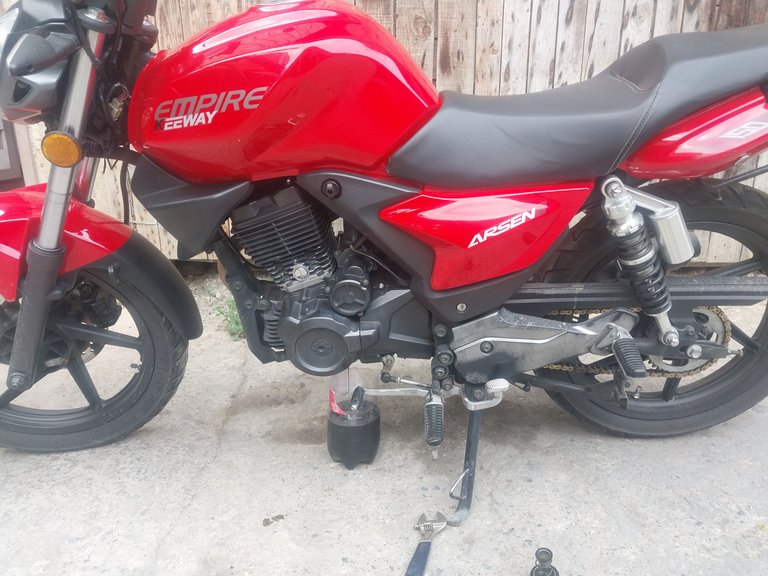
Today I changed the crochet to my bike because the crochet was already slipping and when starting the bike was slow to come out.
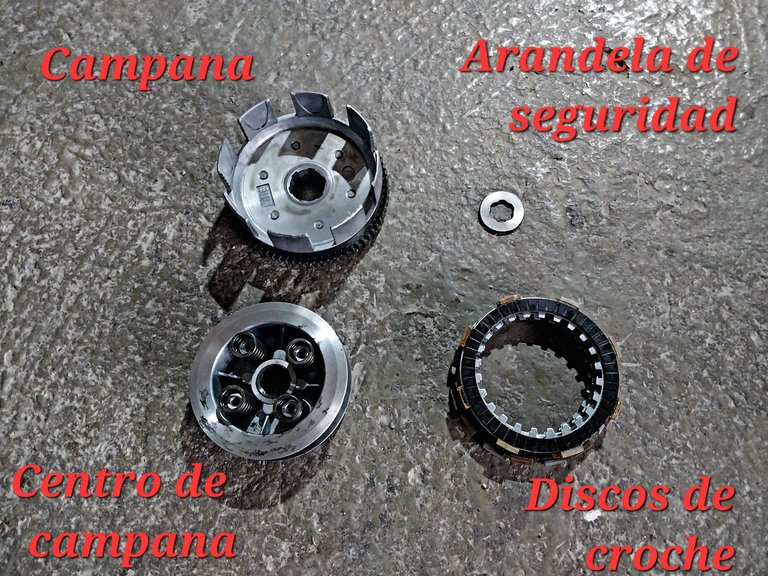
A crochet is composed of a bell, the center of the bell and the crochet discs that in this type of bike have 5 discs.
To make the replacement of the crochet we start by removing all the oil from the engine, so that when we unclog it we don't spill all the oil. In this opportunity I will use the same oil since it has been changed a few days ago.
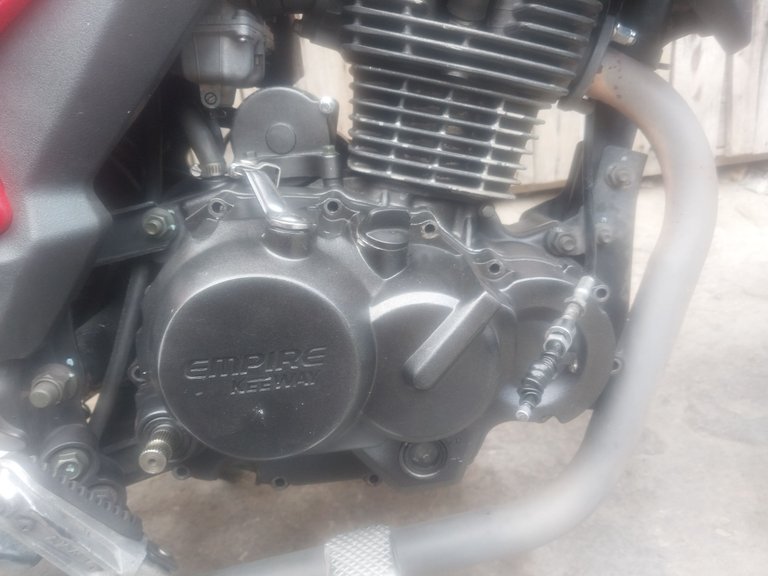
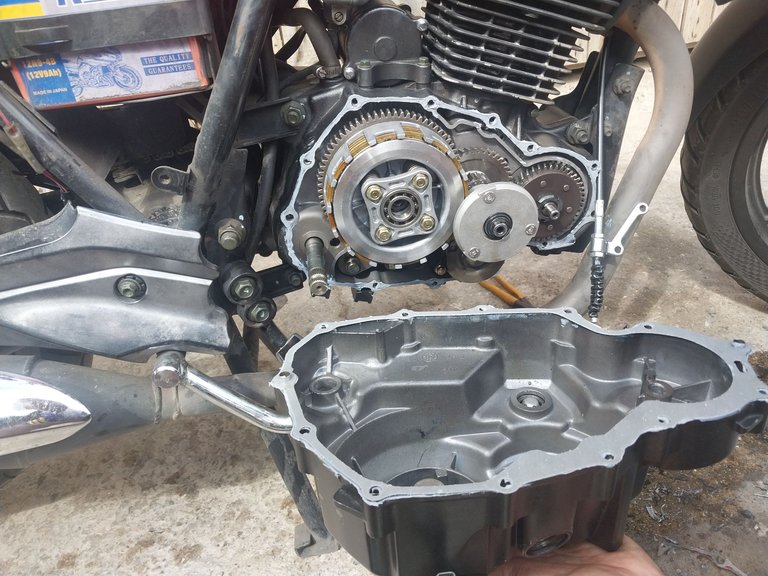
Once the oil is out we proceed to uncover the right side of the engine, we must be very careful with the screws as they have different sizes so it is best to organize it the way you took it out.
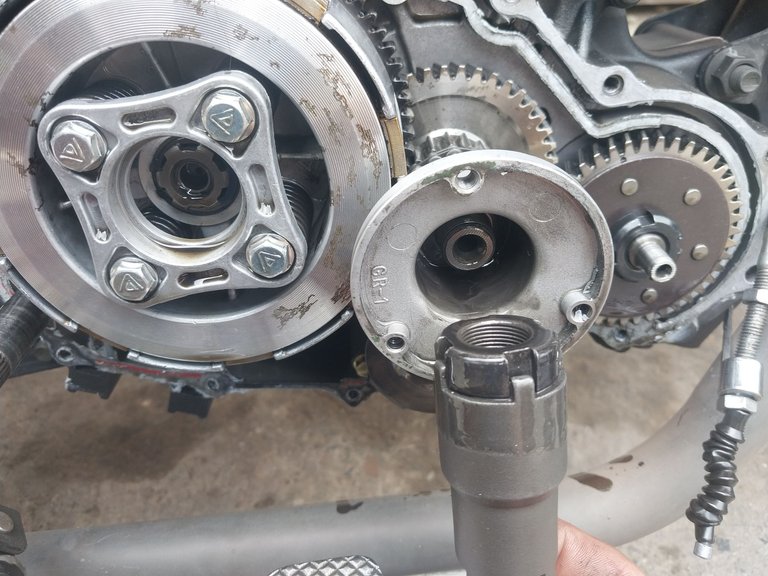
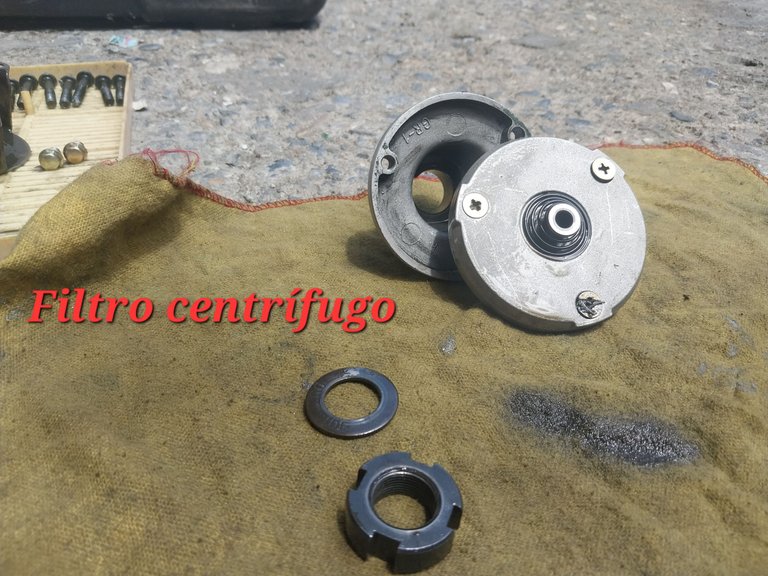
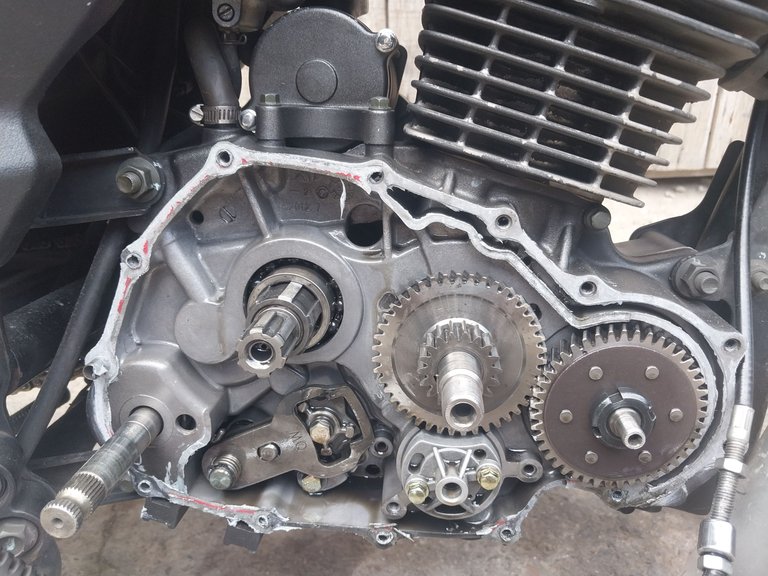
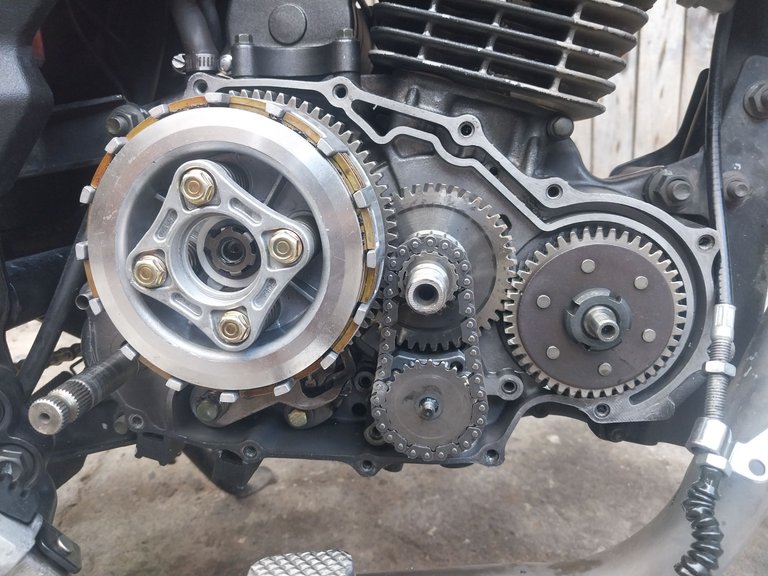
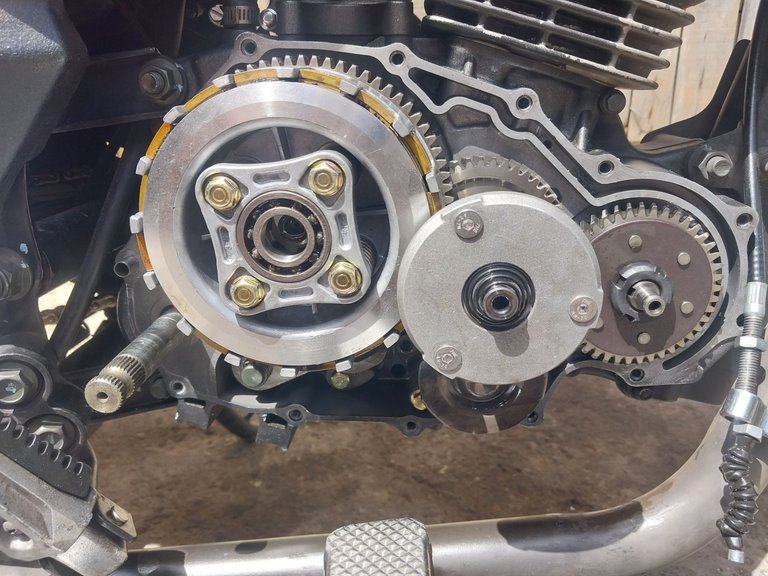
Once the engine is open you will notice that the crochet will not come out without first removing the centrifugal filter. To remove the centrifugal filter you must remove those three screws which we can notice that they are in bad condition. Once the filter cover is removed you need a Torre die to remove the nut that holds it, if you do not have this die and you need to do this job my recommendation is to buy it because without this die you will not be able to remove the filter and you will not be able to continue the work.
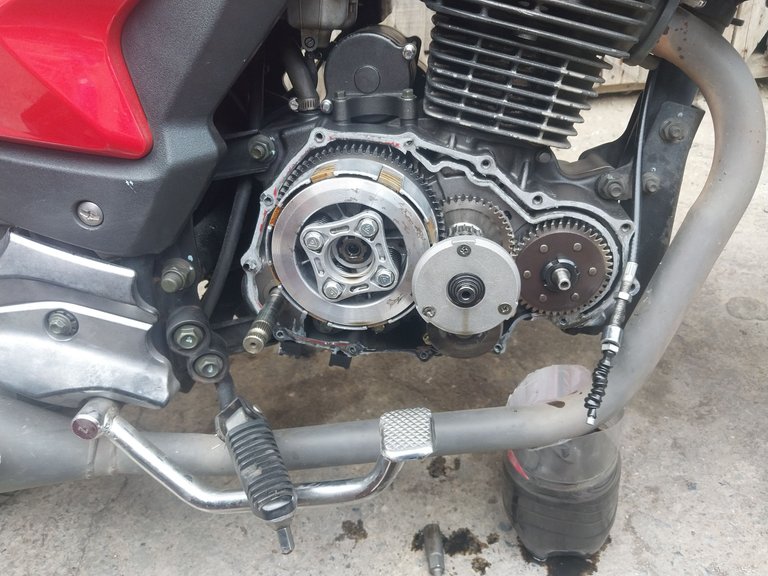
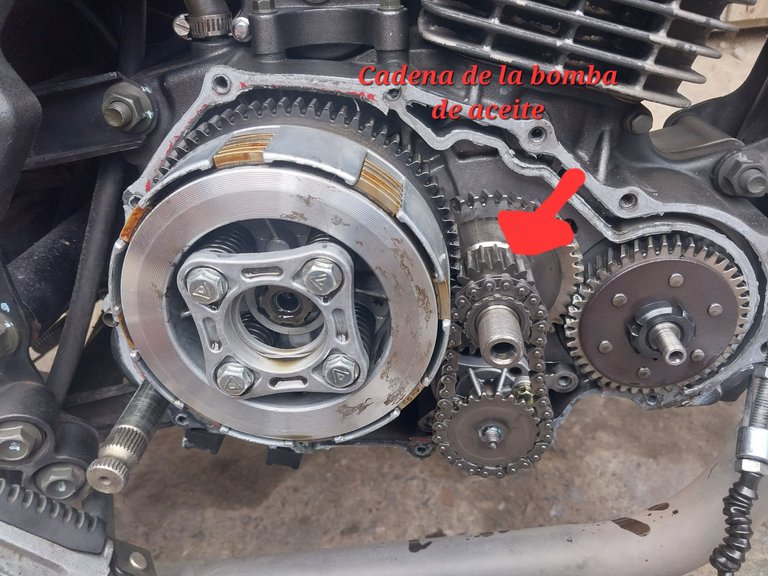
Once the filter is out we proceed to remove the oil pump chain or also called timing chain. You can notice that it is a little stretched so we must replace it.
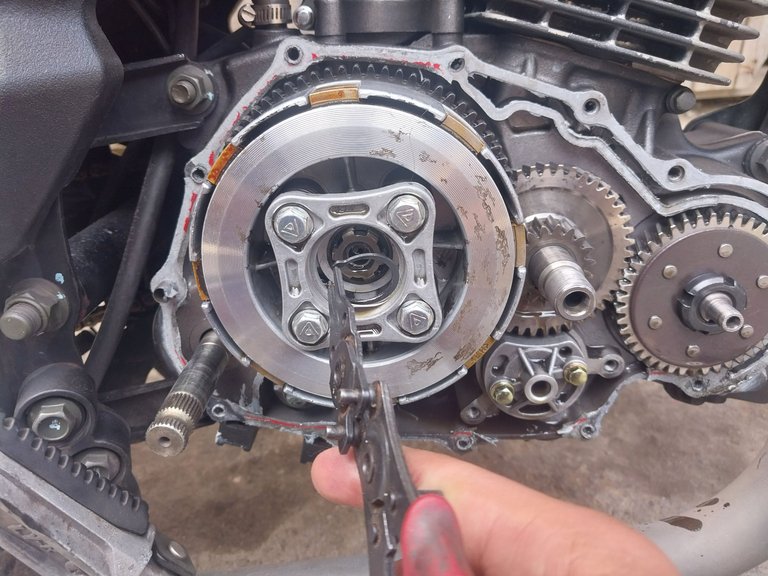
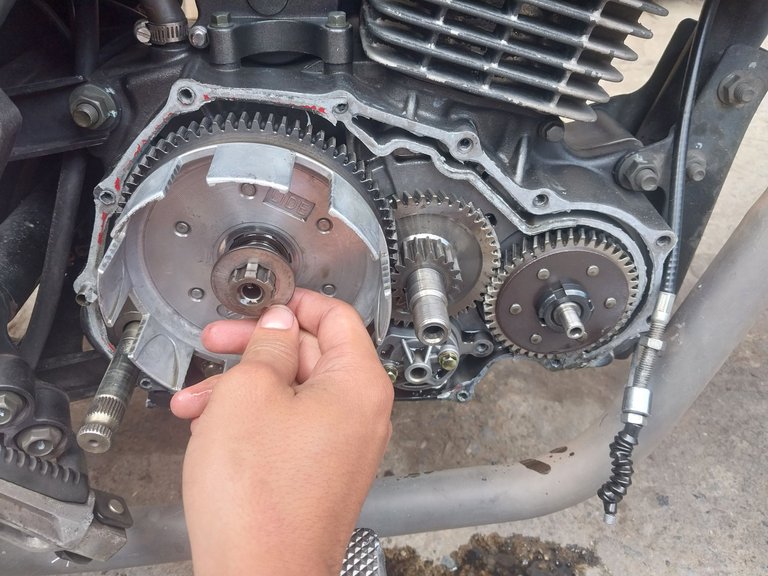
Once the filter and the chain are out, we can proceed to remove the bell housing. This must be done by part, first we remove the center of the bell which is held by a retainer and once the center is out we would only have the bell, it has a safety washer.
Before assembling the new crochet hook, oil should be put on the crochet discs, because of the pressure that it has, the lubrication between discs is very little.
After having done this step we proceed to assemble everything as it goes, but not before having removed the old packing and cleaned both the motor and its cover.
Once we have everything clean we proceed to mount the bell with its respective washer, then the center of the bell is mounted and then the chain of the oil pump.
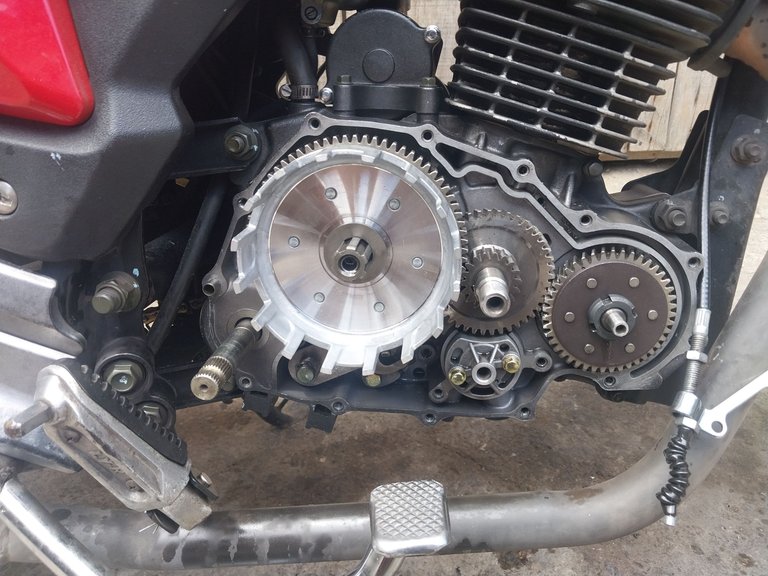
Now to close the engine, we only need to mount the centrifugal filter, which had the screws in bad condition, so they were changed for stainless steel ones with torx head. To mount this filter we must take into account that it has a conical washer which has written out which is what indicates that this part goes outwards and above its respective nut to finish with the cover and its three screws.
With everything in place and everything tightened we proceed to mount the engine cover, we put a little gray silicone that is of temperature and its packer on top, this should be put very carefully because it can be stepped on any edge. Once the cover is mounted we proceed to put the screws in place and gradually tighten in a star shape to finish and clean the excess silicone.
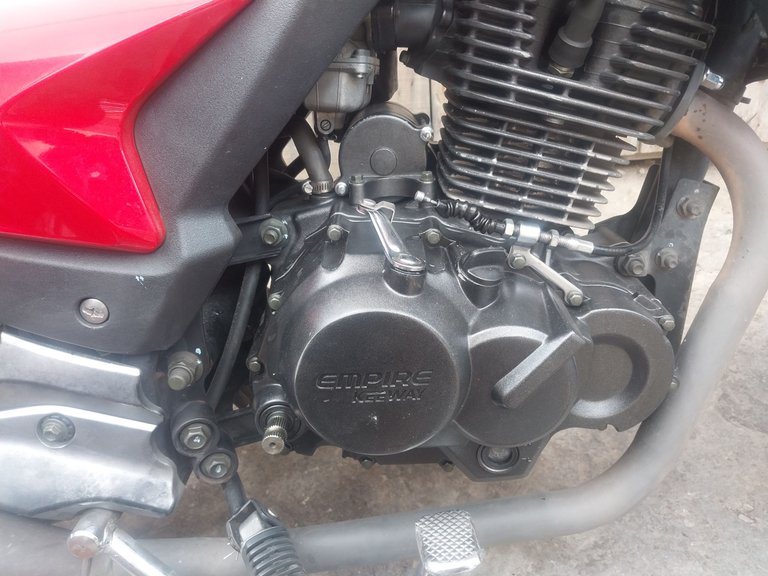
We wait for the silicone to dry and then we pour the oil and it will be ready to use.
If you want to see more post like this I invite you to go through my previous post where I changed the winding to my bike
🇻🇪ESPAÑOL🇻🇪
¡Hola comunidad de Hive Motors espero todos esten bien!
Hoy le cambié la crochera a mi moto porque ya el crochet estaba deslizando y al arrancar la moto tardaba en salir.
Una crochera esta compuesta por una campana, el centro de campana y los discos de crochet que en este tipo de moto llevan 5 discos.
Para hacer la sustitución de la crochera empezamos sacándole todo el aceite al motor, para que al destapar no derramemos todo el aceite. En esta oportunidad usaré el mismo aceite ya que lleva pocos días de cambiado.
Una vez que el aceite esté afuera procedemos a destapar el lado derecho del motor, debemos tener mucho cuidado con los tornillos ya que tienen diferentes tamaños así que lo mejor es organizarlo de la manera en que lo sacaste.
Una vez abierto el motor se puede notar que la crochera no va a salir sin antes sacar el filtro centrífugo. Para sacar dicho filtro se deben quitar esos tres tornillos los cuales podemos notar que están en mal estado. Una vez ya quitada la tapa del filtro se necesita un dado Torre para quitar la tuerca que lo sostiene , si no tienes este dado y necesita hacer este trabajo mi recomendación es que lo compre ya que sin este dado no podrá hacer la extracción del filtro y no podrá seguir el trabajo.
Ya estando el filtro afuera procedemos a sacar la cadena de la bomba de aceite o también llamada cadena de tiempo. Se puede notar que está un poco estirada así que debemos reemplazarla.
Ya con el filtro y la cadena afuera podemos proceder a sacar la campana. Esto debemos hacerlo por parte, primero sacamos el centro de campana que está sostenido por un retén y una vez fuera el centro ya nos quedaría solo la campana, la misma tiene una arandela de seguridad.
Antes de montar la crochera nueva se debe poner aceite en los discos de crochet ya que por la presión que ésta tiene, la lubricación entre disco y disco es muy poca.
Luego de haber hecho este paso procedemos a montar todo como va, no sin antes haber quitado la empacadura vieja y limpiado tanto el motor como su tapa.
Una vez que tenemos todo limpio procedemos a montar la campana con su respectiva arandela, luego se monta el centro de campana y posteriormente la cadena de la bomba de aceite.
Ya para cerrar el motor solo nos faltaría montar el filtro centrífugo el mismo tenía los tornillos en mal estado así que se cambiaron por unos de acero de inoxidable con cabeza torx. Para montar este filtro debemos tener en cuenta que tiene una arandela cónica la misma tiene escrito out que es lo que nos indica que esta parte va hacia afuera y encima su respectiva tuerca para ya terminar con la tapa y sus tres tornillos.
Con todo en su lugar y ya todo apretado procedemos a montar la tapa del motor la misma le ponemos un poco de silicón gris que es de temperatura y su empacadora encima, esta se debe poner con mucho cuidado ya que puede quedar pisada en algún borde. Ya montada la tapa procedemos a poner los tornillos en su lugar y apretar gradualmente en forma de estrella para así terminar y limpiar el excedente de silicón.
Esperamos que seque el silicon y le echamos el aceite y así ya quedaria lista para usar.
Si quiere ver más post como este les invito a pasar por mi post anterior donde le cambie el embobinado a mi moto