Bienvenidos

Welcome
Esta semana tenía planificado escribir sobre algo tan importante para el mantenimiento de los vehículos como lo es el cambio de aceite, qué suele ser rápido y sin ningún tipo de trauma.
Desde que aprendí a manejar, lo primero que me indicaron fue sobre el mantenimiento y revisión de un vehículo, qué antes de encender el carro lo primero que debía realizar era su revisión, qué va desde confirmar el estatus de los cauchos con detalle en las tuercas y situación del aire en los mismos.
Luego de ello levantar el capo del carro y medir sacando la vara del aceite del motor, con la observación de la consistencia del aceite. Para esto es importante sacar la vara en dos oportunidades tomando las medidas respectivas, así si tiene algún faltante, bien sea por evaporación o porque tiene algún tipo de bote, el cual debemos identificar para llevar a un mecánico especialista qué indique como corregir.
Revisar el deposito de agua y el de la liga de frenos, qué estos estén en su óptima capacidad de llenado para evitar males innecesarios a futuro.
Ahora bien, para llegar a determinar cuando debemos realizar el cambio de aceite de nuestros vehículos, lo primero que debemos tomar en cuenta es el kilometraje qué tiene respecto al último cambio hecho, qué por lo general es de 5000 km cuando se trata de aceite mineral, qué es el caso de mi vehículo.
Otra forma de determinar el cambio es cuando le estamos haciendo la revisión sacando la varilla y tocamos con la yema de los dedos el aceite qué está en ella, lo olemos y lo frotamos para tomar en cuenta su consistencia y viscosidad, esto nos permite obtener algunas características qué nos indican si el aceite esta quemado o perdió propiedades.
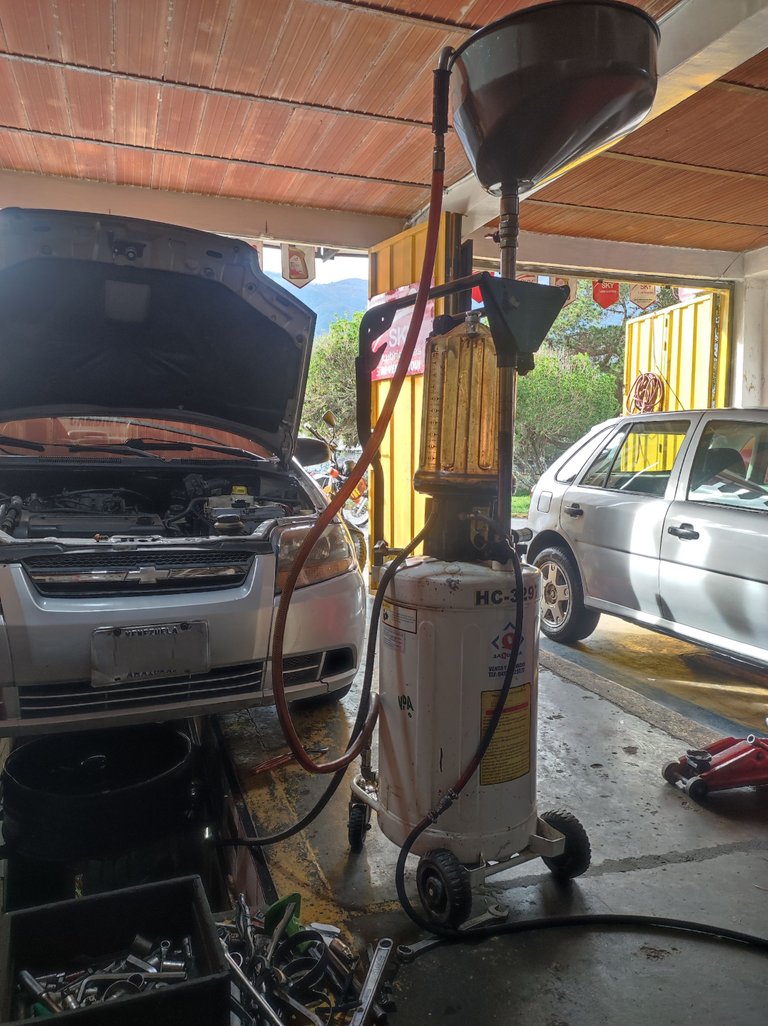
Al saber que debemos hacerle el cambio de aceite, nos dirigimos hacia un técnico especialista, qué montado en carro sobre un anden, el técnico por debajo del carro quita con una llave el tapón del cárter para drenar todo el aceite, luego introduce una manguera aspiradora para sacar el aceite con sucio y partículas ajenas al sistema de lubricacion. Posteriormente se vuelve a colocar el tapon en su sitio.
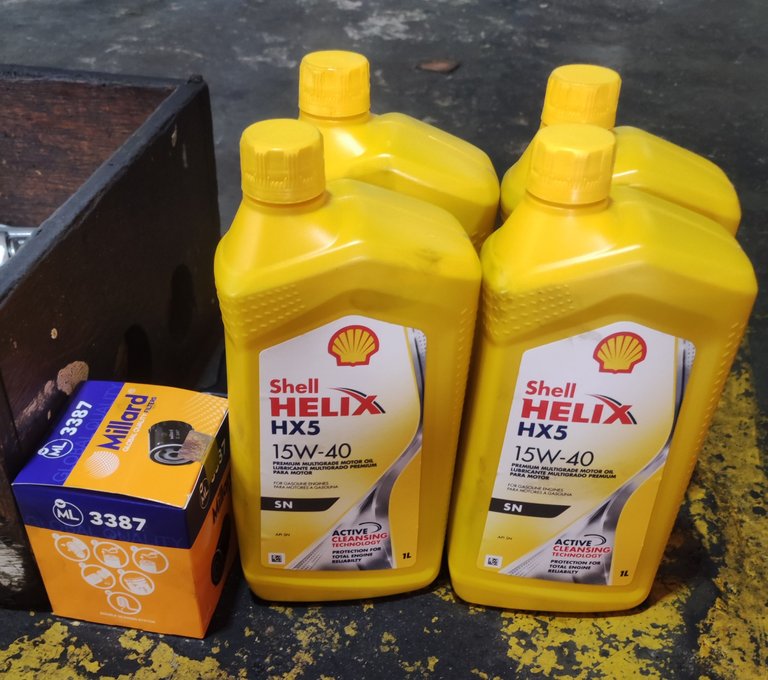
Con un suncho (herramienta especial) sacan el filtro de aceite del carro y lo sustituyen con uno nuevo.
Ya realizado todo lo anterior, se comienza a colocar el aceite por la parte superior de aceite, quitando la tapa de aceite del motor. En mi caso siempre busco la mejor calidad y compre los 4 litros 15w40 correspondientes al tipo de carro y características del motor.
Ademas de eso, siempre se debe respetar el tipo y característica de aceite qué se le deben colocar a los vehículos. Jamás colocarle aceites más viscosos si no lo indica el fabricante, podemos ocasionar un daño mayor al motor, debido a las características de los conductos y Bombeo del sistema de lubricacion.
Ya realizado el cambio se procedio a encender el vehículo para verificar que todo estaba bien...
Vake la pena destacar y aconsejar qué la vida útil de tu vehículo siempre va estar sujeto al mantenimiento qué le des consecutivamente.
This week I had planned to write about something as important for the maintenance of vehicles as is the oil change, which is usually fast and without any trauma.
Since I learned to drive, the first thing I was told was about the maintenance and review of a vehicle, that before starting the car the first thing I should do was his review, which goes from confirming the status of the tires with detail in the nuts and air situation in them.
After that, lift the hood of the car and measure by removing the oil dipstick from the engine, observing the consistency of the oil. For this it is important to take out the dipstick twice taking the respective measures, so if it has some missing, either by evaporation or because it has some kind of pot, which we must identify to take to a specialist mechanic who will indicate how to correct it.
Check the water tank and the brake fluid reservoir to ensure that they are at their optimum filling capacity to avoid unnecessary problems in the future.
Now, in order to determine when we should change the oil in our vehicles, the first thing we must take into account is the mileage of the last oil change, which is usually 5000 km when it is mineral oil, which is the case of my vehicle.
Another way to determine the change is when we are doing the revision by taking out the dipstick and touching with the fingertips the oil that is in it, we smell it and rub it to take into account its consistency and viscosity, this allows us to obtain some characteristics that tell us if the oil is burned or lost properties.
When we know that we must change the oil, we go to a specialist technician, who mounted in a car on a platform, the technician under the car removes with a key the crankcase cap to drain all the oil, then introduces a vacuum hose to remove the oil with dirt and foreign particles to the lubrication system. The plug is then put back in place.
With a suncho (special tool) they remove the oil filter from the car and replace it with a new one.
Once all the above is done, they start to put the oil through the top part of the oil, removing the oil cap from the engine. In my case I always look for the best quality and buy the 4 liters 15w40 corresponding to the type of car and engine characteristics.
Besides that, you should always respect the type and characteristics of the oil that should be used in the vehicles. Never put more viscous oils if the manufacturer does not indicate it, we can cause a greater damage to the engine, due to the characteristics of the conduits and pumping of the lubrication system.
Once the change was done, we proceeded to turn on the vehicle to verify that everything was ok...
It is worth mentioning and advising that the useful life of your vehicle will always be subject to maintenance.


Gracias por leer y votar este post...
Un abrazo!
Hasta otra oportunidad!
Thank you for reading and voting this post...
A hug!
See you again!
Para este post me apoye en Translated with www.DeepL.com/Translator (free version)

For this post I relied on Translated with www.DeepL.com/Translator (free version)