Greetings,
Dear friends once again here in this opportunity I am going to share with you a repair I did to the spark.
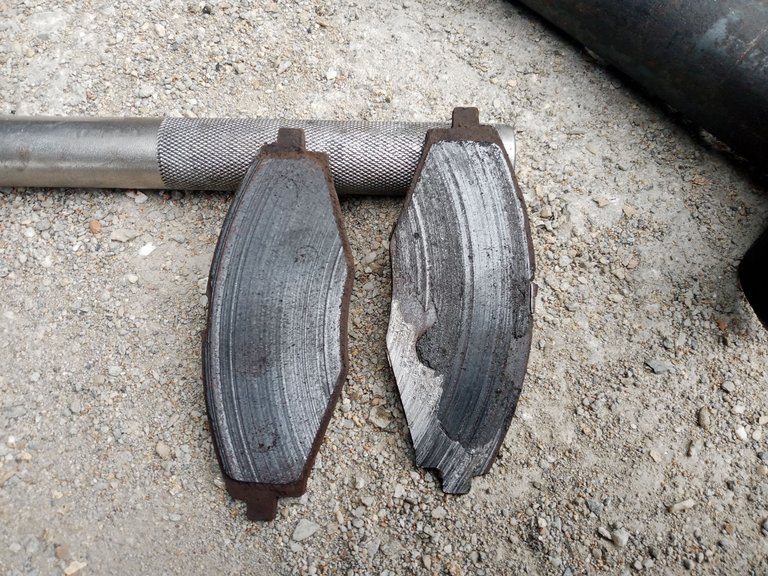
A few days ago the car started to sound metallic when braking but the noise was intermittent, I knew that the pads had little life but I was waiting to buy the shocks and do a single job.

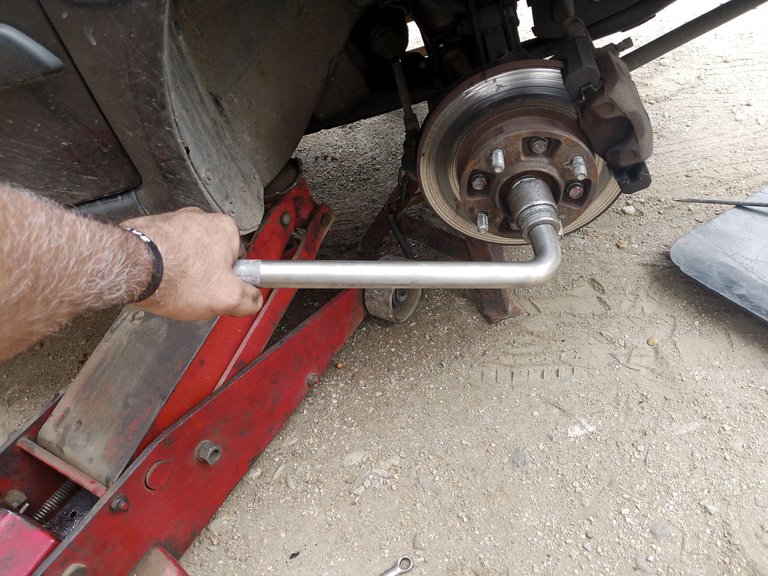
The sound became more frequent so I could not delay more that work so I had to disassemble again to change the shock absorbers, I went to do the job yesterday after noon relying on the simplicity of the rest of the cars that is to change the pads and remove the disc to rectify it.
Well I tell you that this model is not complicated and you must disassemble the entire upright as if you are going to change a bearing, this worried me a little because if you damage a bearing was not in my budget, thank God I managed to disassemble without generating any problem in the bearing.

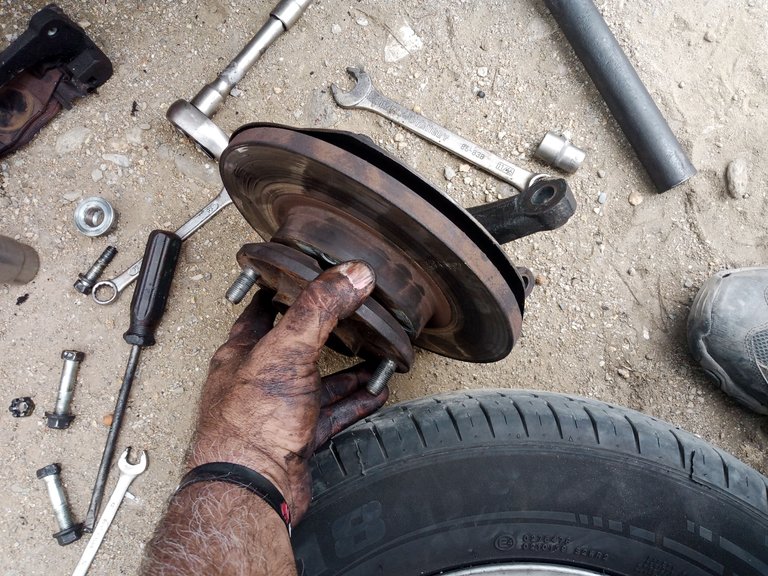
After disassembling the whole piece I mounted it in the press to disassemble very carefully so as not to damage the bearing and with the disassembled discs go to the brake shop to turn the discs and correct the imperfections of the braking without paste.
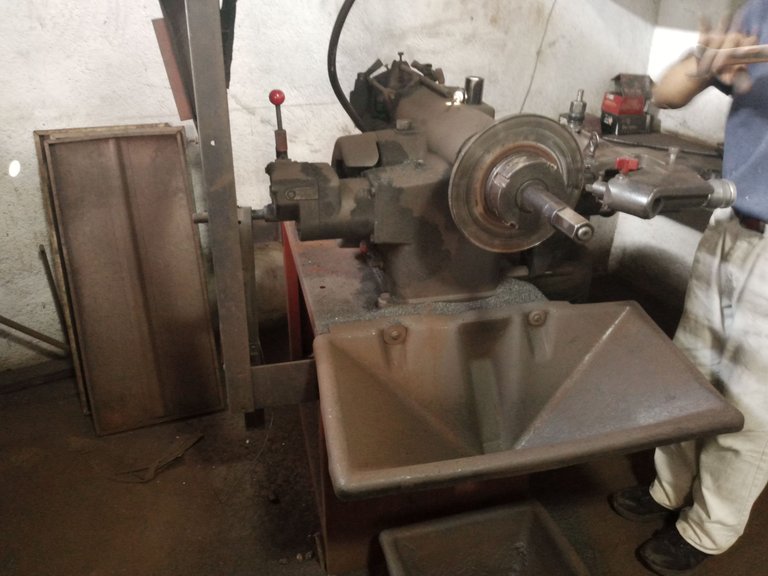
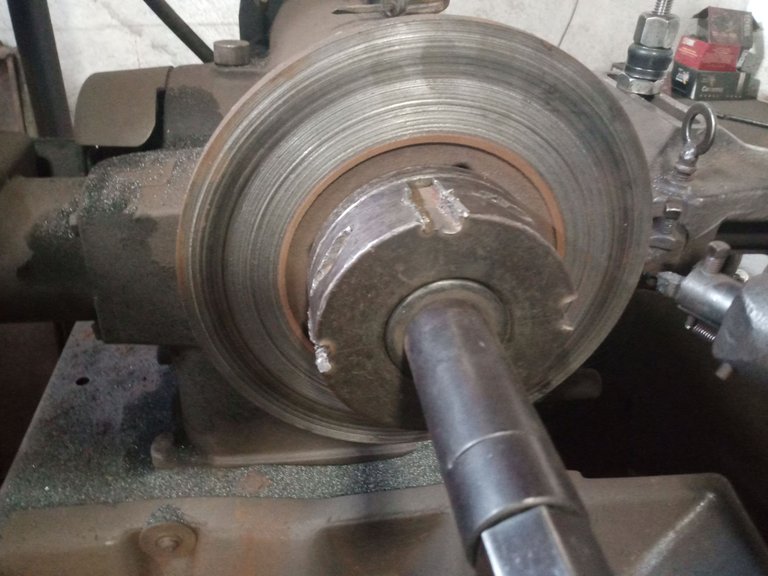
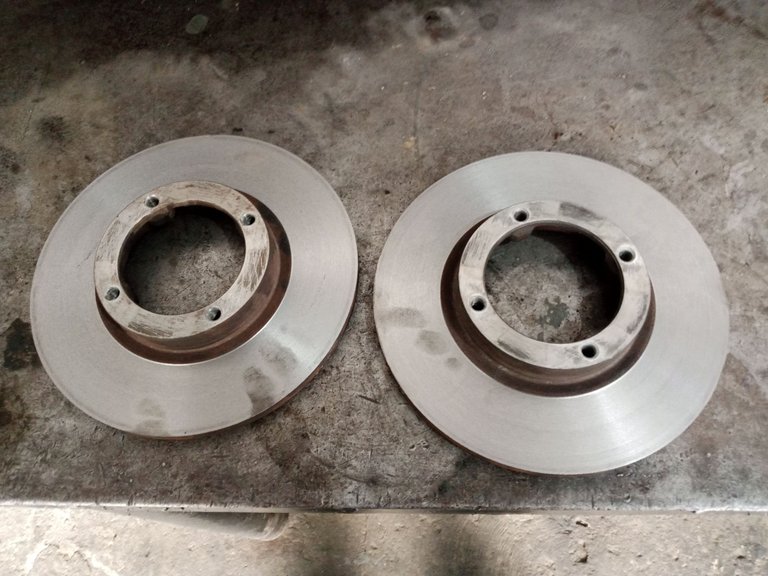
This work in the store has a cost of $ 3 per disc and took about 30 minutes, if you see my blog a few months ago I made a video of this process with another car.
Already in the shop I carefully reassemble everything in order to install in the car again and now I can replace the brake pads.
This work in the store has a cost of $ 3 per disc and took about 30 minutes, if you see my blog a few months ago I made a video of this process with another car.
Already in the shop I carefully reassemble everything in order to install in the car again and now I can replace the brake pads.
The process itself to replace the pads if it is simple just touches disassemble the wheel and with a 14mm wrench remove one of the screws that hold the caliper and the pads come out.
We must be very careful not to bend the protective sheet so that it is not making rubbing noise and we must be careful not to damage the sheets that hold the pads known as Anti-noise.
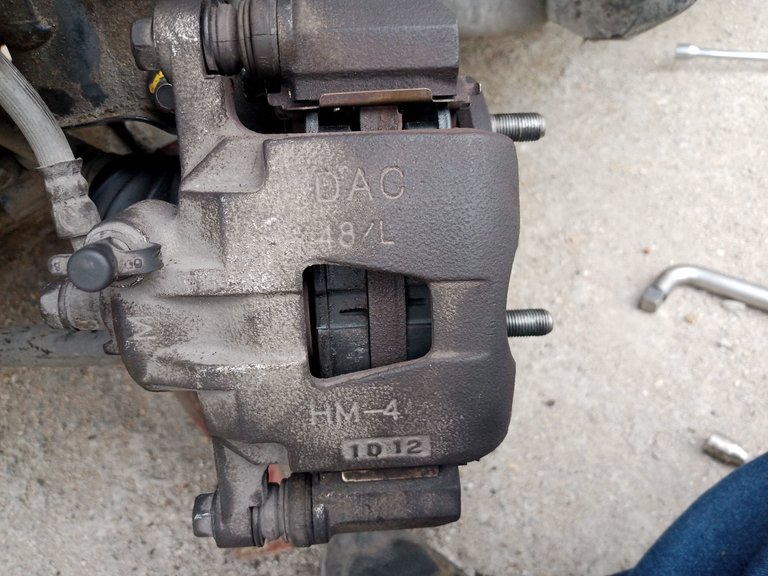
Another process to do a quality job is to open the brake fluid tap to put pressure on the piston and return it to its original position.
Once the piston returns we close the tap, install the pads and perform an air bleed process in the brake fluid lines, and finally once the system is free of air and the brake operates correctly we top up the fluid as long as it is not contaminated.
In my case the fluid is fine since by manual I had replaced it with a new one 10000km ago, I just had to top it up.
As users or customers of workshops should be very careful because many mechanics to do the job quickly return the piston with pliers to save that step and this can scratch the surface of the piston or failing that the pressure can break a seal that is vulnerable over the years causing fluid leaks later or brake failure.
Well friends I hope this data will be helpful and if you have a spark or a matiz take care of your brake discs as this work is quite tedious and can be costly to have to replace the bearings.
Just change the pads on time and do not wait until the last thing as I did🤭.
Thank you for joining me in this repair and God bless you greatly, the photos are my own taken with the Infinix Hot 10 i cell phone.
SPANISH
Saludos,
Queridos amigos una vez más por aquí en esta oportunidad les voy a compartir una reparación que le hice al spark.
Hace unos días el auto empezó a sonar metálico cuando frenaba pero era intermitente el ruido, sabía que las pastillas tenían poca vida útil pero estaba esperando poder comprar los amortiguadores y hacer un solo trabajo.
El sonido se hizo mas frecuente así que no pude atrasar más ese trabajo así me toque desarmar de nuevo para cambiar los amortiguadores, fui a realizar el trabajo ayer luego del mediodía confiando en lo sencillo del resto de los autos que es cambiar las pastillas y desmontar el disco para rectificarlo.
Pues les cuento que no este modelo es complicado y se debe desmontar el montante completo tal cual si se va a cambiar un rodamiento, esto me preocupo un poco ya que si se daña un rodamiento no estaba en mi presupuesto, gracias a Dios logré desarmar sin generar ningún problema en el rodamiento.
Luego de desmontar toda la pieza la monte en la prensa para desarmar con mucho cuidado para no dañar el rodamiento y con los discos desmontados acudir al taller de frenos para que tornearan los discos y corregir las imperfecciones de la frenada sin pasta.
Este trabajo en la tienda tiene un costo de 3$ por cada disco y tomo aproximadamente 30 minutos, si ven mi blog hace unos meses hice un vídeo de este proceso con otro auto.
Ya en el taller vuelvo a ensamblar con cuidado todo en orden para instalar en el auto nuevamente y ahora sí poder reemplazar las pastillas de freno.
El proceso en si de reemplazar las pastillas si es sencillo solo toca desmontar la rueda y con una llave 14mm quitamos uno de los tornillos que sujetan el caliper y salen las pastillas.
Debemos tener mucho cuidado de no doblar la lámina protectora para que no quede haciendo ruido de roce así como debemos cuidar no estropear las láminas que sujetan las pastillas conocidas como Anti ruidos.
Otro proceso para realizar un trabajo de calidad es abrir el grifo del fluido de frenos para hacer presión en el pistón y regresarlo a su posición original.
Una vez que el pistón regresa cerramos el grifo, instalamos las pastillas y realizamos un proceso de purga de aire en las líneas del fluido de frenos, ya por último una vez que el sistema no tiene aire y el freno acciona correctamente completamos el fluido siempre y cuando no esté contaminado.
En mi caso el fluido está bien ya que por manual yo lo había reemplazado por uno nuevo hace 10000km solo me tocó completar.
Como usuarios o clientes de talleres deben tener mucho cuidado ya que muchos mecánicos por hacer el trabajo rápido regresan el pistón con un alicate para ahorrarse ese paso y esto puede rayar la superficie del pistón o en su defecto la presión puede romper algún sello que este vulnerable con los años causando fugas de fluido más adelante o fallas de frenado.
Bueno amigos espero que estos datos le sean de ayuda y si tienen un spark o un matiz cuiden mucho sus discos de frenos ya que este trabajo es bastante tedioso y puede salir costoso de tener que reemplazar los rodamientos.
Solo basta con cambiar las pastillas a tiempo y no esperar hasta lo último como hice yo🤭
Gracias por acompañarme en esta reparación y que Dios les bendiga grandemente, las fotos son de mi propiedad tomadas con el celular Infinix Hot 10 i.