¡Hola amigos de Hive! 🖤💗
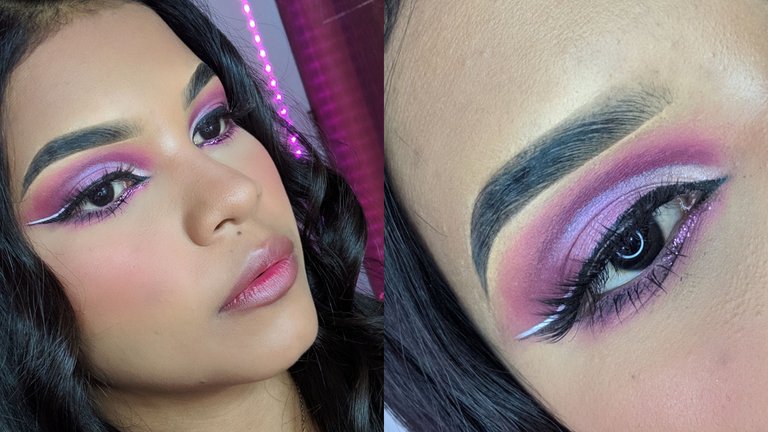
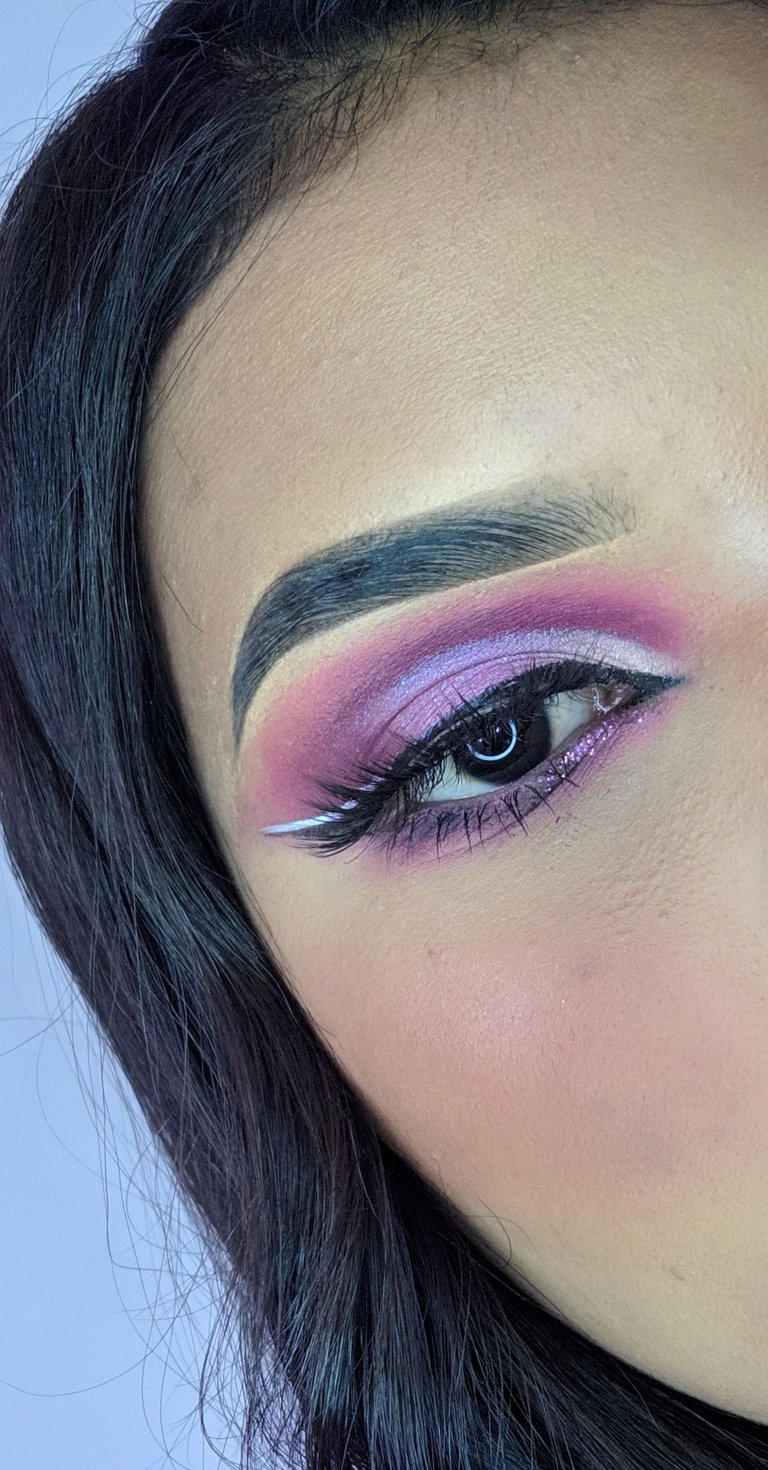
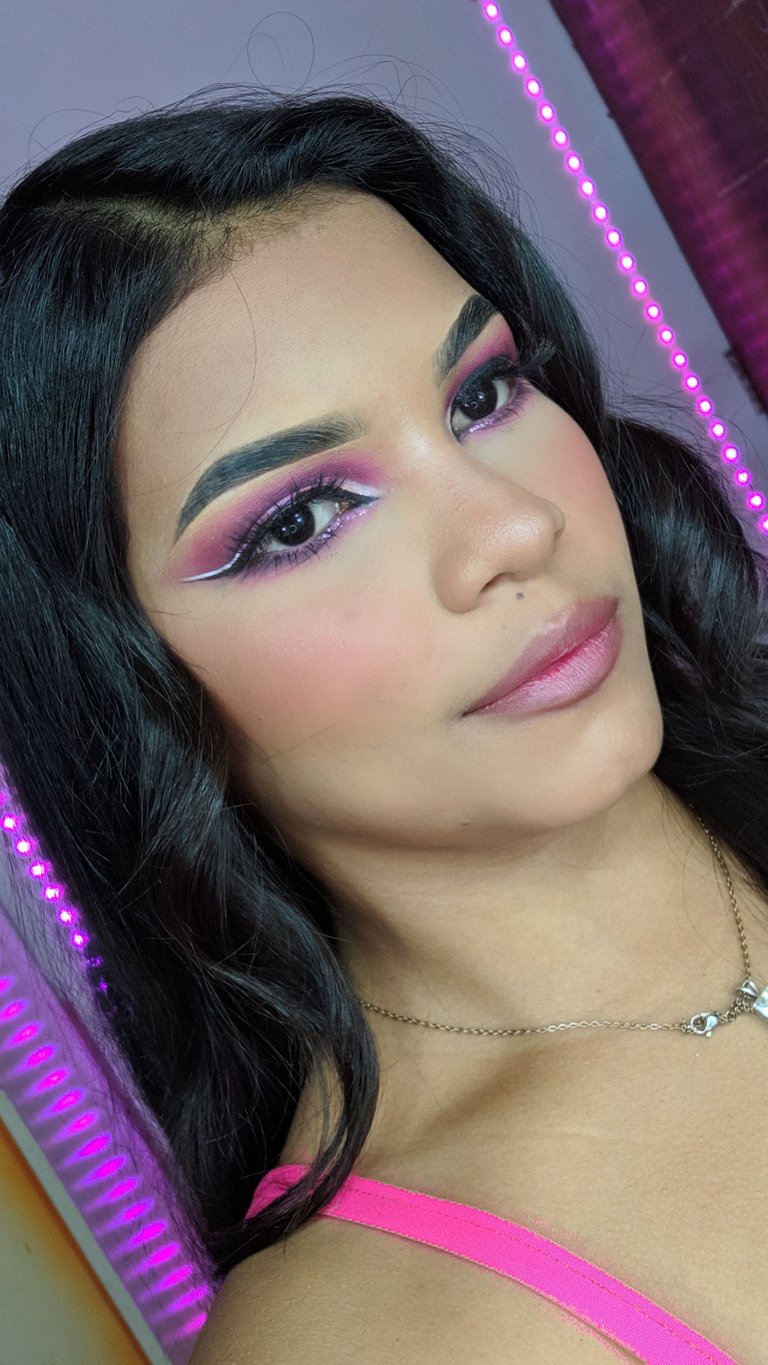
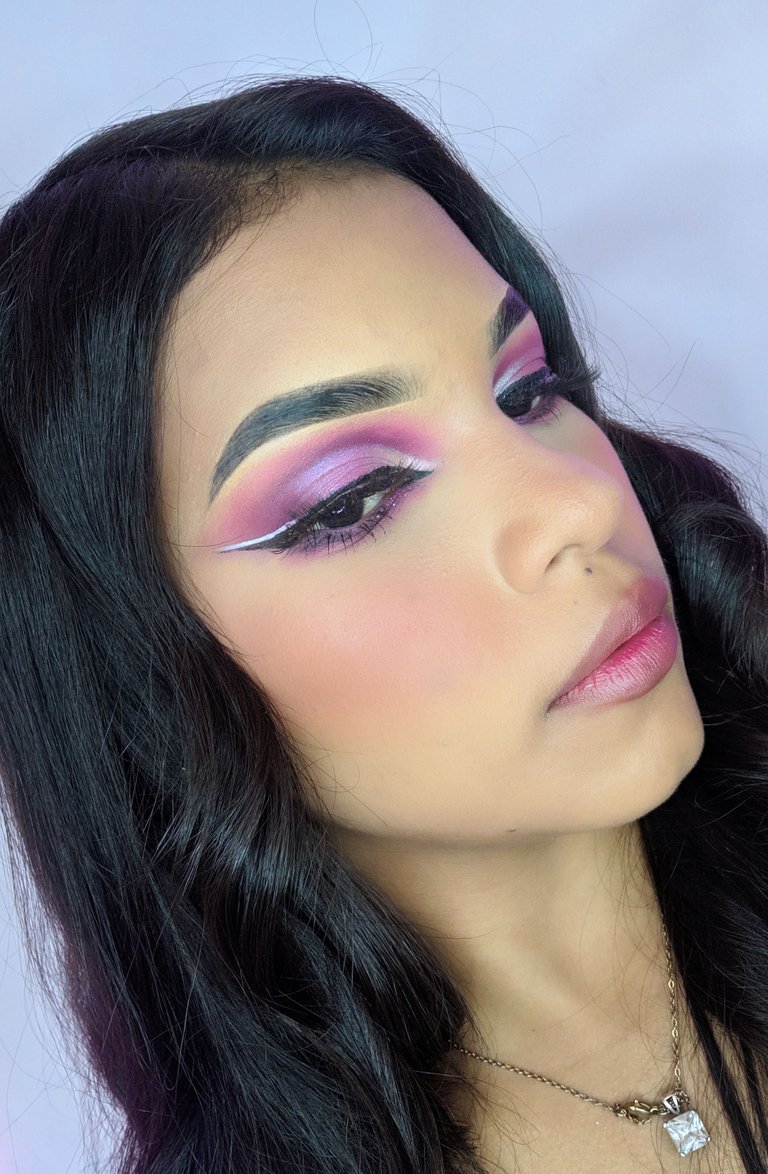
Hoy les mostraré el paso a paso de este maquillaje en tendencia con delineado blanco. Y aunque es fucsia la iluminación lo hace ver morado. He visto mucho en imagenes de páginas de salones de belleza en México este tipo de maquillaje y también se lo he visto a el maquillador Luis Torres, amé hacerlo porque tenía tiempo con esta idea en mente y los complementé con ondas suaves las clave de estos looks con las cejas orgánicas y aunque siento que duran muy poco se ven espectaculares y tengo entendido que es una maquillaje en tendencia social GLAM.
Hello friends of Hive! 🖤💗
Today I will show you the step by step of this on trend makeup with white eyeliner. And even though it's fuchsia the lighting makes it look purple. I have seen a lot in images of beauty salon pages in Mexico this type of makeup and I have also seen it to the makeup artist Luis Torres, I loved to do it because I had time with this idea in mind and I complemented them with soft waves the key to these looks with organic eyebrows and although I feel that they last very little they look spectacular and I understand that it is a makeup in social trend GLAM.
PASOS:
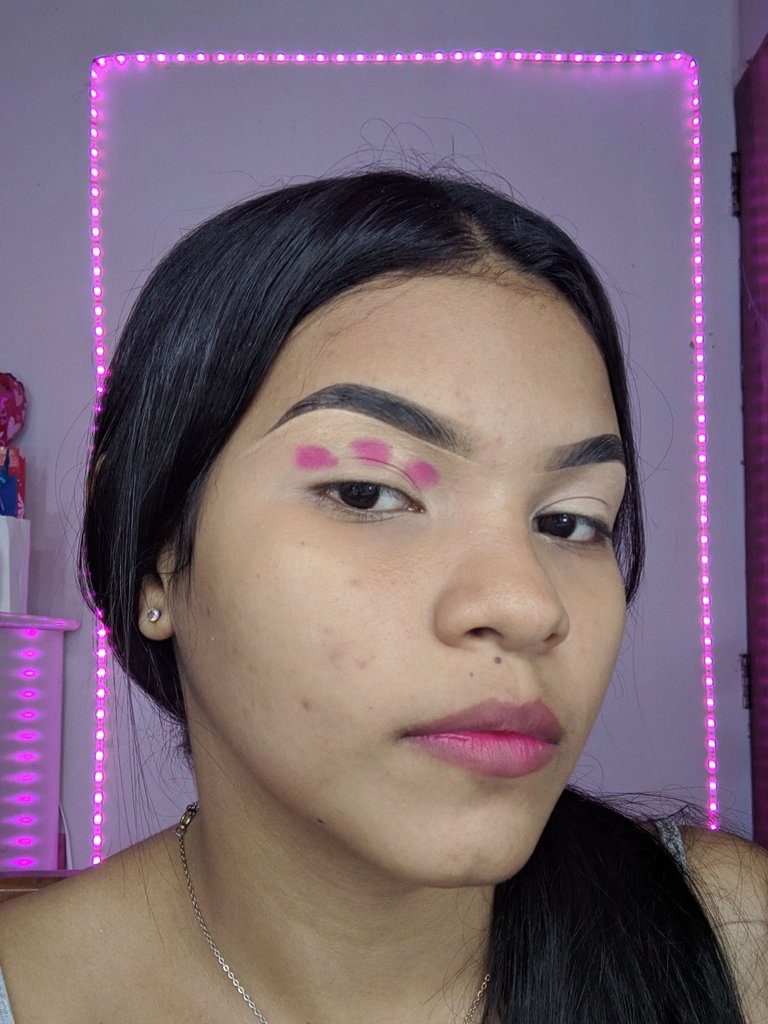
1- Corrector: empezaremos preparando y corrigiendo las cejas con corrector, para definir las cejas y que las sombras se adiheran mejor.
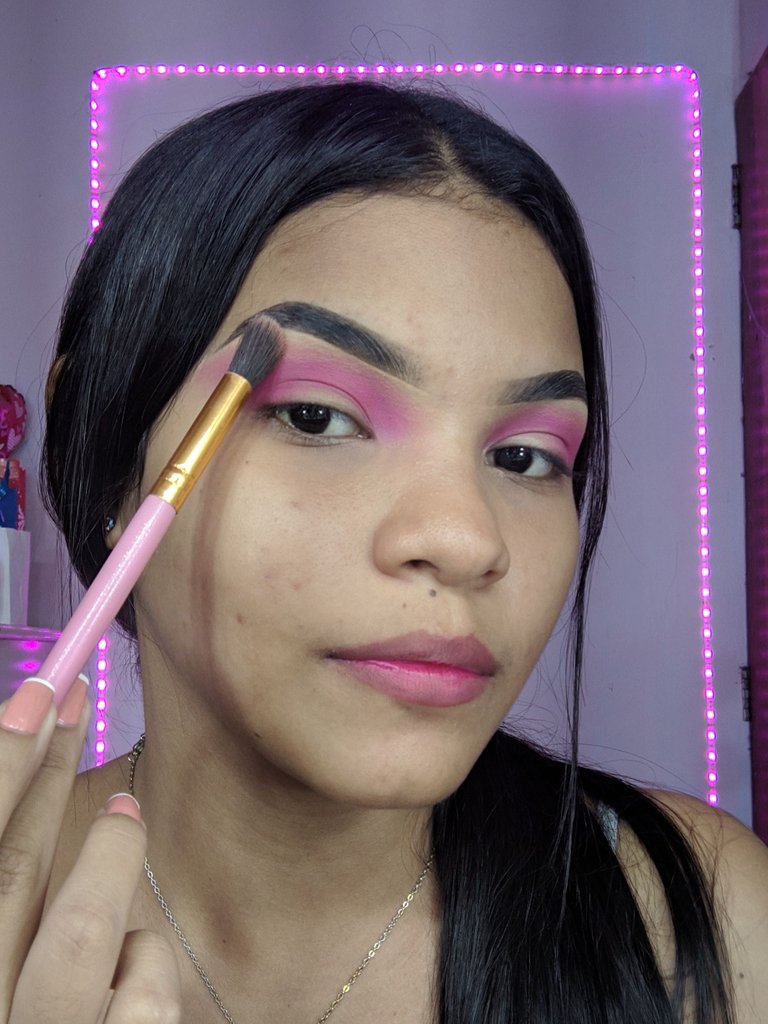
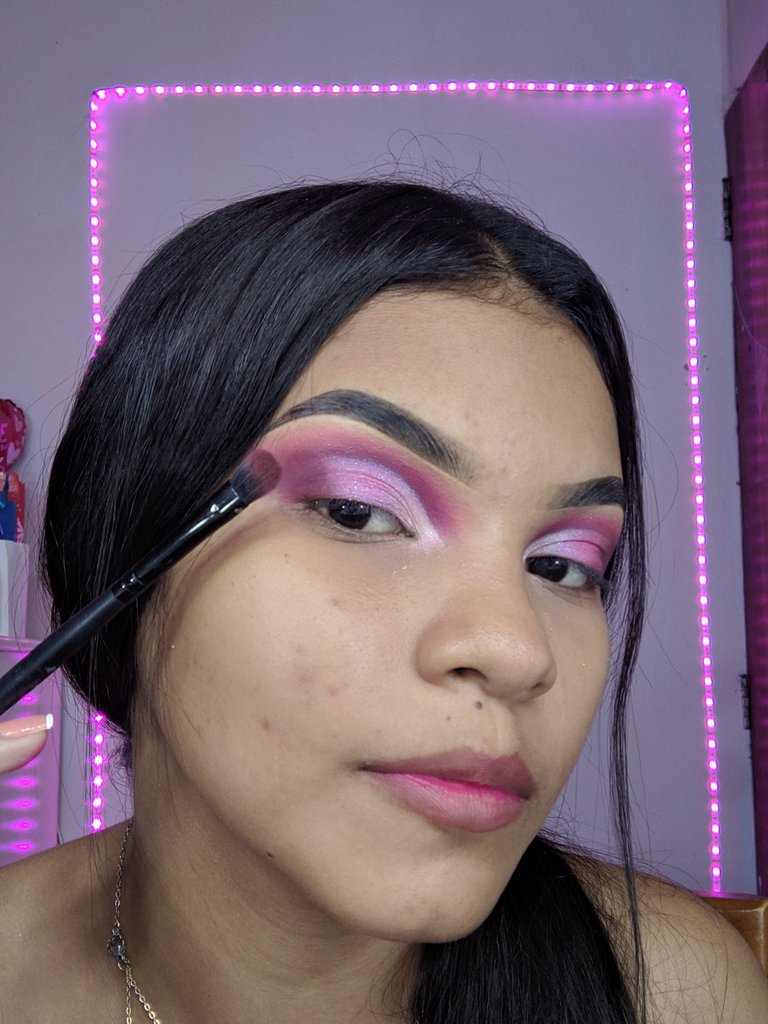
2- Sombra: con una brocha densa vamos a dar toques para aplicar la sombra más obscura, en este caso fucsia (hacemos tres puntos como en la imagen y luego los conectamos)
3- Difuminar: con un color más claro y una brocha más amplia difuminamos todo el borde para desvanecer el color más obscuro.
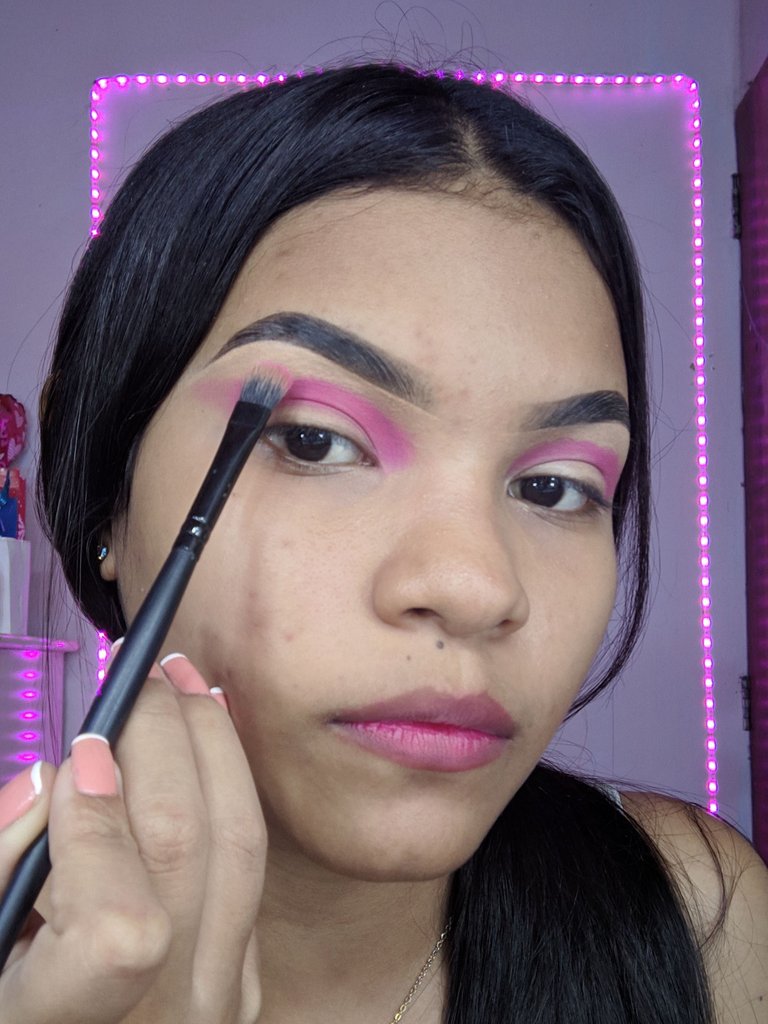
4- Semi corte de cuenca: con corrector haremos el corte de cuenca hasta un poquito más de la mitad del ojo, alargándose un poco más del lagrimal.
5- Siguiendo la forma del semi corte de cuenca aplicaremos sombra metalizada lila con brillos y hacia el lagrimal un poco de Sombra metálica blanca.
STEPS:.
1- Concealer: we will start by preparing and correcting the eyebrows with concealer, to define the eyebrows and make the shadows adhere better.
2- Shadow: with a dense brush we will apply the darkest shadow, in this case fuchsia (we make three dots as in the image and then connect them).
3- Diffuse: with a lighter color and a wider brush we diffuse all the edge to fade the darker color.
4- Semi-cutting of the eye socket: with concealer we will cut the eye socket up to a little more than the middle of the eye, extending a little more than the tear trough.
5- Following the shape of the semi-shape of the eye socket, apply lilac metallic shadow with glitter and a little white metallic shadow towards the tear trough.
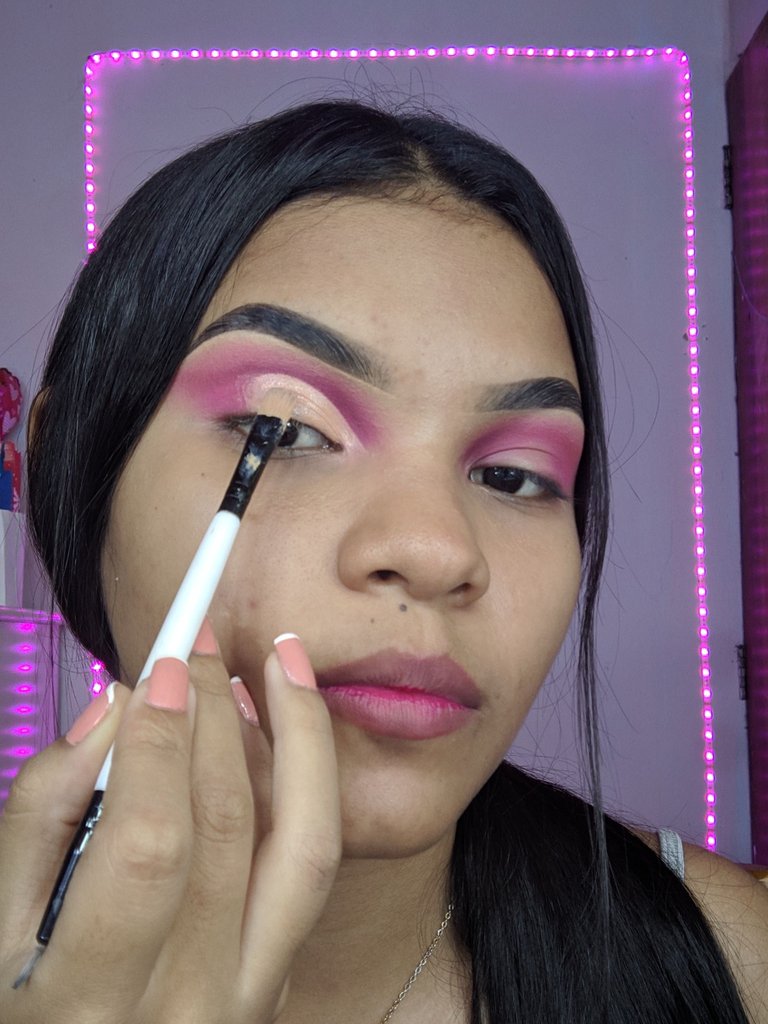
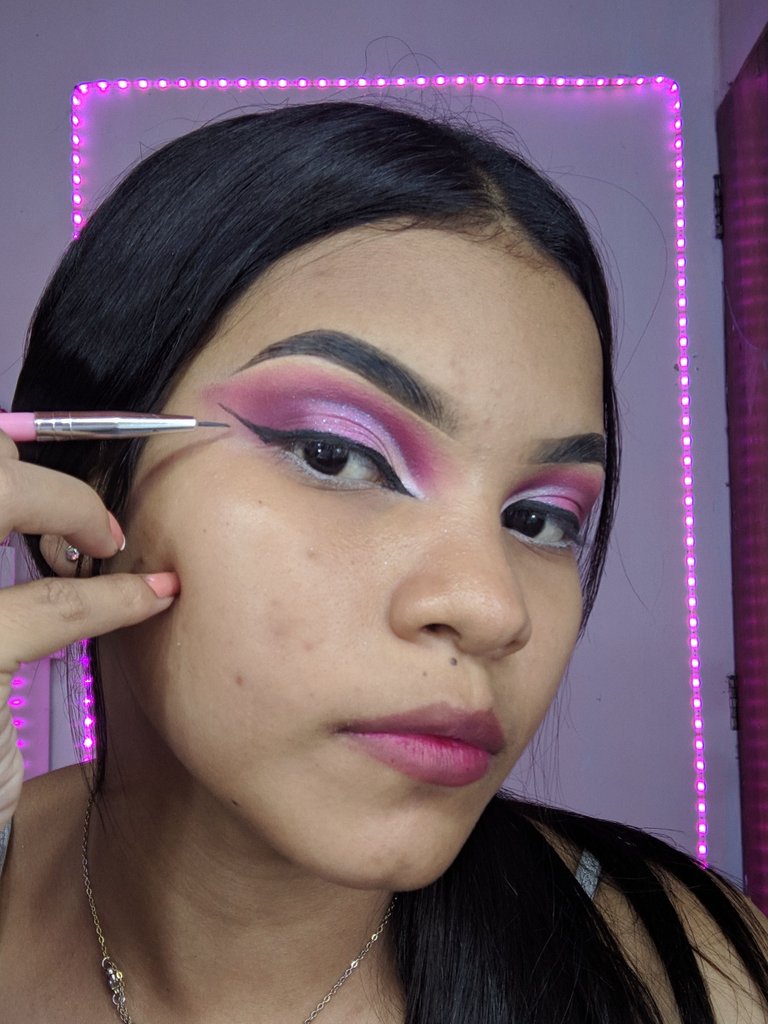
6- Aplicamos un color más fuerte en la parte externa del párpado para crear profundidad, yo lo hice con un poco de marrón.
7- Haremos un delineado con extensión lágrimal y que al finalizar sea sumamente delgado.
8- Con un poco de base corregiremos las cejas por la parte de arriba aunque para este look no es tan necesario tener un ceja definida si no, mantenerla un poco despeinada. Pero por gusto yo prefiero tenerlas definidas.
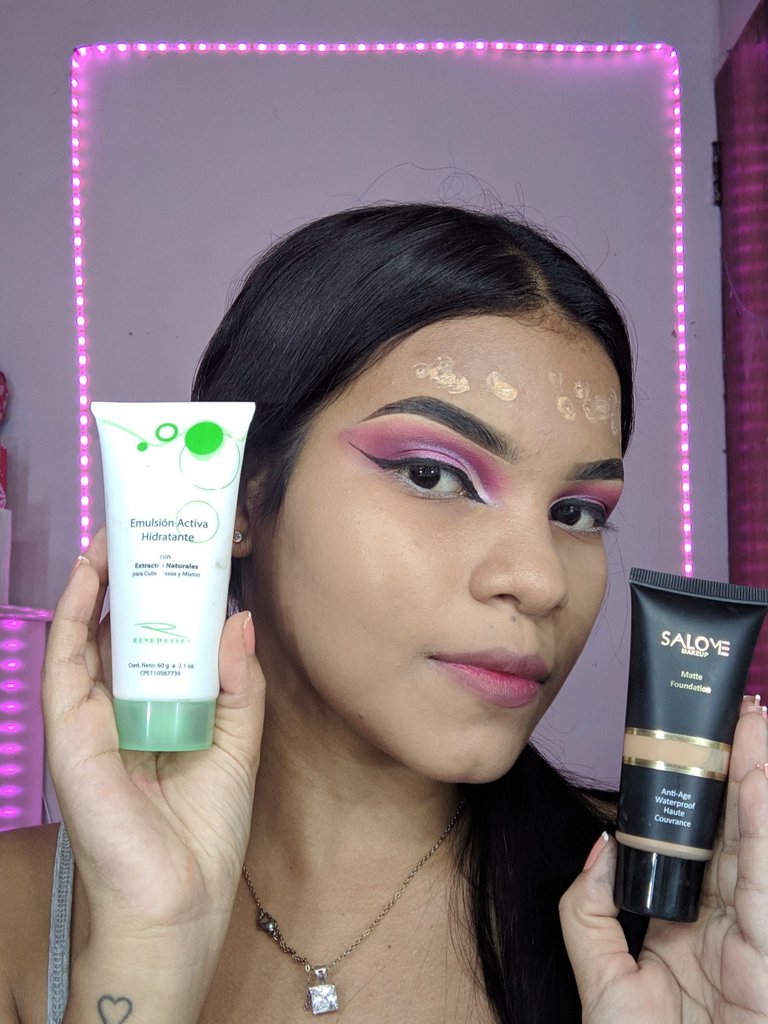
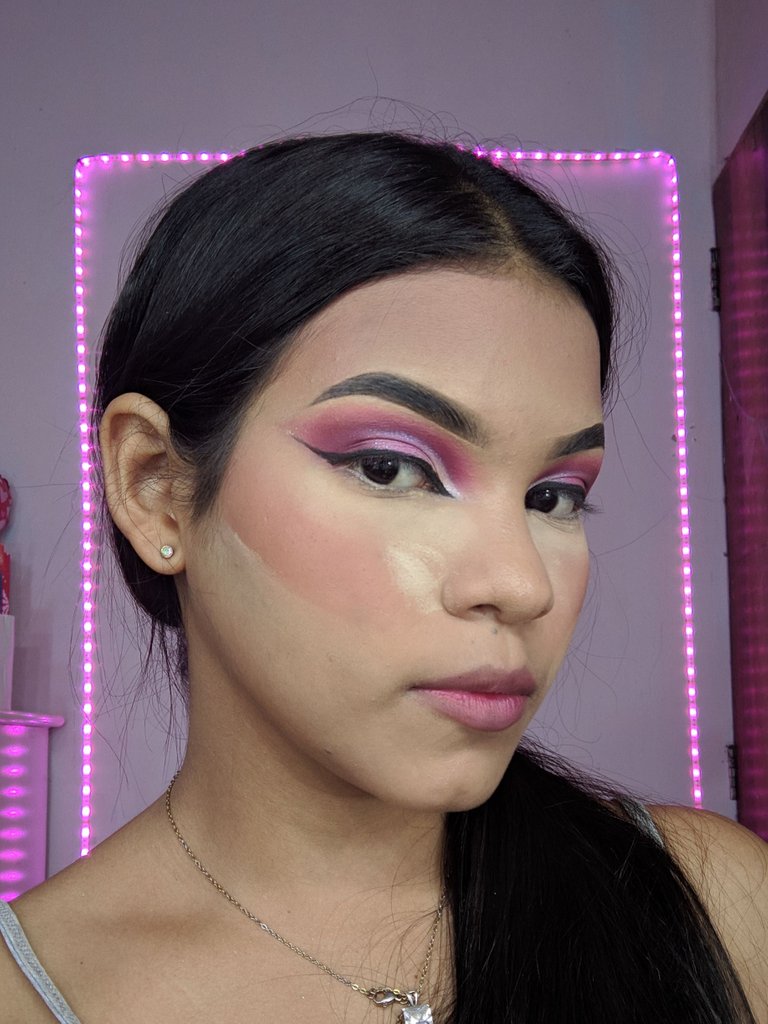
9- IMPORTANTE : preparar la piel antes de aplicar la base con una crema hidratante según tu tipo de piel, en esta ocasión apliqué una base ligera en el tono 03 de Salomé.
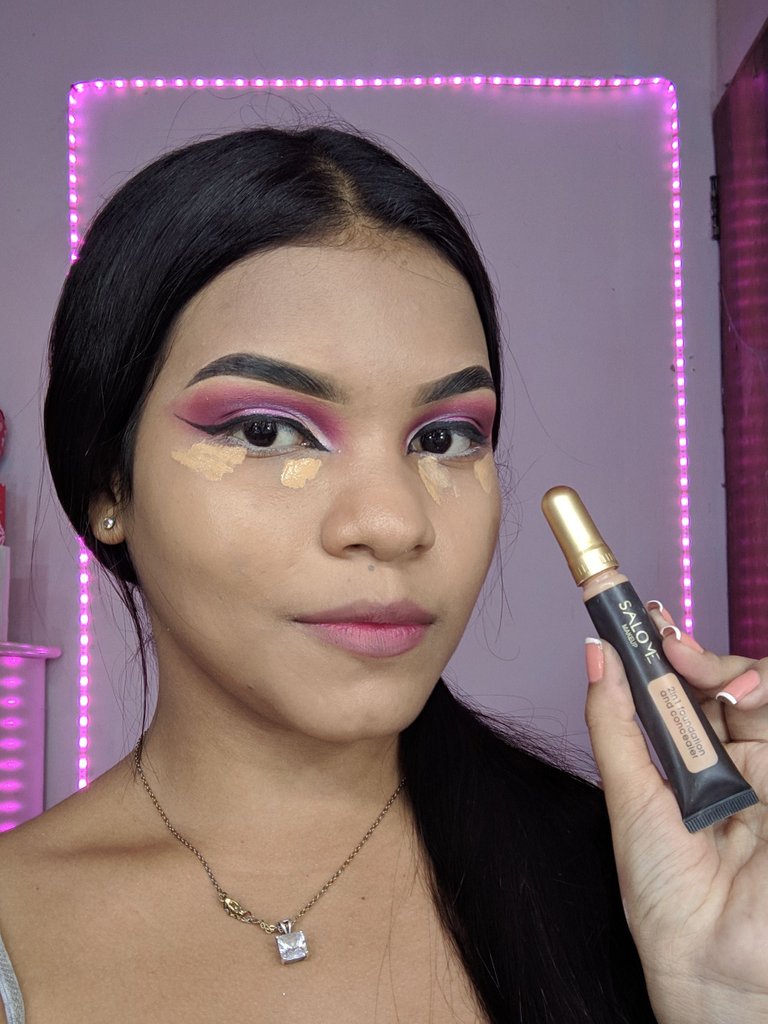
10- Corregí el área de las ojeras con un corrector de subtono amarillo y luego lo iluminé con uno más claro.
6- Apply a stronger color on the outer part of the eyelid to create depth, I did it with a bit of brown.
7- We will make an eyeliner with a tear extension and that at the end is extremely thin.
8- With a little bit of foundation we will correct the eyebrows on the upper part, although for this look it is not so necessary to have a defined eyebrow but to keep it a little bit tousled. But for my taste I prefer to have them defined.
9- IMPORTANT: prepare the skin before applying the foundation with a moisturizer according to your skin type, this time I applied a light foundation in Salome tone 03.
10- I corrected the dark circles area with a yellow undertone concealer and then illuminated it with a lighter one.


11- Con la piel aún húmeda por la base haremos los contornos con un color más obscuro para ocultar facciones y si queremos resaltar aplicamos un color más claro.
12- Sellamos con polvo suelto solo debajo de las ojeras con una brocha y el resto del rostro con una brocha y polvo compacto.
13- Terminamos con detalles como un poquito de brillo en la parte interna del párpado inferior y sombra.
14- Sellamos los contornos con productos en polvo y aplicamos el rubor y por último el iluminador.
11- With the skin still damp from the foundation we make the contours with a darker color to hide features and if we want to highlight we apply a lighter color.
12- We seal with loose powder only under the dark circles with a brush and the rest of the face with a brush and compact powder.
13- Finish with details such as a little bit of gloss on the inner part of the lower eyelid and shadow.
14- We seal the contours with powder products and apply the blush and finally the highlighter.
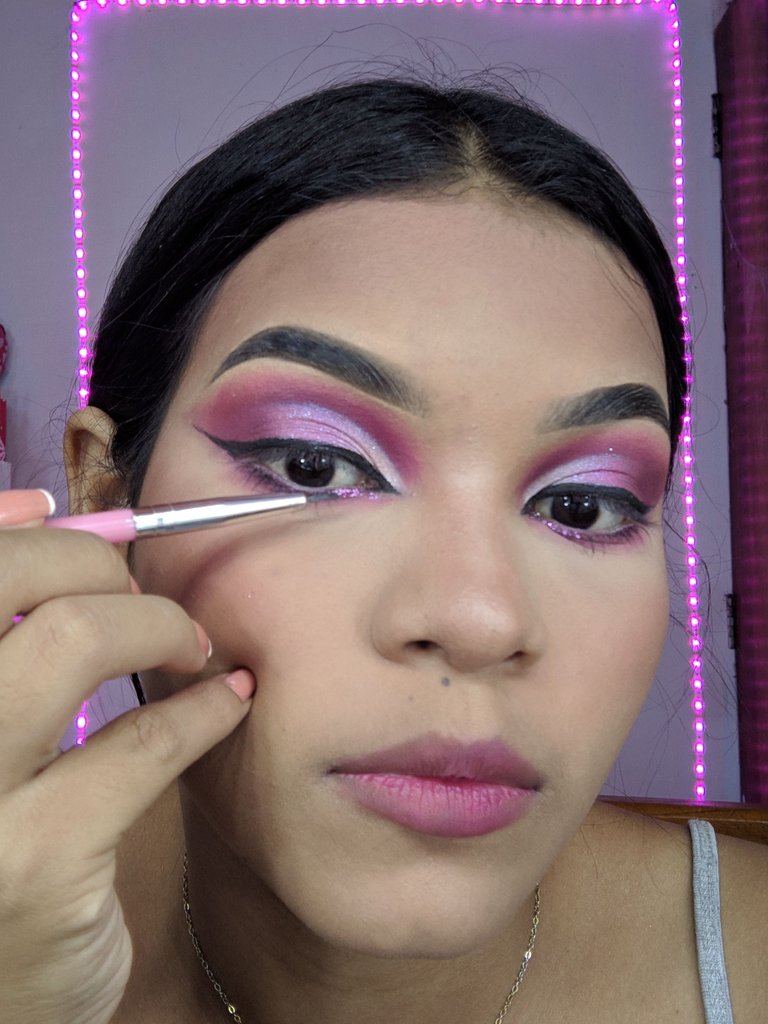
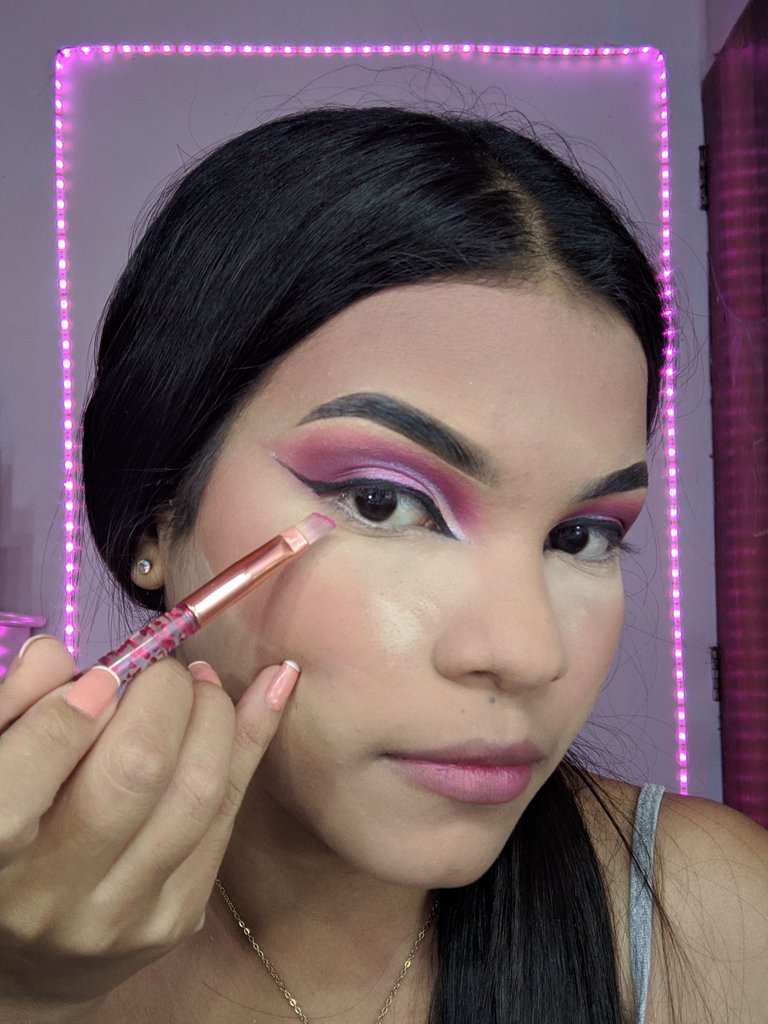
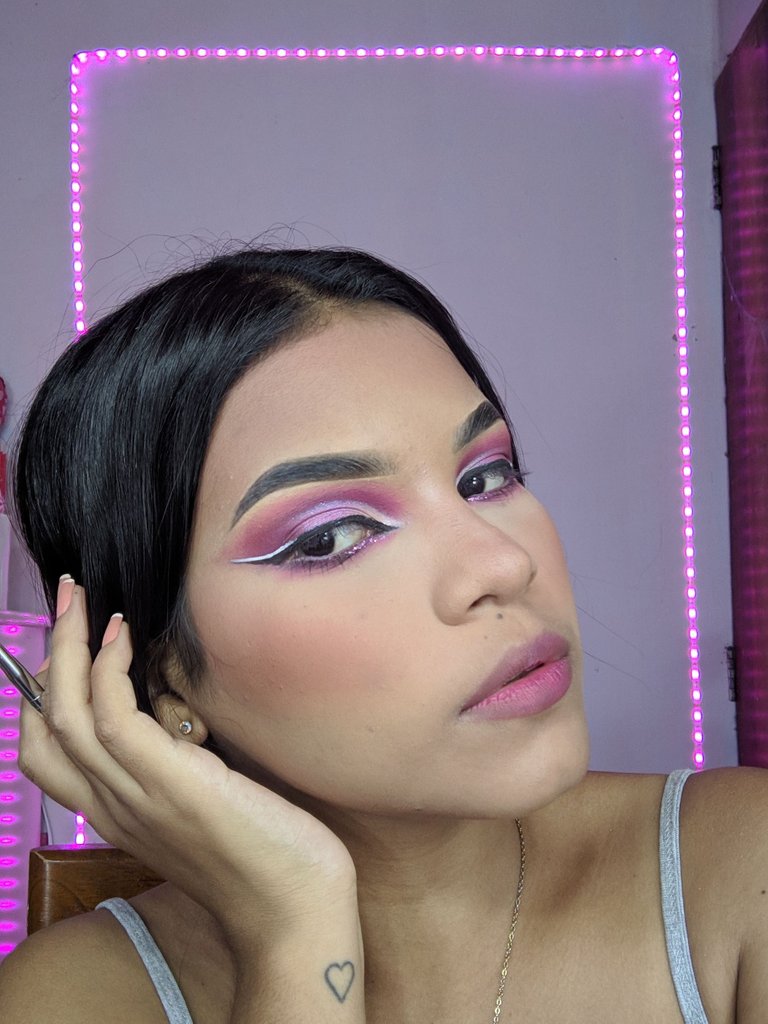
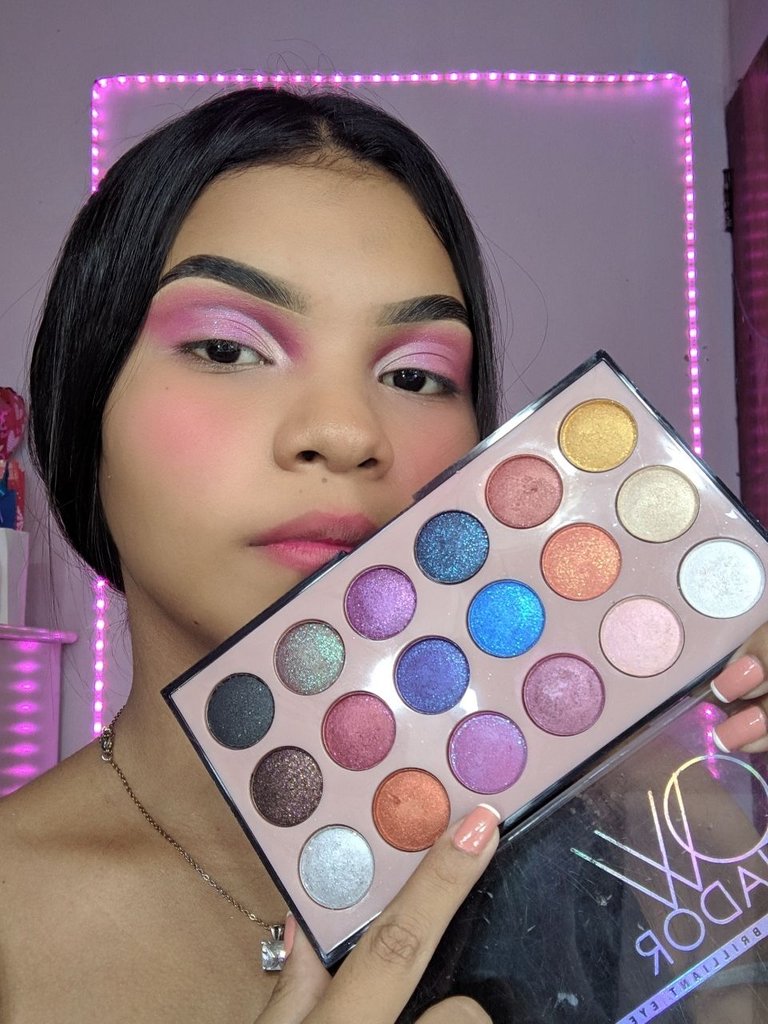
Por último haremos un delineado blanco sobre el delineado negro muy delgadito, procedemos a aplicar pestañas y un poco de máscara de pestañas en las pestañas inferiores y este es el resultado.
Finally we will do a white eyeliner over the very thin black eyeliner, proceed to apply eyelashes and a little mascara on the lower lashes and this is the result.
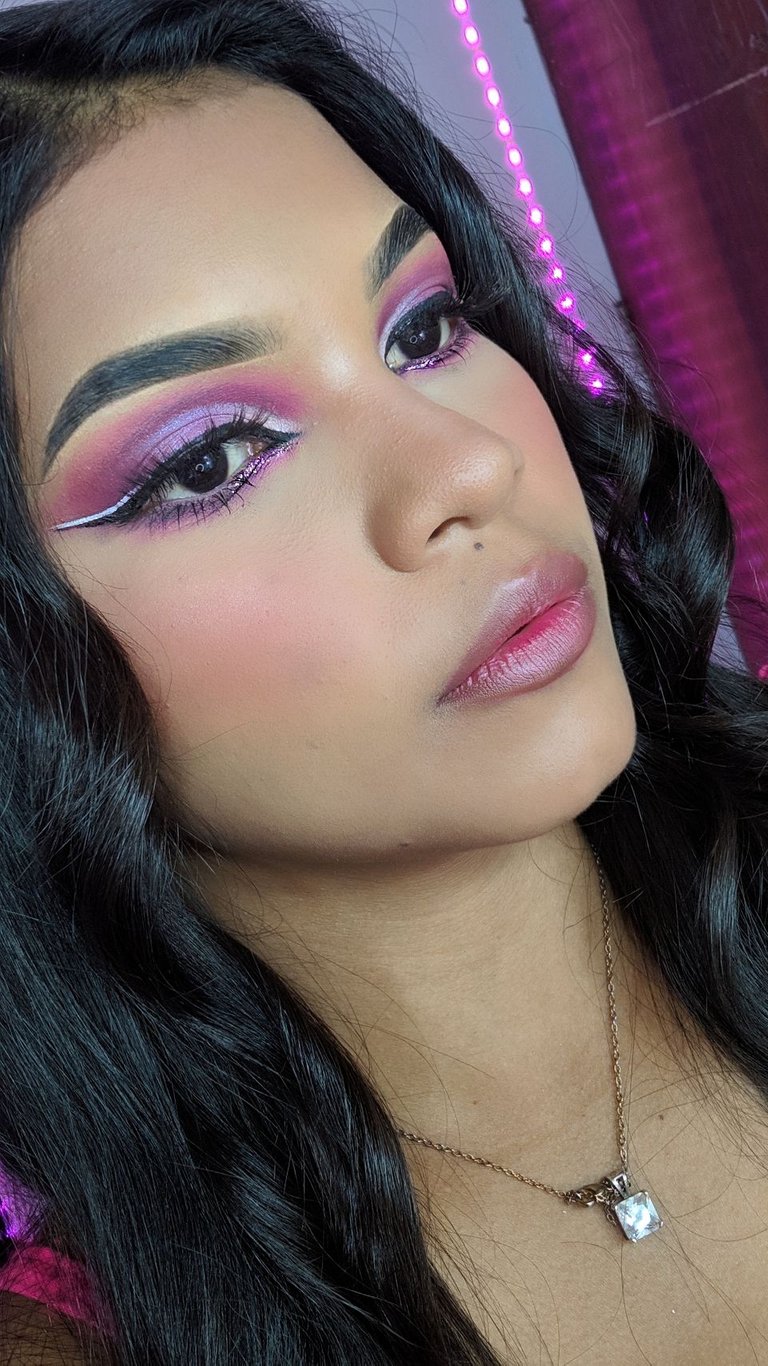
Espero que les haya gustado tanto como a mí 💓
I hope you liked it as much as I did 💓.