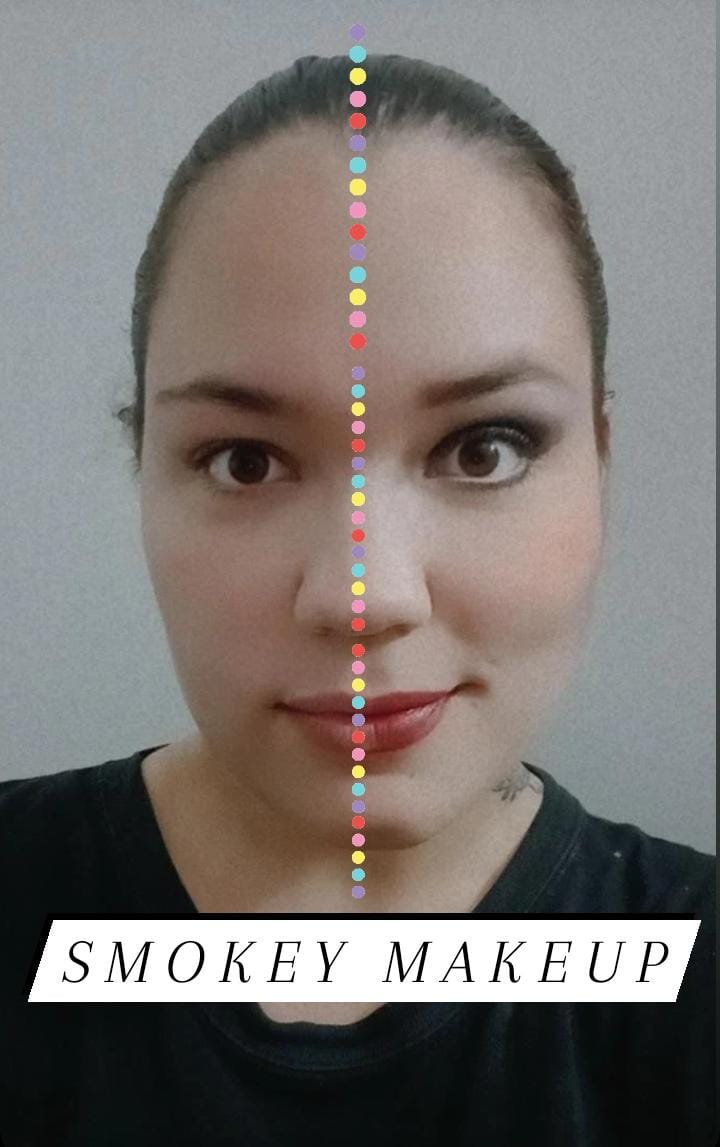
Hello friends of Hive! Happy Thursday, today I show you how to do a quick and easy smoky makeup and give some tips for people who have droopy eyelids.
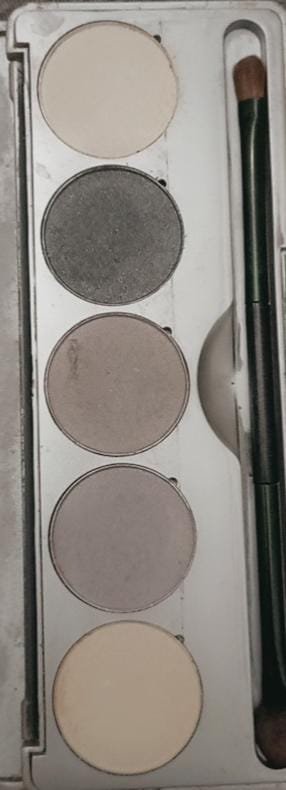
Smokey makeup can be done in several ways, in this case I will do the classic one, which is using black as a base and blending it with gray and white to achieve that “smoky” result, hence its name. This is a quite dramatic makeup, it brings a lot of intensity to the look, it is usually a makeup for the night since it is somewhat loaded, at first it may cost a bit to get the desired result but the key is in practice. This was not a type of makeup that went well for me the first time, I remember that I had to repeat it several times until I was able to master the blending with the black color well.
Hola amigos de Hive! Feliz jueves, el día de hoy les muestro como hacer un fácil y rápido maquillaje ahumado y dar algunos tips para las personas que tienen el párpado caído.
El maquillaje ahumado se puede hacer de varias maneras, en este caso haré el clásico que es utilizando el color negro como base e ir difuminándolo con gris y blanco para lograr ese resultado de “humo” de allí su nombre. Este es un maquillaje bastante dramático, aporta bastante intensidad a la mirada, por lo general es un maquillaje para la noche ya que es algo cargado, al principio puede costar un poco tener el resultado deseado pero la clave está en la práctica. Este no fue un tipo de maquillaje que me saliera bien a la primera vez, recuerdo que tuve que repetirlo varias veces hasta que pude dominar bien el difuminado con el color negro.
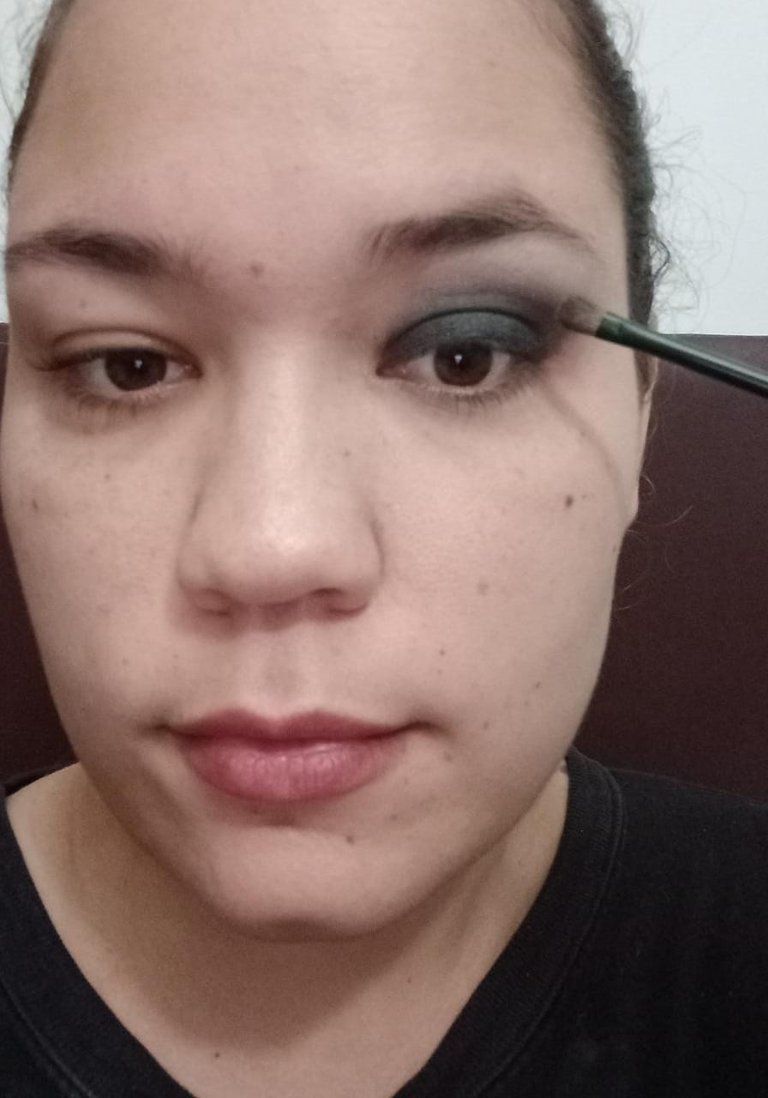
I did this makeup only on one side of the face so that you could see the change in the appearance of the look. First I used a primer that will make the colors stay more fixed and stand out more. I applied this with my finger since it is faster and easier to apply, on the entire mobile and fixed eyelid.
Este maquillaje lo hice solamente de un lado de la cara para que se pudiera ver el cambio en la apariencia de la mirada. Primero utilicé una pre base que hará que los colores queden más fijados y resalten más. Esto lo apliqué con el dedo ya que se me hace más rápido y fácil de aplicar, en todo el párpado móvil y fijo.

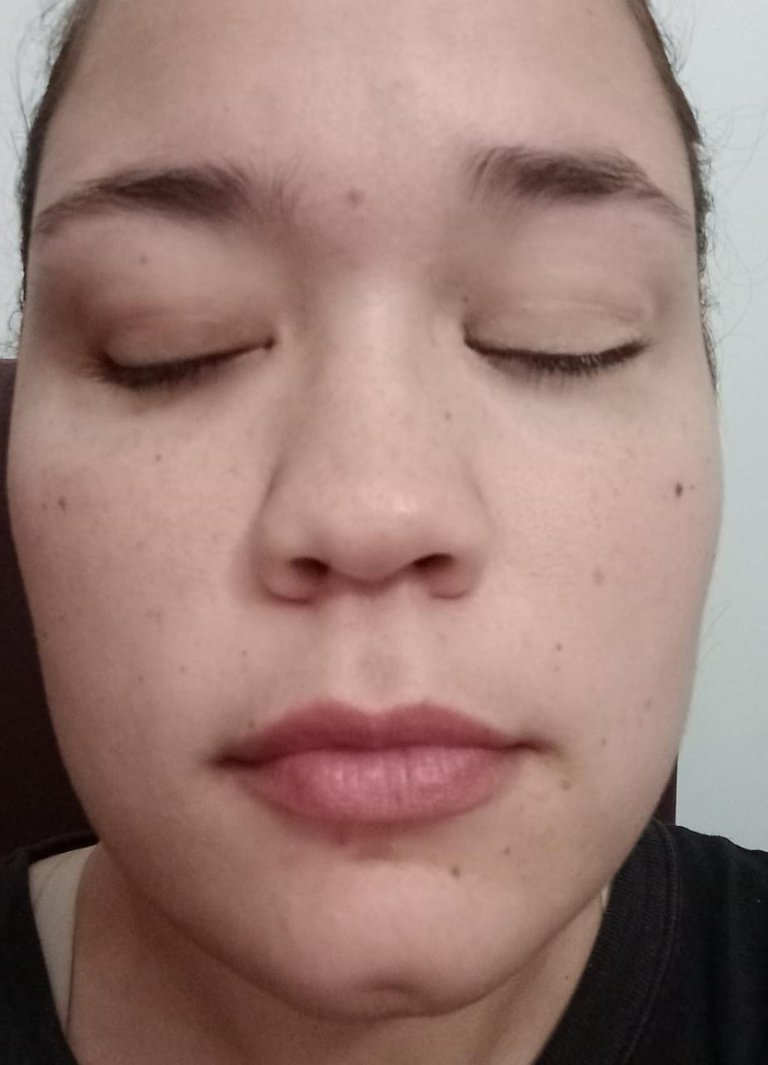
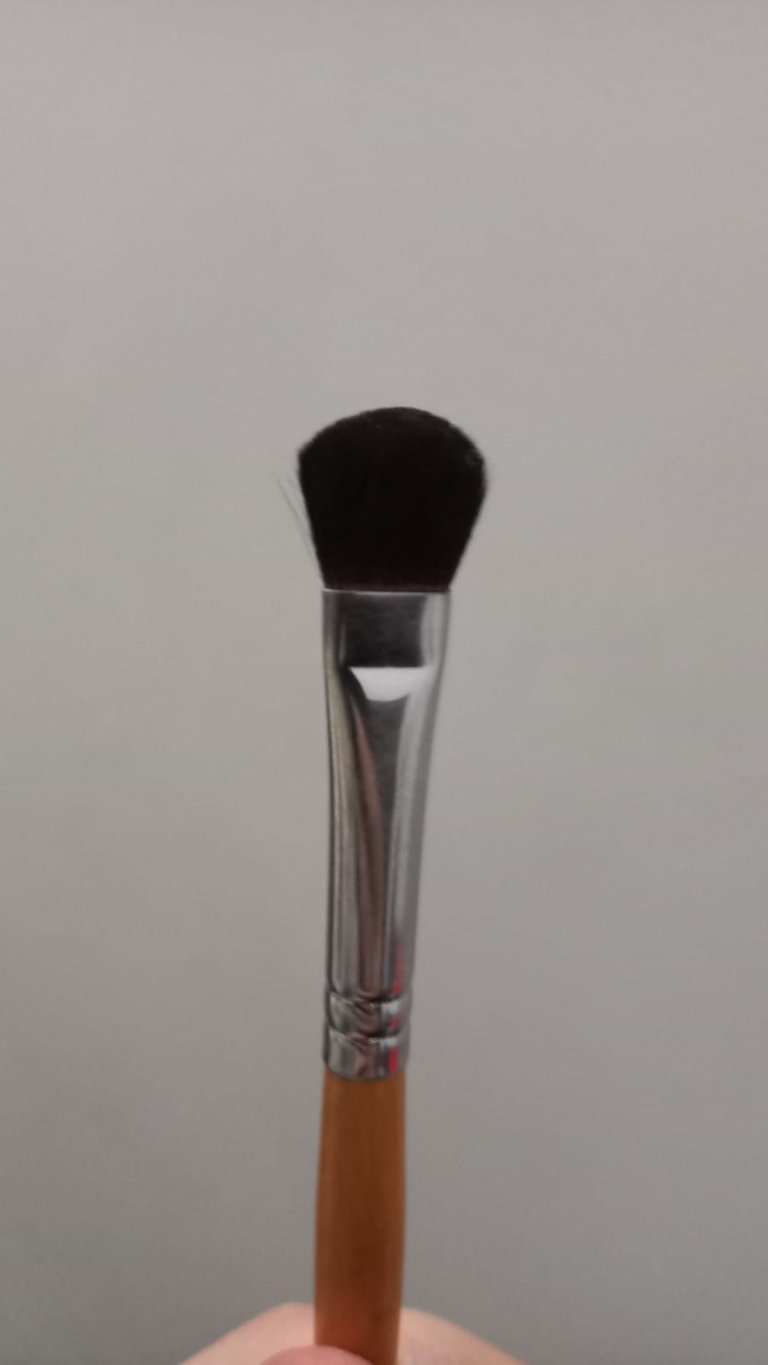
The second step was to put a black shadow on my mobile eyelid, for this step the eye looks quite small as you can see in the photo but don't worry, then it is corrected. For this we must take a round tip brush that allows us to blur correctly, we must take the black color to the middle of the eyelid with circular movements so that it is uniform.
El segundo paso fue colocarme una sombra negra en el párpado móvil, para este paso el ojo se ve bastante pequeño como se puede observar en la foto pero no te preocupes, luego se corrige. Para esto debemos tomar una brocha de punta redonda que nos permita difuminar correctamente, debemos llevar el color negro hasta la mitad del párpado con movimientos circulares para que quede uniforme.
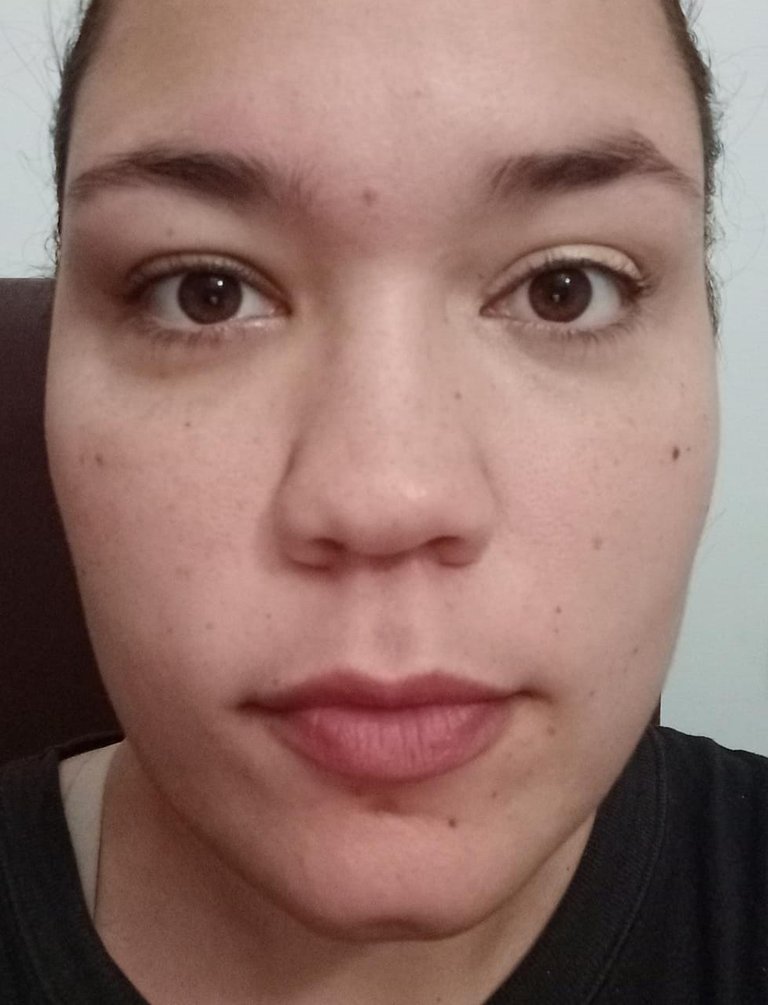
The intention of this makeup, as I said before, is to create a smoke effect, so then in the middle of the eyelid I used a light gray tone and blended it with black to create the gradient. In my case, I have droopy or hooded eyelids, so it is important to do the blurring with the eye open and take it a little higher so that more depth is seen.
La intensión de este maquillaje como dije anteriormente, es crear un efecto de humo, por lo cual luego en la mitad del párpado utilicé un tono gris claro y lo difuminé con el negro para crear el degradado. En mi caso, tengo parpado caído o encapotado, por lo cual es importante hacer el difuminado con el ojo abierto y llevarlo un poco más arriba para que se vea más profundidad.
Then I used a bone-colored shade to place it under the arch of the eyebrow and in the tear duct to give light to the look and not make everything look so dark. Finally I went on to outline with black powder below the inner lashes only up to the middle of the eye, since I want the look to be more open, also for this it is recommended to use cream or white eyeliner for the water line.
Luego utilicé un tono color hueso para colocarlo debajo del arco de la ceja y en el lagrimal para darle luz a la mirada y que no se vea tan oscuro todo. Finalmente pasé a delinear con polvo negro por debajo de las pestañas interiores solamente hasta la mitad del ojo, ya que quiero que se vea la mirada más abierta, también para esto se recomienda utilizar delineador color crema o blanco ara la línea de agua.
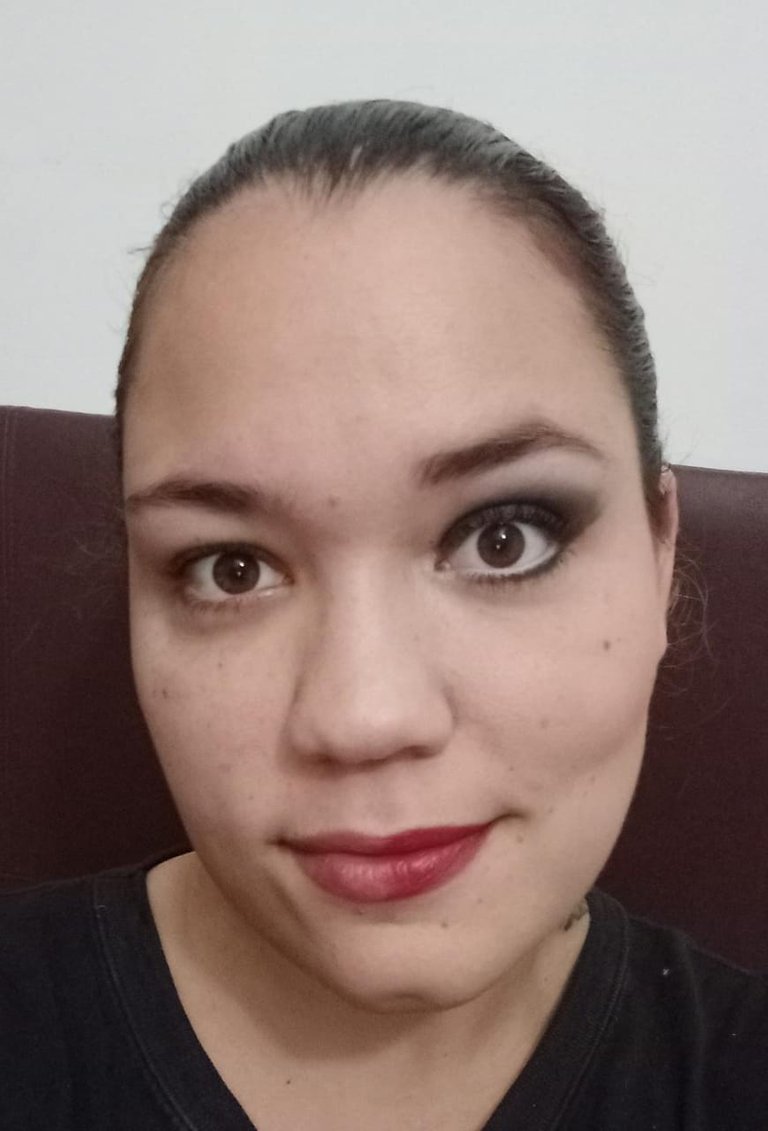
As this is a more intense makeup, intense in the eyes, it is recommended that the lips do not have such a strong color, in my case I used the Wine Berry tone and placed it in the middle of the lip so that it would be noticed that it is not too much. the difference between my lip color and the paint. Likewise for blush, it should be a soft shade like peach. The most important thing for me when doing these makeups is the good blurring and that it does not look exaggerated, since when using colors like black and gray, you have to be careful so that the final result does not look "dirty", I insist a lot of practice. Greetings!
Como este es un maquillaje más cargado, intenso en los ojos, se recomienda que los labios no tengan un color tan fuerte, en mi caso utilicé el tono Wine Berry y lo coloqué en la mitad del labio para que se notara que no es mucha la diferencia entre mi color de labios y la pintura. Igualmente para el rubor, debe ser un tono suave como el tono durazno. Lo más importante para mí al hacer estos maquillajes, es el buen difuminado y que no sea vea exagerado, ya que al utilizar colores como el negro y el gris, hay que tener cuidado para que el resultado final no se vea como “sucio”, insisto mucha práctica. Saludos!