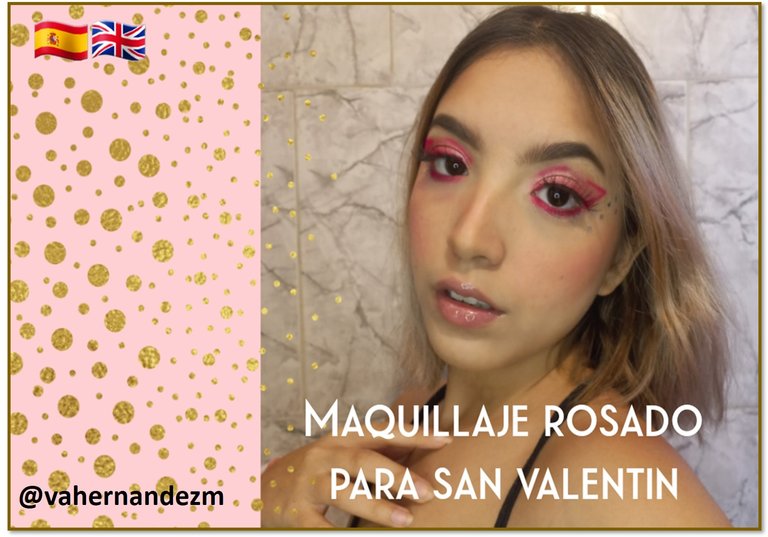
¡Hola amigos de Hive! Hoy quiero compartirles un pictorial de un maquillaje con tonos rosados ideal para el día de los enamorados.
Hello friends of Hive! Today I want to share with you a pictorial of a makeup with pink tones ideal for Valentine's Day.
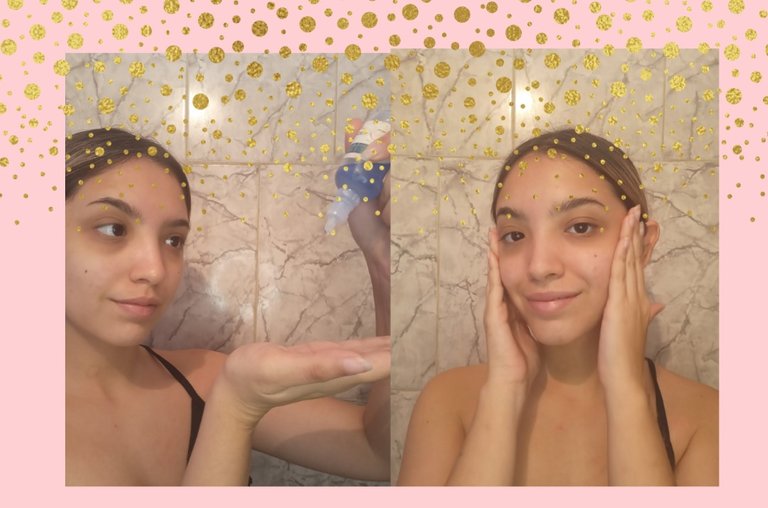
Paso 1
Vamos a comenzar, aplicando un serum hidratante o una crema hidratante para la piel.
Step 1
Let's start by applying a moisturizing serum or a moisturizing cream.
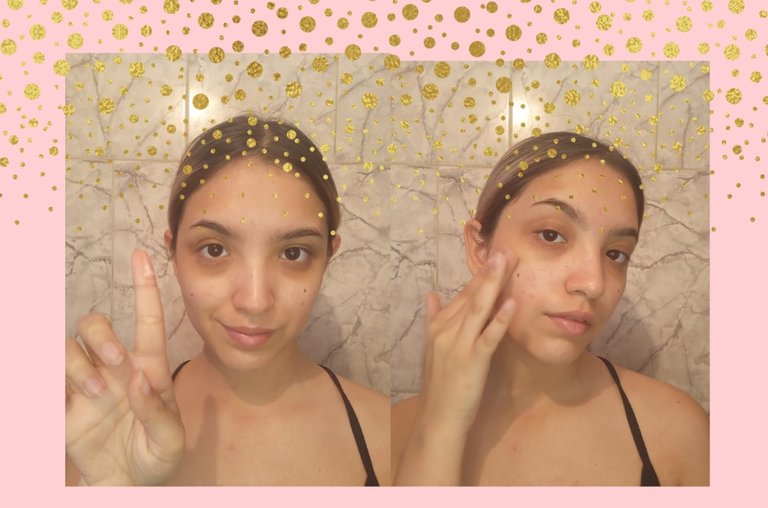
Paso 2
Luego, aplico un primer para minimizar los poros. Me encanta este producto ya que, hace que mi piel se vea más bonita y el maquillaje se mantenga durante varias horas.
Step 2
Then I apply a primer to minimize pores. I love this product as it makes my skin look prettier and the makeup stays put for several hours.
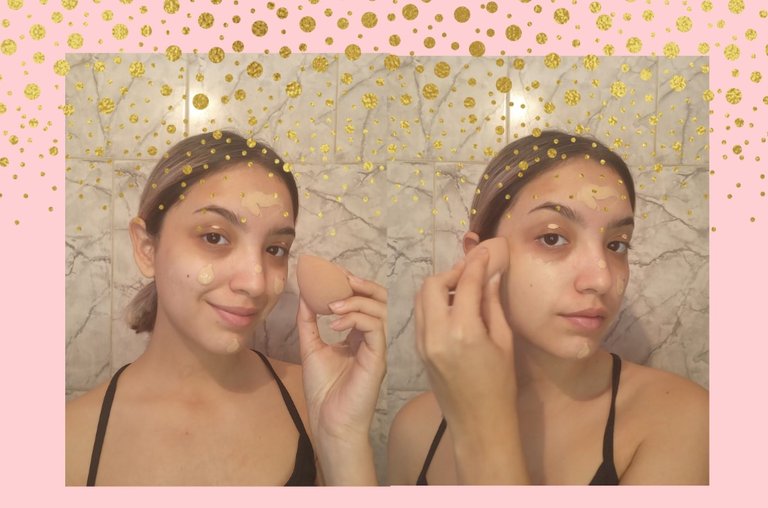
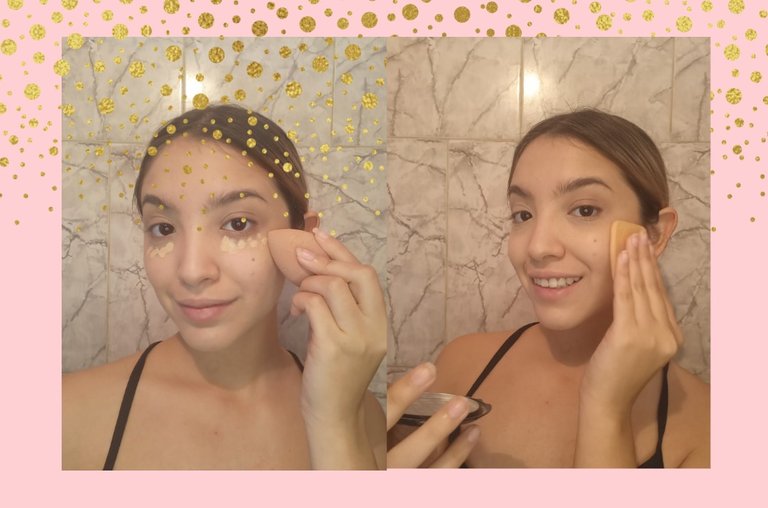
Paso 3
Escoge tu base de maquillaje favorita y, aplícala en tu rostro con una esponja mientras das pequeños toques para difuminar el producto.
Step 3
Choose your favorite foundation and apply it to your face with a blender while giving small touches to blend the product.
Paso 4
El siguiente paso será aplicar nuestro corrector de ojeras y difuminarlo, puedes hacerlo con una esponja para difuminar, un pincel o incluso con tus dedos. Al terminar de difuminar el corrector, pasaremos a aplicar nuestro polvo favorito.
Step 4
The next step will be to apply our dark circles concealer and blur it. you can do this with a blending sponge, a brush, or even your fingers. When we finish blurring our concealer, we will go on to apply our favorite powder.
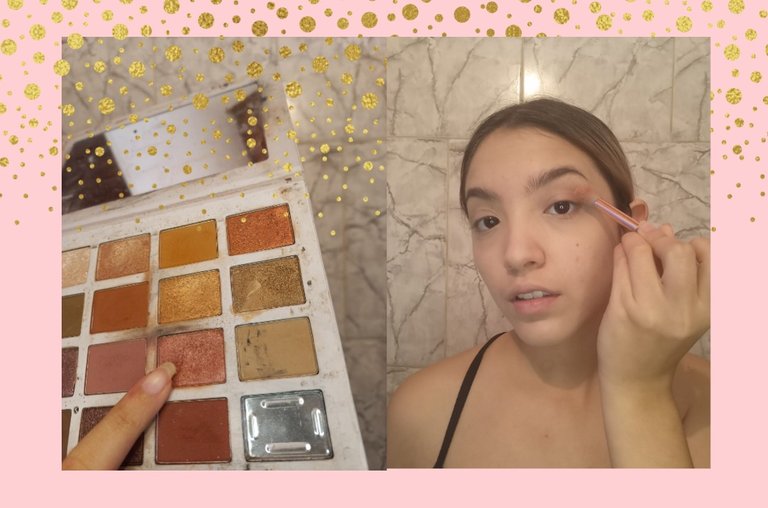
Paso 5
Una vez que tengamos listo y sellado nuestro rostro, comenzaremos a trabajar en nuestros ojos. Escogí un tono rosado satinado como sombra base, la cual estaré aplicando en todo mi parpado móvil.
Step 5
Once we have our face ready and sealed, we will start working on our eyes. I chose a pink satin tone as a base shade, which will be applying throughout my mobile eyelid.
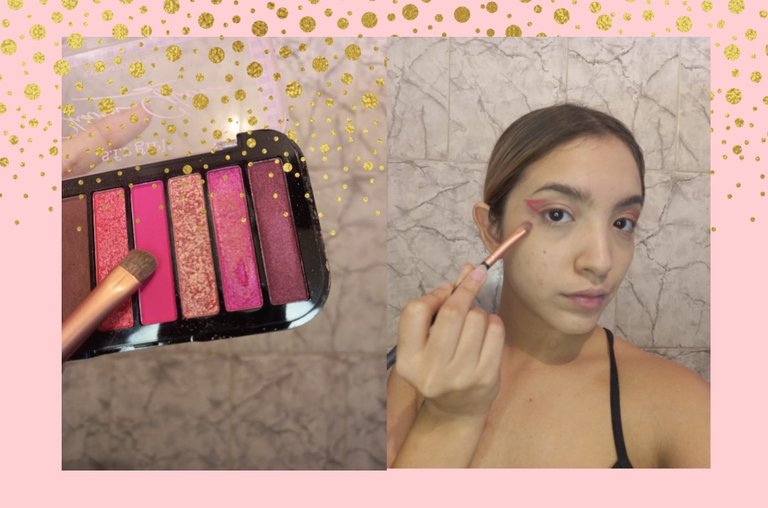
Paso 6
Tras finalizar la aplicación de la sombra que utilizamos como base en nuestro parpado móvil, escogí un tono fucsia mate y con un pincel lengua de gato comencé a realizar trazados para crear un delineado. Tras finalizar mi delineado de ojos rosado, decidí utilizar la misma sombra para aplicarla en la parte inferior de mis ojos.
Step 6
After finishing the shadow application that it uses as a base in my mobile eyeliner, I chose a shade fuchsia mate and with a cat tongue brush I started making trace to create an eyeline. After finishing my pink eyes delineated, I decided to use the same eye shadow to apply it at the bottom of my eyes.
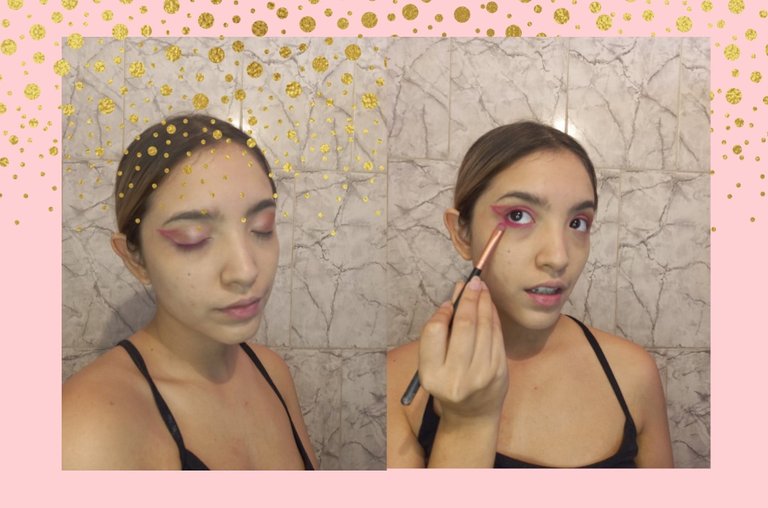
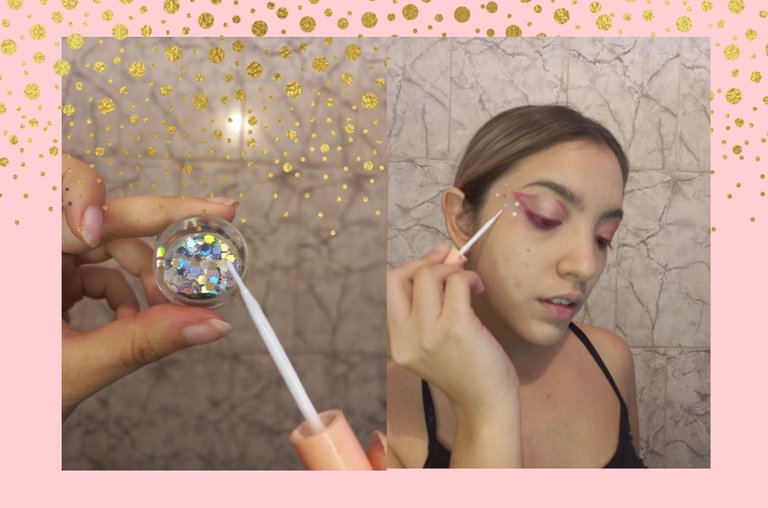
Paso 7
Para darle un toque especial y moderno a este maquillaje, decidí aplicar un poco de brillo justo en la parte inferior de mi delineado hasta el inicio de mi cabello, utilizando pequeños brillantes que logré pegar a mi rostro con pega para pestañas.
Step 7
To give a special and modern touch to this makeup, I decided to apply a little glitter just in the lower part of my eyeliner to the beginning of my hair, using small rhinestones that I managed to stick to my face with false eyelash glue.
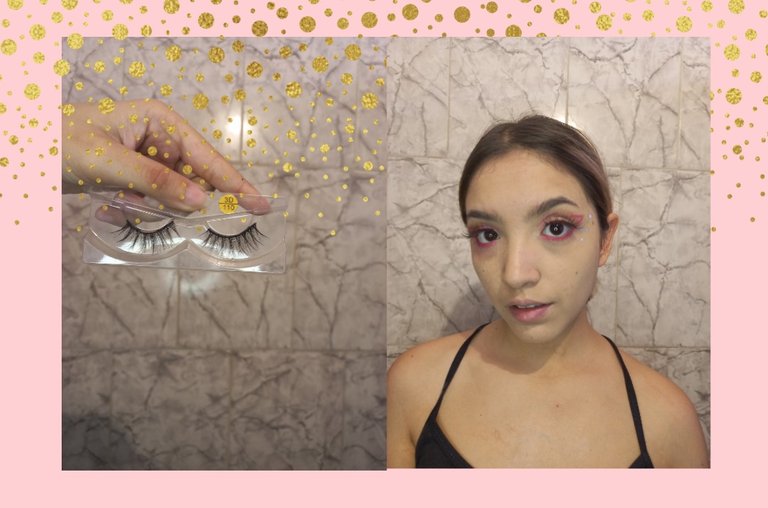
Paso 8
Para terminar con mis ojos, escogí un par de pestañas postizas ideales para este look.
Step 8
To finish with my eyes, I chose a pair of false eyelashes perfect for this look.
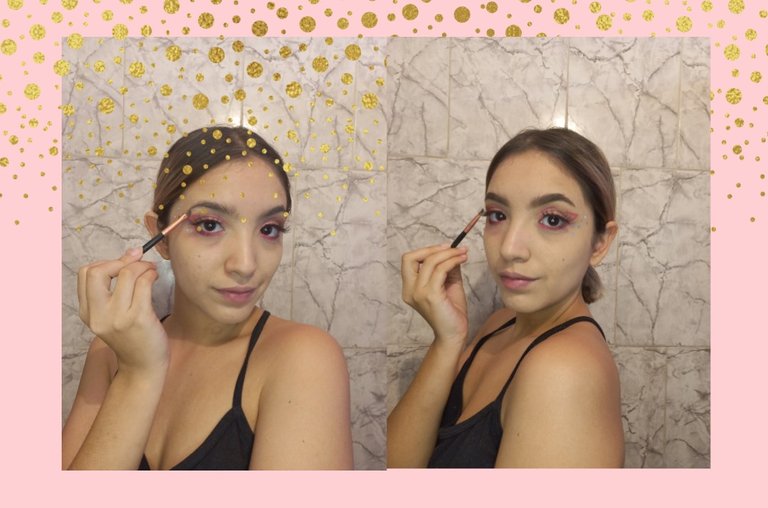
Paso 9
El siguiente paso será realizar nuestras cejas. A mí en lo personal me gusta que mis cejas de vean muy naturales, así que con un pincel especial para cejas y una sombra apropiada a mi tono, realizo un contorno y poco a poco voy rellenando
Step 9
The next step will be to make our eyebrows. I personally like my eyebrows to look very natural, so with a special brush for eyebrows and an appropriate shade to my tone, I make a contour and little by little I fill in my eyebrows.
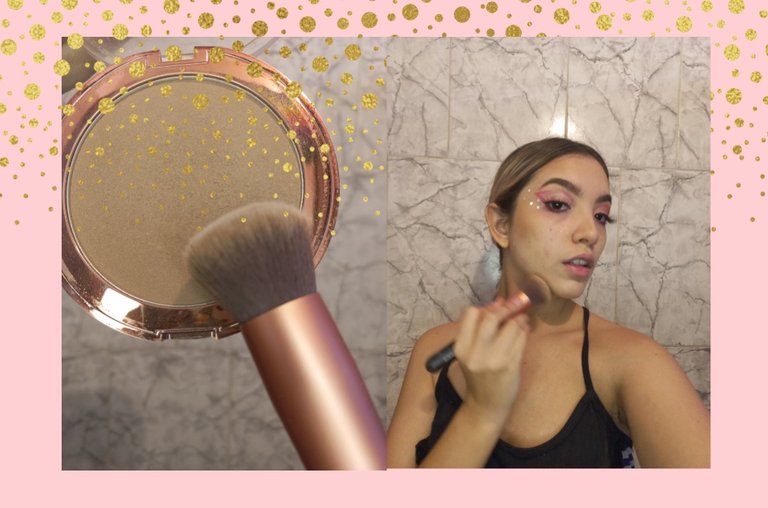
Paso 9
Es hora de que pasemos a contornear nuestro rostro, de esta manera lograremos definir y dar profundidad a nuestro maquillaje, además de ayudar a que no se vea pálido. Utilizando nuestro bronzer favorito y, una brocha apropiada para su aplicación comenzaremos a contornear. Es importante que, conozcas tu tipo de rostro para poder realizar el contorno adecuado. Normalmente se contornea la cara en el borde del cabello, la frente, las sienes y debajo de los pómulos.
Step 9
It is time that we go on to contour our face, in this way we will be able to define and give depth to our makeup, in addition to helping it not look pale.Using our favorite bronzer and an appropriate brush for the application we will start contouring. It is important that you know your type of face to be able to make the appropriate contour. Normally the face is outlined at the hairline, forehead, temples and below the cheekbones.
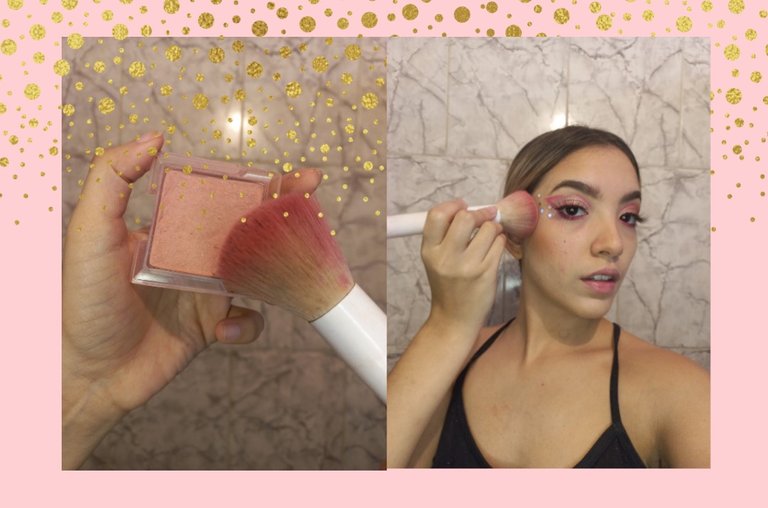
Paso 10
No podemos olvidar darle vida y color a nuestro rostro con un poco de blush.
Step 10
We can not forget to give life and color to our face with a little touch of blush.
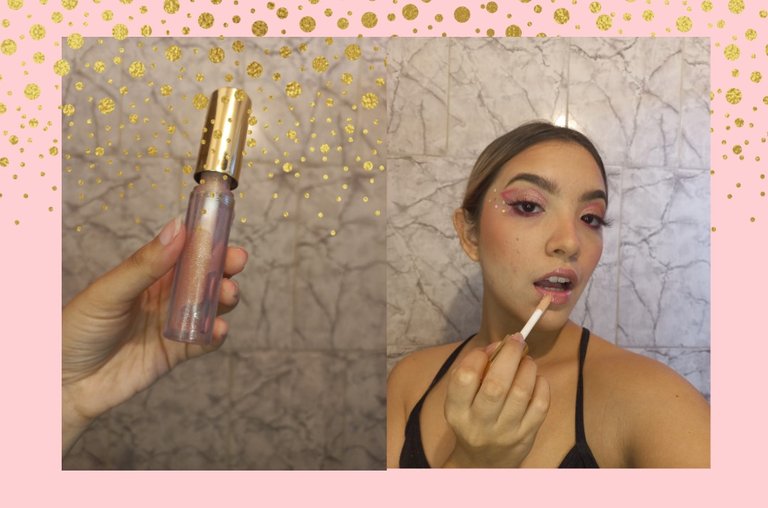
Paso 11
Para finalizar aplicaremos sobre los labios nuestro labial favorito, en mi caso, yo escogí un gloss transparente con pequeños toques de brillo que además tiene como objetivo maximizar un poco el tamaño de mis labios.
Step 11
To finish, we will apply our favorite lipstick on our lips. In my case, I chose a transparent gloss with small ouches of shine that also in its formulation aims to maximize the size of my lips a little.
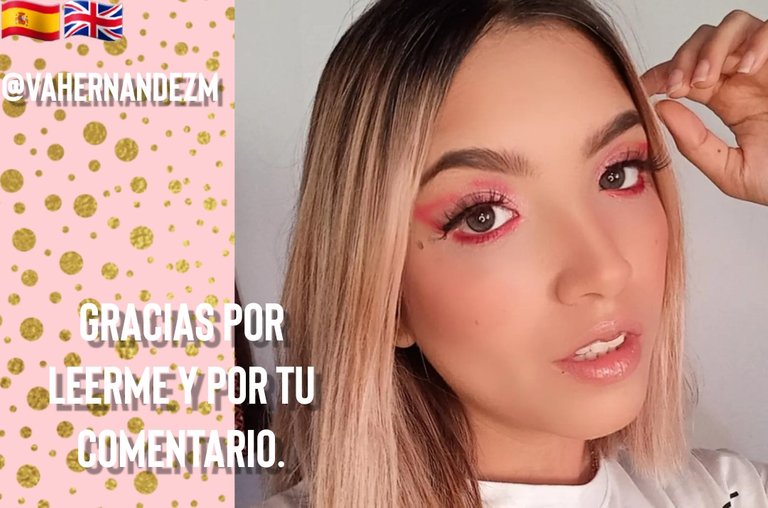
Gracias por tomarte el tiempo de leer este tutorial y dejarme un comentario. Espero que les haya gustado y que se animen a recrearlo para su cita del día de los enamorados
Thank you for taking the time to read this tutorial and leave me a comment. I hope you liked it and that you are encouraged to recreate it for your date on Valentine's Day.


