

ESPAÑOL
¿Qué tal amigos de Hive? ¿Cómo va su inicio de semana? El mío comenzó un poco flojo la verdad, espero que el de ustedes esté muchísimo mejor. No había subido más post sobre maquillaje porque no estaba de ánimos para tomar fotos de mi misma por algunas cosas personales que he estado atravesando. Hace poco subí un post a Liketu hablando sobre cómo no me sentía muy confiada de subir este maquillaje, pero que estaba bien que no me gustara solo debía seguir intentando, creo que una de las cosas que me animó fue el entrar en un grupo creado por la hermosa @lunaticanto, un grupo lleno de personas increíbles que se retan día a día para mejorar su contenido y organización pero de ellos les traeré otro post muy pronto, ¡estén atentos!
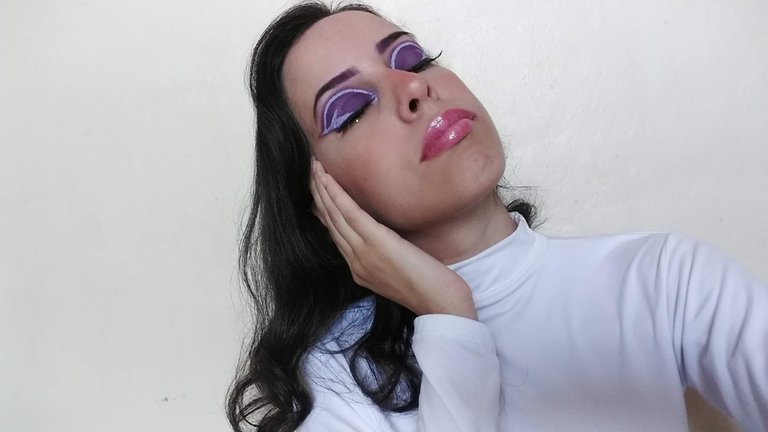
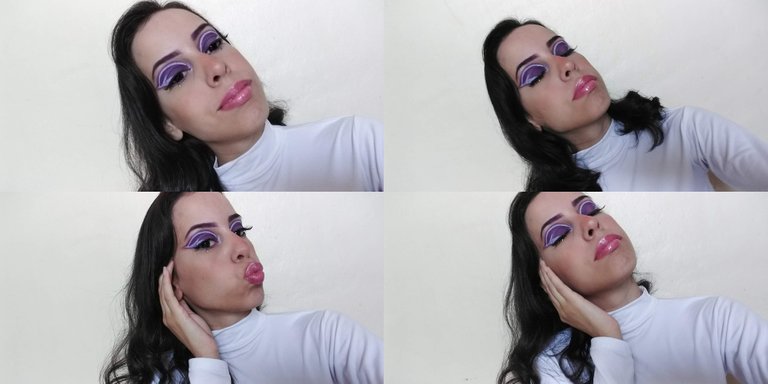
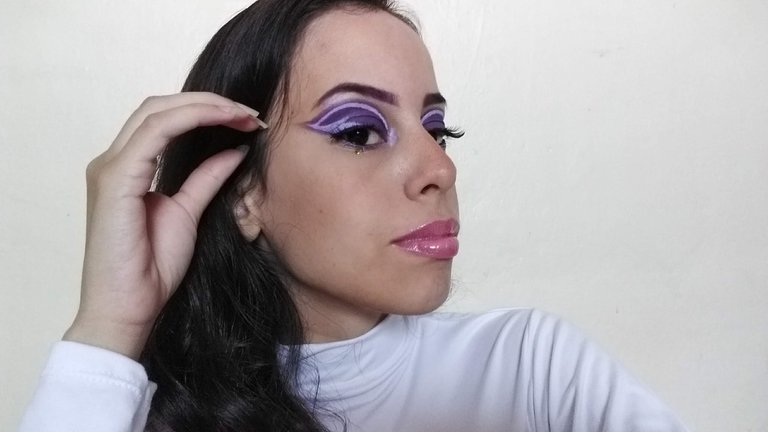
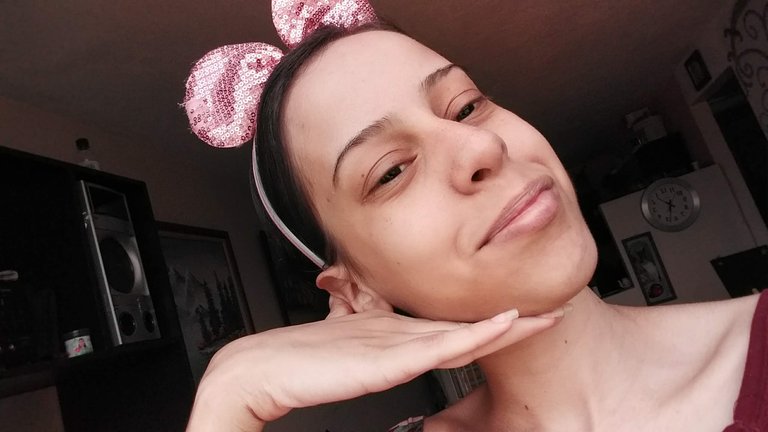
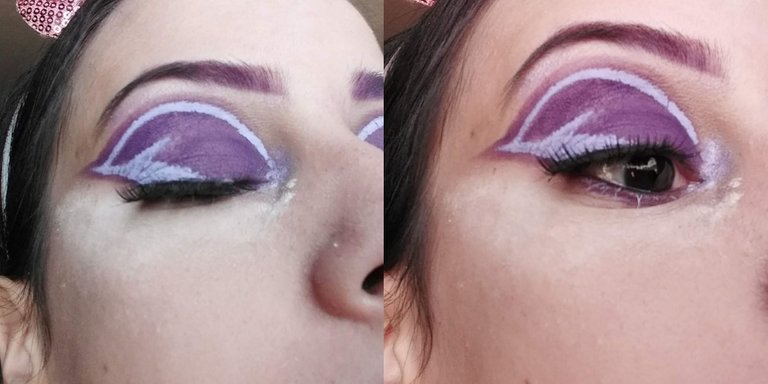
Ante ustedes un hermoso maquillaje en tonos purpura con un delineado lila y algunas cosas extras... En esta ocasión no me puse mi pañoleta verde (no la encontré), me puse unas orejitas rosadas de lentejuelas de mi sobrina y creo que me dieron hasta ganas de ir a Disney, ¿debería seguir usándolas? Tal vez, a mi hijo le llamó muchísimo la atención, supongo que por los brillos y a mí también me gustaron para serles sincera. Ya, basta de tanta cháchara, espero les guste, ¡comencemos!
ENGLISH
What's up Hive friends, how is your start of the week? Mine started off a little slow to be honest, I hope yours is a lot better. I haven't posted more about makeup because I wasn't in the mood to take pictures of myself due to some personal things I've been going through. I recently uploaded a post to Liketu talking about how I didn't feel very confident about uploading this makeup, but that it was ok that I didn't like it I just had to keep trying, I think one of the things that encouraged me was joining a group created by the beautiful @lunaticanto, a group full of amazing people who challenge themselves day by day to improve their content and organization but from them I will bring you another post very soon, stay tuned!
Before you a beautiful makeup in purple tones with a lilac eyeliner and a few extra things.... This time I didn't wear my green scarf (I couldn't find it), I wore some pink sequined ears from my niece and I think they even made me want to go to Disney, should I keep wearing them? Maybe, my son really liked them, I guess because of the sparkles and I liked them too to be honest. Enough chitchat, I hope you like it, let's get started!

Materiales:
⚜️ Crema Hidratante
⚜️ Polvo compacto
⚜️ Corrector Fit Me
⚜️ Brochas para ojos: Difuminar, precisión, lengua de gato, pincel fino para delinear
⚜️ Elsa Palette
⚜️ Delineador en tono lila
⚜️ Iluminador Plata
⚜️ Pedrería
Materials:
⚜️ Moisturizing Cream.
⚜️ Pressed powder.
⚜️ Fit Me Concealer.
⚜️ Eye brushes: blending, precision, cat tongue, fine liner brush.
⚜️ Elsa Palette.
⚜️ Eyeliner in lilac shade.
⚜️ Silver Illuminator
⚜️ Rhinestones.

Paso 1 :
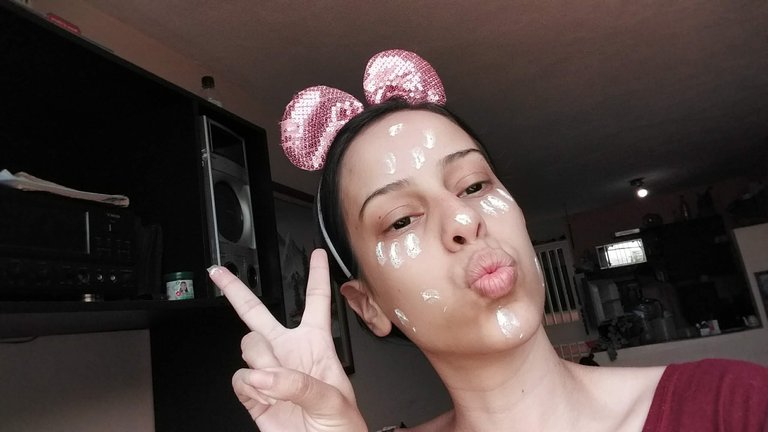
Siempre lo primero va a ser hidratarnos la piel y yo lo hice con una crema fría de DERNIER, muy bueno, se siente el rostro fresco y suave. Tenia como una resequedad en la piel bastante extraña, pero esta crema me prestó muchísimo
Step 1:
Always the first thing is going to be to moisturize the skin and I did it with a cold cream of DERNIER, it is very good, the face feels fresh and soft. I had a strange kind of dryness in my skin, but this cream helped me a lot.

Paso 2:
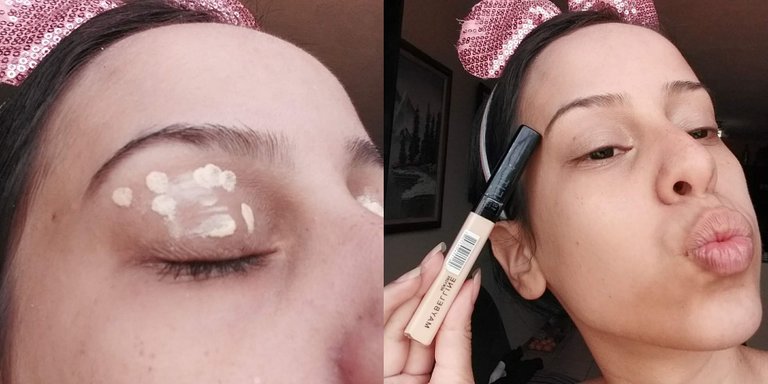
En este post dije que necesitaba cambiar de corrector porque el que tenia era muy naranja, por fin lo hice y este si combina con mi tono de piel, es fit me de Maybelline en tono 15 fairy claire
Lo aplique en mis parpados para que la sombra que utilicé pigmentara más y no se corriera, pero... Al final del día, el corrector no realizo su función, se termino cuarteando el maquillaje, así que, a cambiar otra vez de corrector, de los errores se aprende
Step 2:
In this post I said I needed to change concealer because the one I had was too orange, I finally did and this one does match my skin tone, it's fit me from Maybelline in shade 15 fairy claire
I applied it on my eyelids so that the shadow I used would pigment more and not fall off, but... At the end of the day, the concealer did not perform its function, the makeup ended up cracking, so I had to change the concealer again.

Paso 3:
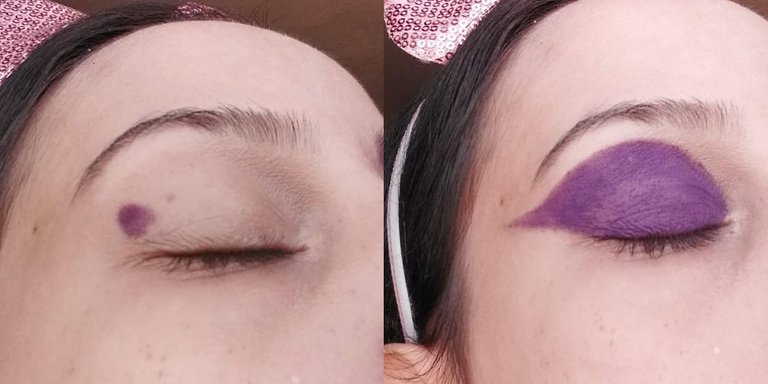
Empecé aplicando de a toques el color morado en todo el parpado móvil y parte de la cuenca haciendo una forma de gato no tan alargada, tuve que poner 2 capas de esta sombra porque es muy polvorienta y la mayor parte se caía, pero al final si resultó. 😌
Step 3:
I started by applying the purple color in touches all over the mobile eyelid and part of the crease making a cat shape not so wide, I had to put 2 layers of this shadow because it is very powdery and most of it fell off, but in the end it did work out. 😌

Paso 4:
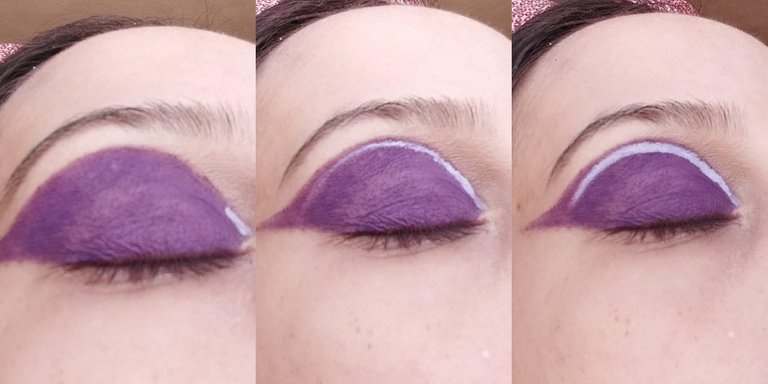
Hora del delineado, le agregué fijador a un pincel fino para delinear y tomé una sombra bastante pigmentado, así cree mi delineador lila. Comencé mi delineado haciendo una pequeña linea en el extremo interno del ojo para poder posicionarlo, continué con el arco poco a poco hasta engrosarlo
Step 4:
It's eyeliner time, I added fixative to a fine eyeliner brush and took a very pigmented shadow to create my lilac eyeliner. I started my eyeliner by making a small line on the inner corner of the eye to position it, I continued with the arc little by little until it thickened.

Paso 5:
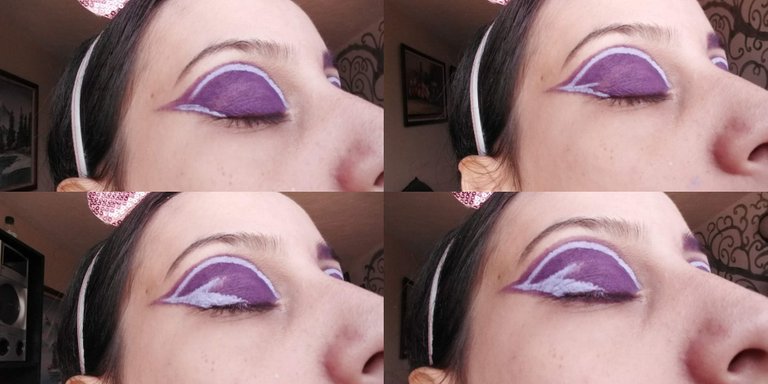
Con el pincel hice un triangulo hacia el exterior uniéndolo con el arco que ya elaboré antes, lo rellené y le saqué una linea hacia el centro, creo que no hace falta decir que esto era de improvisación pero el resultado me gustó bastante.
Step 5:
With the brush I made a triangle towards the outside joining it with the arc that I already made before, I filled it and drew a line towards the center, I think it goes without saying that this was improvisation but I liked the result quite a lot.

Paso 6:
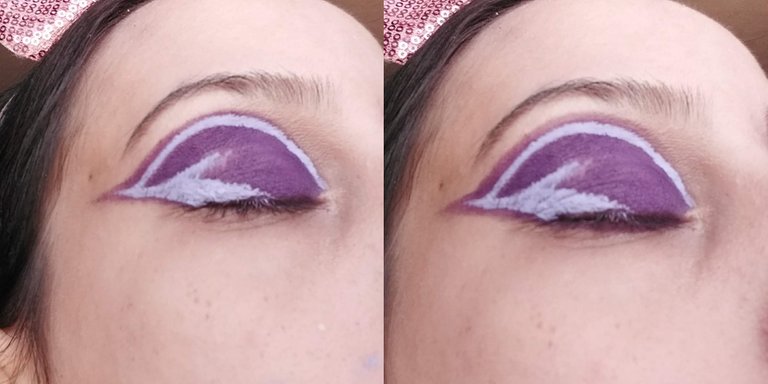
Ahora con una brocha de detalle y la sombra morada que utilice antes pasaré a difuminar un borde en el delineado para darle profundidad, al igual que la aplicaré debajo de mis ojos
Step 6:
Now with a detail brush and the purple shadow I used before I will move on to smudge an edge on the eyeliner to give it depth, just as I will apply it under my eyes.

Paso 7:
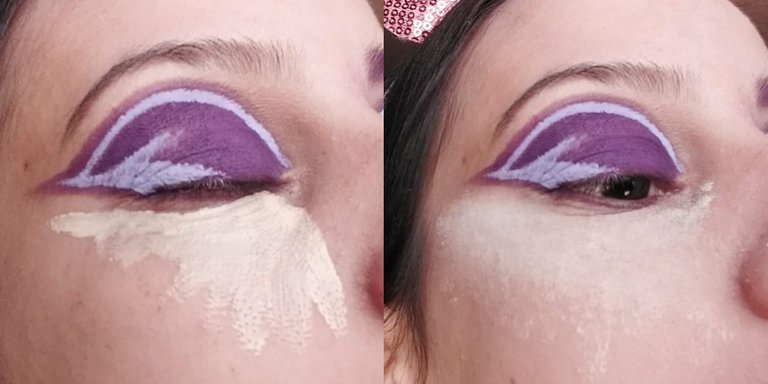
Agregué corrector para ocultar unas largas noches, malas decisiones y bastantes pañales jajajaja. Sellé con polvo suelto y lo dejé ahí un rato para hacer efecto baking.
Step 7:
I added concealer to hide some long nights, bad decisions and quite a few diapers hahahaha. I sealed with loose powder and left it there for a while for a baking effect.

Paso 8:
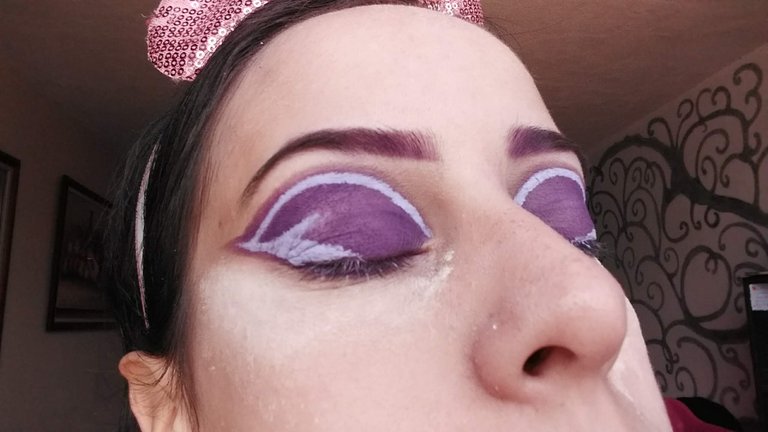
Ahora, hablemos de mis cejas… La verdad no sé qué quería hacer, pero definitivamente me gustó y bastante, nunca me había realizado las cejas de otro color que no fuera el común, triste que en las fotos finales no se notan
Step 8:
Now, let's talk about my eyebrows... I really don't know what I wanted to do, but I definitely liked it, I had never done my eyebrows in a color other than the common one, sad that in the final photos they aren't noticeable.

Paso 9
Las pestañas, no me las supe poner... Tenía ya rato sin aplicarme nada en las pestañas porque se me habían estado cayendo bastante, quise intentar algo más llamativo pero sinceramente no me gustaron en lo absoluto. Voy a aprender a ponerme mejor las pestañas, no se preocupen, creo en mi 💪
Step 9:
The lashes, I didn't know how to put them on.... I hadn't applied anything on my eyelashes for a while because they had been falling off a lot, I wanted to try something more eye-catching but I honestly didn't like them at all. I'm going to learn how to apply my eyelashes better, don't worry, I believe in myself, I can do it.

Paso final
Quise agregarle un poco de brillo, así que, con un poco de pega para pestañas y un pulso tremendo, apliqué pedrería estética amarilla (no tenía otro color) debajo de mi ojo
Final step
I wanted to add a little sparkle, so with some eyelash glue and a tremendous pulse, I applied yellow rhinestones (I had no other color) under my eye.
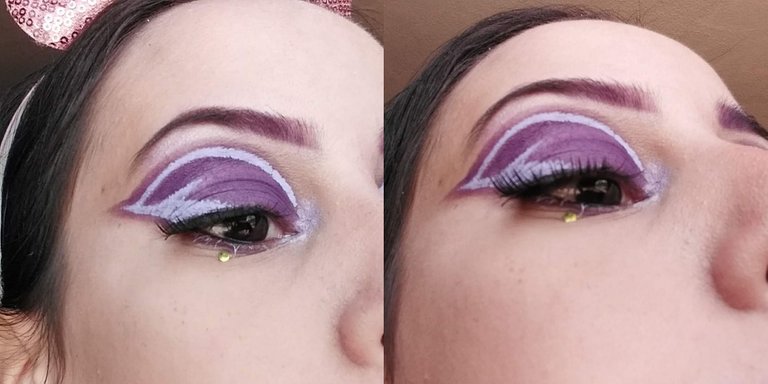

¿Por qué posteo hasta ahora? Así como dije en un post anterior lo importante es aprender y arriesgarse, si no nos quedaríamos estancados. Lo posteo porque habrá alguien que si le guste, habrá alguien que pueda aprender algo de ello, habrá alguien que estaba buscando un maquillaje morado y este tiene lo que se necesita, ¿y sabes qué? ¿Por qué no? Es solo hacerlo, sin tantos peros, sin tanto pensarlo, sin tanto procrastinar, solo hacerlo. En serio gracias por tomarte el tiempo de leer y acompañarme, nos vemos en una próxima entrega, y recuerda, solo hazlo.
Why am I posting until now? Well as I said in a previous post the important thing is to learn and take risks, otherwise we would be stuck. I post it because there will be someone who likes it, there will be someone who can learn something from it, there will be someone who was looking for a purple makeup and this one has what it takes, and you know what, why not? It's just do it, without so many buts, without so much thinking about it, without so much procrastination, just do it. Seriously thanks for taking the time to read and join me, see you in an upcoming installment, and remember, just do it.

