Hello dear community of Geek Zone, I hope you are very well, today I come to show you a post quite different from what I'm used to bring, because today will not be a post about games or any review, this will be a very interesting post because I will show you how was to fix a monitor which had damaged some capacitors.
Prologue
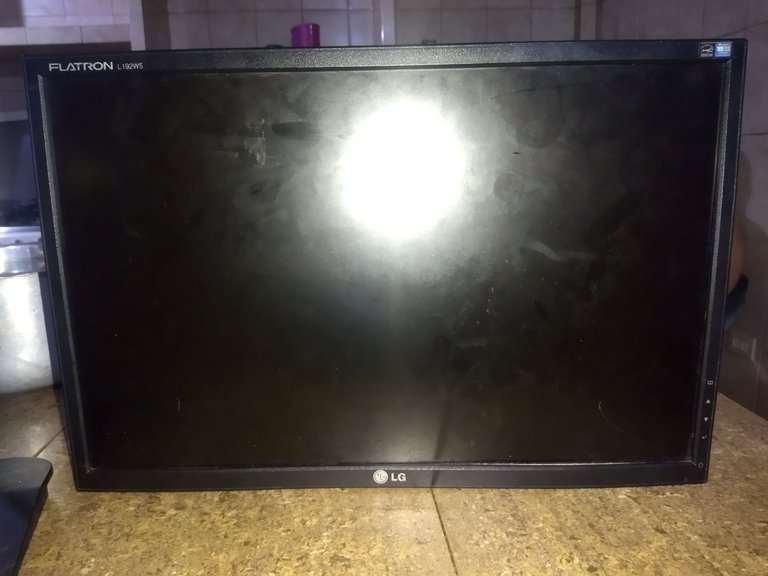
This is a monitor that I had for quite some time, and which has been through a lot. I was currently using this monitor on a borrowed computer because I don't have a computer but I do have a monitor, and my friend @therealflaws has a secondary computer that was missing the monitor, so we are using the monitor on that computer.
The problem is that this monitor had long ago presented a failure that one day a blackout occurred and the electricity returned a while later being the monitor connected at all this time, so when we tried to turn it on nothing happened.
The monitor only turned on and off constantly, it did nothing else, so I took it home to disassemble it and see what had happened, being at this moment in which I realized that in the board where the power cable is connected a few capacitors had swollen or damaged, this being the obvious cause, since without the flow of voltages that these generate in the monitor, it was not going to turn on as usual.
In spite of this, a few days later when I tried to test the monitor out of mere curiosity, it turned on, which seemed strange to me because it was a real miracle that it turned on with four damaged capacitors if it is half the capacitors that the board had.
The problem was when I left the monitor like that, because a couple of days ago the same thing happened again, it turned off and did not turn on again, when I took it home I saw that another capacitor had been damaged, so my hope that it would fix itself was very impossible now, so the only solution was to buy a soldering iron to be able to change these parts.
At this moment is the one we give the honor to @therealflaws cousin named Miguel, he was the one who bought the soldering iron to be able to fix the monitor, he is a great graphic designer and also has experience with the topic of technological repair.
This being all prologue, I will now show you how the repair went.
Repair
I quickly explain what the capacitors look like and how to change them.
Explanation of the repair
These are the capacitors.
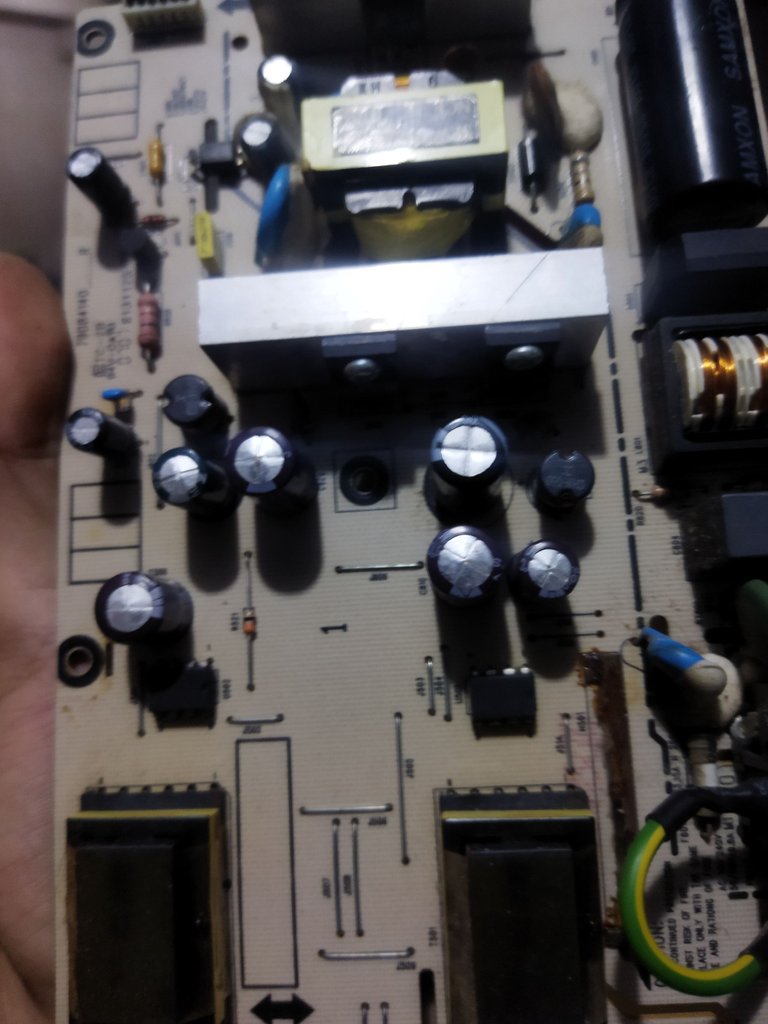
Sorry for the blur.
For those who do not know, capacitors or capacitors, work to store and control the flow of electricity on the motherboard, there are many models and sizes, but most of the time they have a cylindrical shape having the top part of aluminum with a kind of cross, which is flat naturally, but when damaged this part swells ceasing to be flat.
And they will look like this.
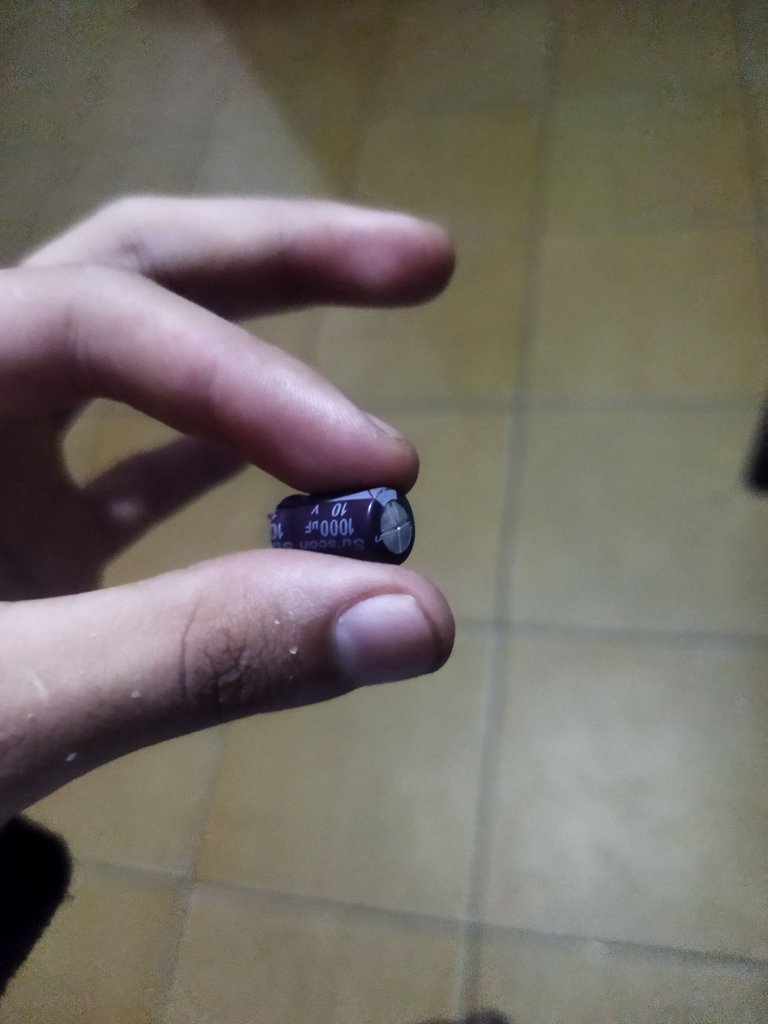
We can see that the metal part with the X is facing out, which indicates that it is damaged.
Besides taking this into account, you also have to look at the values that shows a capacitor, because a capacitor works with two measures, being commonly uF which means microfarad and V which means voltage, this is very important when replacing a capacitor, because the values have to be the same or higher, but they can never be lower because this can create a failure on the board.
You may see capacitors of the same size or different sizes, but this does not matter as much as the values do.
In addition to everything, to be able to make this relationship you also have to have a good handling with the soldering iron, because you can burn or damage something that was in good condition or more relevant you can hurt yourself because these soldering irons work at temperatures over 400 degrees, a minimum friction with this can be very painful.
Once this is explained let's go with the pictures of how we did it.
Applying what we learned.
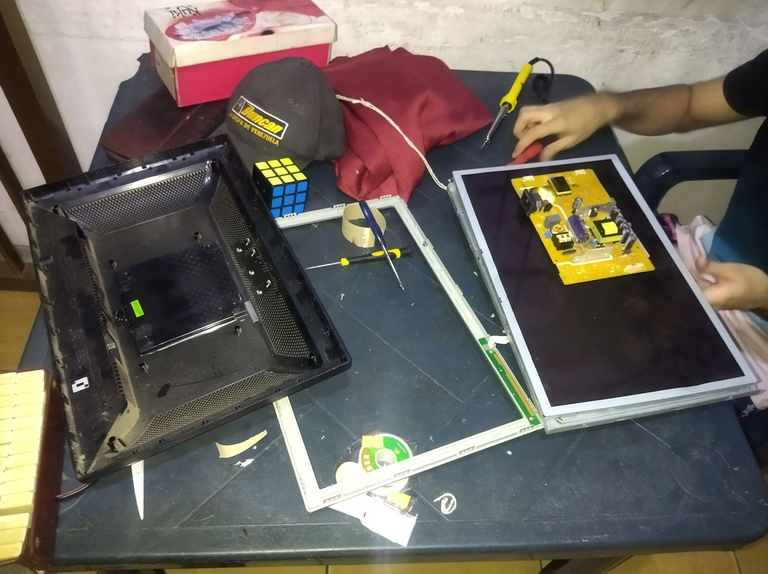
Don't question why there is a rubik's cube on the table where we were disassembling the monitors.
We were planning to remove the capacitors from a damaged monitor that Miguel had, but in the end we had to look for more base plates from other appliances because we couldn't find the necessary sizes.
For this Miguel had to unsolder the good capacitors from the board they were on, then he had to unsolder the bad ones on the monitor board to be able to replace it with the good one.
The good thing is that as I said he has experience in this of the relationship of appliances, I also have knowledge in this, mostly because of the time I was working with my brother in his technical service, where I learned this of the capacitors because he explained to me and put me to change the motherboard capacitors of some televisions.
But in this case the credit goes to Miguel because when he bought the soldering iron he was also going to be the one to use it.
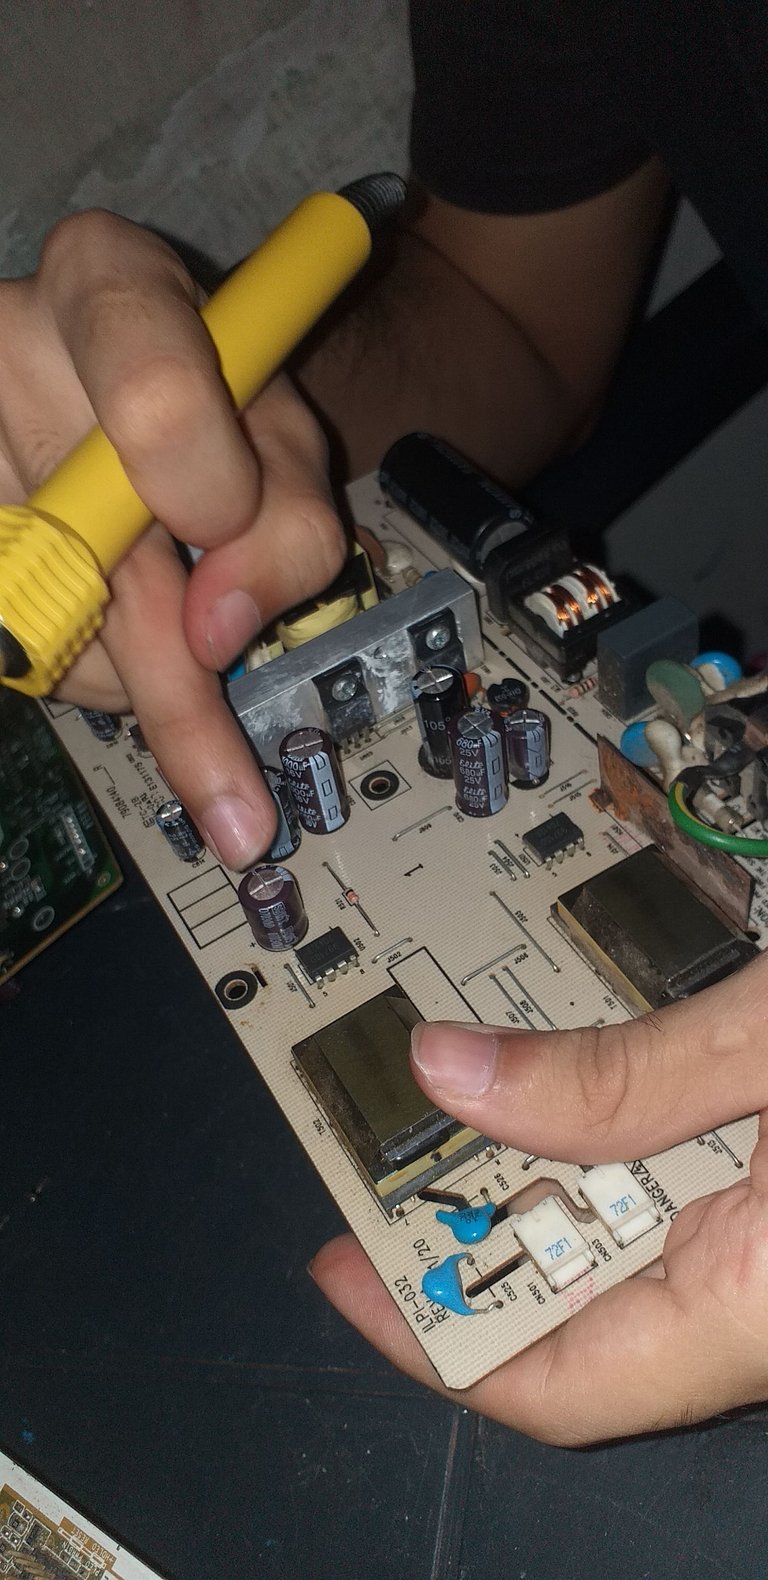
In this photo he is indicating which one is one of the swollen ones and one of which we could not change because we found a replacement because it had very high voltages and we could not find one that would replace it.
In the end we ended up changing only three capacitors because we couldn't find replacements for the other two that were also damaged, but going from five to two damaged capacitors is a big improvement.
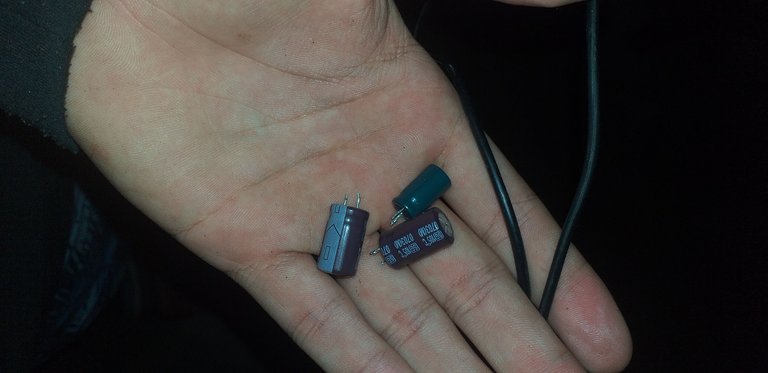
These were the three damaged capacitors that we managed to replace, they are going straight to the trash.
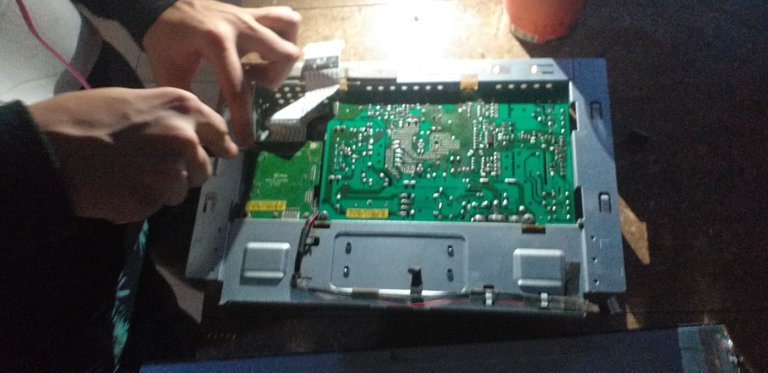
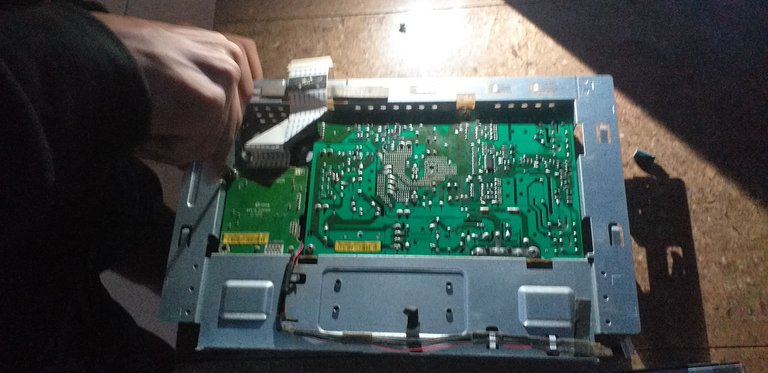
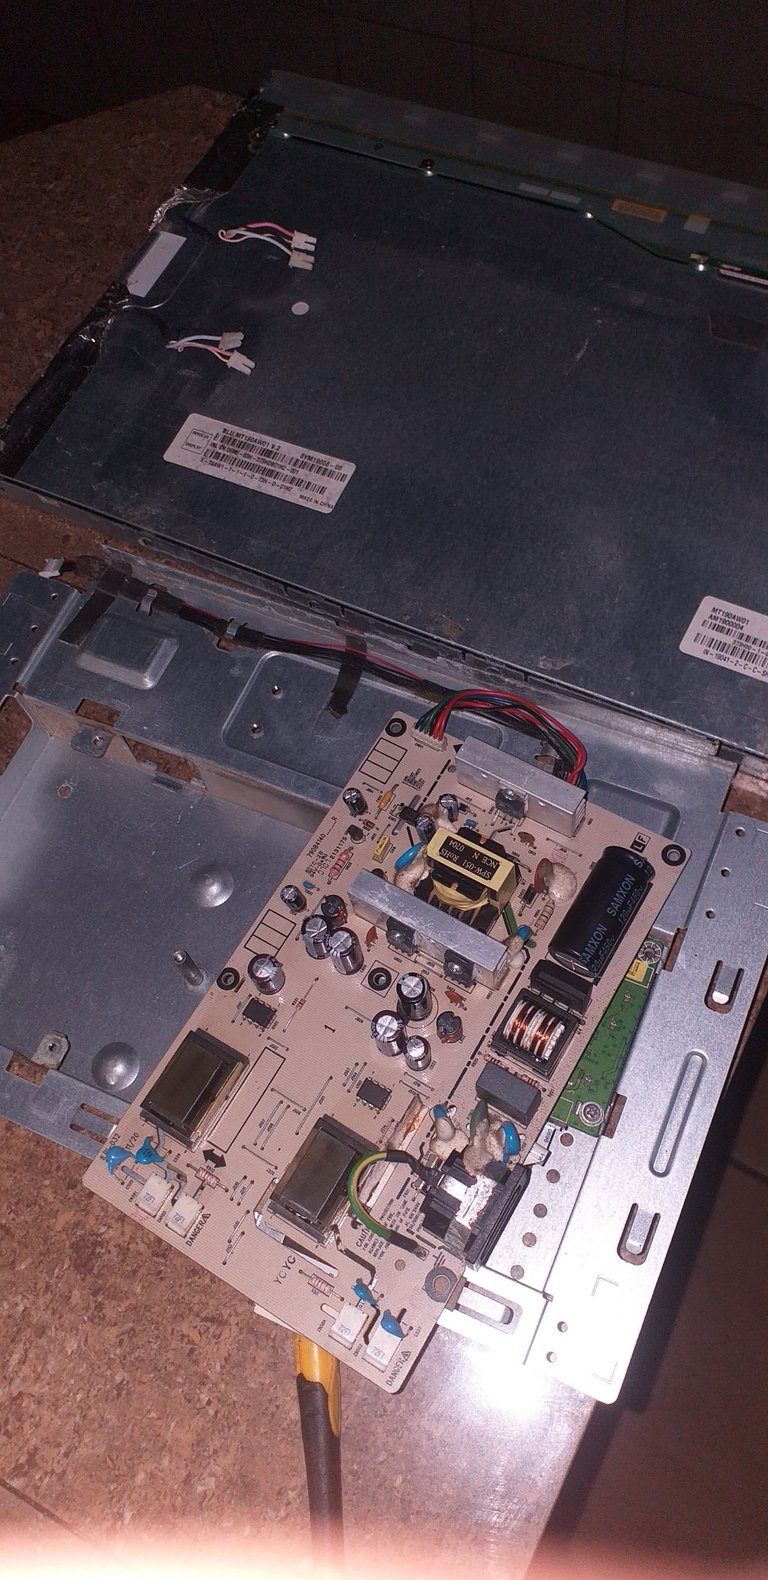
To finish this repair, we only needed to assemble the monitor, which I took care of, while Miguel took the pictures because I told him I was going to make a post of this repair.
Here we were finishing the screws to fix the plate to the base.
Here we are connecting the lamps that give light to the monitor screen.
And finally a picture of how it turned on perfectly.
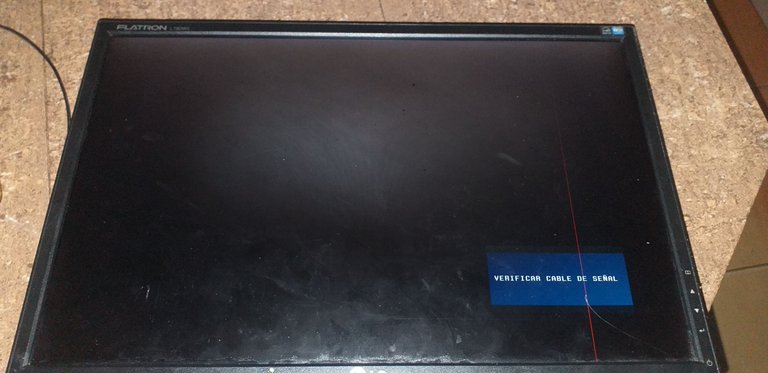
If you look closely, you will notice that the monitor has a red stripe, being this a problem of the screen that was already like this for a long time.
Now I want to show you two pictures that I really liked, but I didn't know where to put it.
The first one is a picture of the whole monitor before assembling it, the problem is that my finger appeared.
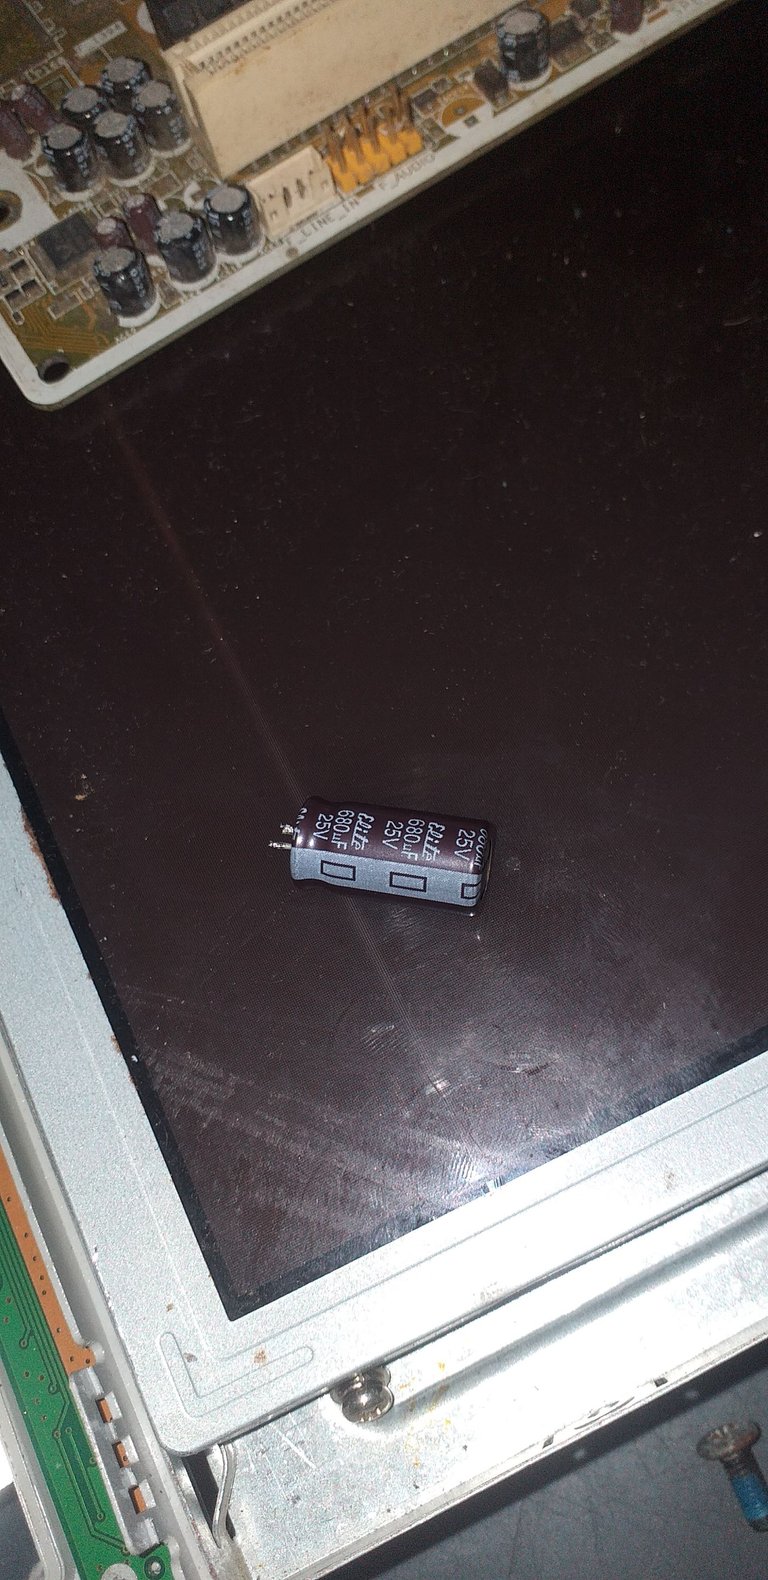
And a photo of a damaged capacitor.
Without further comment, this is the end of the post, but not before saying that I loved doing this post and that it was a lot of fun, repair the monitor.
Thank you very much for reading.
I have to clarify that the images shown in this post are mine or were edited by me, but if not mine I will place their respective source.

Hola querida comunidad de Geek Zone, espero que estén muy bien, el día de hoy vengo a mostrarles un post bastante diferente a lo que estoy acostumbra a traer, debido a que hoy no será un post sobre juegos o alguna review, este será un post bastante interesante porque les mostrares como fue arreglar un monitor al cual se le habían dañado algunos capacitadores.
Prologo
Este es un monitor que yo tenía desde hace bastante tiempo, y el cual ha pasado por muchas cosas. Este monitor actualmente lo estaba utilizando en una computadora prestada debido a que yo no tengo computadora pero si monitor, y a mi amigo @therealflaws tiene una computadora secundaria a la cual le faltaba el monitor, así que estamos usando el monitor en dicha computadora.
El problema es que este monitor hace mucho había presentado un fallo de que un día ocurrió un apagón y la electricidad volvió un rato después estando el monitor conectado en todo este momento, así que cuando lo tratamos de encender no sucedía nada.
El monitor solo se encendía y apagaba constantemente, no hacía nada más, así que me lo lleve para mi casa para desmontarlo y ver que había ocurrido, siendo en este momento en el cual me di cuenta de que en la placa donde va conectada el cable de alimentación se habían hinchado o dañado unos cuantos capacitadores, siendo esta la evidente causa, ya que sin el fluido de voltajes que estos generan en el monitor, este no iba a encender como es de costumbre.
A pesar de esto a los días que intente probar el monitor por mera curiosidad este encendió, lo cual me parecía raro porque era un auténtico milagro que encendiera con cuatro capacitadores dañados si es la mitad de capacitadores que la placa tenía.
El problema estuvo cuando yo deje el monitor así, porque hace un par de días le volvió a pasar lo mismo, se apagó y no volvió a encender, cuando me lo lleve a mi casa vi que se había dañado otro capacitador, así que mi esperanza de que se arreglara solo era muy imposible ahora, por lo cual la única solución era comprar un soldador para poder cambiar estas piezas.
En este momento es el que le damos el honor al primo de @therealflaws llamado Miguel, él fue el que compro el soldador para poder arreglar el monitor, él es un gran diseñador gráfico y además tiene experiencia con el tema de reparación tecnológica.
Siendo todo este el prólogo, ahora les mostraré como fue la reparación.
Reparación
Les explico rápidamente como son los capacitadores y como se cambian.
Explicación de la reparación
Estos son los capacitadores.
Perdonen el desenfoque.
Para los que no sepan, los capacitadores o condensadores, funcionan para almacenar y controlar el flujo de electricidad en la placa madre, hay muchos modelos y tamaños, pero la mayor parte de las veces tienen una forma cilíndrica teniendo la parte superior de aluminio con una especie de cruz, la cual es plana naturalmente, pero cuando está dañada esta parte se hincha dejando de ser plana.
Y pasarán a verse así.
Podemos ver que la parte de metal que tiene la X está hacia fuera, lo cual nos indica que está dañada.
Además de tener esto en cuanta, también tiene que fijarse en los valores que muestra un capacitador, porque un capacitador trabaja con dos medidas, siendo comúnmente uF Que significa microfaradio Y V que significa voltaje, esto es demasiado importante al momento de remplazar un capacitador, debido a que los valores tienen que ser los mismos o mayores, pero nunca pueden ser menores porque esto puede crear un fallo en la placa.
Puede que vean capacitadores del mismo tamaño o de tamaños diferentes, pero esto no importa tanto como importa los valores.
Además de todo, para poder hacer esta relación también tienes que tener un buen manejo con el soldador, debido a que puedes quemar o dañar algo que estaba en buen estado o más relevante puedes hacerte daño debido a que estos soldadores trabajan a temperaturas mayores a 400 grados, un mínimo roce con este puede ser muy doloroso.
Una vez explicado este vamos con las fotos de como lo hicimos.
Aplicando lo aprendido.
No se cuestionen porque hay un cubo de rubik en la mesa donde estábamos desmontando los monitores.
Pensábamos sacar los capacitadores de un monitor dañado que tenía Miguel, pero al final tuvimos que buscar más placas bases de otros electrodomésticos porque no encontrábamos de las medidas necesarias.
Para esto Miguel tenía que desoldar los capacitadores buenos de la placa en la que se encontraban, luego tenía que desoldar los malos en la placa del monitor para poder remplazarlo con el bueno.
Lo bueno es que como ya comente él tiene experiencia en esto de la relación de electrodomésticos, yo también tengo conocimiento en esto, más que nada por el tiempo que estuve trabajando con mi hermano en su servicio técnico, donde yo aprendí esto de los capacitadores porque él me explico y me ponía a cambiar los capacitadores de placa madres de algunos televisores.
Pero en este caso el mérito es para Miguel porque al comprar el soldador`y también iba a ser el que lo usara.
En esta foto él está indicando cuál es uno de los que están hinchados y uno de los cuales no pudimos cambiar porque encontramos un remplazo porque tenía voltajes muy altos y no encontramos uno que lo remplazaría.
Al final terminamos cambiando solo tres capacitadores debido a que para los otros dos que también estaban dañados no encontramos remplazo, pero pasar de cinco a dos capacitadores dañados es una gran mejora.
Estos fueron los tres capacitadores dañados que logramos remplazar, van directos a la basura.
Para terminar esta reparación, solo hacía falta ensamblar el monitor, de lo cual me encargue yo, mientras Miguel me tomo las fotos porque le dije que iba a hacer un post de esta reparación.
Aquí estábamos terminando de colocarles los tornillos que fijaran la placa a la base.
Aquí estamos conectando las lámparas que le dan luz a la pantalla del monitor.
Y para terminar una foto de como encendió perfectamente.
Si se observan bien, se darán cuenta de que el monitor tiene una raya roja, siendo este un problema de la pantalla que ya estaba así desde hace mucho que lo tenía.
Ahora quiero mostrarles dos fotos que me gustaron mucho, pero no sabía donde ponerla.
La primera es una foto a todo el monitor antes de ensamblarlo, el problema es que apareció mi dedo.
Y una foto de un capacitador dañado.
Sin más que comentar al respecto, esto es el final del post, pero no antes decir que me encanto hacer este post y que fue muy divertido, repara el monitor.
Muchas gracias por leer.
Tengo que aclarar que las imágenes mostradas en este post son mías o fueron editadas por mí, pero si no es mía, colocaré su respectiva fuente.