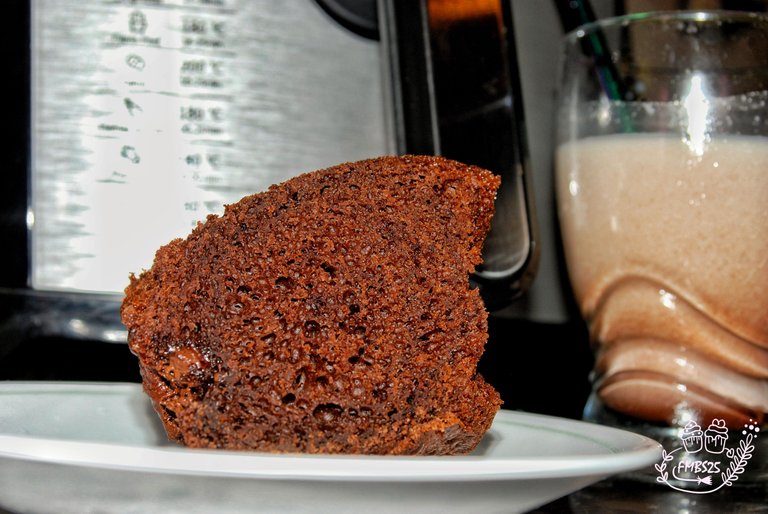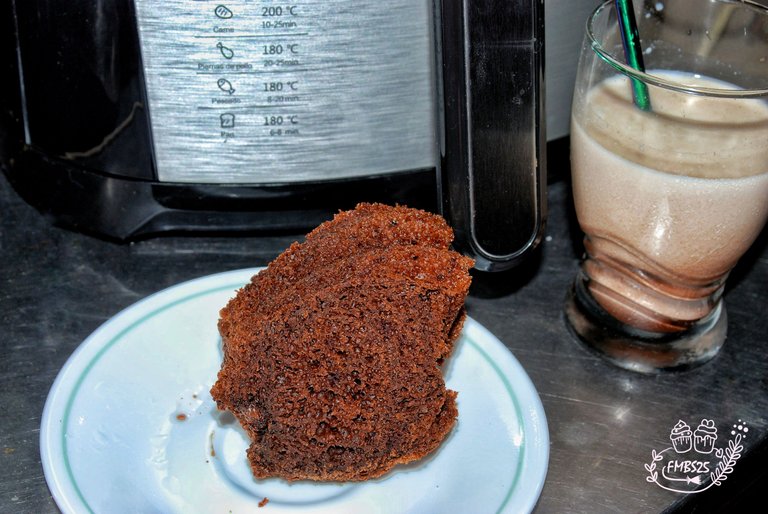
Point in favor for the fryer making a cake, you can do it in half the time it would take to do it in the oven, which also represents an energy saving, point against, and this will depend on the size of your air fryer, mine is 5.5 liters and I can bake in it in a mold of 20 centimeters in diameter at most, which implies a small amount for a large family, but if your family is small or you live alone, this size is more than enough. I must confess that I prepared my mixture with a little fear of losing it, but as he who does not risk neither wins nor loses, I decided to go all out and if I won, I knew I would win a lot, at the end of the story it was a lot of profit hahaha a delicious moist and fluffy cake that I will surely be repeating countless times.

The mixture for this cake is quite simple, if you don't have Greek yogurt in your cupboard you can perfectly substitute it with butter or margarine, the cooking time is the most amazing, because it is practically reduced to half of what it would take us to make it in a conventional oven and the result is simply luxurious, I must admit that I thought it would be overcooked or raw, but it was just right, but, join me and I'll show you how to prepare it.

Ingredientes

| 170 gr | All purpose wheat flour | 200 gr | Sugar |
| 30 gr | Cocoa powder without sugar |
| 3 | Eggs | 1/2 cup | Whole milk |
| 125 gr | Greek yogurt |
| 1 tsp | Sodium bicarbonate |
Preparation
| Preparation time | 5 Minutes |
| Cooking Time | 20 Minutes |

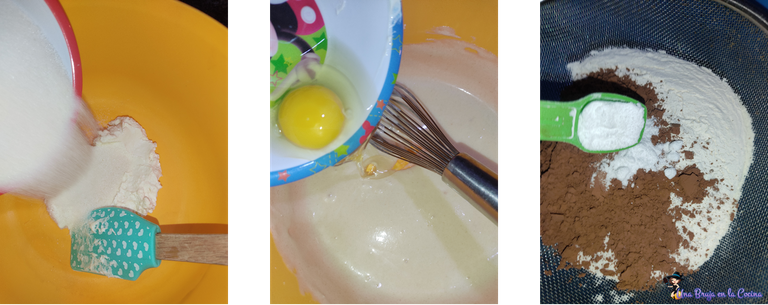
To begin we are going to make a cream with the Greek yogurt and the sugar, just as we would do with the butter, once the cream is obtained we will add the eggs one by one mixing until well integrated each time we add one. On the other hand, we sift the wheat flour with the cocoa and the baking soda.

We are going to add the dry ingredients with the help of a sieve (yes, we will sift again when adding) to the mixture of eggs, yogurt and sugar, we will do this in three batches, so that there are no lumps in the mixture, add the milk and finish mixing, It is not necessary to beat much, it is enough just to integrate the mixture very well, pour the mixture into a previously buttered and floured mold and if you wish you can add some chocolate drops, this is optional, if not, in the same way the cake will be delicious.

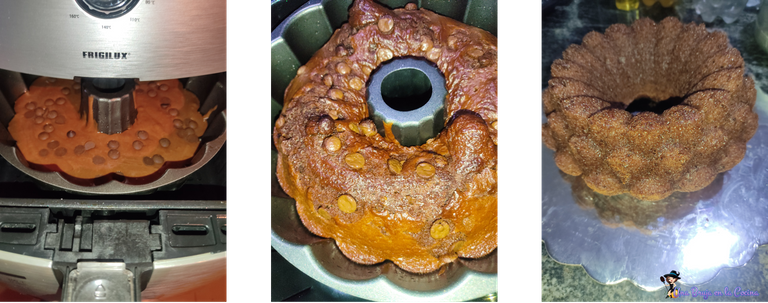
We took it to the air fryer, which I preheated to 200 °C for about 5 minutes and then lowered the temperature to 160 °C, for 20 minutes, at minute 18 I opened the fryer to test how the cooking was going and in fact it lacked that couple of minutes for the 20, the result was as you see in the pictures a fluffy cake that grew a lot, in fact and I think that because of the temperature and the reduced space of the fryer, I created a big belly to the cake.

It is important to keep in mind that the mold should not be higher than the fryer tray, in my case this mold fits exactly to the height, also the mixtures that we add should not rise too much, because this will make them stick to the resistance that has the fryer and can besides smelling awful, damage it. I think that lowering the cooking temperature by about 5 °C would slow down the process, but it would not form so much belly to the cake, this for decoration purposes, however, I love when they are like this, the crust that forms is the best, so from now on I marry these small cakes in the air fryer.


Thank you for taking the time to read this post, if you have any questions, criticisms or suggestions, I would appreciate it if you put them in the comment box, and remember, you too can do magic on the kitchen and wherever you go!

[ES]


Punto a favor para la freidora haciendo una torta, la puedes hacer en la mitad del tiempo que llevaría hacerlo en el horno, lo que representa además un ahorro energético, punto en contra, y esto dependerá del tamaño de tu freidora de aire, la mía es de 5.5 litros y puedo hornear en ella en un molde de 20 centímetros de diámetro como máximo, lo que implica una cantidad pequeña para una familia grande, pero si tu familia es pequeña o vives solo, este tamaño es más que suficiente. Debo confesar que prepare mi mezcla con un poco de temor a perderla, pero como el que no arriesga ni gana ni pierde, decidí ir con todo y si ganaba, sabía que ganaría mucho, al final del cuento fue mucha la ganancia jajaja una torta deliciosa húmeda y esponjosa que seguramente estaré repitiendo infinidad de veces.

La mezcla para esta torta es bastante sencilla, si no tienes en tu alacena yogurt griego perfectamente puedes sustituir con mantequilla o margarina, el tiempo de cocción es lo más alucinante, pues se reduce prácticamente a la mitad de lo que nos tardaríamos en hacerla en un horno convencional y el resultado sencillamente de lujo, debo admitir que pensé que me quedaría o muy cocida o de plano cruda, pero quedo justo en su punto, pero, acompáñame y te muestro como la prepare.

Ingredientes

| 170 gr | Harina de trigo de todo uso | 200 gr | Azúcar |
| 30 gr | Cacao en polvo sin azucar |
| 3 | Huevos | 1/2 Taza | Leche entera |
| 125 gr | Yogurt griego |
| 1 Cdta | Bicarbonato de sodio |
Preparación
| Tiempo de preparación | 5 Minutos |
| Tiempo de Cocción | 20 Minutos |

Para comenzar vamos a hacer una crema con el yogurt griego y el azúcar, tal como lo haríamos con la mantequilla, una vez obtenida la crema agregaremos los huevos de uno en uno mezclando hasta integrar bien cada vez que agregamos uno. Por otro lado, tamizamos la harina de trigo con el cacao y el bicarbonato de sodio.

Vamos a ir agregando los ingredientes secos con ayuda de un tamiz (si, volveremos a tamizar al agregar) a la mezcla de huevos, yogurt y azúcar, esto lo haremos en tres tandas, para que no se hagan grumos en la mezcla, agregamos la leche y terminamos de mezclar, no es necesario batir mucho, basta solo con integrar muy bien la mezcla, volcamos la mezcla en un molde previamente enmantecado y enharinado y si lo desean pueden agregar algunas gotas de chocolate, esto es opcional, si no, de igual manera la torta quedara deliciosa.

Llevamos a la freidora de aire, que yo pre calenté a 200 °C por unos 5 minutos y luego baje la temperatura a 160 °C, por espacio de 20 minutos, al minuto 18 abrí la freidora para probar como iba la cocción y en efecto le faltaban ese par de minutos para los 20, el resultado fue como lo ven en las imágenes una torta esponjosa que creció muchísimo, de hecho y creo que por la temperatura y el espacio reducido de la freidora, se le creo una gran barriga a la torta.

Es importante tener en cuenta que el molde no debe ser más alto que la bandeja de la freidora, en mi caso este molde le queda exacta a la altura, además las mezclas que agreguemos no deben subir demasiado, pues esto hará que se peguen a la resistencia que posee la freidora y puede además de oler espantoso, dañar la misma. Considero que bajarle unos 5 °C a la temperatura de cocción haría el proceso más lento pero no se le formaría tanta barriga a la torta, esto para efectos de decoración, sin embargo, a mí me encanta cuando quedan así, la costra que se le forma a la misma es de lo mejor, así que desde ahora me caso con estas pequeñas tortas en la freidora de aire.


Gracias por tomarse el tiempo de leer esta publicación, si tiene alguna pregunta, crítica o sugerencia, la agradecería que la pusiera en la caja de comentarios, y recuerda, ¡Tú también puedes hacer magia en la cocina ya dondequiera que vayas!


