On my quest to become more self-sufficient, I find myself constantly having to learn new skills and try new things that are sometimes outside of my comfort zone. I have very little mechanical experience. I have never really worked on cars or even small engines. When things go wrong, I have always felt like the money spent on having a mechanic make the repair is well worth the time and aggravation saved for me. Furthermore, I don't really have the tools to work on vehicles. However, if I really want to become self-sufficient, then I need to get the necessary tools and learn how to do these things on my own. So, when the brakes on my wife's 2019 Ford Flex began to start rubbing, I figured it would be a good place for me to start.
Well, if I'm being honest, she thought it would be a good place for me to start; I wanted to take it to a mechanic. But, after checking on some prices and doing a little bit of research, I begrudgingly decided that it was a job that I could handle. This is my story:
Flexin' On Them Haters

I have only changed a set of brakes one other time, and it was on my old Ford Explorer Sport Trac. So, I figured this Ford Flex would be the same, and it was... except for one tiny detail
Proprietary Design
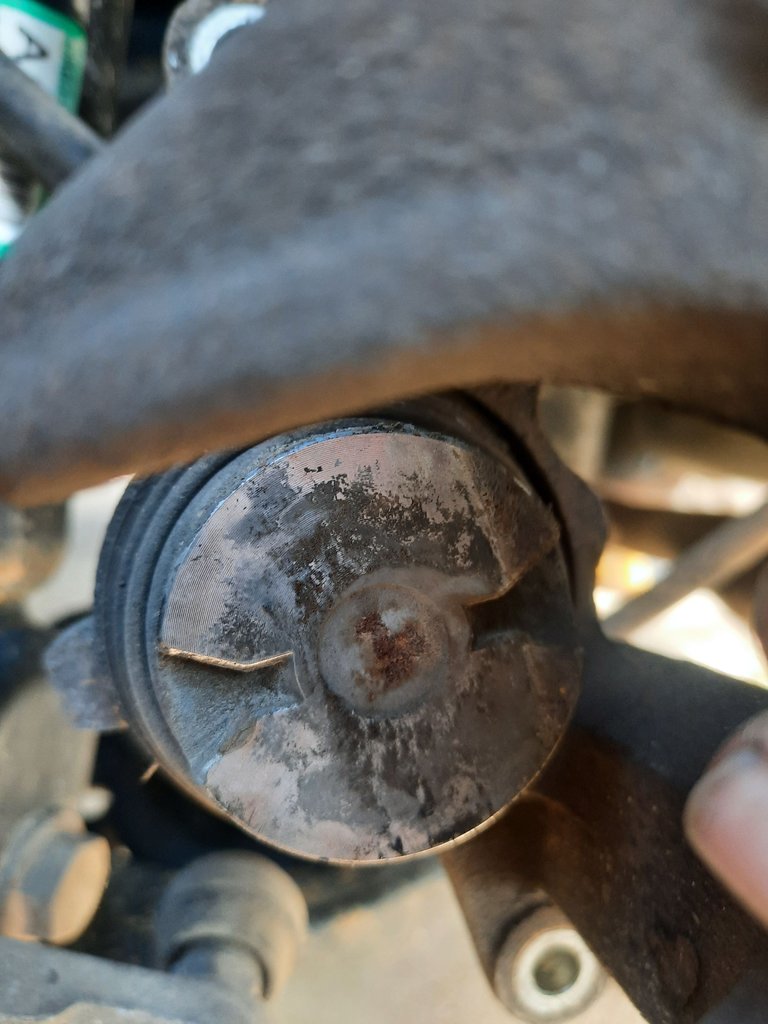
The surface of the brake piston has two little notches on it. That doesn't seem like a big deal, but it completely ruined my plans! I should have been able to finish the whole job in no more than a couple of hours, even with my inexperience. But those two tiny little notches turned this whole thing into an ordeal!
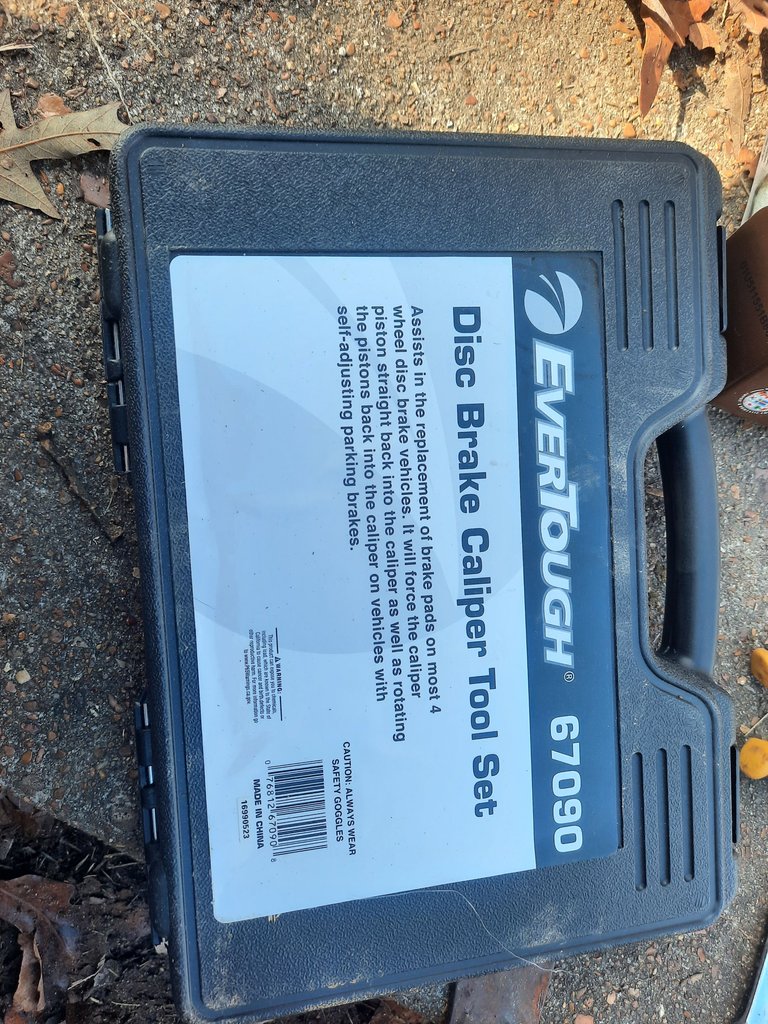
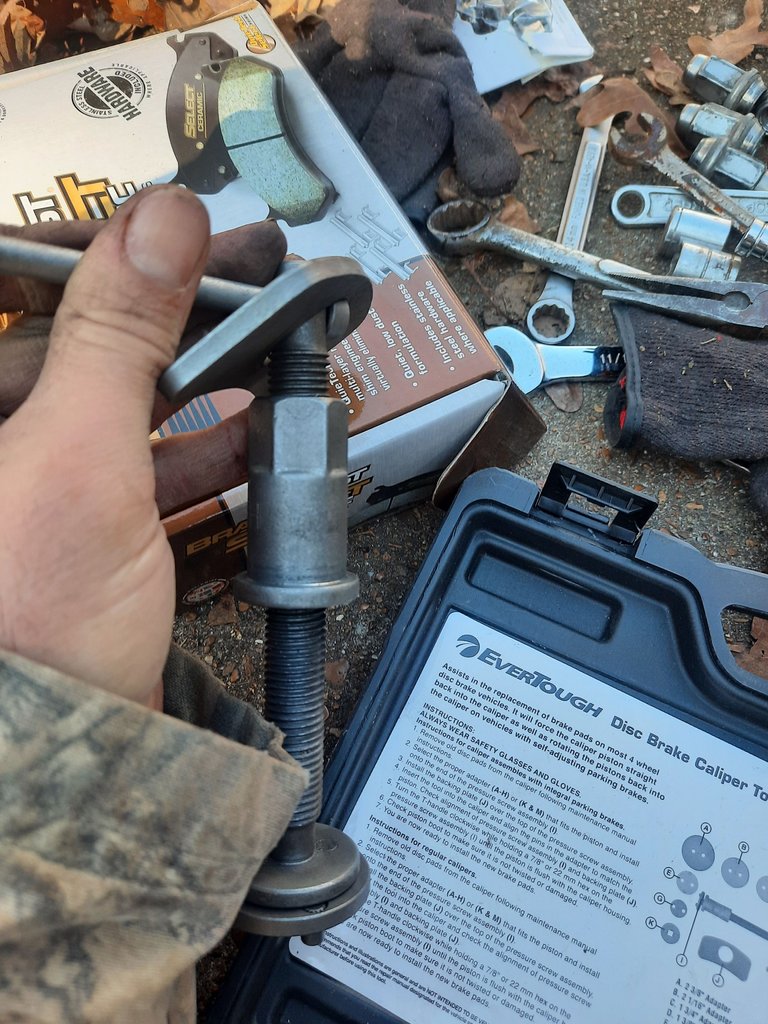
For those of you who have never changed the brakes on a vehicle, before you can put the brake assembly back onto the rotor, you have to compress that piston all the way back down. On the last (and only) vehicle that I worked on, it was a simple matter of putting a solid surface up against it and putting some really good pressure on it to press the piston down. I just used a C-clamp. However, on this car, you have to have a special tool with the two buttons that match up with those two notches. Then, not only do you have to press in on the piston, but you have to turn it clockwise while you are pushing. I did some Googling, and this could have been done with some long needle nose pliers; but, not only did I not have a long enough pair of those, the process would have taken a really long time to complete. Luckily, I was able to locate the toolset that I needed to do the job the easy way at our local auto parts store.
Not only did I find the tool, but I was able to borrow it for FREE! Well, kind of. I had to pay a deposit to take it home, but I get my money back when I return the tool. Thank you O'Reilly Auto Parts! Unfortunately, the trip into town to pick up the thing really threw my schedule off. But, I got thing thing home and gave it a once over.
Universal Caliper Tool
But How Do I Use It?
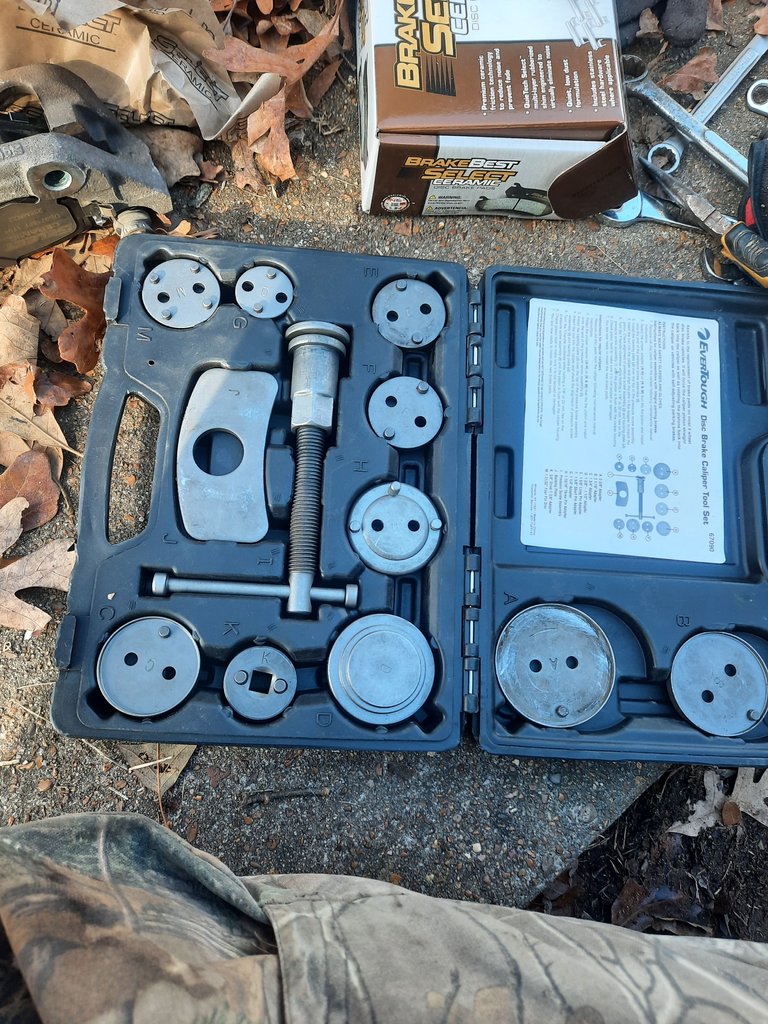
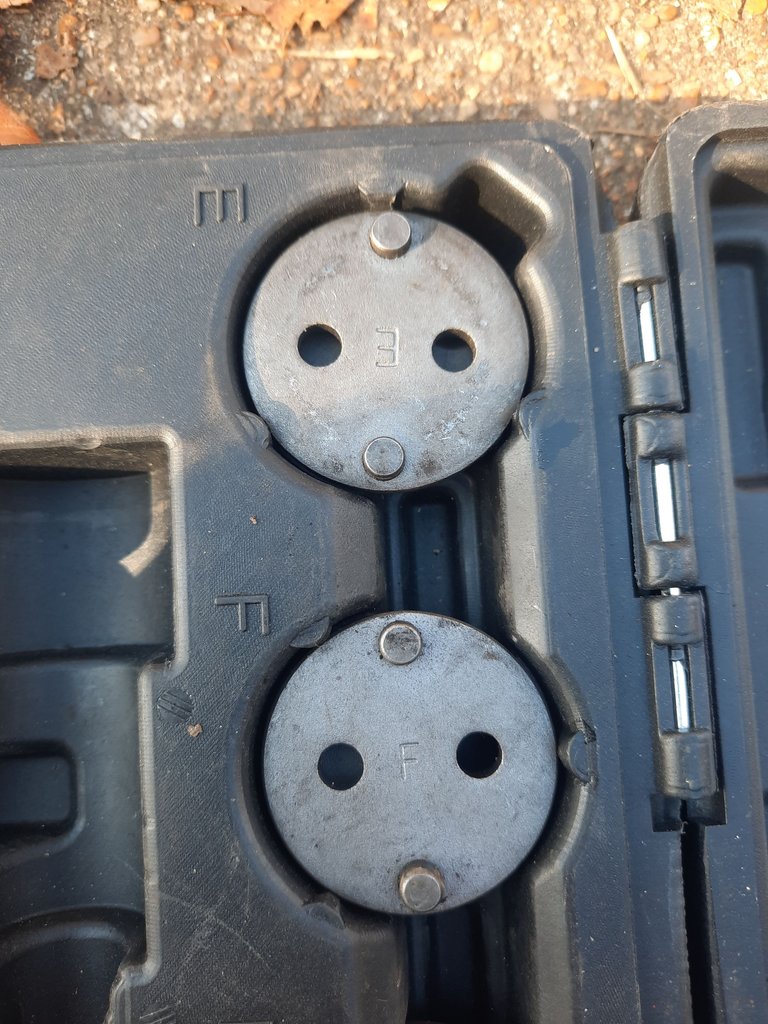
Anyway, it allowed me to get started. After fiddling around with it for a little while, I figured out that each of the little disks are meant to match up to different caliper styles. I found that either disk E or disk F looked about right for the Flex.
So Many Options!
I find it ridiculous how manufacturers today come up with these little intricacies just to make their product proprietary so you have to depend on them for even the simplest maintenance. I was so grateful to have found this universal tool set that I was able to borrow essentially for free!
Putting The Thing Together
To put the tool together, I had to run the handle of it through the center hole on the rectangle-shaped bracket until it rested against the stop (see next picture).
Tool Assembled
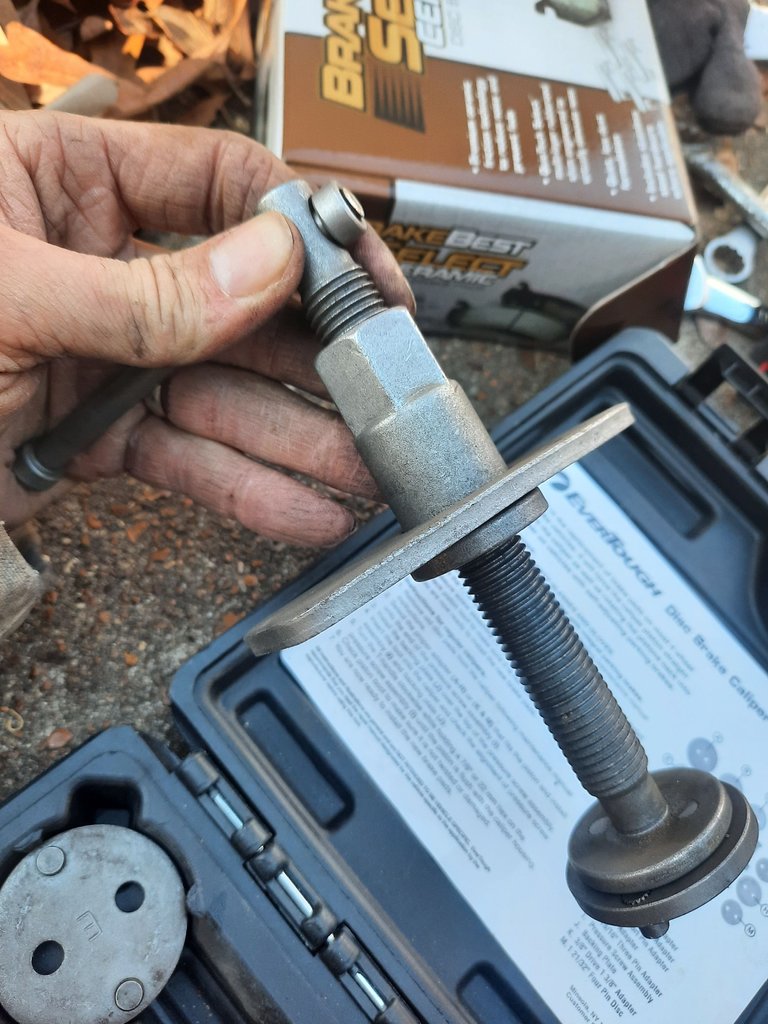
Next, I twisted the bracket until it was all the way down to the end that interfaces with the piston and put the entire assemble between the piston and caliper, ensuring that the buttons on the tool were in the grooves on the piston surface. Then, I threaded the piece with the bracket back until it was snug against the inside of the caliper.
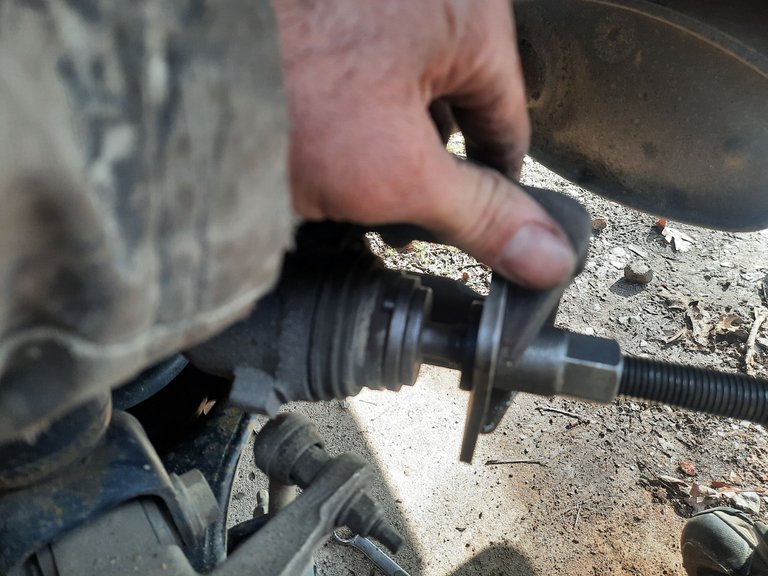
From there, it was just a matter of rotating the handle of the tool until the piston was compressed. I did find, however, that I needed to occasionally thread the bracket out further to snug it back up against the inside of the caliper as the piston compressed further in, and I knew that the job was done when it would not compress any further.
Finally, with the piston in position, I was able to replace the old brake pads and reinstall them. Unfortunately, that was all that I had time to do, because we were scheduled to go to my parents' today; so, I had to take a break before putting the tire back on, and I still had the passenger side to do.
Later That Day
It was pushing dark by the time we got back home, and it was well past sundown by the time I finished tending to the animals and got back around to the brake job. Also, the temperature had dropped down quite a bit, so I didn't want to ask anybody to come out and help. I learned that it is kind of difficult holding a flashlight and loosening break caliper bolts at the same time. But, I finally got the job done. The tires are back on, and I've pumped the brakes until they are all pressured up, ensuring that those pistons are pushed back out to hold the break pad against the rotor.Now, all that is left is for me to take it for a test drive to make sure I did the job right.
WISH ME LUCK!
If you don't see me around here for a while, maybe take that as a lesson that you shouldn't be changing your brakes if you don't know what you're doing.
Then again, it will probably just be because I suck at posting regularly here lately.
