¡HI FRIENDS OF NEEDLEWORK MONDAY!.😊
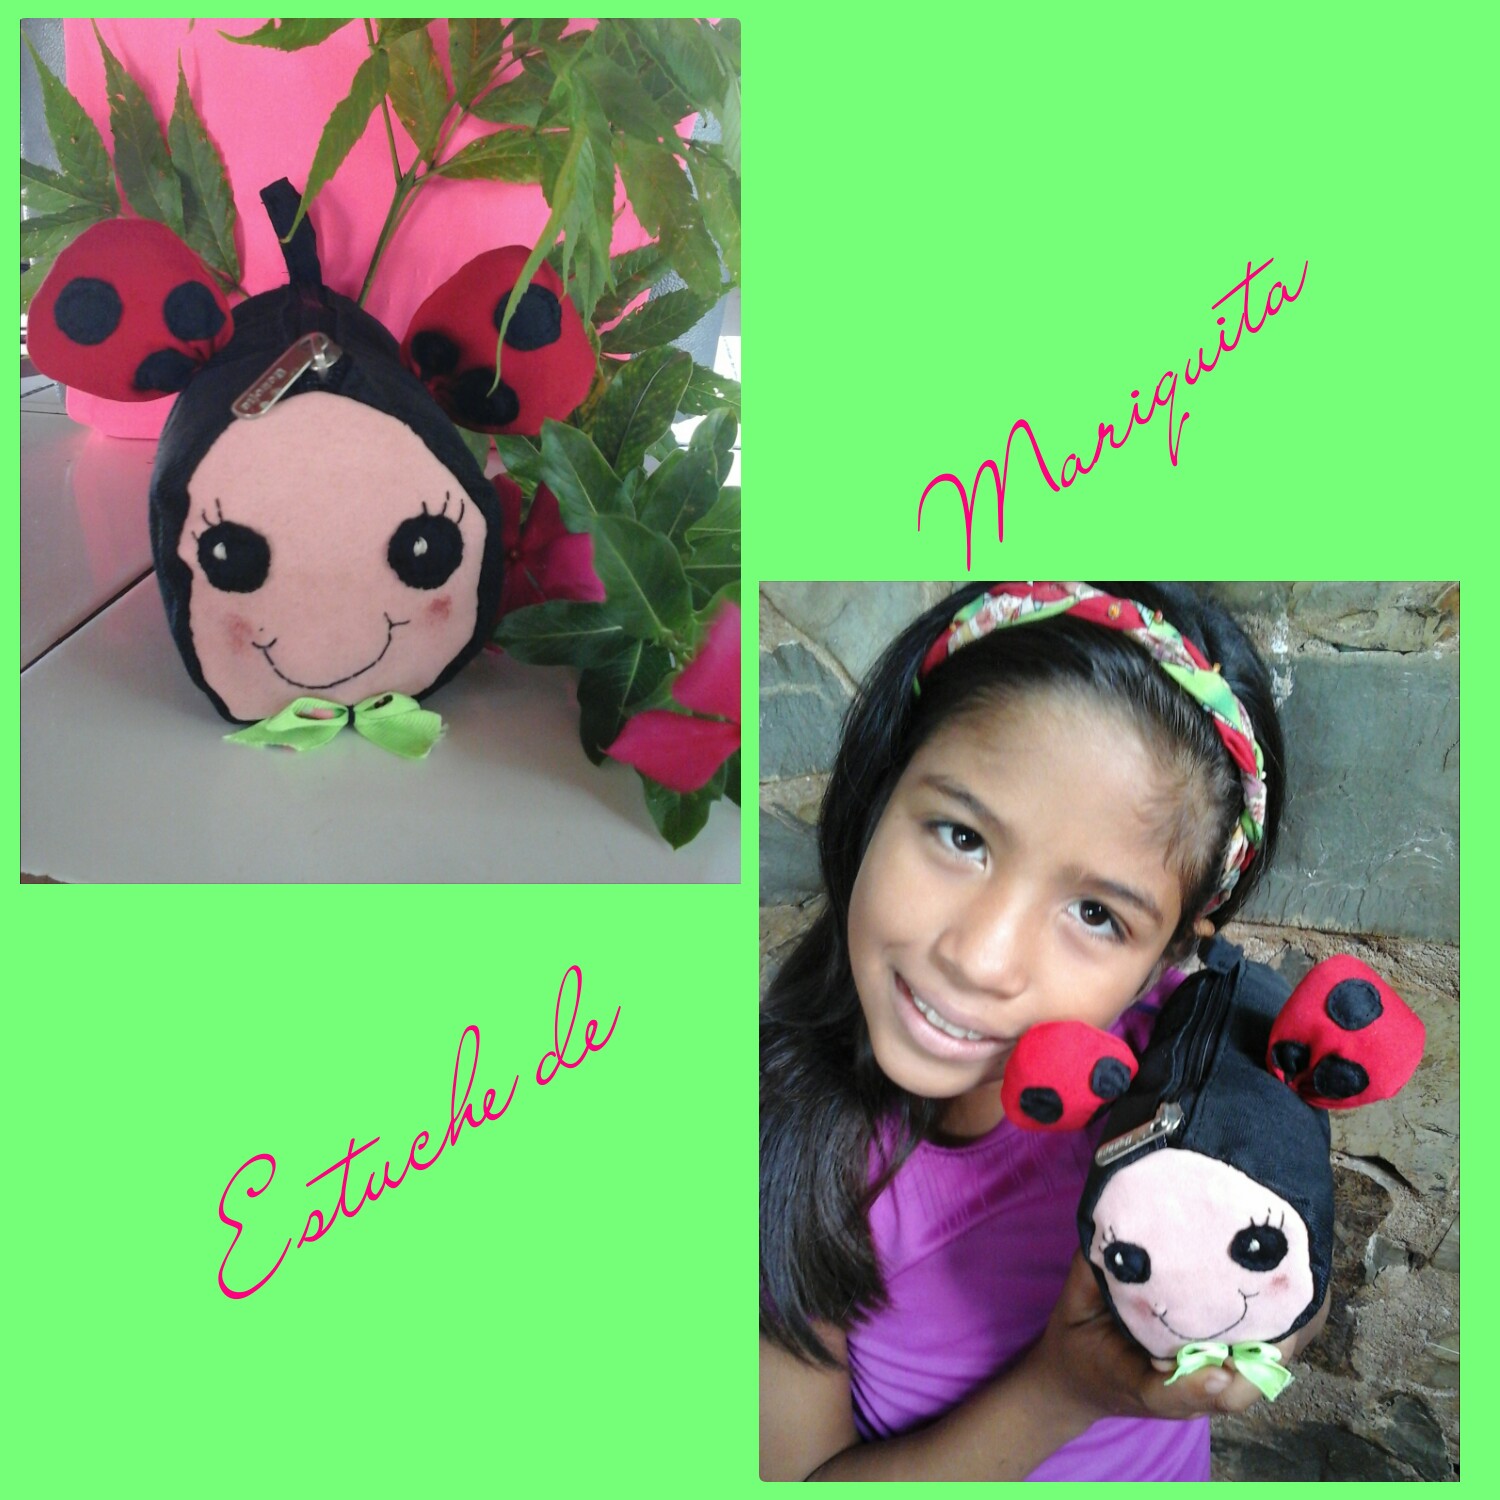
Es un gusto para mi saludarlos nuevamente, ¡que la paz de Dios llene cada día más sus vidas!
¡Espero que estés excelente y que tengas una noche bendecida! ♥
En esta noche quiero compartir un tutorial fácil de hacer y con materiales que estoy muy segura deben tener en casa. Es un estuche para los pequeños de la casa.
En muchos casos, organizar lápices, crayones y útiles escolares a veces es un problema, ya que tienden a perderse todo el tiempo. En esta ocasión les presentaré la solución, compartiré el procedimiento para hacer un estuche fabuloso y así poder llevar los lápices de colores y demás cosas de nuestros pequeños a cualquier lugar, o simplemente tenerlos en casa de manera organizada.
Tuve esta idea porque creo que he perdido la cuenta de las veces que mi hija ha perdido sus lápices de colores y hasta el estuche, jejeje! 😁
Es por esto quise hacer un estuche, pero con un diseño lindo y tierno para lograr que mi hija lo aprecie tanto que lo pueda cuidar muy bien.
Les cuento que cuando lo vio terminado, me dijo que parecía un peluche, ¡jeje! 😁 ¡Creo que lo logré!
No solo podemos usarlo para guardar las ceras de los más pequeños, sino que también podemos usarlo como un cómodo y práctico neceser.
Quiero invitar a todos los lectores a seguir el procedimiento para realizar este estuche. ¡Acompañenme! 👇
It is a pleasure for me to greet you again, may the peace of God fill your lives more every day! I hope you are very well and have a blessed night! ♥ Tonight I want to share with you an easy tutorial to make and with materials that I am very sure you must have at home. It is a case for the smallest of the house. In many cases, organizing pencils, crayons and school supplies is sometimes a problem as they tend to get lost all the time. This time I will present the solution, I will share the procedure to make a fabulous case so that we can take the colored pencils and other things of our little ones anywhere, or simply have them at home in an organized way. I had this idea because I think I've lost count of how many times my daughter has lost her colored pencils and even the pencil case, lol! 😁 This is why I wanted to make a case, but with a cute and cute design so that my daughter appreciates it so much that she can take good care of it. I tell you that when he saw it finished he told me it looked like a stuffed animal, hehe! 😁 I think I made it! Not only can we use it to store the colored pencils of the little ones, but we can also use it as a comfortable and practical toiletry bag. I want to invite all readers to follow the procedure to make a nice case. Join me! 👇
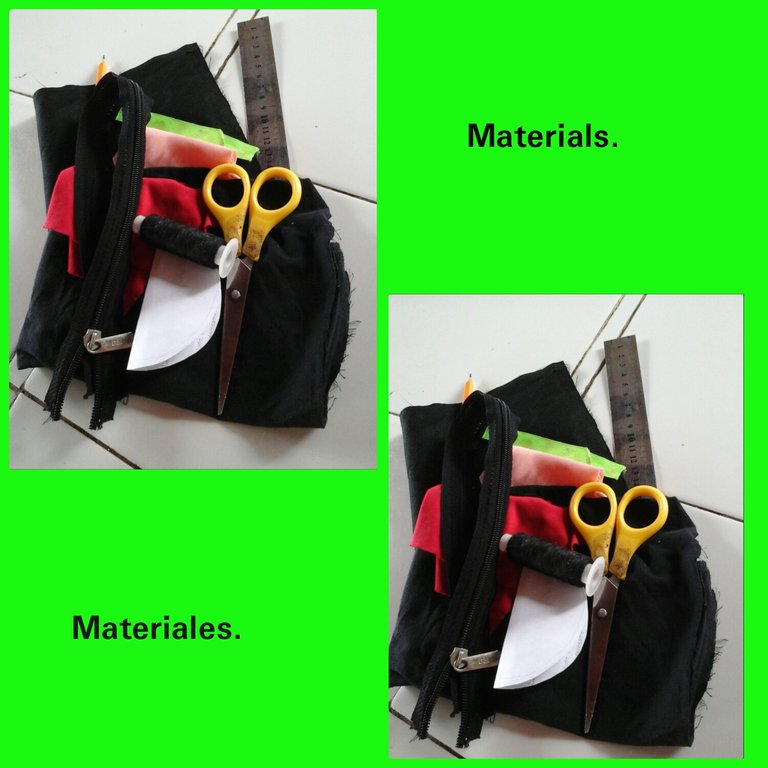
Materiales:
- Tela de nylon y de otros tipos.
- Tijera.
- Hilo y aguja.
- Lápiz.
- Cinta gross.
- Regla.
- Patrones.
- Cierre.
- Un poco de relleno para peluches.
Materials:
- Nylon fabric and other types.
- Scissors.
- Thread and needle.
- Pencil.
- Gross tape.
- Rule.
- Patterns.
- Closure.
- Some stuffing for stuffed animals.
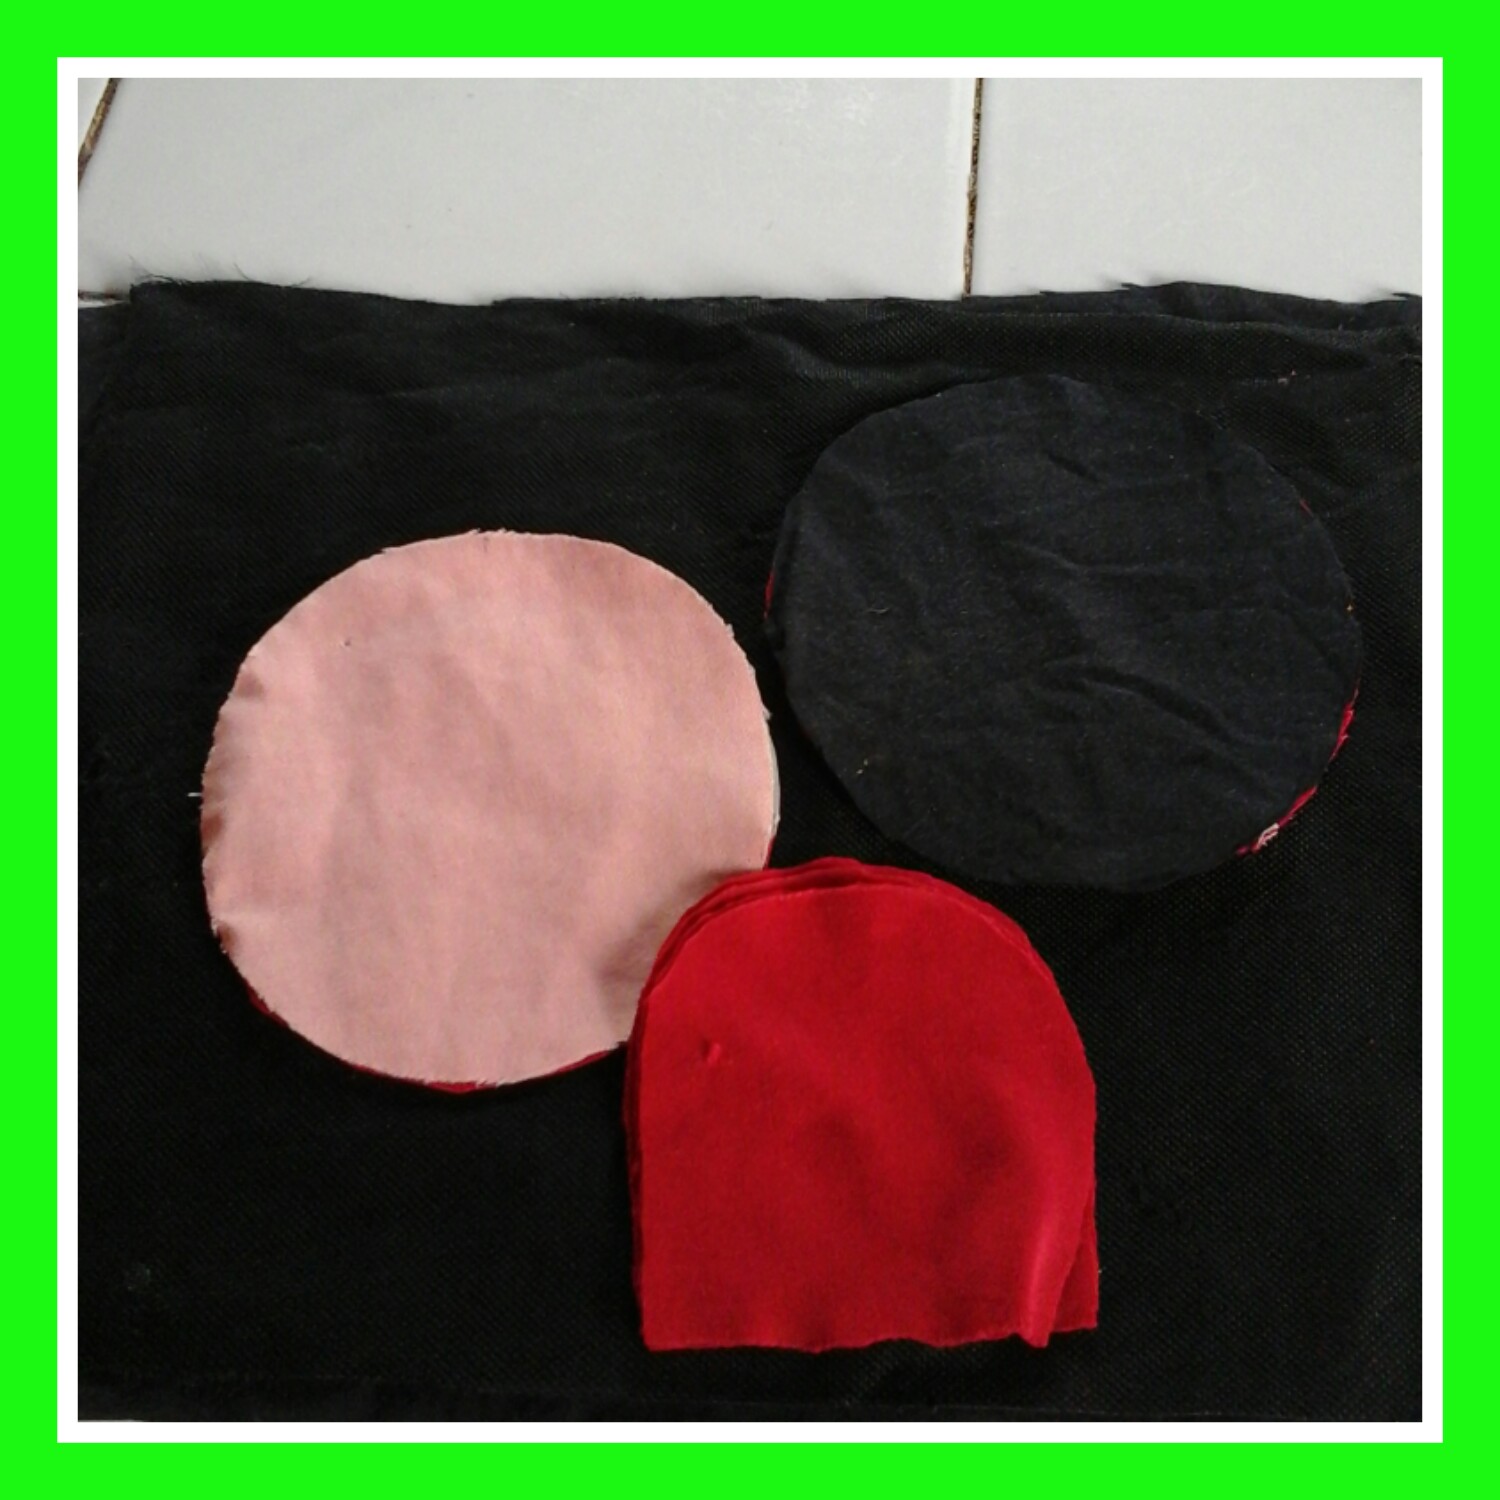
Para iniciar a realizar este lindo estuche lo primero será tomar los patrones en forma de un círculo y uno en forma de arco. Colocarlos cada uno sobre la tela marcamos y recortamos para así obtener 2 pares de círculos color carne y negro.
También debemos recortar 2 pares en forma de arco color rojo para hacer las alas.
LET'S DO IT!.
To start making this beautiful case, the first thing will be to take the patterns in the form of a circle and one in the form of an arc. Place each one on the fabric, mark and cut out to obtain 2 pairs of flesh-colored and black circles. We must also cut 2 pairs in the shape of a red bow to make the wings.
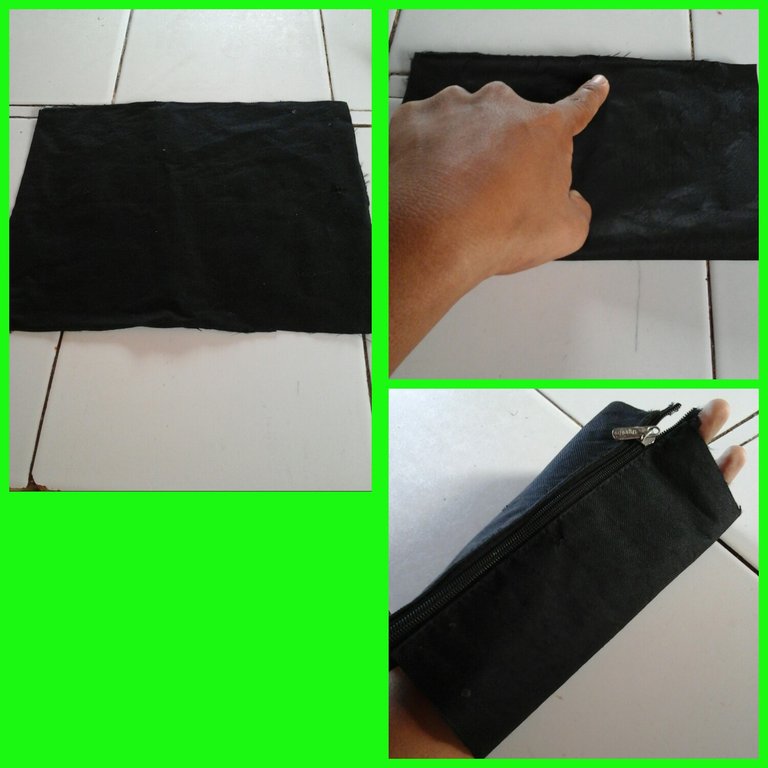
Para hacer el estuche lo primero será recortar un trozo de tela en forma de rectángulo, con medidas aproximadas de 25 cm de ancho con 16 de largo.
Doblamos y procedemos a colocar el cierre.
En mi caso primero coloqué el cierre pero si para ustedes es mas fácil colocar primero los círculos laterales, pueden hacerlo sin ninguna dificultad.
To make the case, the first thing will be to cut a piece of fabric in the shape of a rectangle, with approximate measures of 25 cm wide by 16 long. We fold and proceed to place the closure. In my case I placed the closure first but if it is easier for you to place the side circles first, you can do it without any difficulty.
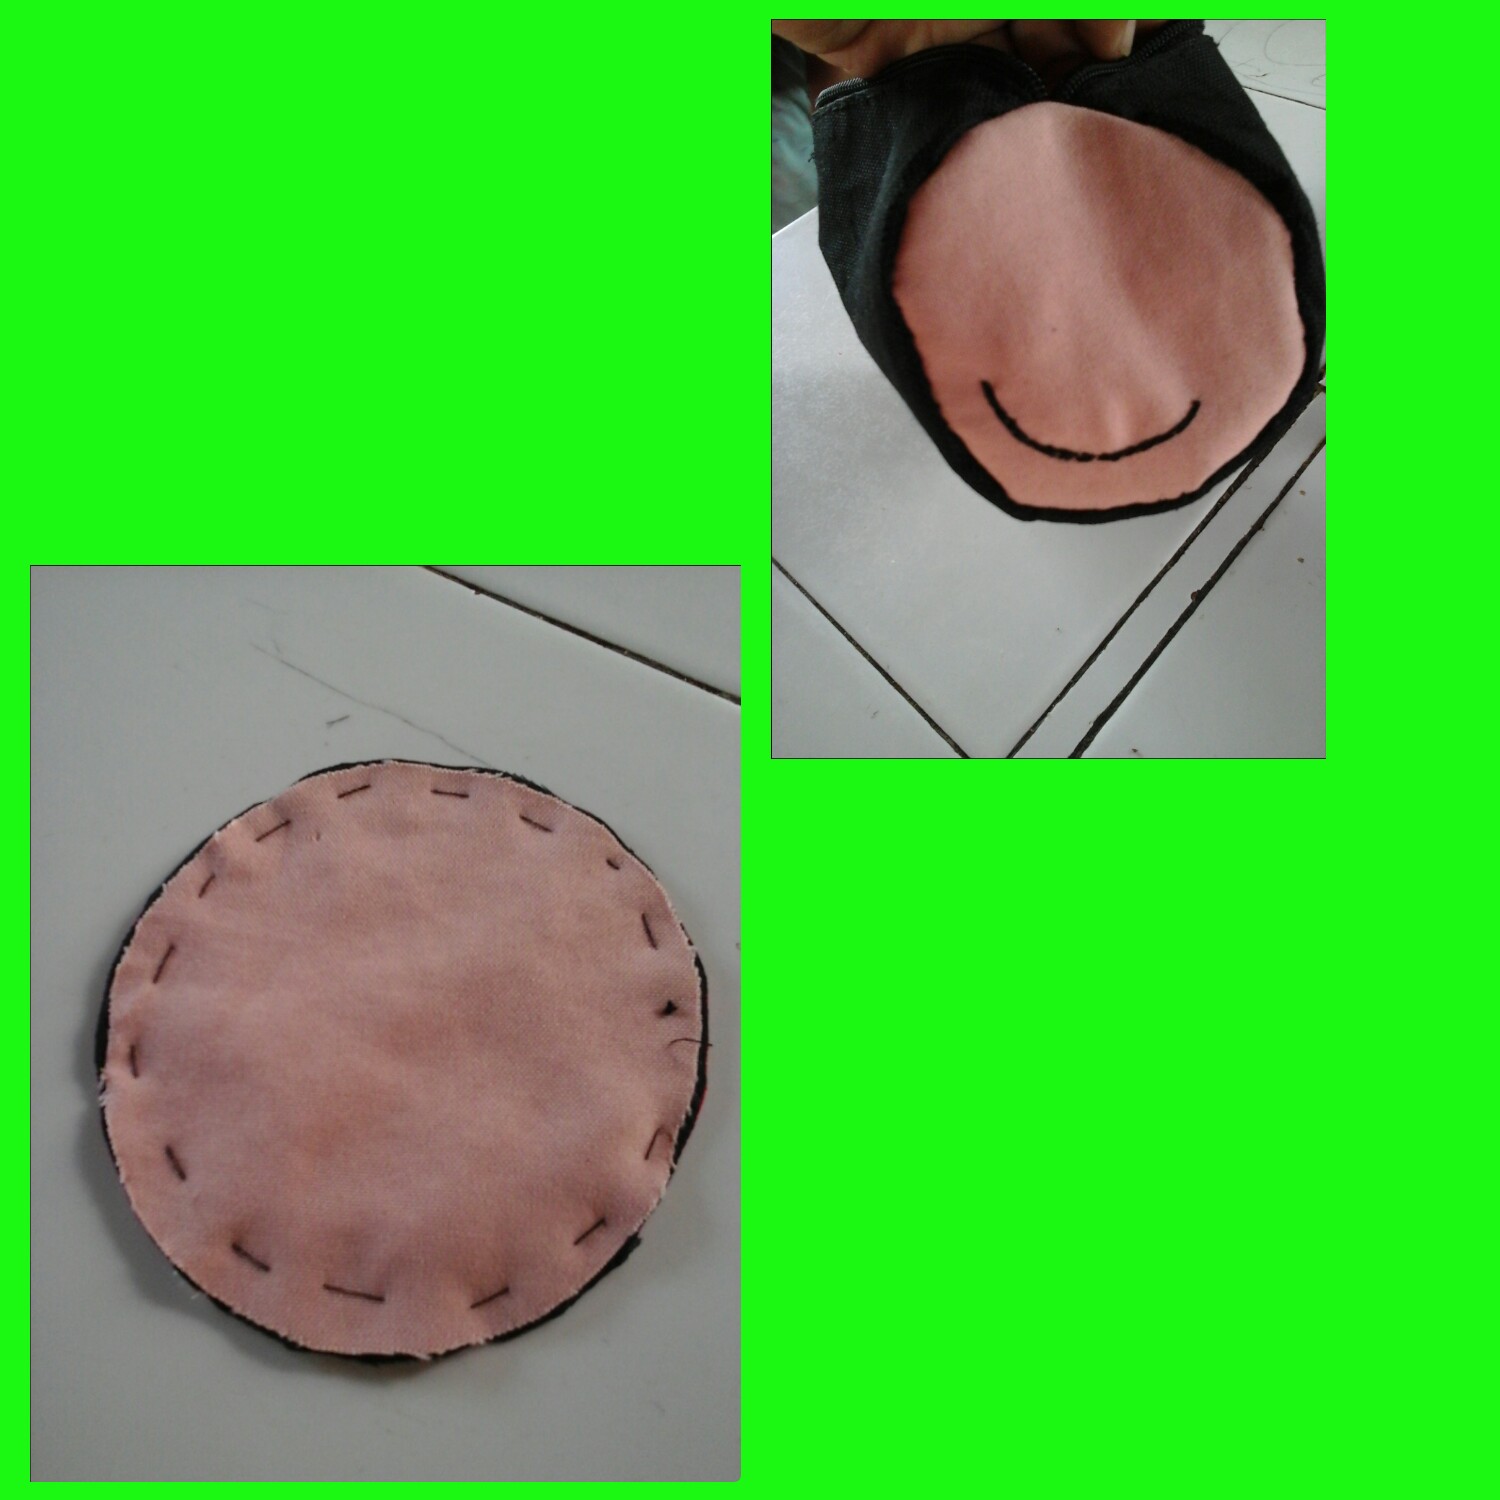
En este paso cosemos los círculos que irán a los lados del estuche. Para hacer estos círculo utilicé tela de popelina color carne que deberán ir sobre los círculos de tela nylon, esto es solo para poder hacer la carita de la mariquita. Tomamos la aguja con un poco de hilo negro y hacemos costura tipo pespunte para hacer la boca.
In this step we sew the circles that will go to the sides of the case. To make these circles I used flesh-colored poplin fabric that should go over the nylon fabric circles, this is only to be able to make the ladybug's face. We take the needle with a bit of black thread and make a topstitch seam to make the mouth.
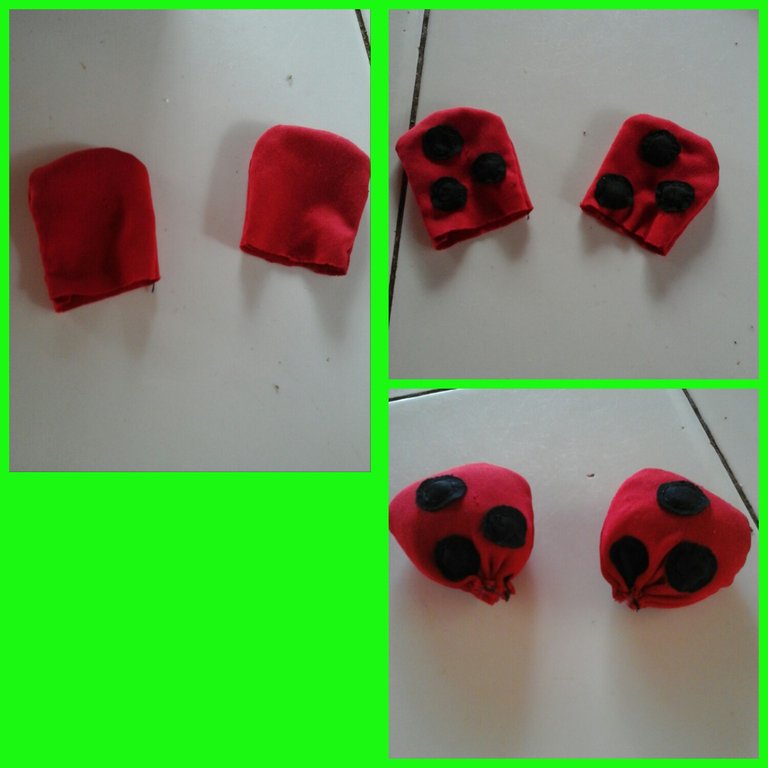
Tomamos las piezas en forma de arcos y cosemos, recortamos unos pequeños círculos de tela negra y cosemos para crear las alas. Colocamos un poco de relleno para peluches, fruncimos para cerrar y de esta manera parecerán unas pequeñas alas.
We take the pieces in the form of bows and sew, cut out a few small circles of black fabric and sew to create the wings. We put a little stuffing for stuffed animals, we gather to close and in this way they will look like little wings.
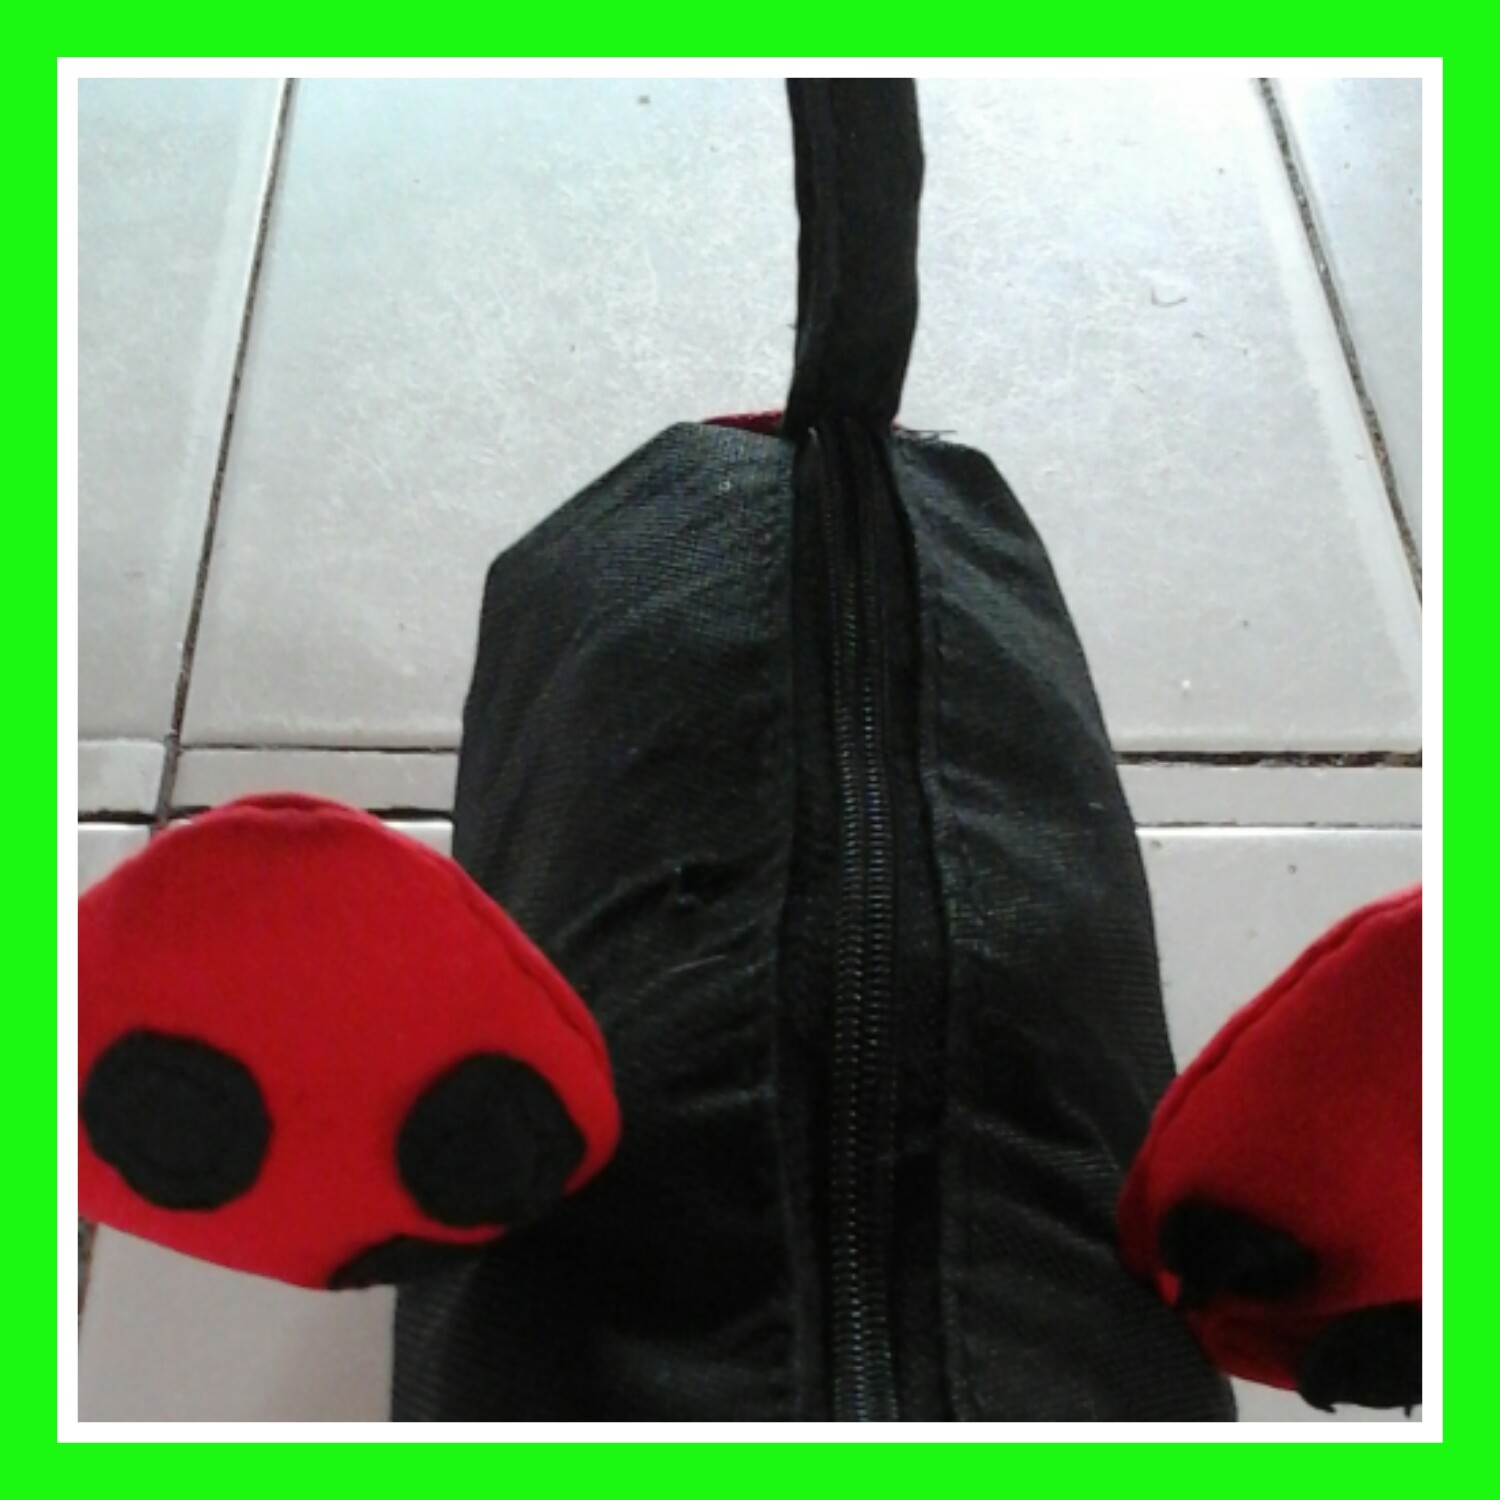
Para colocar y coser las alas al estuche, hacemos un pequeño corte con una hojilla en la parte superior, introducimos cada una y cosemos. Cosemos una pequeña tira en la parte trasera de nuestro estuche para poder sujetarlo.
To place and sew the wings to the case, we make a small cut with a blade in the upper part, insert each one and sew. We sew a small strip on the back of our case to hold it.
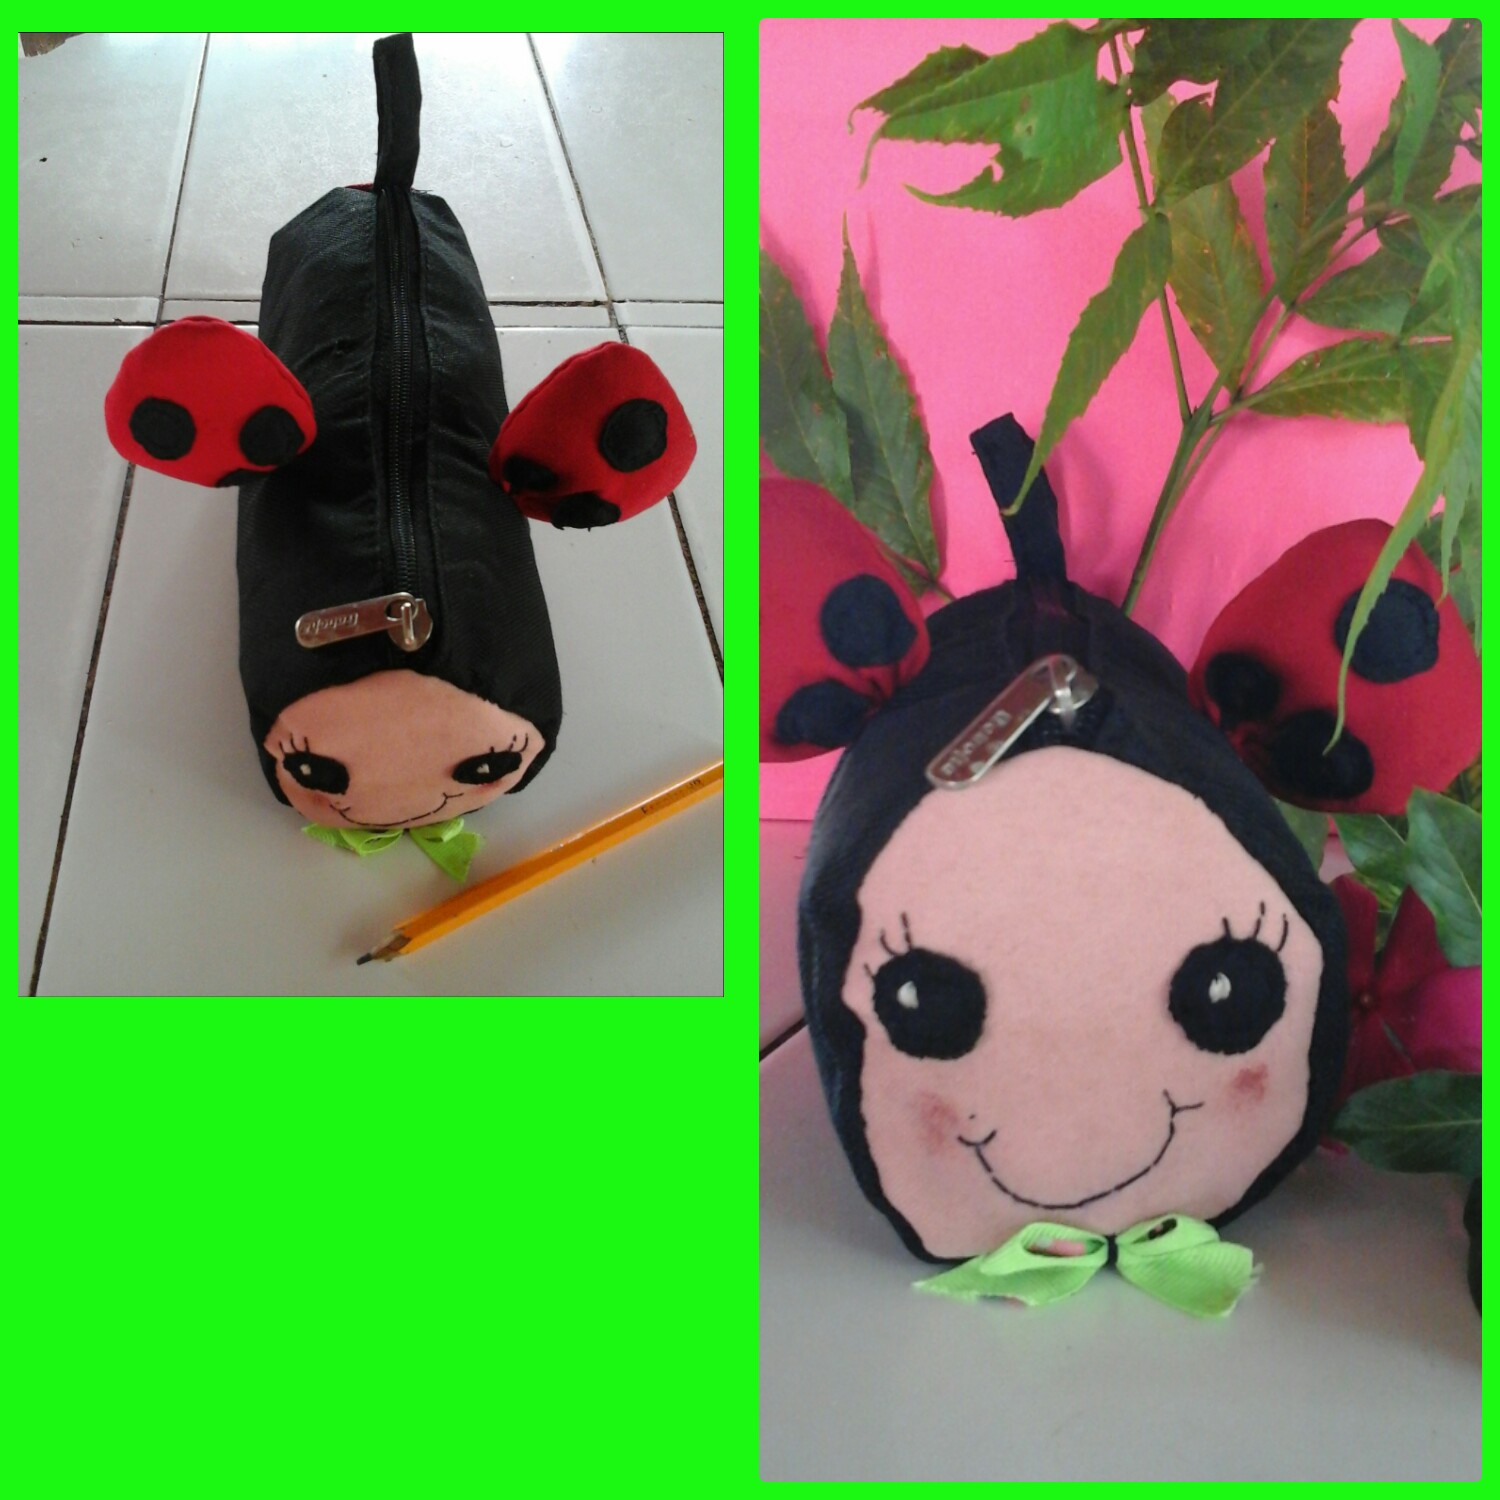
Para terminar con el estuche recortamos unos pequeños círculos negros para coserlos en la parte del frente y así hacer la carita, para ponerle luz a los ojos cosi un poco con hilo blanco, coloqué un lazo verde y listo hemos finalizado con este hermoso trabajo para obsequiar a los pequeños.
To finish with the case we cut out some small black circles to sew them on the front and thus make the face, to put light in the eyes I sewed a little with white thread, I placed a green bow and ready we have finished with this beautiful work to give as a gift to the little ones.
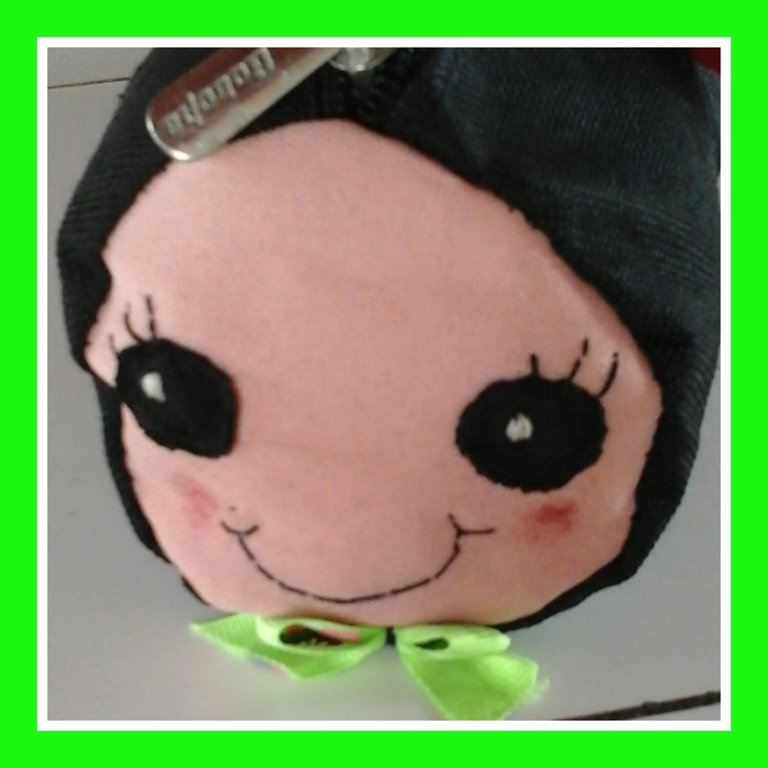
FINISHED PROJECT.
Amigos espero que les haya gustado mi proyecto de hoy, agradecida con todos por poder leer cada paso hasta el final. Espero que se motiven a elaborar uno para los pequeño.
Me despido deseandoles ¡una hermosa y bendecida noche! ¡cuidense y nos vemos pronto!
¡BENDICIONES!.😙
Friends I hope you liked my project today, grateful to everyone for being able to read each step until the end. I hope they are motivated to make one for the little ones. I say goodbye wishing you a beautiful and blessed night! take care and see you soon!
BLESSINGS!.😙
Todas las fotos son capturadas por mi tablet Samsung galaxy.
Editadas por Collage_maker.
Traductor Español/inglés (google.com).
All photos are captured by my Samsung galaxy tablet.
Edited by Collage_maker.
Spanish/English translator (google.com).
