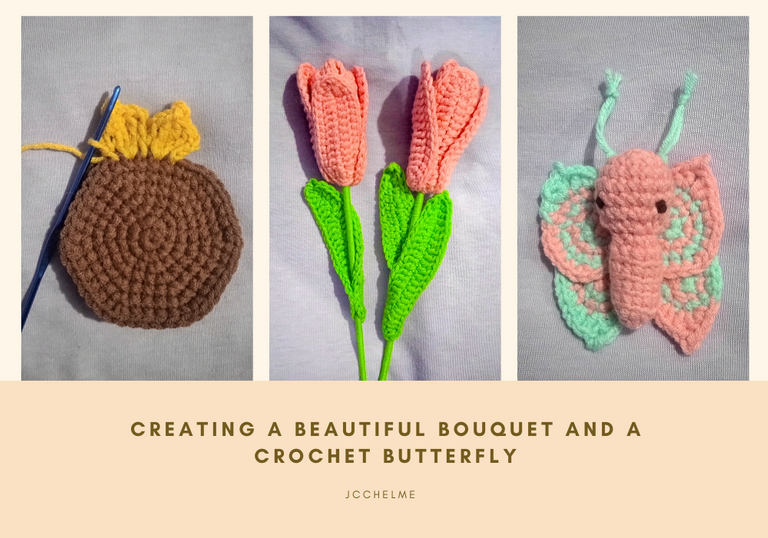
Creating a beautiful bouquet and a crochet butterfly [ENG/ESP]

in #hive-127911last year

I would like to live there (5).png

Although I have been a little absent from the community do not think that I have left my precious crochet, I am quite busy creating amirugumis and bouquets of flowers, I have the illusion of being able to sell my creations in the near future.

A month ago we were invited to a craft fair with my sister, she makes embroidery for pets; bears in memory of deceased people; pet name plates, etc. But for this we have to have a lot of stock and since we got tonsillitis, things have been very slow.

Aunque he estado un poco ausente de la comunidad no piensen que he dejado mi preciado crochet, estoy bastante ocupada creando amirugumis y ramos de flores, tengo la ilusión de poder vender mis creaciones en un futuro próximo.

Hace un mes nos invitaron a una feria de artesanía con mi hermana, ella hace bordados para mascotas; osos en memoria de personas fallecidas; placas con nombres de mascotas, etc. Pero para esto tenemos que tener mucho stock y desde que nos dio amigdalitis, las cosas han estado muy lentas.

I dream that my creations become a business, it would be amazing. Well, for now I have to keep learning more and more. I want to share with you the elaboration of some crochet flowers for a bouquet, I hope you like it, because I liked it very much...
Sueño con que mis creaciones se conviertan en un negocio, sería increíble. Bueno, por ahora tengo que seguir aprendiendo más y más. Quiero compartir con ustedes la elaboración de unas flores de crochet para un ramo, espero que les guste, porque a mi me ha encantado.
Flowers make us smile with their vivid colors and thrill us when someone we love offers them to us as a gift. Unfortunately, they wilt over time, so recreating them in crochet is very satisfying for me. I use 50% cotton/50% acrylic yarn because I like the way it finishes, unlike 100% acrylic which I don't like. I guess I just haven't found the right acrylic 🤔...

Las flores nos hacen sonreír con sus vivos colores y nos emocionan cuando alguien a quien queremos nos las ofrece como regalo. Por desgracia, se marchitan con el tiempo, así que recrearlas en crochet es muy satisfactorio para mí.
Utilizo hilo 50% algodón/50% acrílico porque me gusta el acabado, a diferencia del 100% acrílico, que no me gusta. Supongo que no he encontrado el acrílico adecuado 🤔...


Materials / Materiales
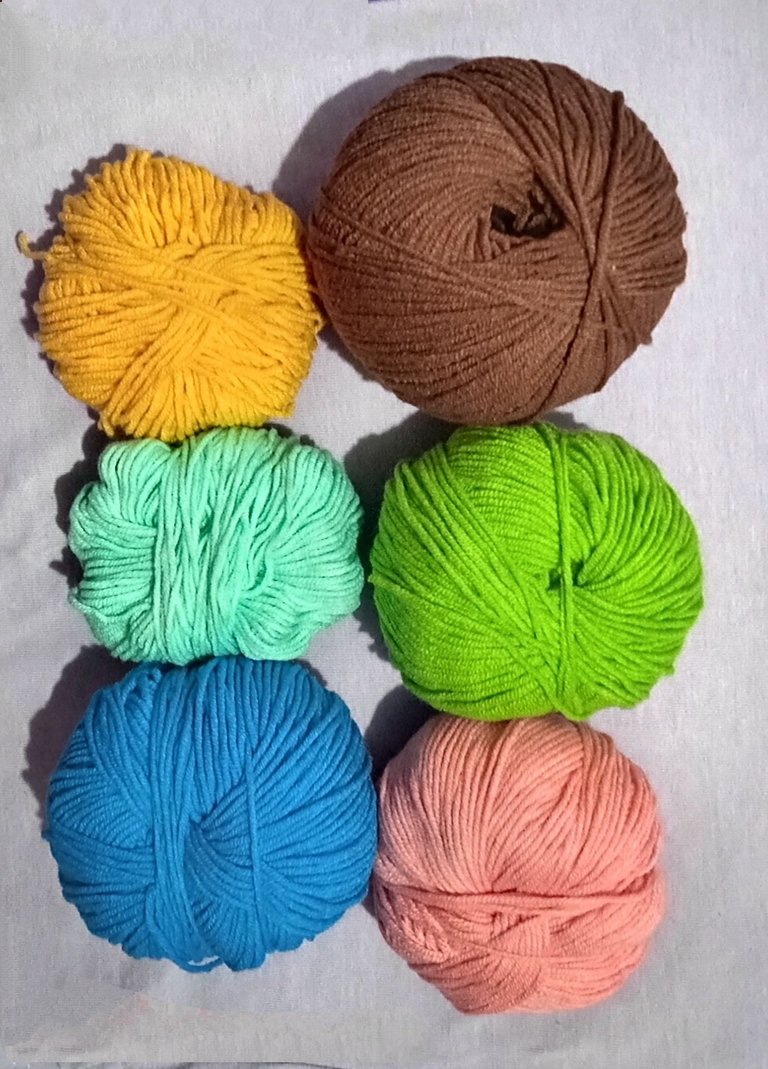

  • Thread for pink colored amirugumi
  • Thread for green colored amirugumi
  • Thread for yellow colored amirugumi
  • Thread for blue colored amirugumi
  • Thread for brown colored amirugumi
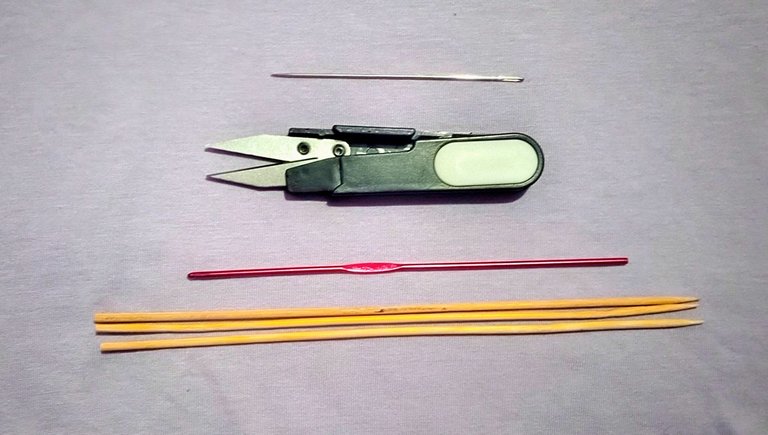
  • crochet 2,5 mm
  • Scissor
  • Needle
  • Synthetic cotton
  • Silicone gun
  • Kraft Paper
  • Ribbon
  • Skewer sticks
  • Hilo para amirugumi de color rosado
  • Hilo para amirugumi de color verde
  • Hilo para amirugumi de color amarillo
  • Hilo para amirugumi de color azul
  • Hilo para amirugumi de color cafe
  • crochet 2,5 mm
  • Tijera
  • aguja
  • Algodón sintético
  • Pistola de silicón
  • Papel Kraft
  • Cinta
  • Palos de brochetas


Elaboration / Elaboración


I simply cut off the ends of the Skewer sticks, sanded them and then put green thread on them. I preferred these sticks because they are cheaper than the special craft sticks.

Simplemente corté los extremos de los palitos de brocheta, los lijé y luego les puse hilo verde. Preferí estos palos porque son más baratos que los palos especiales para manualidades.


Sunflower leaves / hojas de girasol
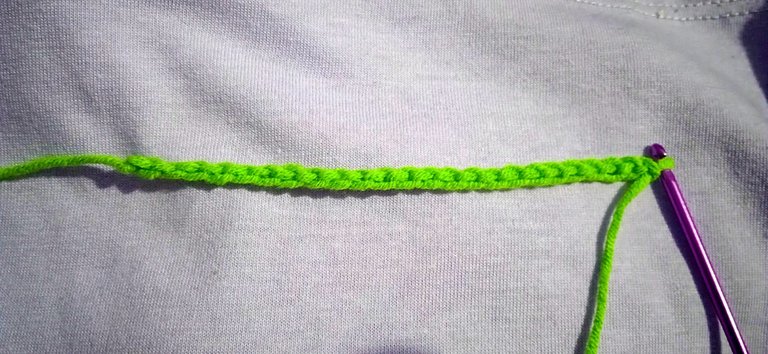
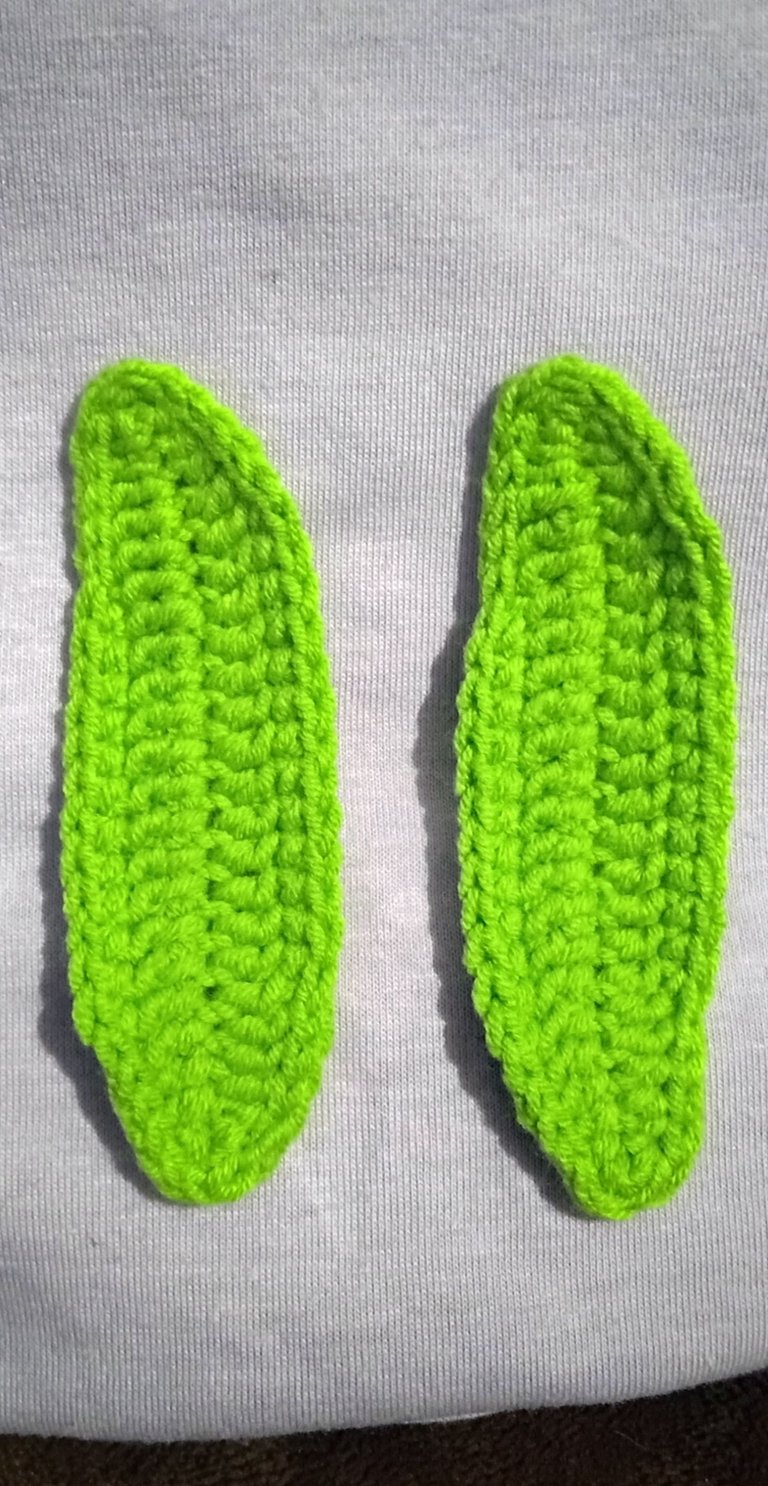
It is very easy, I made 25 chains in which I knit two single crochets, 2 half double crochets, 17 double crochets, two half double crochets, 1 single crochet, 1 double crochet increase, 2 half double crochets, again 17 double crochets, 2 half double crochets, 2 single crochets, 6 slip stitches, continue with single crochets. Then 6 slip stitches, single crochet and finally 6 slip stitches.

It's a bit repetitive but that's the pattern.

Es muy fácil. Yo hice 25 cadenas en las que tejí dos puntos bajos, 2 medios puntos altos, 17 puntos altos, 2 medios puntos altos , 1 punto bajo, 1 aumento de punto bajo, 2 medios puntos, de nuevo 17 puntos altos, 2 puntos medios altos , 2 puntos bajos, 6 puntos deslizado, continúo con puntos bajos. A continuación 6 puntos deslizado, punto bajos y por último, 6 deslizado.

Es un poco repetitivo pero ese es el patrón.


Petals and base/ pétalos y base
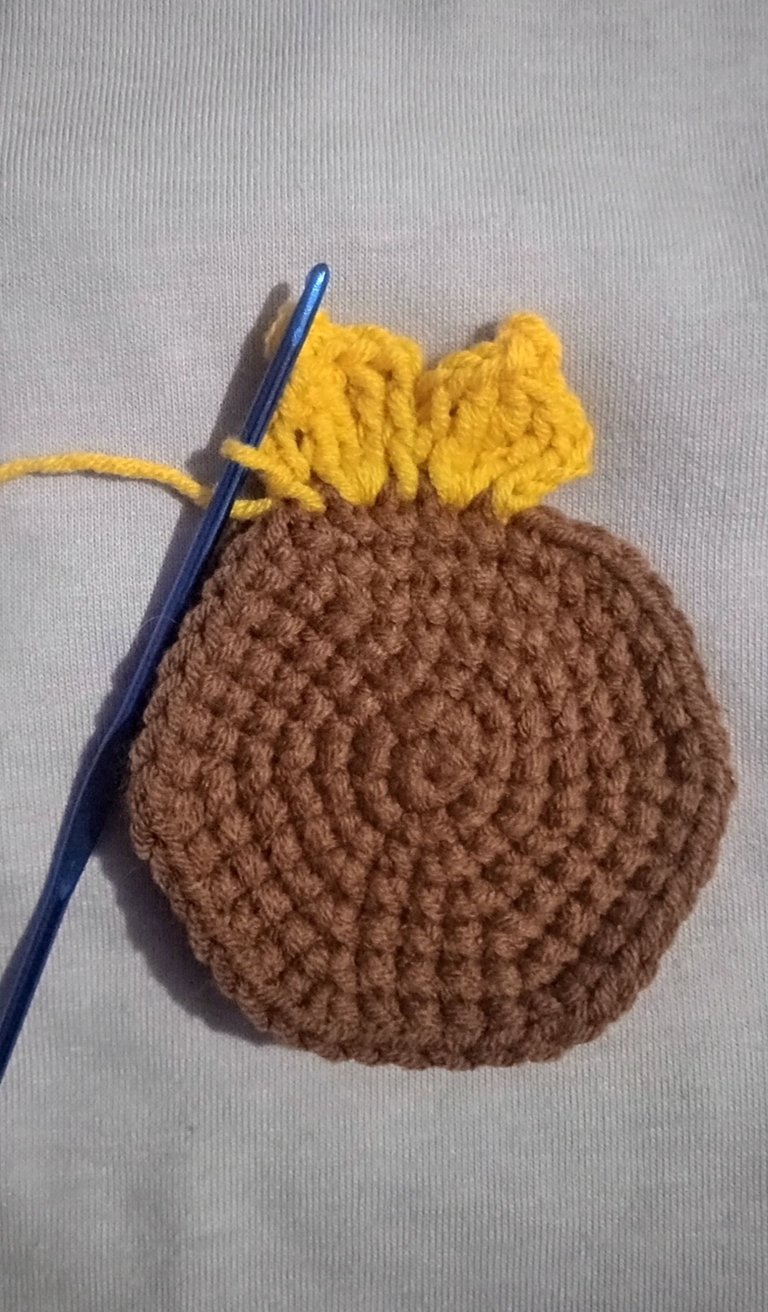
I started with 1 magic ring with 6 single crochet, from there I knit in a spiral.

Only single crochet increases.

In the next round 1 single crochet + 1 increase.

Then 2 single crochets + 1 increase.

3 single crochets + 1 increase.

4 single crochets + 1 increase.

To finish 1 increase + 5 single crochets.

I made two of these pieces.

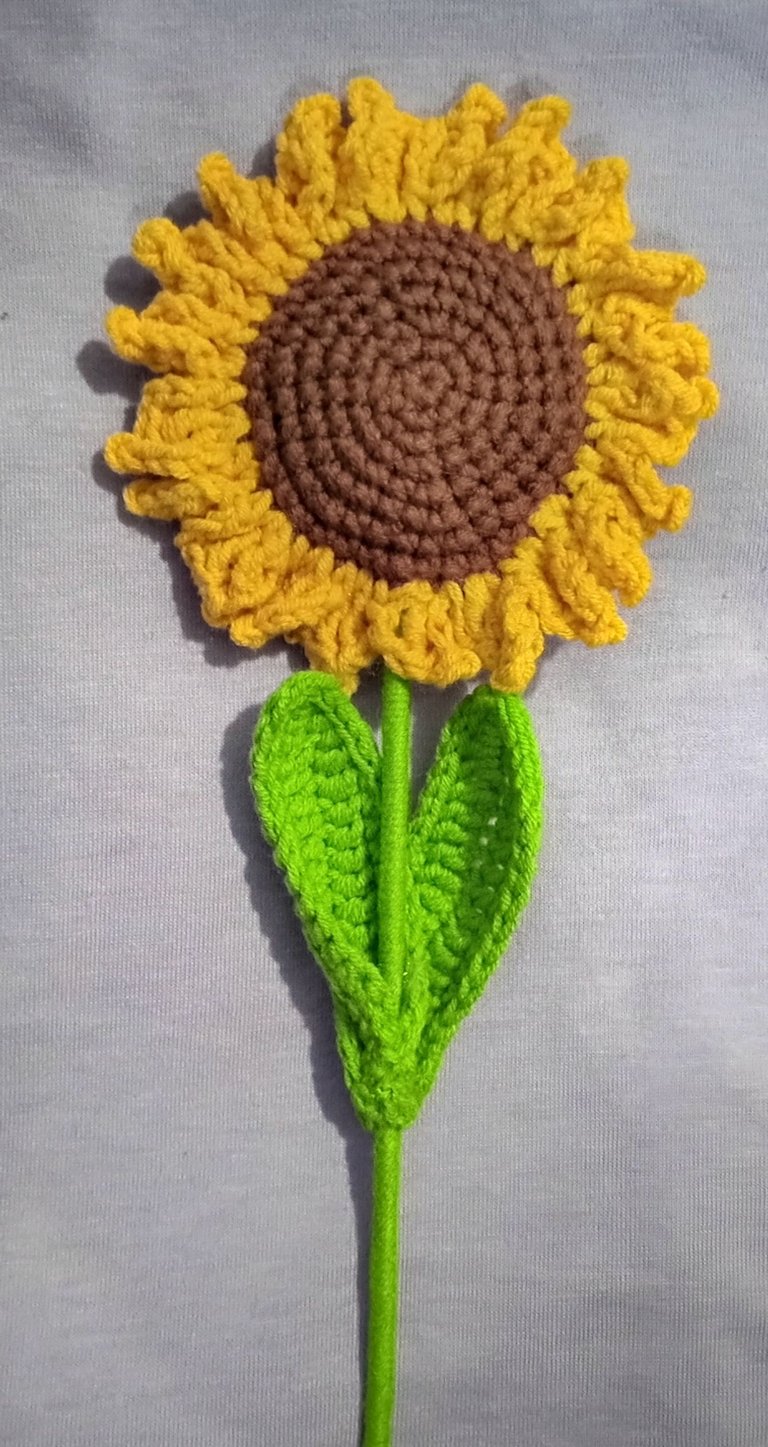
Then I join them together and with the yellow yarn I start knitting 4 chain stitches, double crochet, triple crochet in the same chain, 2 chain stitches, skip the double crochet and at the base I knit 1 slip stitch. Then I knit a double crochet in the same stitch where I knit the previous stitch. I pick up 3 chains and knit in single crochet, repeat until the end of the row.

Before closing I stuff with a little synthetic cotton and place the lined skewer stick, also the leaves with a little hot silicone.

Empecé con 1 anillo mágico con 6 puntos bajos, a partir de ahí tejí en espiral.

Sólo aumentos de puntos bajos.

En la siguiente vuelta 1 punto bajo + 1 aumento.

Luego 2 punto bajo + 1 aumento.

3 punto bajo + 1 aumento.

4 punto bajo + 1 aumento.

Para terminar 1 aumento + 5 puntos bajos.

Hice dos de estas piezas.

Luego las uno y con el hilo amarillo empiezo a tejer 4 cadenas, punto alto, triple punto alto en la misma cadena, 2 cadenas, me saltó estás y en la base tejo 1 punto deslizado. Luego tejo un punto alto en el mismo punto donde tejí el punto anterior. Recojo 3 cadenas y un punto bajo ,repito secuencia hasta el final.

Antes de cerrar relleno con un poco de algodón sintético y coloco el palito de brocheta forrado, también las hojas con un poco de silicona caliente.


Lavender/ lavanda
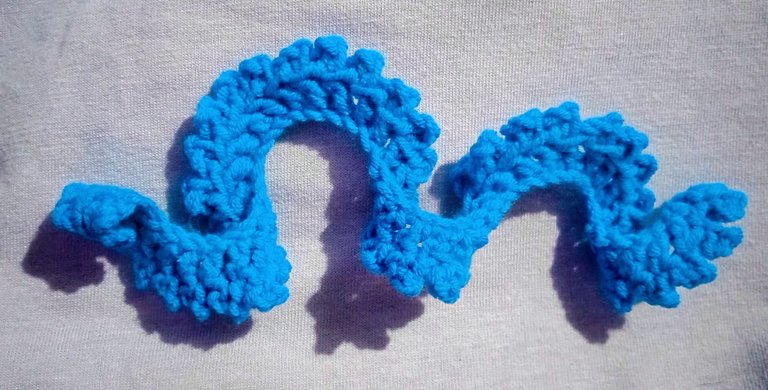
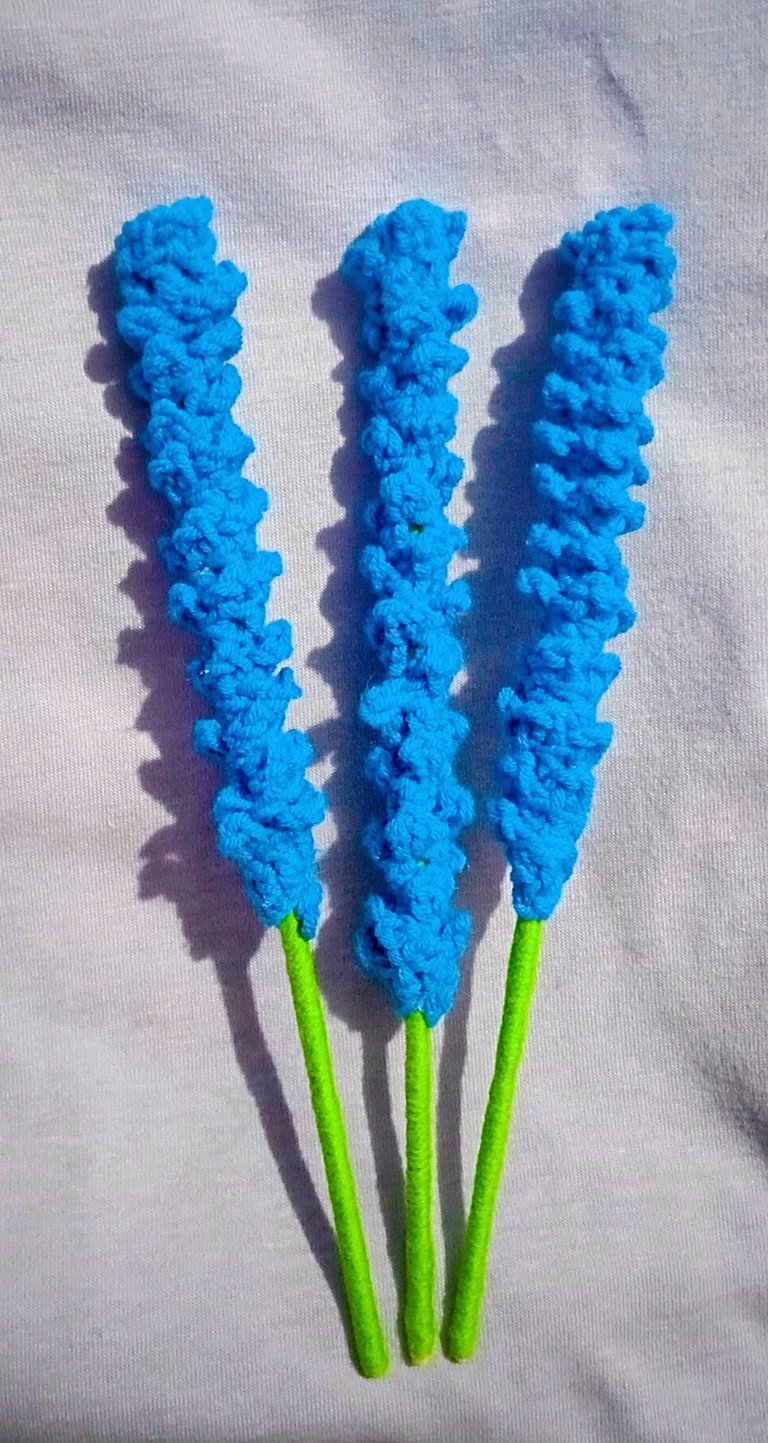
I started with 50 chain stitches, in the third chain I increase double crochet, in the next double crochet, 3 chain stitches in the air and at the base of chain stitches I picked up those two strands and made a slip stitch. I followed this sequence until the end.

Empecé con 50 cadenas, en la tercera cadena aumento de punto alto, en la siguiente un punto alto, 3 cadenas al aire y en la base de esos puntos cogí esas dos hebras e hice un punto deslizado. Seguí esta secuencia hasta el final.

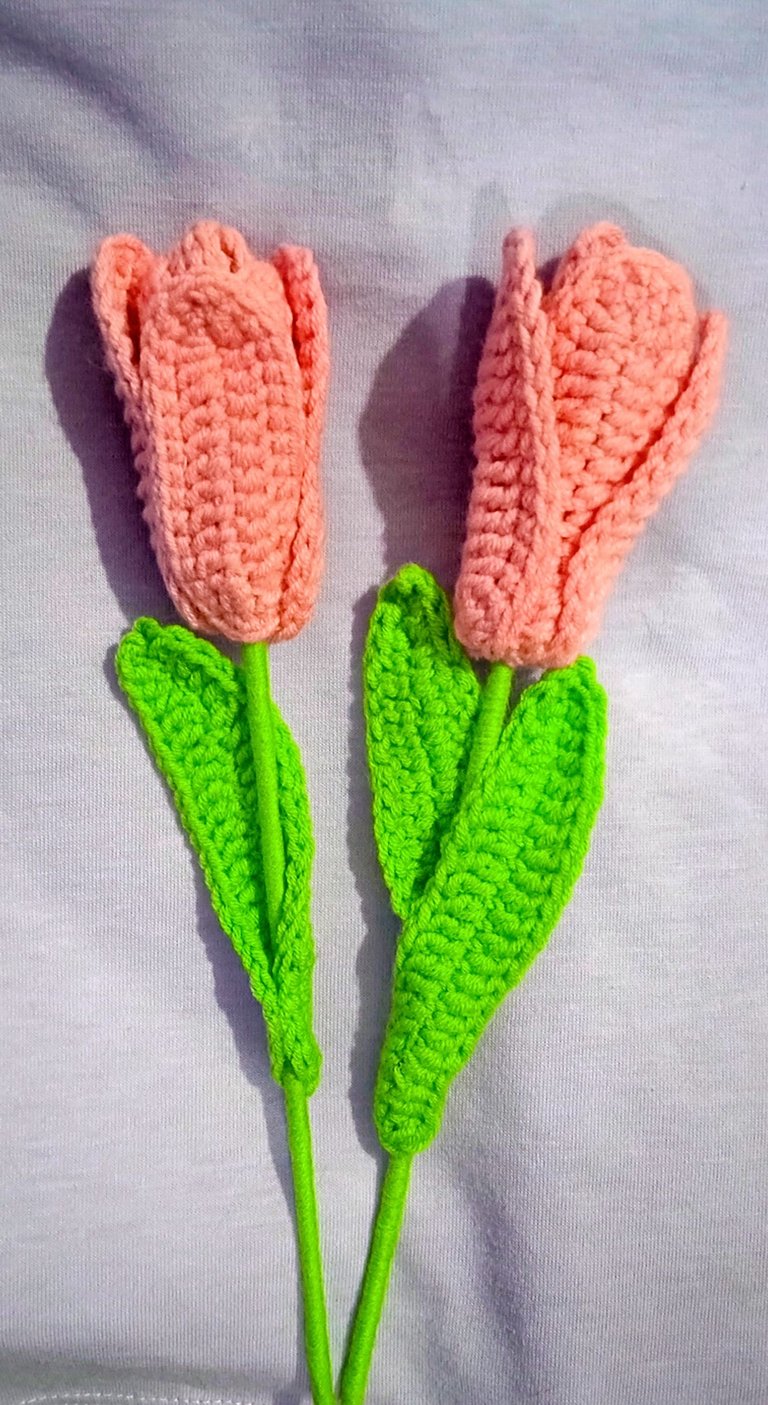
Common pink flower/ flor rosada común
leaves / hojas

24 chains, then I made 1 single crochet, 3 half double crochet, 9 double crochet, before the end I left 5 chains and in them I made 3 half double crochet, a single crochet and a slip stitch. Then 1 single crochet and 3 half double crochet, 9 double crochet, a single crochet and a slip stitch.

They are similar to the sunflower ones but finer.

24 cadenetas, luego hice 1 ganchillo sencillo, 3 medio ganchillo doble, 9 ganchillo doble, antes del final dejé 5 cadenetas y en ellas hice 3 medio ganchillo doble, un ganchillo sencillo y un punto deslizado. Luego 1 punto bajo y 3 medios puntos dobles, 9 puntos dobles, un punto bajo y un punto enano.

Petals/ Petalos

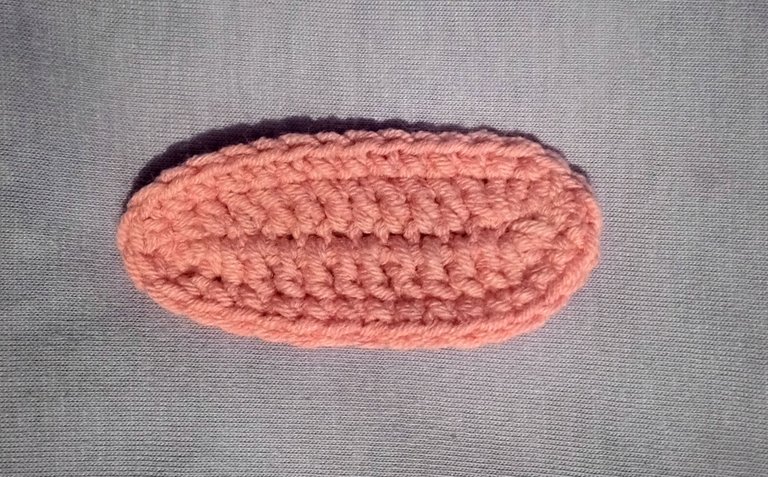
I also knitted in a spiral, but this time with a more elliptical shape. I started with 14 chain stitches, single crochet, increase half double crochet, 9 double crochets, increase half double crochet, increase single crochet, increase half double crochet, 9 double crochets, increase half double crochet, single crochet, one chain up, increase single crochet. Mark the up chain, continue with single crochet until you reach the edge and knit a single crochet low and then a increase single crochet , I continued to do single crochet..

Then I glued with hot silicone the petals to the skewer stick and the leaves as well.

También tejí en espiral, pero esta vez con una forma más elíptica. Empecé 14 cadenas, punto bajo, aumento de medio punto alto, 9 puntos altos , aumento de medio punto alto, punto bajo ahí mismo otro punto bajo, aumento de medio punto alto, 9 puntos altos, aumento de punto medio alto, punto bajo, una cadena de subida, aumento de puntos bajos. Marque la cadena de subida, continue con puntos bajos hasta llegar a la orilla e hice punto bajo y luego un aumento de punto bajo, seguimos con puntos bajos hasta donde marque.

Luego pegué con silicona caliente los pétalos al palo de brocheta y las hojas también.


Amirugumi butterfly / Mariposa amirugumi
Head and body / Cabeza y cuerpo

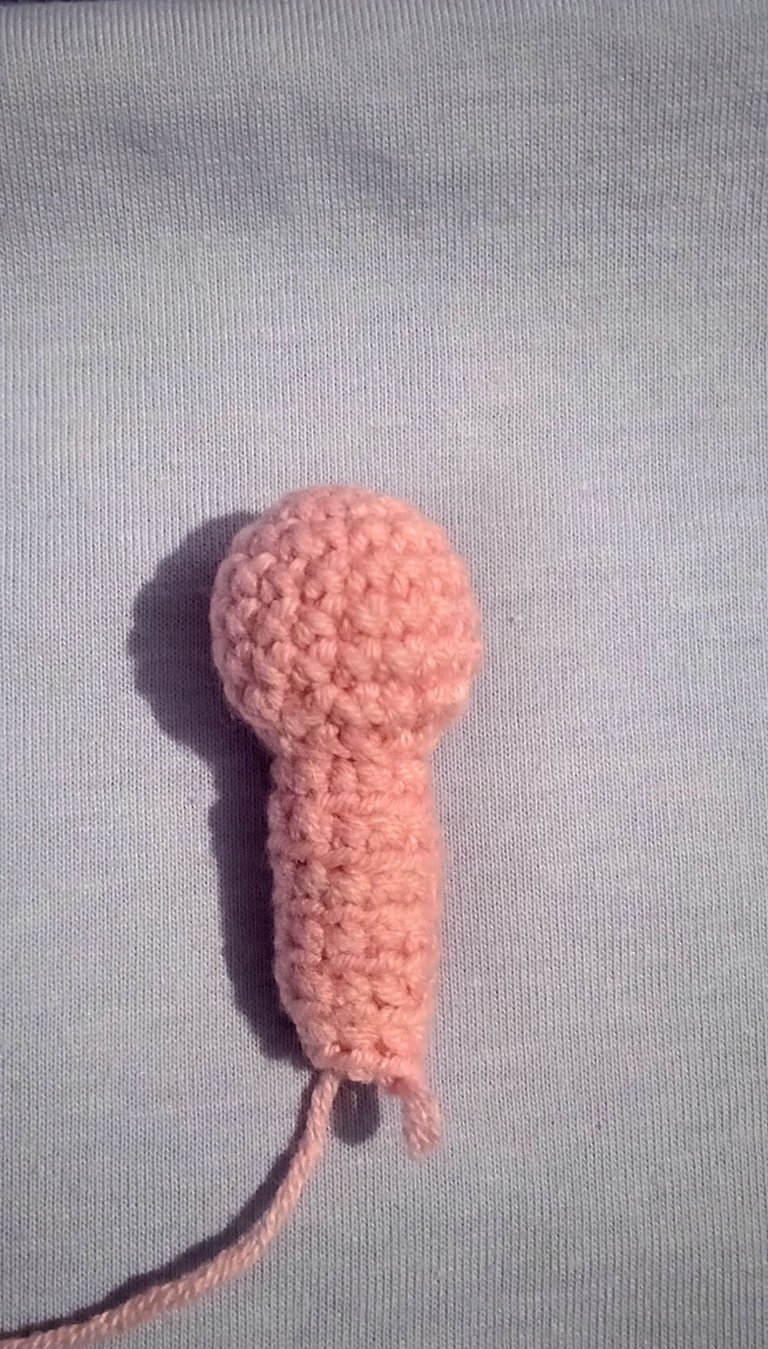
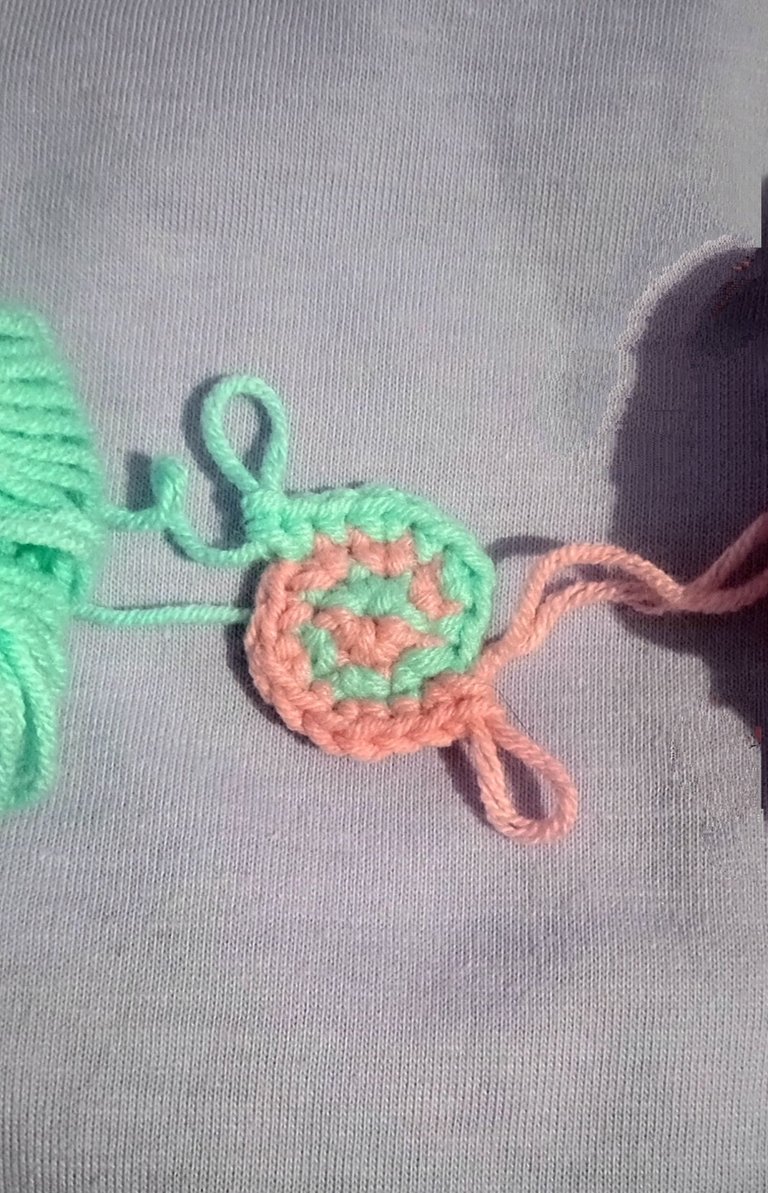
1 magic ring with 6 single crochet.
6 increase single crochet.
1 single crochet + 1 increase single crochet (x 6)
In the next 3 rows 18 single crochets.
In the next row 1 single crochet + 1 decrease (x 6)
Next row only decreases, next row only increases.
In the next 3 rows only single crochet.
To close the body of my butterfly, I filled with synthetic cotton and made 1 single crochet and 1 decrease.
Finish with 4 decreases.

1 anillo mágico con 6 puntos bajos. 6 aumentos de puntos bajos. 1 punto bajo + 1 punto bajo de aumento. (x 6) En las 3 filas siguientes 18 puntos bajos. En la siguiente fila 1 ganchillo sencillo + 1 disminución (x 6) En la siguiente hilera sólo disminuciones, en la siguiente sólo aumentos. En las 3 filas siguientes sólo puntos bajos. Para cerrar el cuerpo de mi mariposa, rellené con algodón sintético e hice 1 bajo y 1 disminución (x 6) Finalice con 4 disminuciones.

Wings / Alas

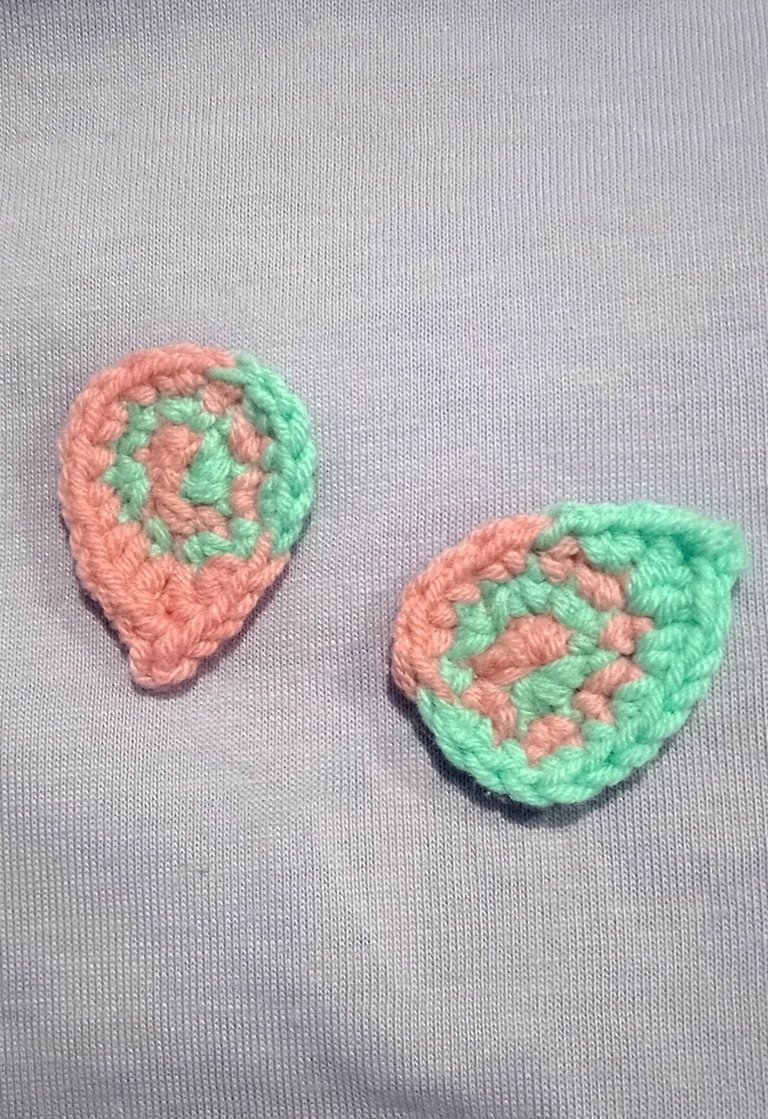
I made the wings with two colors, so in each stitch I alternate them.

1 magic ring with 6 single crochet.

6 increases.

1 single crochet + 1 increase x 6

In the next 3 rows 18 single crochets.
In the next row 1 single crochet + 1 decrease x 6

In the next row only decreases, in the next row only increases.

In the next 3 rows only single crochet.

To close the body of my butterfly, I filled with synthetic cotton and made 1 single crochet and 1 decrease x 6, then 4 decreases in the next row.

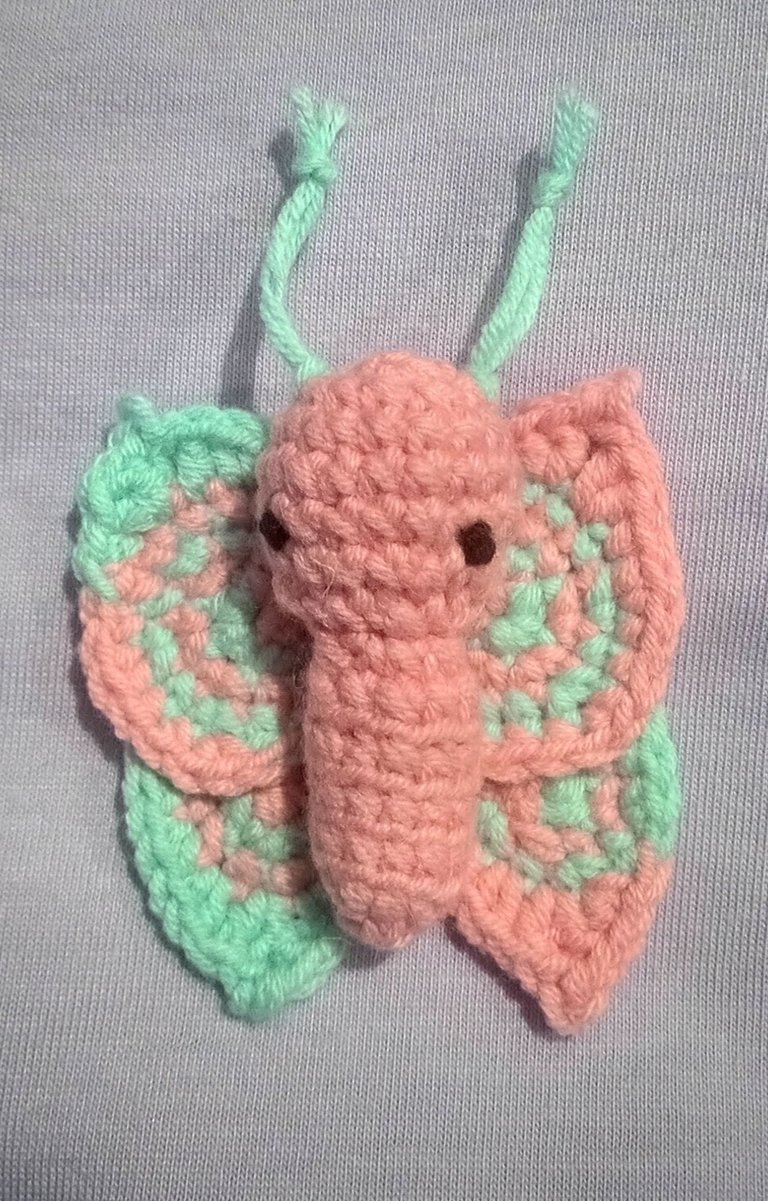
I glued the wings with hot silicone and made the eyes with black thread, I also placed some antennas made with thread.

Hice las alas con dos colores, así que en cada punto los alternó.

1 anillo mágico con 6 puntos bajos.

6 aumentos.

1 punto bajo + 1 aumento x 6

En las siguientes 3 filas 18 puntos bajos.
En la siguiente fila 1 punto bajo + 1 disminución x 6

En la siguiente vuelta sólo disminuciones, en la siguiente vuelta sólo aumentos.

En las 3 filas siguientes sólo punto bajo.

Para cerrar el cuerpo de mi mariposa, rellené con algodón sintético e hice 1 punto bajo y 1 disminución x 6, luego 4 disminuciones en la siguiente hilera.

Pegué las alas con silicona caliente e hice los ojos con hilo negro, también coloqué unas antenas hechas con hilo


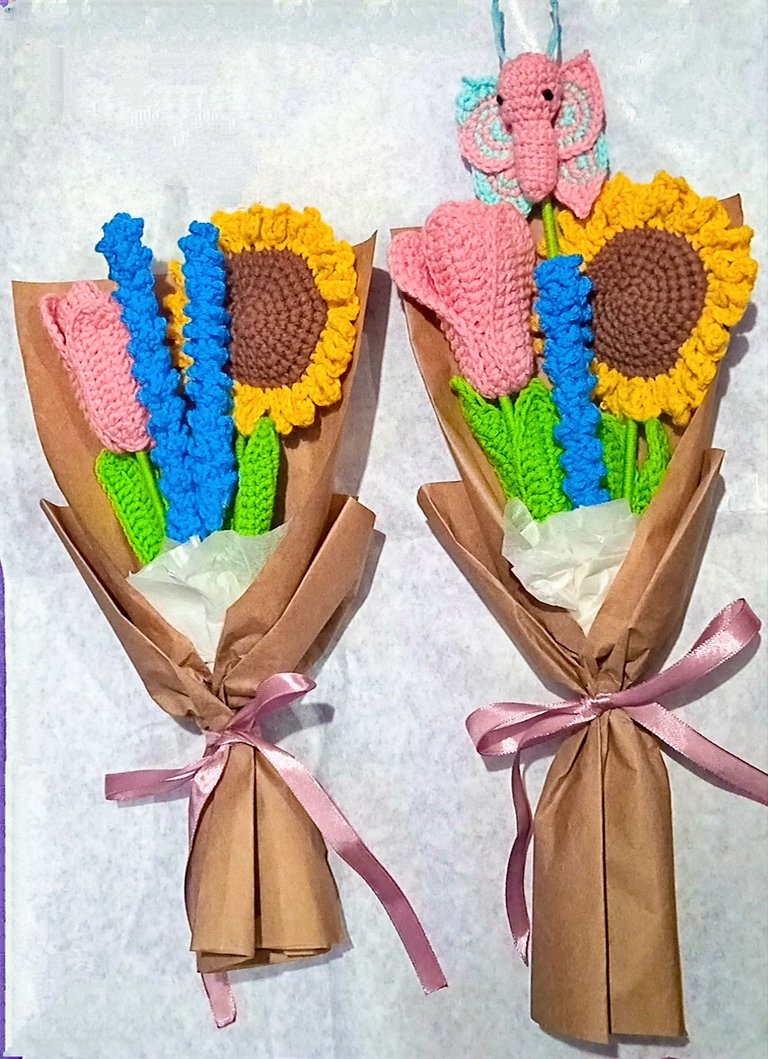
Final result / Resultado final

IMG_20230605_171407.jpg

Sorry for the length but I wanted to put everything I did in this work, because I loved it.

Disculpen lo extenso pero quise colocar todo lo que hice en este trabajo, porque me ha encantado.


SAVE_20211104_212132.jpg

Bienvenido (3).png
Banner and text separator created in Canva
Photos of my property
Text translated into English with Deep Translator

Sort:  

Hola!! 🌷 qué hermosos te han quedado estos ramos de flores!! Me gusta mucho que sean de colores llamativos y alegres!! te deseo mucho éxito en estos proyectos 💕 Saludos!!💐

Hola, sí los colores son vistosos.
Espero que así sea y se cumplan mis proyectos.
Gracias por pasar por este rinconcito de Hive, saludos 😊

Saludos @jcchelme, que mariposita tan cuchi y tierna, está perfecta para decorar los vestidos de la nenas o las moñeras, gracias por compartir tu lindo proyecto.

Feliz noche!

Sí es verdad puede tener varias aplicaciones, se vería linda en los vestidos de la niñitas. Gracias por visitarme saludos 😊

Que hermoso trabajo @jcchelme, realmente te felicito. Éxitos, y que tengas una bella semana...

!DIY

Lo más hermoso de crear, es que a las personas les guste el trabajo que se hace.
Muchas gracias ☺️

https://leofinance.io/threads/dayadam/re-leothreads-fruusjyu
The rewards earned on this comment will go directly to the people ( dayadam ) sharing the post on LeoThreads,LikeTu,dBuzz.

Mi querida Juani @jcchelme qué guisto leerte y ver estas bellezas de manualidades.
Te envío mis bendiciones a tus manos, a tu familia y a ti.
Besos.

My dear Juani @jcchelme how nice to read you and see these beautiful crafts.
I send my blessings to your hands, your family and you.
Kisses.


This post was shared and voted inside the discord by the curators team of discovery-it
Join our Community and follow our Curation Trail
Discovery-it is also a Witness, vote for us here
Delegate to us for passive income. Check our 80% fee-back Program
@dayadam just sent you a DIY token as a little appreciation for your post dear @jcchelme! Feel free to multiply it by sending someone else !DIY in a comment :) You can do that x times a day depending on your balance so:

Don't be shy - share some DIY!

Esto está muy lindo, me encantaron todas.

!discovery 40

Good work! I want to learn this too ☺️❤️

Beautiful work done in crochet, that bouquet was awesome and great. Congratulations @jcchelme // Bellisimo trabajo realizado en crochet, ese ramo te quedo impresionante y genial. Felicidades @jcchelme

Congratulations @jcchelme! You have completed the following achievement on the Hive blockchain And have been rewarded with New badge(s)

You received more than 8000 upvotes.
Your next target is to reach 9000 upvotes.

You can view your badges on your board and compare yourself to others in the Ranking
If you no longer want to receive notifications, reply to this comment with the word STOP

Check out our last posts:

Our Hive Power Delegations to the May PUM Winners
Feedback from the June Hive Power Up Day
Hive Power Up Month Challenge - May 2023 Winners List
Loading...