Greetings dear community of crafters.
I had a pretty big mess among my balls of thread for amirugumi, rag, wool and embroidery threads, so I gave myself the great task of sorting and such was my surprise that I found a rag bag that my mom recycled some time ago for me, I had forgotten it was there 😅.
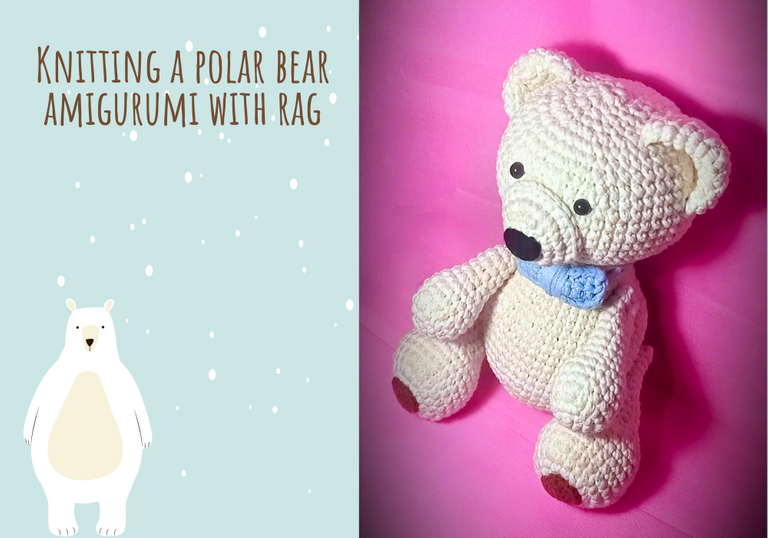
I rolled it into a ball and it occurred to me to make an XL amirugumi, because most of the time when I make dolls they measure between 15 and 28 cm, this time I wanted to make it 40 cm.
The problem that arose was that although it is a soft material, the rag is much harder than cotton yarn, I had to use more force in the stitches so that the fabric would be well joined and uniform. I even broke a crochet, but it was my fault for using a crochet that was much thinner than it should be.
I was super immersed in this project, knitting and unknitting again and again, because I didn't like the result. That's why I haven't taken so many pictures, anyway in this post I will try to show you a little bit of the process it took me to create this cute polar bear.
It was exhausting, it has quite a few stitches and I ended up with sore thumbs with tendonitis, but this is because I knitted for too many hours without stopping. Don't do what I did, it's better to take it easy with rest intervals.
El problema que surgió fue que aunque es un material suave, el trapillo es mucho más duro que el hilo de algodón, tuve que hacer más fuerza en los puntos para que el tejido quedara bien unido y uniforme. Incluso rompí un ganchillo, pero fue culpa mía por utilizar uno mucho más fino de lo que debería.
Estuve super inmersa en este proyecto, tejiendo y destejiendo una y otra vez, porque no me gustaba el resultado. Por eso no he hecho tantas fotos, de todas formas en este post intentaré mostraros un poco el proceso que me llevó crear este simpático oso polar.
Fue agotador, tiene bastantes puntos y acabé con los pulgares doloridos con tendinitis, pero esto es porque tejí durante demasiadas horas sin parar. No hagas lo que yo hice, es mejor tomárselo con calma con intervalos de descanso.
Materials used / Materiales utilizados
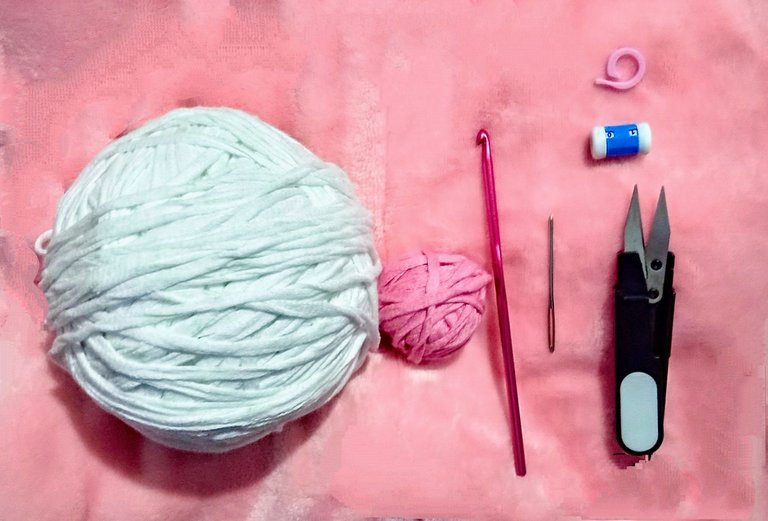
I did not use the pink fabric, because in the end I decided to use a sky blue one for the tie.
- 600 gr. White rag
- 30 gr. Sky blue rag
- Brown and black amirugumi yarn
- Scissor
- Row counter
- Stitch marker
- crochet 5 mm
- Needle
- Synthetic cotton
- Safety eyes
No utilicé la tela rosa, porque al final decidí utilizar una celeste para la corbata.
- 600 gr.trapillo blanco
- 30 gr. trapillo celeste
- Hilo para amirugumi de color cafe y negro
- Tijera
- contador de vueltas
- contador de puntos
- crochet 5 mm
- aguja
- Algodón sintético
- ojos de seguridad
Elaboration / Elaboración
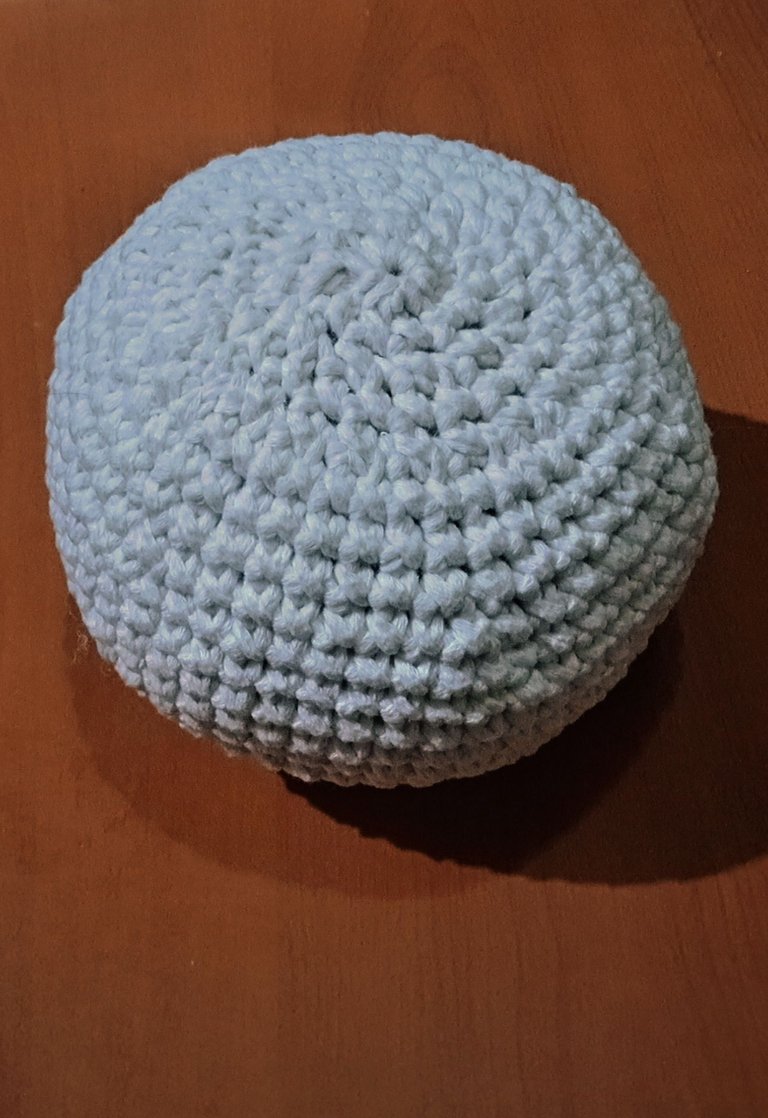
I started by making the head of the polar bear:
Empecé haciendo la cabeza del oso polar:
|
|
Row 1: a magic ring with 6 single crochet stitches. Total stitches 6.
Row 2: 6 increases. Total stitches 12.
Row 3: 1 single crochet, 1 increase x6. Total stitches 18.
Row 4: 2 single crochet, 1 increase x6. Total stitches 24.
Row 5: 3 single crochet, 1 increase x6. Total stitches 30.
Row 6: 4 single crochet, 1 increase x6. Total stitches 36.
Row 7: 5 single crochet, 1 increase x6. Total stitches 42.
Row 8: 6 single crochet, 1 increase x6. Total stitches 48.
Row 9 to 15: Only single crochet stitches. Total stitches 48.
Row 16: 6 single crochet, 1 decrease x6. Total stitches 42.
Row 17: 5 single crochet, 1 decrease x6. Total stitches 36.
Row 18: 4 single crochet, 1 decrease x6. Total stitches 30.
Row 19: 3 single crochet, 1 decrease x6. Total stitches 24.
Row 20 to 23: single crochet only. Total of stitches 24.
Row 24: 12 decreases. Total stitches 12.
At this point I put the eyes and stuff the head with synthetic cotton.
Row 25: 6 decreases. Total stitches 6.
To finish simply with the wool needle I closed taking the 6 front strands and that's it.
Vuelta 1: un anillo mágico con 6 puntos de ganchillo. Total 6 puntos.
Vuelta 2: 6 aumentos. Total 12 puntos.
Vuelta 3: 1 punto bajo, 1 aumento x6. Total 18 puntos.
Vuelta 4: 2 puntos bajo, 1 aumento x6. Total puntos 24.
Vuelta 5: 3 puntos bajo, 1 aumento x6. Total puntos 30.
Vuelta 6: 4 puntos bajo, 1 aumento x6. Total puntos 36.
Vuelta 7: 5 punto bajo, 1 aumento x6. Total puntos 42.
Vuelta 8: 6 punto bajo, 1 aumento x6. Total puntos 48.
Vuelta 9 a 15: solo puntos bajos. Total puntos 48.
Vuelta 16: 6 puntos bajo, 1 disminución x6. Total puntos 42.
Vuelta 17: 5 puntos bajo, 1 disminución x6. Total puntos 36.
Vuelta 18: 4 puntos bajo, 1 disminución x6. Total puntos 30.
Vuelta 19: 3 puntos bajo, 1 disminución x6. Total puntos 24.
Vuelta 20 a 23: sólo punto bajo. Total puntos 24.
Vuelta 24: 12 disminuciones. Total puntos 12.
En este punto coloco los ojos y relleno la cabeza con algodón sintético.
Vuelta 25: 6 disminuciones. Total puntos 6.
Para terminar, simplemente cierro con la aguja lanera, recogiendo las 6 hebras delanteras y listo.
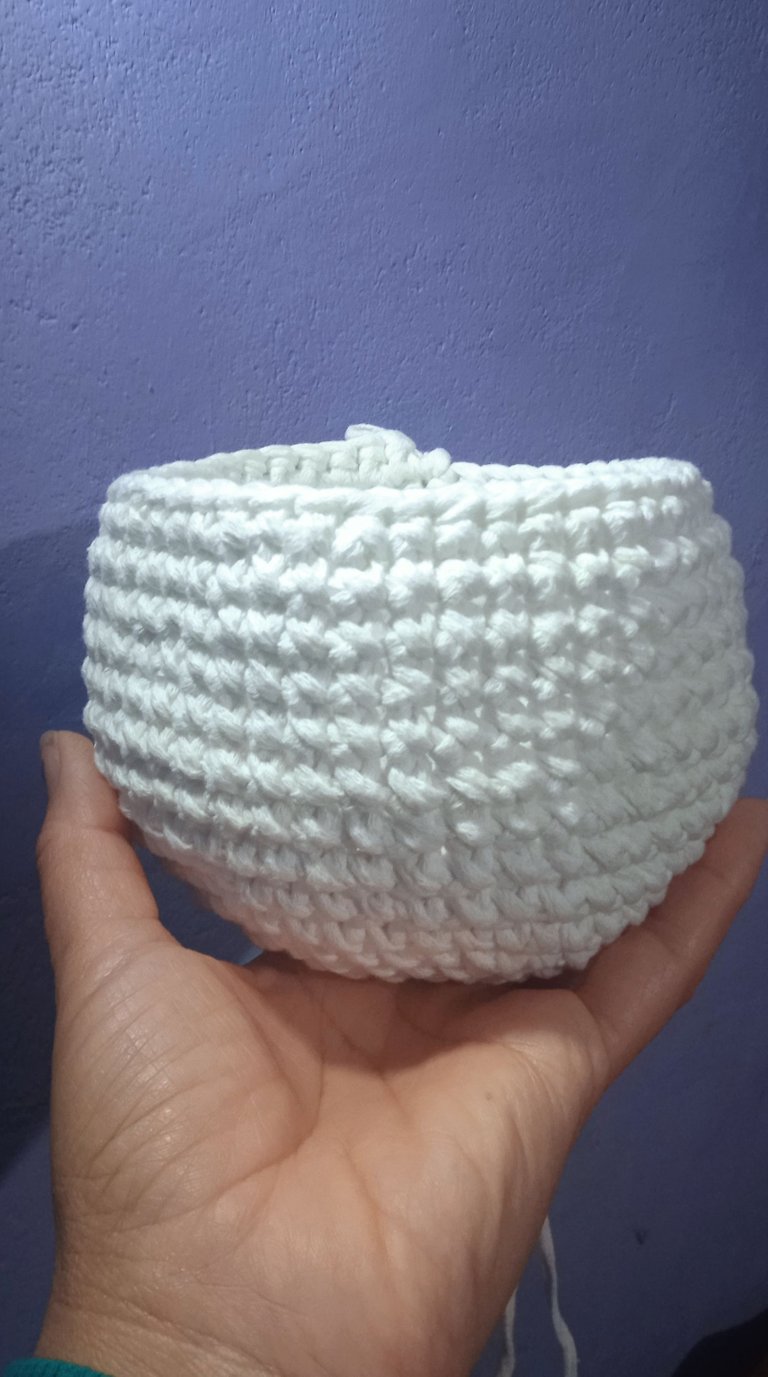
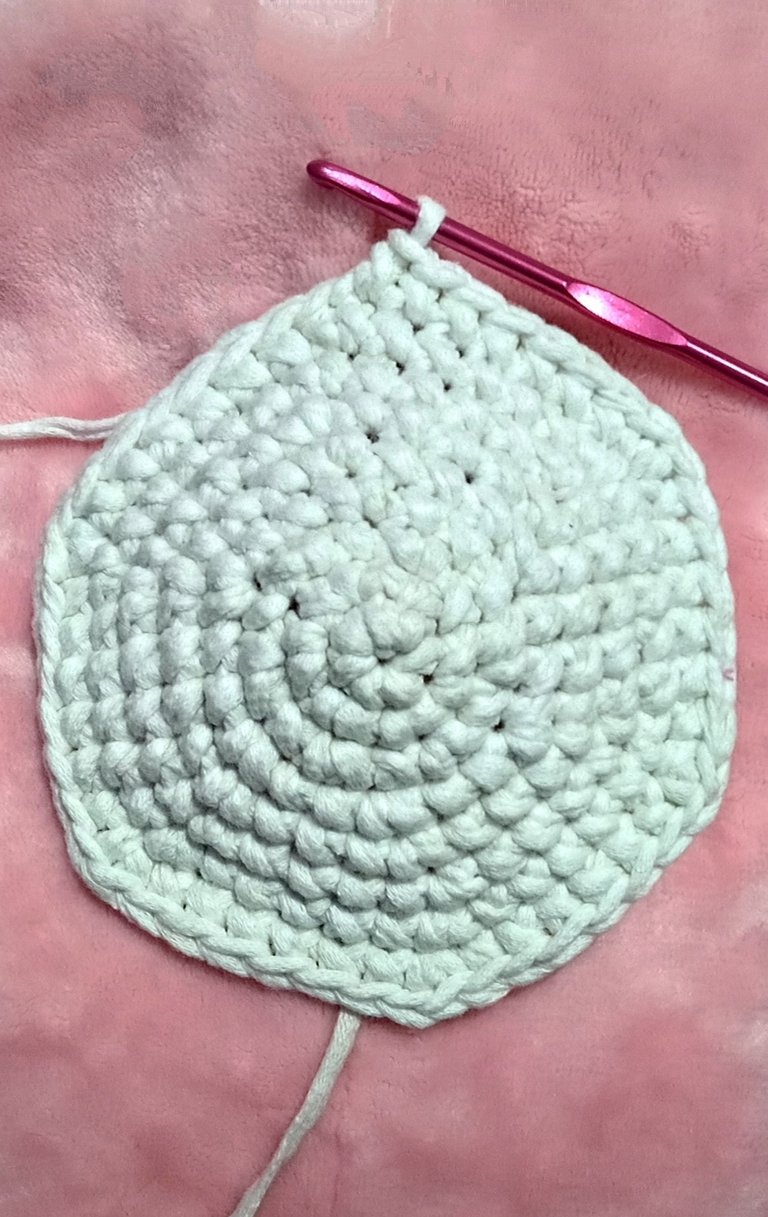
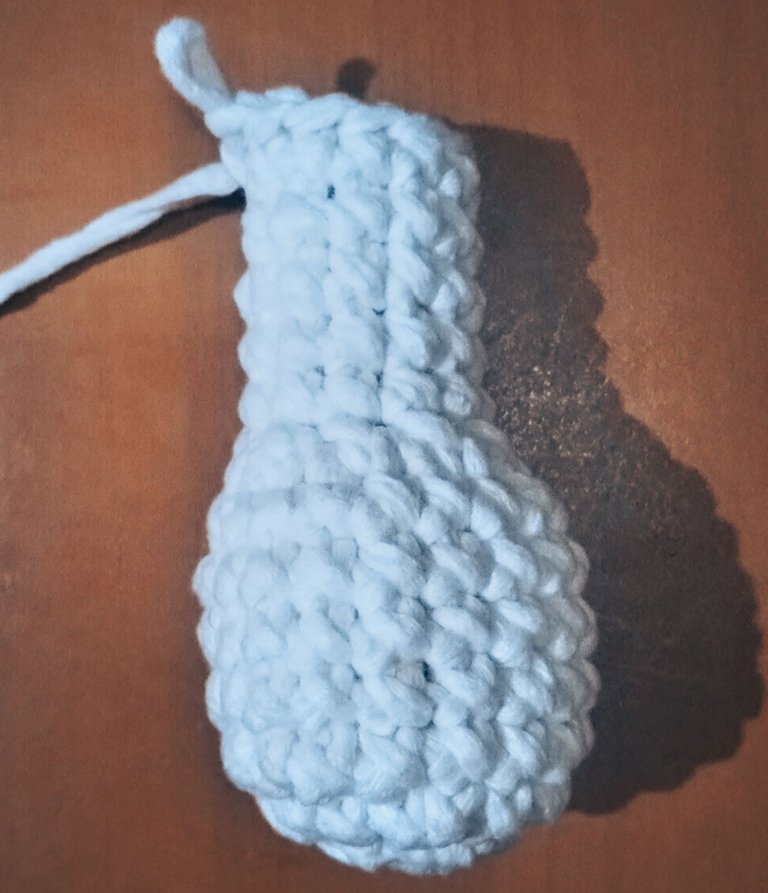
Continue with the body / Continúe con el cuerpo
|
|
Row 1: a magic ring with 6 single crochet stitches. Total stitches 6.
Row 2: 6 increases. Total stitches 12.
Row 3: 1 single crochet, 1 increase x6. Total stitches 18.
Row 4: 2 single crochet, 1 increase x6. Total stitches 24.
Row 5: 3 single crochet, 1 increase x6. Total stitches 30.
Row 6: 4 single crochet, 1 increase x6. Total stitches 36.
Row 7: 5 single crochet, 1 increase x6. Total stitches 42.
Row 8: 6 single crochet, 1 increase x6. Total stitches 48.
Row 9 to 17: Only single crochet. Total stitches 48.
Row 18: 14 single crochet, 1 decrease x3. Total stitches 45.
Row 19: 13 single crochet, 1 decrease x3. Total stitches 42.
Row 20: 12 single crochet, 1 decrease x3. Total stitches 39.
Row 21: 11 single crochet, 1 decrease x3. Total stitches 36.
Row 22: 10 single crochet, 1 decrease x3. Total stitches 33.
Row 23: 9 single crochet, 1 decrease x3. Total stitches 30.
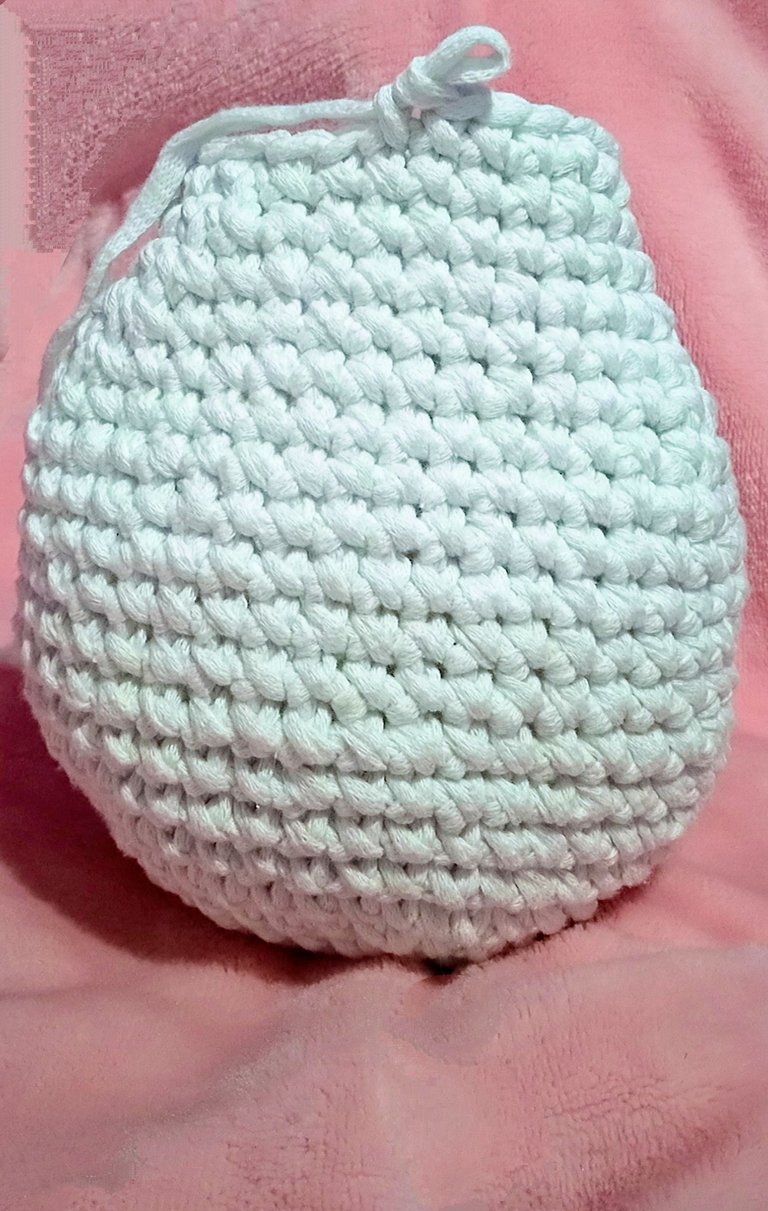
Row 24 to 25: single crochet only. Total stitches 30.
Filled in and ready. I left a long strand of rag to join with the head.
Vuelta 1: un anillo mágico con 6 puntos bajos. Total de puntos 6.
Vuelta 2: 6 aumentos. Total de puntos 12.
Vuelta 3: 1 punto bajo, 1 aumento x6. Total de puntos 18.
Vuelta 4: 2 puntos bajos, 1 aumento x6. Total de puntos 24.
Vuelta 5: 3 puntos bajos, 1 aumento x6. Total de puntos 30.
Vuelta 6: 4 puntos bajos, 1 aumento x6. Total de puntos 36.
Vuelta 7: 5 puntos bajos, 1 aumento x6. Total de puntos 42.
Vuelta 8: 6 puntos bajos, 1 aumento x6. Total de puntos 48.
Vuelta 9 a 17: solo puntos bajos. Total de puntos 48.
Vuelta 18: 14 puntos bajos, 1 disminución x3. Total de puntos 45.
Vuelta 19: 13 puntos bajos, 1 disminución x3. Total de puntos 42.
Vuelta 20: 12 puntos bajos, 1 disminución x3. Total de puntos 39.
Vuelta 21: 11 puntos bajos, 1 disminución x3. Total de puntos 36.
Vuelta 22: 10 puntos bajos, 1 disminución x3. Total de puntos 33.
Vuelta 23: 9 puntos bajos, 1 disminución x3. Total de puntos 30.
Vuelta 24 a 25: solo puntos bajos. Total de puntos 30.
Rellene y listo. Deje una hebra de trapillo larga para unir con la cabeza.
Arms / Brazos
Row 1: a magic ring with 6 single crochet stitches. Total stitches 6.
Row 2: 6 increases. Total stitches 12.
Row 3: 1 single crochet, 1 increase x6. Total stitches 18.
Row 4: 2 single crochet, 1 increase x6. Total stitches 24.
Row 5: 3 single crochet, 1 increase x6. Total stitches 30.
Row 6 to 11: Only single crochet. Total stitches 30.
Row 12: 3 single crochet, 1 decrease x6. Total stitches 24.
Row 13: 2 single crochet, 1 decrease X6. Total stitches 18.
Row 14 to 16: single crochet. Total of stitches 18.
Row 17: 16 single crochet, 1 decrease. Total of stitches 17.
Row 18: 3 single crochets, 1 decrease, 12 single crochets. Total of stitches 16.
Row 19: 7 single crochets, 1 decrease, 7 single crochets. Total of stitches 15.
Row 20: 10 single crochets, 1 decrease, 3 single crochets. Total of stitches 14.
Row 21: 12 single crochet, 1 decrease. Total of stitches 13.
Row 22: 3 single crochets, 1 decrease, 8 single crochets. Total of stitches 12.
Row 23: 5 single crochets, 1 decrease, 5 single crochets. Total of stitches 11.
Row 24: 7 single crochets, 1 decrease, 2 single crochets. Total stitches 10.
Fill in the arms and close with a knitting needle, leaving one strand of yarn.
Vuelta 1: un anillo mágico con 6 puntos bajos. Total de puntos 6.
Vuelta 2: 6 aumentos. Total de puntos 12.
Vuelta 3: 1 punto bajo, 1 aumento x6. Total de puntos 18.
Vuelta 4: 2 puntos bajos, 1 aumento x6. Total de puntos 24.
Vuelta 5: 3 puntos bajos, 1 aumento x6. Total de puntos 30.
Vuelta 6 a 11: solo puntos bajos. Total de puntos 30.
Vuelta 12: 3 puntos bajos, 1 disminución X6. Total de puntos 24.
Vuelta 13: 2 puntos bajos, 1 disminución X6. Total de puntos 18.
Vuelta 14 a 16: solo puntos bajos. Total de puntos 18.
Vuelta 17: 16 puntos bajos, 1 disminución. Total de puntos 17.
Vuelta 18: 3 puntos bajos, 1 disminución, 12 puntos bajos. Total de puntos 16.
Vuelta 19: 7 puntos bajos, 1 disminución, 7 puntos bajos. Total de puntos 15.
Vuelta 20: 10 puntos bajos, 1 disminución, 3 puntos bajos. Total de puntos 14.
Vuelta 21: 12 puntos bajos, 1 disminución. Total de puntos 13.
Vuelta 22: 3 puntos bajos, 1 disminución, 8 puntos bajos. Total de puntos 12.
Vuelta 23: 5 puntos bajos, 1 disminución, 5 puntos bajos. Total de puntos 11.
Vuelta 24: 7 puntos bajos, 1 disminución, 2 puntos bajos. Total de puntos 10.
Rellene los brazos y cerré con aguja lanera dejando una hebra.
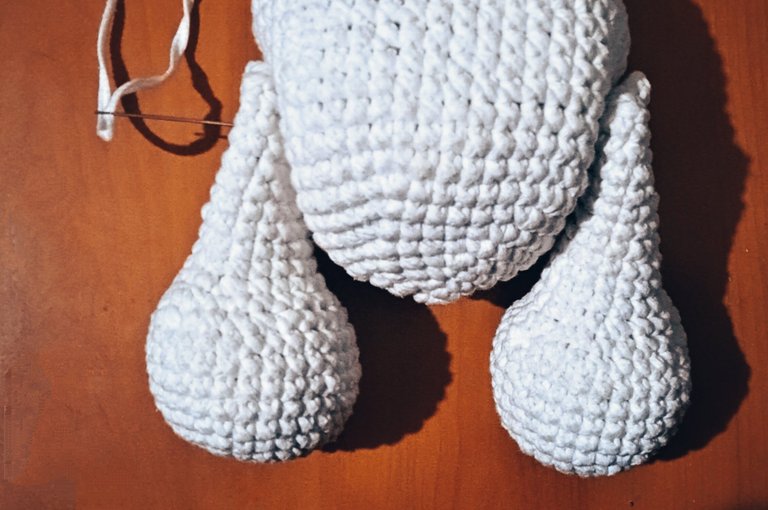
Legs / piernas
Row 1: a magic ring with 6 single crochet stitches. Total stitches 6.
Row 2: 6 increases. Total stitches 12.
Row 3: 1 single crochet, 1 increase x6. Total stitches 18.
Row 4: 2 single crochet, 1 increase x6. Total stitches 24.
Row 5: 3 single crochet, 1 increase x6. Total stitches 30.
Row 6: 4 single crochet, 1 increase x6. Total stitches 36.
Row 7: 5 single crochet, 1 increase x6. Total stitches 42.
Row 8 to 11: single crochet. Total stitches 42.
Row 12: 5 single crochet, 1 decrease x6. Total stitches 36.
Row 13: 1 single crochet, 1 decrease, 11 half stitches, 1 decrease, 1 single crochet, 1 decrease, 1 single crochet, 1 decrease, 11 half stitches, 1 decrease, 1 decrease, 1 single crochet. Total stitches 31.
Row 14: 2 single crochet, 1 decrease, 6 single crochets, 1 decrease, 1 single crochet, 1 decrease, 1 single crochet, 1 decrease, 1 single crochet, 1 decrease, 6 single crochets, 1 decrease, 2 single crochets. Total stitches 25.
Row 15 to 18: single crochet only. Total stitches 25.
Row 19: 5 single crochet, 1 decrease, 18 single crochets. Total stitches 24.
Row 20: 11 single crochets, 1 decrease, 11 single crochets. Total of stitches 23.
Row 21: 16 single crochet, 1 decrease, 5 single crochets. Total of stitches 22.
Row 22: 20 single crochet, 1 decrease. Total 21.
Time to fill in.
Row 23: 4 single crochets, 1 decrease, 15 single crochets. Total of stitches 20.
Row 24: 9 single crochet, 1 decrease, 9 single stitches. Total of stitches 19.
Row 25: 13 single crochet, 1 decrease, 4 single crochets. Total of stitches 18.
Row 26: 16 single crochet, 1 decrease. Total of stitches 17.
Row 27: 3 single crochets, 1 decrease, 12 single crochets. Total of stitches 16.
Row 28: 7 single crochets, 1 decrease, 7 single crochets. Total stitches 15.
Row 29: 10 single crochet, 1 decrease, 3 single crochets. Total of stitches 14.
Row 30: 8 single crochets, 1 decrease, 4 single crochets. Total stitches 13.
I closed with needle and I'm done.
Vuelta 1: un anillo mágico con 6 puntos bajos. Total de puntos 6.
Vuelta 2: 6 aumentos. Total de puntos 12.
Vuelta 3: 1 punto bajo, 1 aumento x6. Total de puntos 18.
Vuelta 4: 2 puntos bajos, 1 aumento x6. Total de puntos 24.
Vuelta 5: 3 puntos bajos, 1 aumento x6. Total de puntos 30.
Vuelta 6: 4 puntos bajos, 1 aumento x6. Total de puntos 36.
Vuelta 7: 5 puntos bajos, 1 aumento x6. Total de puntos 42.
Vuelta 8 a 11: solo puntos bajos. Total de puntos 42.
Vuelta 12: 5 puntos bajos, 1 disminución x6. Total de puntos 36.
Vuelta 13: 1 punto bajo, 1 disminución, 11 medios punto, 1 disminución, 1 punto bajo, 1 disminución, 1 punto bajo, 1 disminución, 11 medios puntos, 1 disminución, 1 punto bajo. Total de puntos 31.
Vuelta 14: 2 puntos bajos, 1 disminución, 6 puntos bajos, 1 disminución, 1 punto bajo, 1 disminución, 1 punto bajo, 1 disminución, 1 punto bajo, 1 disminución, 6 puntos bajos, 1 disminución, 2 puntos bajos. Total puntos 25.
Vuelta 15 a 18: solo puntos bajos. Total de puntos 25.
Vuelta 19: 5 puntos bajos, 1 disminución, 18 puntos bajos. Total de puntos 24.
Vuelta 20: 11 puntos bajos, 1 disminución, 11 puntos bajos. Total de puntos 23.
Vuelta 21: 16 puntos bajos, 1 disminución, 5 puntos bajos. Total de puntos 22.
Vuelta 22: 20 puntos bajos, 1 disminución. Total 21.
Momento de rellenar.
Vuelta 23: 4 puntos bajos, 1 disminución, 15 puntos bajos. Total de puntos 20.
Vuelta 24: 9 puntos bajos, 1 disminución, 9 puntos bajos. Total de puntos 19.
Vuelta 25: 13 puntos bajos, 1 disminución, 4 puntos bajos. Total de puntos 18.
Vuelta 26: 16 puntos bajos, 1 disminución. Total de puntos 17.
Vuelta 27: 3 puntos bajos, 1 disminución, 12 puntos bajos. Total de puntos 16.
Vuelta 28: 7 puntos bajos, 1 disminución, 7 puntos bajos. Total de puntos 15.
Vuelta 29: 10 puntos bajos, 1 disminución, 3 puntos bajos. Total de puntos 14.
Vuelta 30: 8 puntos bajos, 1 disminución, 4 puntos bajos. Total de puntos 13.
Cerré con aguja y Listo .
Ears / orejas
Row 1: a magic ring with 6 single crochet stitches. Total stitches 6.
Row 2: 6 increases. Total stitches 12.
Row 3: 1 single crochet, 1 increase x6. Total stitches 18.
Row 4: 2 single crochet, 1 increase x6. Total stitches 24.
Row 5 to 8: single crochet. Total stitches 24.
Vuelta 1: un anillo mágico con 6 puntos bajos. Total de puntos 6.
Vuelta 2: 6 aumentos. Total de puntos 12.
Vuelta 3: 1 punto bajo, 1 aumento x6. Total de puntos 18.
Vuelta 4: 2 puntos bajos, 1 aumento x6. Total de puntos 24.
Vuelta 5 a 8: solo puntos bajos. Total de puntos 24.
Muzzle / Bozal
This is a circle that will go along with the nose.
Row 1: a magic ring with 6 single crochet stitches. Total stitches 6.
Row 2: 6 increases. Total stitches 12.
Row 3: 1 single crochet, 1 increase x6. Total stitches 18.
Row 4: 2 single crochet, 1 increase x6. Total stitches 24.
Row 5: 3 single crochet, 1 increase x6. Total stitches 30.
Row 6: 4 single crochet, 1 increase x6. Total stitches 36.
Se trata de un círculo que acompañará a la nariz.
Vuelta 1: un anillo mágico con 6 puntos bajos. Total de puntos 6.
Vuelta 2: 6 aumentos. Total de puntos 12.
Vuelta 3: 1 punto bajo, 1 aumento x6. Total de puntos 18.
Vuelta 4: 2 puntos bajos, 1 aumento x6. Total de puntos 24.
Vuelta 5: 3 puntos bajos, 1 aumento x6. Total de puntos 30.
Vuelta 6: 4 puntos bajos, 1 aumento x6. Total de puntos 36.
Nose / Nariz
Bow tie / corbata de lazo
With the Sky blue rag I made 14 chains, skipped two and made half double crochet stitches in the whole row. In rows 3 and 4 it was exactly the same.
I left a long strand that I introduced in a needle, I went through the middle in a zigzag pattern and then I pulled it through, then I wound that same strand in the middle.
I made 25 chains that I sewed with the tie.
Con el hilo celeste hice 14 cadenas, me salte dos e hice en toda la vuelta medios puntos altos. Ya en la vuelta 3 y 4 fue exactamente lo mismo.
Deje una hebra larga que introduje en una aguja, fui pasando por en medio en forma de zigzag para luego tirar, después esa misma hebra la enrolle en medio.
Hice aparte 25 cadenas las que coci con el corbatín.
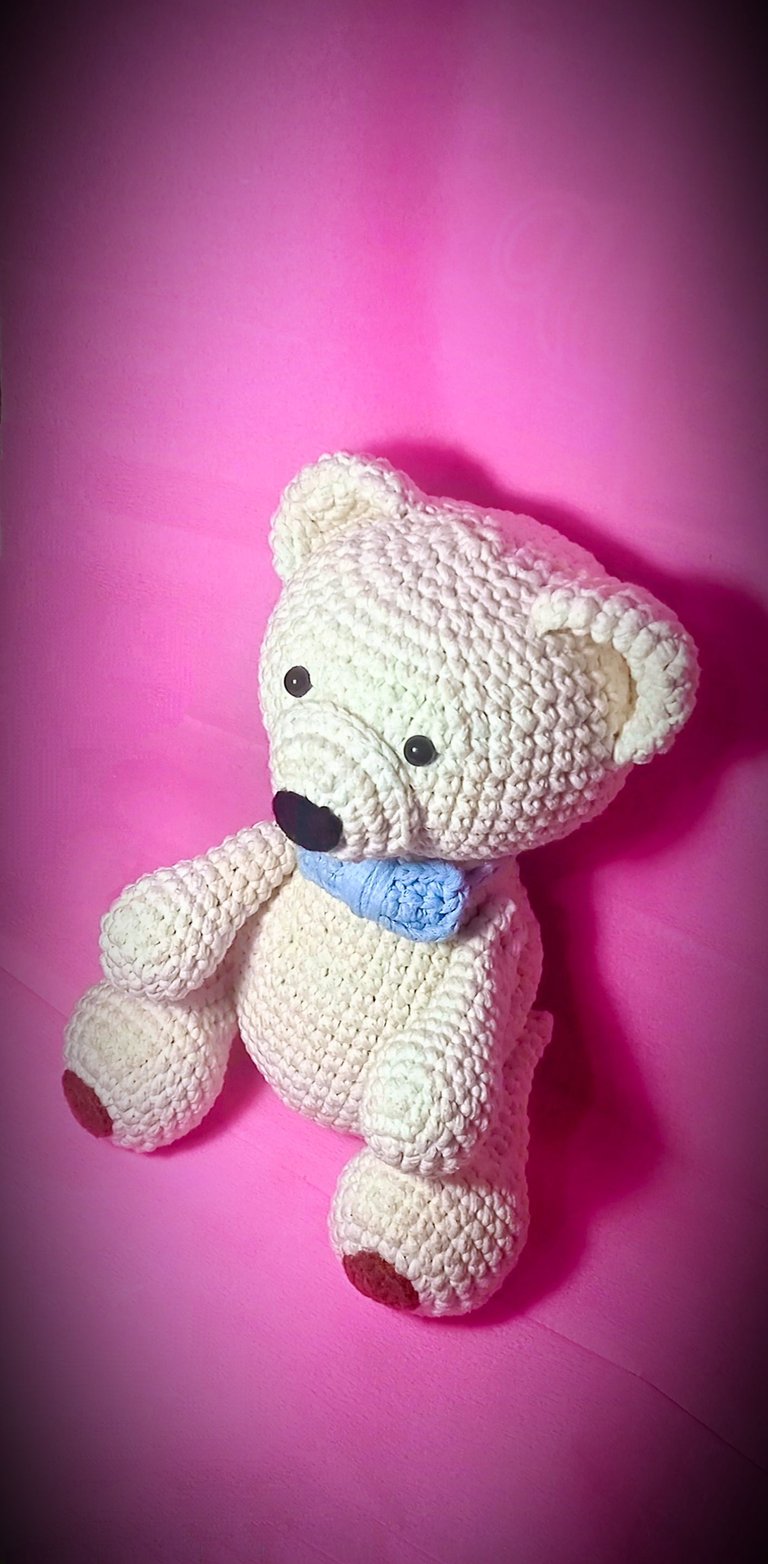
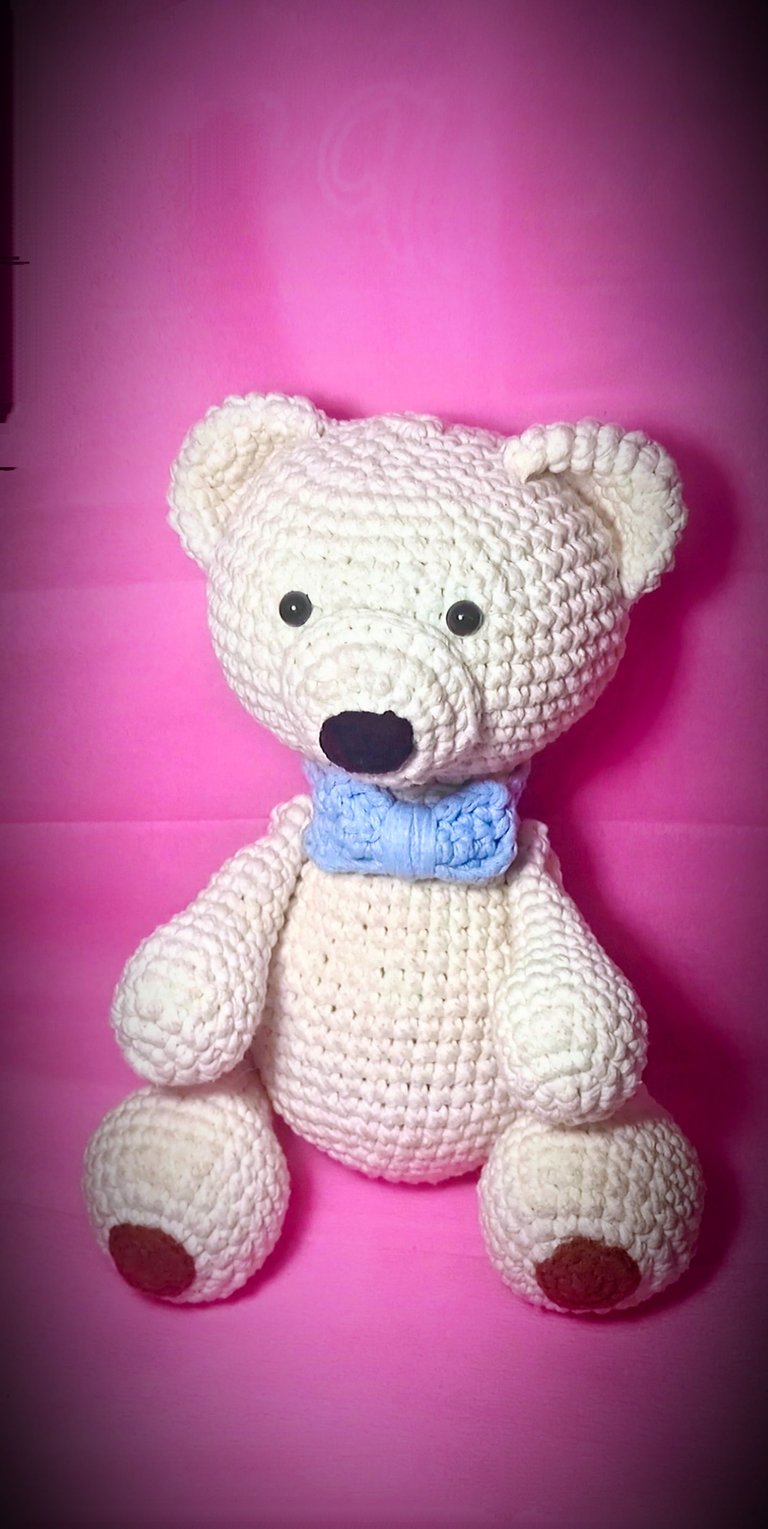
Assembly and result!! / ¡¡Ensamblaje y resultado!!
|
|
Now is when all the work will pay off ☺️
I simply sewed the head to the body and both the legs and arms I passed the thread from one side to the other, that way they were articulated.
I sewed the nose to the snout and then to the head.
I also sewed the bow tie and on the legs I placed a circle, which I made with brown thread. Simply 1 magic ring with 6 single crochets, 6 increases and sequences of 1 single crochet 1 increase and 2 double crochets 1 increase.
It's cute, it couldn't be cuter 😍.
It does weigh quite a lot, almost 800 grams, but thanks to that it has more shape... Sorry for the length of this post 😬
Ahora es cuando todo el trabajo dará sus frutos ☺️
Cosí la cabeza al cuerpo y tanto las piernas como los brazos pasé el hilo de un lado a otro, de esa forma quedaban articulados.
La nariz la cosí al hocico y luego a la cabeza.
También cosí la corbata de lazo y en las piernas coloqué un círculo, que hice con hilo cafe. Simplemente 1 anillo mágico con 6 ganchillos sencillos, 6 aumentos y secuencias de 1 ganchillo sencillo 1 aumento y 2 ganchillos dobles 1 aumento.
Es una ternura, no puede ser más bonito 😍.
Eso sí, pesa bastante, casi 800 gramos, pero gracias a eso tiene más forma... Perdón por lo extendido de este post 😬.