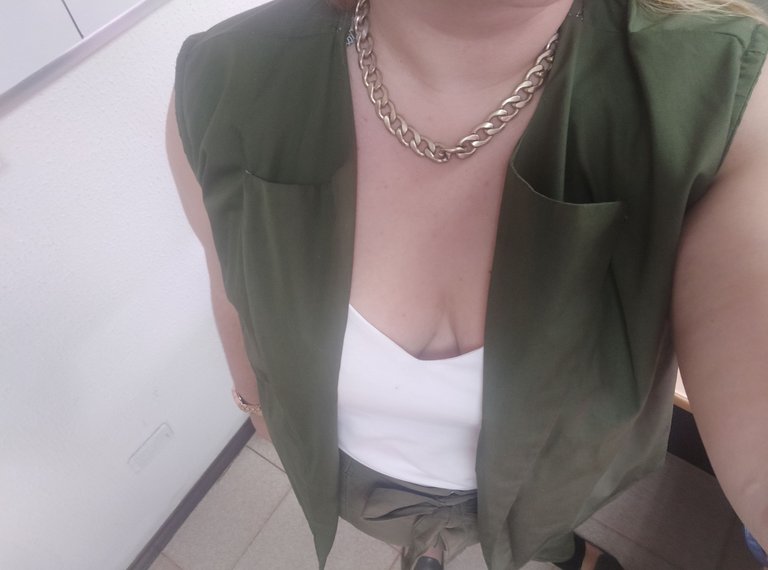
Happy Monday my people of needleworkmonday, although I still have the injury of my foot, yesterday I made the mischief of sewing for a while, I already have several weeks without sewing and the truth is that the desire was stronger than my forced rest, so I made the vest that I left the pattern last week.
Here you can see the post with the guide for this pattern.
Feliz lunes mi gente de needleworkmonday, aunque sigo con la lesión de mi pie, ayer hice la travesura de coser un rato, ya tengo varias semanas sin coser y la verdad las ganas pudieron más que mi reposo forzado, así que confeccione el chaleco que les dejé la semana pasada el patrón.
Aquí puedes ver el post con la guía para este patrón.
Today I am going to explain how I made the vest and I will tell you a little about what I did and the mistakes I made to sew the vest so that you do not make these mistakes that seem so subtle but are reflected in the final result or that could make us work more than necessary.
El día de hoy les voy a explicar cómo confeccione el chaleco y les contaré un poco lo que hice y los errores que cometí para coser el chaleco para que ustedes no cometan estos errores que parecen tan sutiles pero se reflejan en el resultado final o que podrían hacernos trabajar más de lo necesario.
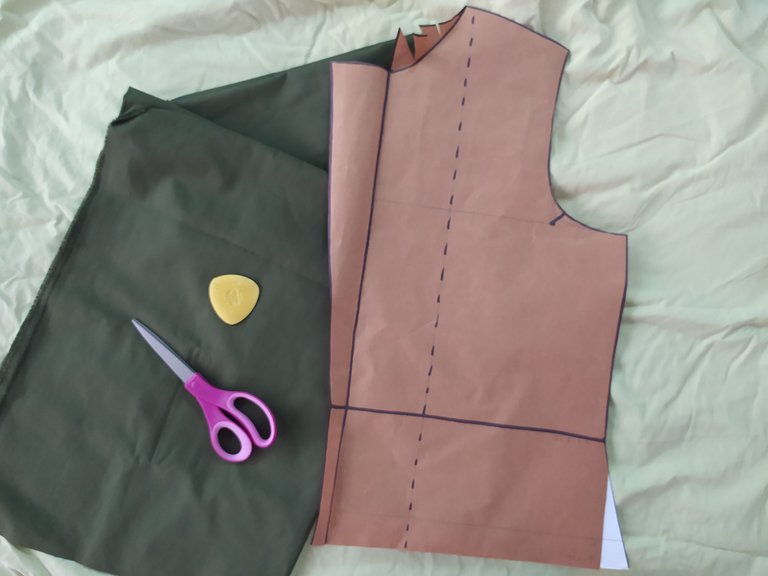
To make this vest I bought 2 meters of shirt fabric (it usually has a higher percentage of cotton in its composition) although I used less, because I used the same fabric to make the lining of the lapel and I wanted to be sure that I would not run out of fabric.
Para realizar este chaleco yo compré 2 metros de tela para camisa (generalmente tiene mayor porcentaje de algodón en su composición) aunque utilicé menos, porque utilicé la misma tela para hacer el forro de la solapa y quería estar segura que no me fuera a faltar tela.
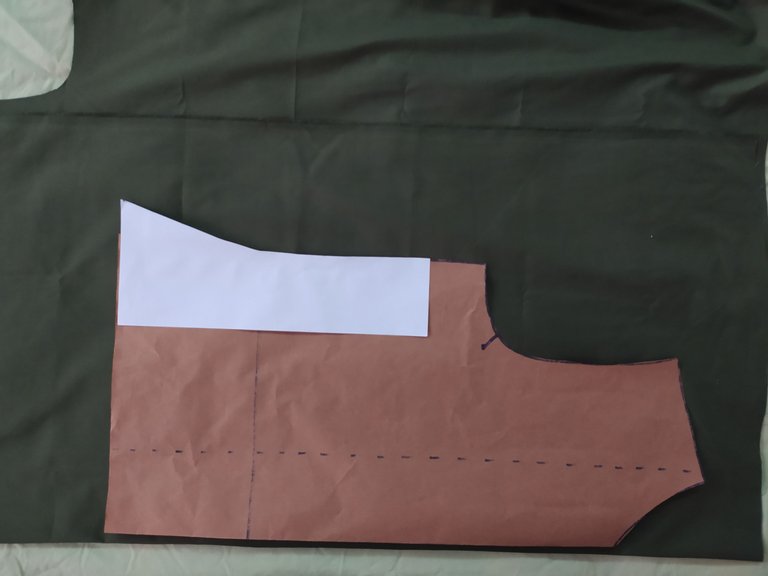
The first thing we do is to place the fabric facing right sides together and place the pattern to cut the back piece, with which we will form the back.
To make the back we are going to place the part of the pattern that forms the neck, that is to say the opposite of the armpit, in the fold of the fabric, in this way we will not have seams in the center of the back.
Lo primero que hacemos es colocar la tela enfrentando los derechos, es decir derecho con derecho y colocamos el patrón para cortar la pieza trasera, con la que formaremos la espalda.
Para hacer la espalda vamos a ubicar la parte del patrón que forma el cuello, es decir el opuesto al de la axila, en el doblez de la tela, de esta forma no tendremos costuras en el centro de la espalda.
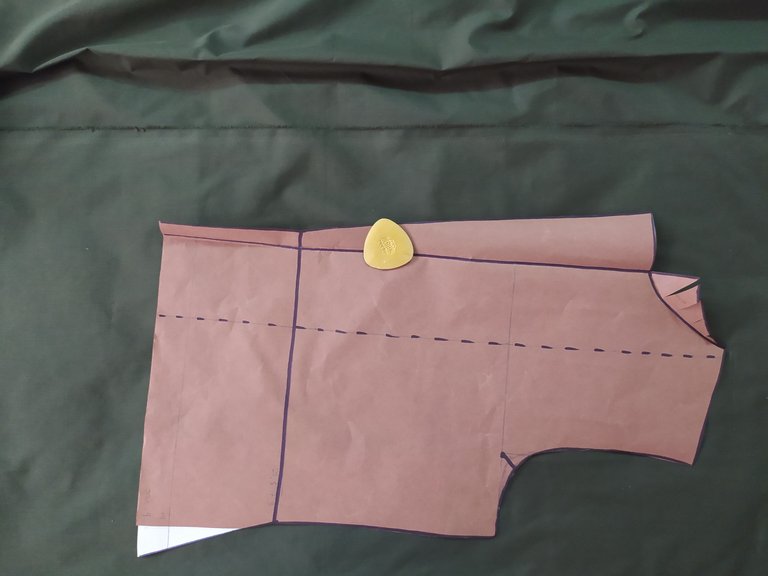
Now we will cut the pattern of the front part, in this part we will cut all the contour of the pattern, so two pieces will be formed.
Ahora cortaremos el patrón de la parte delantera, en esta parte vamos a cortar todo el contorno del patrón, por lo que se formarán dos piezas.
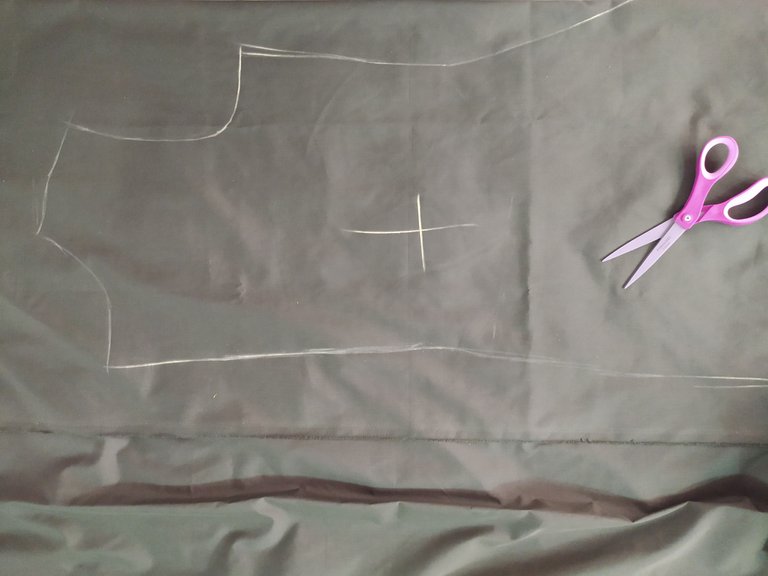
This type of fabric is very similar on the front and back, so I recommend marking it with tailor's chalk or a special fabric pencil so that you can better orient yourself when sewing.
Este tipo de tela es muy parecida por el derecho y el revés por lo que te recomiendo marcarla con tiza de sastre o algún lápiz especial para tela para que te puedas orientar mejor a la hora de coser.
Another piece of information is that the pattern does not include the seam allowances, so you will have to add approximately one centimeter to all the areas of the pattern where we are going to join with seams.
Otro dato que te doy es que el patrón no tiene incluído los centímetros de costura, así que deberás agregar aproximadamente un centímetro a todas las áreas del patrón dónde vamos a unir con costuras.
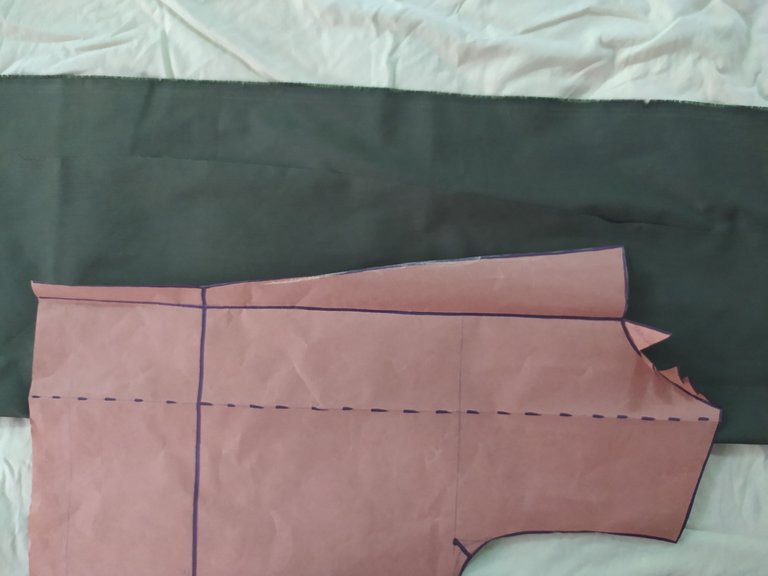
Finally, we are going to cut the lining of the flap, for this you can use the fabric you have already cut or the pattern according to the indications of the pattern adding the centimeters of seams.
Por último, vamos a cortar el forro de la solapa, para esto puedes usar la tela que ya hayas cortado o el patrón de acuerdo a las indicaciones de este agregando los centímetros de costuras.
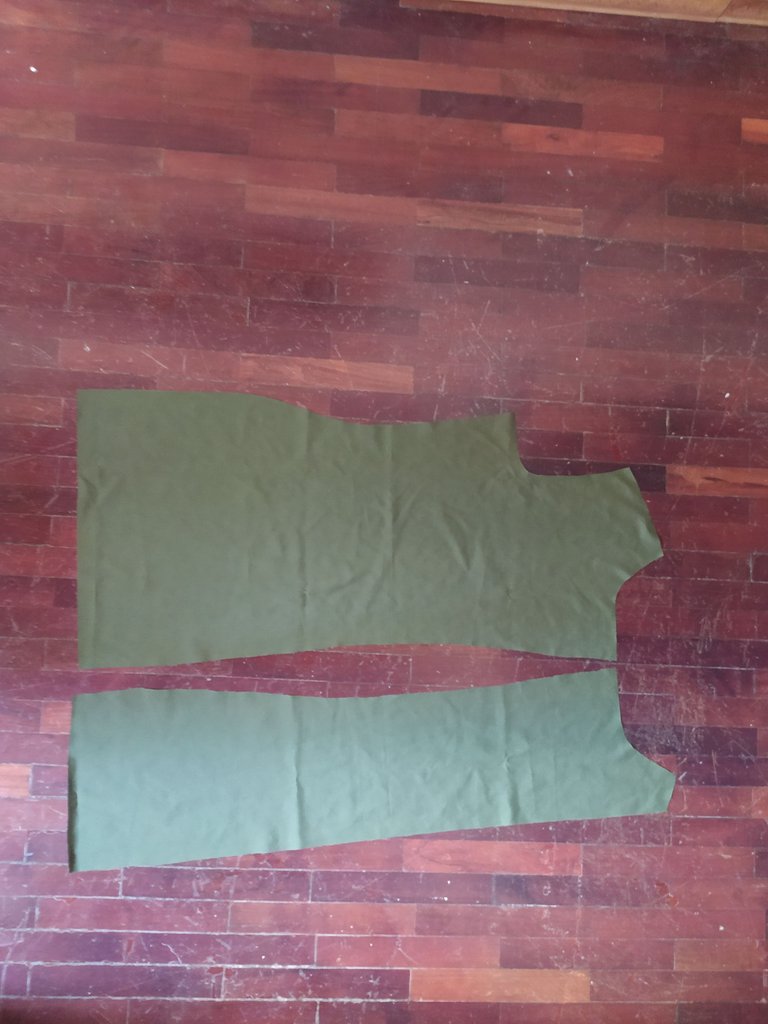
With all the pieces cut, we will sew the lapel lining to the front, join the edge of the lapel, the shoulder and the collar.
Ya con todas las piezas cortadas vamos a coser el forro de la solapa con el delantero, uniremos el borde de la solapa, el hombro y el cuello.
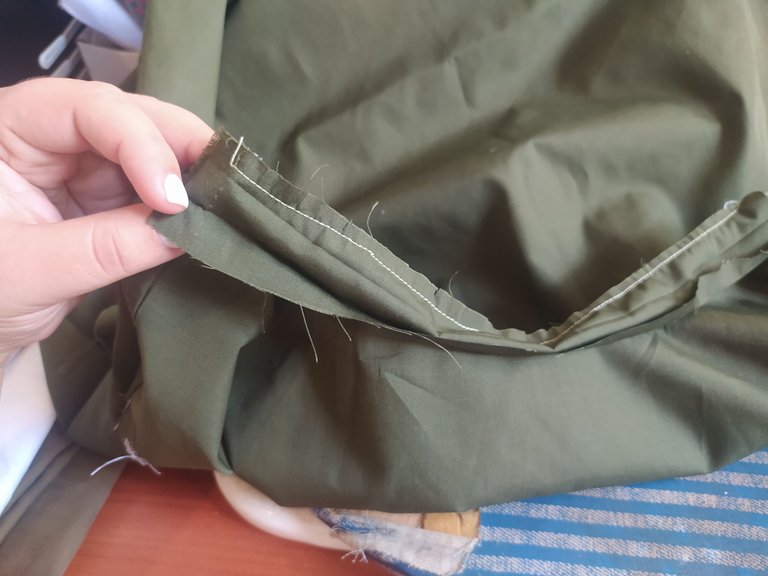
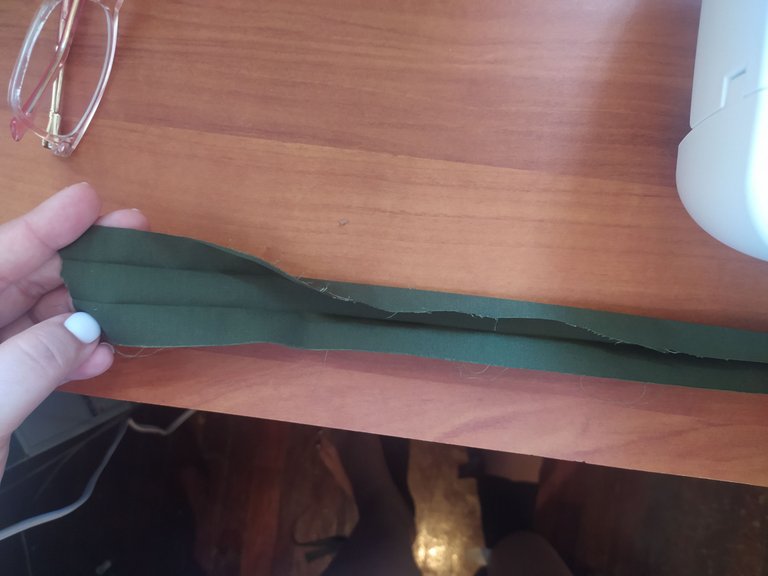
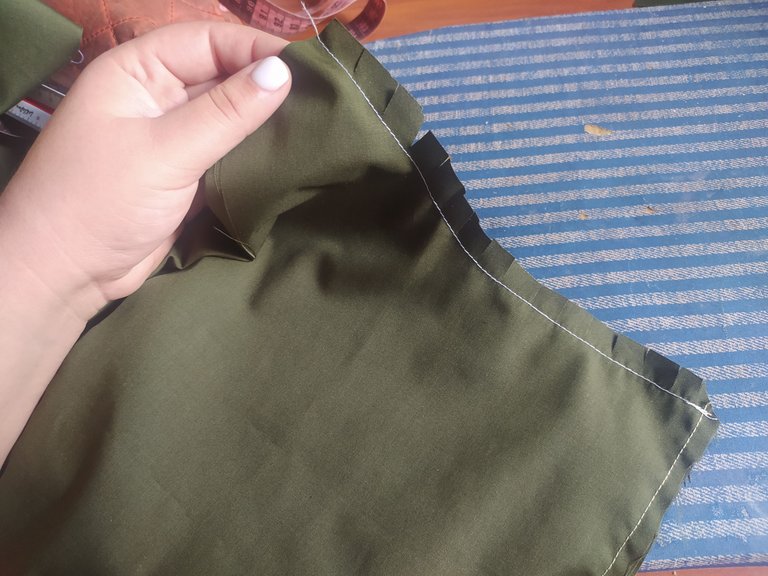
Once we have the front part ready, we are going to make the detail of the back neck to avoid the fabric to spill with the use, for this we are going to cut a strip of fabric about two centimeters wide and we are going to sew to the edge of the neck, as in the rest of what we have sewn, joining right side to right side. Once this is done we are going to make some cuts very carefully to avoid that the fabric is tense when closing this bias binding. (These cuts are made in all the seams that have curvature).
Once this is done, we fold towards the center and then once again towards the inside, this will give us an excellent finish.
You can be guided by the photo to make the bias binding.
Una vez que tenemos lista la parte delantera vamos a hacer el detalle del cuello de atrás para evitar que se Hilache la tela con el uso, para esto vamos a cortar una tira de tela de unos dos centímetros de ancho y vamos a coser al borde del cuello, al igual que en el resto de lo que hemos cosido, uniendo derecho con derecho. Una vez hecho esto vamos a realizar unos cortes con mucho cuidado para evitar que la tela quede tensa al cerrar este bies. (Estos cortes se realizan en todas las costuras que tengan curvatura)
Hecho esto, doblamos hacía el centro y luego una vez más hacia adentro, esto nos dará un excelente acabado.
Puedes guiarte por la foto para hacer el bies.
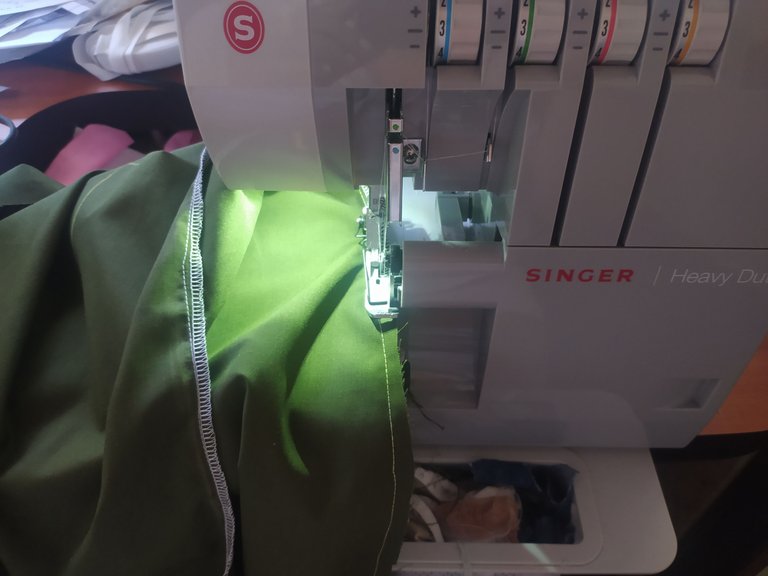
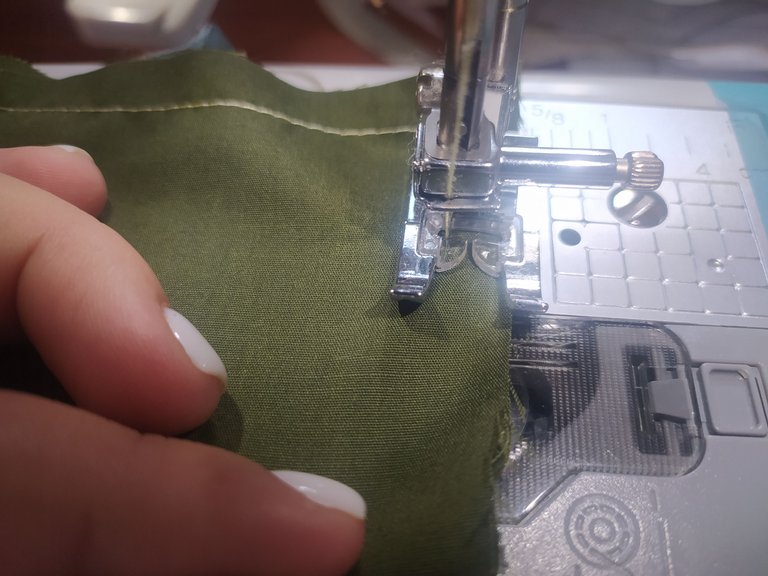
Once the neck detail is ready, we are going to perform the same procedure in the armhole or armpit area.
Now we are going to join the front and back at the sides and shoulders.
Listo el detalle del cuello vamos a realizar el mismo procedimiento en la sisa o el área de las axilas.
Ahora sí vamos a unir delantero y trasero por los costados y en los hombros.
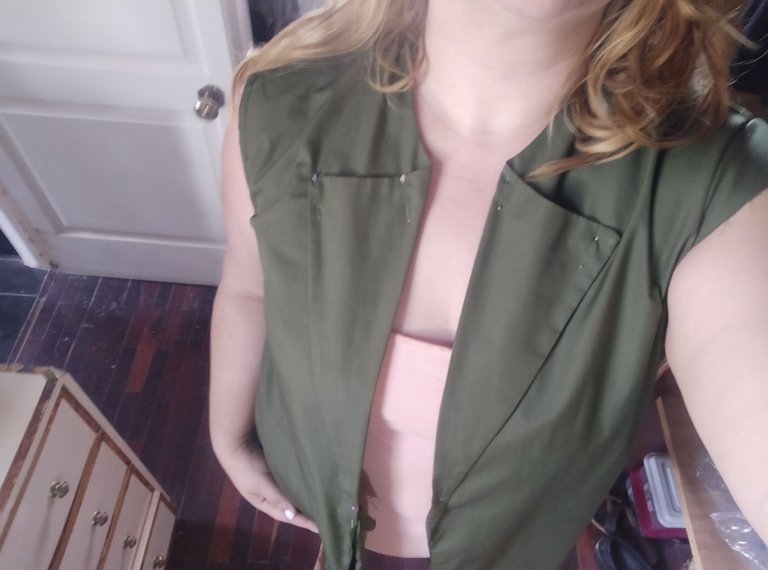
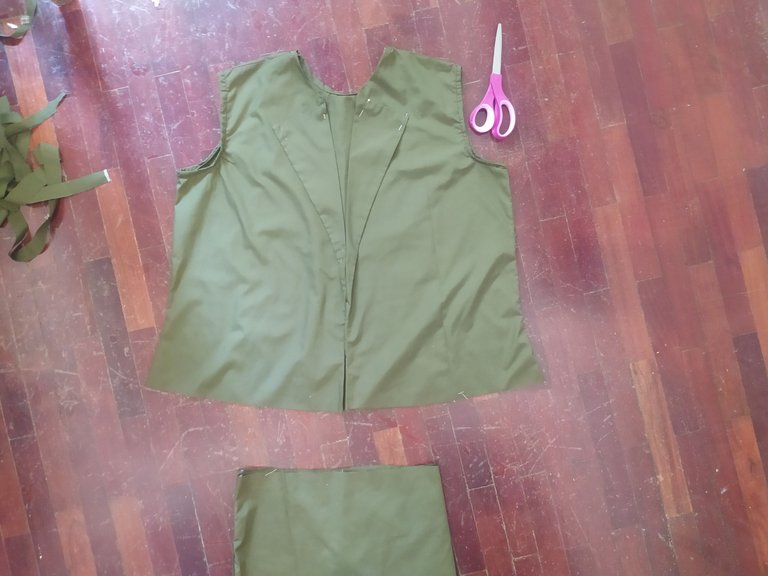
Finally, we adjust the length of the vest, hem it and iron it.
Por último, ajustamos el largo del chaleco, haremos el dobladillo de este y lo planchamos.
I did not make the lining of the whole vest and although this is not a mistake, it is something I would do in a next vest making as it gives it a little more structure. If this is not relevant for you, you can do it without lining just making the lapel lining. As I told you it is not something serious but in a next opportunity I would like to do it differently and choose the shape that I liked the most.
No realice el forro de todo el chaleco y aunque este no es un error propiamente, es algo que haría en una próxima confección de chaleco pues le da un poco más de estructura. Si esto para ti no es relevante puedes hacerlo sin forro solo haciendo el forro de la solapa. Cómo les comenté no es algo grave pero que en una próxima oportunidad me gustaría hacer diferente y elegir la forma que me gustó más.
What were my mistakes?
Before cutting the fabric I got a little scared and added several inches too much fabric and the pattern got a little too big. I was able to solve it but it meant that I had to unpick the piece a few times before finishing it. The lesson I took away from this is to trust my whole process so I don't have to rework it later.
¿Cuales fueron mis errores?
Antes de cortar la tela me dió un poco de miedo y agregue varios centímetros de más directo en La tela y el patrón se me agrando un poco más. Pude resolverlo pero implicó que descosiera la pieza unas cuantas veces antes de terminarlo. La enseñanza que me quedo de esto es confiar en todo mi proceso para no tener que retrabajar luego.
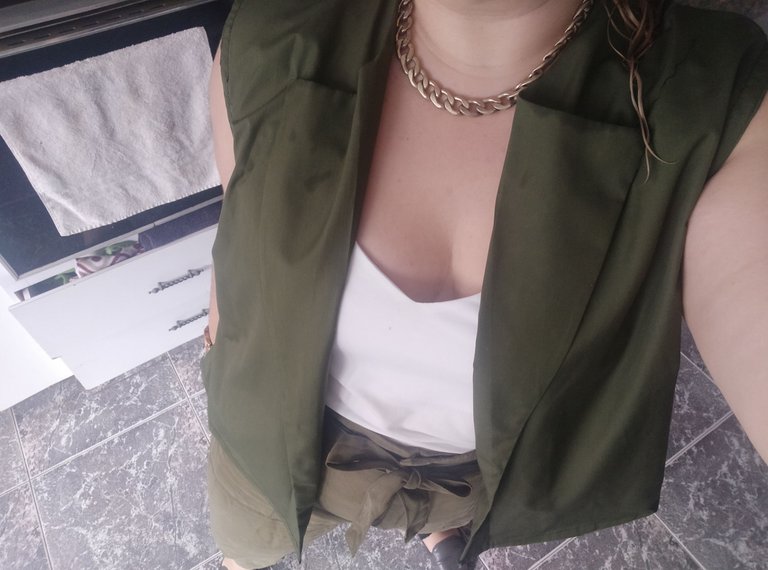
In general it is a garment that sews quickly and has no major sewing secrets other than the typical ones of cutting respecting the direction of the thread of the fabric, besides being quite fresh, although this also depends on the type of fabric you choose.
En líneas generales es una prenda que se cose rápido y no tiene mayores secretos de costura que los típicos de cortar respetando el sentido del hilo de la tela, además de ser bastante fresco, aunque esto también depende del tipo de tejido que elijas.
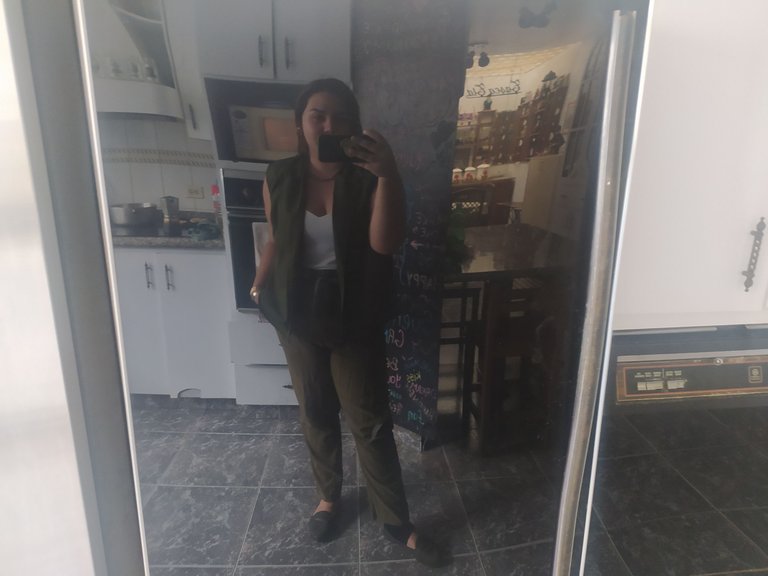
I hope you liked this project, and I hope this step by step will be useful for you. If you dare to make it, I hope you like the result as much as I do.
Espero te haya gustado este proyecto, y te sirva este paso a paso. Si te animas a confeccionarlo espero te guste el resultado tanto como a mí.


