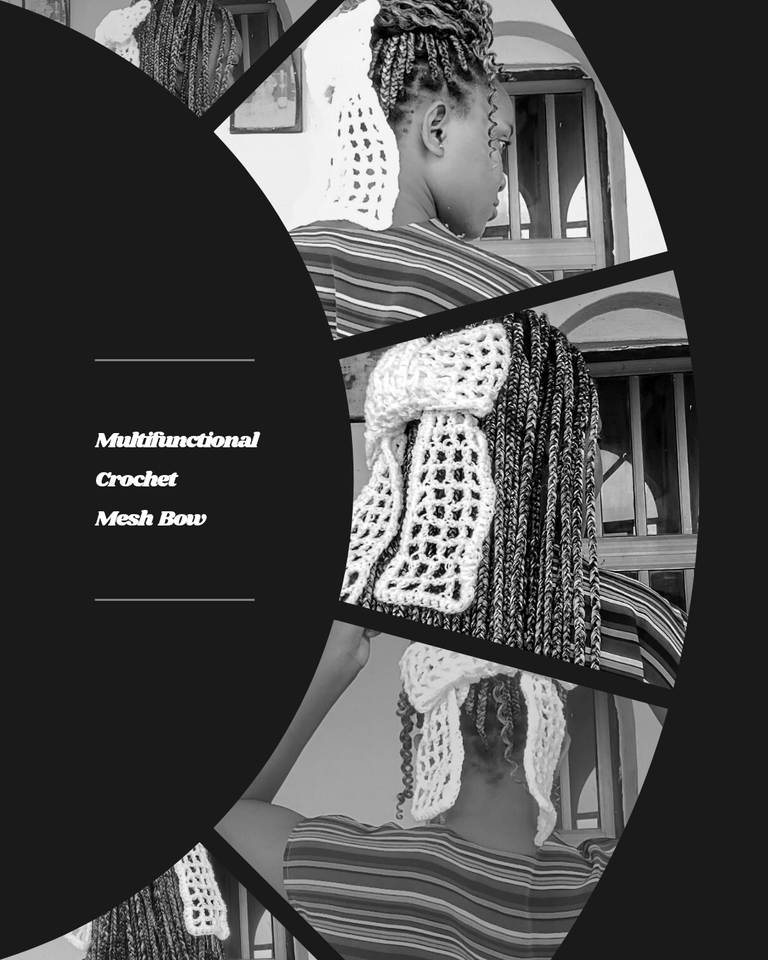
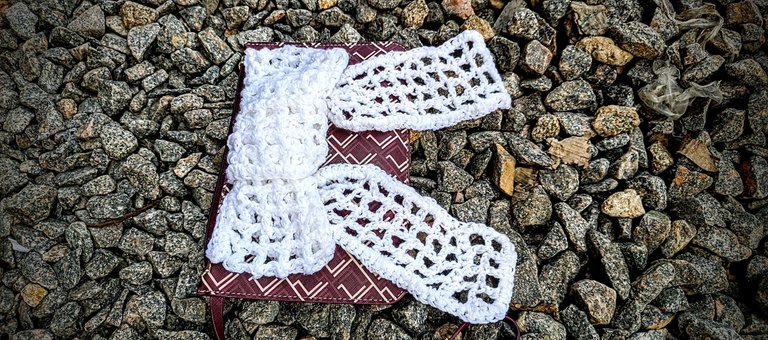
The beautiful thing about being a crochet artist is that every single thing I look at can be a muse. Flowers, insects, books and even humans. Today, I would be sharing with you a mesh multi-functional crochet bow that I made courtesy of one of my colleague.
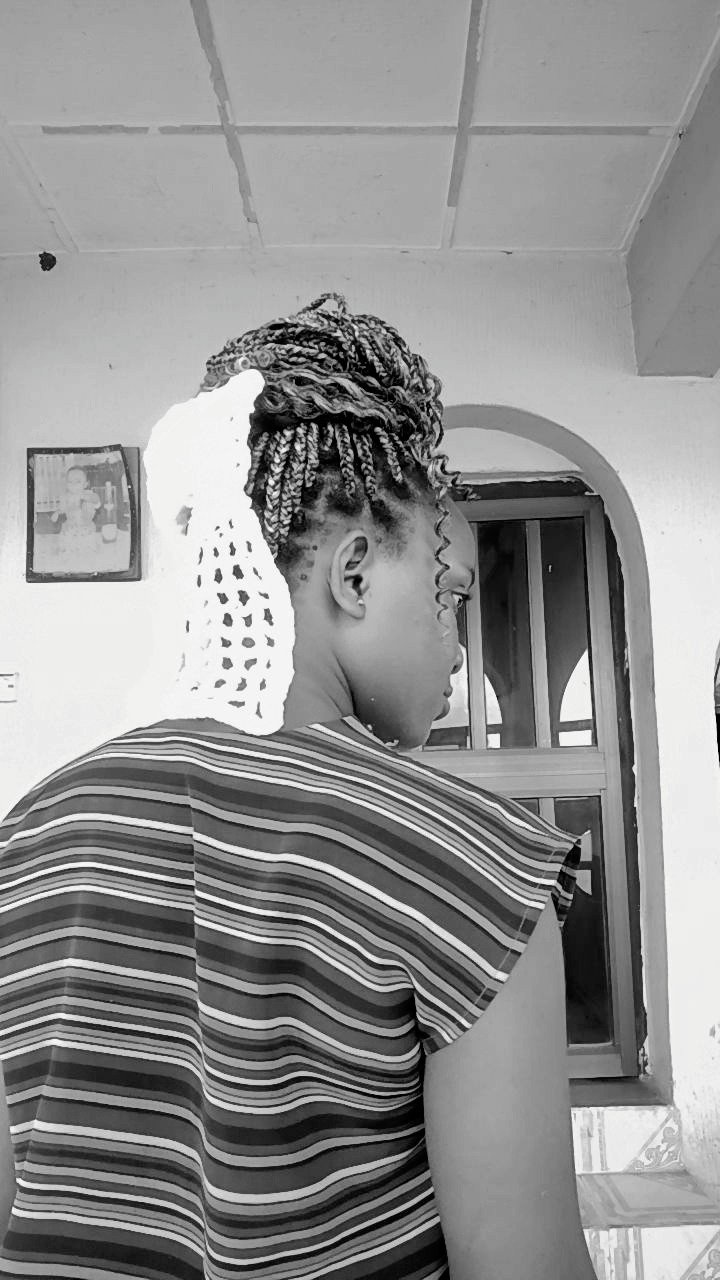
Yesterday, on my way back from campus, I boarded a bus alongside some of my colleague and behind me was this very inquisitive colleague of mine. I was extremely exhausted but somehow, she wasn’t. I plugged in my earpods to silence out the noise but almost immediately after I plugged the earpods in, this colleague who was seated directly behind me started fiddling with my braids.
With a weak smile, I asked why she was doing that and her response was “I like your braids and I want to fiddle with them”. Shocking but I let her do it anyway. She kept fiddling with the braid and at some point, she requested for my phone to take a picture of what she did with my braids. I gave the phone to her and she took a few pictures.
An eternity later(at least it felt that way), she stopped fiddling with my braids and said “a bow accessory would really look good on these braids”. After some back and forth, I agreed to make the crochet bow for the braids. Hence, the inspiration.

Materials Used
- A skein of yarn
- 4.5mm crochet hook
- Darning needle
- A pair of scissors
Procedures
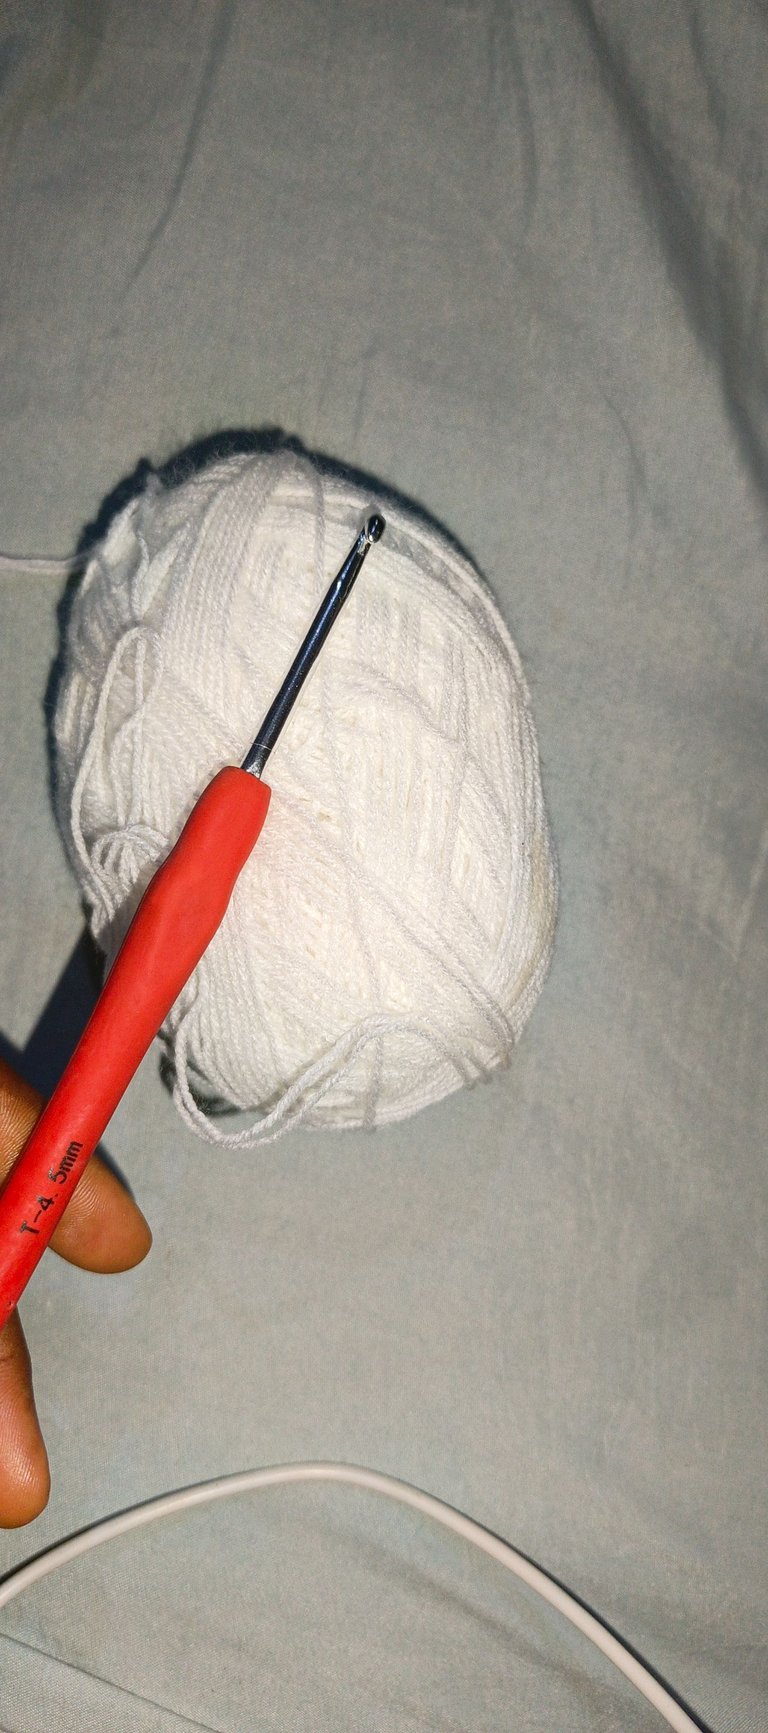
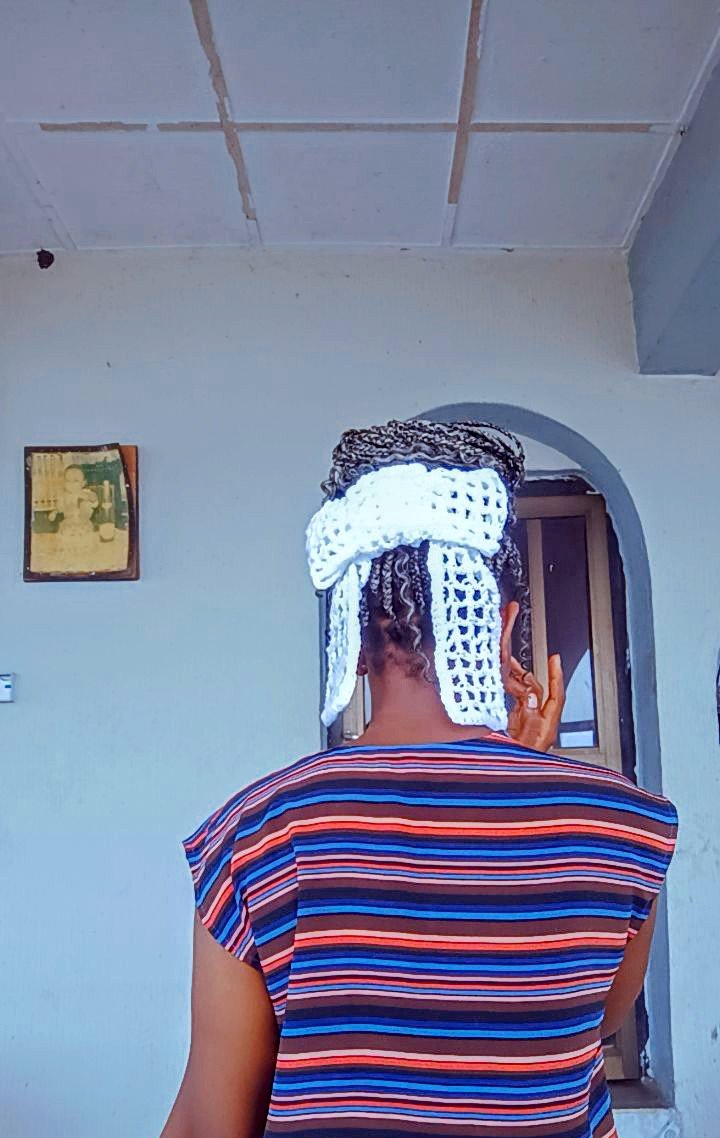
I had the option to either use white or black yarn and on a good day, I would go with the black yarn without batting an eyelid but hair accessories are supposed to stand out. Yes? And making one with a black yarn to be placed on a monochrome braid would not be such a good idea. This is why I went with the white yarn.
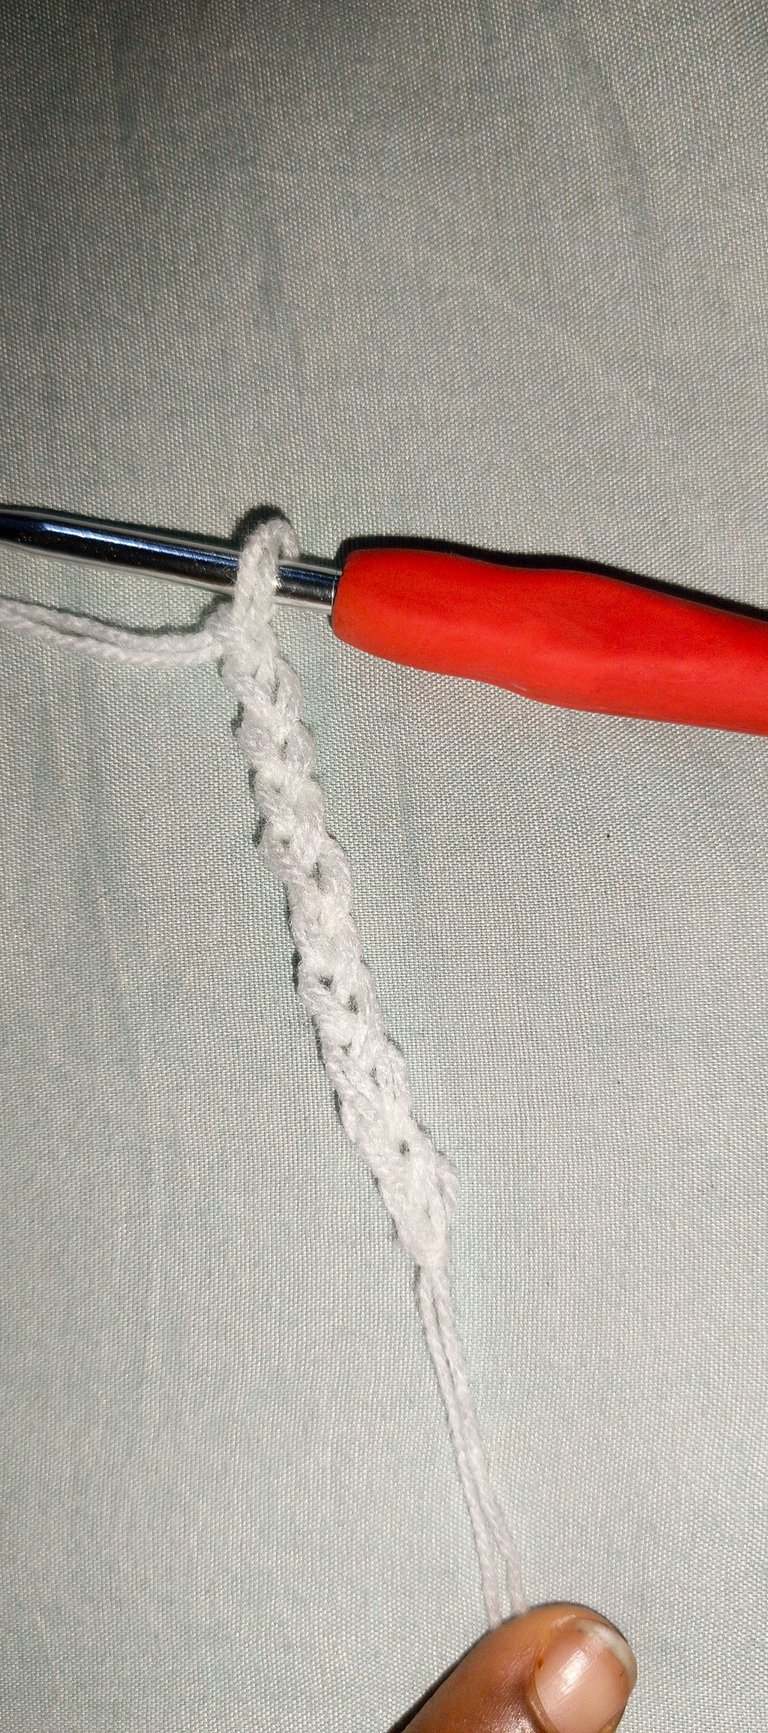
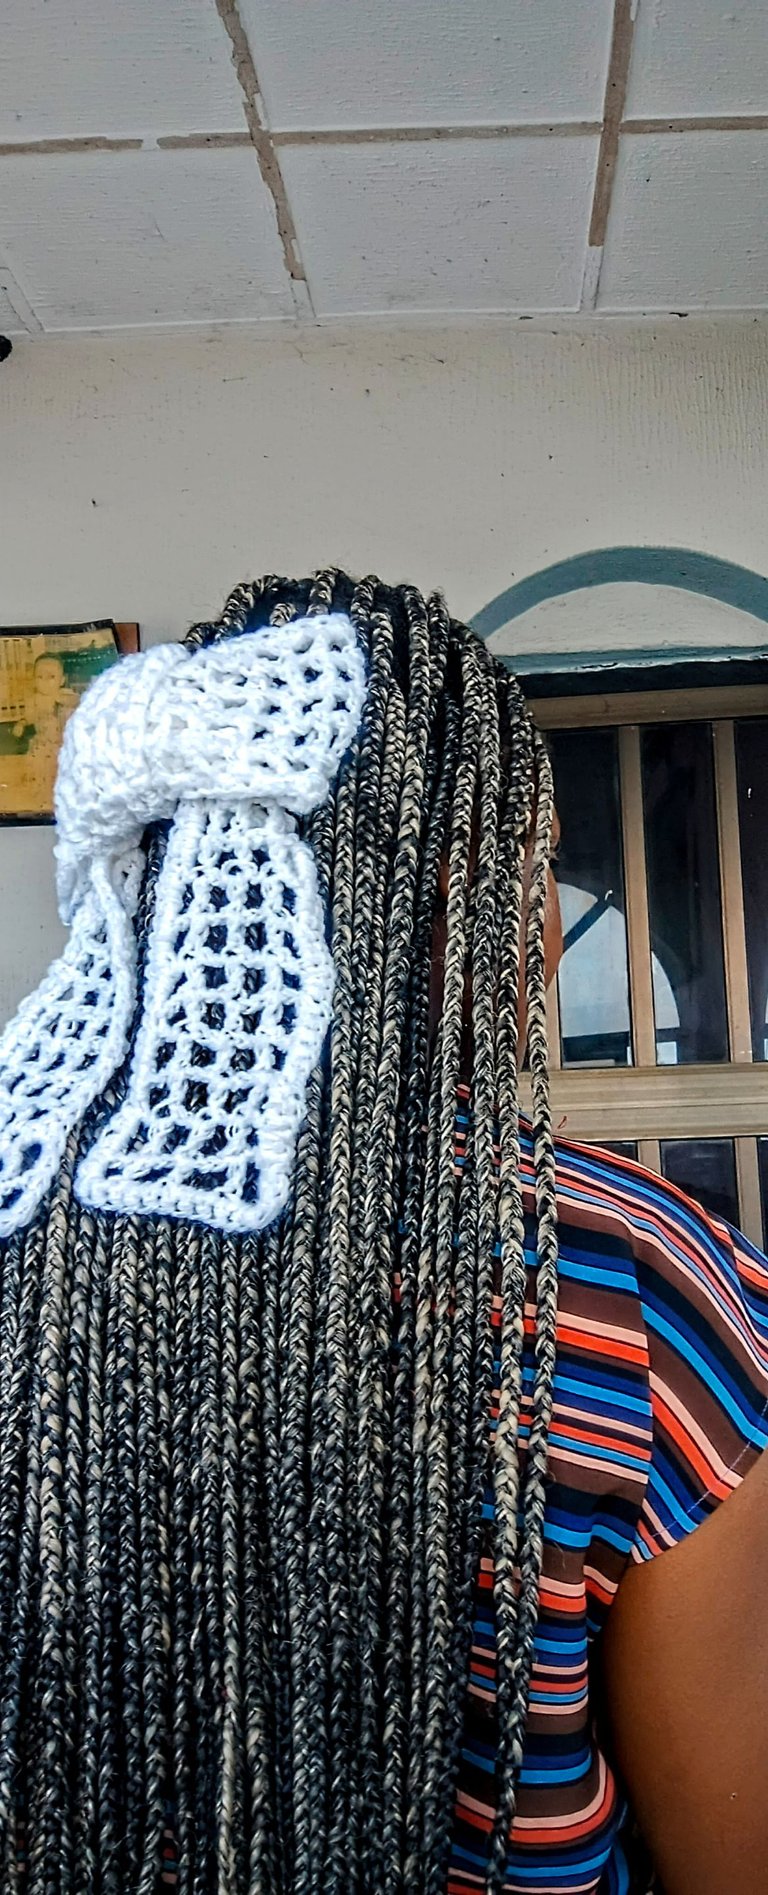
To make this bow, I split the process into three. First, the limbs, then the leaf and finally the knot.

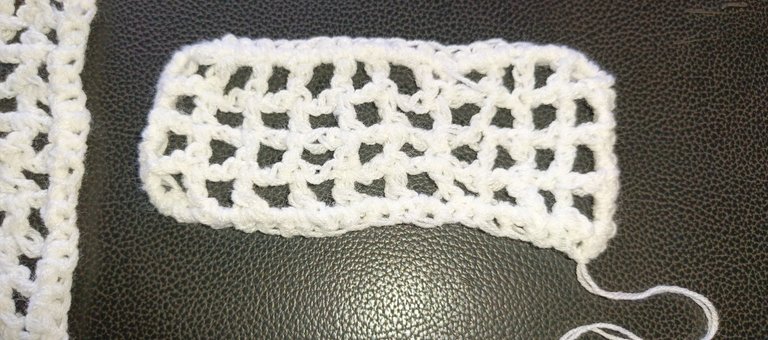
For the limbs, I started by making a chain of ten plus one turning chain. I proceeded to make the first row using half double crochet stitches. To get the mesh pattern, I skipped one chain and into the next chain I made one double crochet stitch.
Next, I made a chain of two, skipped one space again and inserted a double crochet stitch into the very next space. I repeated this pattern till I got a total of twenty-eight rows of mesh crochet stitches. It is worthy to note that at the end of every row, I made a chain of three instead of two, turned my work and continued the pattern.
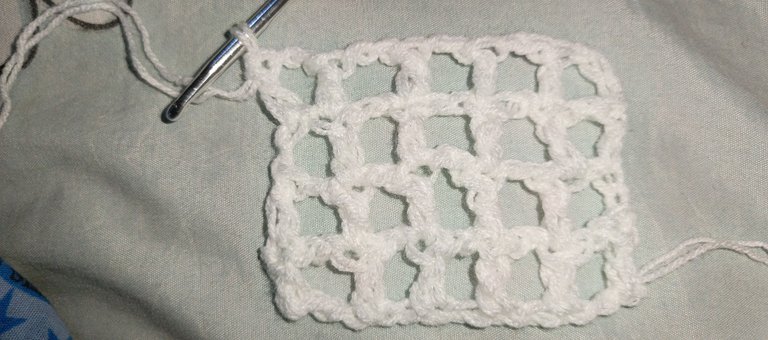
For the leaf, I repeated the same pattern but chained twelve in contrast to the ten starting chains I made for the limbs. For the leaves, I made yet another twenty-eight rows of mesh crochet stitches.
To give both the limb and the leaf more defined looks, I went all around with single crochet stitches. This is the reason for the fuzzy edges. It is also advisable to leave long strands of yarn at the end to aid the coupling later on.
The last piece I made was the knot. I made a total of four rows by fourteen. This means, I started by making fourteen chains and repeated the mesh pattern for four rows. In the end, the four rows seemed really wide for the project so if you're following this exact pattern, I would advise you to make three rows to enable the leaf curve properly.
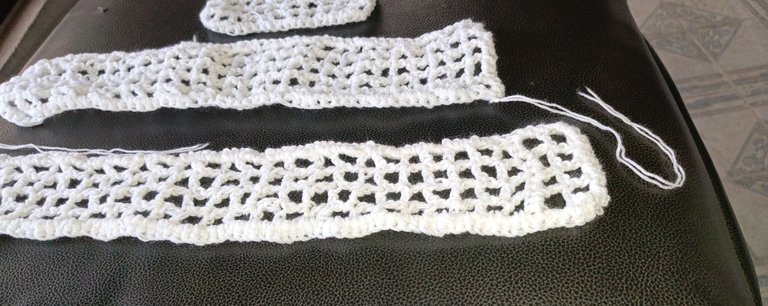
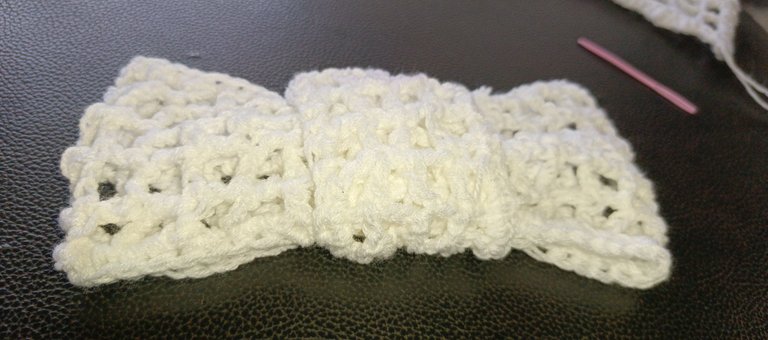
The last thing I did was couple the parts together. I started by attaching both ends of the leaf to form a rectangle. Then, I joined both ends of the knot using a darning needle. One can also choose to use single crochet stitches for this purpose.
The final component I added were the limbs. I slipped it in behind and fastened it in place using a loose strand. With that, I was pretty much done with the mesh bow.
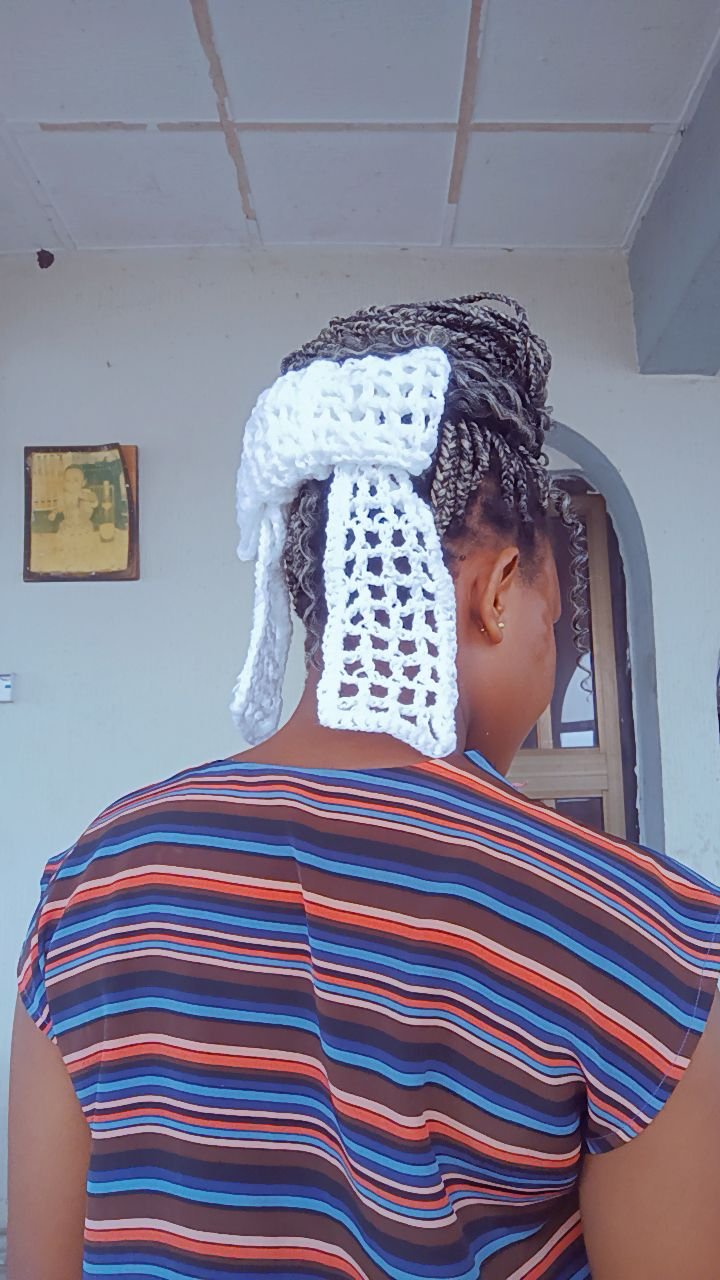
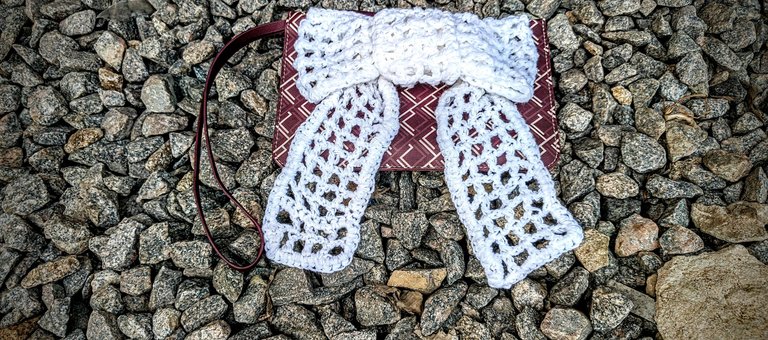
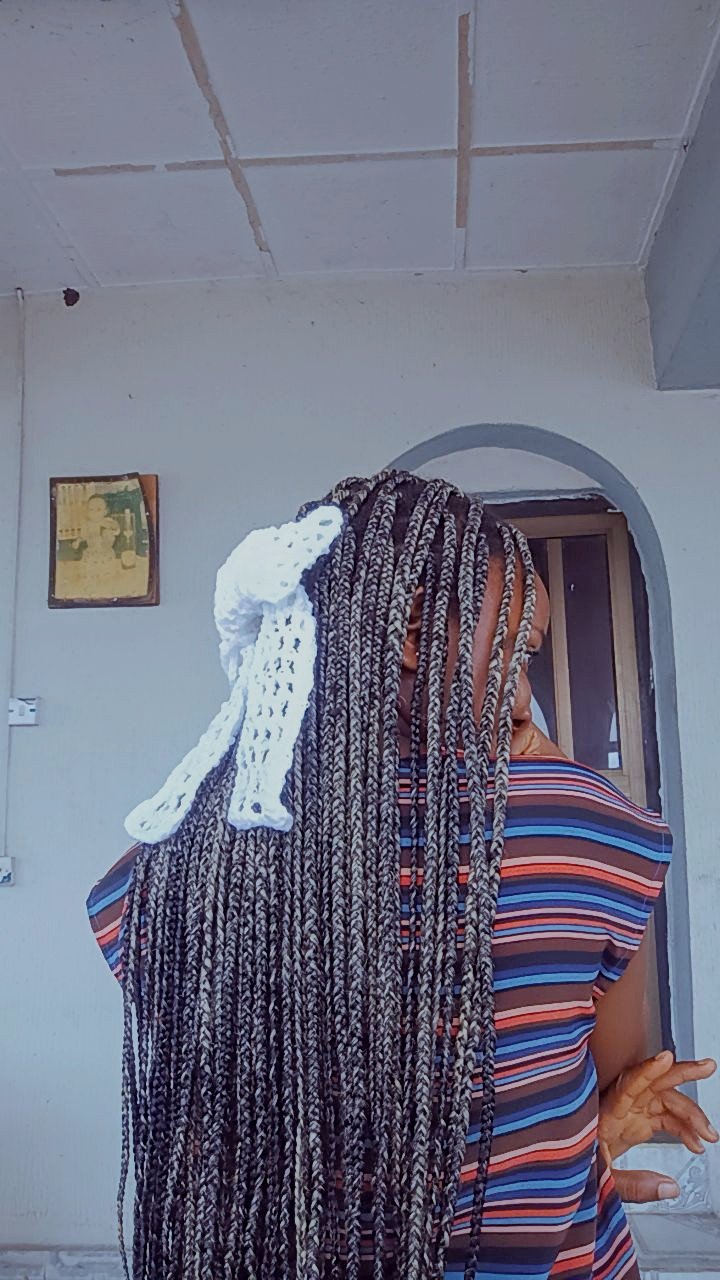
I call it multifunctional because it can be used to accessorize just about anything ranging from the braids, to bags, to clothes, you name it. I'm really pleased with how this bow came out and I may eventually get to make it in some more colours.
Thumbnail made with canva.
Images are mine.
LIEBE🤍
Posted Using INLEO


