Saludos amigos que me visitan.
Bienvenidos a este mi espacio.
Hoy les quiero compartir un fácil tutorial realizado también con materiales económicos y reusables.
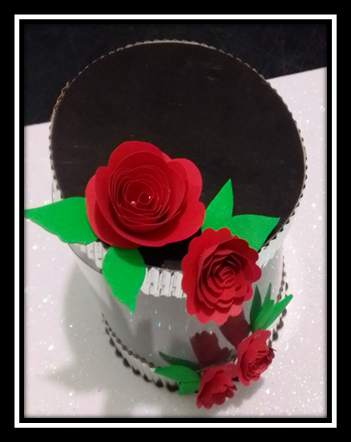
Les enseñaré como se hace y decora una caja, está especial para obsequiar un detalle el día de las madres.
Empecemos ya!
Greetings friends who visit me.
Welcome to this my space.
Today I want to share with you an easy tutorial also made with inexpensive and reusable materials.
I will show you how to make and decorate a box, it is special to give a gift on Mother's Day.
Let's start now!
Materiales/Materials:
| Cartulina metalizada | Cartulina roja y negra |
|---|---|
| Botella desechable | Cuchilla o exacto |
| Tijeras | Silicón líquido |
| Foami |
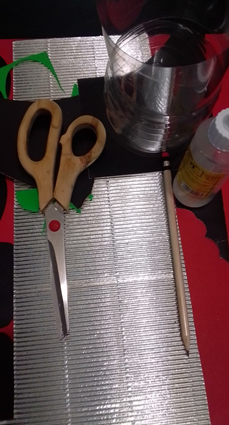
Materials:/Materials:
| Metallic cardboard | Red and black cardboard |
|---|---|
| Disposable bottle | Cutting blade or exacto |
| Scissors | Liquid silicon |
| Foami |
Translated with www.DeepL.com/Translator (free version)
- Recortar la parte lisa de la botella.
- Sacar el cilindro.
- Colocarlo sobre la cartulina y marcar todo el borde.
- Recortar el círculo con tijera de ondas 4 ó 5 milímetros por el
lado de afuera.
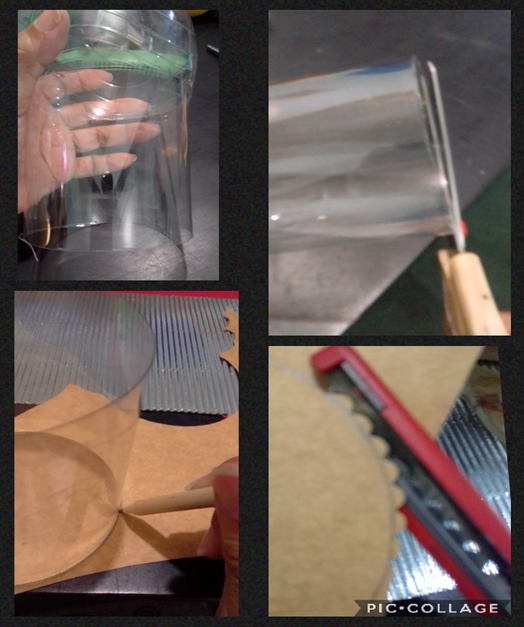
- Cut off the smooth part of the bottle.
- Remove the cylinder.
- Place it on the cardboard and mark the entire edge.
- Cut out the circle with wave scissors 4 or 5 millimeters on the
outside.
- Aplicar silicón por todo el borde del cilindro.
- Pegar al círculo recortado de cartulina.
- Medir con cinta métrica la circunferencia del cilindro.
- Marcar y recortar en cartulina metalizada, 2 tiras de 2x 29 cms
c/u.
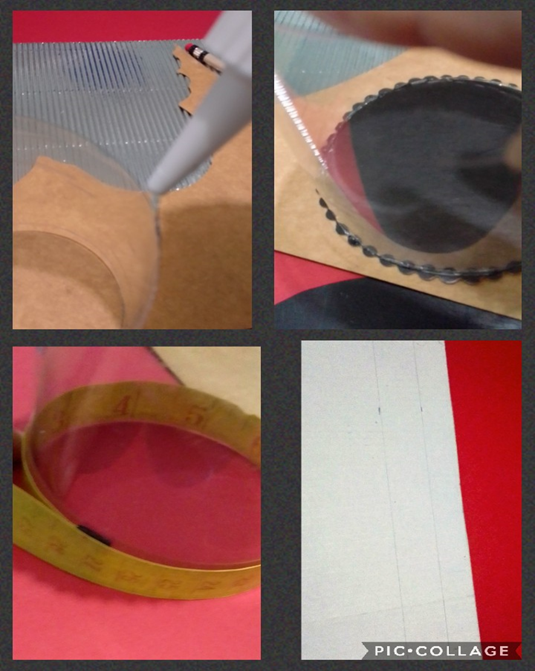
- Apply silicone all around the edge of the cylinder.
- Glue to the circle cut out of cardboard.
- Measure the circumference of the cylinder with a tape measure.
- Mark and cut out 2 strips of 2 x 29 cm each, on metallic cardboard.
each.
- Pegar una tira en la parte de abajo del cilindro donde se fijó a la cartulina.
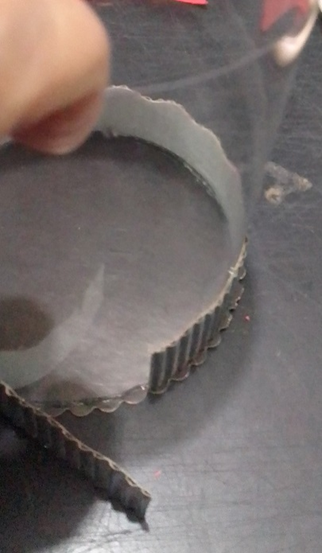
- Glue a strip to the bottom of the cylinder where it was attached to the cardboard.
- Nuevamente marcar en cartulina y recortar el círculo que será la tapa de la caja.
- Pegar la otra tira de cartulina metalizada al borde de la tapa
y cerrar.
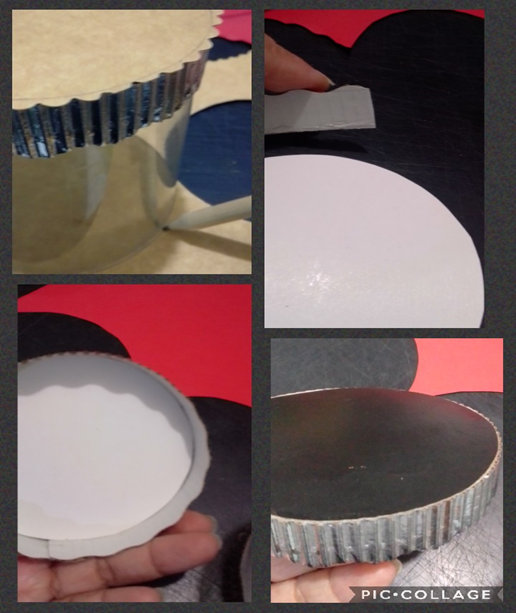
- Again mark on cardboard and cut out the circle that will be the lid of the box.
- Glue the other strip of metallic cardboard to the edge of the lid and close.
- Recortar varios círculos en cartulina roja y con tijera de ondas dar forma de caracol.
- Aplicar silicón en la punta externa y enrollar hasta formar la flor.
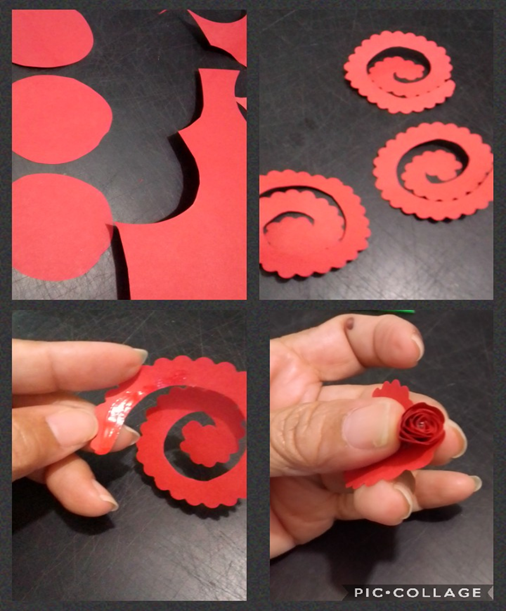
- Cut out several circles in red cardboard and shape them into snail shapes with wave scissors.
- Apply silicone to the outer tip and roll up to form the flower.
- Al terminar de enrollar la flor aplicar silicón en el círculo del medio y hacer presión hasta que pegue.
- Pegar las rosas en la tapa y en la parte de abajo de la caja para decorar.
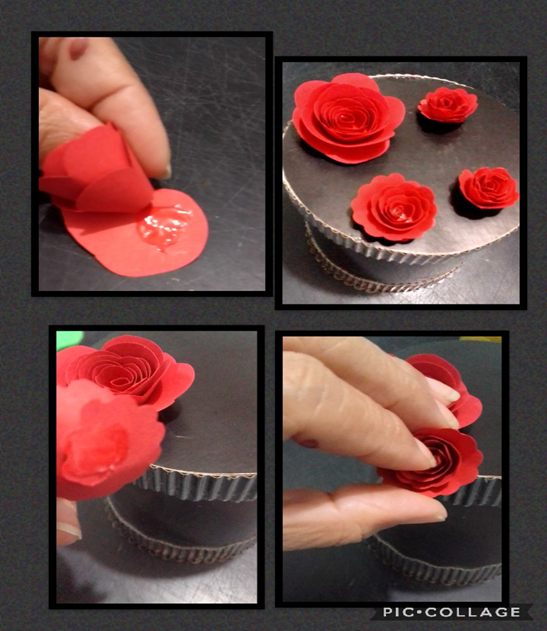
- When you finish rolling the flower, apply silicone to the middle circle and press until it sticks.
- Glue the roses on the lid and on the bottom of the box to decorate.
- Recortar en foami (Goma eva) y pegar una hojas para acompañar las rosas dando un toque de naturalidad.
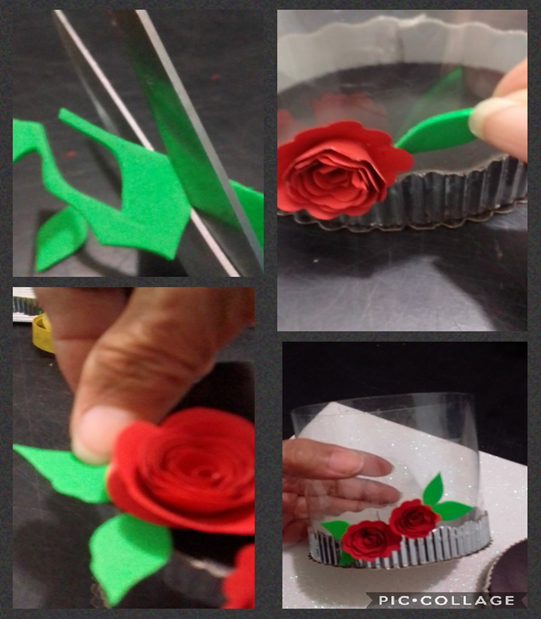
- Cut out in foami (eva rubber) and glue a leaf to go with the roses giving a touch of naturalness.
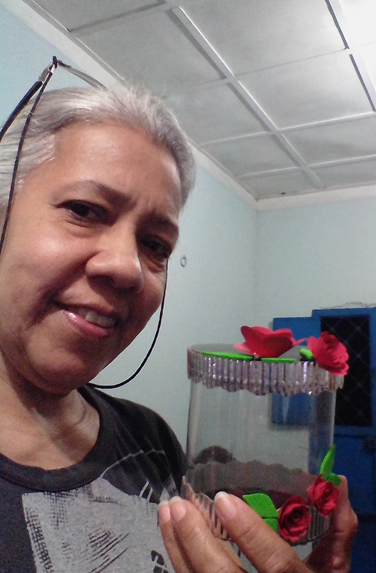
- Así quedó esta linda cajita.
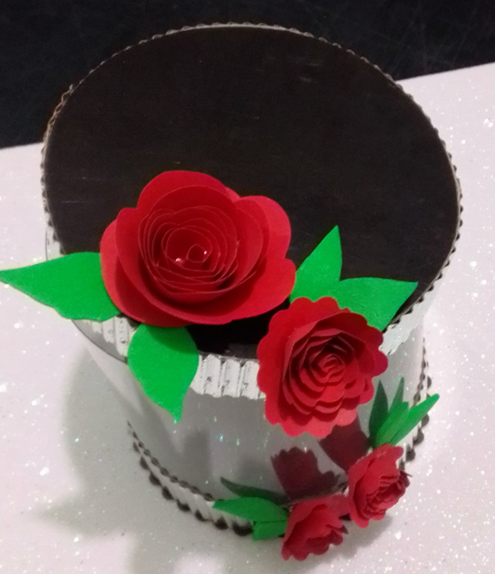
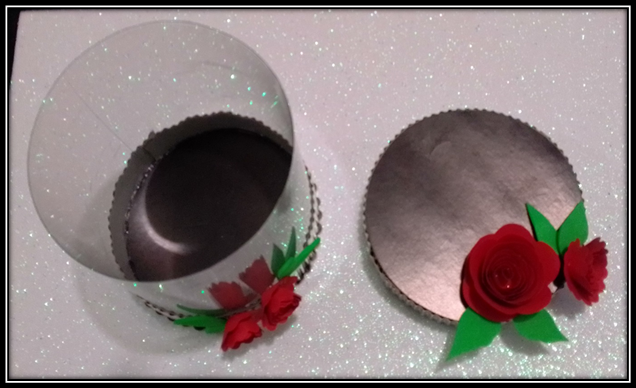
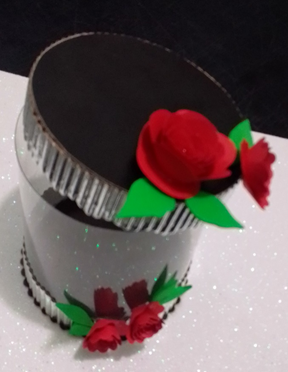
Es muy agradable para mí, crear y enseñar a realizar manualidades a las que le pueden sacar provecho, al igual que yo aprendo también mirando sus publicaciones...y me encantaría que me apoyaran y dejaran sus comentarios y así conocer de ustedes...
Espero mi publicación sea del agrado de muchos!
Gracias a todos.
Fotos tomadas por mi teléfono Blu 5G.
Traductor/ www.DeepL.com/Translator
Etiquetas de HTML.
It is very nice for me to create and teach you how to make crafts that you can take advantage of, just as I also learn by looking at your publications ... and I would love to support me and leave your comments and thus know about you ....
I hope my publication will be liked by many!
Thanks to all of you.
Photos taken by my Blu 5G phone.
Translator/ www.DeepL.com/Translator
HTML tags.