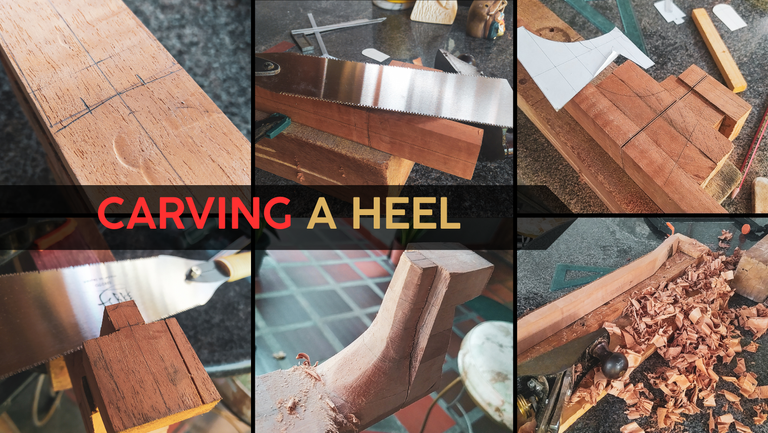

We're to start the toughest part of this project, the neck. Last time, we saw how the heel was made of some blocks of wood. Now, it's time to give it shape and some cuts. If you missed the previous entry, you can check it out here.
Let's jump to it!
Lines and cuts
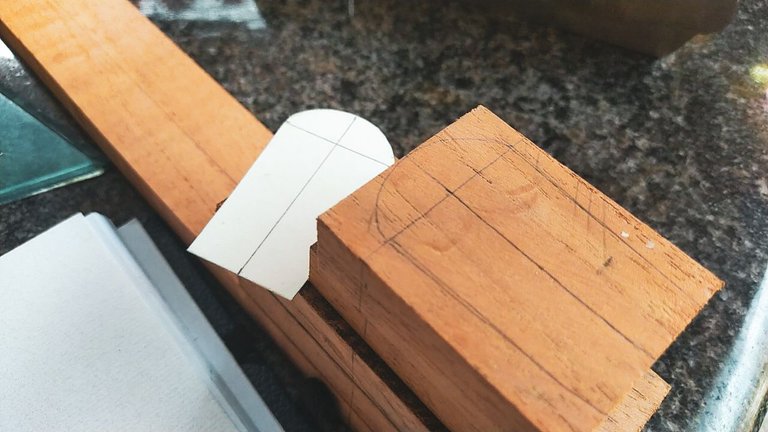
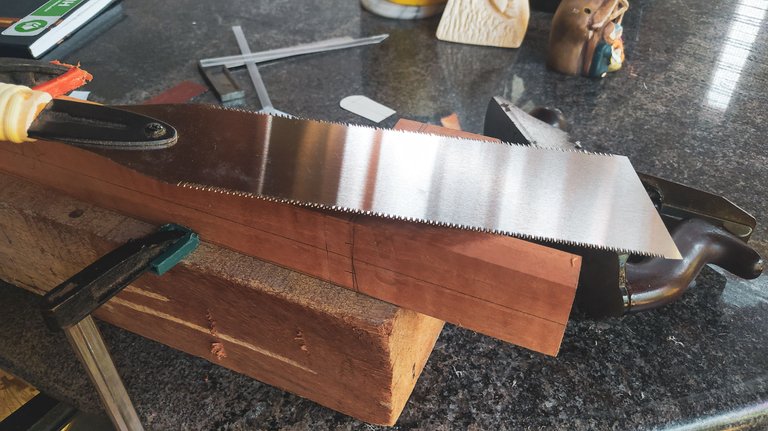
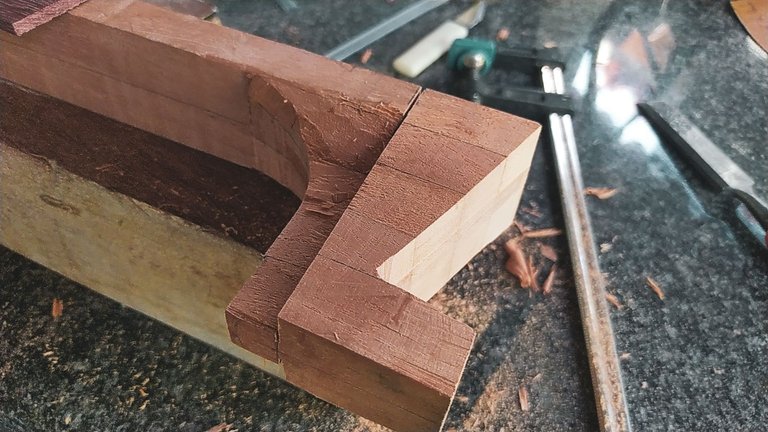
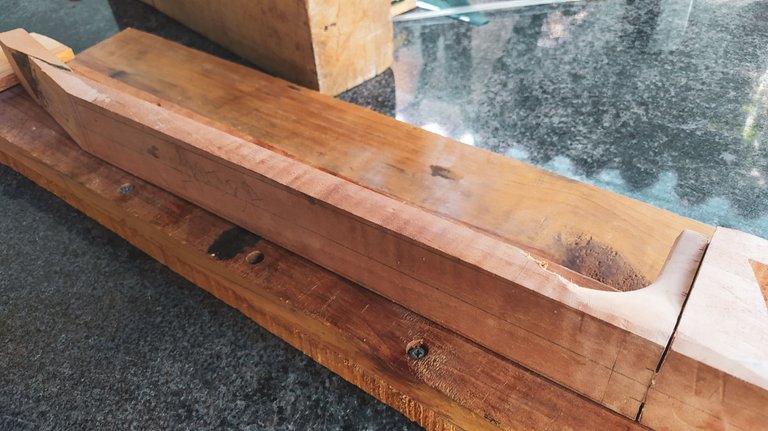
The first order of business is to mark the lines for cuts and shape of the heel. The final shape is going to be different from this drawing but this is the template I have available for the moment. The tough thing to do here is to get the cut for the sides in place. This is basically the socket to put the sides in place. So part of the symmetry of this work needs to be perfect, unless there's a special thing to do.
There's different methods to get these sockets done. One of the interesting ones is the Romanillos. In this technique, you make bigger sockets and use some wood wedges to push the sides in place. I've tried this before, but it requires having some spare material that I usually don't have.
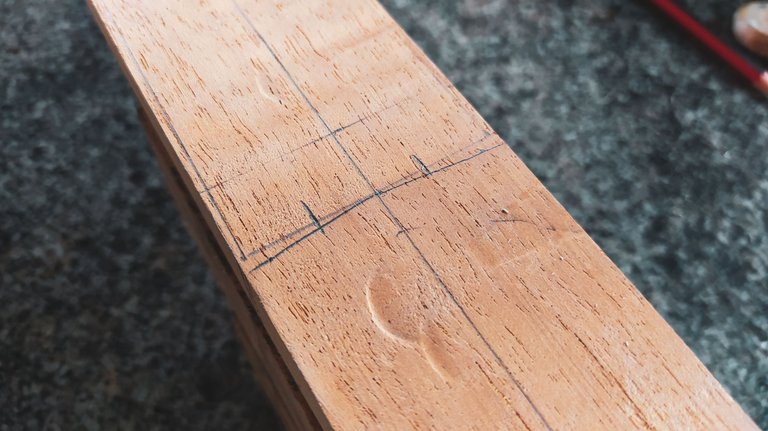
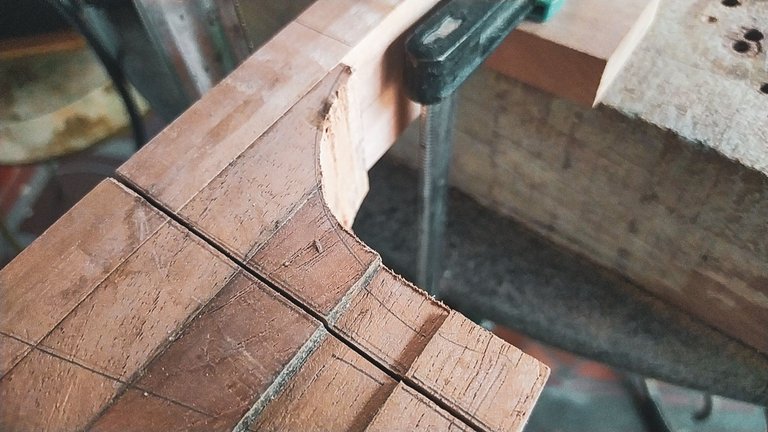
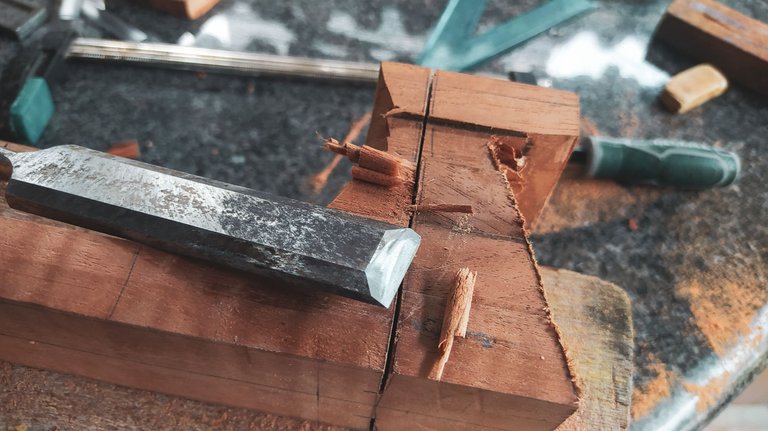
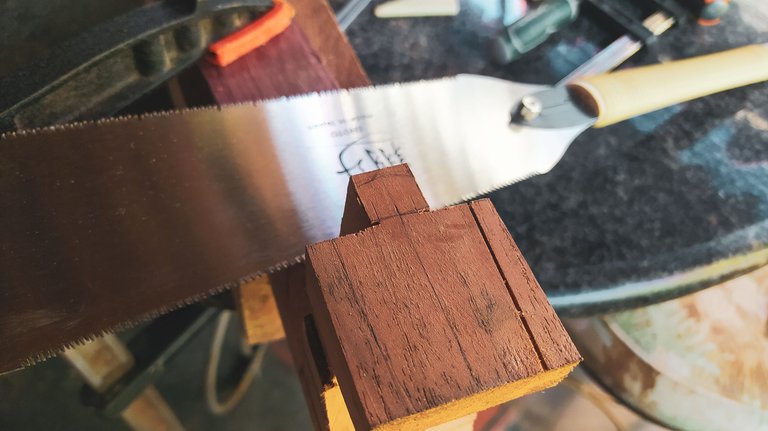
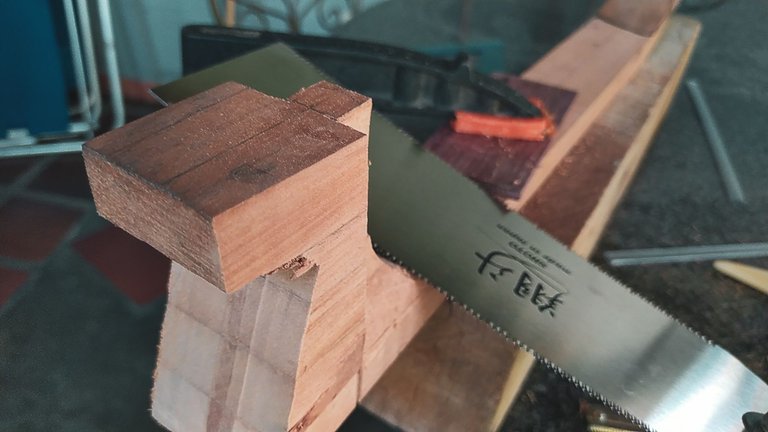
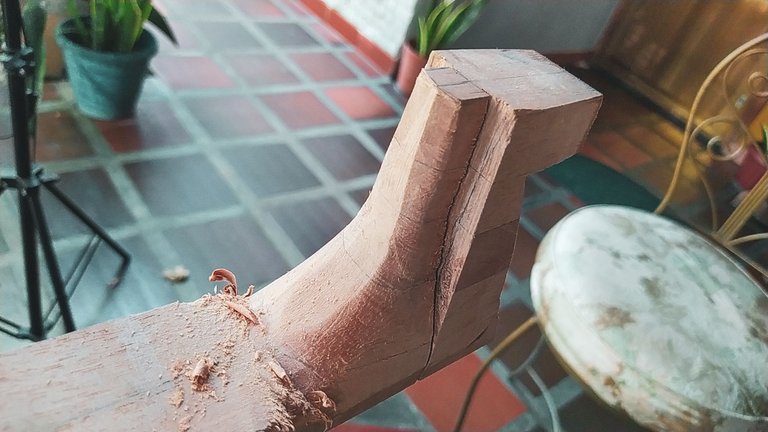
For this instrument, I went on with the traditional Spanish heel. This means the width of the socket is the kerf of the saw. So, once I need to thickness the sides, I'll need the end of them to be around this width. And of course, we use all the tricks in the book. To keep the cut straight, we start a little on each end and them make the marks meet in the middle. As you can see, the sockets are wider on the front and narrower in the back. This also requires to be extra careful. As the space between both sockets in the back is 1cm.
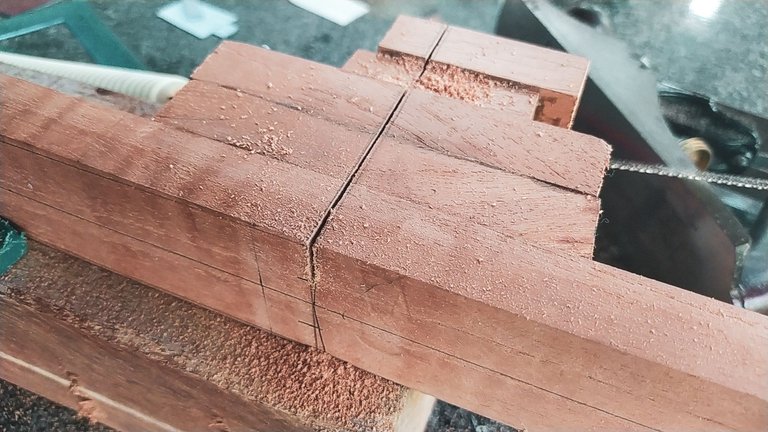
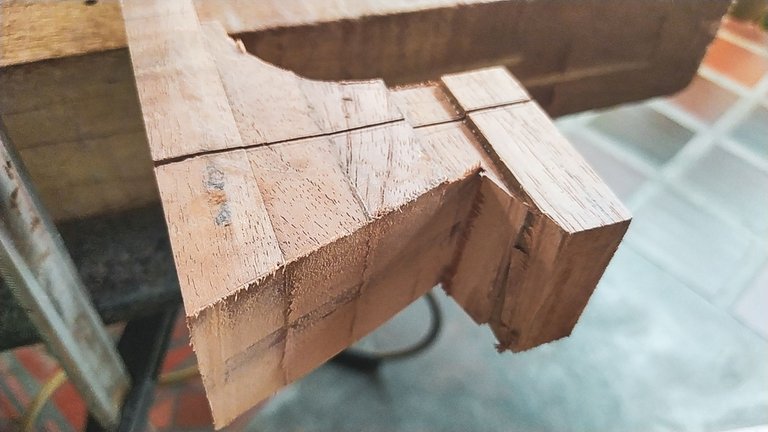
The last bit of shape we need to have is the whole outline of the heel. That includes both the visible part and the internal side.
A whole lot of carving
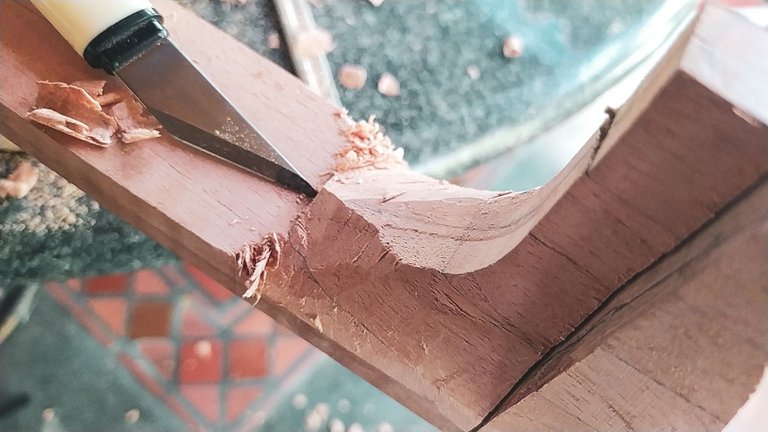
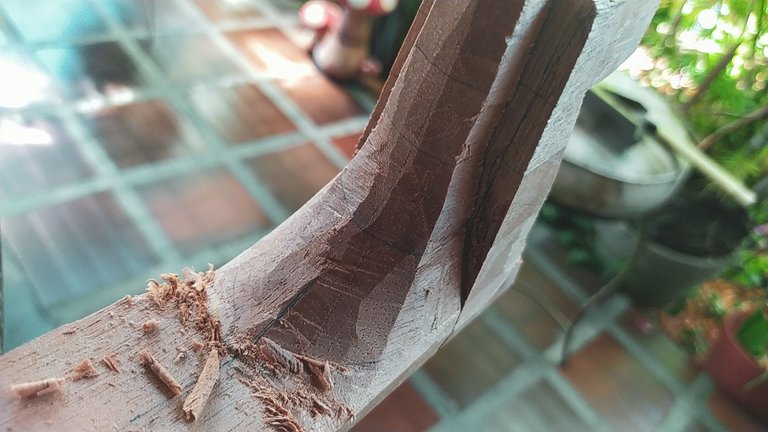
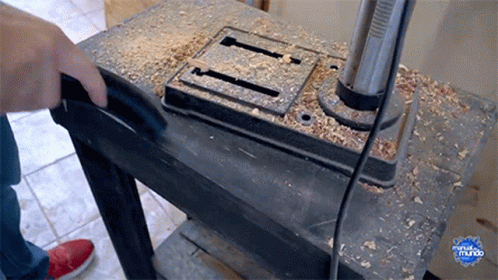
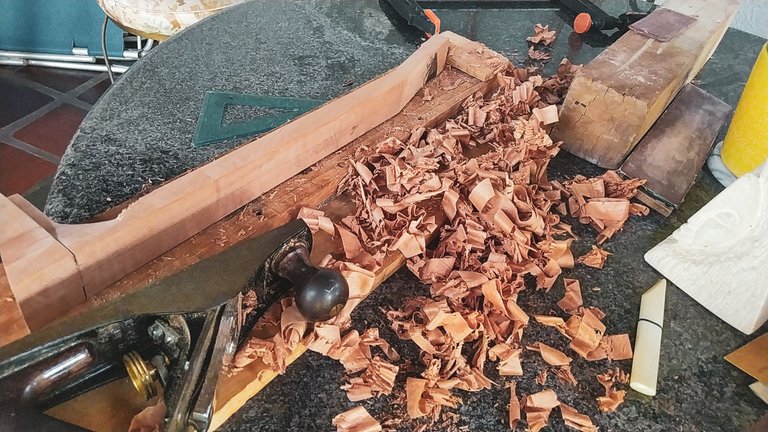
Before we start the longest part of carving in this project, we need to make the cuts for the shape of the heel. We use an electric jigsaw to get this done quickly. You'll see a lot of rough edges until we get to the last stages of work as carving is the priority and then we move ahead with the finishing.
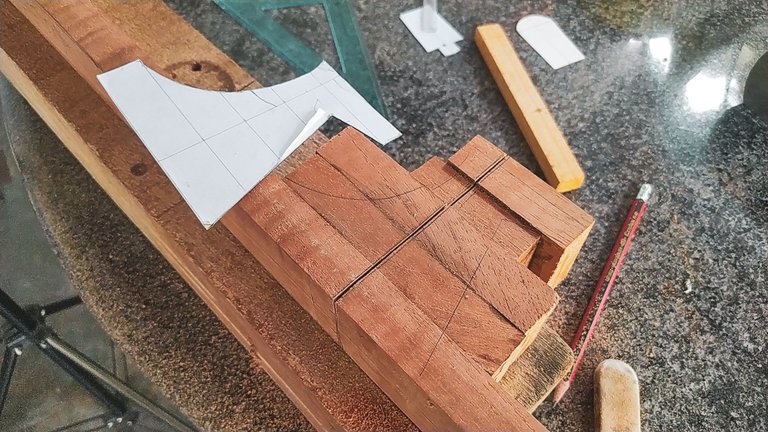
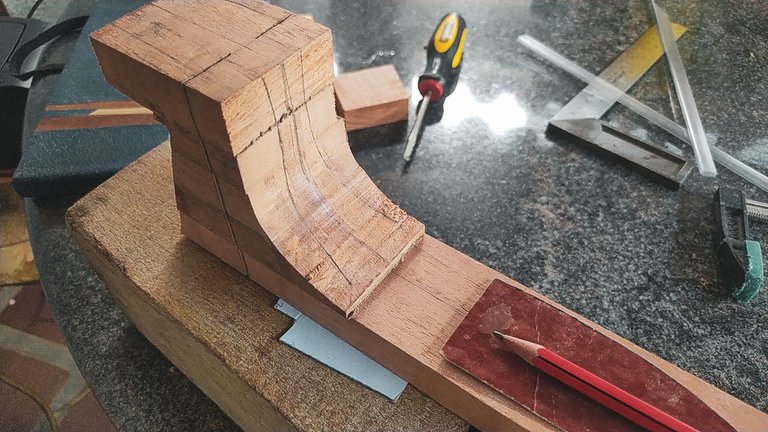
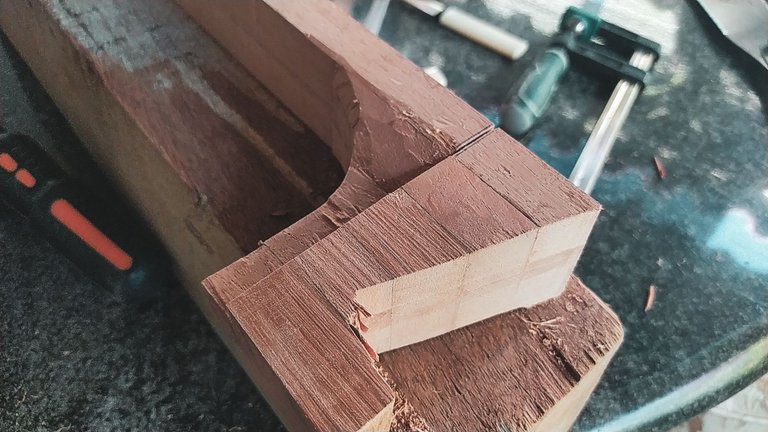
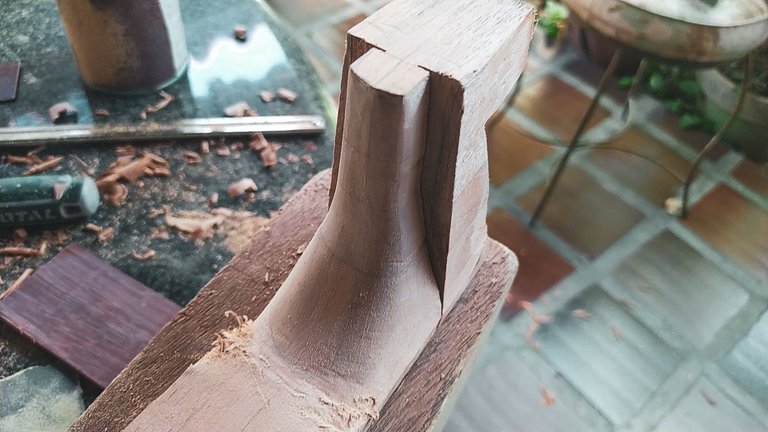
Once we have the rough shape, it's time to mark another outline to know how much to carve. Think of it as the heel of a shoe. But think about high heels. That's the kind of shape we're looking to get. So, we need to start removing material carefully. If you wonder why this comes after the other part, it's because we need to give wood some rest from stress. So, and that because we can't do this hard jobs on freshly dried glue. Otherwise, we'll break something.
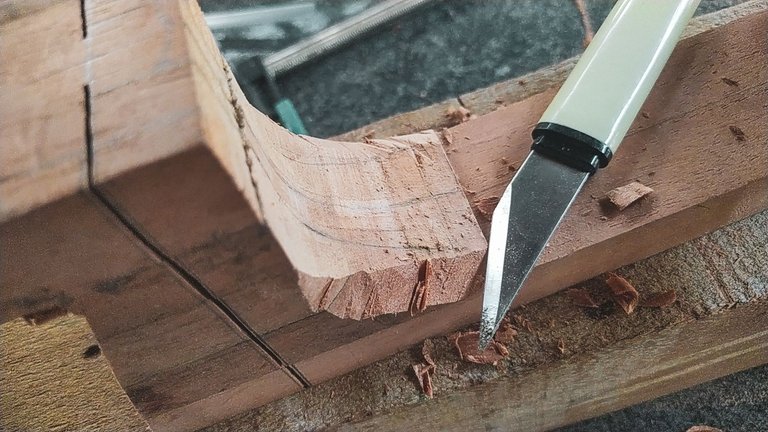
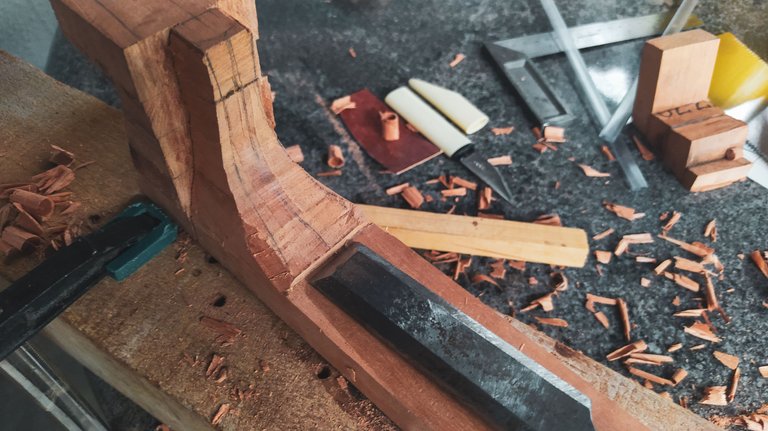
It's all a thing of cutting some corners and remove the material according to the outline. This gives us a more refined shape and it will also remove some weight from the whole instrument once it's all together. And as you can see, there are several tools involved in this process. The most important once are the knife and chisel. With these we can remove the material in small portions and get the shape close to it's final form.
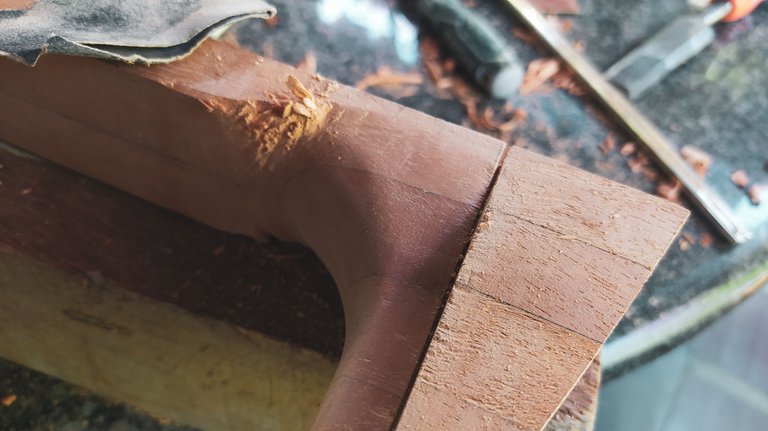
The whole carving process ends with some sanding on the upper part of the heel. And with this we can move ahead to the next section.
Working ahead of time
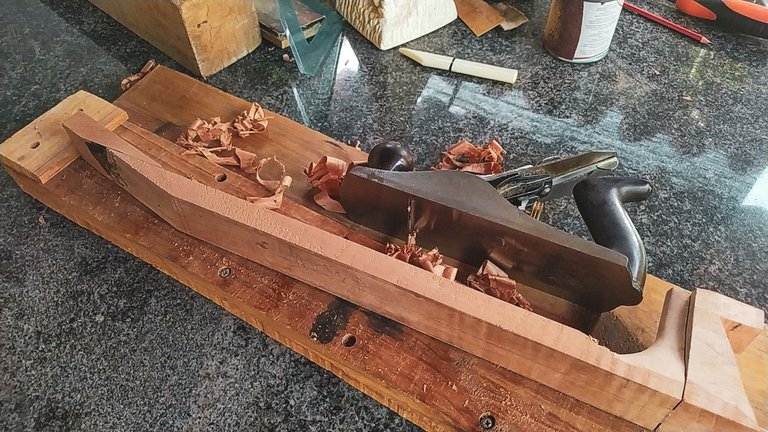
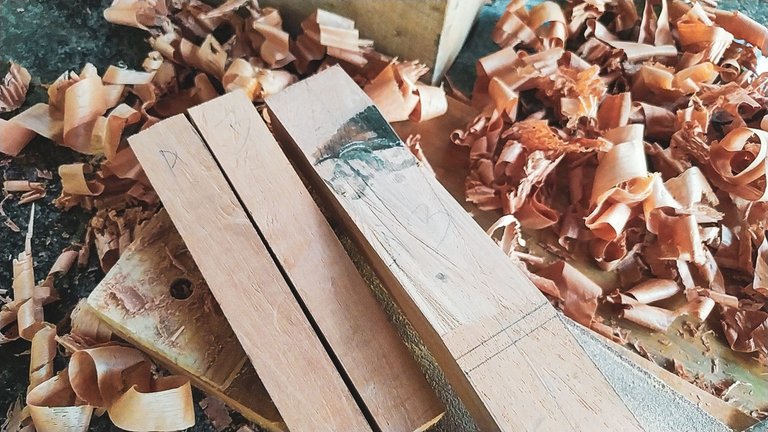
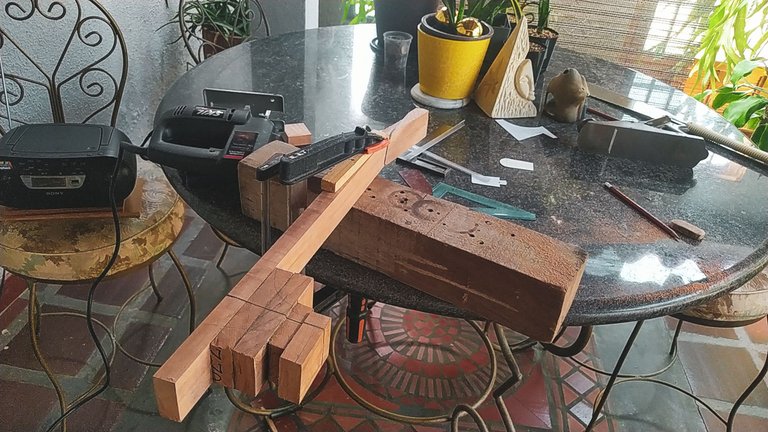
The last bit of work for this time is the conic shape of the neck. With the heel ready we can remove material with the plane following the lines to give the shape to the neck. This serves two purposes. First, we have the width of the neck already done. The second, is to prepare the base of the head stock for the upcoming work.
And on this note, it's time to end this post. Next time, we'll see the whole work on the head stock. Once that is ready, the assembly process will begin.
Thanks for reading!
Tallando el tacón
Estamos por comenzar la parte más ruda del proyecto: el tacón. La última vez que vimos esto, ya teníamos los bloques del tacón pegados. Ahora, es hora de cortar y darle forma. Si te perdiste la publicación anterior, la puedes revisar dando click aquí.
¡Vamos allá!
Cortes y líneas
El primer trabajo por hacer es marcar las líneas para cortar y darle forma al tacón. La forma final se va a ver muy diferente de este dibujo, pero esta es la platilla que tengo disponible por el momento. La parte complicada aquí es hacer los cortes para los aros. Aquí es donde tiene que encajar ambos aros después de doblados. Aquí se mantiene la simetría en el trabajo a menos que el proyecto requiera alguna diferencia en la colocación de estas partes.
Hay varios método para esto. Uno de los más interesantes es el Romanillos. En esta técnica, se hacen cortes más grandes y se rellena el espacio sobrante con una cuña para empujar el aro hacia arriba. Este método me ha servido varias veces, pero solo lo puedes hacer si tienes material de sobra.
Para este instrumento, utilicé la técnica tradicional del tacón español. Esto implica que el ancho de los cortes es el ancho del corte del serrucho. Así que a la hora de trabajar los aros, tiene que tener este grosor para entrar en la ranuras. Para hacerlas, usamos todos los trucos posibles. El primero, es comenzar el corte en ambos extremos y después lograr que estos se junten en el medio. Como pueden ver, las ranuras son más profundas en la parte trasera. Solo hay 1cm entre ambas. Esto requiere mucha precisión para no echar a perder toda la pieza.
Lo último por hacer es marcar la forma del tacón desde una vista lateral. Eso incluye la parte externa y la interna.
A tallar
Antes de comenzar todo el tallado de esta parte, tenemos que hacer un corte siguiendo las líneas que marcamos al final de la sección anterior. Para esto. utilizar una caladora eléctrica nos facilita mucho del trabajo. Por ahora, verán muchas superficies sin acabar. Primero, hay que hacer todo el tallado y poco a poco se verán los cambios.
Una vez tenemos una base para trabajar, marcamos todas las líneas necesarias para guíar el tallado. Esto es muy parecido al tacón de un zapato. Pero de un zapato de tacón alto. Esa es la forma que estamos tratando de sacar. Todo comienza removiendo material con mucho cuidado y manteniéndose en los márgenes. Esta parte siempre hace mucho después de pegar los bloques del tacón porque el pegamento no puede soportar tanto estrés justo después de que se seca. Algo se rompería.
Todo el trabajo se resume en rebajar un poco del tacón con cada pasada y no salirse de la línea. Así la figura sigue tomando mejor forma y además nos permite remover más peso del instrumento. Como pueden ver, hay varias herramientas involucradas en este proceso. Las más importantes son el cuchillo y el formón. Con estas podemos remover un poco de material por pasada y asegurarnos de mantener la forma.
Todo el tallado acaba con una buena tanda de lijado en la parte superior del tacón. Con esto, podemos avanzar.
The whole carving process ends with some sanding on the upper part of the heel. And with this we can move ahead to the next section.
Adelantando trabajo
La última parte de esta publicación es sobre la forma cónica del mástil. Ahora que el tacón está tallado, podemos remover material de los lados del mástil para darle el ancho que debe tener. Esto lo hacemos con el cepillo y siguiendo las líneas dibujadas en la pieza. La idea es lograr dos cosas. Primero, trabajar el ancho del mástil. La segunda, es comenzar a darle forma a la base del clavijero.
En esta última nota es momento de terminar con esta publicación. En la próxima, veremos todos el trabajo del clavijero. Una vez eso esté listo, comenzaremos a armar el instrumento.
¡Gracias por leer!
Fotos/Photos 📷: taken by me (Redmi Note 8)
Portada/Thumbnail 🖼️: by me, created with Canva.
Edición/Editing 🎬: by me, made with Adobe Photoshop Lightroom.

Follow me on Instagram for enquires and commission.
If you'd like to help the workshop grow, you can make a donation here. You can find me at discord as bertrayo#1763