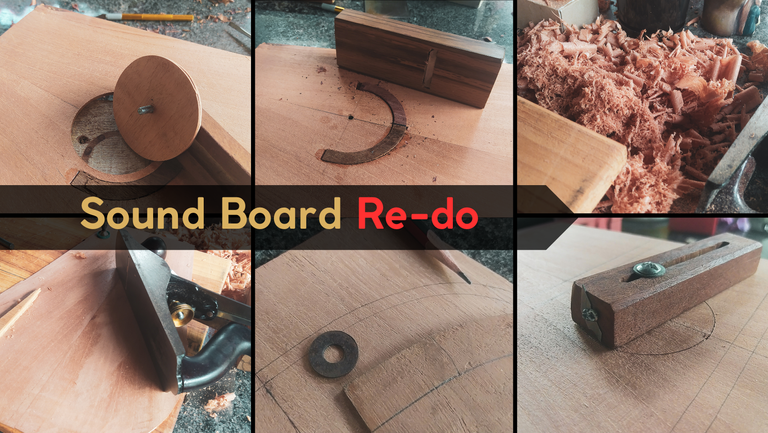

Sometimes things don't go as planned, and we need to start over. An important part of the learning process in any craft and field of knowledge is room for error and re-do's. Today, I want to show you what happened to the rosette attempt of my previous entry.
Let's get to it.
Aftermath
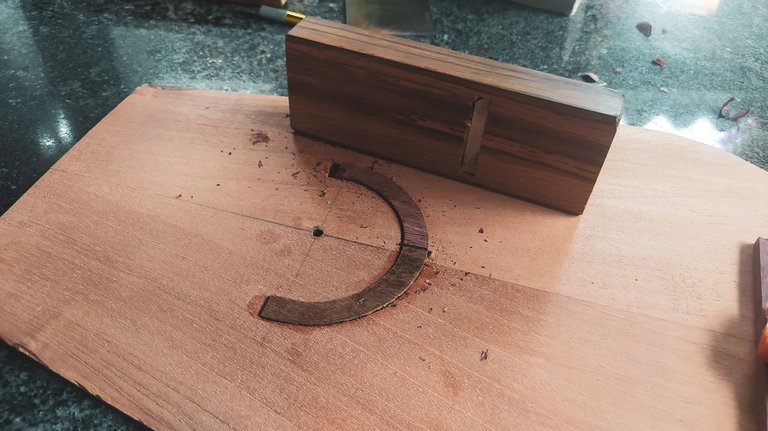


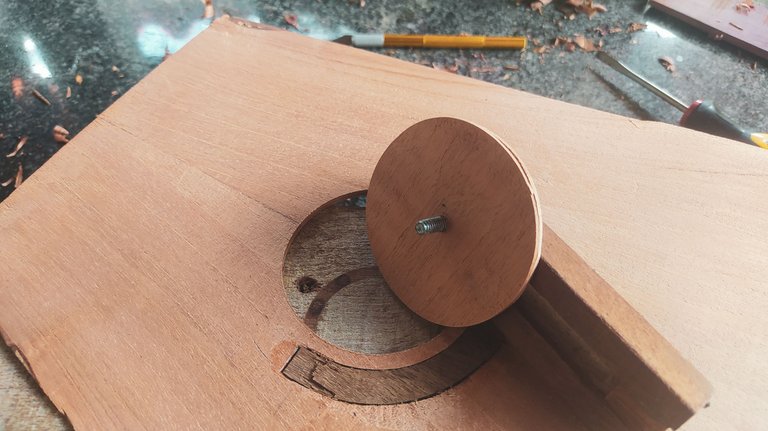
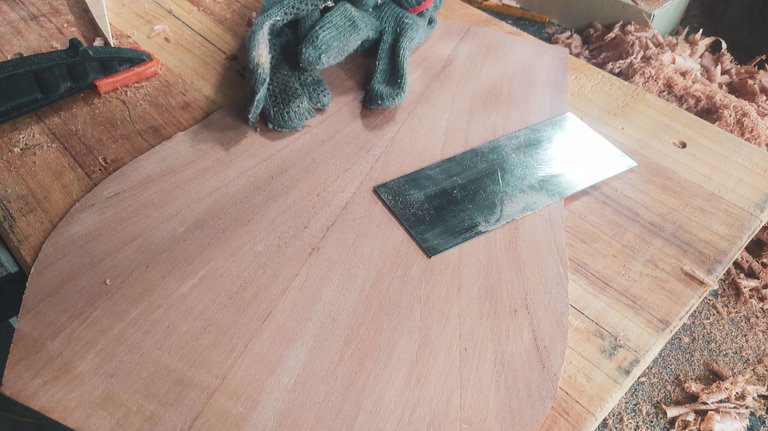
It wasn't until the sound hole part that I noticed some of the sound board was warped around the rosette. This happened during the glue-up and it was one of the overlaying fears of this project. I reckon the mistake was gluing the reinforcement before the rosette. If I had done it the other way around, all this thing would have had a different outcome. Regardless of this, I didn't like the result. However, this sound board joins the collection of mistakes so I don't repeat them.
Screwing projects is part of the whole learning process in the craft. Sometimes, I go back to my first days and was afraid I wasn't making enough mistakes. Well, wood is expensive and I have broken some pieces, but I bet it could be worse.
Nonetheless, I have another sound board blank to start over. No rosette this time.
New Sound Board


This was a sound board blank I made with some of the remaining wood from a plank I bought at the beginning of last year. Buying wood like that certainly gives a ton of material to work.
Since it is already glued, we just need to work on the thickness of the board and then we can move up to the drawing and other jobs.
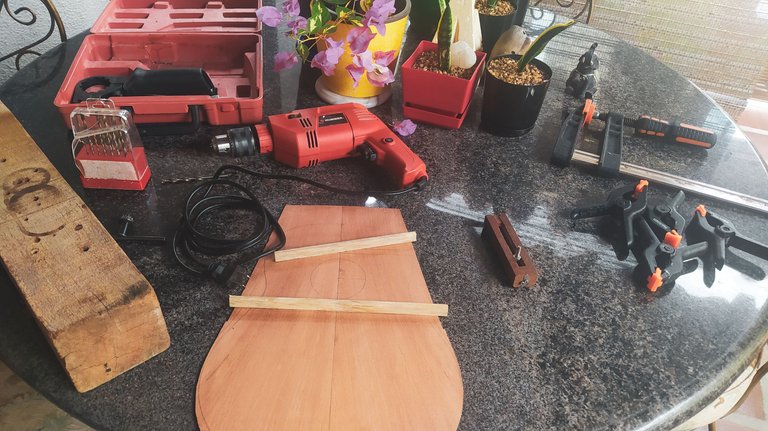
This was a special shaving work since I'm using a new plane. It is a Stanley Bailey #4. I found it online. It was a bit rusty, but after a restoration I got it making some amazing shavings. The best part is that it is a plane made in England which ensure some level of quality. Hopefully, this plane will help me make a lot of instrument and other woodworking gigs.
Drawing and Sound Hole

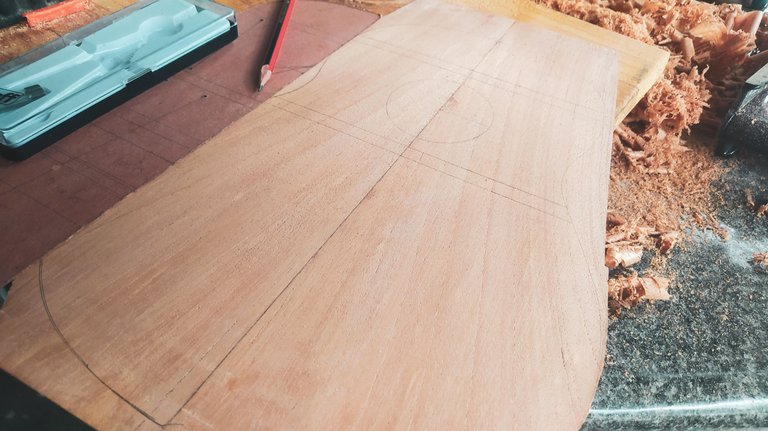
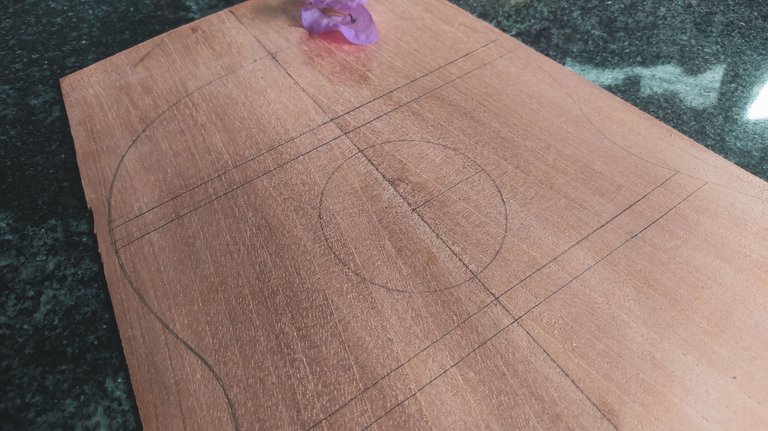
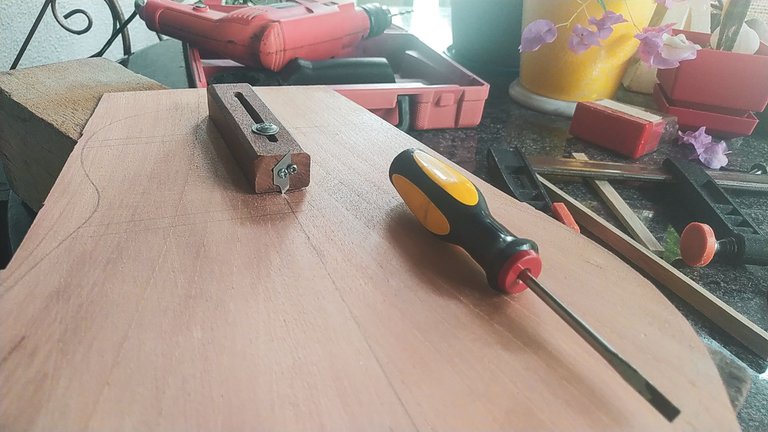


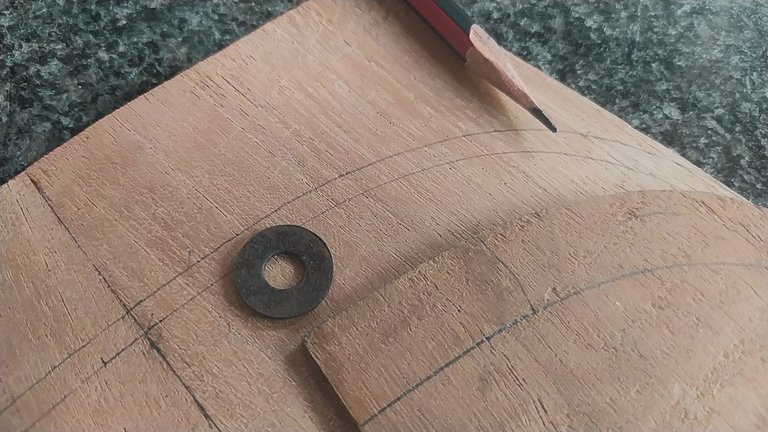
With the thickness out of the way, we can start making a new drawing with the template. No rosette this time. I think I'll use other ornaments since making that one is really tough for the moment.
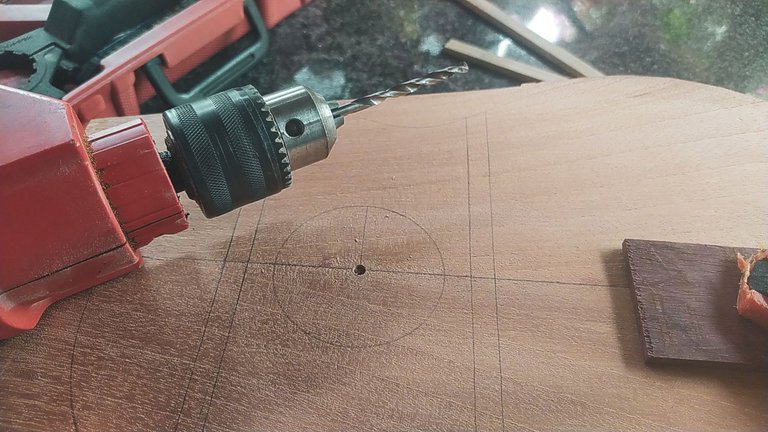
I found also a better way to make the cuts for the sound hole. I had some blades made for circle cutters stashed in my room. I had totally forgotten about them. They work better than the other ones I was using as they aren't so thin that they'll break with harder woods.
Having started over this sound board, we are now back in track to keep steady progress on this project.
Next step, reinforcements on this top and then we can start with the neck!
Until next time, thanks for reading!
Reiniciar la Tapa Armónica
A veces los proyectos no cumplen con nuestas expectativas y tenemos que empezar algo otra vez. Algo importante sobre aprender un oficio o disciplina es tener espacio para equivocarse. Hoy, les quiero mostrar algo de eso. Esto fue lo que pasó con la roseta que estaba haciendo en la publicación anterior.
¡Vamos allá!
Resultados
No fue hasta que estaba recortando la boca en esta tapa armónica que me di cuenta de que estaba doblada cerca de la roseta. Esto seguro ocurrió durante el pegado y fue porque coloqué el refuerzo antes de colocar la roseta. Quizá si hubiera invertido los pasos, el resultado hubiese cambiado. No obstante, esta pieza para a la colección de errores que no se pueden repetir.
Echar a peder los trabajos es parte de el proceso de aprendizaje del oficio. Cuando me acuerdo de mis primeros proyectos, siempre recuerdo que los errores han sido pocos. Eso a veces me preocupa. La madera es un material costoso y aunque he roto algunas piezas, creo que siempre podría ser peor.
Sin embargo, por ahí tengo otra tapa armónica para empezar de nuevo. Sin roseta en esta ocasión.
Tapa Armónica Nueva
Esta tapa armónica es la última de un tablón de cedro que compré a principios del año pasado. Comprar madera de esta manera te da un montón de material para trabajar.
Como ya está pegada, hay que rebajarla un poco para ir a lo importante.
Este rebaje es especial porque estoy estrenando un cepillo nuevo. Es un modelo Bailey #4 de Stanley. Lo encontré en línea. Estaba un poco oxidado, pero nada que una buena restauración no arregle. Ya está sacando virutas sin problemas. La mejor parte es que es un cepillo original hecho en Inglaterra. Esto ya me asegura que va a durar mucho. Seguro me ayudará a hacer varios instrumentos y otros trabajos de carpintería.
Boca y Dibujo
Después de rebajar la tapa armónica a la medida, podemos empezar con el dibujo. No hay roseta en esta ocasión. Creo que utilizaré otro tipo de adornos hasta que considere que puedo hacer aquellas.
Además, encontré una manera más fácil de cortar la boca del instrumento. Por ahí tenía guardadas unas hojillas para cortar círculos. Se me había olvidado que estaban por ahí, pero resulta que funcionan mejor que las que había empleado hasta ahora. No son tan frágiles. Esto es importante porque las puedo usar para cortar maderas más duras sin problemas.
Ahora que reiniciamos el proceso de la tapar armónica, estamos de vuelta en la ruta del progreso con este proyecto.
El próximo paso es reforzar la tapa y comenzar con el mástil.
¡Nos vemos en la siguiente! Gracias por leer.
Fotos/Photos 📷: taken by me (Redmi Note 8)
Portada/Thumbnail 🖼️: by me, created with Canva.
Edición/Editing 🎬: by me, made with Adobe Photoshop Lightroom.

Follow me on Instagram for enquires and commission.
If you'd like to help the workshop grow, you can make a donation here. You can find me at discord as bertrayo#1763