
We are back on this project to start the longest part of the build, figuratively and literally, the neck. In the following posts, we'll see how this piece gets its cuts and additions to have a final form and start the whole assembly process.
Let's jump to it!
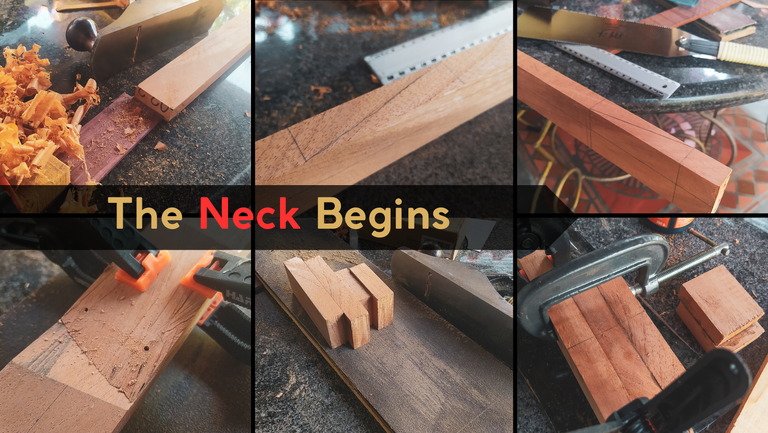
Shaving till even

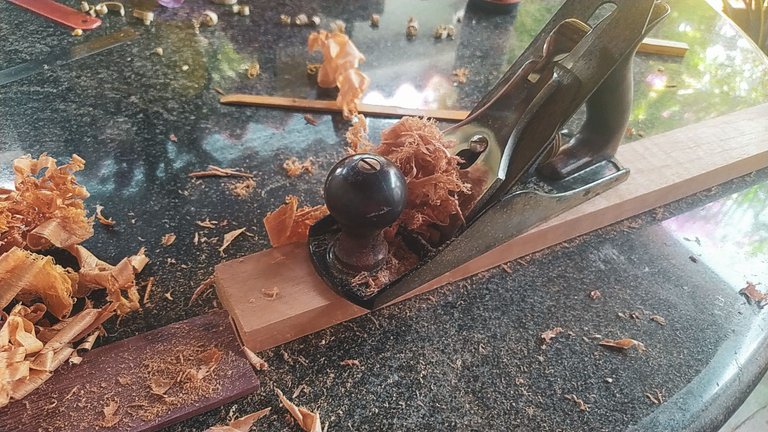


We start with a cedrela blank and the first order of business is to flatten the surface. Pieces like these tend to bend. So, on one side you'll have a groove; on the other, a belly. Both need to be flat since we need to have even surfaces on both parts for the following steps. Fortunately, a number 4 plane is the right tool smooth surfaces. We just need to set of the tool to get thin shavings and work both faces of the blank. But that's not the only part that needs this kind of work, each narrow face needs to be squared up as well.
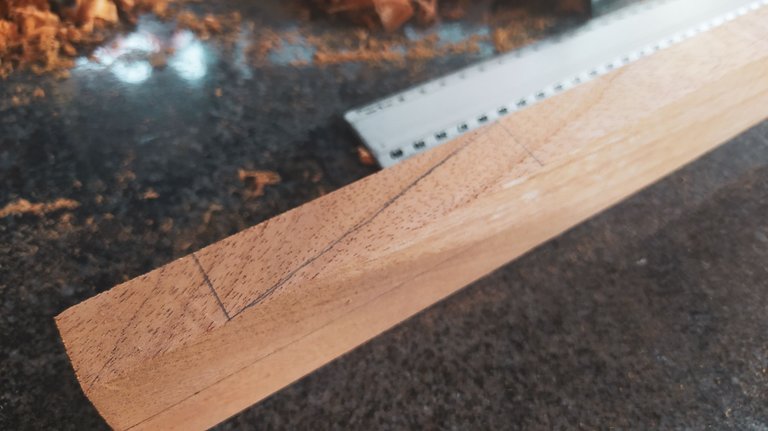
After doing all this work, we need to get to drawing the lines for the center of the piece and the cut for the head stock. On this step we can decide which face we'll leave for the rear of the instrument. The other face will be covered by the fretboard, so we can leave the one we like the least to the front on the instrument.
Head stock cut

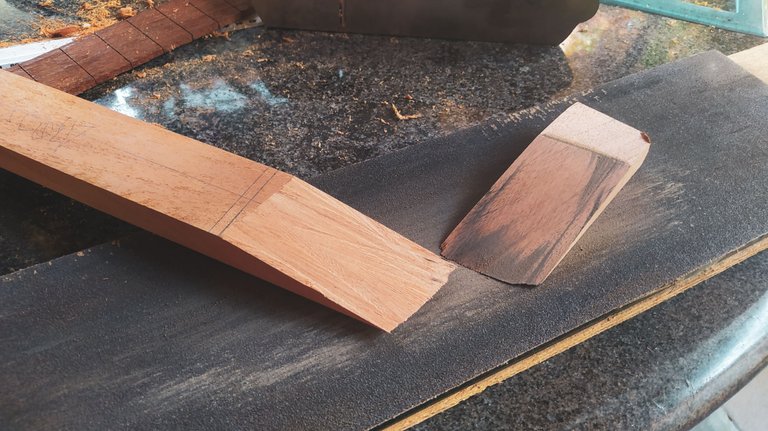


With the marks in place, we can proceed to make the diagonal cut. This usually has an average between 12 and 13 degrees. This can be adjusted according to how much you want to incline the head stock or not. It doesn't need to be a perfect cut since a lot of it can be fixed before gluing the pieces back on its orientation.
So, leaving room for error gives us the chance of fixing any bad cuts with the saw. Once the pieces are cut, we flatten the rough side on the smaller once on sandpaper and can move ahead to the gluing process.
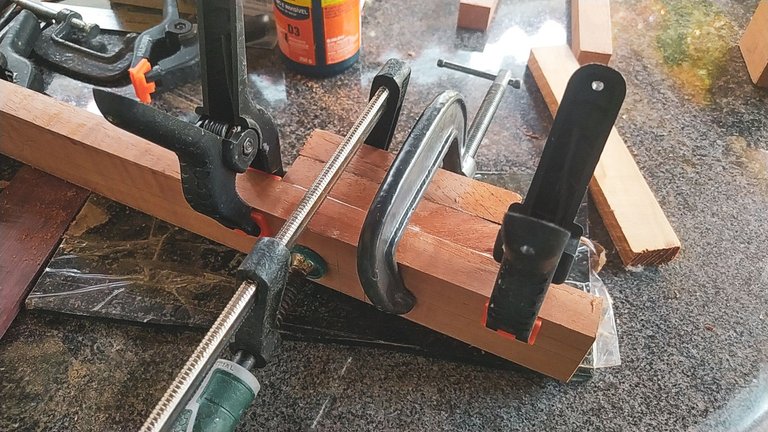
This time, we're going to use some wood anchors to fix the pieces in place and prevent any movement when we apply the glue. For this, we clamp them together, mark the place for some holes, drill them, and then use toothpicks as anchors. It is a technique picked up from some experienced luthiers around web 2. And it works wonders as you only need to apply pressure and the pieces won't move from the marked position.
It's just a matter of letting the glue dry up and we have the base of the head stock ready.
Making a heel
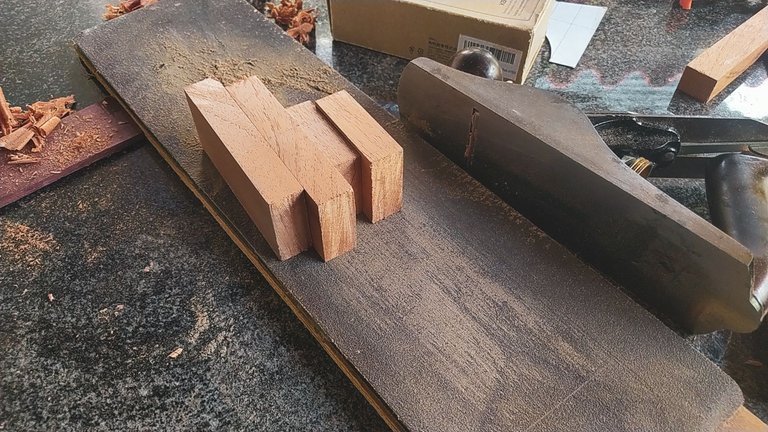


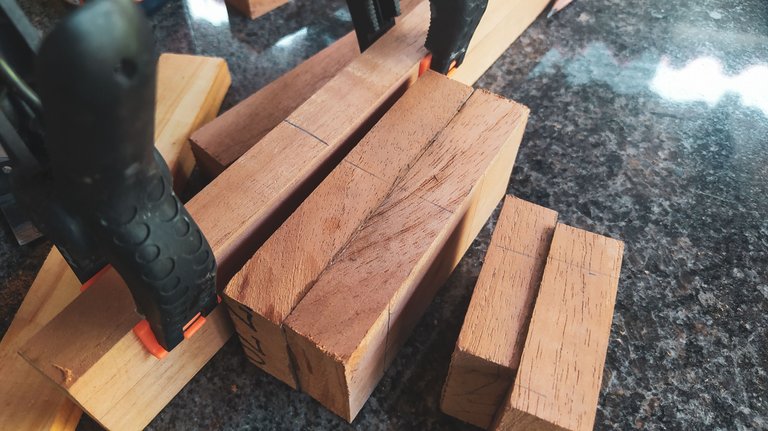
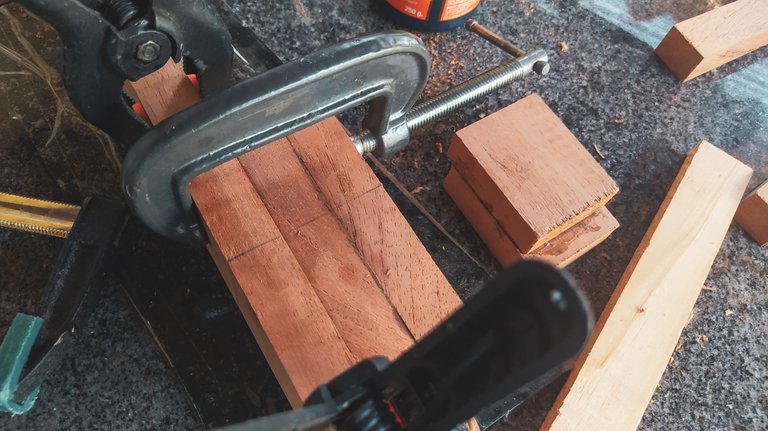

Before working on the rest of the head stock, we need to star making a heel. We have some wood blocks that we need to align and mark with a line to keep track of the alignment. Then we can either glue all of the at once or glue them in pairs and then start adding them to the neck. We're going for the second since it helps preventing having misalignments.
First, we work all the pieces on sandpaper until we remove any uneven parts on the faces that will be glued together. Then, we glue the pairs keeping the lines aligned. Once each pair is ready, they go onto the neck, one pair at a time. It's just a matter of waiting until the glue dries to start carving the heel out and then moving on with the head stock. However, we'll start on those steps next time!
Thanks for reading.
Don't forget to leave a comment if you found this interesting or would like to add anything. I'd be more than happy to reply.
Comenzamos en Mástil
Estamos vuelta con este proyecto para comenar con la parte más larga, literal y metafóricamnete hablando, el mástil. En las publicación que vendrán a continuación, verán todos los cortes y piezas que se añaden para completar esta pieza hasta tenerla completa y comenzar el ensamblado.
¡Vamos allá!
Aplanando las caras
Comenzamos con este listón de cedro criollo y lo primero por hacer es aplanar todas las caras de la pieza. Al tener un listón así, se suele doblar por el movimiento de la fibras de la madera. De un lado, vamos a tener una barriga; del otro, una curva. Al dejar ambas partes planas, nos aseguraremos que todos los cortes y líneas que hagamos sobre la pieza van a estar a escuadra. Las caras angostas son muy importantes porque sobre ellas tenemos que hacer varias líneas de guía. Lo bueno es que el cepillo número 4 es una herramienta para remover poco material. Así que lo ajustamos para sacar una viruta delgada y comenzamos nuestro trabajo.
Después de remover todo ese material, dibujamos las líneas para el corte del clavijero y la línea central del mástil. En este paso, también decidimos cuál es la cara del listón que quedará hacía atrás y será visible. La otra, se tapará con el diapasón. Así que podemos dejar la que nos guste menos de ese lado.
Corte del clavijero
Con nuestras marcas en su lugar, podemos hacer el corte con el serrucho. Aquí tenemos una inclinación entre unos 12 y 13 grados. Esto se puede ajustar de acuerdo a qué tan inclinado se quiera el clavijero. El corte no tiene que ser perfecto. Después se puede ajustar.
Dejar un espacio para los ajustes es importante, por eso la pieza es más larga de lo que necesitamos. Una vez hayamos hecho el corte, podemos aplanar la pieza que tiene marcas de corte y proceder al proceso de pegado.
En esta oportunidad, aplicaremos la técnica de anclajes para evitar que la piezas se muevan una vez tengan pegamento. Para esto, primero fijamos las piezas. Marcamos dónde haremos los agujeros. Hacemos los agujeros con un taladro. Aplicamos el pegament. Utilizamos palillos de dientes como anclas. Aplicamos presión con prensas. Y así evitamos que las piezas se muevan. Esta técnica es muy usada por varios luthiers con experiencia. Y funciona de maravilla para evitar movimientos que puedan arruinar la alineación de las piezas.
Ahora solo dejamos que el pegamento haga su trabajo y tenemos la base del clavijero lista.
Haciendo un tacón
Antes de completar el clavijero, hay que trabajar en el tacón. Para esto, comenzamos con bloques de madera individuales que marcaremos con una línea para acordarnos de la alineación que deben llevar. Luego, se pueden pegar todos la mismo tiempo o hacer por pares y luego pegarlos al mástil. Aquí nos vamos por la segunda opción para evitar que se salgan de la alineación.
Primero, lijamos todas las piezas para que no haya superficies desiguales entre las caras que estarán en contacto. Luego, pegamos los bloques en pares manteniendo la alineación entre ellos. Una vez están listos, podemos pegar cada bloque al mástil sin mucho problema. Dejamos que el pegamento seque bien entre cada instacia y así podemos asegurarnos de mantener la alineación adecuada. Después de que el pegamento seque, podemos comenzar a tallar el tacón y a terminar el clavijero. Sin embargo, ambos procesos quedarán para la próxima entrega.
Gracias por leer.
No olvides dejar cualquier duda o acotación en los comentarios. Estaré encantando de leerte y responder.
Fotos/Photos 📷: taken by me (Redmi Note 8)
Portada/Thumbnail 🖼️: by me, created with Canva.
Edición/Editing 🎬: by me, made with Adobe Photoshop Lightroom.

Follow me on Instagram for enquires and commission.
If you'd like to help the workshop grow, you can make a donation here. You can find me at discord as bertrayo#1763