[ESP-ENG] Beautiful tendril organizer | Hermoso Organizador de Zarcillos

in Hive Diy2 years ago

294901873_550039543572668_5161214427384375811_n (1).png

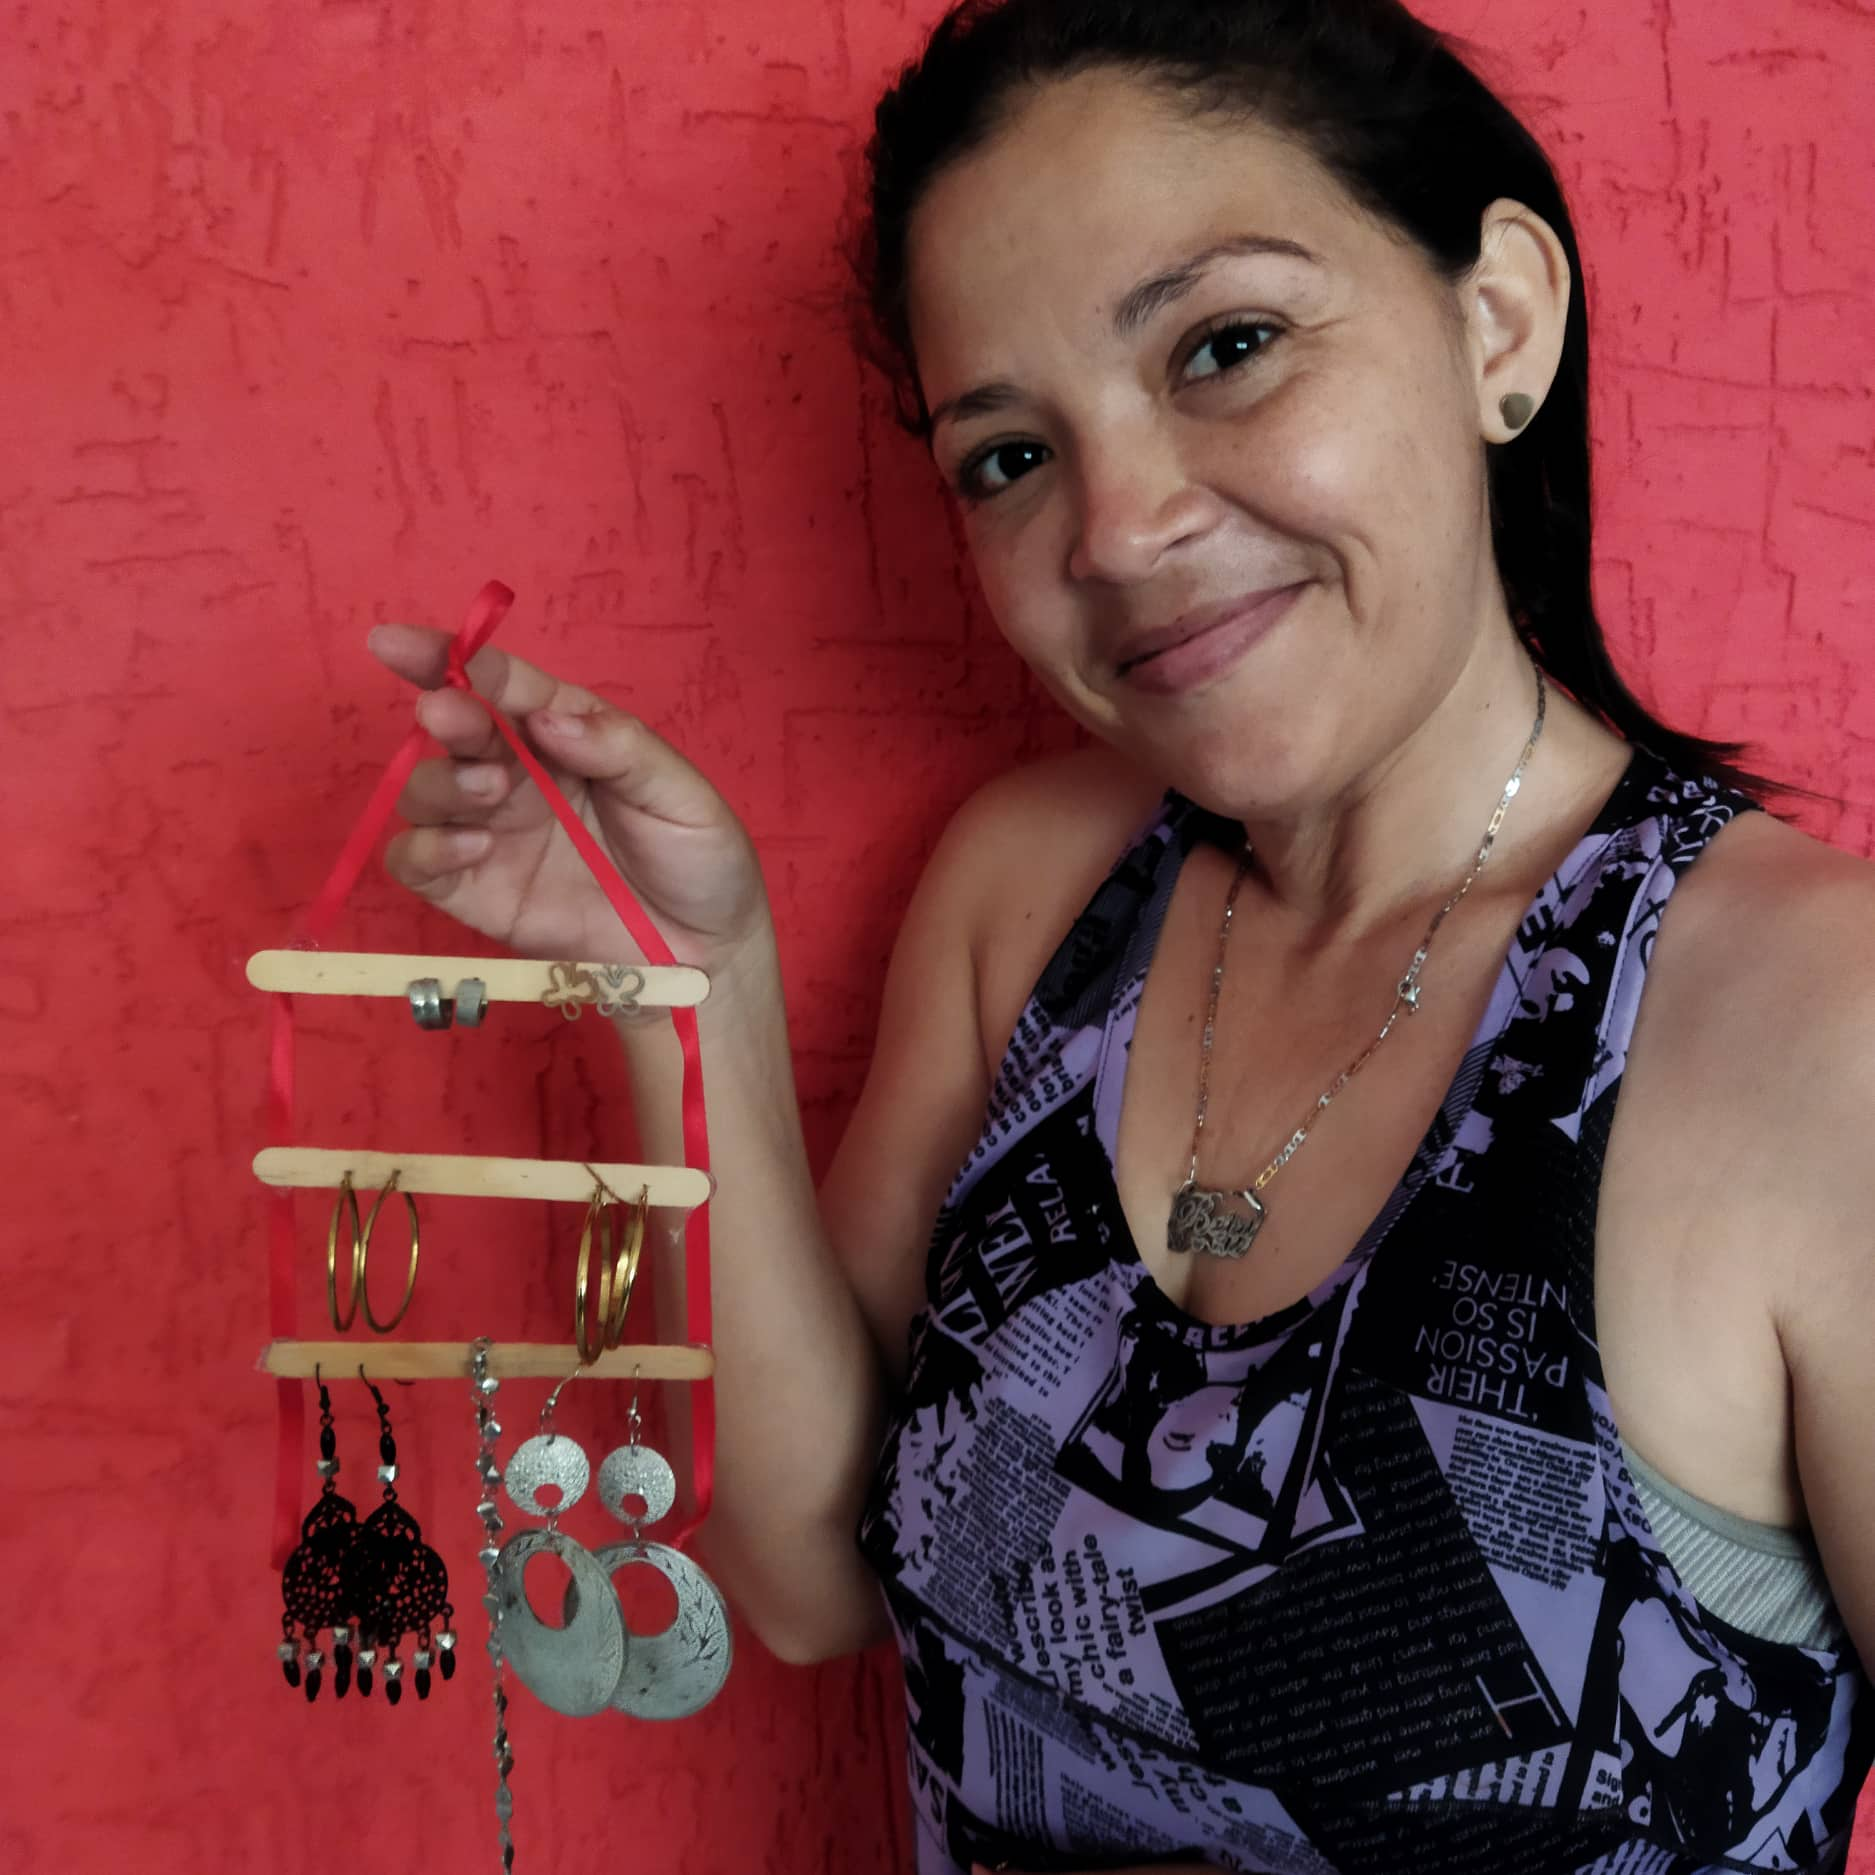
Hola familia de hive, espero que todos se encuentren bien, el día de hoy estoy feliz de poder compartir con todos ustedes cómo realicé un Hermoso organizador de Zarcillos, ésto es necesario ya que a veces se nos pierde uno de nuestros zarcillos y nuestro par de zarcillos queda incompleto, entonces con ésta idea práctica podremos tener nuestros zarcillos organizados y que ninguno de ellos se nos pierda, así que vamos a ver el paso a paso.

Hi hive family, I hope everyone is well, today I am happy to share with you all how I made a beautiful tendril organizer, this is necessary because sometimes we lose one of our tendrils and our pair of tendrils is incomplete, then with this practical idea we can have our tendrils organized and that none of them is lost, so let's see the step by step.

290955761_376703664446720_7282532516395952112_n.png

295225163_1213426826074664_9054987060458013225_n.png

Español:

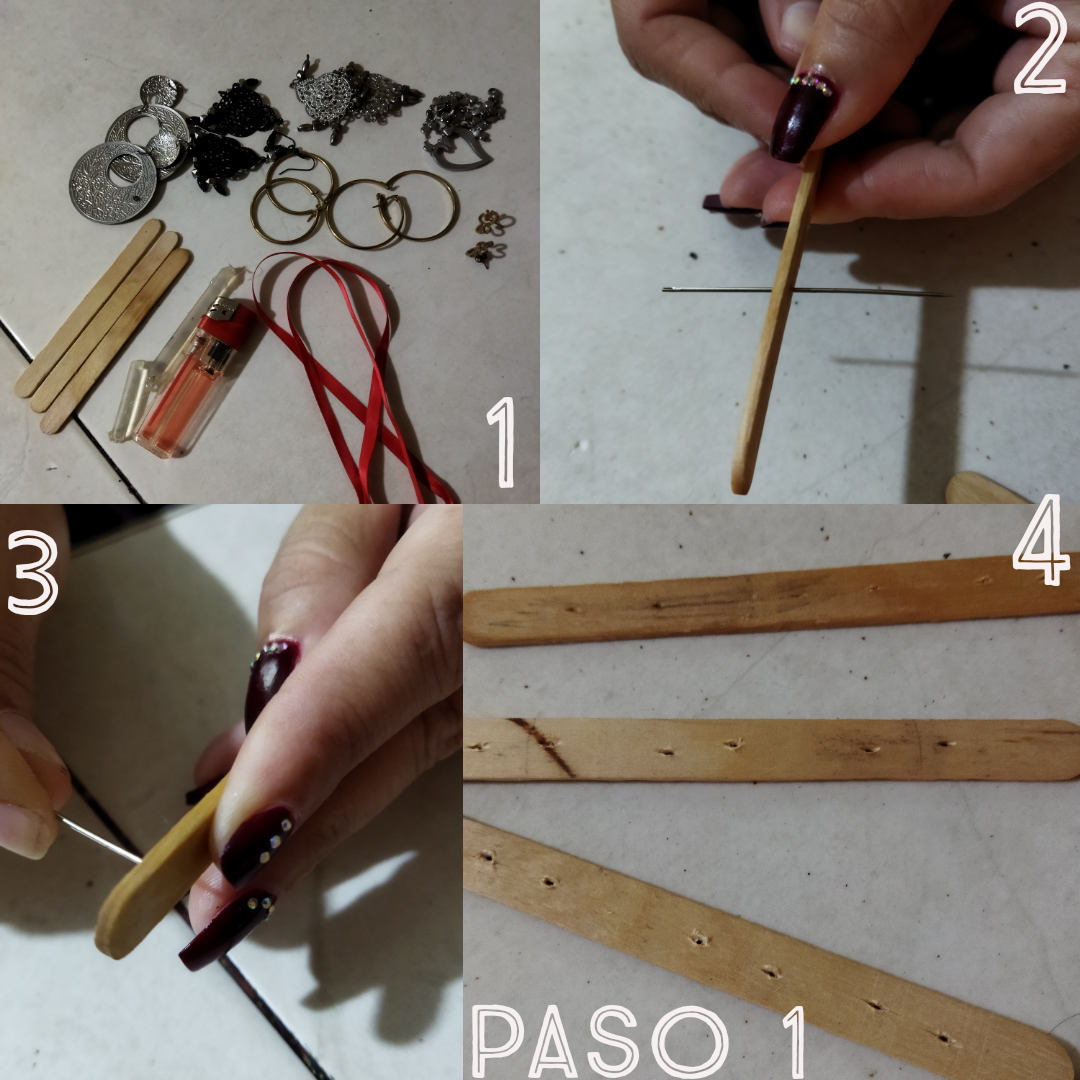
Paso 1: Paso 1: Cómo pueden observar en la imagen tenemos los materiales, paletas de helado, cinta, silicón, yesquero, y por supuesto nuestros zarcillos y una aguja gruesa. Procederemos a abrir agujeros en nuestras paletas de helado, porque en esos agujeros es donde irán nuestros zarcillos.

English:

Step 1: As you can see in the picture we have the materials, popsicle sticks, tape, silicone, tinder, and of course our tendrils and a thick needle. We will proceed to open holes in our popsicle sticks, because those holes are where our tendrils will go.

290955761_376703664446720_7282532516395952112_n.png

294395159_593082165548894_970338570702412372_n.png

Español:

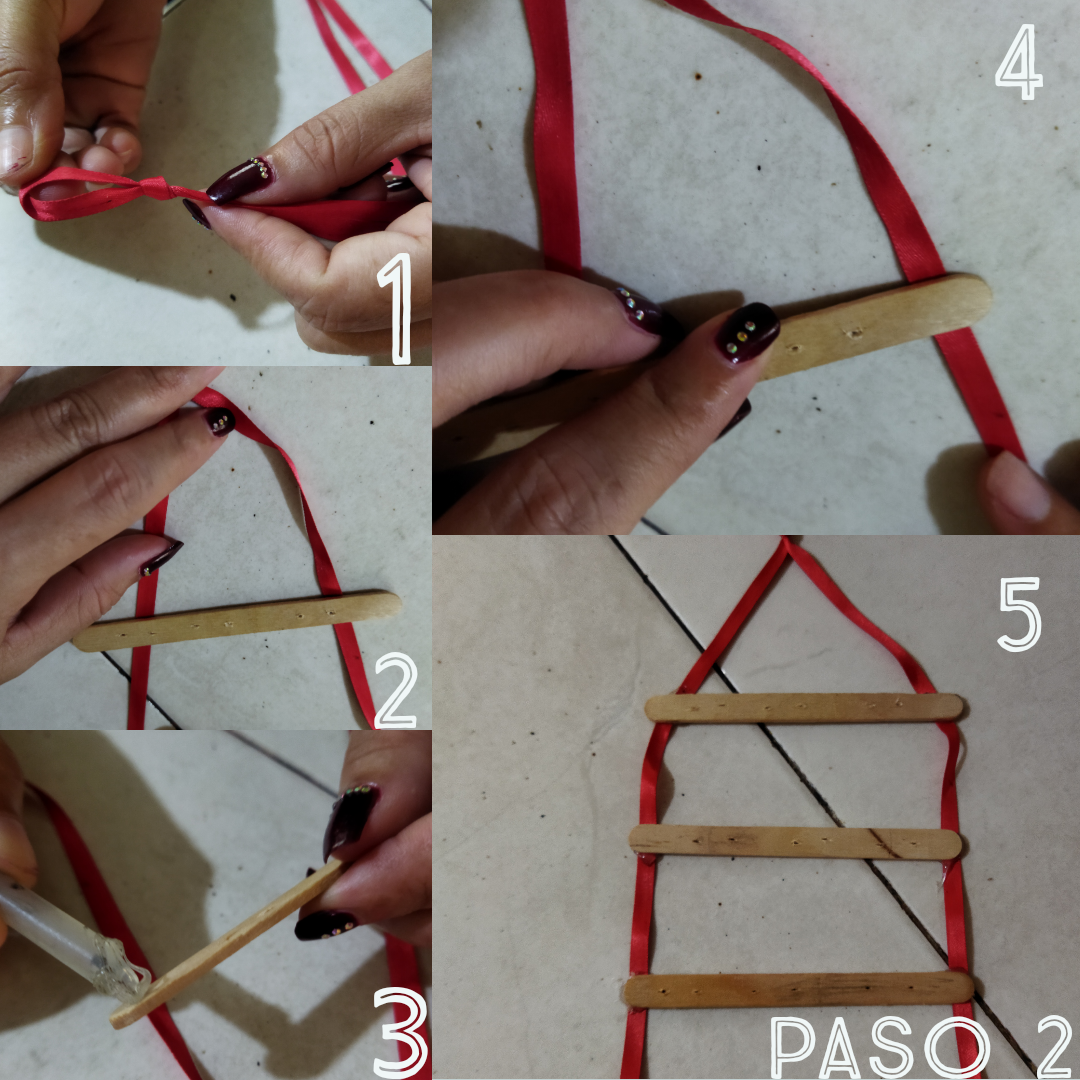
Paso 2:Paso 2: vamos a hacer un nudo de ésta manera con nuestra cinta, para poder de ésta manera pegar las paletas de helado en los extremos de la cinta, y quedará de ésta manera.

English:

Step 2:Step 2: we are going to make a knot this way with our ribbon, so we can glue the popsicle sticks to the ends of the ribbon, and it will look like this.

290955761_376703664446720_7282532516395952112_n.png

295090408_1203913477100528_8575547443256967528_n.png

Español:

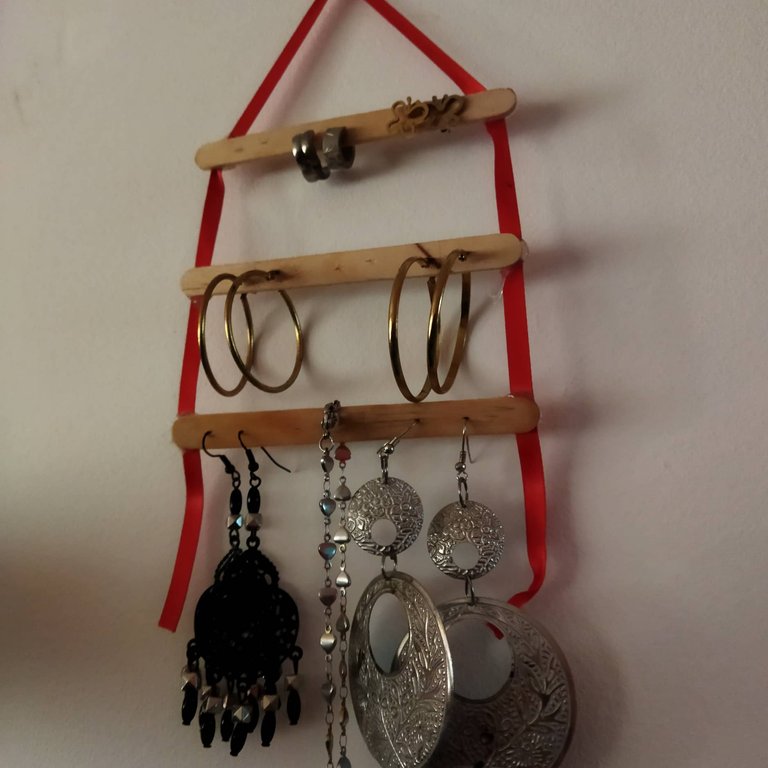
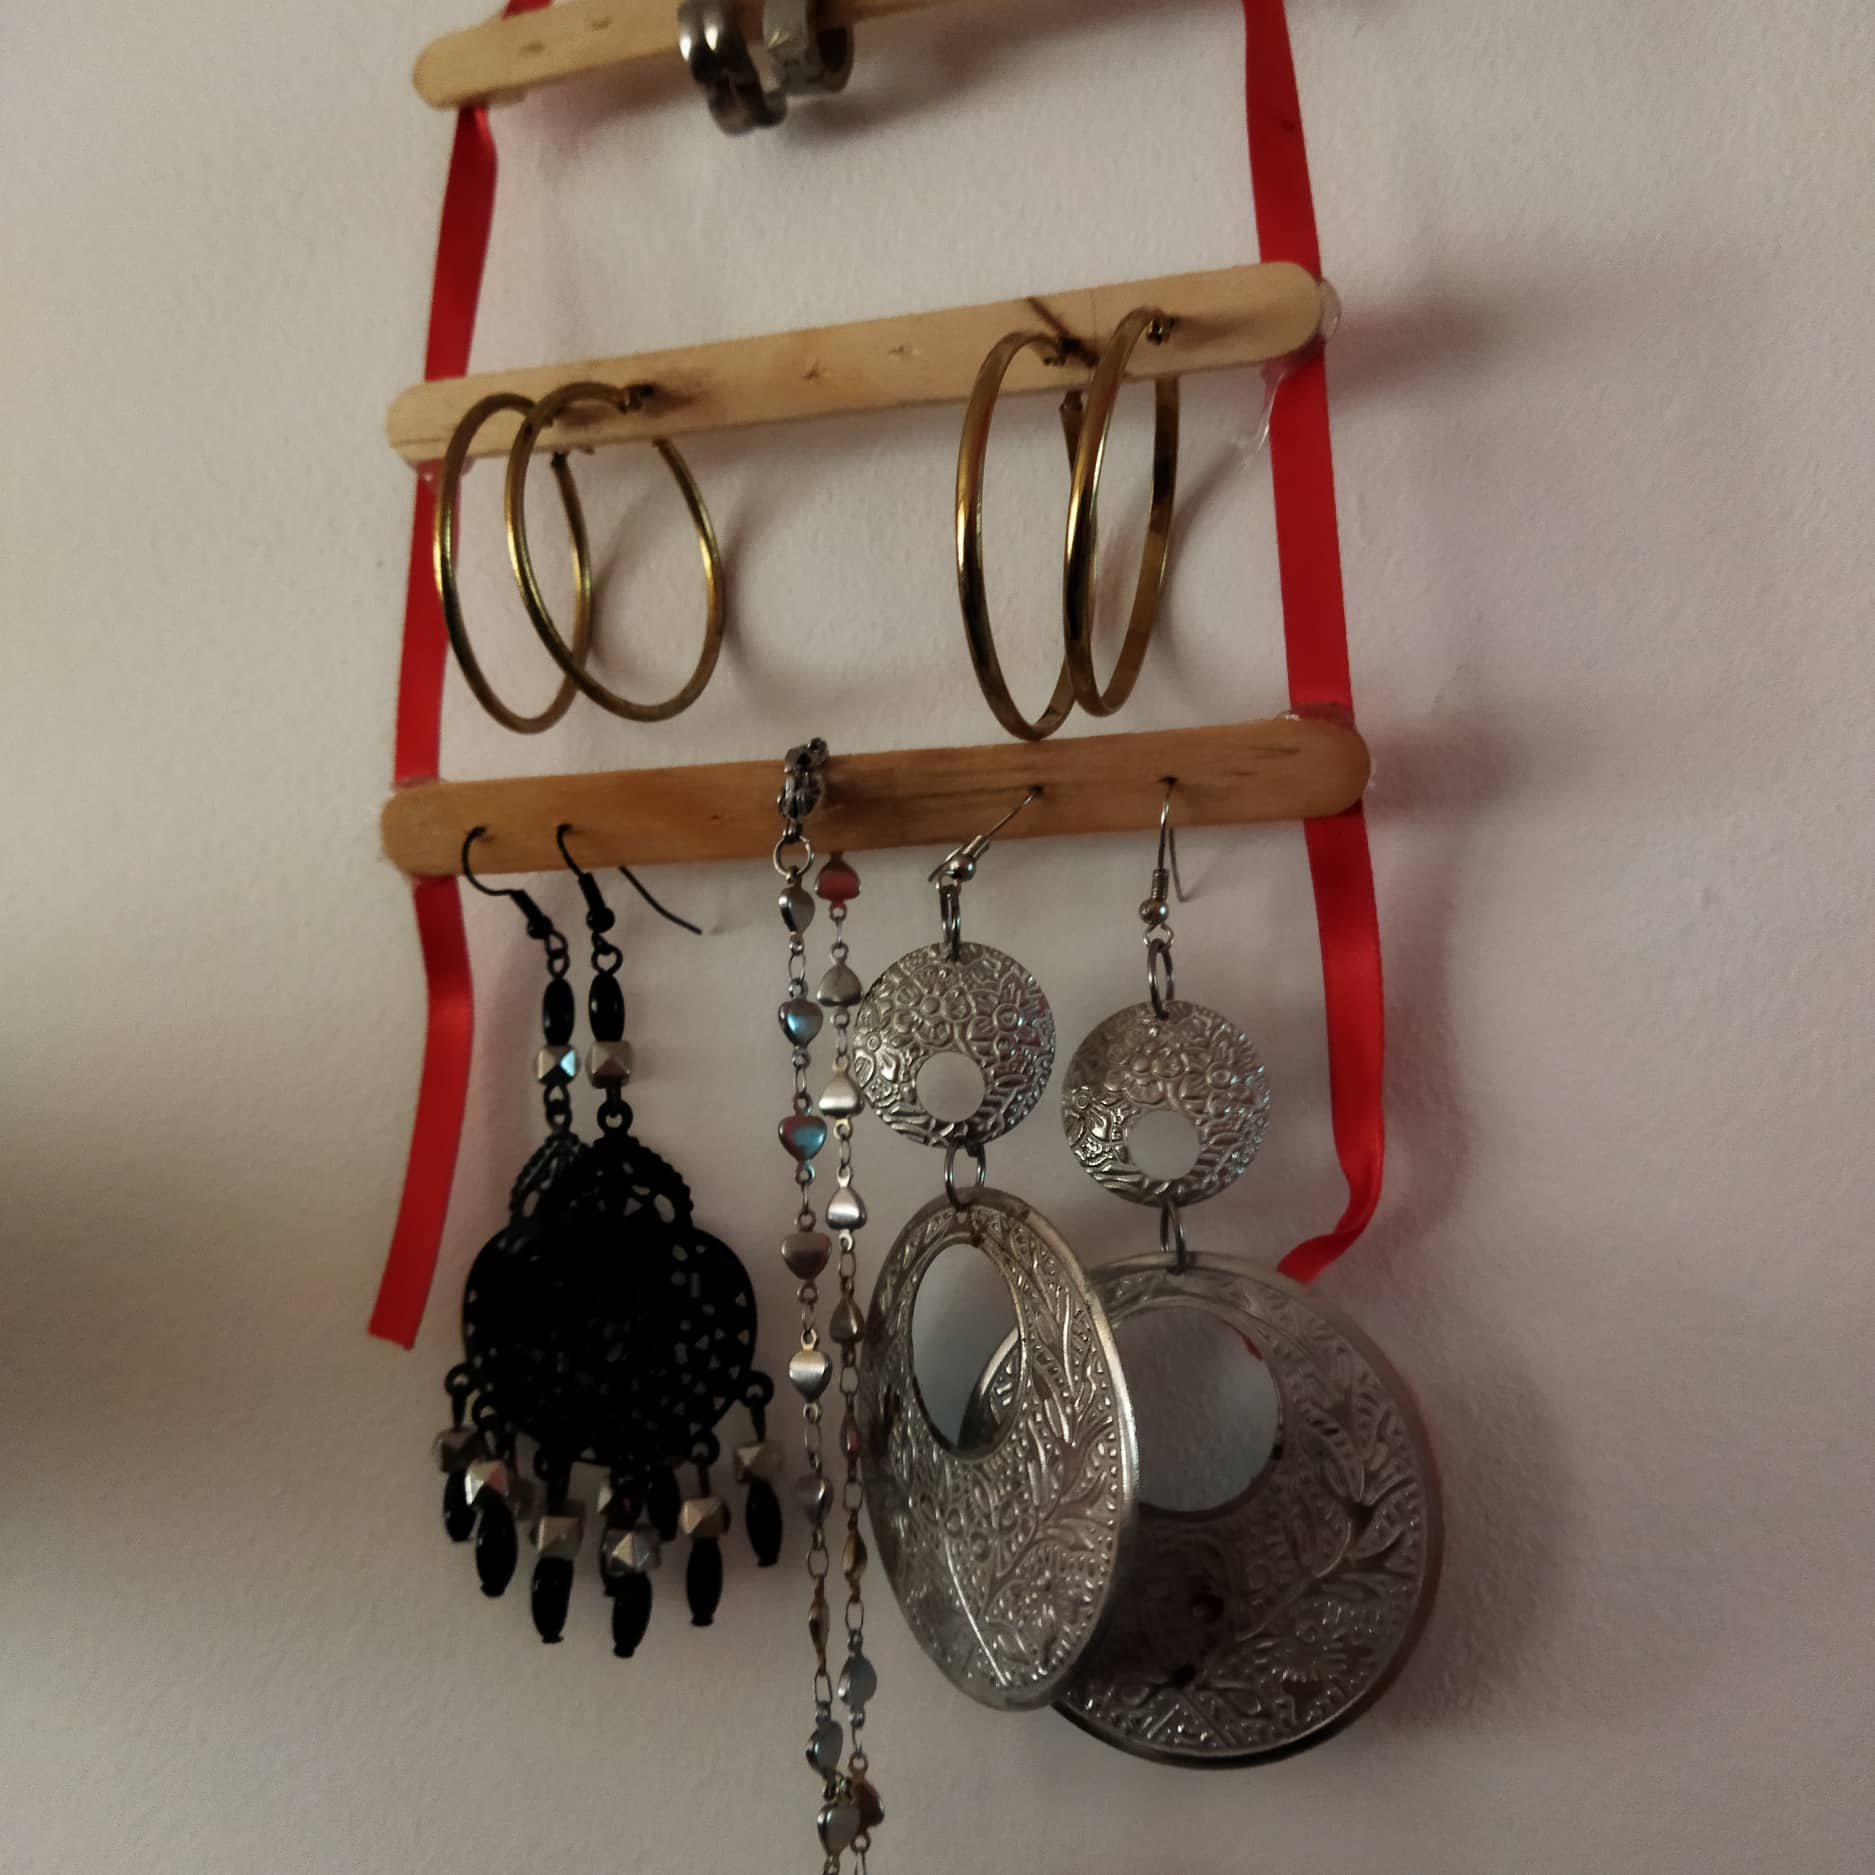
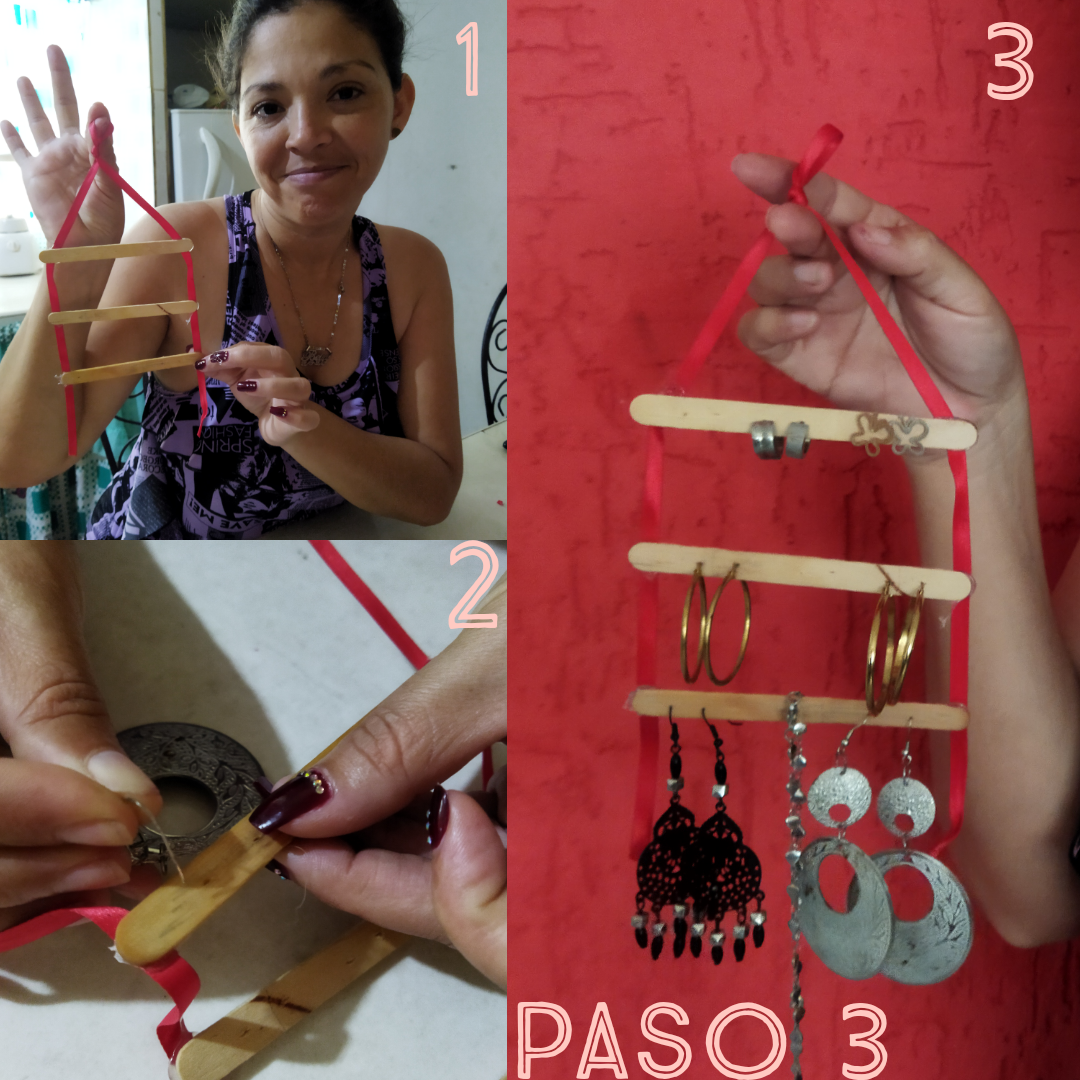
Paso 3: luego de ya tener las paletas pegadas a la cinta, vamos a proceder a enganchar cada uno de nuestros zarcillos e incluso alguna cadena que tengamos, lo hacemos con cuidado procurando el orden en este organizador, debemos guindarlo en un lugar para que pueda mantenerse y así podremos encontrar siempre los pares de nuestros zarcillos.

English:

Step 3: after we have the paddles glued to the ribbon, we will proceed to hook each of our earrings and even any chain we have, we do it carefully trying to keep order in this organizer, we must hang it in a place so that it can be kept and so we can always find the pairs of our earrings.

290955761_376703664446720_7282532516395952112_n.png

Resultado Final.

Final Result.

293790592_2864520253849395_2232998980371475898_n.jpg

295508626_3122803334696692_3273835871386271692_n.jpg

295240948_338325311716537_6107268319532359884_n.jpg

290955761_376703664446720_7282532516395952112_n.png

¡Gracias por Visitar mi Blog!.png

Sort:  

Hola amiga, muy original, creativo, me gusto mucho. Esa idea es fabulosa.

Thank you for sharing this amazing post on HIVE!
  • Your content got selected by our fellow curator @rezoanulvibes & you just received a little thank you via an upvote from our non-profit curation initiative!

  • You will be featured in one of our recurring curation compilations and on our pinterest boards! Both are aiming to offer you a stage to widen your audience within and outside of the DIY scene of hive.

Join the official DIYHub community on HIVE and show us more of your amazing work and feel free to connect with us and other DIYers via our discord server: https://discord.gg/mY5uCfQ !

If you want to support our goal to motivate other DIY/art/music/homesteading/... creators just delegate to us and earn 100% of your curation rewards!

Stay creative & hive on!