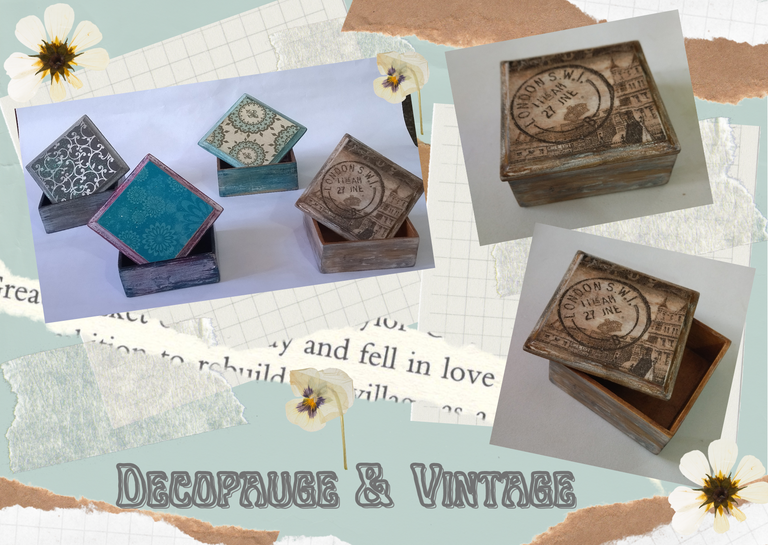
Hello everyone... 🐱🐾💕
Hello my dear Hiver, and especially to my beautiful community of #HiveDIY / @hive-130560 artists . It is very pleasing for me to meet again here to participate in this new contest related to the decopauge technique, created by the friend @equipodelta .
I used to do a lot of painting on wood some years ago, and fortunately I still have some materials, which I decided to use to present you today, a simple and small jewelry box, with the decopauge technique in addition to show you the vintage painting technique, I hope you like it, let's get to work.
Let's get started:😃

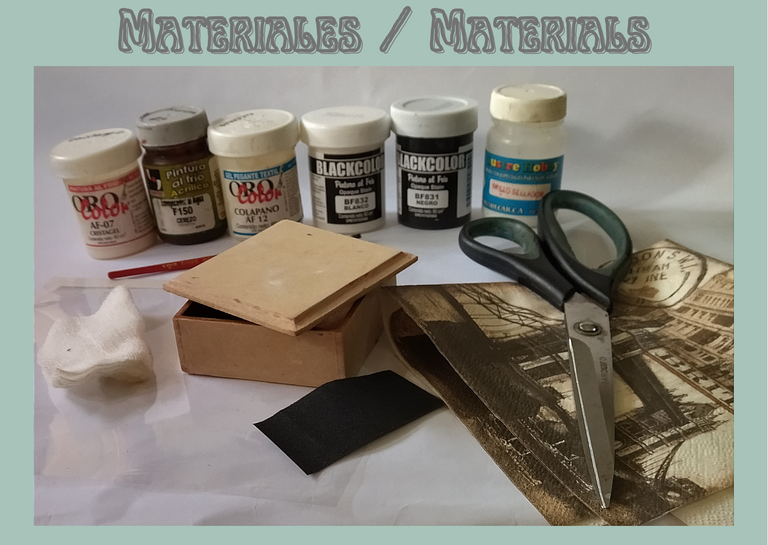
- Wooden box 4cms high x 8cms wide.
- Water based paints, white, black.
- Cherry wood aging.
- Cristagel (Surface sealer).
- Colapano (product to adhere, fabric, napkins, paper, etc).
- Gloss sealer (product to seal, and to give them brightness to painted surfaces or of wood).
- Brush.
- Scissors.
- Sandpaper.
- Gauze.
- Napkin, or decorative paper.
- Piece of plastic or acetate.

Hola a todos... 🐱🐾💕
Hola mis queridos Hiver, y sobre todo a mi hermosa comunidad de artistas de #HiveDIY / @hive-130560. Es muy grato para mi encontrarme nuevamente por acá para participar en este nuevo concurso con relación a la técnica de decopauge, creado por la amiga @equipodelta .
Yo solía hace algunos años hacer muchos trabajos de pintura sobre madera, y afortunadamente aún conservo algunos materiales, los cuales decidí utilizar para presentarles el día de hoy, un sencillo y pequeño joyero, con la técnica de decopauge además de mostrarles la técnica de pintura vintage, esperando sea de su agrado, manos a la obra.
Comencemos:😃

• Caja de madera de 4cms de alto x 8cms de ancho.
• Pinturas al agua, blanca, negra.
• Envejecedor cerezo.
• Cristagel (Sellador para superficies).
• Colapano. (Producto para adherir, tela, servilletas, papel, etc).
• Brillo sellador (producto para sellar, y darles brillo a superficies pintadas o de madera).
• Pincel.
• Tijera.
• Lija.
• Gasa.
• Servilleta, o papel decorativo.
•Trozo de plástico o acetato.

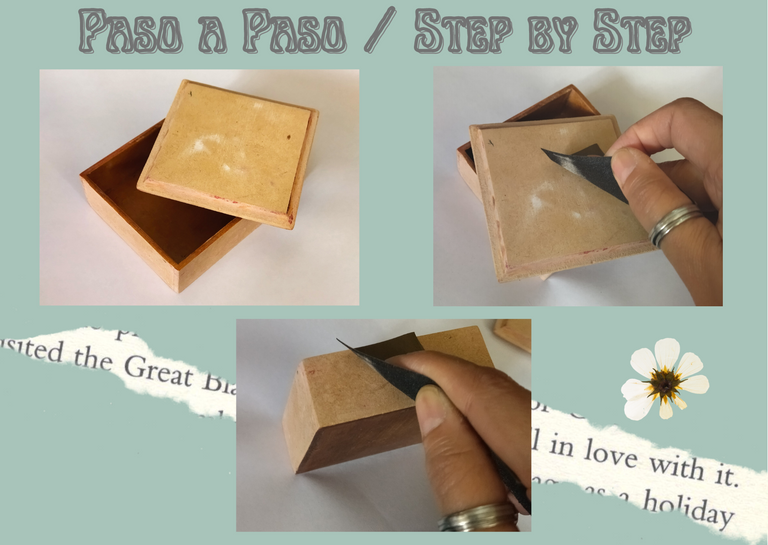
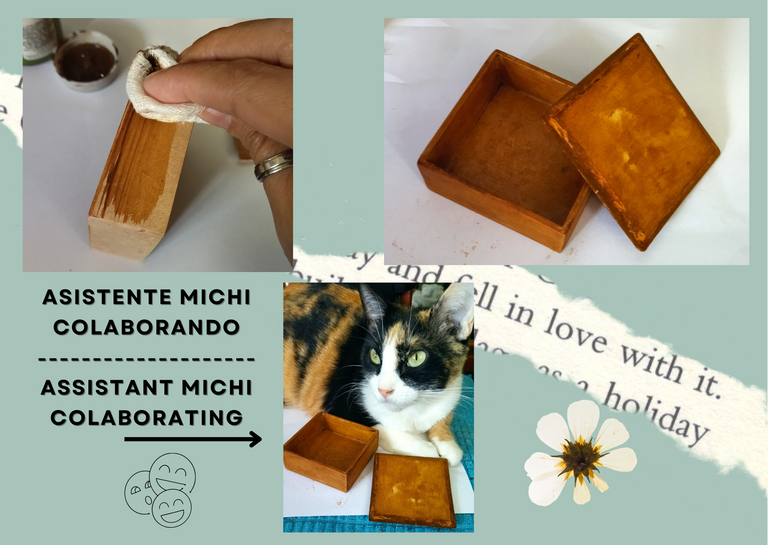
- Let's start working on the box, the one I am going to use is one that I had with some paint and already had an antiquing agent applied, so I decided to recycle it as it is ideal for this technique, because it does not matter that it has some imperfections in the paint, because we will create a vintage effect, that is to say as if the paint was old and deteriorated.
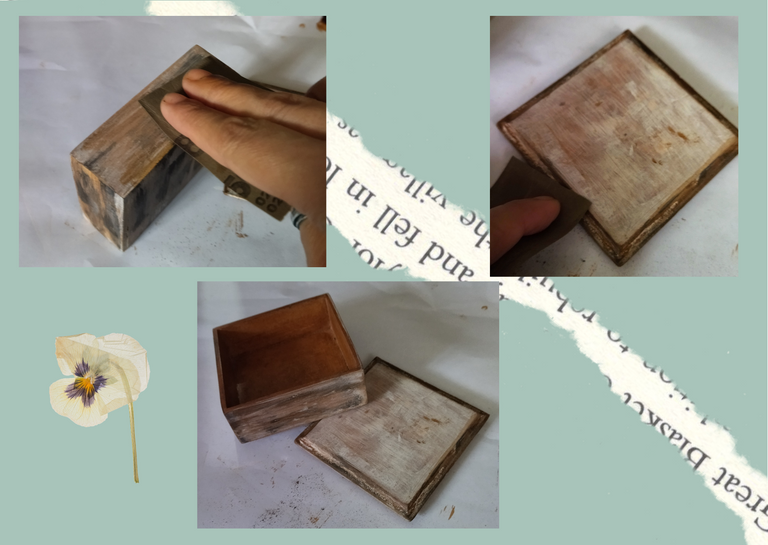
- I start by gently sanding all surfaces, so that it takes a little porosity, and thus the paint is well adhered.
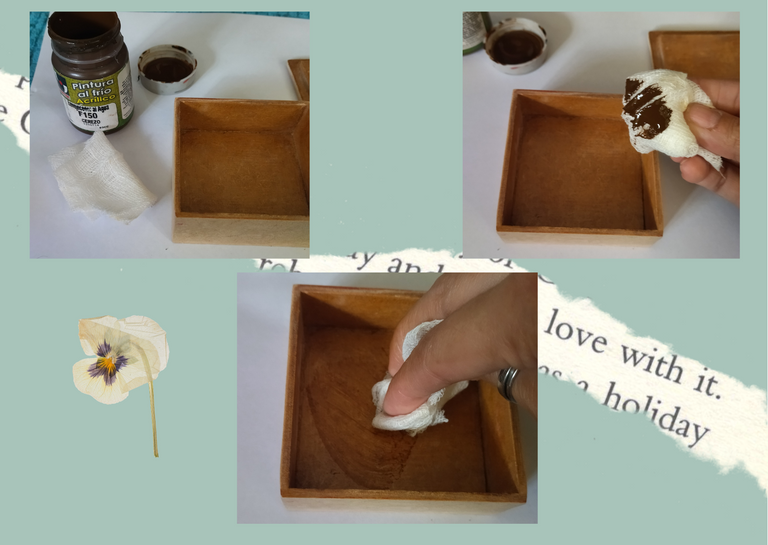
- Once past the sandpaper we will begin to paint the box, we take the cherry antiquing agent and a piece of gauze, (I am using gauze because I had some old ones, you can use a sponge or a piece of cloth), we take the gauze, wet it with the antiquing agent and apply on all surfaces of the box, we wait for it to dry.

• Empecemos a trabajar la caja, la que voy a utilizar es una que tenía con algo de pintura y ya tenía aplicado envejecedor, por ello decidí reciclarla ya que es ideal para esta técnica, ya que no importa que tenga algunas imperfecciones en la parte de pintura, porque vamos a crear un efecto vintage, es decir como si la pintura estuviera vieja y deteriorada.
• Comienzo pasándole suavemente una lija por todas sus superficies, para que tome un poco de porosidad, y de esta manera quede adherida bien la pintura.
• Una vez pasada la lija comenzaremos a pintar la caja, tomamos el envejecedor cerezo y un trozo de gasa, (estoy usando gasas ya que tenía unas viejas, ustedes pueden usar una esponja o un trozo de tela), tomamos la gasa la mojamos con el envejecedor y aplicamos en todas las superficies de la caja, esperamos que seque.
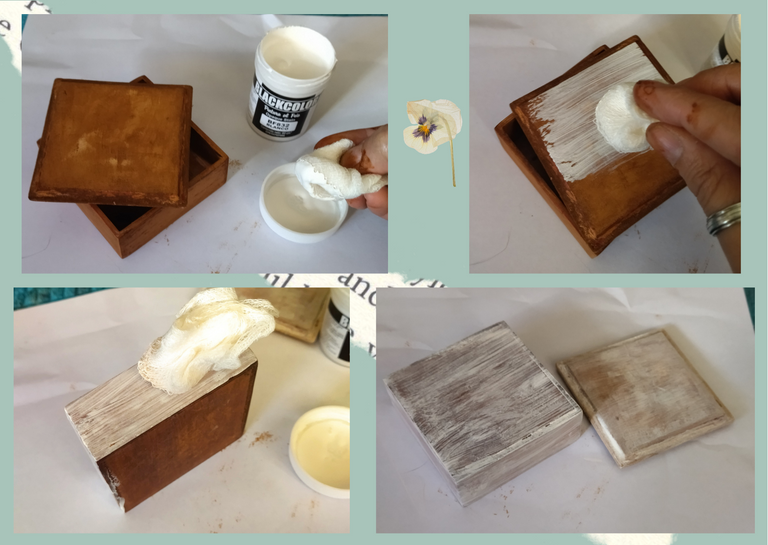
- Once dry we take another piece of gauze and the white paint, we will repeat the process, but all over the outside of the box, both the base and the box, it does not have to be completely covered or perfect, as it is ultimately the effect we want to create.
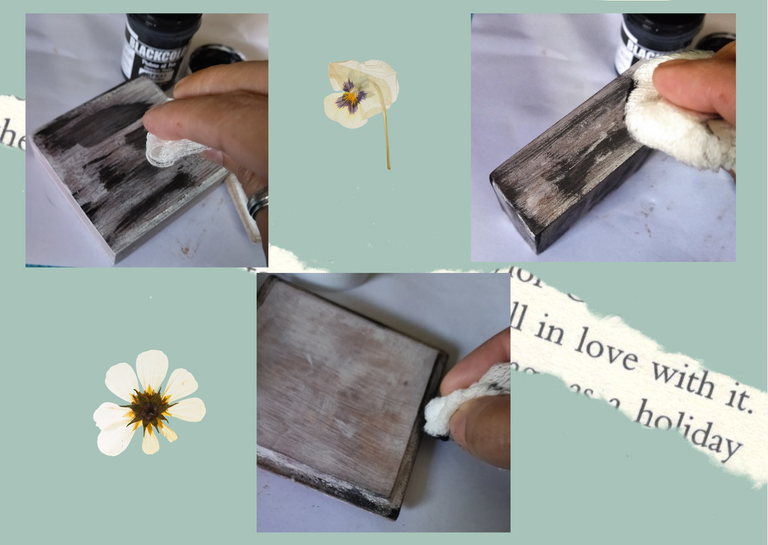
- Now we take the black paint, and with the piece of gauze we apply in some points of the box and on the edges of the lid, let it dry, (on the top of the lid is not necessary because there we are going to place the napkin or decorative paper).
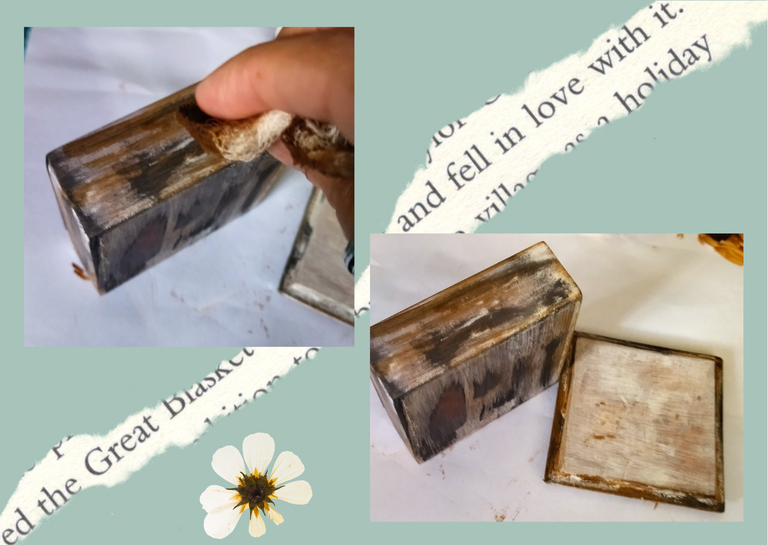
- Finally with the cherry antiquing paint we repeat what we did with the black paint, only apply in specific points, let it dry.
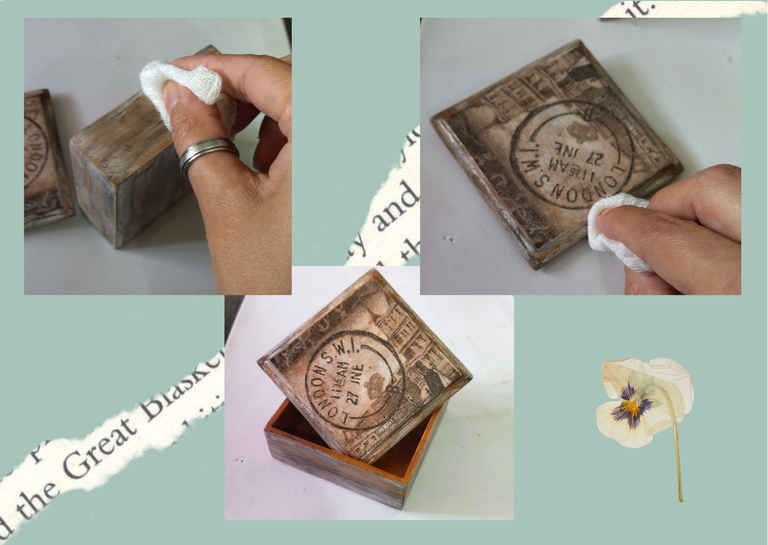
- Once our box is completely dry, we proceed to take a piece of sandpaper and go through all the external surfaces to which we apply different layers of paint, this to create the vintage effect we want to get, in my case I removed as much paint I love how it looks that way as it gives the impression of a painting of years, peeled and totally deteriorated.

• Una vez seca tomamos otro trozo de gasa y la pintura blanca, vamos a repetir el proceso, pero por toda la parte externa de la caja, tanto la base como la caja, no tiene que quedar totalmente cubierta ni perfecta, ya que es en definitiva el efecto que queremos crear.
• Ahora tomemos la pintura negra, y con el trozo de gasa aplicamos en algunos puntos de la caja y en los bordes de la tapa, dejamos secar, (en la parte de arriba de la tapa no es necesario ya que allí vamos a colocar la servilleta o papel decorativo).
• Por ultimo con el envejecedor cerezo repetimos lo que hicimos con la pintura negra, solo aplicar en puntos específicos, dejamos secar.
• Una vez que nuestra caja este totalmente seca, procedemos a tomar un trozo de lija y pasamos por todas las superficies externas a las que aplicamos distintas capas de pintura, esto para crear el efecto vintage que deseamos obtener, en mi caso le quite la mayor cantidad de pintura me encanta como se ve de esa manera ya que hace dar la impresión de una pintura de años, pelada y totalmente deteriorada.
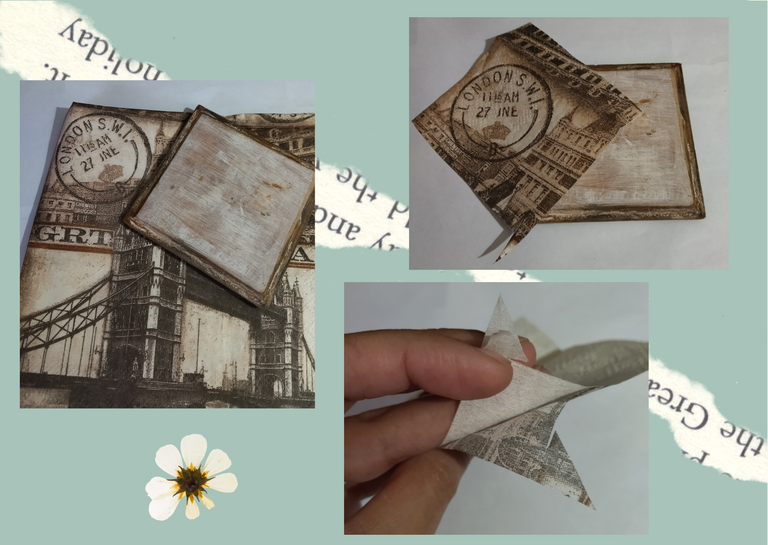
- Now let's go with the decorative detail, we are going to place the napkin. We cut the piece we want to place on the lid, (it should be a little larger than the surface to which we are going to adhere it). Once we have the desired piece we are going to separate the layers of the napkin, and we will only leave one, which is the one we are going to use, this we must do it very carefully to avoid the napkin to break.
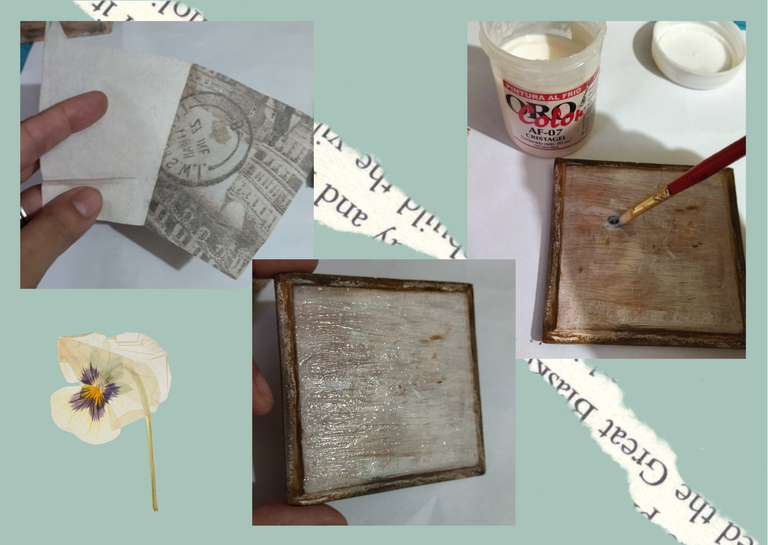
- Now we take the cristagel, and with a brush we are going to place in all the part in which we are going to place the napkin, as my surface is small very carefully I decided to place it all at once, but avoiding that air enters that can form bags or bubbles in it, once placed take the piece of acetate place it on top of the lid, and with your fingers press to remove any imperfections that may have been left.
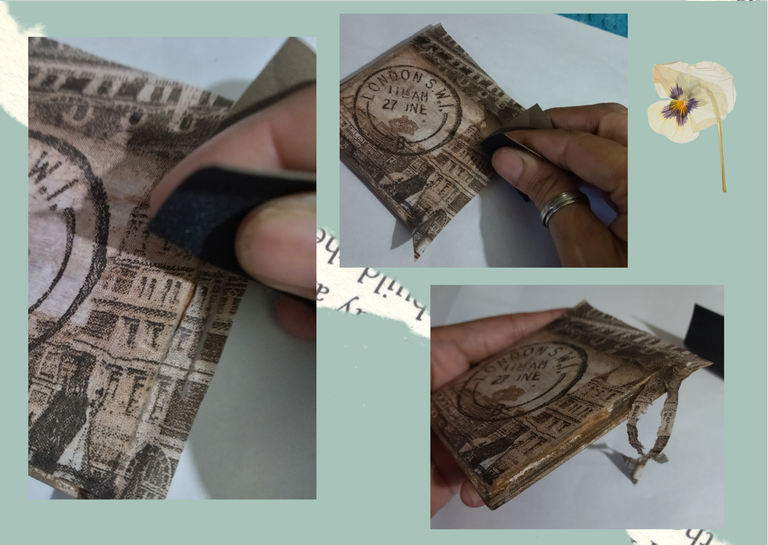
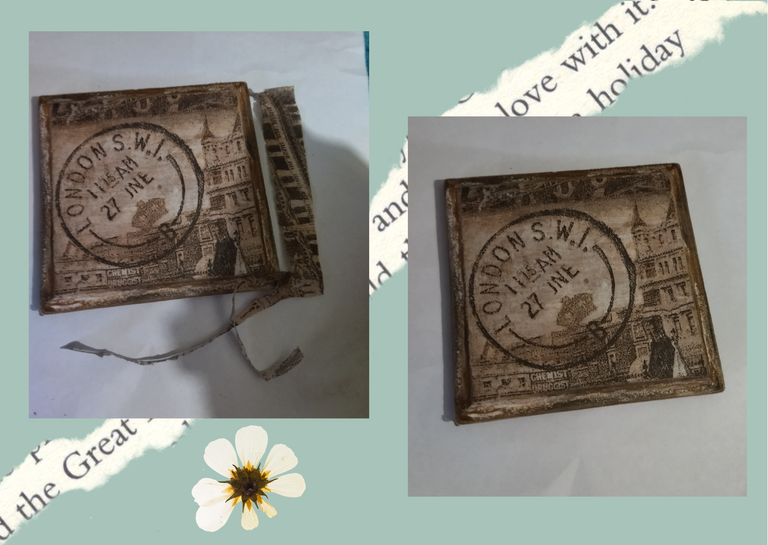
- We are going to remove the excess of the napkin, we will take a piece of sandpaper we will go through the edges of the lid very carefully, all this excess will come out easily.

• Ahora vamos con el detalle decorativo, vamos a colocar la servilleta. Cortamos el trozo de queremos colocar a la tapa, (debe ser un poco más grande que la superficie a la cual la vamos a adherir). Una vez que tengamos el trozo deseado vamos a separar las capas de la servilleta, y solo dejaremos una, la cual es la que vamos a usar, esto debemos hacerlo con sumo cuidado para evitar que la servilleta se rompa.
• Ahora tomamos el cristagel, y con un pincel vamos a colocar en toda la parte en la que vamos a colocar la servilleta, como mi superficie es pequeña con mucho cuidado decidí colocarla toda de una vez, pero evitando que entre aire que puedan formar bolsas o burbujas en la misma, una vez colocada tome el trozo de acetato lo coloque encima de la tapa, y con los dedos presione para sacar cualquier imperfección que haya podido quedar.
• Vamos a retirar el excedente de la servilleta, tomaremos un trozo de lija pasaremos por los bordes de la tapa con mucho cuidado, todo este exceso saldrá con facilidad.
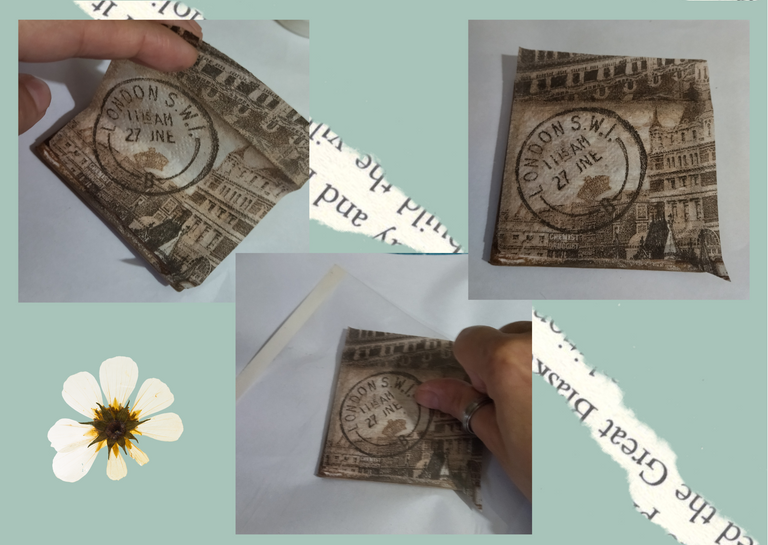
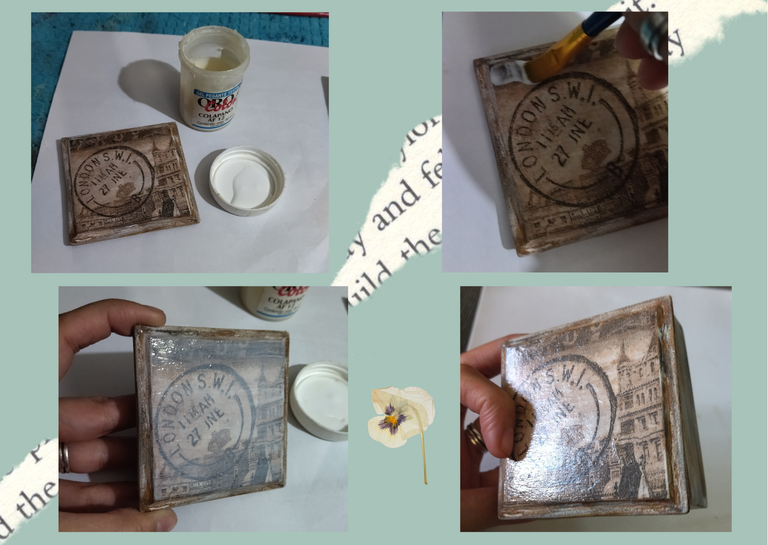
- Now we will proceed to protect our decorative napkin, we take the colapano, and with a brush we apply to the entire surface of the napkin, this will give a shiny effect to it in addition to giving protection, let it dry.
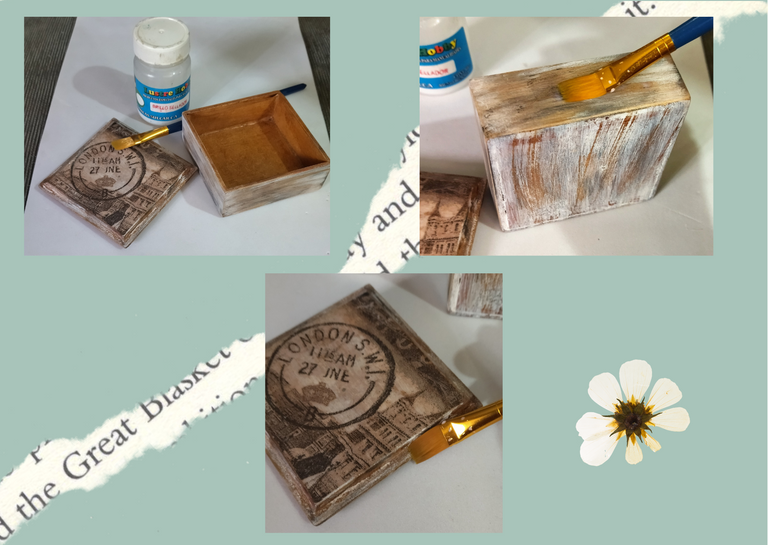
- To finish we are going to seal, protect and give a touch of shine to the paint that we add to the box, we take sealer gloss and with a brush we apply to all parts of the box, except the place where the decorative napkin is placed, let it dry and then we take a piece of gauze or dry cloth and pass around it to give it shine, this sealer that is placed makes an effect like the wax that we apply to the floor, when it dries when rubbing the surface gives a shiny effect. If you want it to be shinier you can let it dry, wipe it and then apply another coat, the more coats the shinier it will be. Personally I don't like it so shiny, so I apply only one coat.
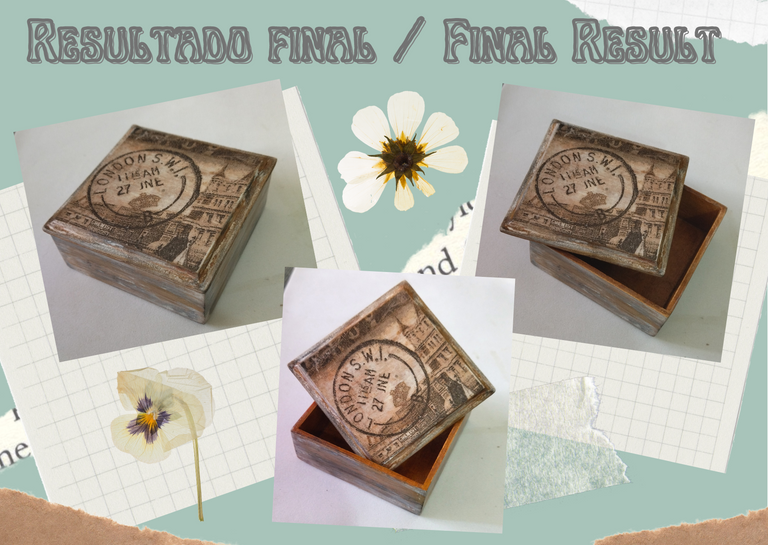
This way we have our little jewelry box with the Decoupage and Vintage technique, ready for use.

• Ahora vamos a proceder a proteger nuestra servilleta decorativa, tomamos el colapano, y con un pincel aplicamos en toda la superficie de la servilleta, esto le dará un efecto brillante a la misma además de darle protección, dejamos secar.
• Para finalizar vamos a sellar, proteger y darle un toque de brillo a la pintura que agregamos a la caja, tomamos brillo sellador y con un pincel aplicamos a todas las partes de la caja, menos al sitio donde está colocada la servilleta decorativa, dejamos secar y luego tomamos un trozo de gasa o tela seco y pasamos alrededor de la misma para darle brillo, este sellador que se le coloca hace como un efecto de la cera que aplicamos al piso, cuando seca al frotar la superficie da un efecto brillante. Si desean que queda más brillante pueden dejar secar, pasar el trapo y luego aplicar otra capa, mientras más capas tenga más brillante quedara. A mí en lo personal no me gusta tan brillante, por ello aplico solo una capa.
De esta manera ya tenemos nuestra cajita joyero con la técnica de Decoupage y Vintage, lista para su uso.

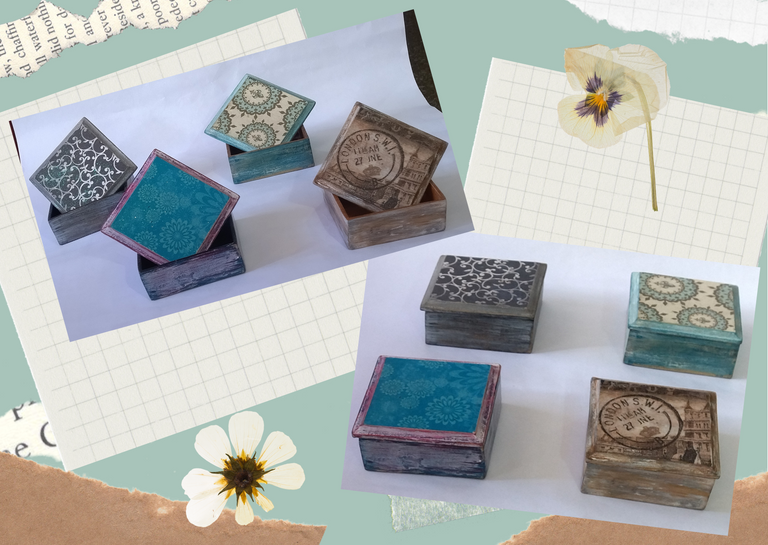
Here I leave other models that I made with a thicker decorative paper, and other colors of paint with the vintage technique, so you can see how they look. For me sometimes it is never enough to do just one job hahahaha.
This is the end of my publication, I used the materials I had at hand to show you a simple work, but made with love and affection for you.

Por acá les dejo otros modelos que elabore con un papel decorativo más grueso, y otros colores de pintura con la técnica vintage, para que vean como lucen. Para mí a veces nunca basta hacer un solo trabajo jajajaja.
Hasta acá llega mi publicación, utilice los materiales que tenía a la mano para mostrarles un sencillo trabajo, pero hecho con mucho amor, y cariño para ustedes.
What did you think, did you like it?
I hope you did, I hope you liked my explanation, procedure and photos, I made them with love for you.
"Let out that muse that inspires you, and let your imagination fly".
Thank you all, see you next time. 🐾🐱💕

¿Que les pareció, les gustó?
Espero que sí, que les haya gustado mi explicación, procedimiento y fotos, los hice con mucho cariño por y para ustedes.
"Deja salir esa musa que te inspira, y deja volar tu imaginación".
Gracias a todos, nos vemos en la próxima. 🐾🐱💕

Todas las fotos usadas en este post son de mi autoría y han sido sacadas en mi celular personal un Redmi 9T y editadas Canva Banner and separator made by me in Canva Traducido con la ayuda de DeepL


