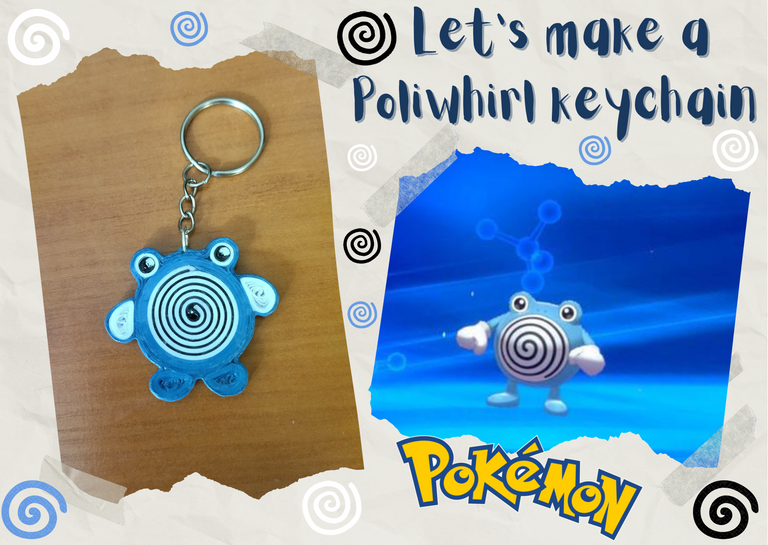
Hello everyone... 🐱🐾💕
Hello to my dear Hiver and my dear community of great talented artists of #HiveDiy, as always very pleased and excited to find me here, showing you a work made with love and especially for you.
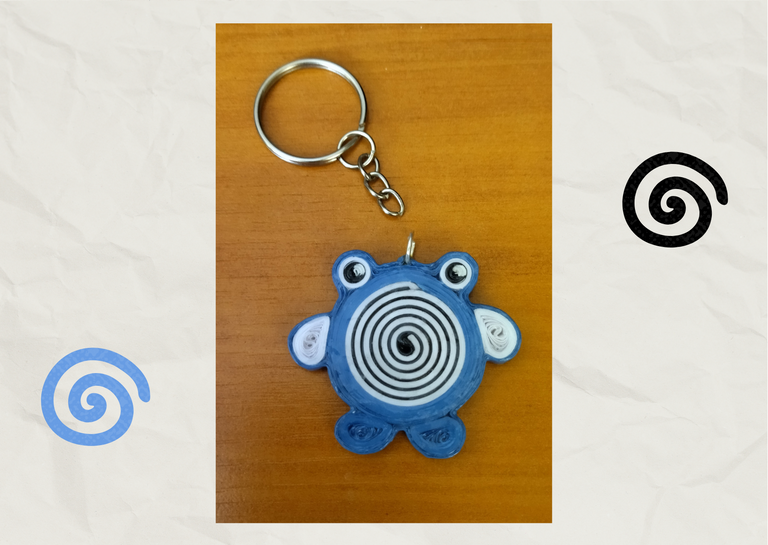
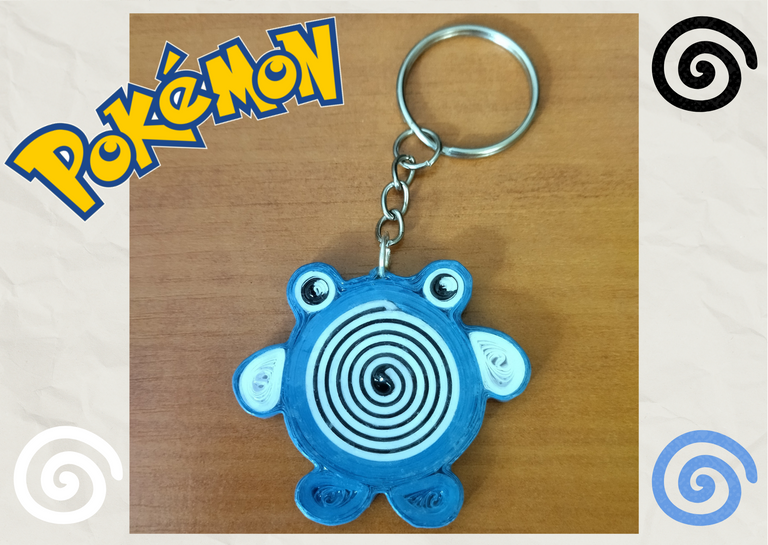
This time, for lovers of the so named Japanese anime Pokemon, I bring you a nice keychain of one of his characters called Poliwhirl in the quilling technique. Once I made a Pokeball keychain, and I've been thinking about making some other figure of their characters in 3D, (that will come soon), for today I will make this character especially at the request of my daughter because she has a particular inclination for it and so I wanted to do it to give her that detail, but also to give you the process of making it.
I hope you like it.
Let's get started:😃

- Quilling ribbons 3mm wide, white, black and dark blue.
- Quilling needle.
- Scissors.
- White glue.
- Fine brush.
- White cold paint.
- Thick brush.
- Medium size costume jewelry ring.
- Key ring and chain.
- Fine-nosed pliers.

Hola a todos... 🐱🐾💕
Hola a mis queridos Hiver y a mi querida comunidad de grandes artistas talentosos de #HiveDiy, como siempre muy complacida y emocionada de encontrarme por acá, mostrándole un trabajo hecho con mucho amor y especialmente para ustedes.En esta oportunidad, para los amantes del tan nombrado anime japonés Pokemon, les traigo un bonito llavero de uno de sus personajes llamado Poliwhirl en la técnica de quilling. Ya en una oportunidad realice un llavero de una Pokeball, y llevo algún tiempo pensando en hacer alguna otra figura de sus personajes en 3D, (eso se vendrá próximamente), para hoy les voy a elaborar este personaje en especial por petición de mi hija ya que tiene una inclinación particular por el mismo y por ello quise hacerlo para regalarle ese detalle, pero también para obsequiarles a ustedes el proceso de elaboración del mismo.
Esperando sea de su agrado.
Comencemos:😃

• Cintas de quilling de 3mm de ancho, blancas, negras y azul oscuro.
• Aguja para quilling.
• Tijera.
• Pega blanca.
• Pincel fino.
• Pintura al frío blanca.
• Pincel grueso.
• Argolla mediana de bisutería.
• Argolla y cadena de llavero.
• Alicate punta fina.

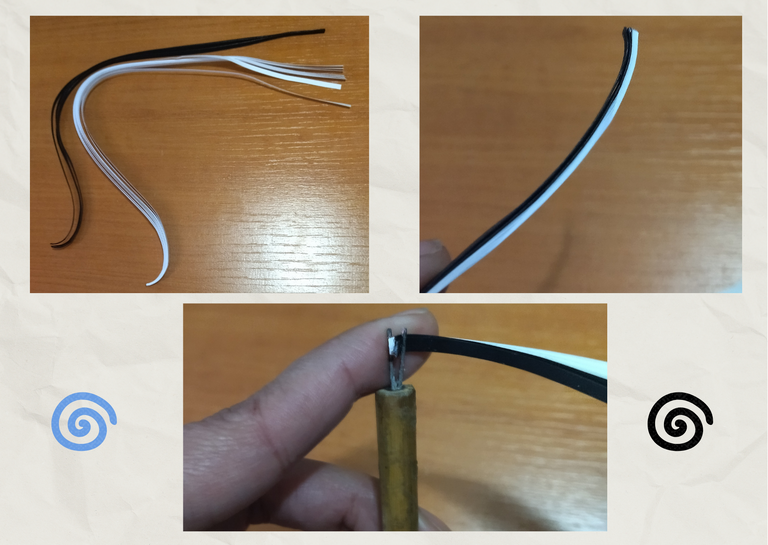
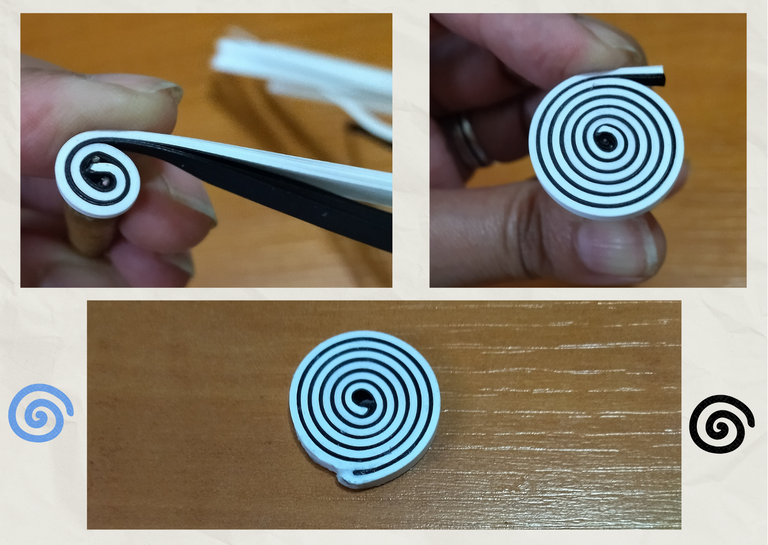
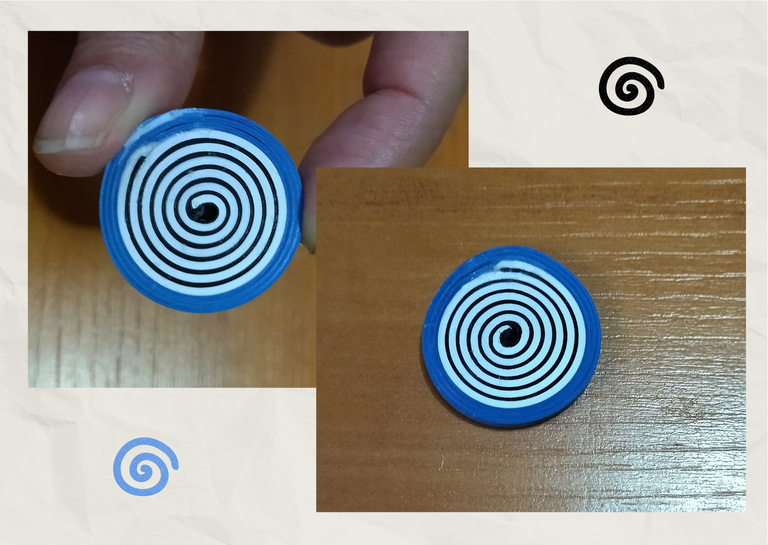
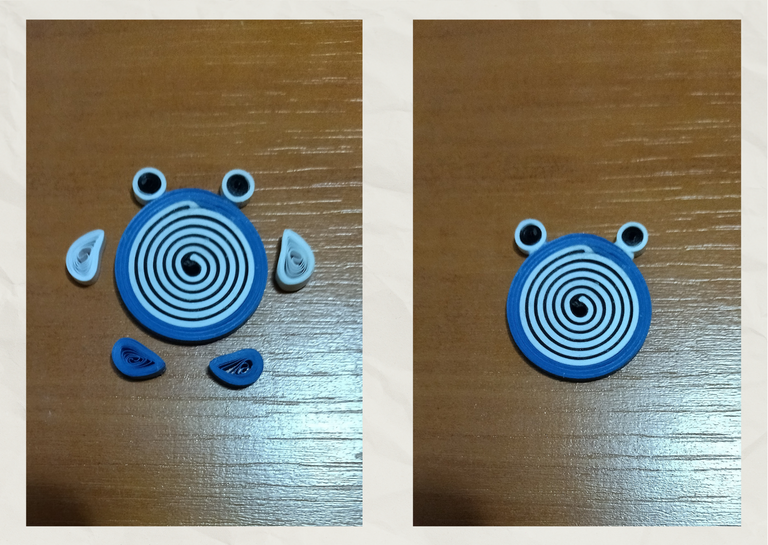
- To make the base of the body of our polywhirl, in this case its belly with ribbons in spiral form, we will take approximately 8 quilling ribbons of 3mm wide x 25cms long and 4 black ribbons of 3mm wide x 25cms long, we will overlap all the ribbons as if it were one, we take the quilling needle and proceed to roll, at the end we seal with glue.
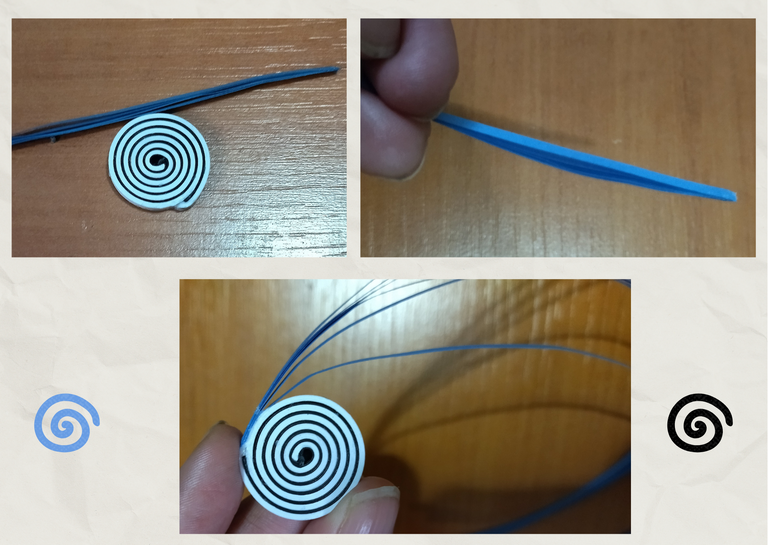
- Now we will take 3 dark blue ribbons 3mm wide x 25cms long and we will overlap one on top of the other as we did before, we will pass them around the spiral that we made, when we finish winding we will seal with glue, in this way we will complete the base of the body of our polywhirl.

• Para hacer la base del cuerpo de nuestro poliwhirl, en este caso su barriga con cintas en forma de espiral, tomaremos aproximadamente 8 cintas de quilling de 3mm de ancho x 25cms de largo y 4 cintas negras de 3mm de ancho x 25cms de largo, vamos a sobreponer todas las cintas como si fuera una sola, tomamos la aguja de quilling y procedemos a enrollar, al finalizar sellamos con pega.
• Ahora tomaremos 3 cintas azul oscuro de 3mm de ancho x 25cms de largo y vamos a sobreponer una encima de la otra como lo hicimos anteriormente, estás las pasaremos alrededor del espiral que realizamos, al terminar de enrollar sellaremos con pega, de esta manera completaremos la base del cuerpo de nuestro poliwhirl.
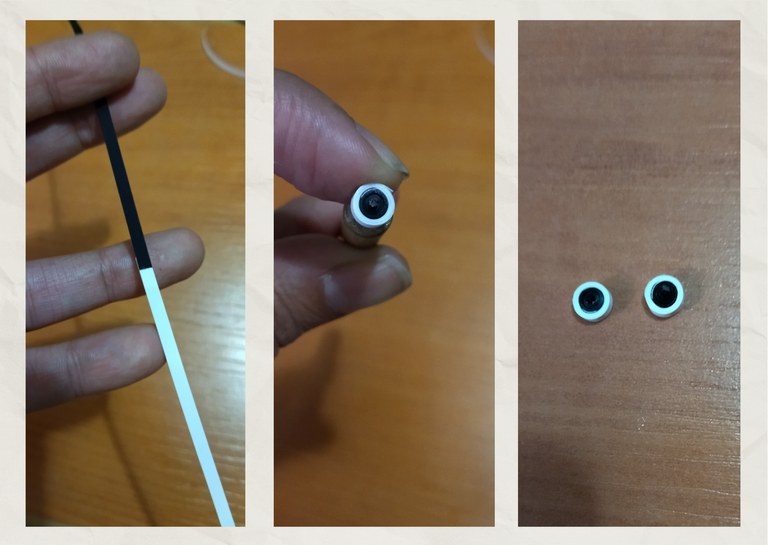
- For the eyes we will take a piece of black ribbon 3mm wide x 7cms long, and another piece of white ribbon 3mm wide x 14cms long, we will join both ribbons to form a single one and we will roll with the quilling needle obtaining a closed circle, when we finish rolling we seal with glue. Repeat the same procedure to make the other eye.
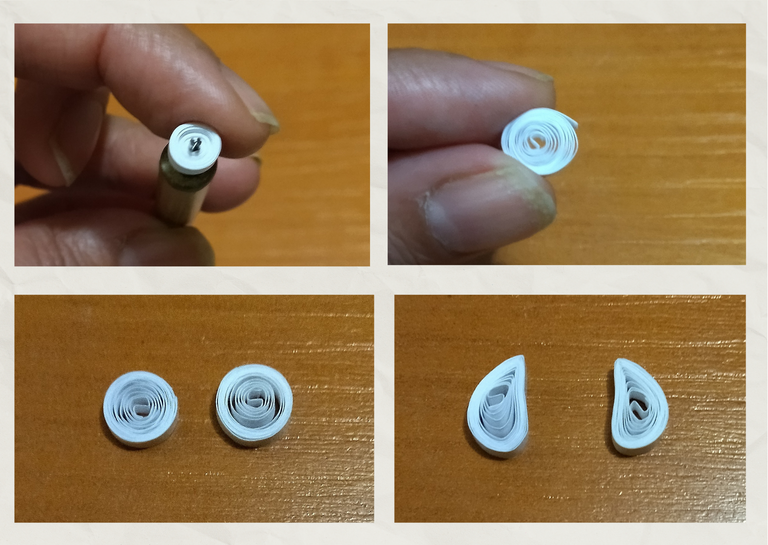
- We are going to make the arms, we take a piece of white ribbon 3mm wide x 28cms long, we will roll it with the quilling needle, when we finish we take it out of the needle we release a little and seal it with glue, we repeat the same procedure for the other arm. When we finish and get our loose circle that will be the arms we proceed to mold with our fingers giving it a drop shape, when we are going to glue to the base of the body we will finish molding.
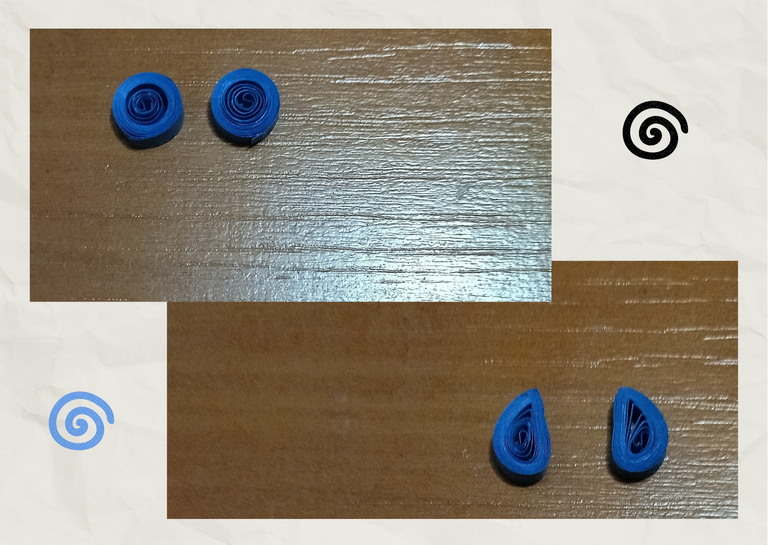
- Let's make the feet, we will perform the same procedure above, but with dark blue tape 3mm wide x 28cms long, we roll with the needle, we take out of it, we release a little sealing with glue to form an open circle, and then molded in the shape of a drop. We will need two equal pieces.

• Para los ojos tomaremos un trozo de cinta negra de 3mm de ancho x 7cms de largo, y otro trozo de cinta blanca de 3mm de ancho x 14cms de largo, uniremos ambas cintas para formar una sola y enrollaremos con la aguja para quilling obteniendo un círculo cerrado, al terminar de enrollar sellamos con pega. Repetiremos el mismo procedimiento para realizar el otro ojo.
• Vamos a elaborar los brazos, tomamos un trozo de cinta blanca de 3mm de ancho x 28cms de largo, enrollaremos con la aguja de quilling, al terminar sacamos de la aguja soltamos un poco y sellamos con pega, repetimos el mismo procedimiento para el otro brazo. Al culminar y obtener nuestro círculo suelto que serán los brazos procedemos moldear con los dedos dándole una forma de gota, cuando vayamos a pegar a la base del cuerpo terminaremos de moldear.
• Vamos a realizar los pies, realizaremos el mismo procedimiento anterior, pero con cinta azul oscuro de 3mm de ancho x 28cms de largo, enrollamos con la aguja, sacamos de la misma, soltamos un poco sellando con pega para forma un círculo abierto, y luego moldeamos en forma de gota. Necesitaremos dos piezas iguales.
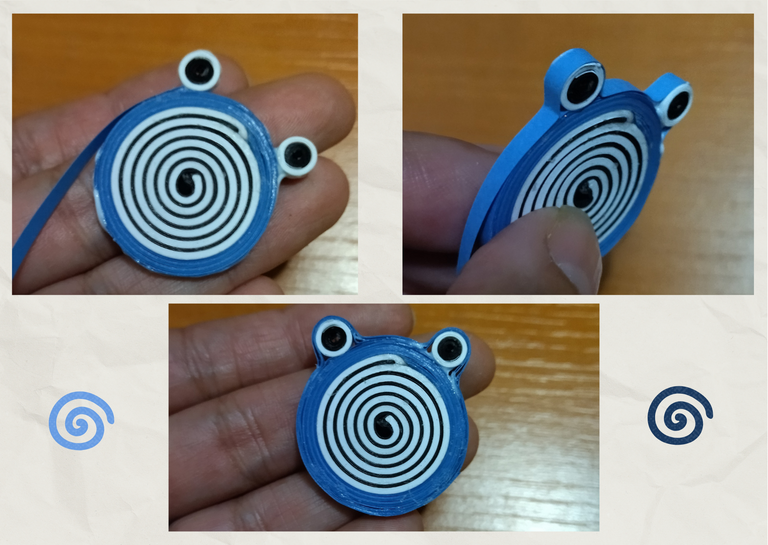
- We have our pieces ready we will proceed to assemble, first we will start with the eyes, add glue and place on top of the base of the body let dry.
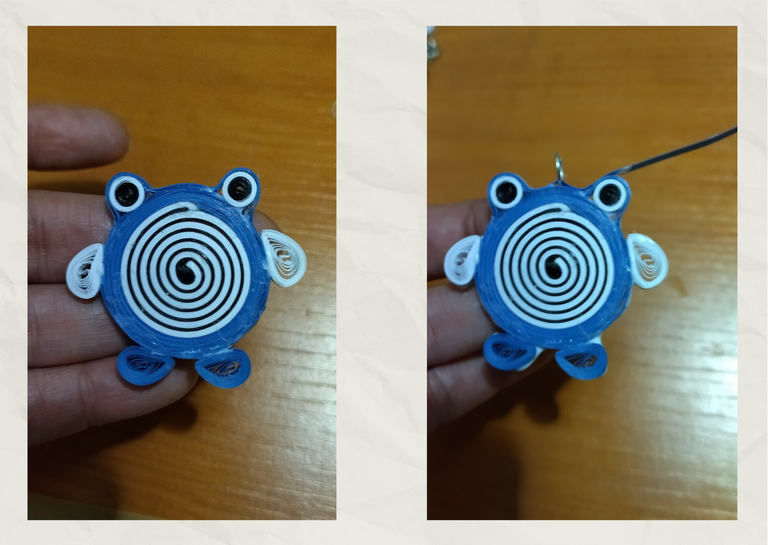
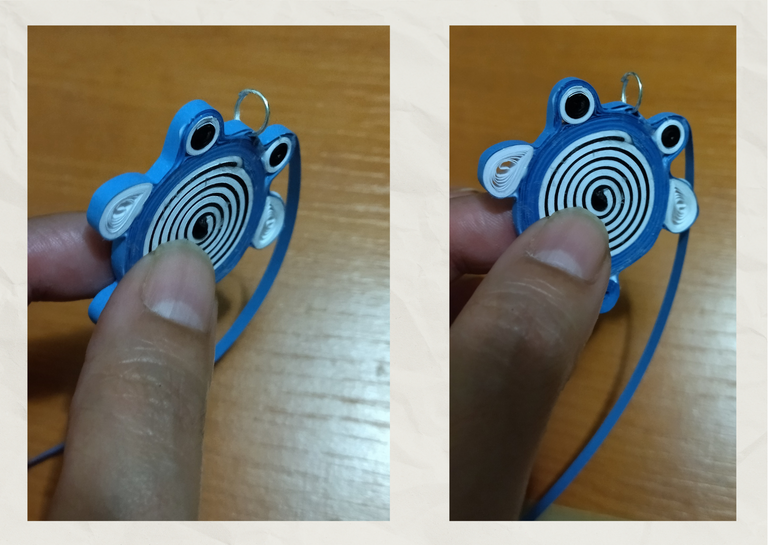
- When the eyes are dry we will take dark blue tape 3mm wide and begin to pass around the eyes and the base of the body, we will give about 6 laps, as we do it we will place glue so that the tape does not come loose as we will place the arms, feet and the ring where the keychain chain will go and continue winding blue tape around, giving about three more laps, we will do this so that all the pieces are subject and do not come off when handled at the end as it will be a keychain.

• Tenemos nuestras piezas listas vamos a proceder a armar, primero comenzaremos con los ojos, añadimos pega y colocamos en la parte de arriba de la base del cuerpo dejamos secar.
• Al estar secos los ojos tomaremos cinta azul oscuro de 3mm de ancho y comenzaremos a pasar alrededor de los ojos y la base del cuerpo, daremos unas 6 vueltas, a medida que lo hacemos vamos colocando pega para que la cinta no se suelte ya que colocaremos los brazos, los pies y la argolla donde va a ir la cadena del llavero y seguiremos enrollando cinta azul alrededor, dando unas tres vueltas más, esto lo haremos para que todas las piezas queden sujetas y no se despeguen al ser manipuladas al final ya que va a ser un llavero.
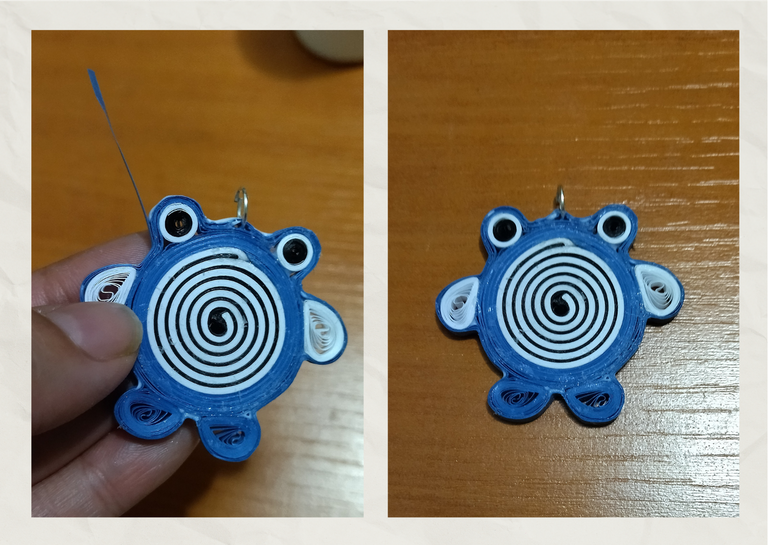
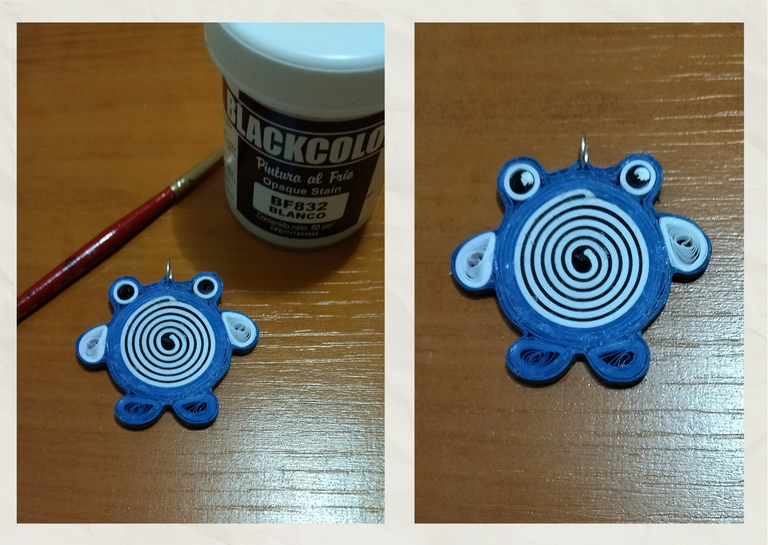
- We are going to take a fine paint brush and cold white paint, and we will give a few strokes in the black part to the eyes.
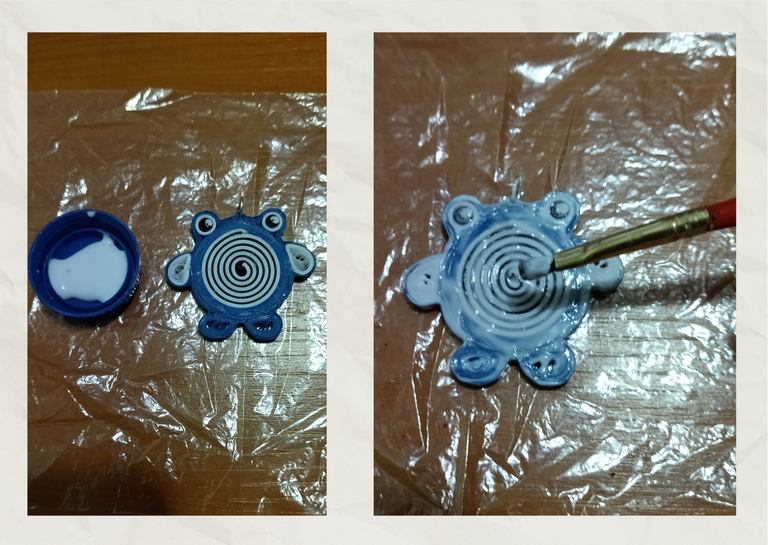
- Once our piece is ready I decided to protect it with white glue, we take a brush and give a few thick coats on both sides, I suggest to let dry completely when applying the first coat and then give another thick coat so that the keychain is completely plasticized. We can also use artistic resin, mirror shine or any product that protects our piece and gives a plasticized finish.
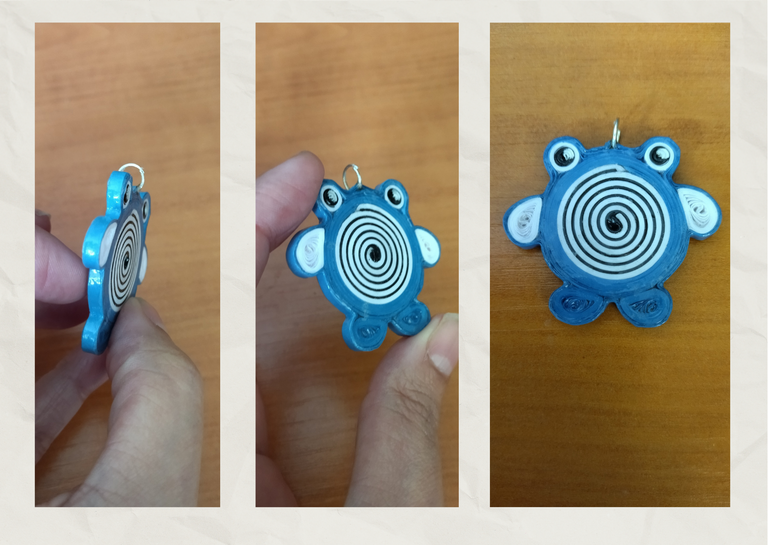
- Dry, fully protected and plasticized our piece of Pokémon Poliwhirl, we proceed to place your ring with chain for keychain, and thus we have our work ready.

• Vamos a tomar un pincel punta fina y la pintura blanca al frío, y le daremos unas pinceladas en la parte negra a los ojitos.
• Ya lista nuestra pieza decidí proteger con cola blanca, tomamos un pincel y daremos unas capas gruesas por ambos lados, sugiero dejar secar totalmente al aplicar la primera capa y luego dar otra capa gruesa para que el llavero quede completamente plastificado. También podemos utilizar resina artística, brillo espejo o cualquier producto que proteja nuestra pieza y de un acabado plastificado.
• Seco, totalmente protegido y plastificada nuestra pieza del Pokémon Poliwhirl, procedemos a colocarle su argolla con cadena para llavero, y de esta manera tenemos listo nuestro trabajo.

What did you think, did you like it?
I hope you did, I hope you liked my explanation, procedure and photos, I made them with love for you.
"Let out that muse that inspires you, and let your imagination fly".
Thank you all, see you next time. 🐾🐱💕

¿Que les pareció, les gustó?
Espero que sí, que les haya gustado mi explicación, procedimiento y fotos, los hice con mucho cariño por y para ustedes.
"Deja salir esa musa que te inspira, y deja volar tu imaginación".
Gracias a todos, nos vemos en la próxima. 🐾🐱💕

La mayoría de las fotos usadas en este post son de mi autoría y han sido sacadas en mi celular personal un Redmi 9T y editadas Canva Dos de las imágenes de portada fueron sacadas de Fuente Logo Pokemon Fuente Foto Poliwhirl y editadas en Canva Banner hecho por mí en Canva Traducido con la ayuda de DeepL


