Hello everyone...✨
Hello to my dear Hivers and the dear community of artists #HiveDIY, as always very pleased and excited to be here again, showing you my work made with love and especially for you.
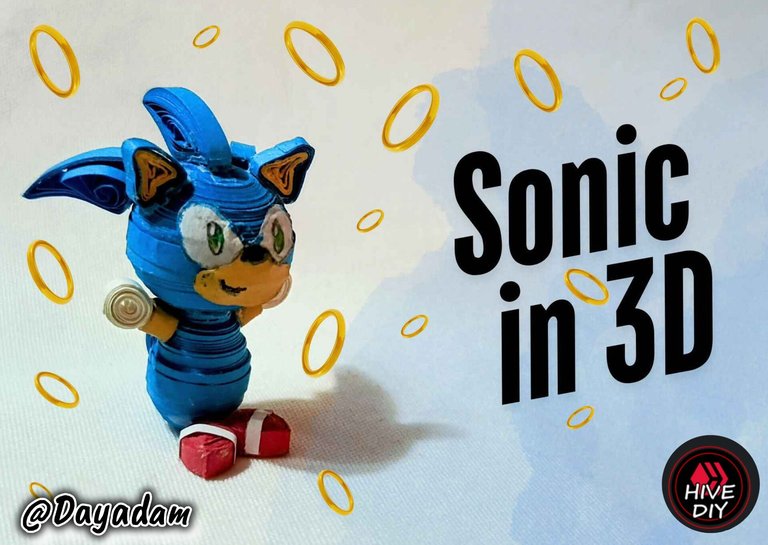
A long time ago I was asked for a figure, I meditated a lot to make it because given the technique I use sometimes there are things that are not so easy for me to get them, but they are a challenge as each of the things I do, as they put my mind to think about how to make them, so I just start the creative process and I observe how they are taking shape and staying in the process, in this case my dear @gaboamc2393 had asked me to make him a Sonic, maybe he doesn't even remember it hahaha, so I got down to work, it occurred to me to do it in 3D chibi version in the quilling technique.
I take this day of love and friendship to give you this little detail, a humble gift with lots of love for you, I hope you like my life 🤎
Hoping you like it, I leave you my creative process:
Let's get started:😃

Hola a Todos...✨
Hola a mis queridos Hivers y a la querida comunidad de artistas #HiveDIY, como siempre muy complacida y emocionada de encontrarme por acá nuevamente, mostrándole mi trabajo hecho con mucho amor y especialmente para ustedes.
Hace muchísimo tiempo me pidieron una figura, medité mucho para hacerla ya que dada la técnica que utilizo a veces hay cosas que no son tan fácil para mí sacarlas, pero son un reto como cada una de las cosas que hago, ya que ponen mi mente a pensar la manera de poder hacerlas, así que simplemente comienzo el proceso creativo y voy observando cómo van tomando forma y quedando en el proceso, en este caso mi querido @gaboamc2393 había pedido que le hiciera un Sonic, quizás ni lo recuerde jajaja, así que puse manos a la obra, se me ocurrió hacerlo en versión chibi en 3D en la técnica de quilling.
Aprovecho este día del amor y la amistad para darte este pequeño detalle, un humilde obsequio con mucho cariño para ti, espero que te guste mi vida 🤎
Esperando que sea de su agrado, les dejo mi proceso creativo:
Comencemos:😃
 |

• Cintas de quilling de diversas medida y colores.
• Molde para círculos.
• Hija blanca, lápiz, colores.
• Pega blanca extra fuerte (de carpintería).
• Tijera.
• Pincel.
- Quilling ribbons of different sizes and colors.
- Mold for circles.
- White scissors, pencil, colors.
- Extra strong white glue (carpentry glue).
- Scissors.
- Brush.

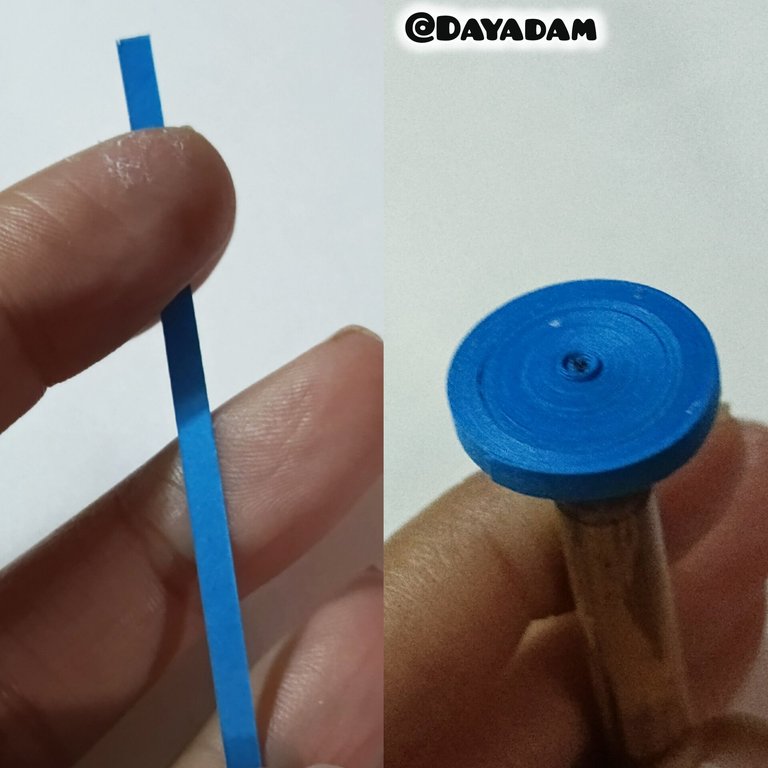
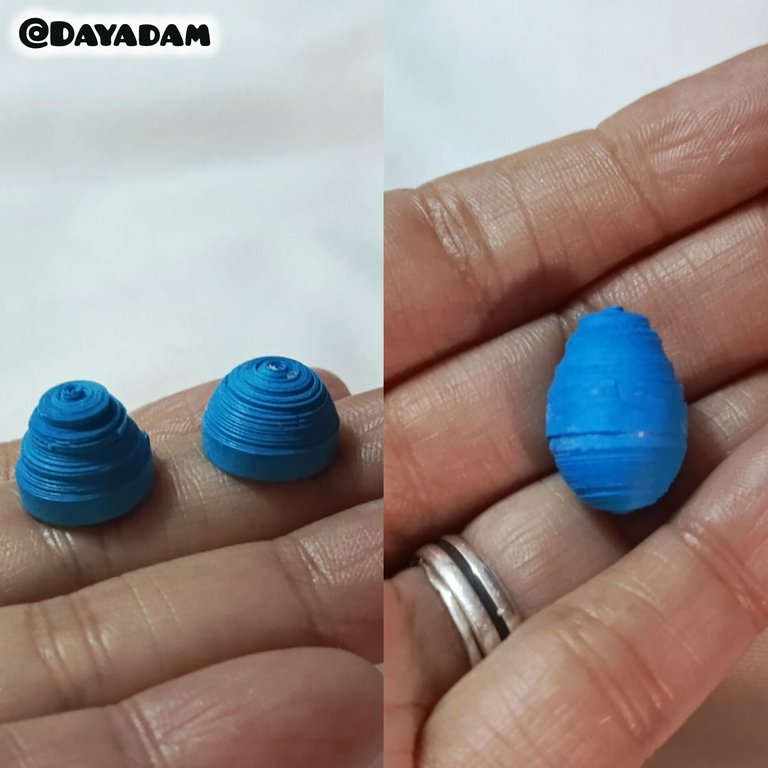
- To make the head, I started by taking 3 mm wide blue quilling tape, with the help of the needle I rolled the tape until I reached the end of the tape, sealed it with extra strong white glue, took it out of the needle and got a closed circle. We will need two equal circles.
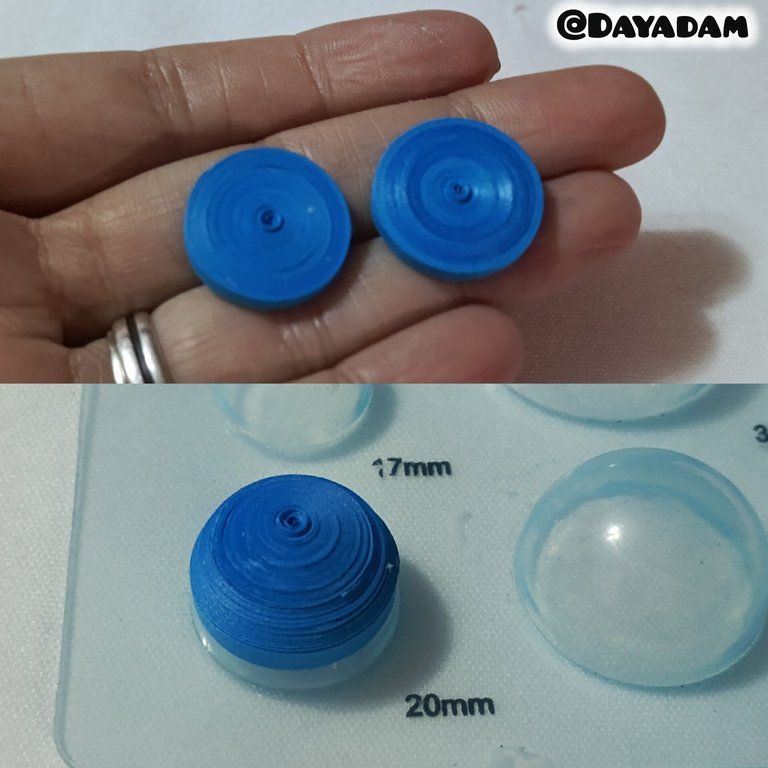
- We are going to mold the circles in a mold, then we take it out of the mold, we apply glue on the inside to prevent the pieces from deforming. Let it dry very well.
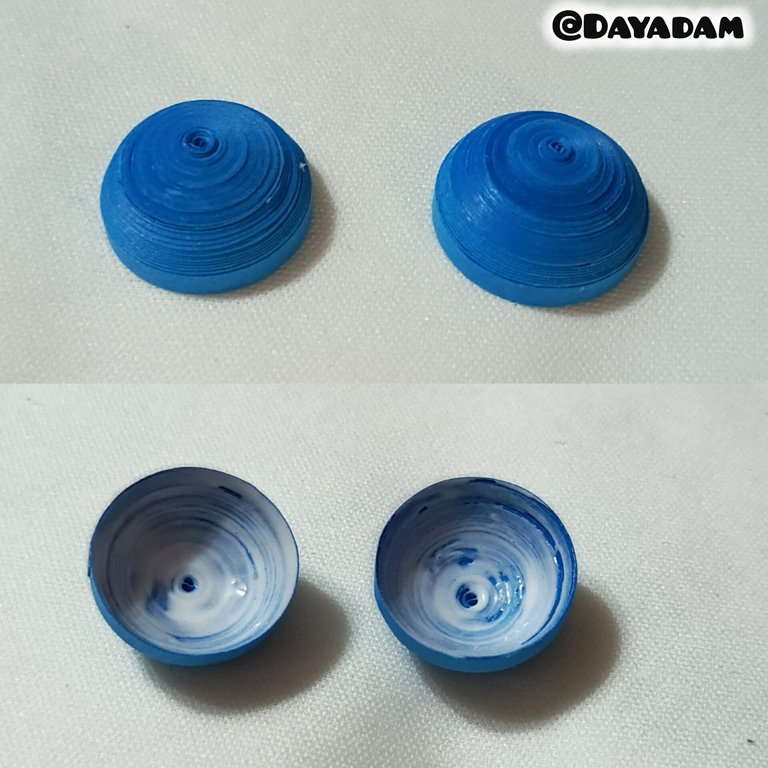
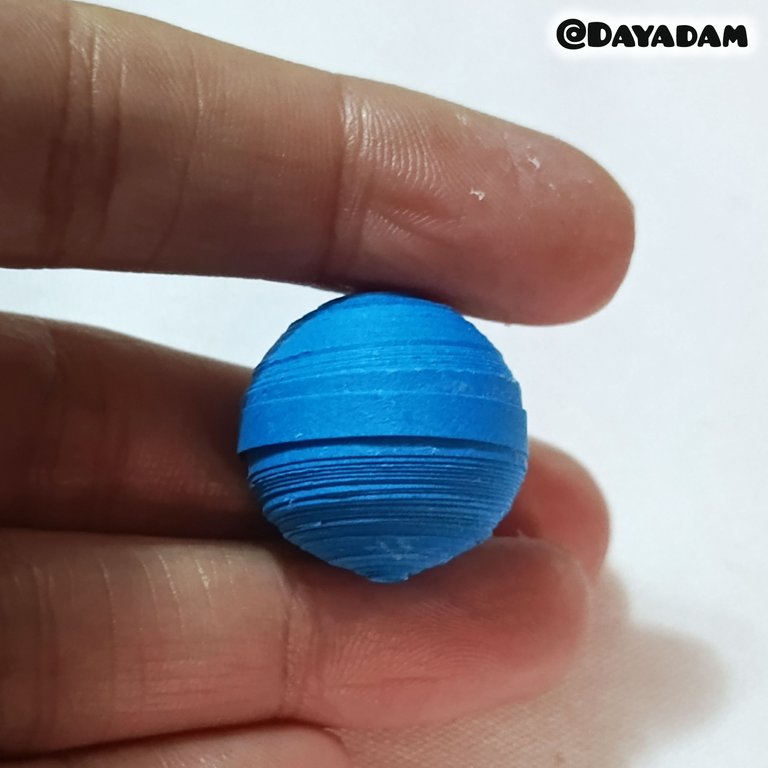
- We proceed to join the pieces with a little white glue, and we pass a ribbon through the middle of both semicircles.

• Para hacer la cabeza, comencé tomando cinta para quilling de color azul de 3 mm de ancho, con ayuda de la aguja enrollé la cinta hasta llegar al final de la misma, selle con pega blanca extra fuerte, saqué de la aguja obtuve un círculo cerrado. Vamos a necesitar dos círculos iguales.
• Vamos a moldear los círculos en un molde, luego lo sacamos del mismo, aplicamos pega por su parte interna para evitar que las piezas se deformen. Dejamos secar muy bien.
• Procedemos a unir las piezas con un poco de pega blanca, y pasamos una cinta por el medio de ambos semicírculos.
 |  |
 |  |
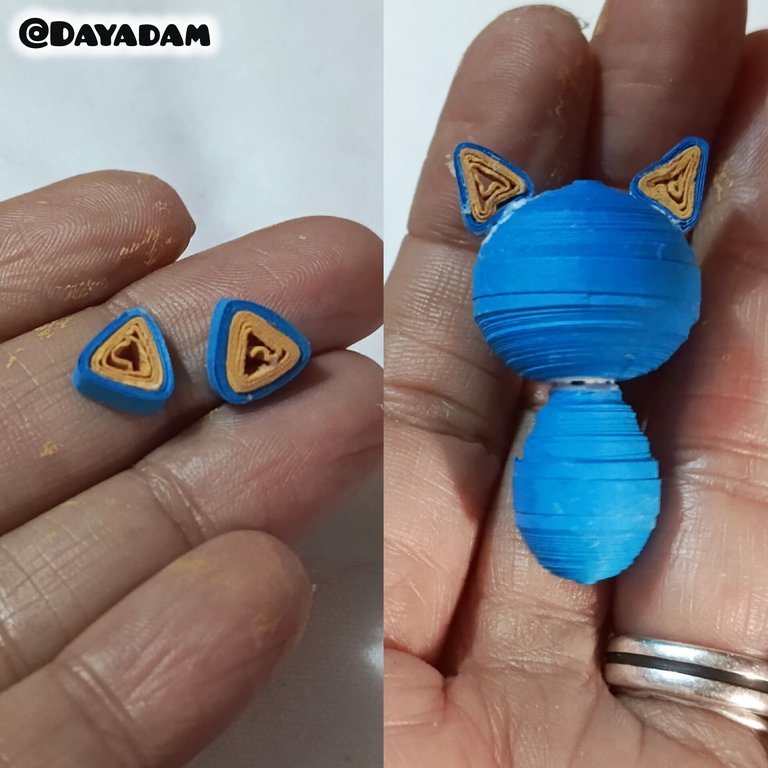
- To make the body under the same parameters I made 2 closed circles a little smaller, which I molded as you can see in the image, one in the shape of a semicircle and the other as a kind of cone, apply glue and join both pieces.
- For the ears I made two small triangles combined blue and skin color on the inside.
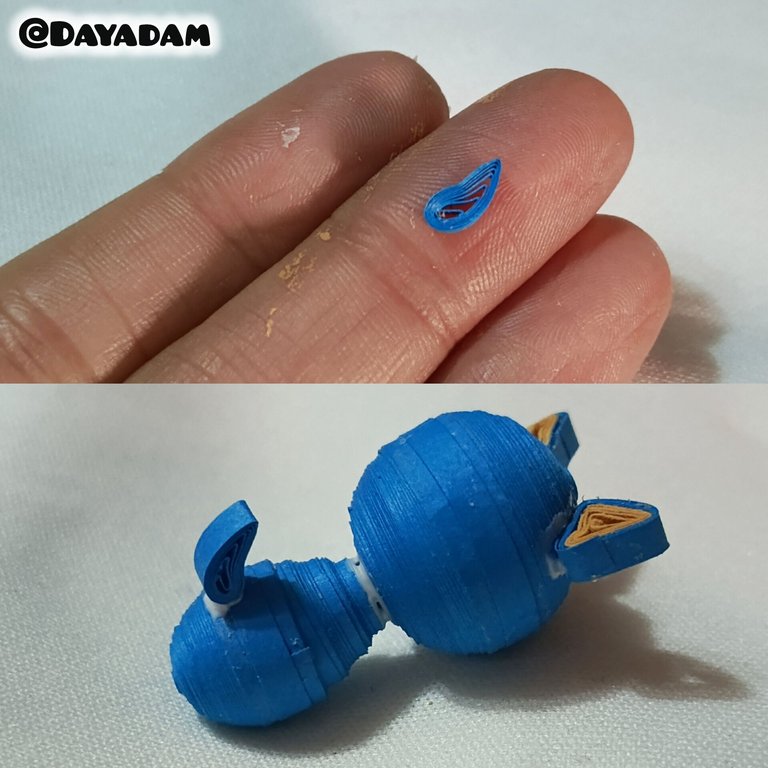
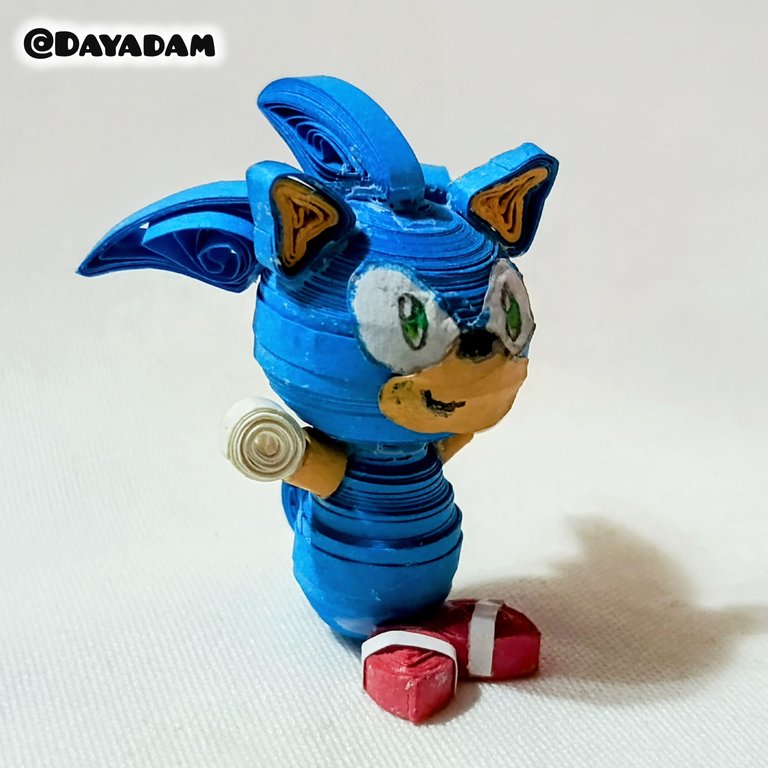
- For the tail I made a small blue crescent moon.
- For the arms and hands, I made 4 small closed circles, 2 skin-colored and 2 white, I joined both pieces with a little glue.
• Para realizar el cuerpo bajo los mismos parámetros anteriores realicé 2 círculos cerrados un poco más pequeños, los cuales moldee tal como pueden ver en la imagen, uno en forma de semicírculo y el otro como una especie de cono, aplicamos pega y unimos ambas piezas.
• Para las orejas realicé dos pequeños triángulos combinados azul, y color piel por la parte interna.
• Para la cola realicé una pequeñita media luna de color azul.
• Para los brazos y manos, realicé 4 pequeños círculos cerrados, 2 color piel, y 2 de color blanco uni ambas piezas con un poco de pega.
 |  |
 | 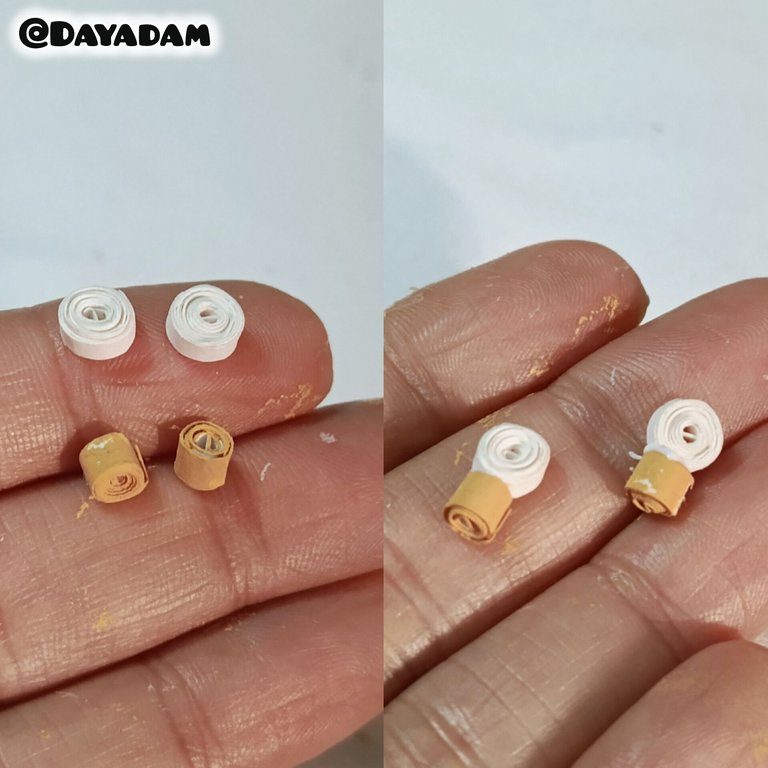 |
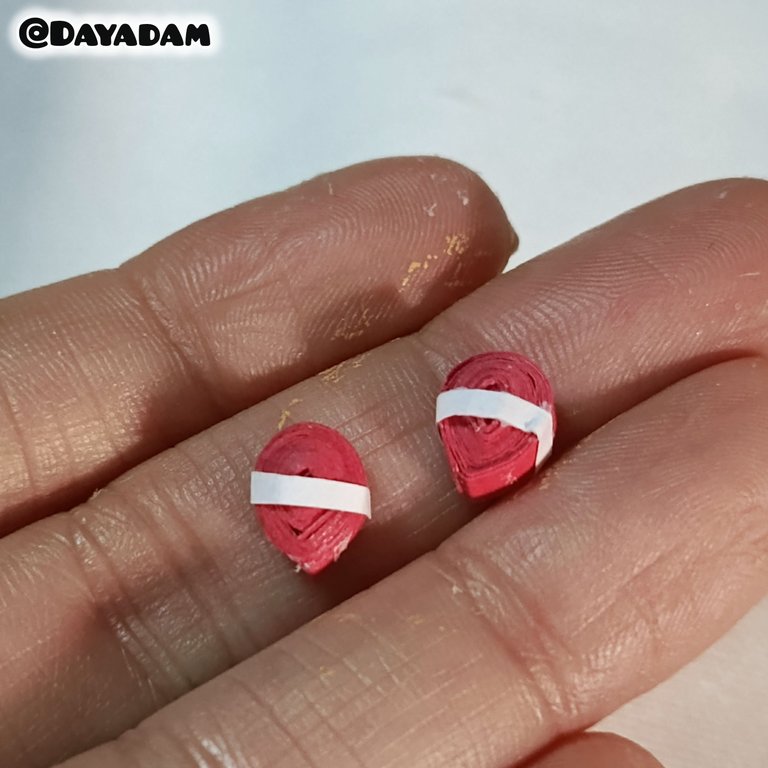
- For the shoes I made 2 small red drops, I passed a 1 millimeter wide white ribbon through the middle of both pieces.
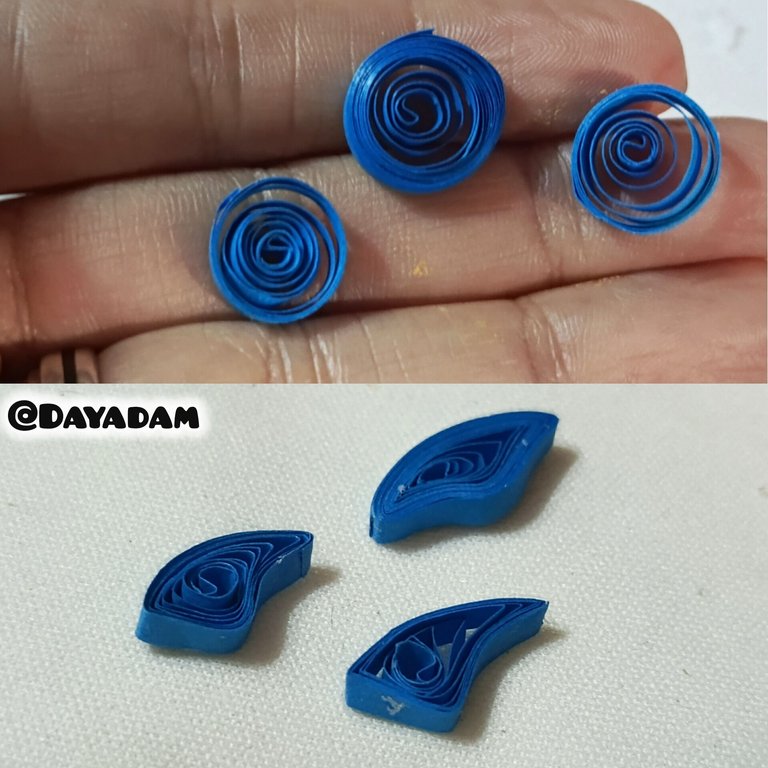
- For the hair, I made three open blue circles and then molded them in the shape of triangles inclined like a kind of wave.
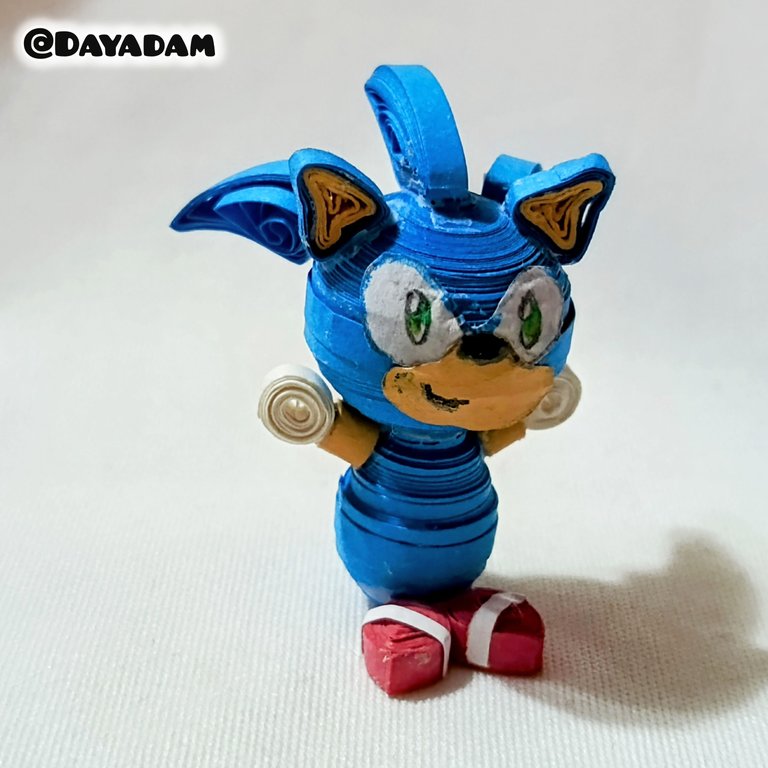
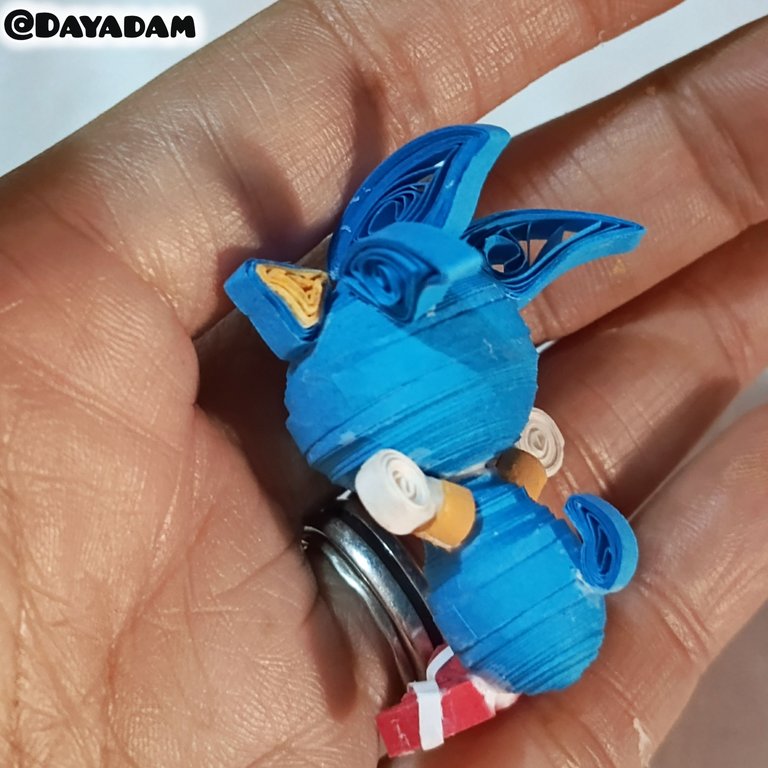
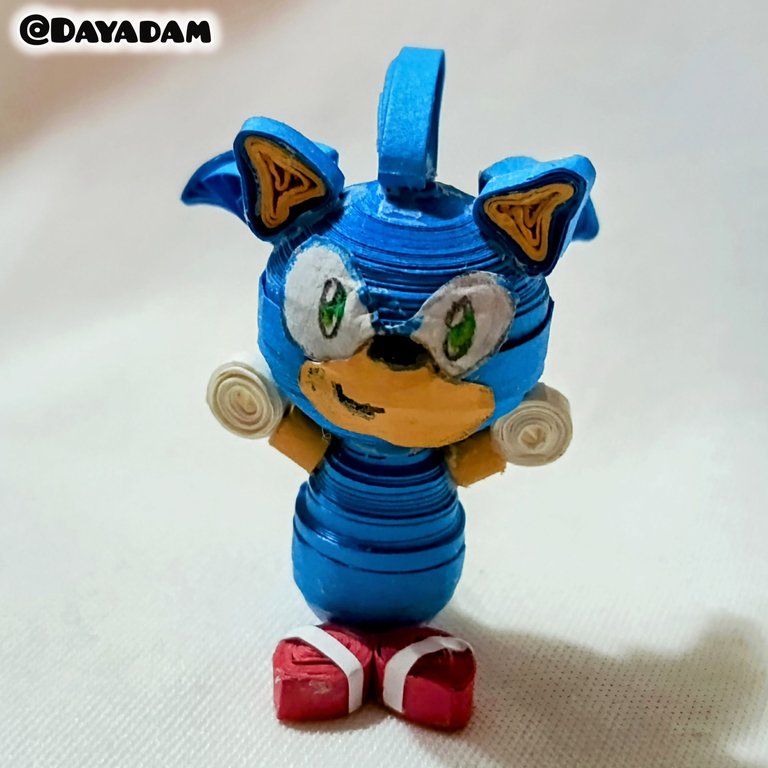
- I proceeded to glue all the pieces harmoniously to form Sonic.
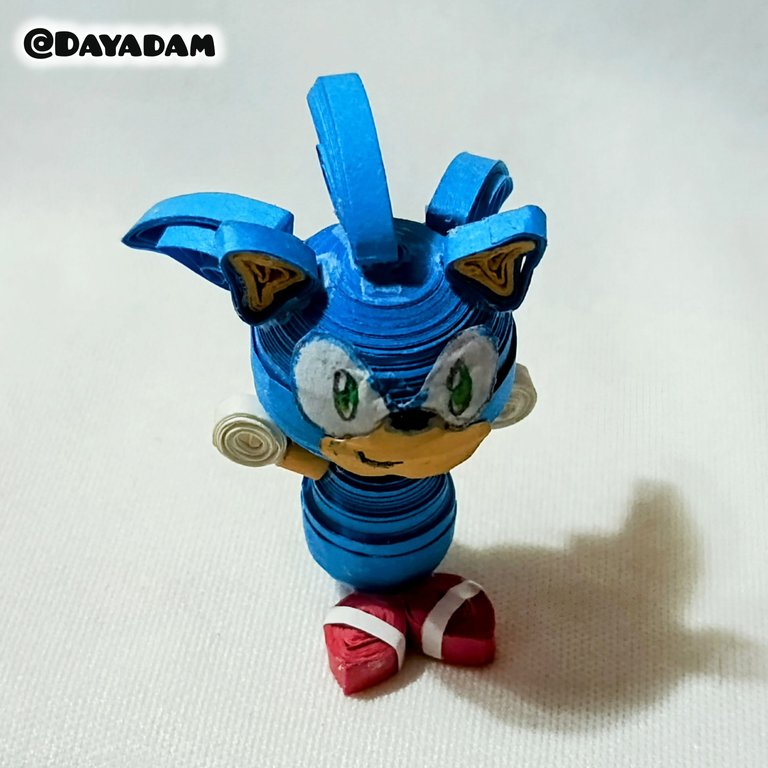
- To finish with a white leaf and colored pencils, I made the eyes and mouth and glued them in the corresponding places.
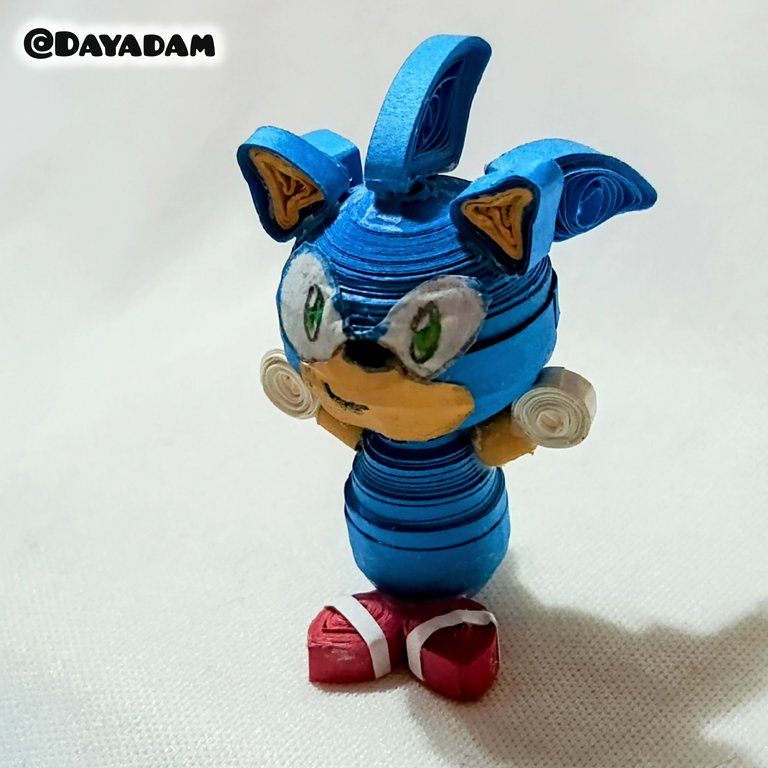
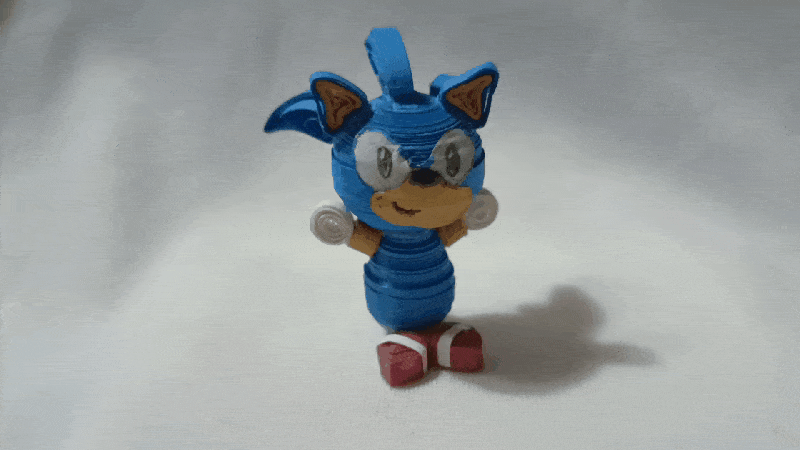
In this way I finished this cute figure of Sonic Chibi decorative Sonic in 3D, in the quilling technique.
• Para los zapatos realicé 2 pequeñas gotas de color rojo, pasé una cinta blanca de 1 milímetro de ancho por el medio de ambas piezas.
• Para el cabello realicé tres círculos abiertos de color azul luego moldee en forma de triángulos inclinados como una especie de ola.
• Procedí a pegar todas las piezas de manera armónica para formar el Sonic.
• Para finalizar con una hojita blanca, lápices de colores, realicé los ojos y boca pegué en los sitios correspondientes.
De esta manera finalice esta tierna figura de Sonic Chibi decorativa en 3D, en la técnica de técnica de quilling.
 |  |  |

|
 |  |
 |  |
 |
 |
What did you think, did you like it?
I hope you did, I hope you liked my explanation, procedure and photos, I made them with love for you.
"Let out that muse that inspires you, and let your imagination fly".
Thank you all, see you next time ✨.
¿Que les pareció, les gustó?
Espero que sí, que les haya gustado mi explicación, procedimiento y fotos, los hice con mucho cariño por y para ustedes.
"Deja salir esa musa que te inspira, y deja volar tu imaginación".
Gracias a todos, nos vemos en la próxima✨