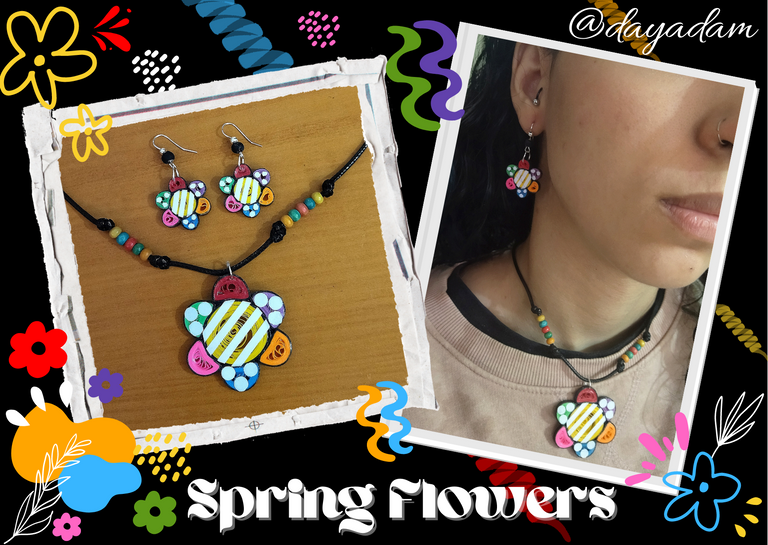
Hello everyone... 🌺✨
Hello my dear Hiver and the dear community of artists #HiveDiy, as always very pleased and excited to be here again to participate in this beautiful contest proposed by my friend @equipodelta, inspired by spring, the beauty of nature and especially the beauty of flowers. I invite you to participate, here are the guidelines for this wonderful contest.
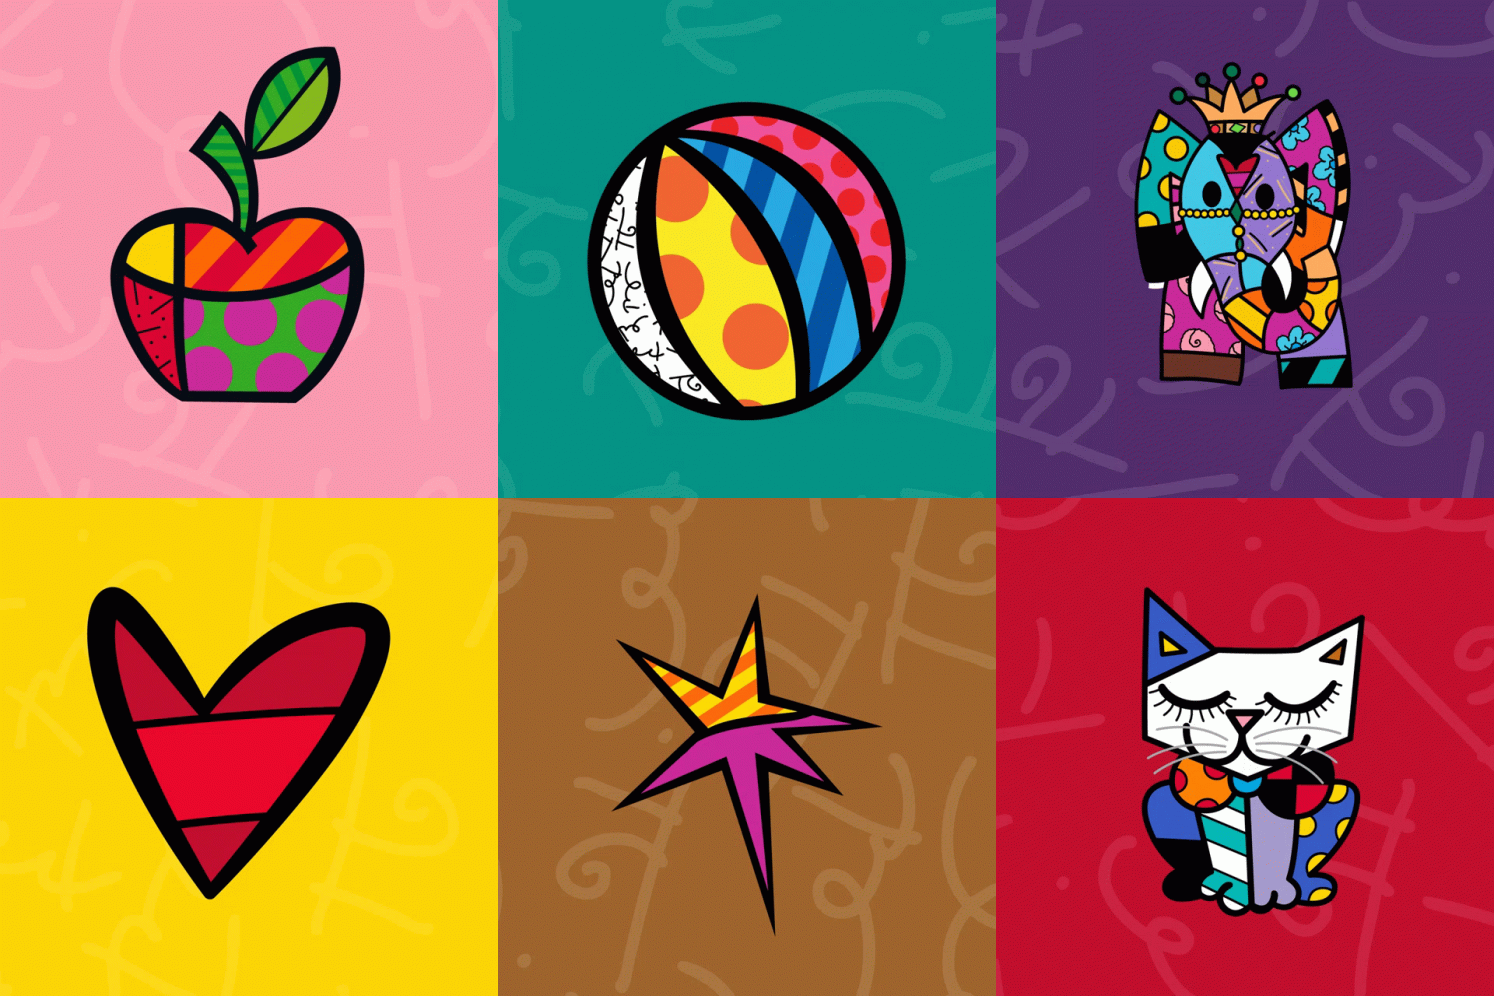
For today I bring you a totally personalized flower, a different flower without a specific name, a flower of my spring, with which I want to materialize a nice medallion with the paper quilling technique, but I had the idea of incorporating strong colors, striking and at the same time diverse decorations, so I was inspired by the artist Romero Britto adding to the work the shades, and the technique that he usually uses in his works.🌺✨
Romero Britto is a Brazilian artist, painter, screen printer and sculptor. He combines elements of cubism, pop art and graffiti painting in his work, using vibrant colors and bold patterns as a visual expression of hope, dreams and happiness, (source), if you want to expand more information and learn more about the wonderful and beautiful work of this artist, I invite you to explore through this link.
I invite to participate in the contest my dear @gaboamc2393 and @leidimarc .
So friends, without further ado join me in this creative process that I made especially for you.💕
Let's get started:😃

Hola a todos... 🌺✨
Hola a mis queridos Hiver y a la querida comunidad de artistas #HiveDiy, como siempre muy complacida y emocionada de encontrarme por acá nuevamente para participar en este bonito concurso propuesto por la amiga @equipodelta, inspirado en la primavera, lo hermoso de la naturaleza y sobre todo la belleza de las flores. Te invito a participar, por acá te dejo las pautas de este maravilloso concurso.
Para hoy les traigo una flor totalmente personalizada, una flor diferente si un nombre especifico, una flor de mi primavera, con la cual deseo materializar un bonito medallón con la técnica de paper quilling, pero me vino la idea de incorporarle colores fuertes, llamativos y al mismo tiempo decoraciones diversas, por esto me inspire en el Artista Romero Britto añadiendo al trabajo las tonalidades, y la técnica que el suele utilizar en sus obras.🌺✨
Romero Britto es un artista, pintor, serigrafista y escultor brasileño. Combina elementos del cubismo, el arte pop y la pintura de graffiti en su trabajo, utilizando colores vibrantes y patrones audaces como expresión visual de esperanza, sueños y felicidad, (fuente), si quieren ampliar más la información y conocer el maravilloso y hermoso trabajo de este artista, los invito a explorar mediante este link.
Invito a participar en el concurso a mi estimado @gaboamc2393 y a @leidimarc .
Entonces amigos, sin más preámbulos acompáñenme en este proceso creativo que realice especialmente para ustedes.💕
Comencemos:😃

• Cintas de papel (quilling) de 3mm de ancho colores negro, amarillo, blanco, rojo, morado, naranja, azul, rosado y verde.
• Trozo de hoja blanca o algunos círculos de papel sacados de un perforador de papel.
• Aguja para quilling.
• Pega blanca
• Regla con diversas medidas de circunferencias.
• Tijera.
• Argolla de bisutería mediana.
• Alicate punta fina.
• Pincel.
• Collar de su preferencia.Opcional si desean realizar hacer los zarcillos:
• Base para zarcillo colgantes (anzuelos).
• Perlas de madera medianas color negro.
- Paper ribbons (quilling) 3mm wide in black, yellow, white, red, purple, orange, blue, pink and green.
- Piece of white sheet or some paper circles taken from a paper punch.
- Quilling needle.
- White glue
- Ruler with different circumference measurements.
- Scissors.
- Medium-sized costume jewelry ring.
- Fine-nosed pliers.
- Paintbrush.
- Necklace of your preference.
Optional if you wish to make the tendrils:
- Base for hanging tendrils (hooks).
- Medium-sized black wooden beads.

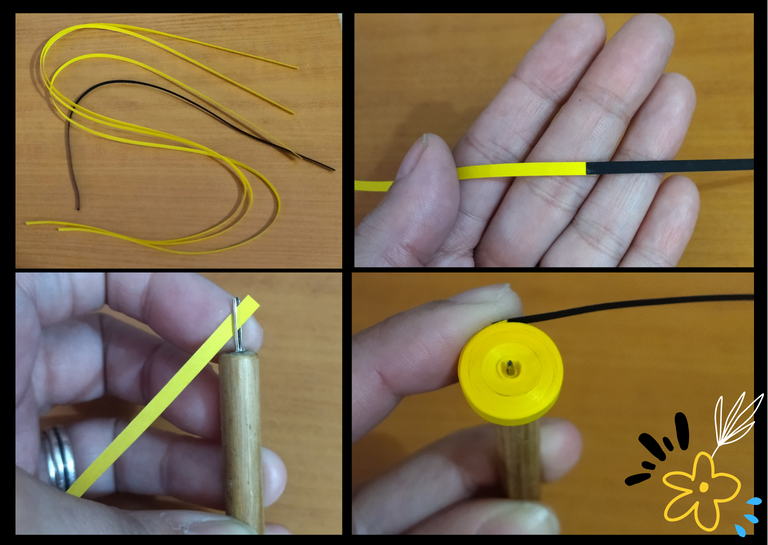
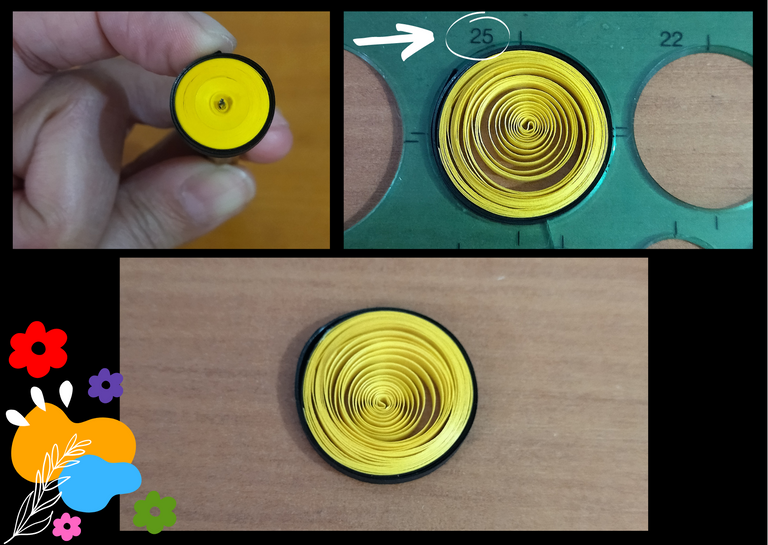
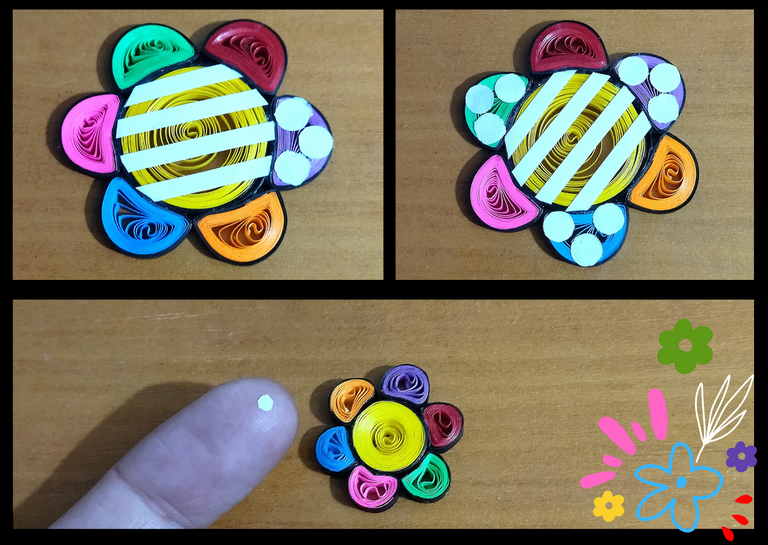
- Let's start making the central circle of the flower, taking yellow quilling ribbon 3mm wide by 150cms long, (if you don't have such a long ribbon just join the strips with a touch of glue to reach the required length), we will also take a black ribbon 3mm wide x 25cms long, we will join it to the yellow ribbon with a touch of white glue forming a single strip.
- With the quilling needle we are going to roll up starting with the yellow part and ending with the black part, when we finish rolling up we take out the needle and we will put in the ruler with circumference measures in the circle number 25 to form an open circle, we take out the ruler and seal with white glue.
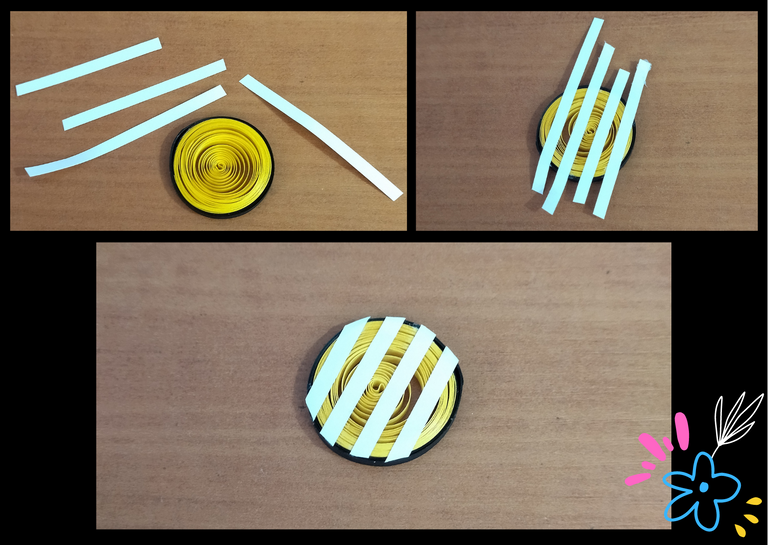
- We are going to decorate the central circle, take some pieces of white ribbons 3mm wide and place 4 strips along the circle, cut the excess, you can place the amount of strips you want according to the size you decide to make your pendant or medallion, (reserve).

• Vamos a comenzar haciendo el círculo central de la flor, tomando cinta para quilling color amarilla de 3mm de ancho por 150cms de largo, (si no tienes una cinta tan larga solo vas a unir las tiras con un toque de pega hasta alcanzar el largo requerido), vamos a tomar también una cinta de color negro de 3mm de ancho x 25cms de largo, está la vamos a unir a la cinta amarilla con un toque de pega blanca formando una sola tira.
• Con la aguja para quilling vamos a enrollar comenzando por la parte amarilla y terminando por la negra, al terminar de enrollar sacamos de la aguja y meteremos en la regla con medidas de circunferencias en el círculo número 25 para formar un circulo abierto, sacamos de la regla sellamos con pega blanca.
• Vamos a adornar el círculo central, tome unos trozos de cintas blanca de 3mm de ancho y coloque 4 tiras a lo largo del círculo, cortamos los excesos, ustedes pueden colocar la cantidad de tiras que deseen según el tamaño en que decidan hacer su dije o medallón, (reservamos).
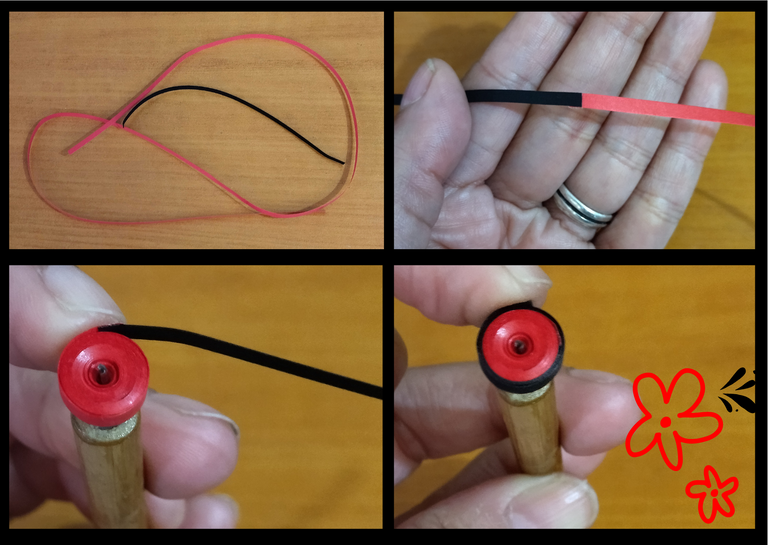
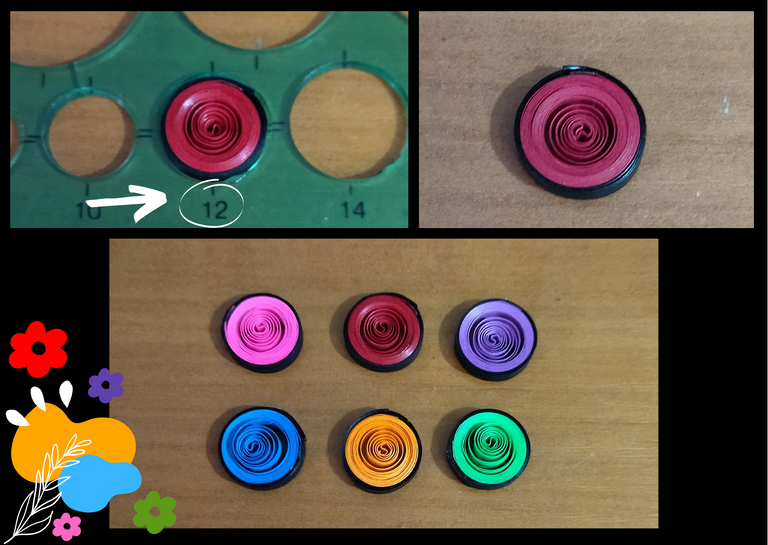
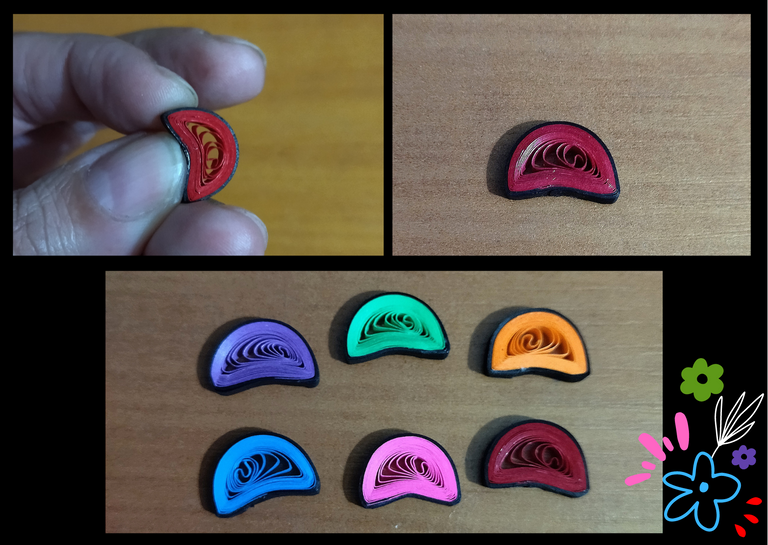
- Now let's go with the petals of the flower which will be six, we will begin by taking a red ribbon 3mm wide x 50cms long and a black ribbon 3mm wide x 12cms long, we will join both to form a single ribbon, we will roll with the quilling needle starting with the red color and ending with the black, when we finish rolling the ribbon we will place it in the circle of the ruler number 12, we take it out of the ruler and seal with glue. We will repeat this same process with the purple, orange, blue, pink and green ribbon to form our 6 open circles and make the petals of our flower.
- Once our circles of different colors are ready, we are going to shape the petals by flattening with our fingers one side of the circle forming a half moon.

• Ahora vamos con los pétalos de la flor los cuales serán seis, vamos a comenzar tomando una cinta roja de 3mm de ancho x 50cms de largo y una cinta negra de 3mm de ancho x 12cms de largo, uniremos ambas para formar una sola cinta, enrollaremos con la aguja para quilling empezando por el color rojo y terminando por el negro, al terminar de enrollar la cinta colocaremos en el círculo de la regla número 12, sacamos de la regla y sellamos con pega. Este mismo proceso lo repetiremos con la cinta morada, anaranjada, azul, rosada y verde para formar nuestros 6 círculos abiertos y elaborar los pétalos de nuestra flor.
• Listos nuestros círculos de diversos colores, vamos a darle forma a los pétalos aplanando con los dedos un lado del círculo formando una media luna.
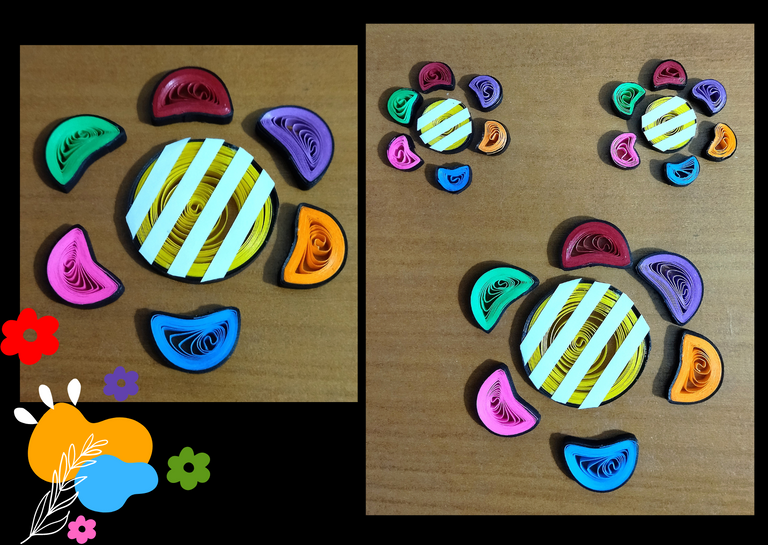
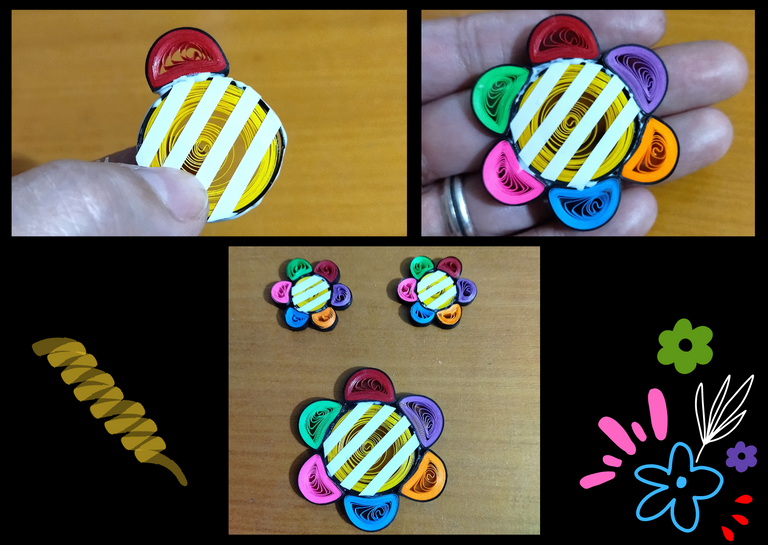
- Let's form our flower by gluing each of the petals with extra strong white glue around the large circle we had reserved.
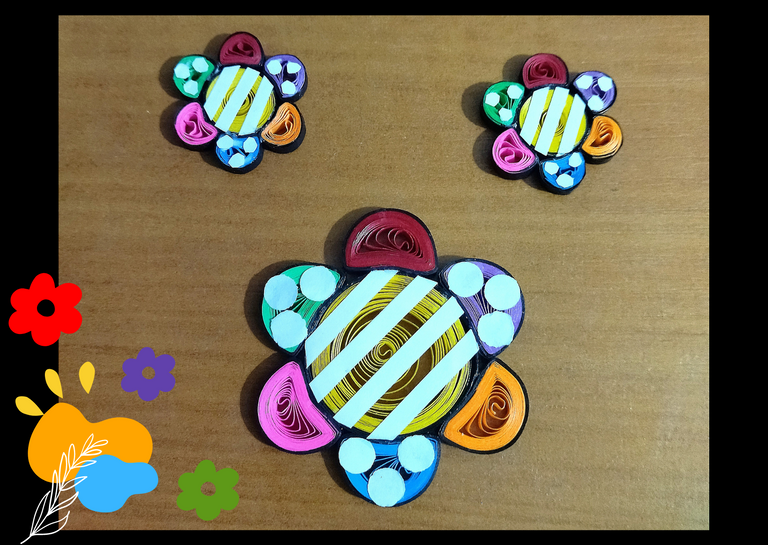
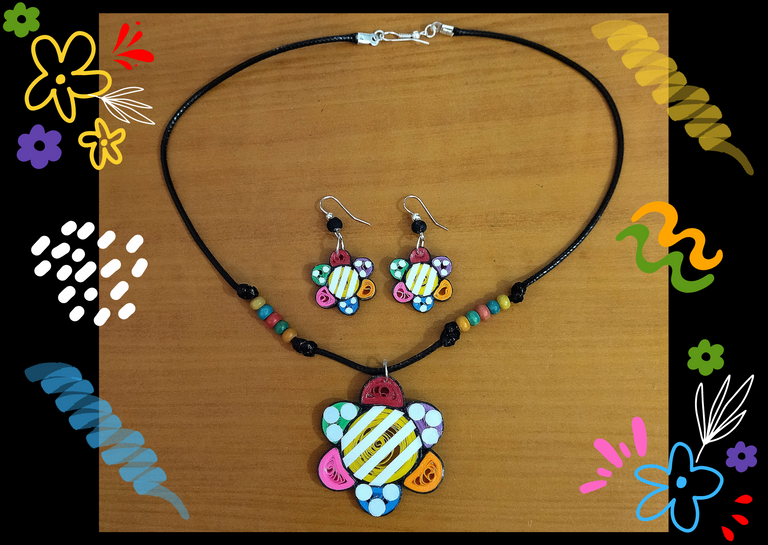
- As you can see simultaneously I wanted to materialize a smaller flower to make some hanging tendrils, I really like to combine pieces of different sizes, you can make your charms in the size of your preference. We are going to form then our big flower and the small ones to make the set of accessories, a pendant or medallion for necklace, and a pair of dangling earrings.

• Formemos nuestra flor pegando cada uno de los pétalos con cola blanca extra fuerte, alrededor del círculo grande que teníamos reservado.
• Como podrán ver simultáneamente quise materializar una flor más pequeña para realizar unos zarcillos colgantes, me gusta mucho combinar piezas de diferentes tamaños, ustedes pueden hacer sus dijes del tamaño de su preferencia. Vamos a formar entonces nuestra flor grande y las pequeñas para hacer el conjunto de accesorios, un dije o medallón para collar, y un par de zarcillos colgantes.
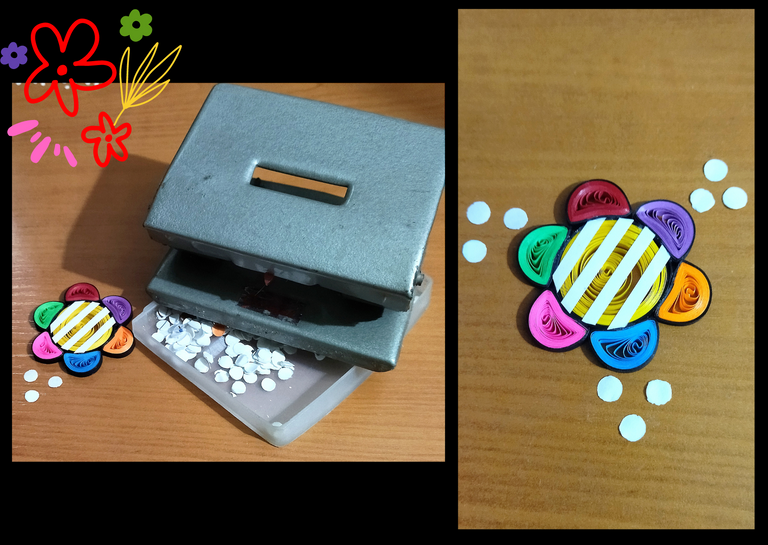
- Once our flower is formed, let's finish decorating to add another touch of the technique of the artist I mentioned ("Britto"), I wanted to place some white circles on three petals, for the big medallion I took the circles out of a paper punch, in the images you can see the way I glued them to the petal, and for the small ones I cut them myself from a piece of white ribbon since they are very small circles.
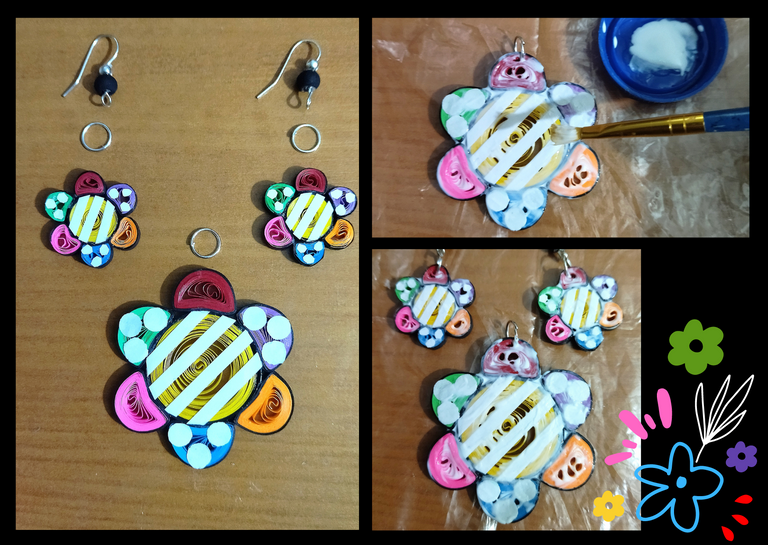
- Now we have our flowers ready, we are going to place their jewelry rings, and to the tendrils their hanging bases (hooks).
- Finally we are going to apply the liquid protection (plasticized) to our pieces, with a brush we will add several layers of extra strong white glue, letting it dry between one layer and another.
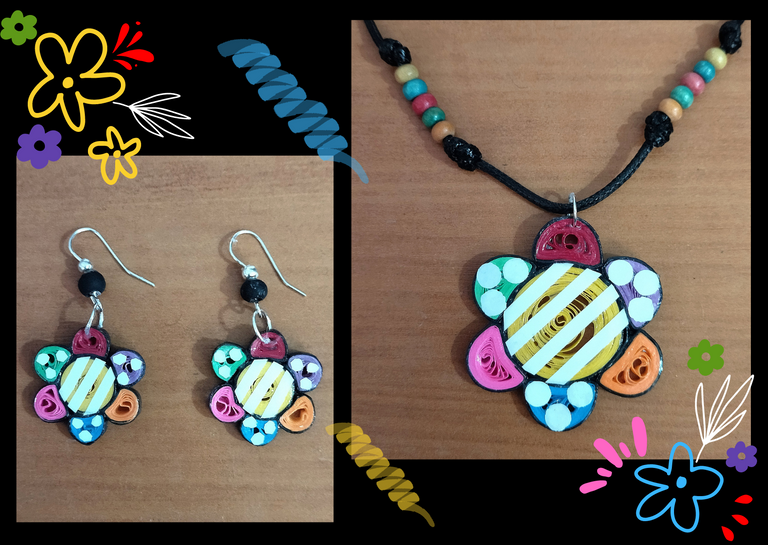
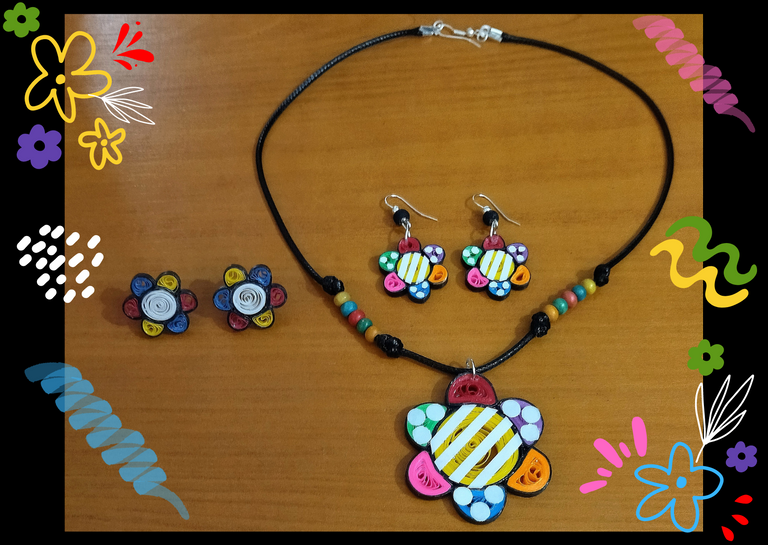
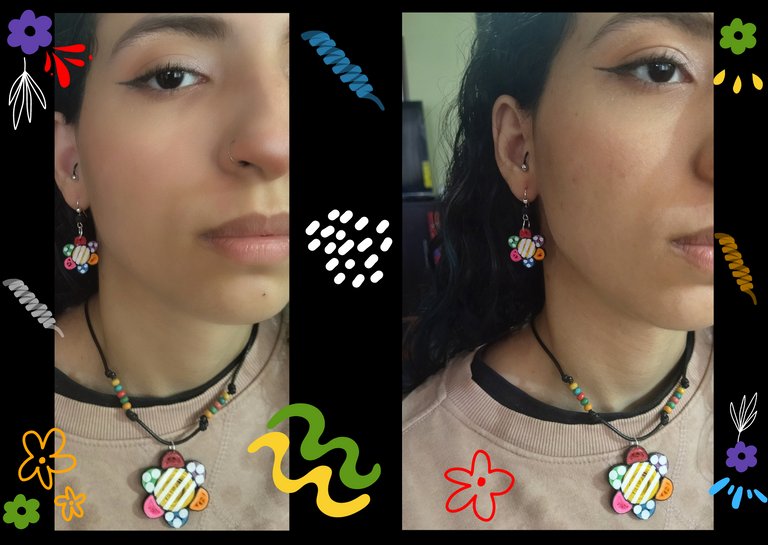
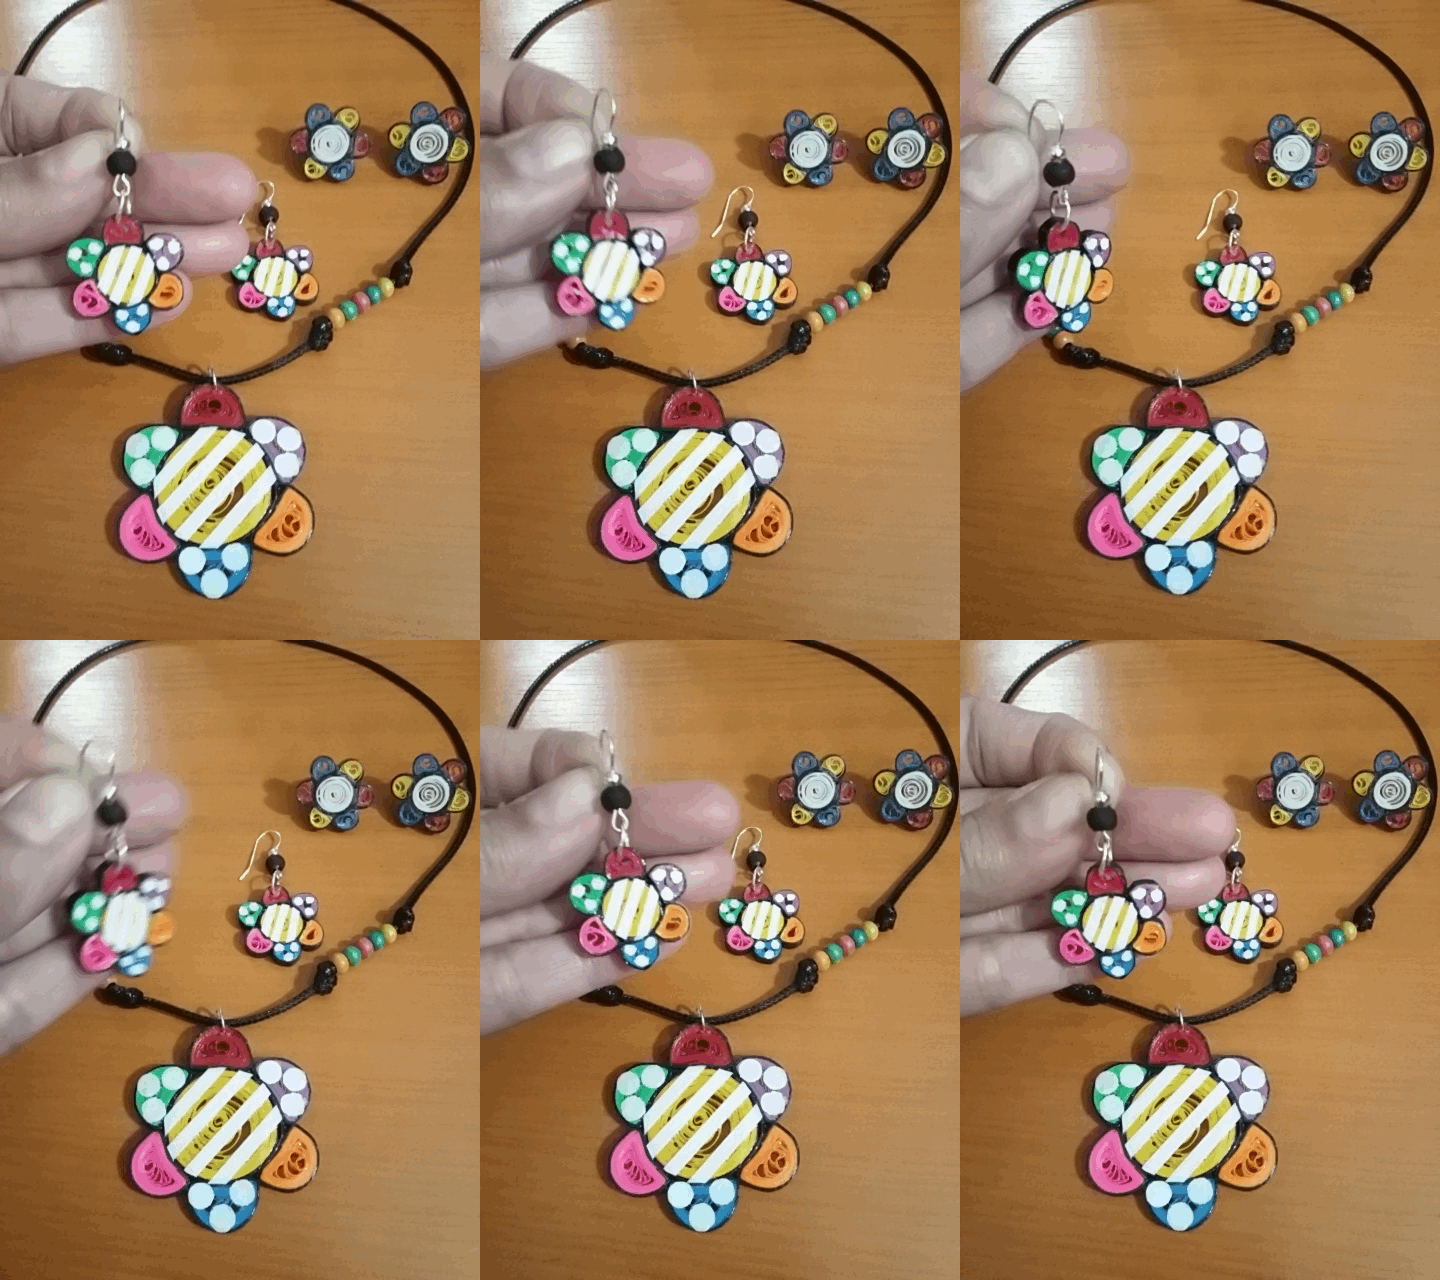
In this way we will have our set of accessories, medallion and hanging tendrils with the technique of the artist "Britto", ready for use.
The medallion can be placed on the necklace of your choice, in my case I made a thick black snakeskin necklace, to which I added some wooden beads of the same color as the medallion to make it stand out.
Additionally you will notice that I made another flower with another combination, I wanted to place the colors of the flag of my country and make it with some fixed bases, I will leave it in the images so you can see how it looks. I always like to emphasize that you can do each work in your own way, with the measures, colors and combinations that you want, everything is in inspiring you and let your imagination fly...🌺✨

• Formada nuestra flor, vamos a terminar de adornar para añadirle otro toque de la técnica del artista que cite (“Britto”), quise colocar a tres pétalos unos círculos de color blanco, para el medallón grande saque los círculos de una perforadora de papel, en las imágenes podrán ver la manera en que los pegue al pétalo, y para los pequeños los corte yo misma de un trocito de cinta blanca ya que son unos círculos muy pequeñitos.
• Ya tenemos nuestras flores listas vamos a colocarles sus argollas de bisutería, y a los zarcillos sus bases colgantes (anzuelos).
• Por ultimo vamos a colocar la protección liquida (plastificado) a nuestras piezas, con un pincel añadiremos varias capas de pega blanca extra fuerte, dejando secar entre una capa y otra.
De esta manera tendremos nuestro conjunto de accesorios, medallón y zarcillos colgantes con la técnica del artista “Britto”, listo para su uso.
El medallón lo puedes colocar en el collar de tu preferencia, en mi caso realice un collar de piel de serpiente gruesa color negro, al cual le añadí algunas perlas de madera de las tonalidades del medallón para que resaltara.
Adicionalmente van a observar que realice otra flor con otra combinación, quise colocar los colores de la bandera de mi país y realizarlo con unas bases fijas, se lo dejare en las imágenes para que vean como luce. Siempre me gusta destacar que cada trabajo lo puedes hacer a tu manera, con las medidas, colores y combinaciones que más desees, todo está en inspirarte y dejar volar tu imaginación… 🌺✨

What did you think, did you like it?
I hope you did, I hope you liked my explanation, procedure and photos, I made them with love for you.
"Let out that muse that inspires you, and let your imagination fly".
Thank you all, see you next time. 🌺✨

¿Que les pareció, les gustó?
Espero que sí, que les haya gustado mi explicación, procedimiento y fotos, los hice con mucho cariño por y para ustedes.
"Deja salir esa musa que te inspira, y deja volar tu imaginación".
Gracias a todos, nos vemos en la próxima. 🌺✨
Los invito que apoyen a "La Colmena", dale tu voto ✨
 Vote la-colmena for witness By @ylich
Todas las fotos usadas en este post son de mi autoría y han sido sacadas en mi celular personal un Redmi 9T y editadas Canva Banner y separador hecho por mí en Canva Traducido con la ayuda de DeepL


