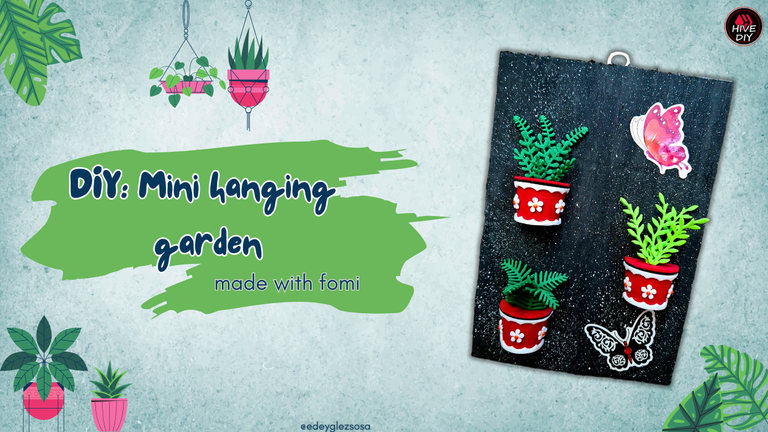
Greetings, dear family of @hivediy. Today I want to show you how to make a miniature hanging garden. But it's not just any hanging garden, because the one I bring you today never withers, requires no water or sun and, if you wish, can give any kind of flower.
Don't believe me? Well, let me tell you that everything I have told you is true, because my hanging garden is made from recycled materials and green fomi, which will adorn with its beautiful color any place 365 days a year. So if I have managed to arouse your curiosity, join me to know the materials and then the step by step.
Saludos, querida familia de @hivediy. Hoy les quiero enseñar a confeccionar un jardín colgante en miniatura. Pero no es cualquier jardín colgante, ya que el que les traigo hoy nunca se marchita, no requiere de agua ni sol y, si así lo desean, puede dar cualquier tipo de flor.
¿No me creen? Pues déjenme decirles que todo lo que les he contado es cierto, pues mi jardín colgante está elaborado a partir de materiales reciclados y fomi verde, el cual adornará con su hermoso color cualquier lugar los 365 días del año. Así que si he logrado despertar su curiosidad, acompáñenme a conocer los materiales y seguidamente el paso a paso.
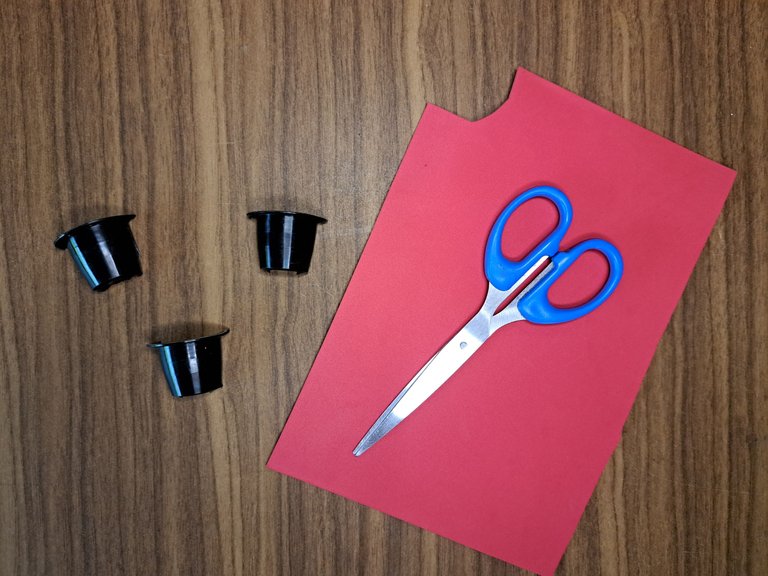
Materials // Materiales
| English | Español |
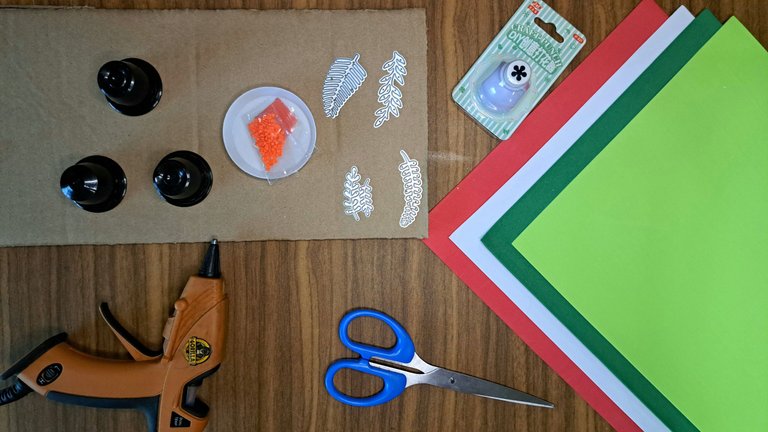
| ✔️ Green, red, white and light green plain fomi | ✔️ Fomi liso verde, rojo, blanco y verde claro |
| ✔️ Recycled cardboard | ✔️ Cartón reciclado |
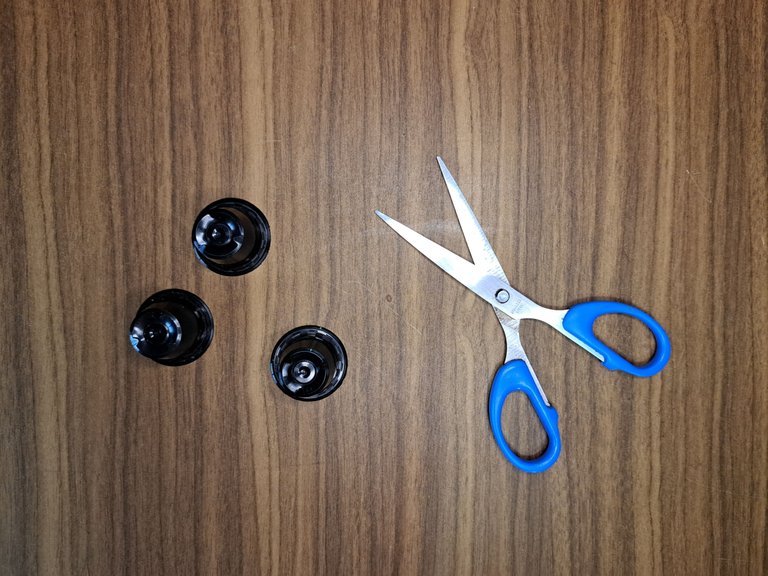
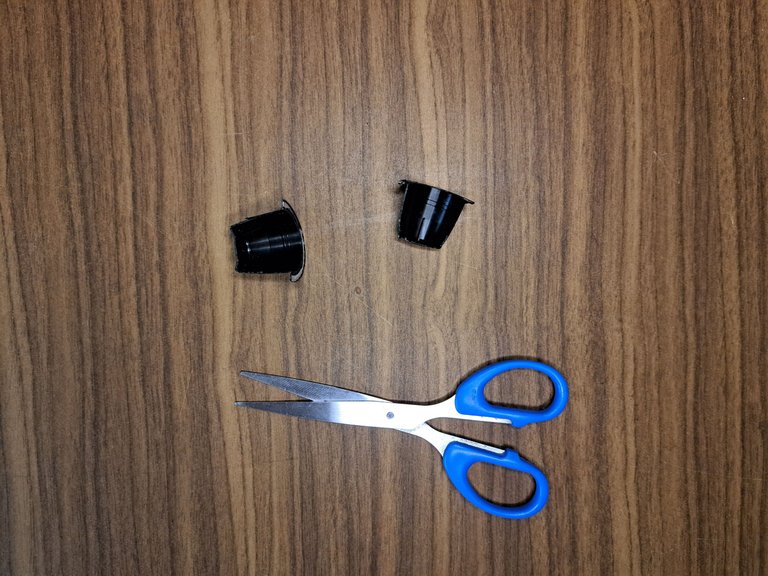
| ✔️ 3 plastic coffee capsules | ✔️ 3 cápsulas plásticos de café |
| ✔️ Metal cutting dies in the shape of branches and ferns | ✔️ Troqueles metálicos con forma de ramas y helechos |
| ✔️ Flower-shaped hole punch | ✔️ Perforadora con forma de flor |
| ✔️ Orange plastic semi-beads | ✔️ Semi-perlas de plásticos naranjas |
| ✔️ Scissors | ✔️ Tijeras |
| ✔️ Hot silicone | ✔️ Silicona caliente |
Step by step // Paso a paso
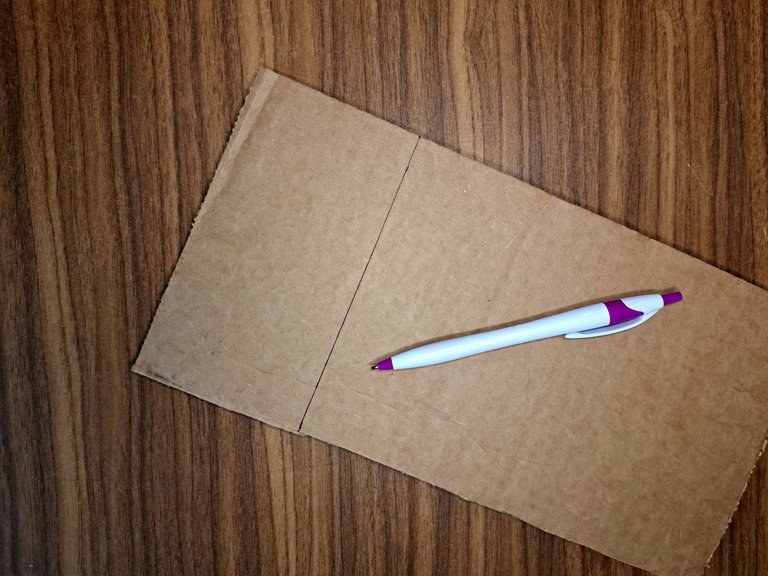
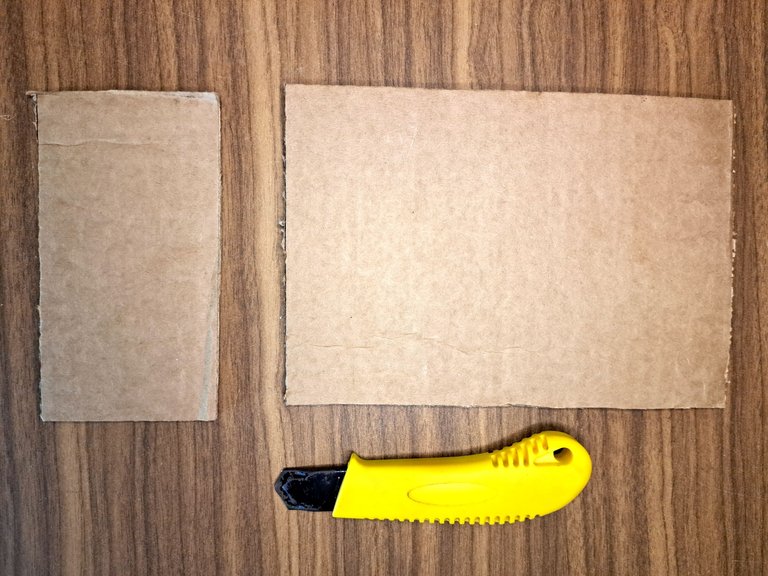
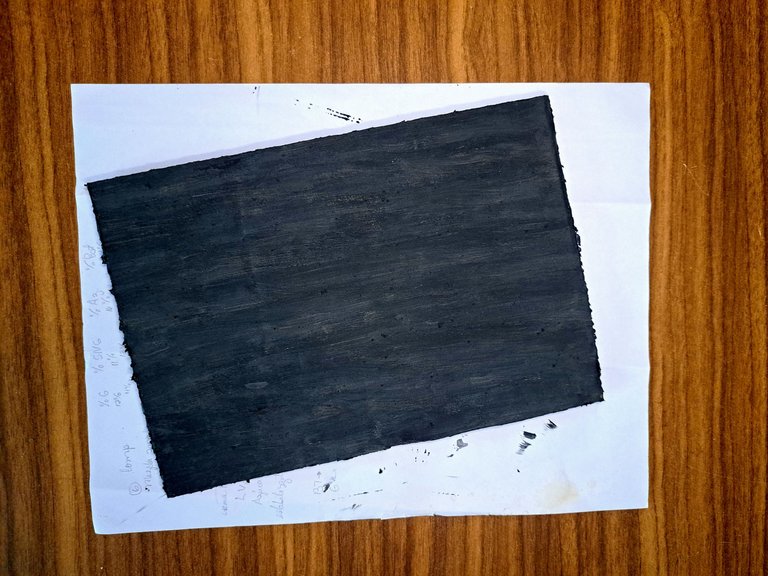
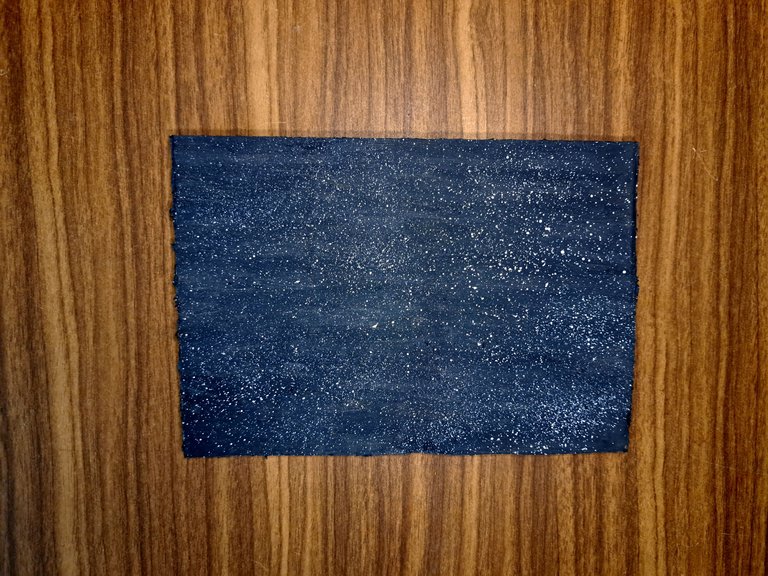
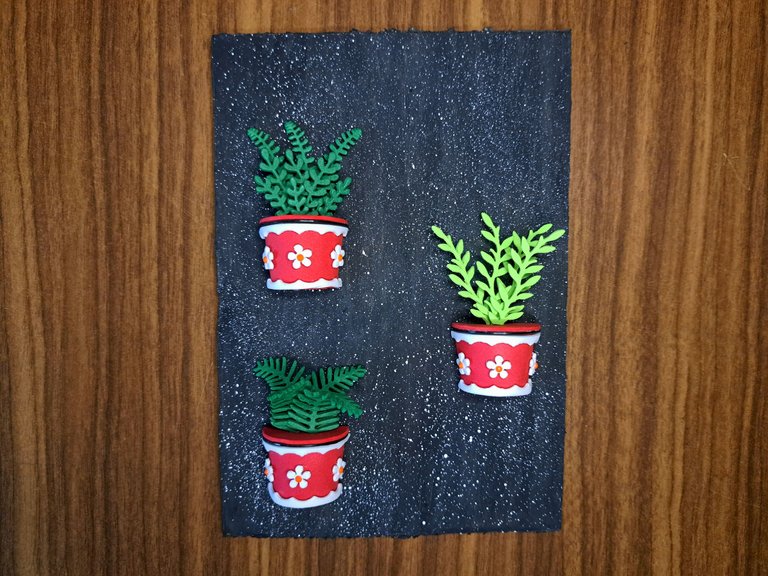
1️⃣ The first thing I did was to cut a piece of cardboard 22 cm long and 16 cm wide. After lining up the edges, I painted one of its sides black and when it dried, I spread white paint on it using a brush.
Lo primero que hice fue cortar una pieza de cartón de 22 cm de largo y 16 cm de ancho. Luego de alinear los bordes, pinté una de sus caras de negro y cuando secó, le esparcí pintura blanca utilizando un cepillo.
 |  |
 |  |
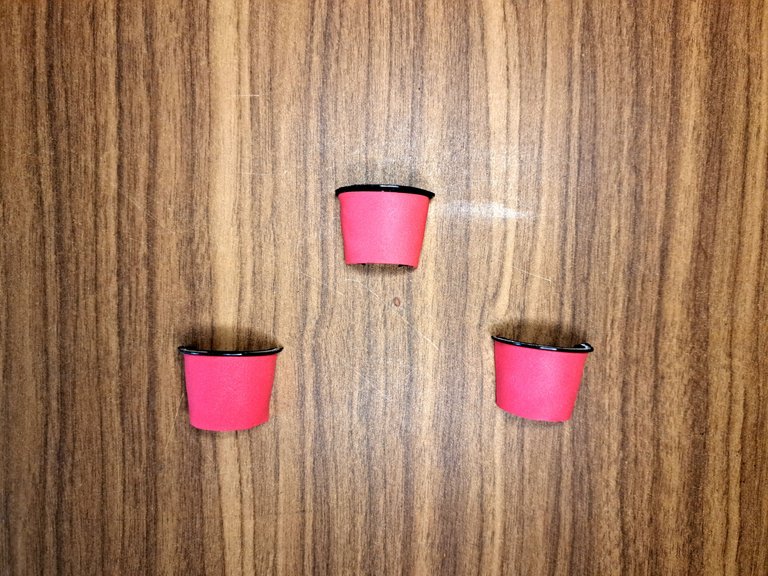
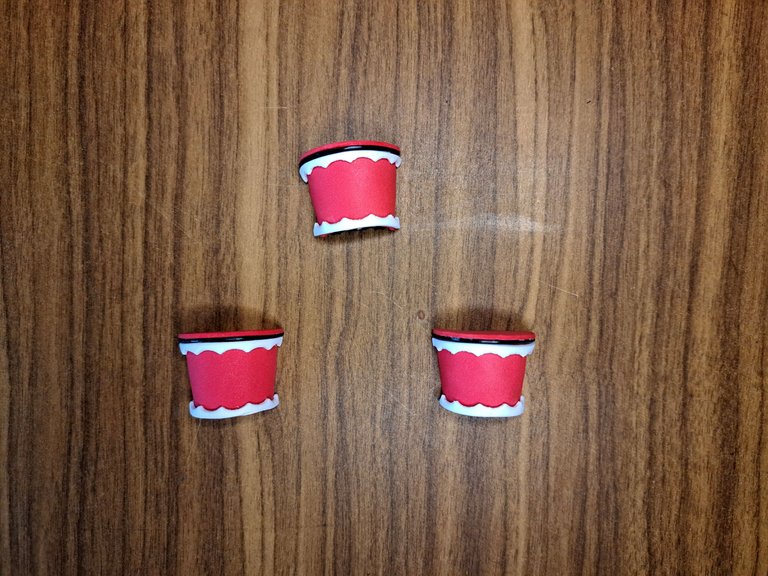
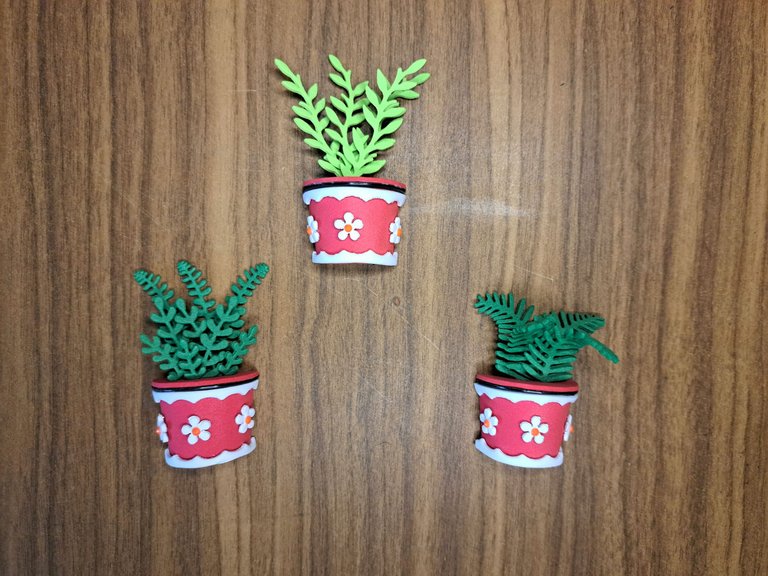
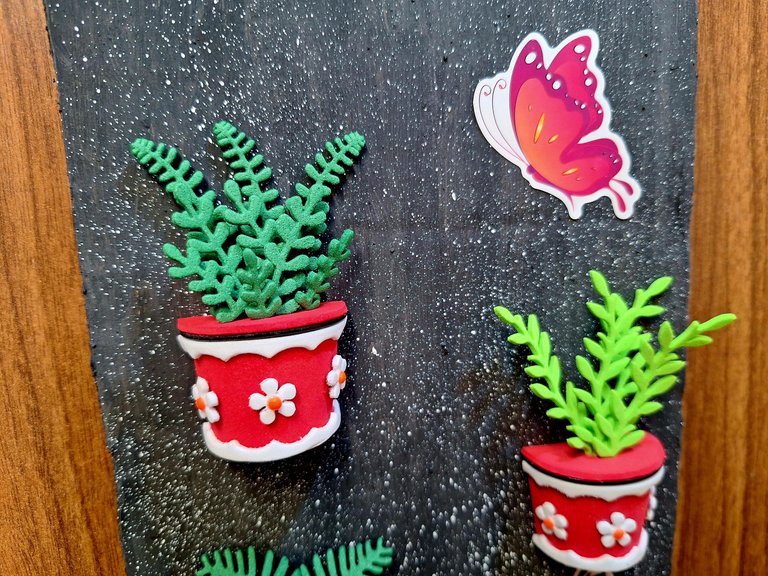
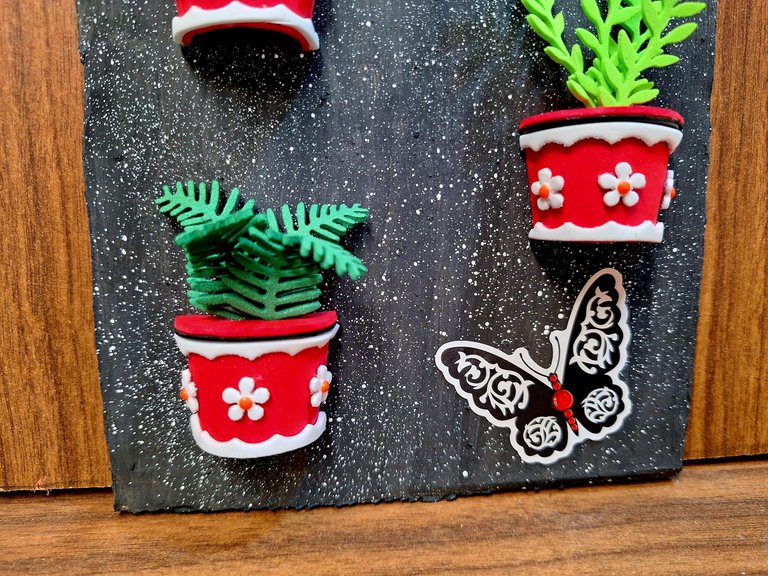
2️⃣ For the pots I used three empty plastic coffee capsules. I cut them in half and then covered them with plain red fomi on the side and top.
Para las macetas utilicé tres cápsulas plásticas de café vacías. Las recorté a la mitad para luego cubrirlas con fomi liso rojo por todo el lateral y la parte superior.
 |  |  |
 | 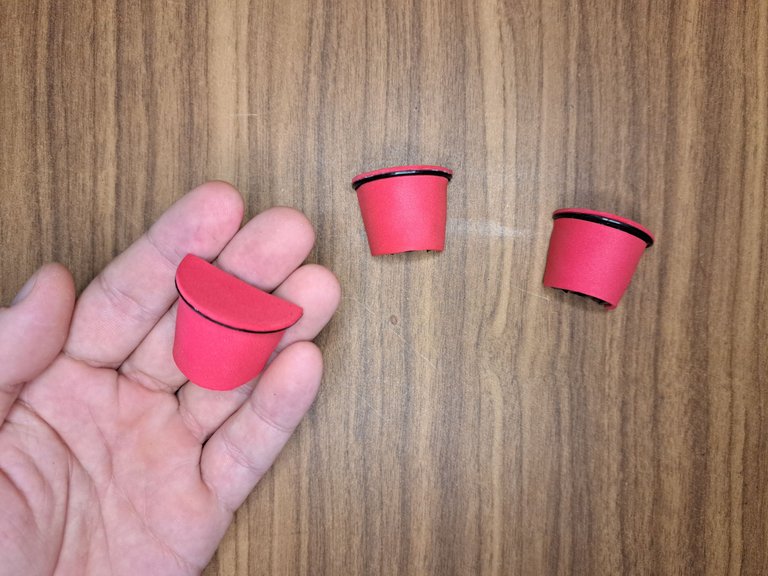 |
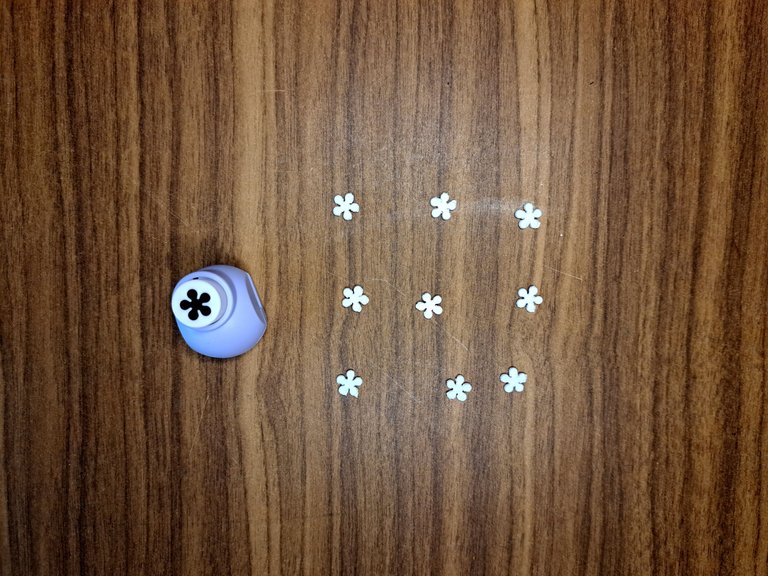
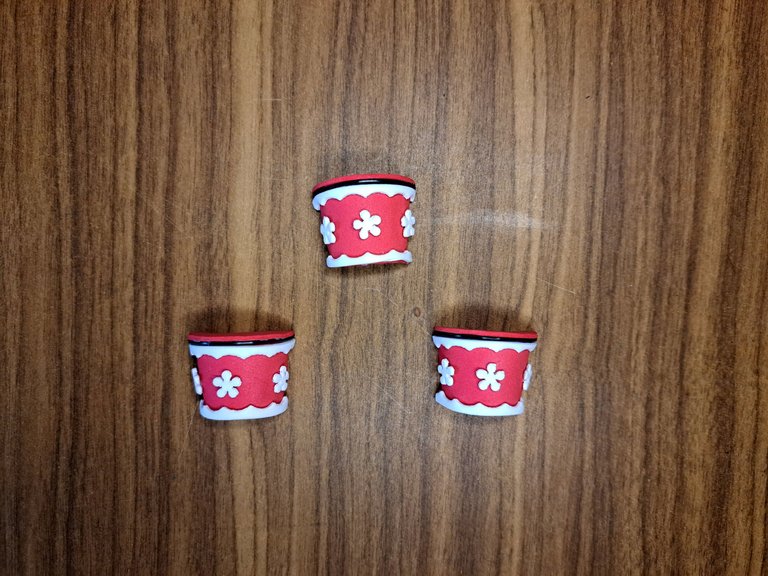
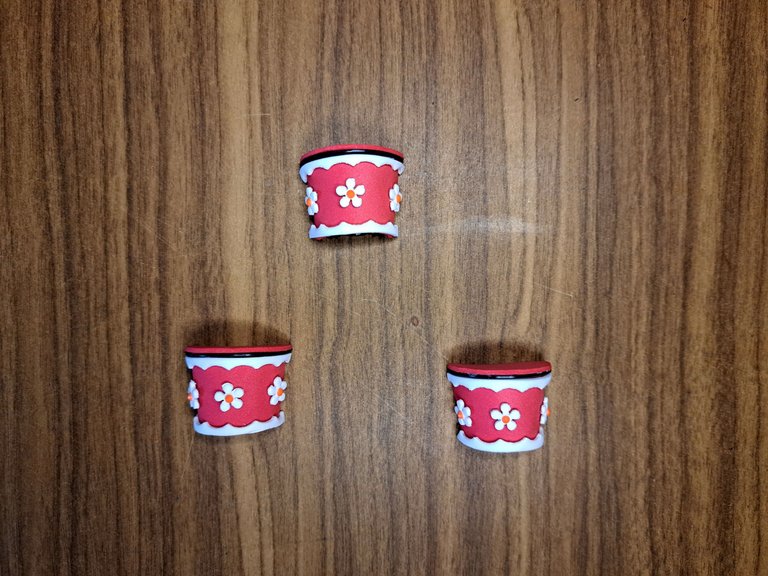
3️⃣ Using the plain white fomi and a pair of scissors, I created thin wavy strips, which I glued all around the top and bottom rim of the pots. I also cut out 89 small white flowers, which I glued to the pots, placing 3 in each. To each white flower I glued an orange plastic semi-pearl in the center.
Utilizando el fomi liso blanco y unas tijeras, creé unas tiras onduladas finas, las cuales pegué por todo el borde superior e inferior de las macetas. También recorté 89 flores blancas pequeñas, las cuales pegué en las macetas, colocando 3 en cada una. A cada flor blanca le pegué en el centro una semi-perla plástica de color naranja.
 |  |  |
 |  |
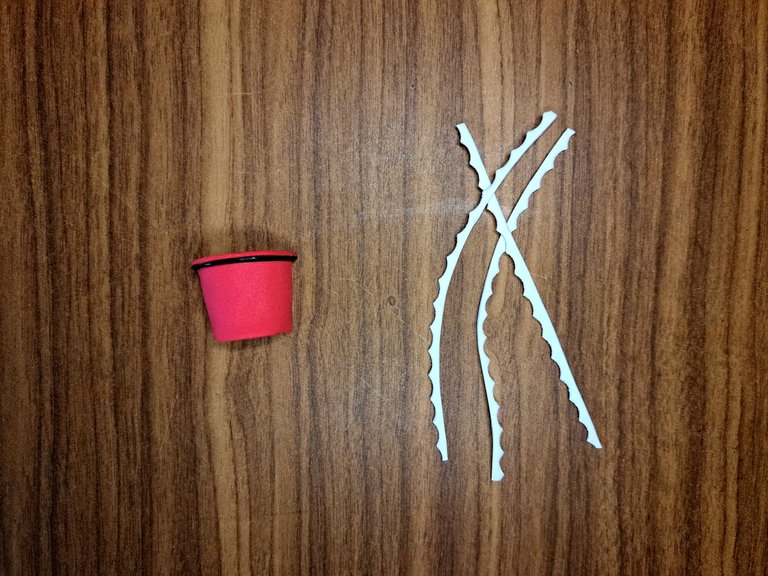
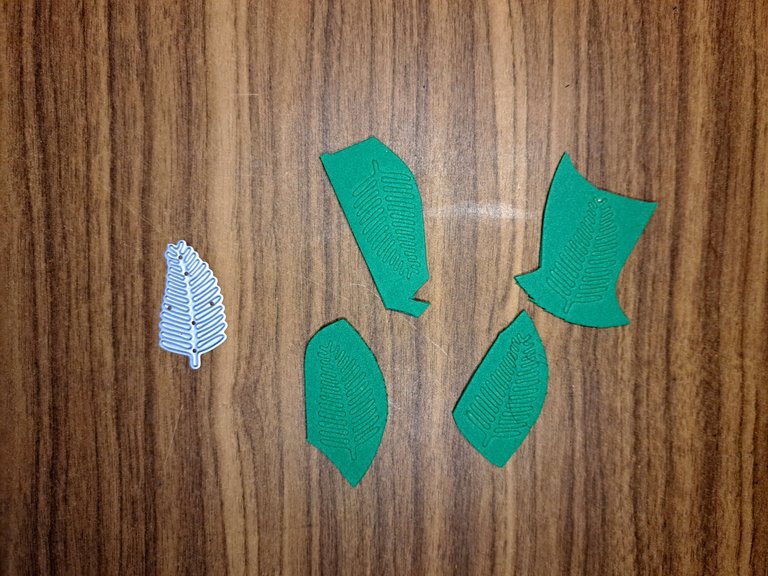
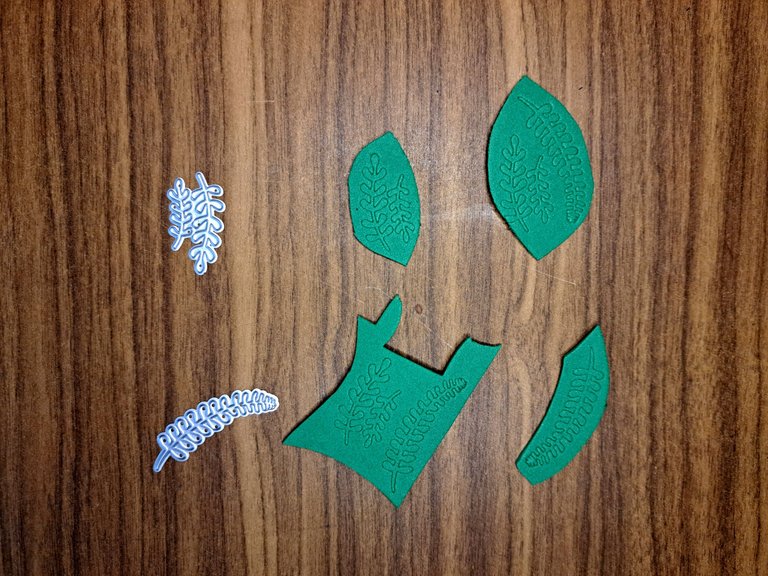
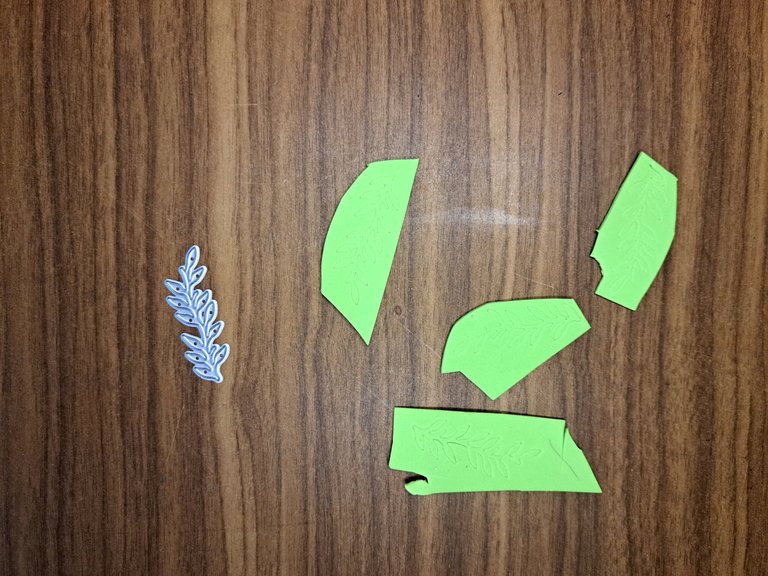
4️⃣ With the metal dies I cut out the shapes of the branches and ferns of the plants in the pots. Two types of plants are dark green and a third plant is yellowish green.
Con los troqueles metálicos recorté las formas de las ramas y helechos de las plantas de las macetas. Dos tipos de plantas son de color verde oscuro y una tercera planta es de color verde amarillento.
 |  |
 | 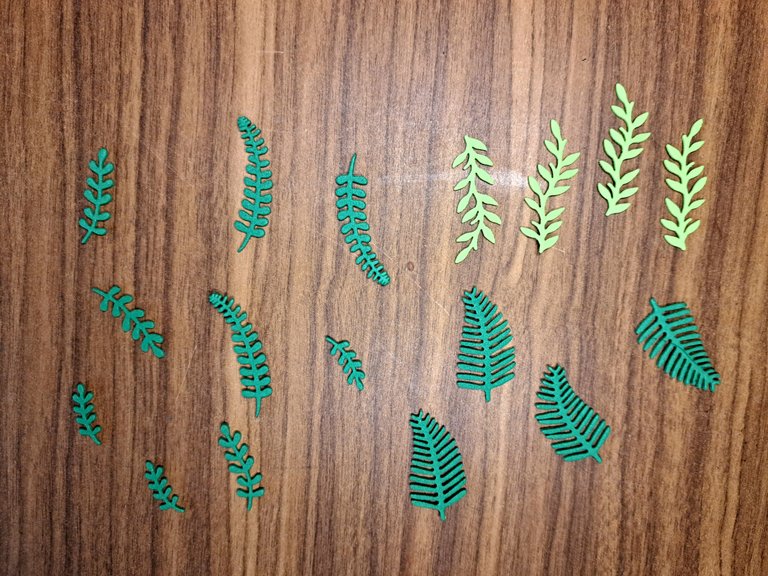 |
5️⃣ Grouping each branch and the fact according to its shape, I managed to assemble three bushes, which I attached to the top of the pots. Once the pots were ready, I glued them on top of the piece of cardboard painted black.
Agrupando cada rama y el hecho según su forma, logré armar tres arbustos, los cuales uní a la parte superior de las macetas. Una vez las macetas estuvieron listas, las pegué encima de la pieza de cartón pintada de negro.
 |  |
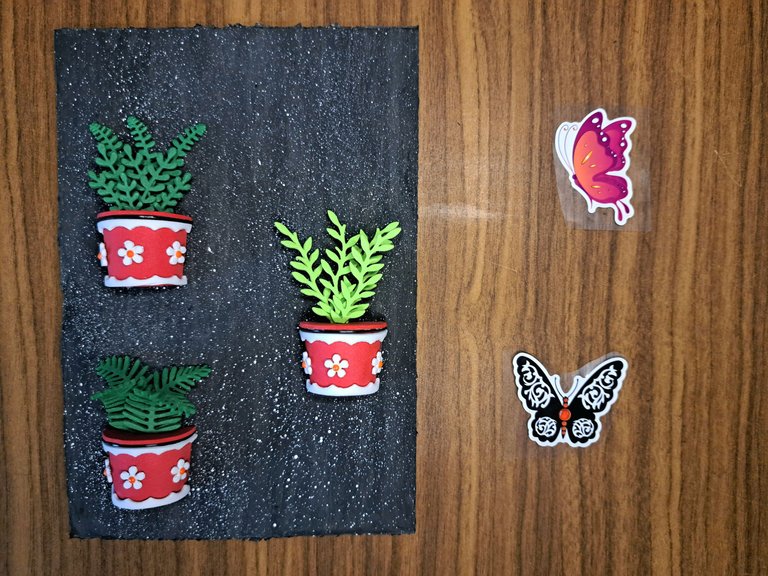
6️⃣ This step is totally optional. I happened to have some butterfly stickers around the house and came up with the idea of sticking them in the empty spaces of the cardboard. You can do the same, hand paint them or just ignore this step and move on to the next one. Any choice you make will give an equally beautiful result.
Este paso es totalmente opcional. Resulta que por casa tenía unas calcomanías con forma de mariposa y se me ocurrió la idea de pegarlas en los espacios vacíos del cartón. Pueden hacer lo mismo, pintarlas a mano o simplemente ignorar este paso y seguir con el próximo. Cualquier elección que tomen dará un resultado igual de bello.
 | |
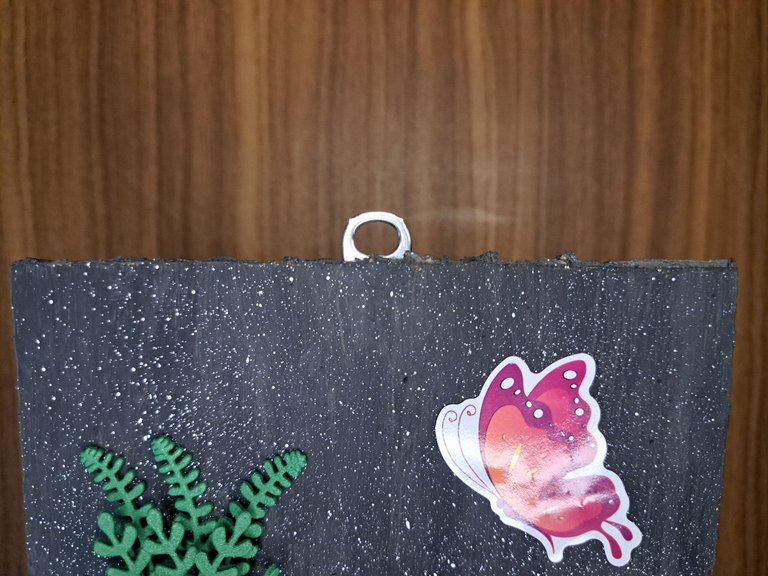
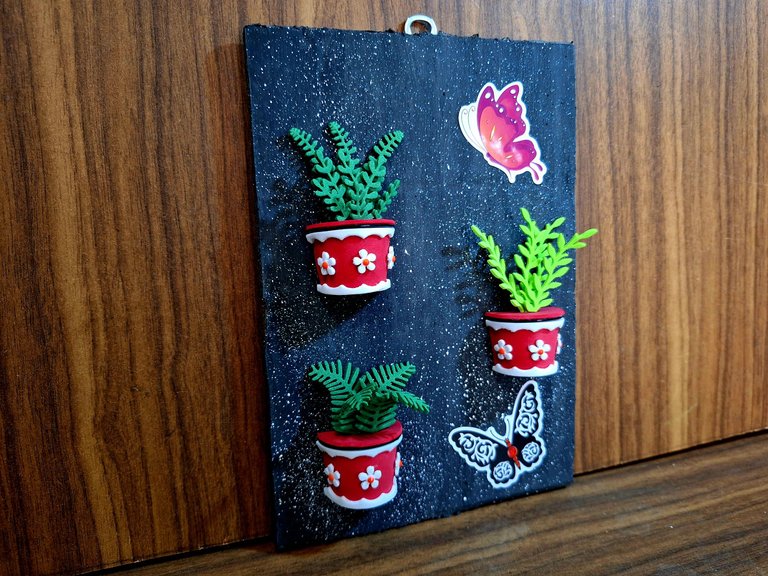
7️⃣ To finish, I took a soda can lid and placed it on the back of the cardboard, in the center of the top. This way, you can hang the ornament on the wall and it looks perfectly balanced.
Para finalizar, tomé una tapa de lata de gaseosa y la coloqué en el reverso del cartón, en el centro de la parte superior. De esta forma, se puede colgar el adorno en la pared y queda perfectamente equilibrado.
 | 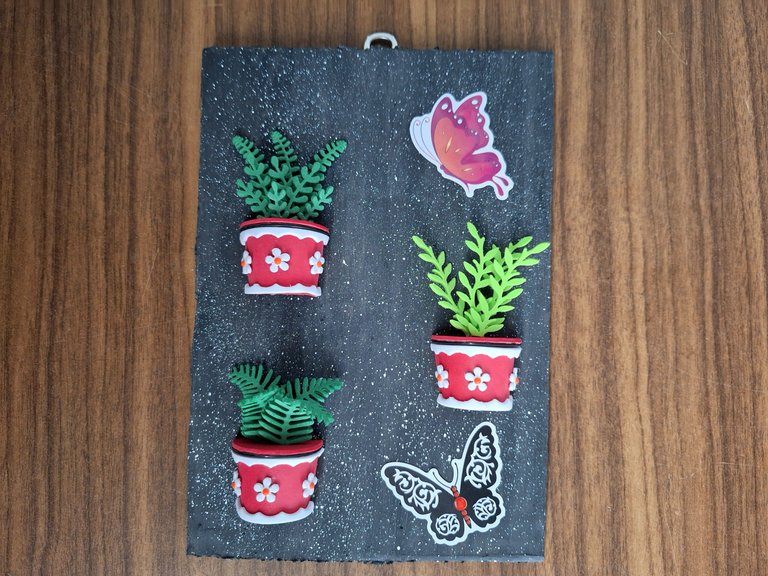 |
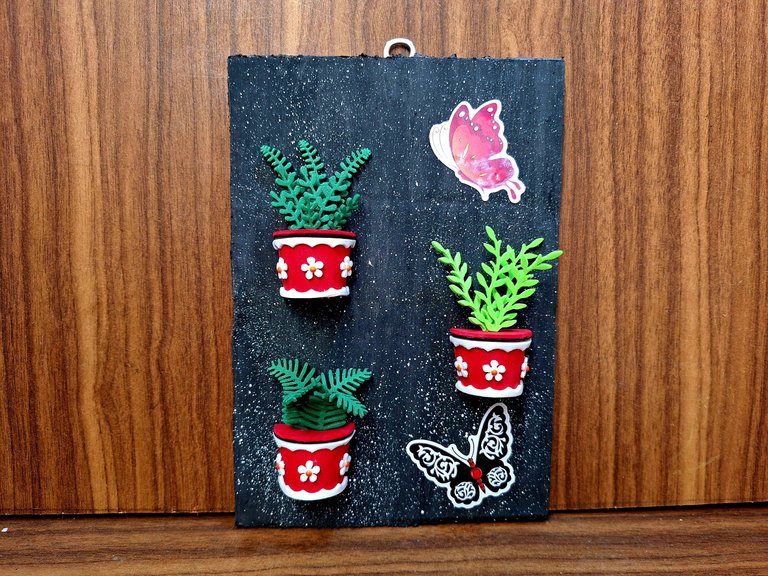
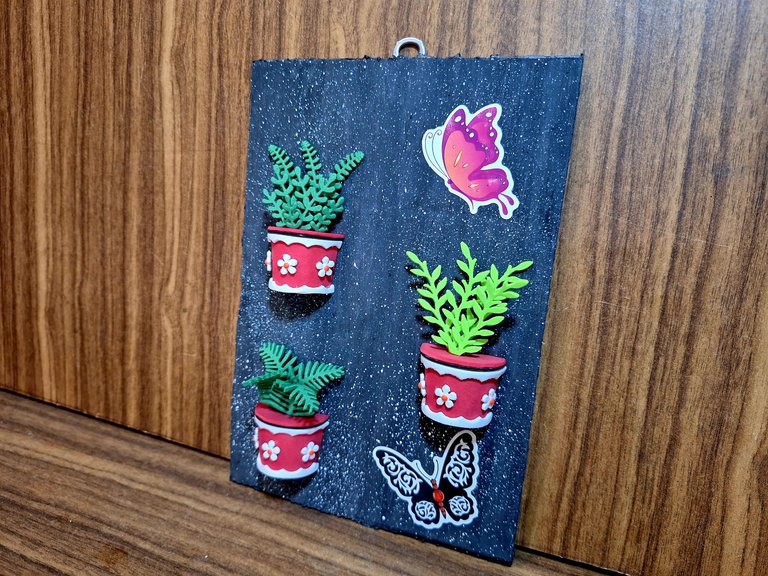
Finished Work // Trabajo Terminado
And well, friends, that's all for today. I hope you liked this ornament and that the tutorial is nice and easy to understand. Without further ado, I say goodbye wishing you a happy and prosperous journey. chao!
 |  |  |
 |  |

Credits and Resources // Créditos y Recursos
Cover page created in Canva
Translated by DeepL
Images captured with my Samsung Galaxy A53


Posted Using INLEO