
Saludos comunidad creativa de Hive, Feliz Domingo de Ramos aqui en Venezuela y en Muchas partes del mundo se conmemora este día donde se bendicen los ramos de palma que simboliza la entrada de Jesús a Jerusalem.
Greetings creative community of Hive, Happy Palm Sunday here in Venezuela and in many parts of the world this day is commemorated where the palm branches that symbolize the entry of Jesus into Jerusalem are blessed.
Yo soy Edioretza y les doy la bienvenida a mi blog. Hoy vengo a mostrarles estos lindos, sencillos y coloridos zarcillos de borlas que puedes usar para cualquier ocasión..
I am Edioretza and I welcome you to my blog. Today I am here to show you these cute, simple and colorful tassel earrings that you can use for any occasion.
Les muestro como hacerlos:
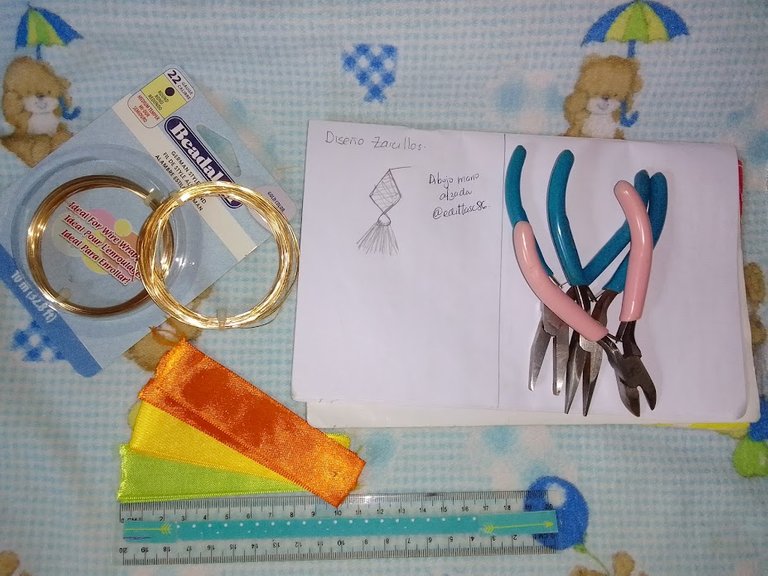
Primero les comento los materiales para realizar las borlas utilizaremos:
Cinta raso yo utilice estos colores: Naranja, amarillo y verde 10 cm aproximados de cada color, ustedes pueden usar cualquier color. Alambre yo utilice esta marca beadalon calibre 22 y 26. los otros materiales pinzas, hilos para sujetar y un lápiz para hacer el aro, yo no tengo esa pinza especial o mandril como se le conoce . Y realice un bosquejo de mis zarcillos:
I show you how to make them:
First I tell you the materials to make the tassels we will use:
Satin ribbon I used these colors: Orange, yellow and green Approximately 10 cm of each color, you can use any color. Wire I use this brand beadalon gauge 22 and 26. the other materials clamps, threads to hold and a pencil to make the ring, I do not have that special clamp or mandrel as it is known. And make a sketch of my tendrils:
Comencemos:
Inicie haciendo las borlas con las cintas raso, para ello en las esquinas o puntas de cada corte se le debe quitar la costura así que con ayuda de la uña intentamos sacar ese hilo es sencillo, retiramos ese hijo y comenzamos a deshilachar la cinta, luego la sujeto con hilo a la mitad para no perder las hebras y poder luego seguir con el trabajo de borla
Let's start:
Start making the tassels with the satin ribbons, for this, in the corners or ends of each cut, the seam must be removed, so with the help of the nail we try to remove that thread, it is simple, we remove that thread and begin to unravel the ribbon, then I hold it with thread in the middle so as not to lose the threads and then be able to continue with the tassel work
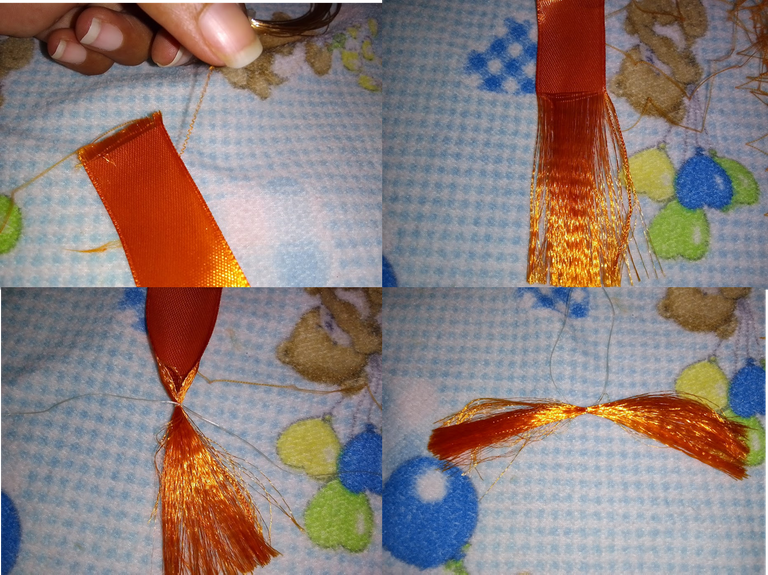
Así mismo repetí el proceso con el resto de las cintas amarilla y verde:
I also repeated the process with the rest of the yellow and green tapes:
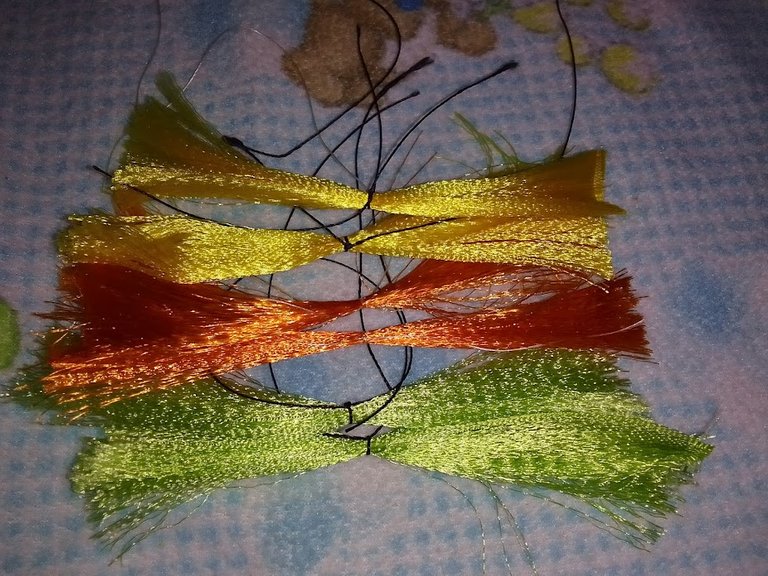
Luego lo que hice fue doblar dejando el amarre en el centro, para sujetar y formar la borla, este procedimiento lo hice con todas:
Then what I did was fold leaving the tie in the center, to hold and form the tassel, I did this procedure with all
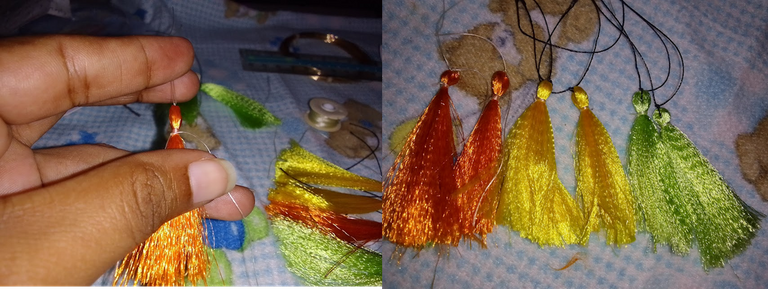
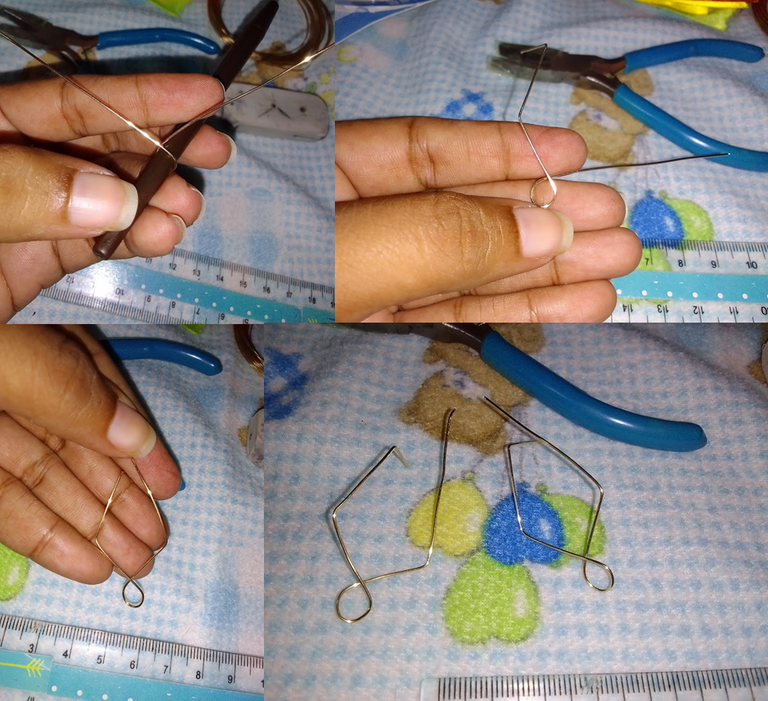
Luego que tuve estas listas entonces realice el rombo para el zarcillo, comencé cortando con la ayuda de la pinza de cortar 12 cm aproximados de alambre calibre 22, con la ayuda del lápiz o cualquier objeto que te ayude a doblar, yo utilice una base de un antiguo pincel coloque el alambre para doblar dejando aproximado de 7 cm de un lado y del otro 5, lo gire y realice el aro, luego doble 1 cm de la punta para hacer el pin del zarcillo y el otro lado le hice el dobles para tener la figura de rombo:
After I had these lists, then I made the rhombus for the earring, I started cutting with the help of the pliers to cut approximately 12 cm of 22 gauge wire, with the help of the pencil or any object that helps you bend, I used a base of an old brush place the wire to bend leaving approximately 7 cm on one side and 5 on the other, turn it and make the ring, then bend 1 cm of the tip to make the tendril pin and the other side I doubled to have the rhombus figure:
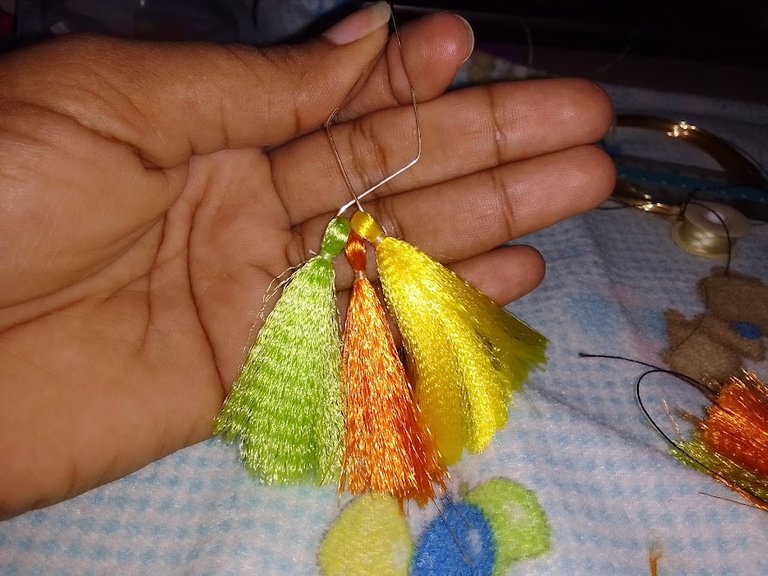
Listo la base de mis zarcillos colocó las borlas en el aro la razón por la que no cerre el rombo es para deslizar por un extremo las borlas porque mi intención es unirlas con alambre para hacer una especie de borla de tres colores pero ustedes pueden colocarlas sueltas de igual manera se vera lindo ❤️
Ready the base of my earrings placed the tassels in the ring the reason why I did not close the diamond is to slide the tassels from one end because my intention is to join them with wire to make a kind of three-color tassel but you can place them loose it will look cute anyway ❤️
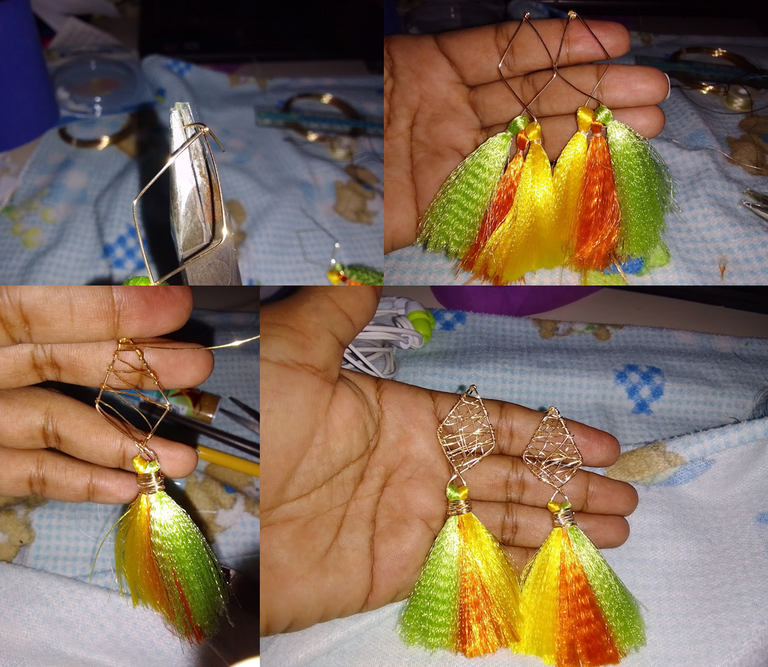
Luego de colocar las borlas, cierro el rombo entorchando con la parte donde esta el pin del zarcillo, luego con alambre calibre 26 uno las tres borlas dando algunas vueltas alrededor de ellas. luego uno el cruce del aro y comenzar a decorar con alambre la parte del rombo pasando varias veces el alambre hasta lograr el decorado deseado. Esta es una de las técnicas de alambrismo más sencillas de realizar, y así quedaron mis zarcillos:
After placing the tassels, I close the rhombus by twisting with the part where the earring pin is, then with 26 gauge wire I join the three tassels by wrapping around them a few times. then join the crossing of the ring and begin to decorate the part of the rhombus with wire, passing the wire several times until the desired decoration is achieved. This is one of the easiest wiring techniques to perform, and this is how my tendrils turned out:
❤️❤️I hope you like my tassel earrings ❤️❤️
Las imágenes son de mi autoría y los collage realizados en PowerPoint
The images are my own and the collages made in PowerPoint


