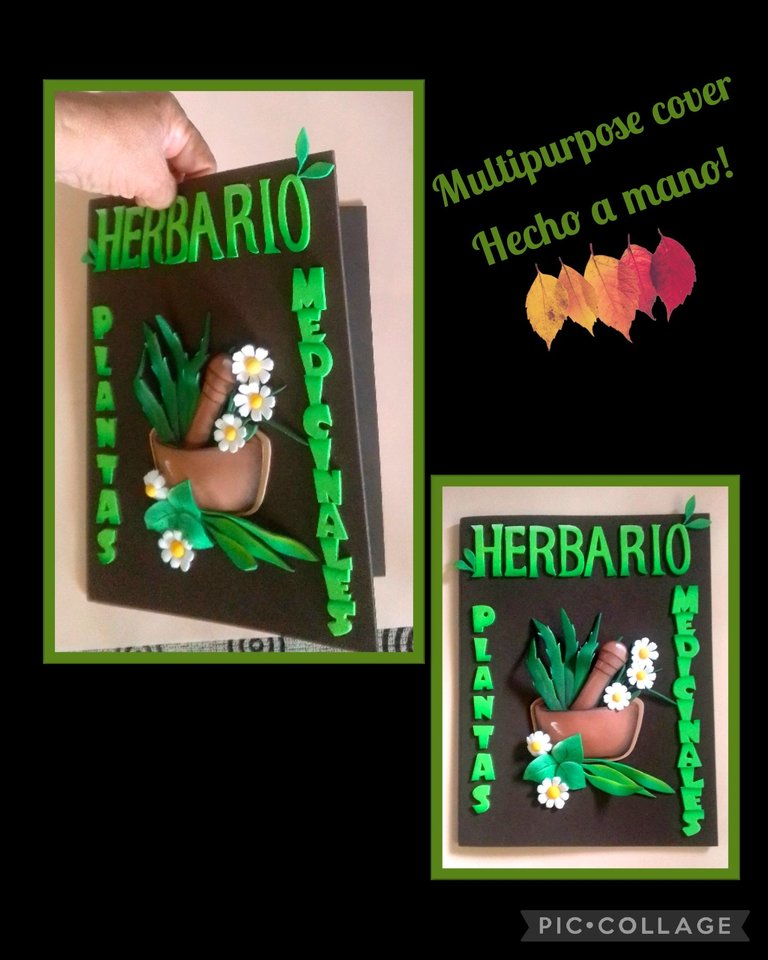
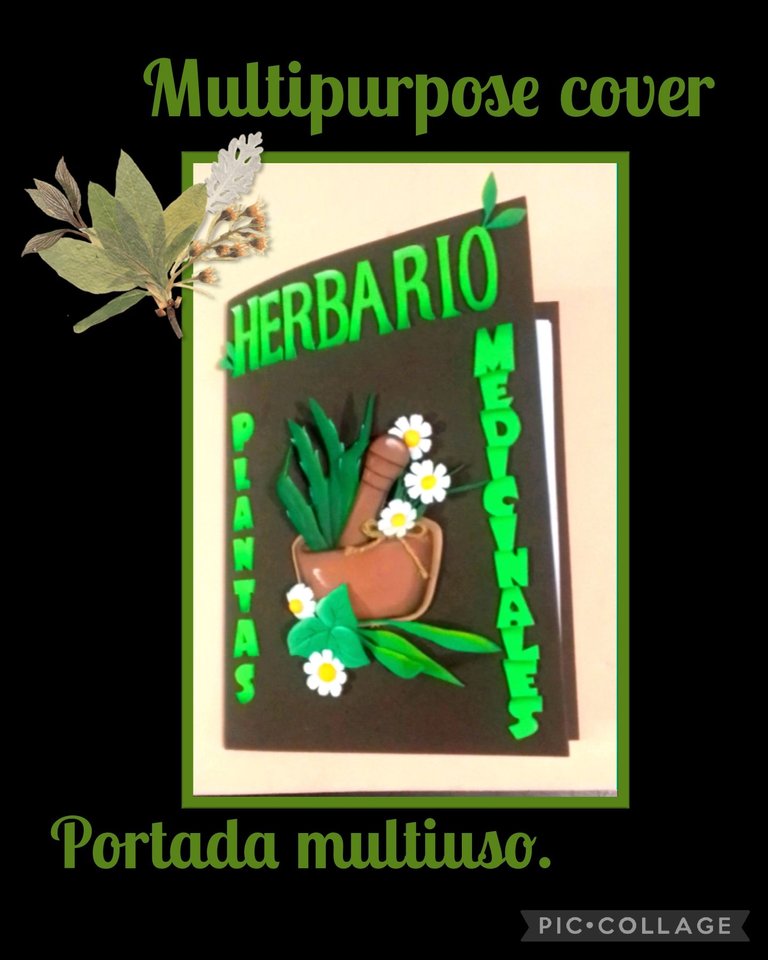
Buenas noches queridos amigos!
Así que ahora me dedicaré a mostrar como hacer esta Portada.
Para ello vas a utilizar:
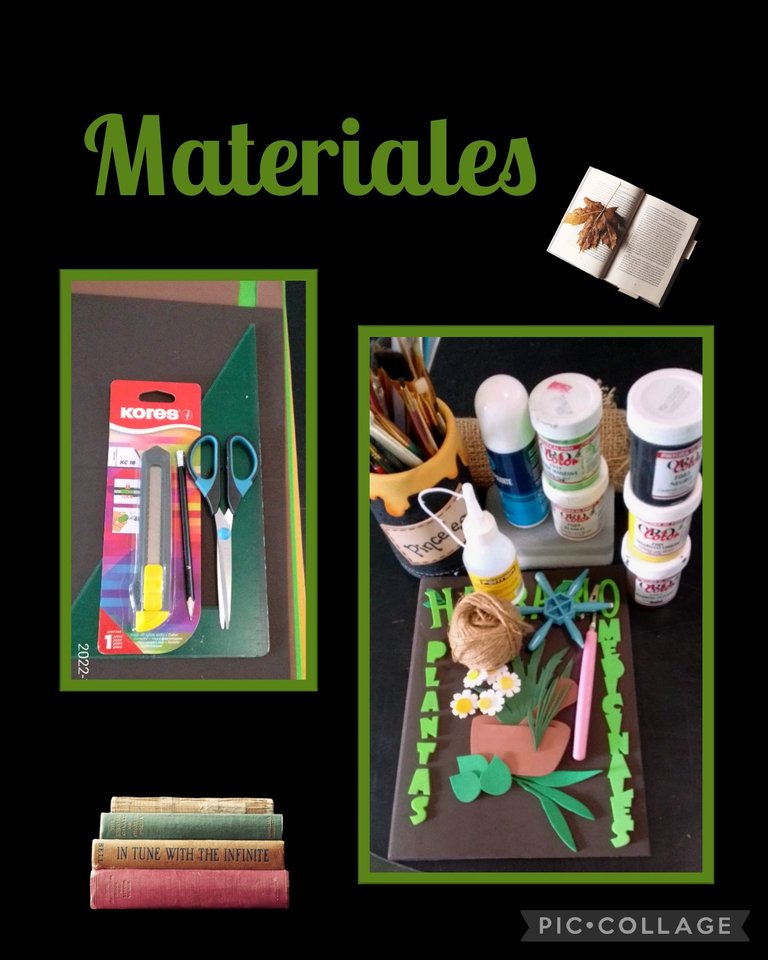
Portada y decoración:
| Foami doble carta | Escuadra o regla |
|---|---|
| Lápiz | Tijera y cuchilla |
| Foami de colores | Hilo mecatillo |
| Marca puntos | Silicón |
| Pinturas y pinceles | Esponja |
| Plancha eléctrica | Tapa de desodorante |
Comencemos el procedimiento:
Paso 1:
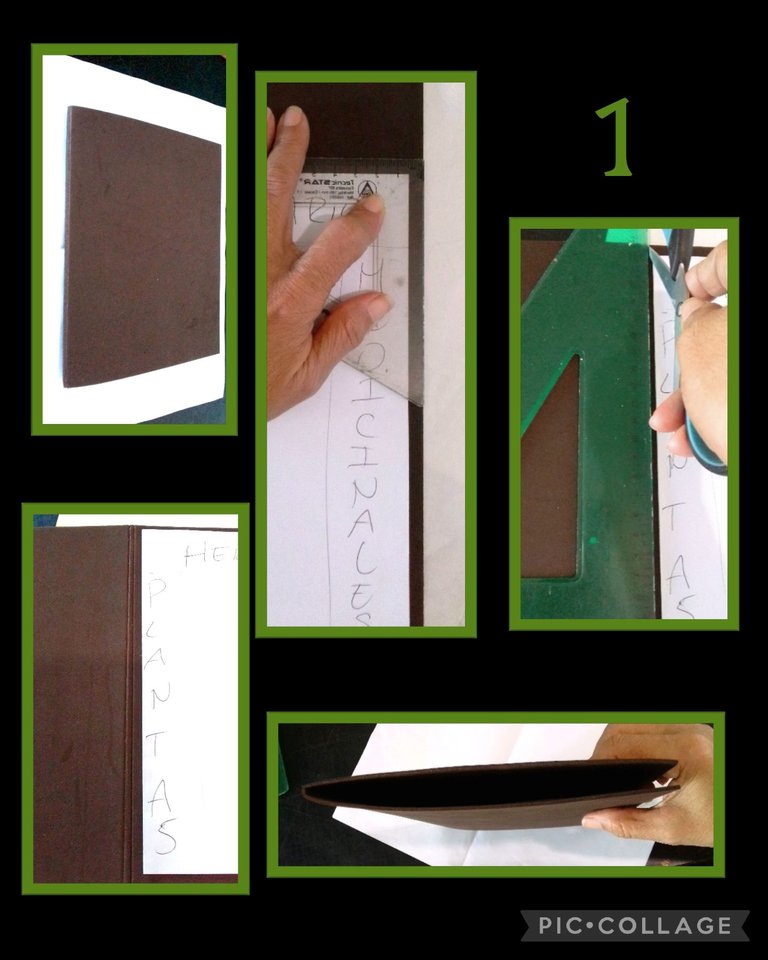
- Coloca el foami sobre la mesa y dependiendo el tamaño de la hoja que escojas (carta, oficio) dobla a la mitad.
- Ahora coloca sobre el foami, marca aumentando 0,5 cm por cada lado y recorta.
- Luego en el centro traza dos líneas separadas (5mm) y remarca con la punta de la tijera y dobla. Ver foto.
Nota: Debes aumentar los cms de ancho del espesor de las hojas para hacer las líneas de dobles del centro.
Como puedes ver es muy fácil.
Paso 2:

Para decorar:
Remarca el dibujo y para transferir coloca sobre el foami del color que escojas y comienza a frotar, así marca todas las piezas que desees.
- Las hojas las puedes recortar sin molde y da tu la forma, para las flores, recorta con tijera de forma varios círculos, luego dobla a la mitad y recorta, haciendo 4 cortes en cada mitad y recorta redondeando cada uno de los pétalos.
Paso 3:
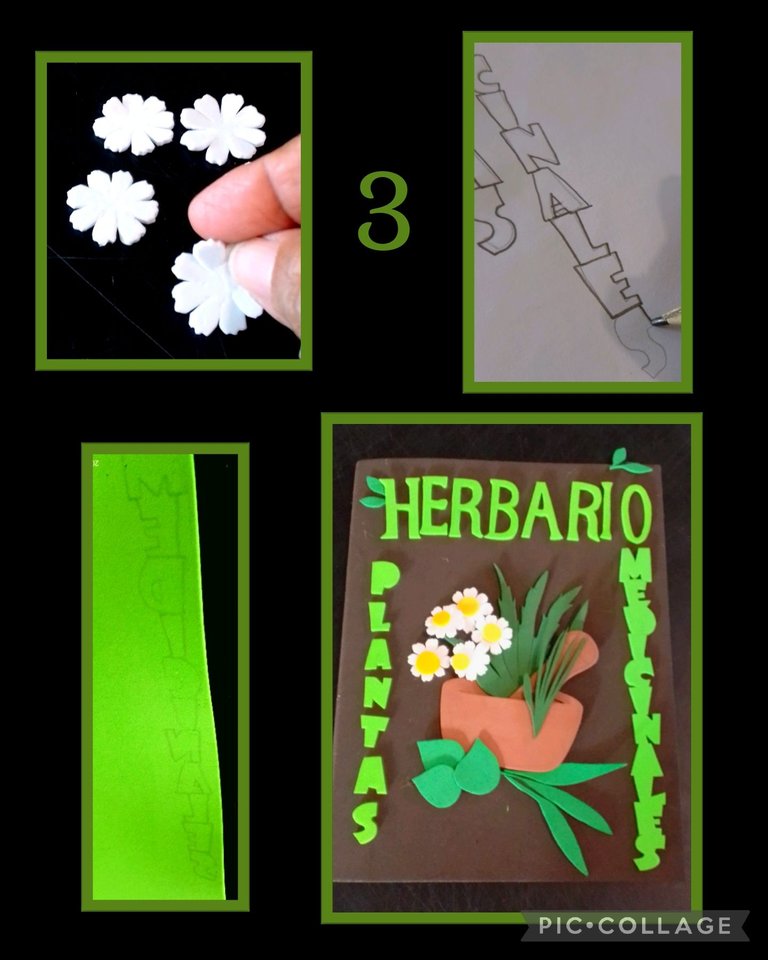
- Recortadas las florecitas, remarca las letras y transfiere al foami repitiendo el paso anterior y recorta todas las letras y coloca sobre la portada en la forma deseada.
Paso 4:
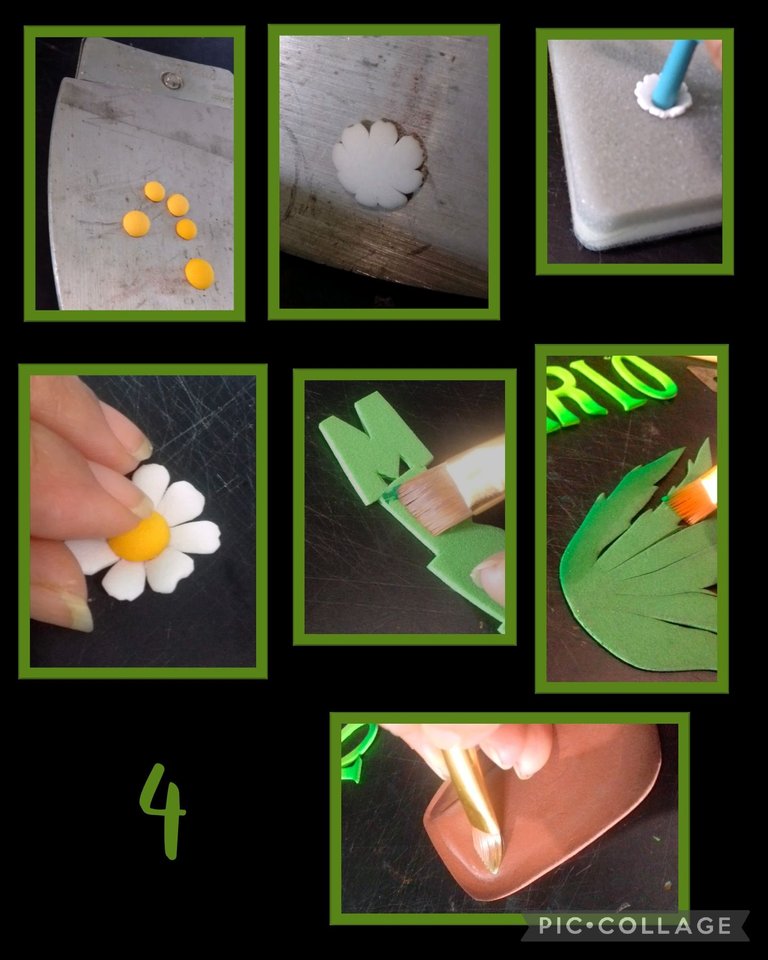
- Después de recortar todas las piezas, calienta la plancha a temperatura media para que tomen forma, las flores también coloca sobre la plancha y al calentar, coloca sobre una esponja o goma espuma y con el marca puntos presiona en el centro y luego aplica silicón y pega el centro amarillo.
- Ahora comienza a pintar las letras, plantas, hojas, etc.
Paso 5:
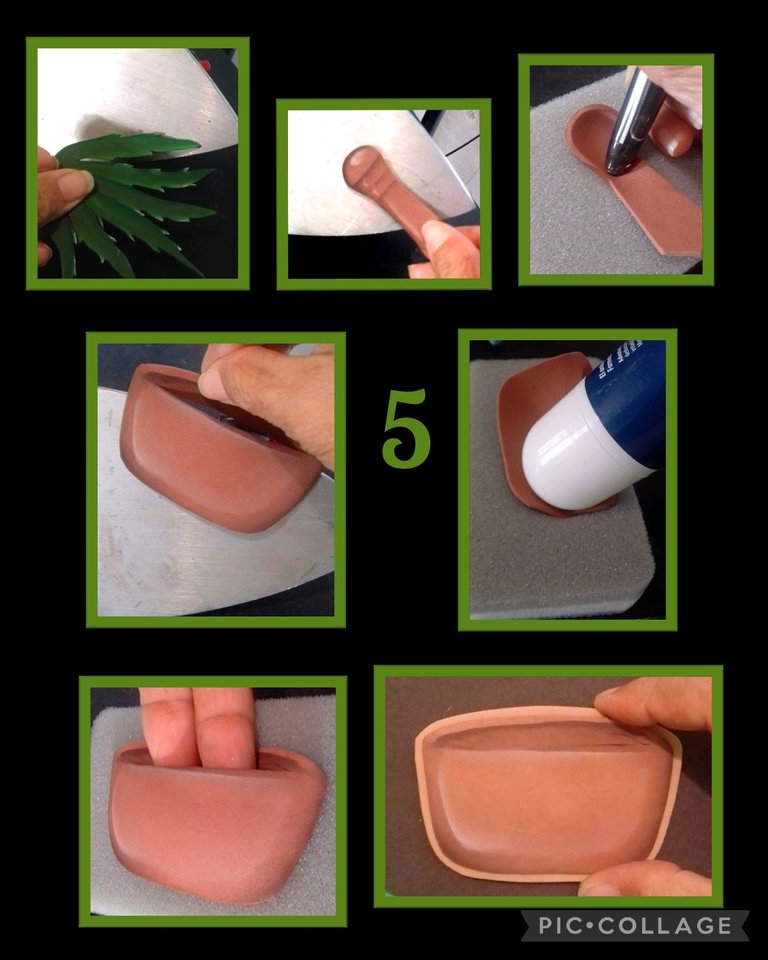
- Después de pintar las piezas coloca sobre la plancha caliente y da más forma colocando sobre esponja y frota con la tapa redonda de un marcador y a la pieza más grande con la tapa de un desodorante.
- Haz una abertura con una cuchilla para meter las plantas en el matero.

- Para pegar las letras ayúdate con una escuadra para que te queden derechas. (ver foto), aplica silicón y pega una a una.
- Ahora toca decorar el centro coloca las piezas en el lugar de tu preferencia.
Paso 7:
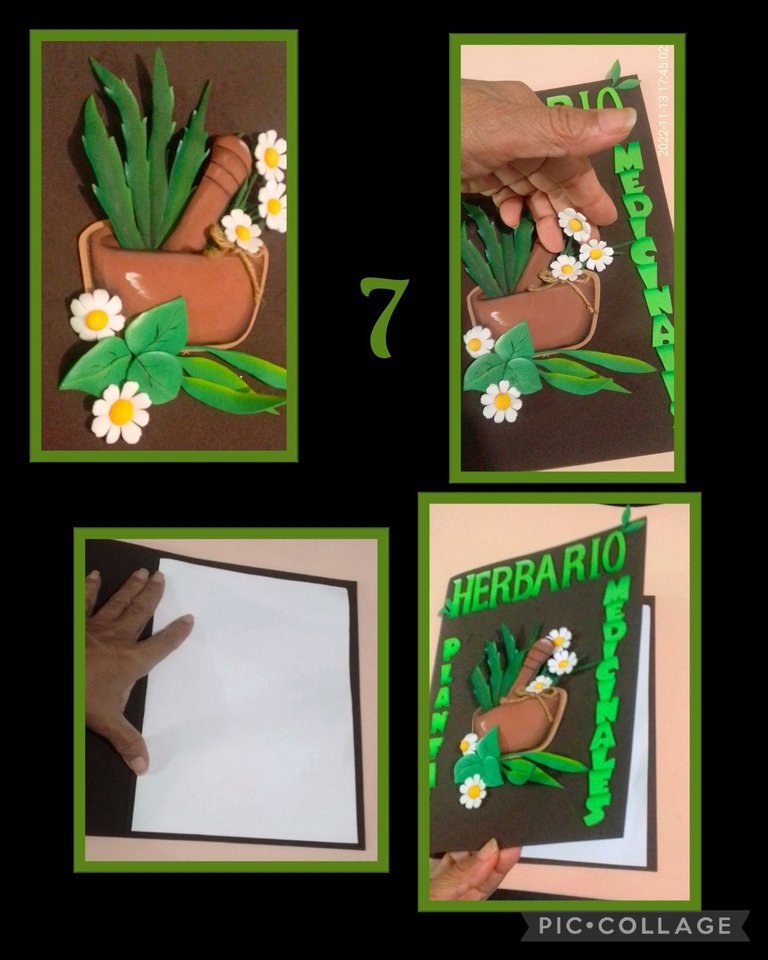
- Puedes pegar las piezas solo en la parte de abajo para que queden con dimensión, también puedes hacer un lazo con hilo mecatillo y decorar.
- Luego aplica silicón en el centro de las hojas y pega en la parte de adentro de la portada.
- Así quedará terminada esta linda y fácil portada.
Terminada esta linda Portada te mostraré algunas fotos!

Fuentes:
Microsoft word: Showcard gothic
https://www.freepik.es/vector-gratis/hierbas-medicinales-ilustracion-mortero_3813314.htm#query=plantas%20medicinales&position=16&from_view=keyword
https://es.wikipedia.org/wiki/Herbario

Editada con: Etiquetas HTML.
Teléfono: BLU G5 y las fotos son editadas con Pic Collage.
Ahora me despido esperando este tutorial te guste, y sea de utilidad en algún momento.
Gracias por el apoyo y tu visita.
Saludos y bendiciones para ti.
English:


Good evening dear friends!
For this you are going to use:

Cover and decoration:
| Foami double letter | Square or ruler |
|---|---|
| Pencil | Scissors and razor blade |
| Colored Foamie | Thread and string |
| Dot marker | Silicone |
| Paints and paintbrushes | Sponge |
| Electric iron | Deodorant cap |
Let's begin the procedure:
Step 1:

- Place the foami on the table and depending on the size of the sheet you choose (letter, legal) fold it in half.
- Now place it on the foami, mark by increasing 0.5 cm on each side and cut it out.
- Then in the center draw two separate lines (5mm) and mark with the tip of the scissors and fold. See photo.
Note: You must increase the cms of width of the thickness of the sheets to make the double lines in the center.
As you can see it is very easy.
Step 2:

To decorate:
Outline the drawing and to transfer place on the foami of the color you choose and start rubbing, so mark all the pieces you want.
- The leaves you can cut without mold and give you the shape, for the flowers, cut with scissors several circles, then fold in half and cut, making 4 cuts in each half and cut rounding each of the petals.
Step 3:

- Once the flowers are cut out, outline the letters and transfer to the foami repeating the previous step and cut out all the letters and place on the cover in the desired shape.
Step 4:

- After cutting out all the pieces, heat the iron at medium temperature to take shape, the flowers are also placed on the iron and when heated, place on a sponge or foam rubber and with the dot marker press in the center and then apply silicone and paste the yellow center.
- Now start to paint the letters, plants, leaves, etc.
Step 5:

- After painting the pieces place on the hot iron and give more shape by placing on sponge and rub with the round cap of a marker and the largest piece with the cap of a deodorant.
- Make an opening with a knife to put the plants in the pot.

- To glue the letters, use a square to make sure they are straight (see photo), apply silicone and glue them one by one.
- Now it's time to decorate the center, place the pieces in the place of your choice.
Step 7:

- You can glue the pieces only on the bottom so that they have dimension, you can also make a bow with mecatillo thread and decorate.
- Then apply silicone in the center of the leaves and glue on the inside of the cover.
- This is how this beautiful and easy cover will be finished.
Once this beautiful cover is finished I will show you some pictures!

Fonts:
Microsoft word: Showcard gothic
https://www.freepik.es/vector-gratis/hierbas-medicinales-ilustracion-mortero_3813314.htm#query=plantas%20medicinales&position=16&from_view=keyword
https://es.wikipedia.org/wiki/Herbario

Edited with: HTML tags.
Phone: BLU G5 and the photos are edited with Pic Collage.
Now I say goodbye hoping you like this tutorial, and be useful at some point.
Thanks for the support and your visit.
Greetings and blessings to you.