Hola queridos amigos y creadores que me visitan.
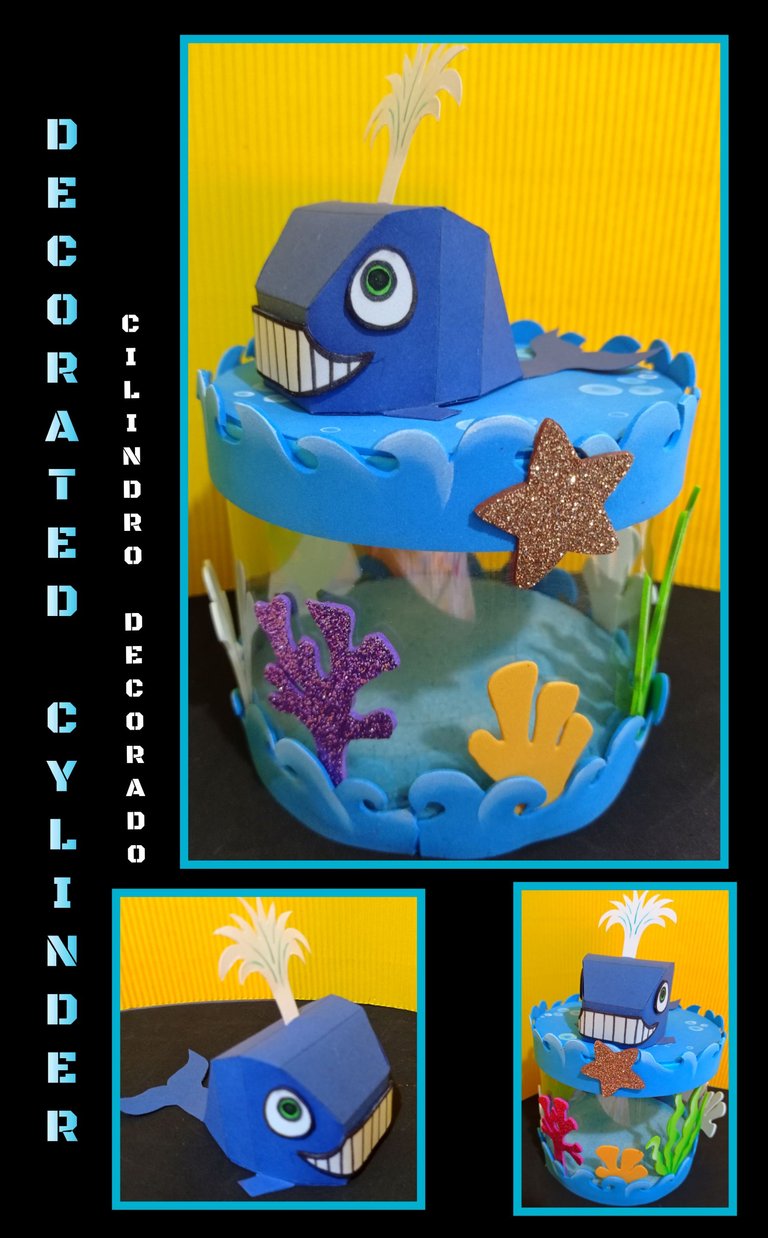
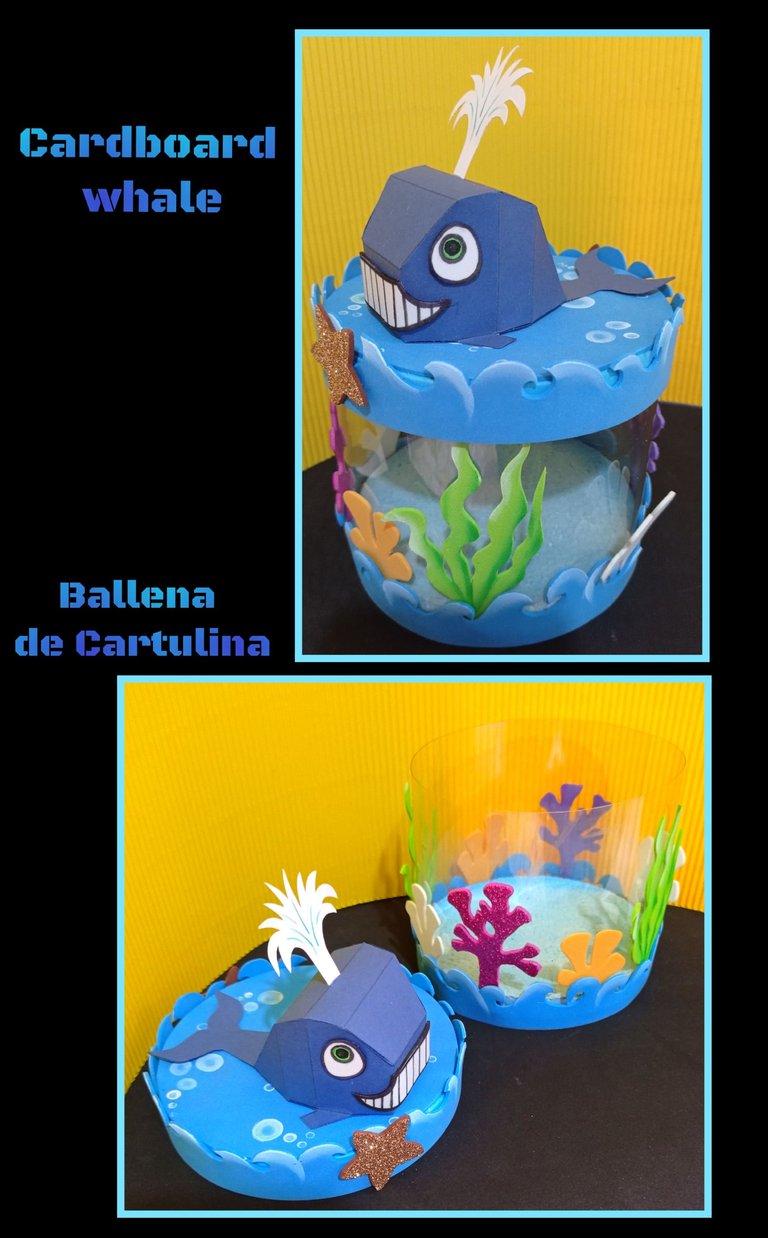
Y bueno en este tutorial les mostraré como armé una ballena de cartulina y decidí hacerle un cilindro con acetato el cual decoré con motivos marinos de foami,jajajaja así que espero les guste.
Van a necesitar:
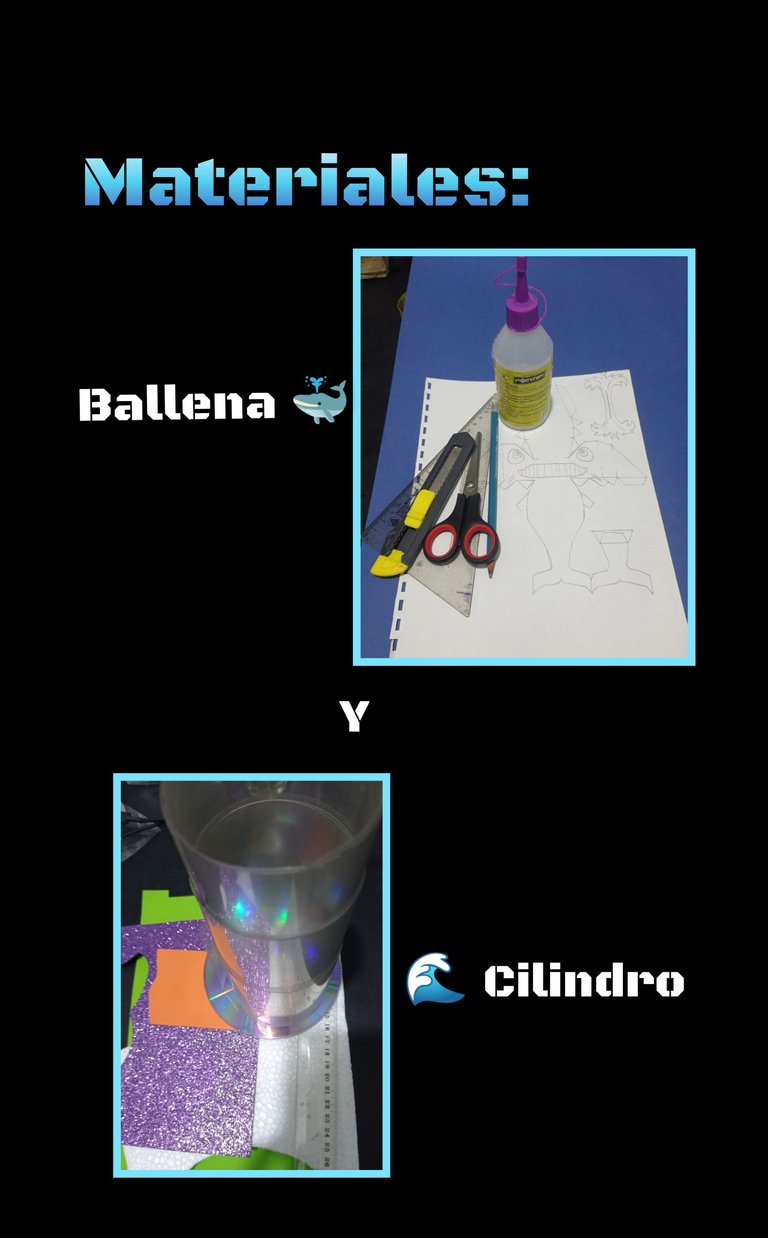
| Cartulina escolar | Molde o plantilla |
|---|---|
| Regla | Tijera |
| Cuchilla | Lápiz y marcador |
| Silicon | Foami blanco |
| Acetato | CD dañados |
| Trozo de anime | Restos de foami |
| Pinturas y pinceles | Papel carbón |
Procedimiento:
Paso 1:

- Calca o imprime el dibujo, luego coloca sobre el papel carbón y la cartulina y comienza a remarcar el dibujo, después recorta por todo el borde.
- Ahora con la punta de la tijera y la ayuda de la regla, comienza a pasar suavemente por todas las líneas marcadas.
- Luego dobla y comienza a aplicando silicon en las pestañas y pega hasta armar toda la ballena.
Paso 2:
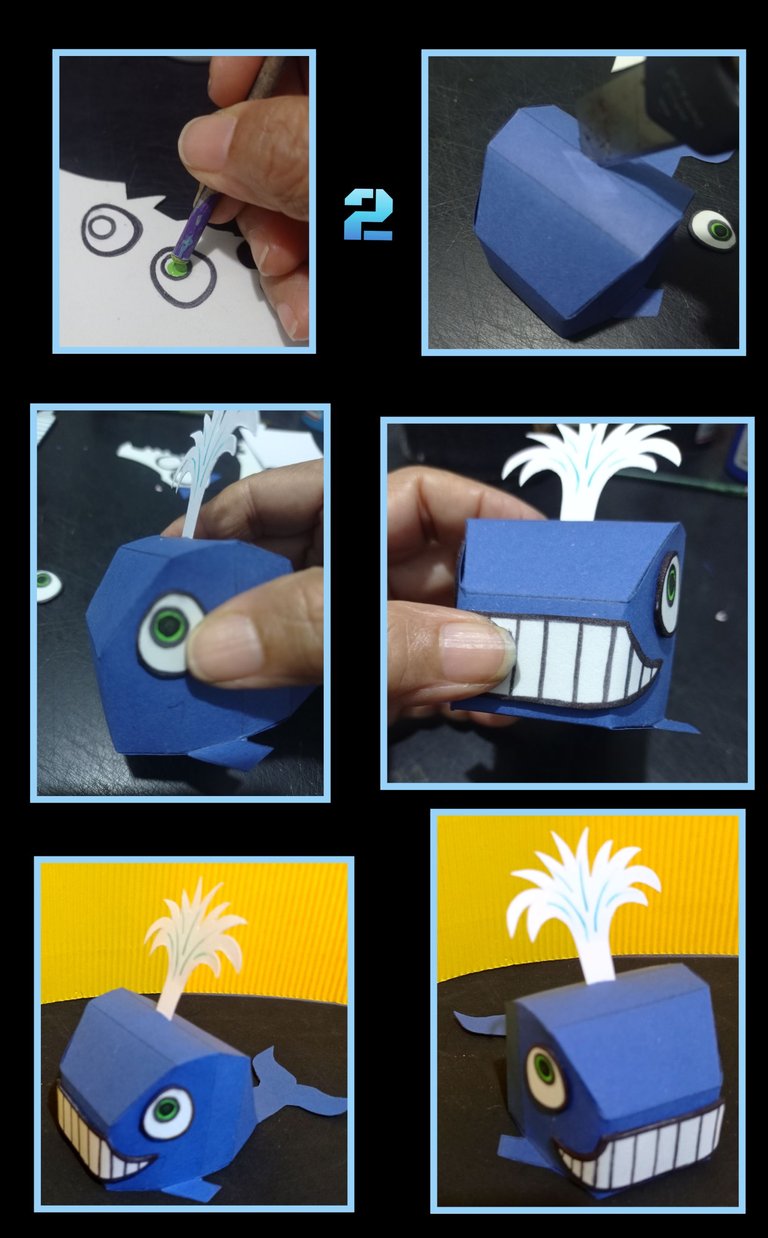
- En el foami blanco dibuja los ojos y repasa el borde con marcador o pincel, luego pinta con verde el centro del ojo, deja secar y luego pinta la pupila y deja secar.
- Aparte inserta la punta de la cuchilla en la parte de arriba de la ballena y haz una pequeña incisión, aplica silicón e inserta el agua y deja secar, luego pega los ojos y la boca.
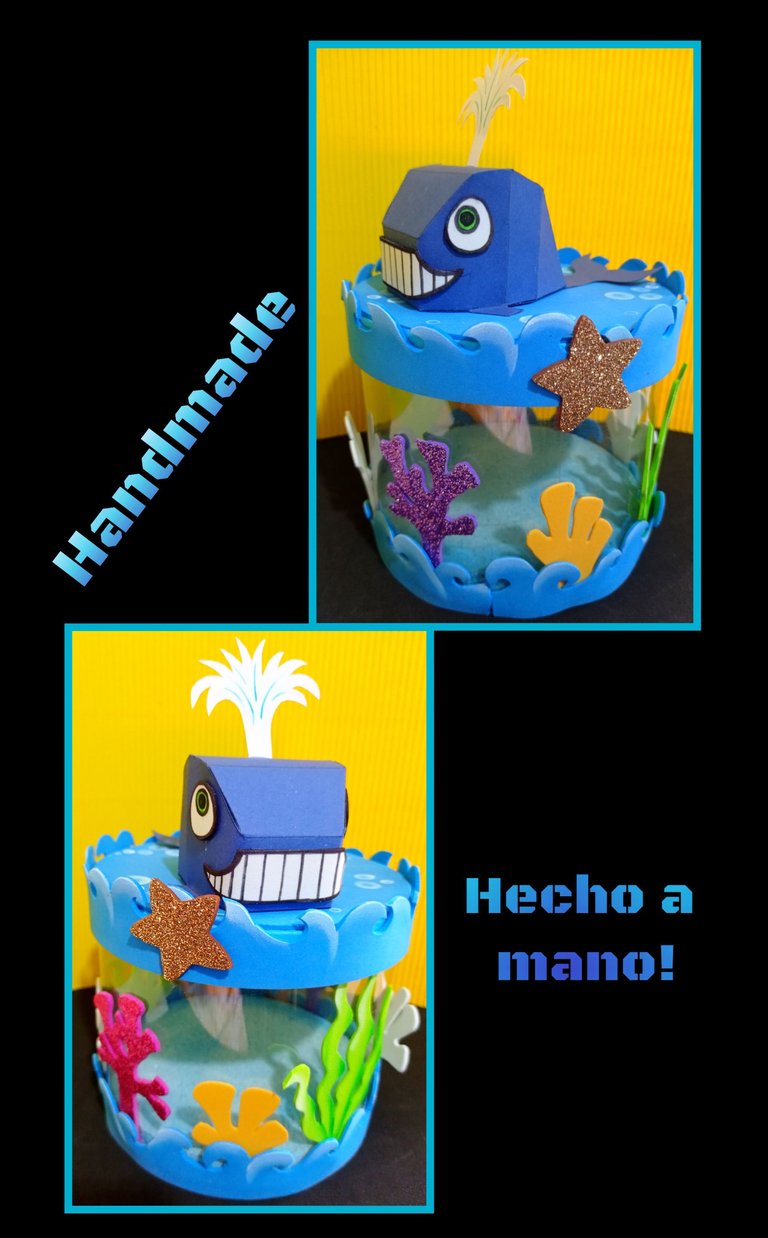
Así quedó lista y sonriente esta linda Ballenita.
Paso 3:
Elaborar el cilindro.
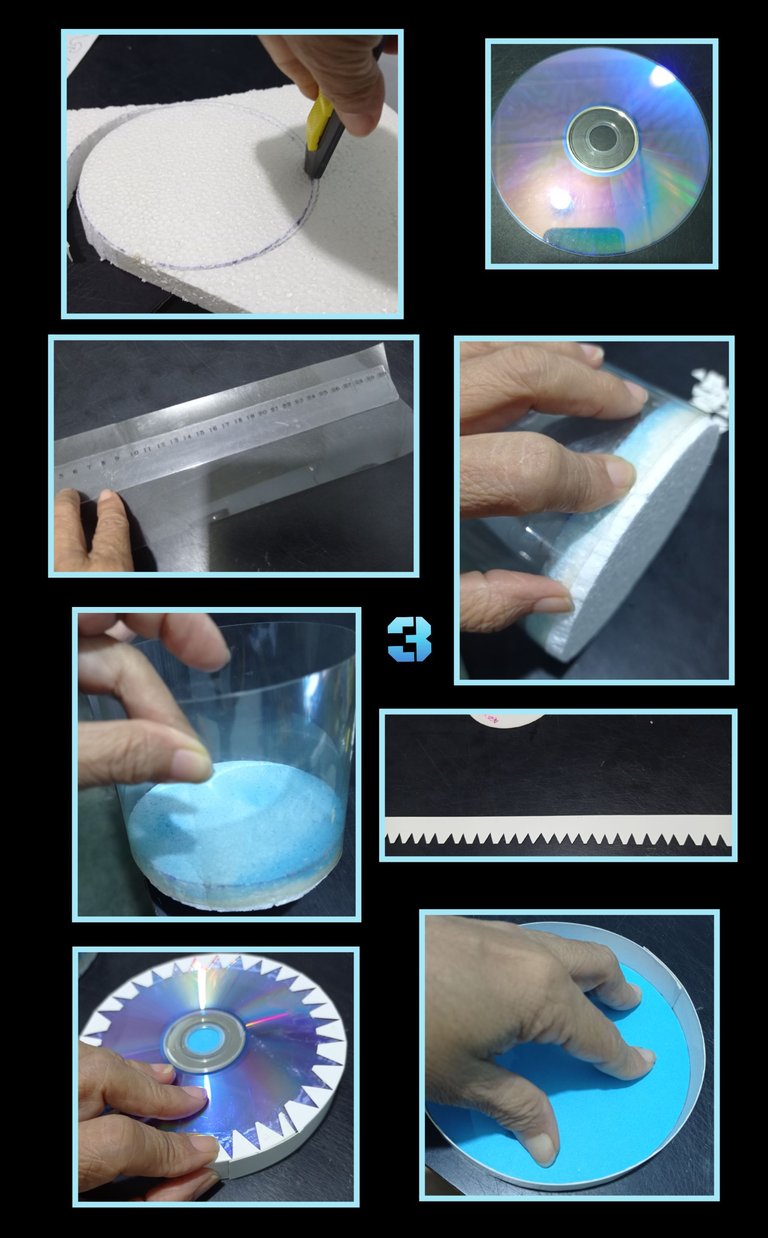
- Recorta y pinta en anime una circunferencia del tamaño deseado, en este caso tomé el tamaño de un CD, luego mide la circunferencia y la altura que desees, marca sobre un pedazo de acetato el rectángulo, recorta y pega por todo el contorno del anime.
- Para la tapa,recorta una tira de cartulina de 3cm de altura, divide en 2 partes y traza una línea y recorta triángulos por una orilla.
- Aplica silicón y pega la tira alrededor del CD.
- Recorta 2 círculos de foami y pega uno en la parte de adentro.
Paso 4:
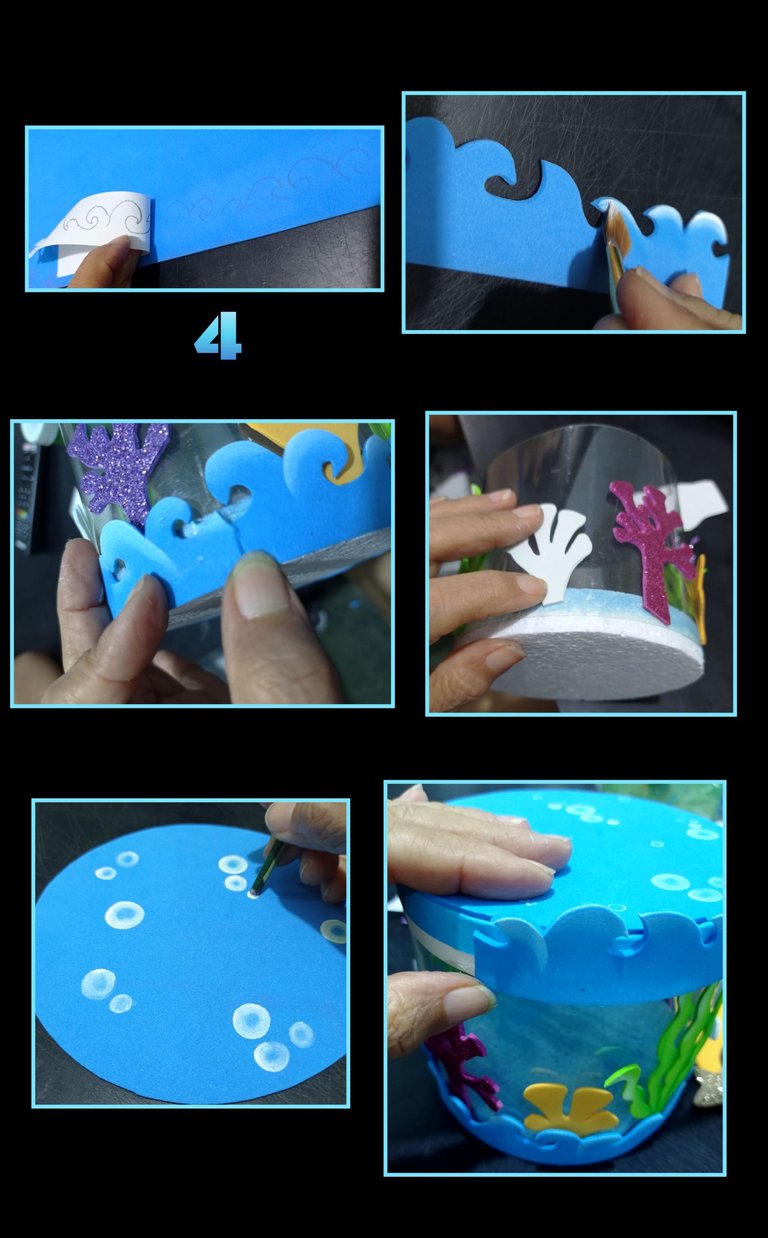
Dibuja a calca la forma de olas y transfiere sobre el foami y recorta dos tiras.
Luego con el pincel pinta la orilla en blanco y deja secar.
Aparte recorta algas y formas marinas y pega en la parte baja del cilindro.
Aplica silicón y pega una tira en el borde inferior.
Ahora en el otro círculo de foami pinta círculos semejando burbujas.
Pega en la parte de arriba de la tapa y luego pega la otra tira de foami en el borde de la tapa y decora con estrellitas.
Y así quedó este lindo cilindro decorado al estilo marino.
Fuente:https://www.pinterest.es/pin/476255729361645593/
Traductor DeepL
Editor de fotos GridArt.
Telefono: Redmi Note 9
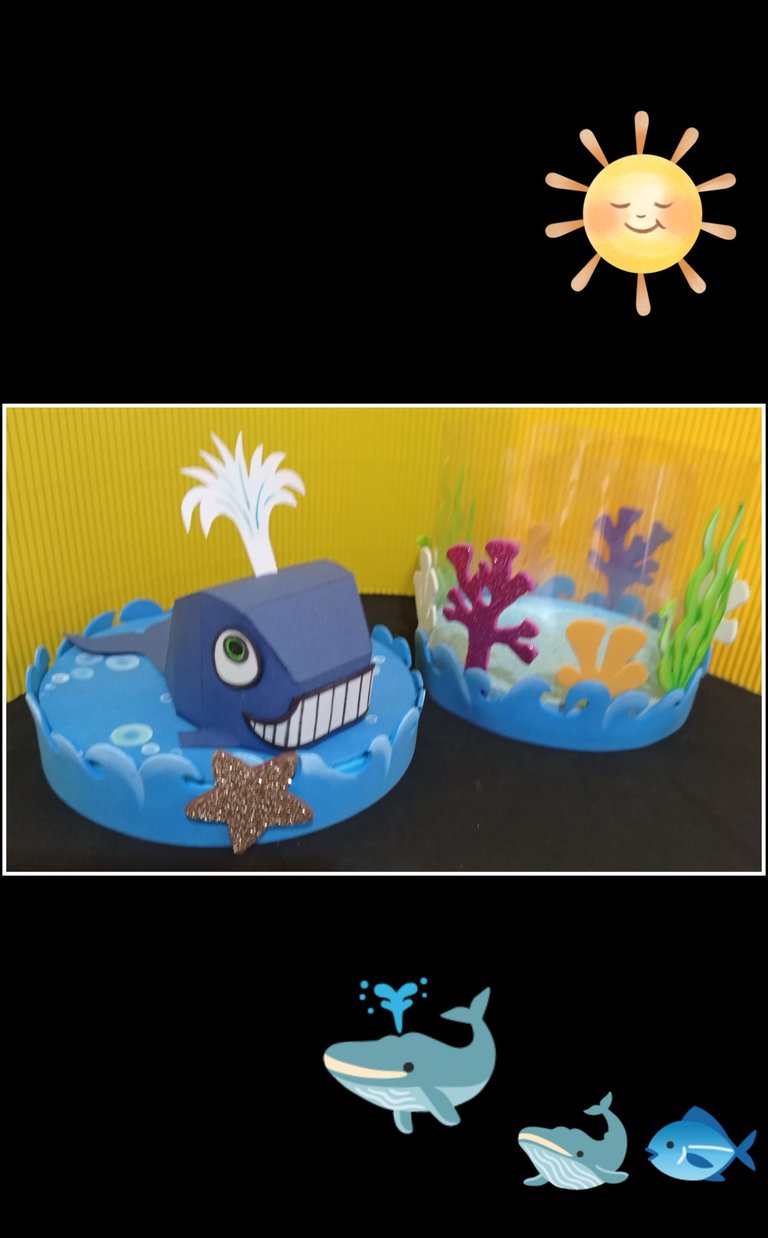
Aquí te dejo otras fotos a ver si te animas a realizarlo.
Espero y deseo que también lo sea para ti, por si te animas a realizarlo.
Muchas gracias por tu apoyo y visita.
English:
Hello dear friends and creators who visit me
And well in this tutorial I will show you how I made a whale out of cardboard and I decided to make a cylinder with acetate which I decorated with foami marine motifs, hahahaha. so I hope you like it.
You will need:
| School cardboard | Mould or stencil |
|---|---|
| Ruler | Scissors |
| Cutters | Pencil and marker |
| Silicon | White Foami |
| Acetato | Damaged CDs |
| Anime scrap of anime | Foami scraps |
| Paints and brushes | Charcoal paper |
Procedure:
Step 1:
- Trace or print out the drawing, then place it on the carbon paper and the cardboard and start to outline the drawing, then cut all around the edge.
- Now with the tip of the scissors and the help of the ruler, start to go gently along all the marked lines.
- Then fold and start applying silicone on the tabs and glue until the whole whale is assembled.
Step 2:
- On the white foami draw the eyes and go over the edge with a marker or brush, then paint the centre of the eye with green, let it dry and then paint the pupil and let it dry.
- Then insert the tip of the blade into the top of the whale and make a small incision, apply silicone and insert the water and let dry, then glue the eyes and mouth.
This is how this cute little whale is ready and smiling.
Step 3:
Make the cylinder.
- Cut out and paint a circle of the desired size in anime, in this case I took the size of a CD, then measure the circle and the height you want, mark on a piece of acetate the rectangle, cut out and glue all around the contour of the anime.
- For the lid, cut a strip of cardboard 3cm high, divide into 2 parts and draw a line and cut out triangles along one edge.
- Apply silicone and stick the strip around the CD.
- Cut out 2 foami circles and glue one on the inside.
Step 4:
Trace the wave shape and transfer it onto the foami and cut out two strips.
Then paint the border in white with the paintbrush and leave to dry.
Cut out seaweed and sea shapes and glue them to the bottom of the cylinder.
Apply silicone and stick a strip on the bottom edge.
Now paint bubble-like circles on the other foami circle.
Stick on the top of the lid and then stick the other foami strip on the edge of the lid and decorate with stars.
And this is how this beautifully decorated cylinder looks like
Translator DeepL
GridArt photo editor.
Phone: Redmi Note 9
Source:https://www.pinterest.es/pin/476255729361645593/
Here I leave other photos to see if you dare to do it.
I hope and wish that it will be for you too, in case you dare to do it.
Thank you very much for your support and visit.