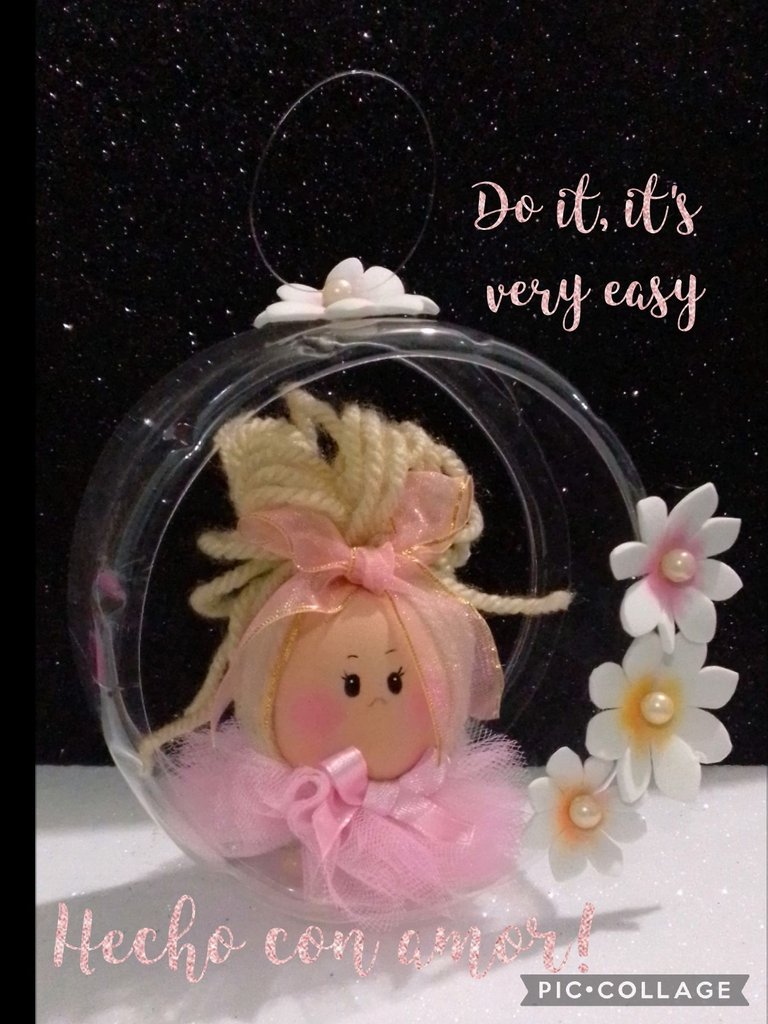

¡Pienso que cuando haces las cosas con amor te quedan más hermosas!
Así que ahora te invito a que busques lápiz y papel para anotar o simplemente toma una foto a lo que vas a necesitar:
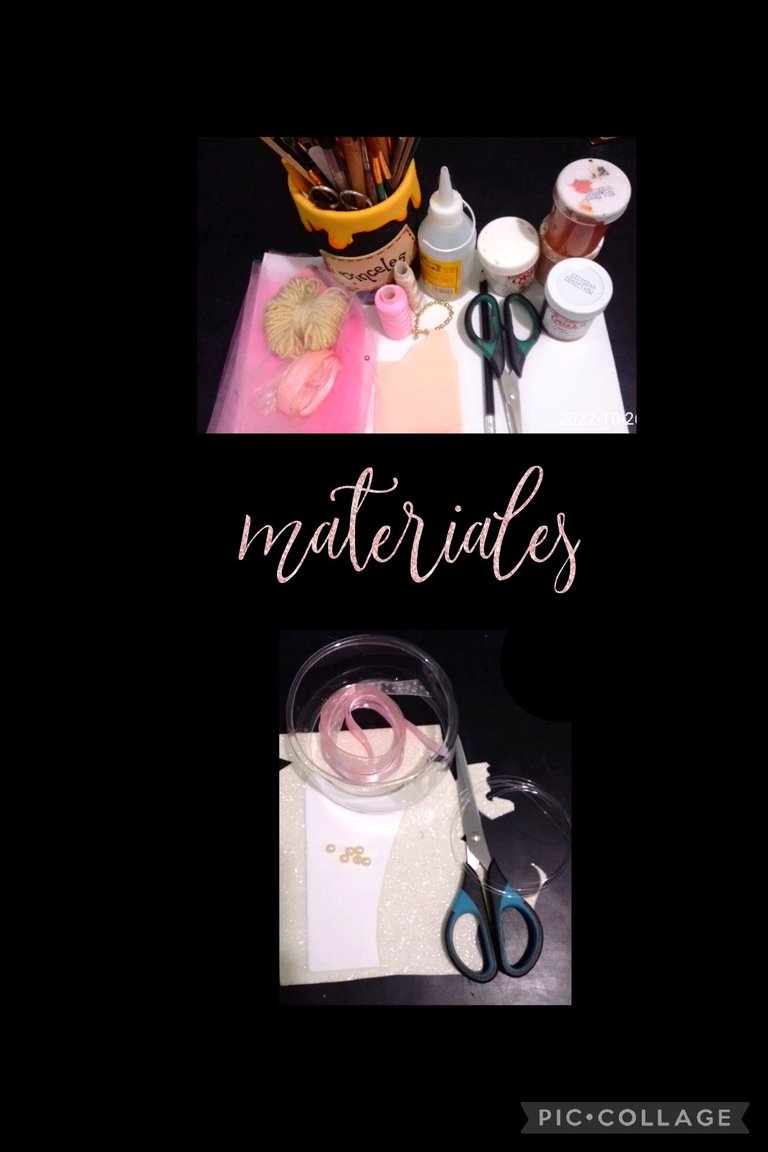
| Tul (recorte) | Estambre (hilo) |
|---|---|
| Goma eva | Cintas |
| Hilos y aguja | Perlitas blancas |
| Nylon | Tijera |
| Botella plástica | Molde |
| Pinturas y pinceles | Lápiz |
| Trocito de icopor | Goma espuma |
| Cautín | Plancha eléctrica |
Entonces comencemos con el paso a paso:
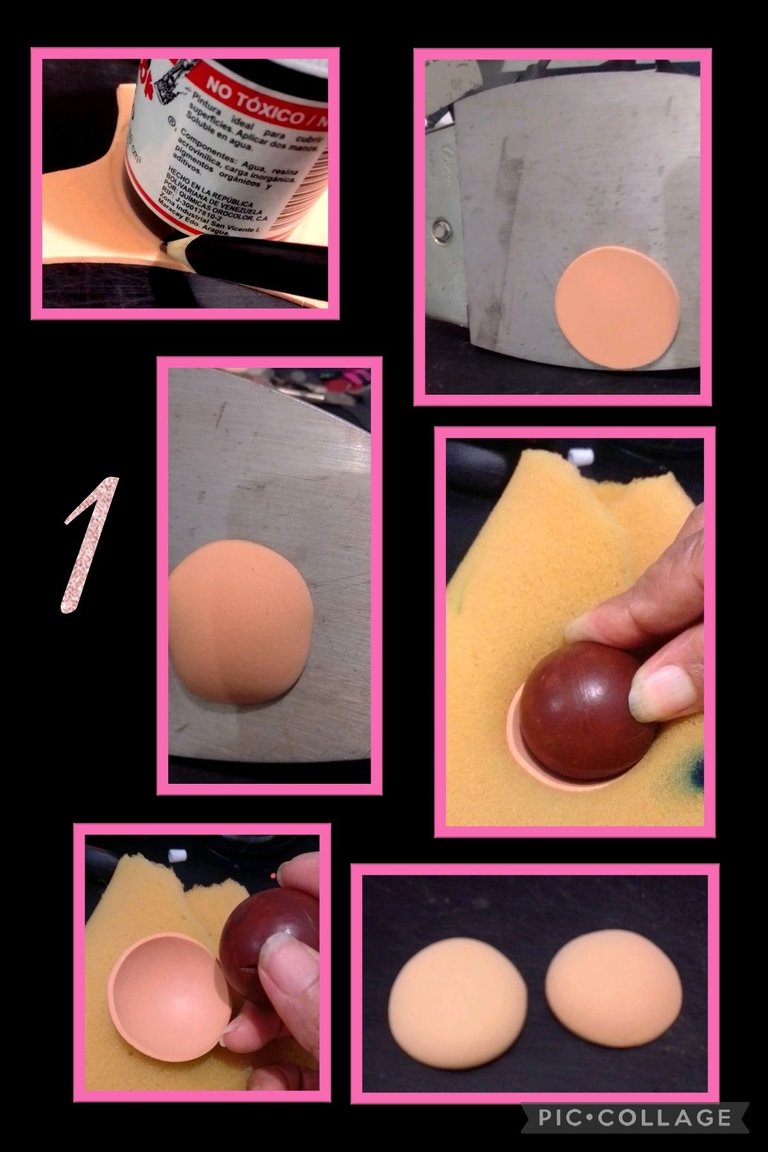
- Marca dos circunferencias del tamaño deseado sobre el foami y recorta, luego calienta la plancha, deja que tome un poco de forma, inmediatamente coloca sobre un pedazo de goma espuma y presiona con una esfera para que queden iguales.
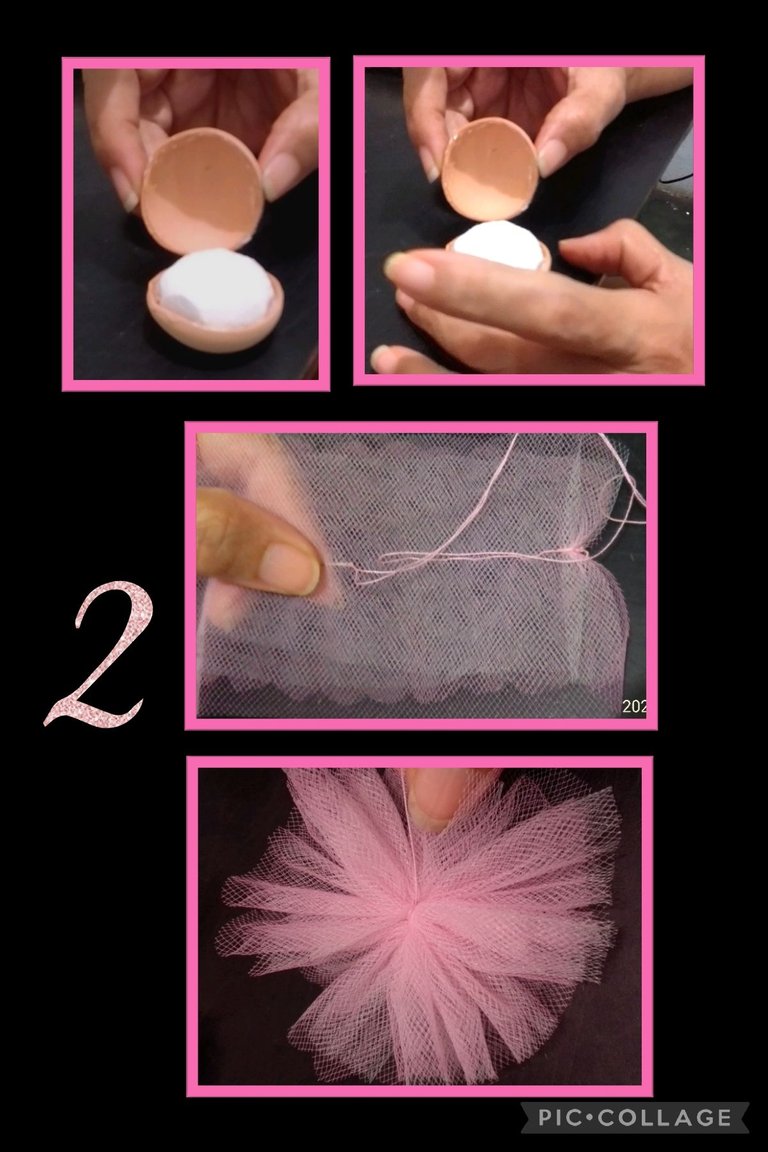
- Recorta un trocito de anime y pega en una de las partes de la cara, luego aplica silicón y pega ambas caras.
- Aparte recorta una tira de tul de 50 x 7cm, hilvana por el centro y frunce hasta formar una circunferencia.

- Mide el largo que quieras para el cabello, luego recorta un pedazo de cartón con esa medida y enrolla dando varias vueltas luego saca del cartón sin soltar y amarra en el centro.
- Ahora aplica silicón por todo el contorno de la cara y pega el cabello dejando la unión en la parte de abajo. (ver foto)
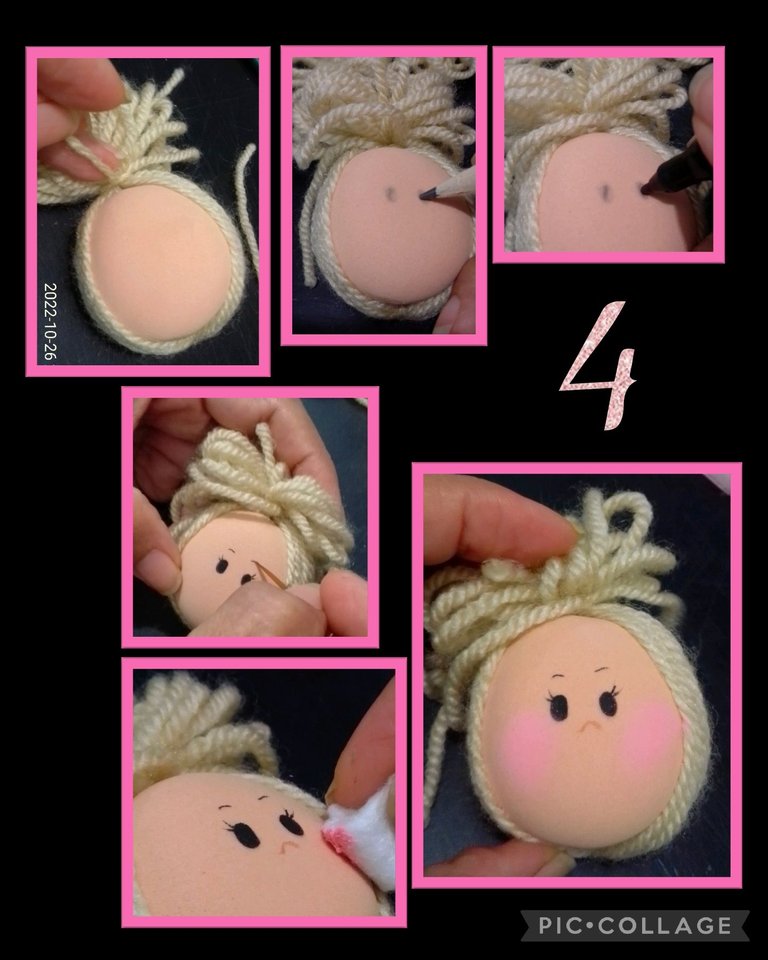
- Cuando subas el cabello, anuda arriba tipo moño.
- Marca los ojos y pinta con un marcador, luego con un pincel delgado pinta pestañas, cejas y nariz y pon color en las mejillas.
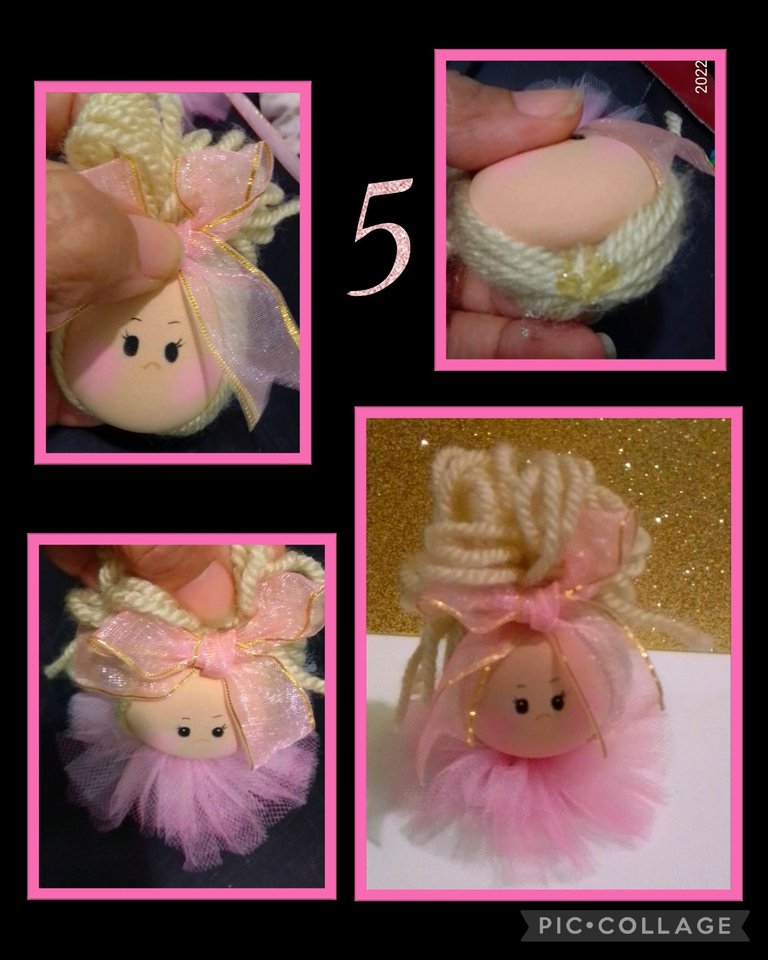
- Haz un lazo y pega sobre la frente, luego aplica silicón en la parte de abajo y pega sobre el tul. Así quedará lista la muñequita.
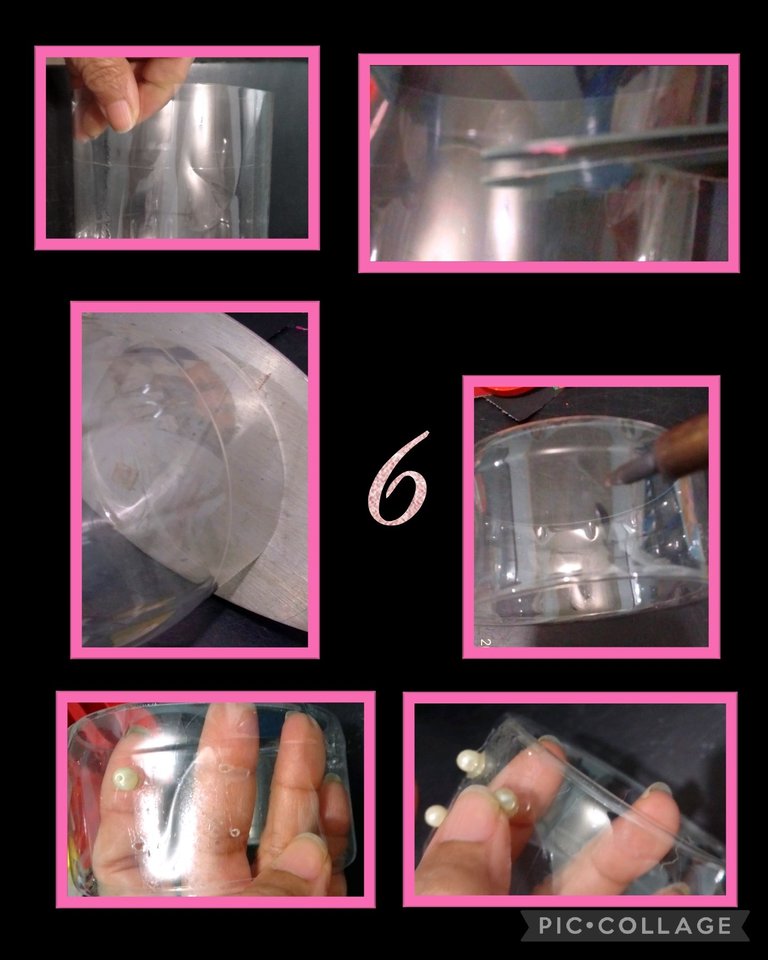
- Recorta la parte lisa de una botella de refresco y recorta al ancho que prefieras, luego para quitar el filo, calienta la plancha, coloca y gira hasta que vaya doblando el filo, esto hazlo en ambos lados.
- Calienta el cautín o un alambre y haz un orificio en el centro, luego en la parte de abajo haz (4) orificios alineados y pega con silicón las perlitas.
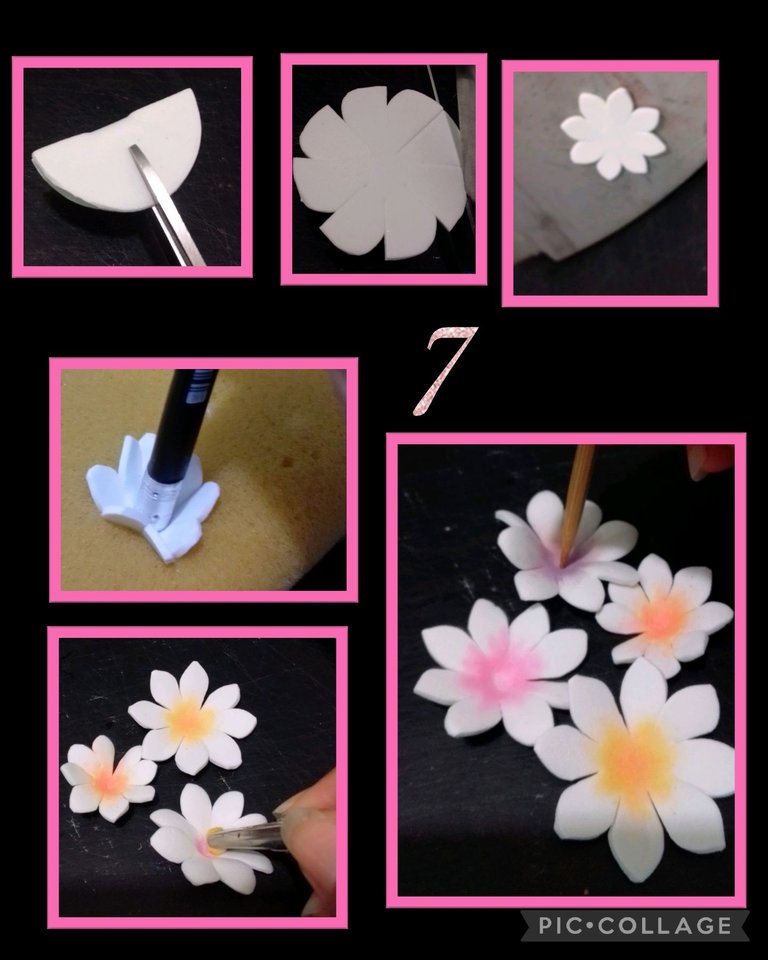
Recorta círculos de varios tamaños en foami blanco, luego divide en 8 partes y recorta dando forma de pétalos, así
harás las flores.Ahora calienta la plancha y coloca las flores, quita cuando calienten, pon sobre la goma espuma y presiona en el centro.
Aparte pinta el centro con tiza o pintura y haz un orificio a una de ellas.
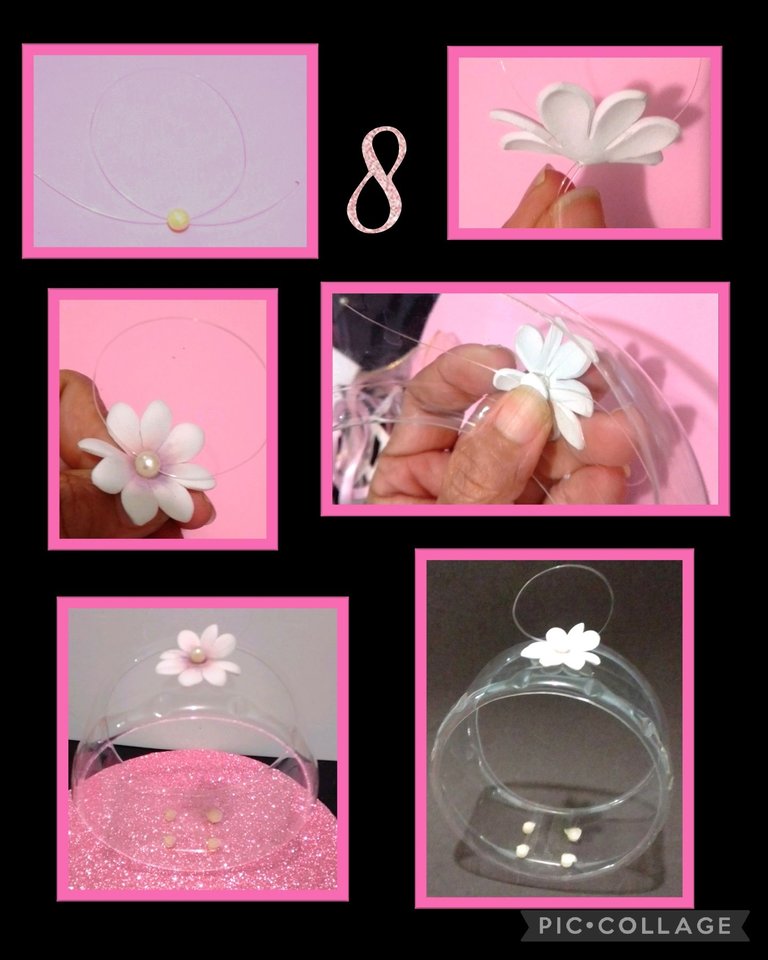
- Recorta un pedacito de nylon e inserta la perlita metiendo cada punta por un extremo, haz un nudo e introduce en la flor.
- Ahora inserta las dos puntas del hilo por el orificio que abriste en el aro de la botella y pega en la parte de abajo con un mini círculo de foami para poder colgar.
(Ver fotos)
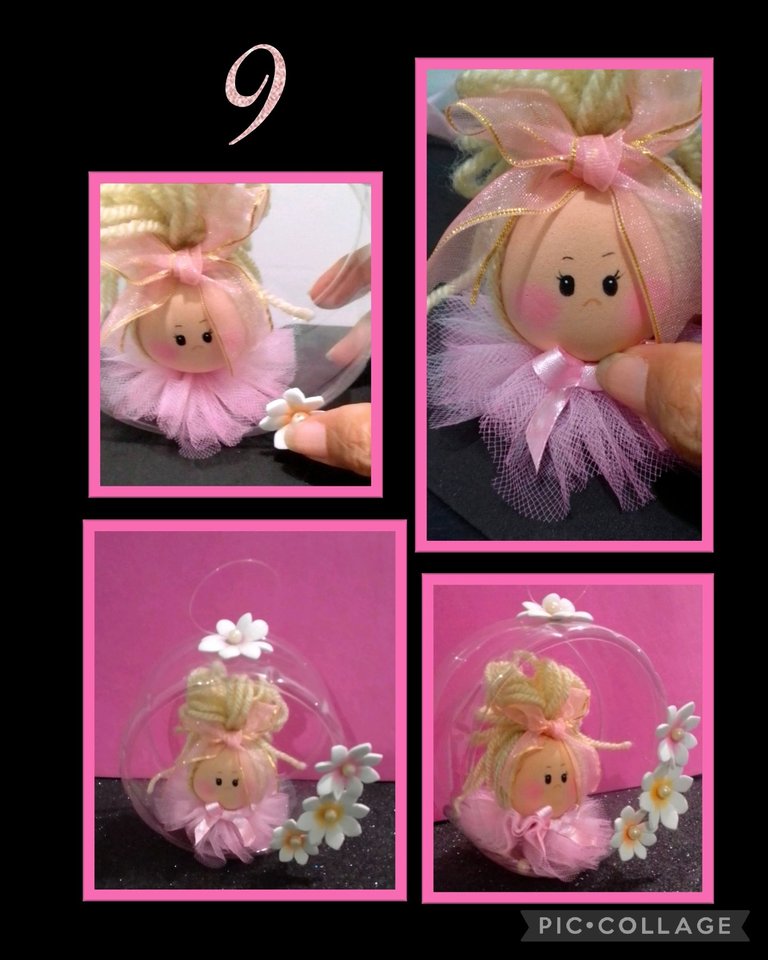
- Ahora solo queda decorar el aro pegando las flores y por último haz un lacito y pega a la muñequita.
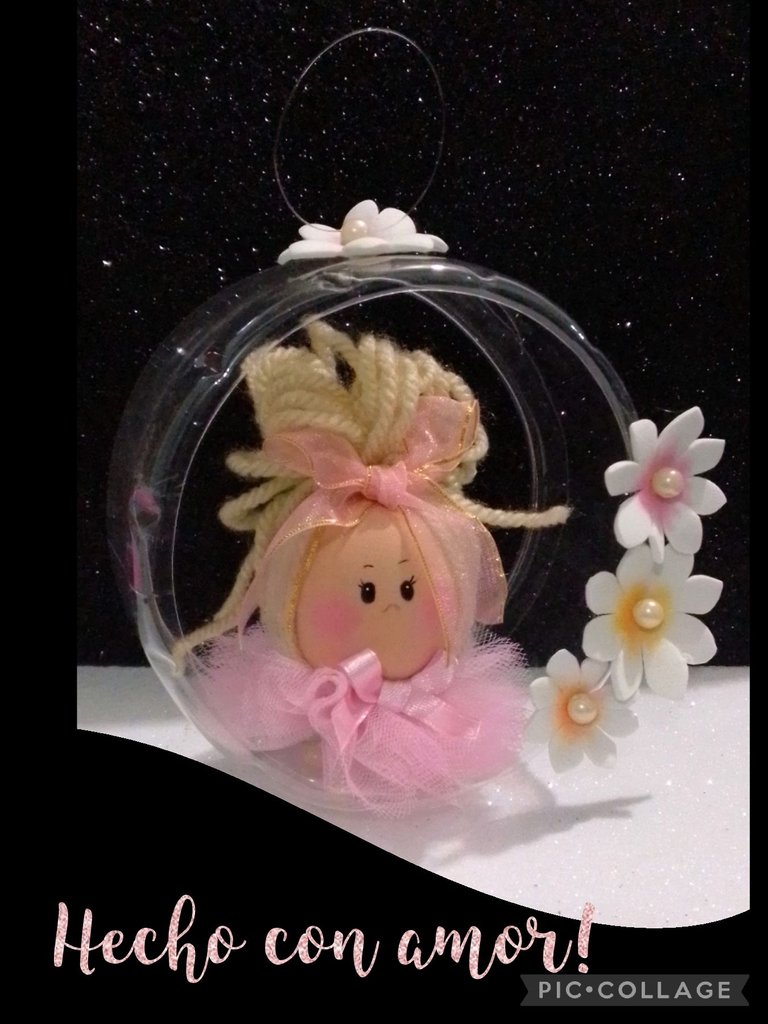
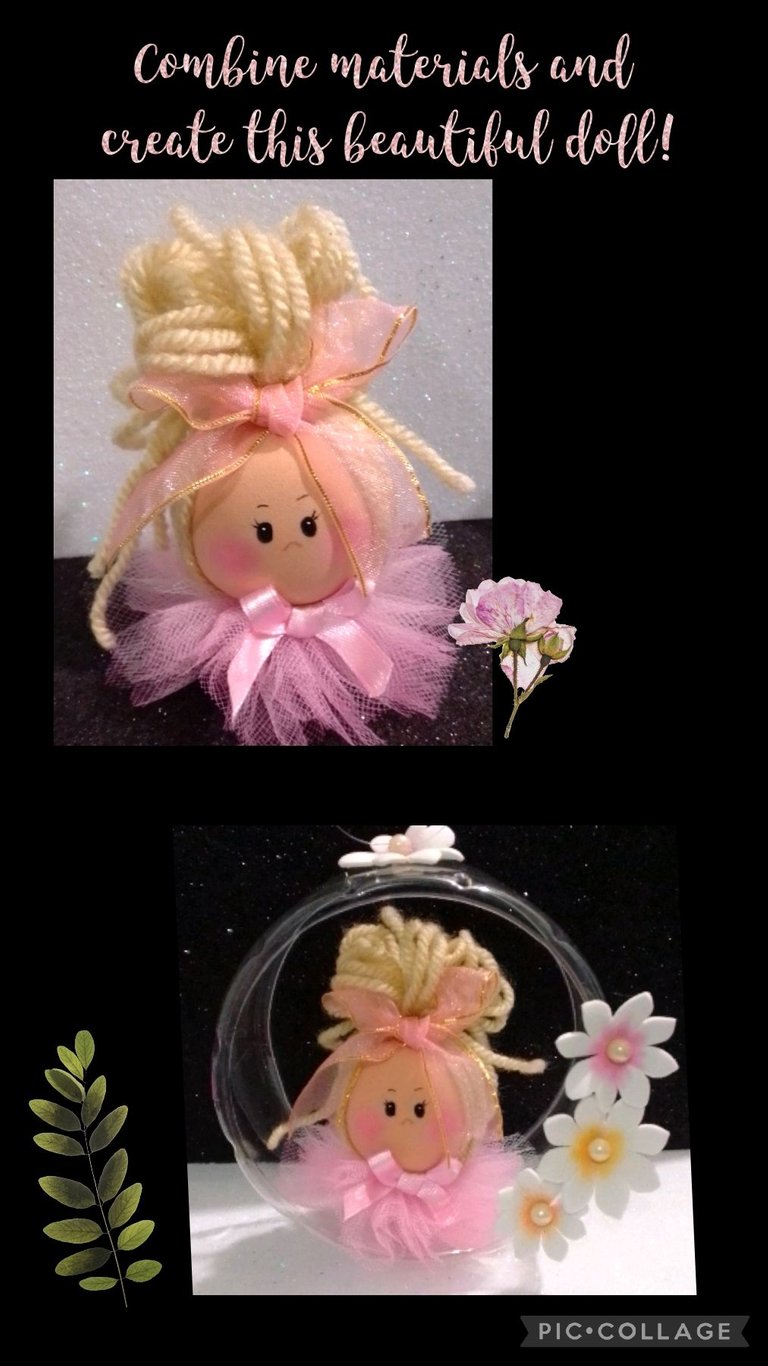
Y así quedó esta linda muñequita
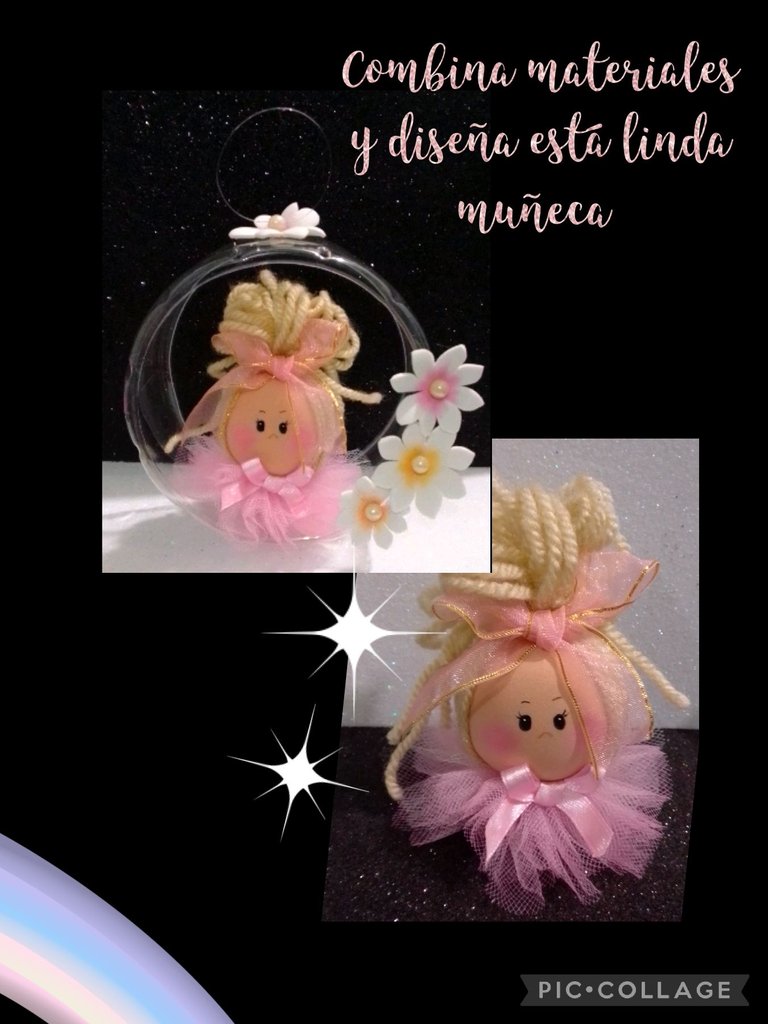
Aquí te dejo varias fotos para que veas lo sencillo, tierna y fácil de realizar!

Fuente:
https://www.pinterest.es/pin/476255729356634284/
Mi publicación está traducida con DeepL, editada con etiquetas HTML y las fotos capturadas con mi BLU G5 y editadas con Pic Collage.
Ahora llegó la hora de despedirme deseando que mi tutorial haya sido de tu agrado.
Saludos, gracias por tu apoyo y visita.


I think that when you do things with love, they are more beautiful!
So now I invite you to get a pencil and paper to write down or just take a picture of what you will need.

| Tulle (trimming) | Stamen (yarn) |
|---|---|
| Foami | Ribbons |
| Threads and needle | White beads |
| Nylon | Scissors |
| Plastic bottle | Mold |
| Paints and paintbrushes | Pencil |
| Cautin | Styrofoam rubber |
| Cutting iron | Electric iron |
So let's start with the step by step:

- Mark two circles of the desired size on the foami and cut out, then heat the iron, let it take a little shape, immediately place on a piece of foam rubber and press with a sphere so that they are equal.

- Cut out a small piece of anime and glue on one side of the face, then apply silicone and glue both sides together.
- Separately cut a 50 x 7cm strip of tulle, thread through the center and gather to form a circumference.

- Measure the length you want for the hair, then cut a piece of cardboard with that measurement and roll it around several times, then pull it out of the cardboard without letting go and tie in the center.
- Now apply silicone all around the face and glue the hair leaving the joint at the bottom (see picture).

- When you bring the hair up, tie the top in a bun.
- Mark the eyes and paint with a marker, then with a thin brush paint eyelashes, eyebrows and nose and put color on the cheeks.

- Make a bow and glue it on the forehead, then apply silicone on the bottom and glue it on the tulle. This way the doll will be ready.

- Cut the smooth part of a soda bottle and cut to the width you prefer, then to remove the edge, heat the iron, place and turn until the edge is bent, do this on both sides.
- Heat the soldering iron or a wire and make a hole in the center, then at the bottom make (4) aligned holes and glue the beads with silicone.

Cut out circles of various sizes in white foami, then divide into 8 parts and cut out in the shape of petals.
you will make the flowers.Now heat the iron and place the flowers, remove when heated, place on the foam rubber and press in the center.
Apart paint the center with chalk or paint and make a hole in one of them.

- Cut out a small piece of nylon and insert the pearlite by inserting each end through one end, tie a knot and insert it into the flower.
- Now insert the two ends of the thread through the hole you opened in the ring of the bottle and glue at the bottom with a mini circle of foami for hanging.
(See photos)

- Now all that remains is to decorate the ring by gluing the flowers and finally make a bow and glue to the doll.

And this is how this cute little doll looks like

Here I leave several photos for you to see how simple, tender and easy to make!


Source:
https://www.pinterest.es/pin/476255729356634284/
My publication is translated with DeepL, edited with HTML tags and the photos captured with my BLU G5 and edited with Pic Collage.
Now it's time to say goodbye wishing that my tutorial has been to your liking.
Greetings, thanks for your support and visit.


