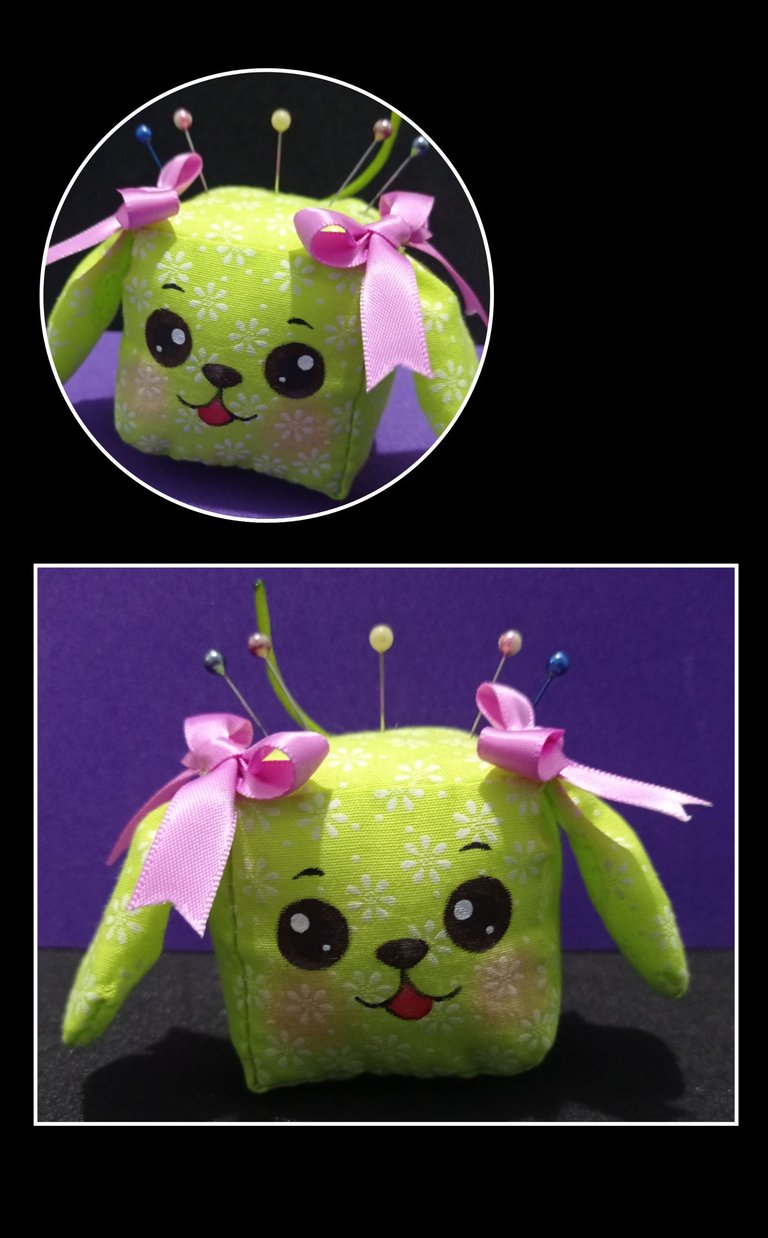

Buenas noches queridos creadores y amigos que hoy me visitan.
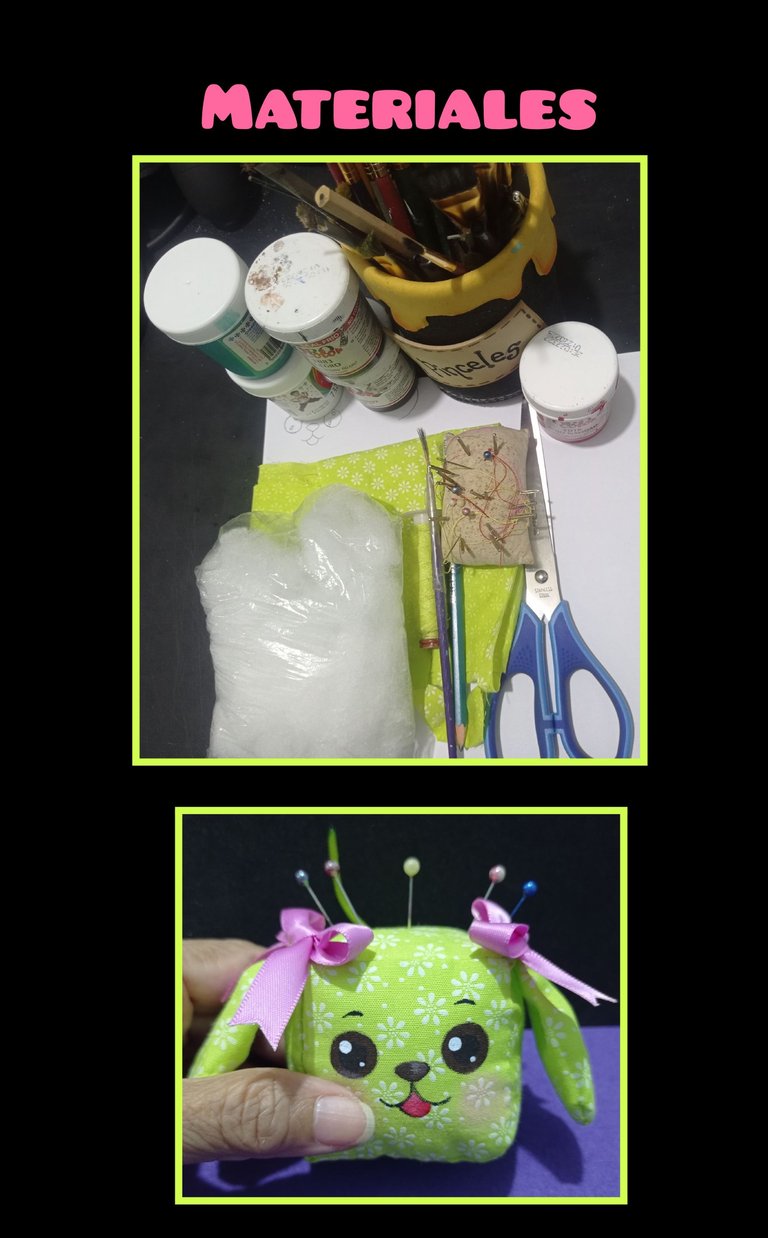
Para realizarlo vas a necesitar los siguientes materiales:

Retazo de tela, rabo de ratòn.
Hilo, aguja y alfileres
Relleno, cinta
Pinturas, pinceles
Lápiz, tijera y molde.
Papel carbón o de calcar.
Ahora acompáñame en el proceso, verás que es fácil
Paso 1:

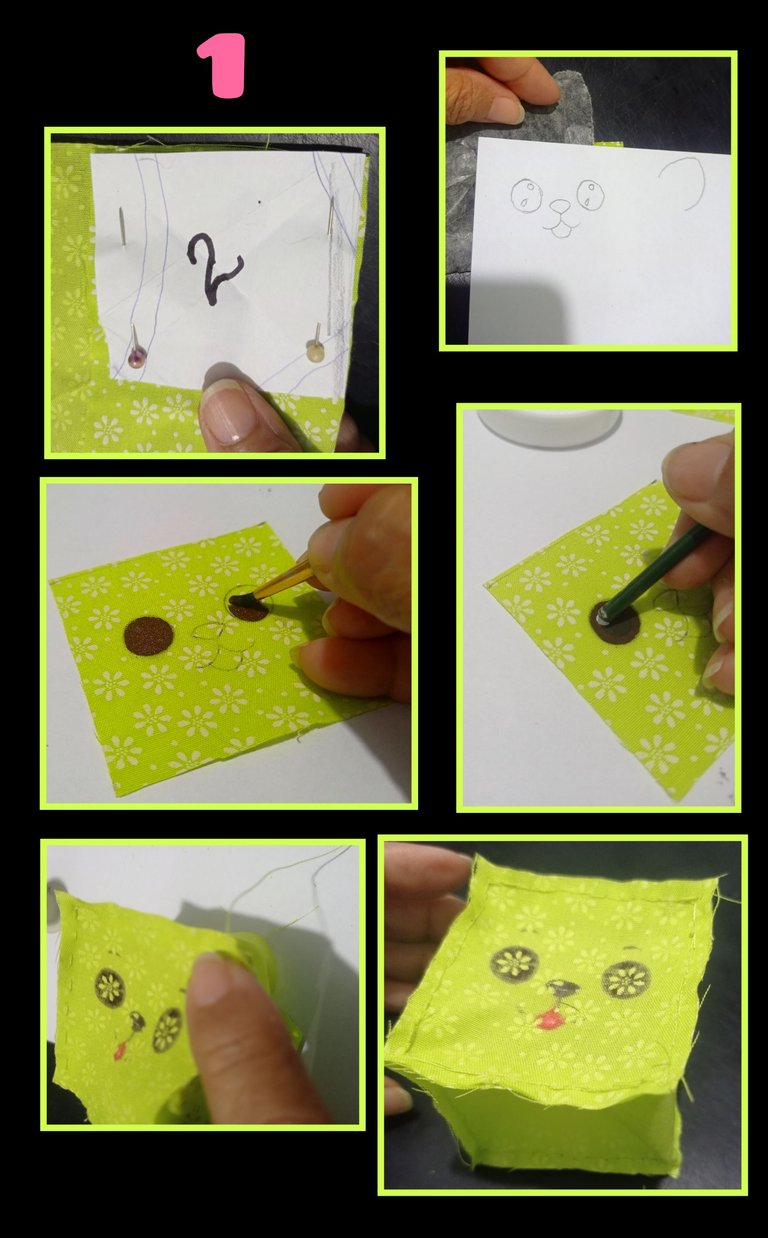
Dibuja y recorta un cuadrado en papel o cartulina, luego fija con alfileres sobre la tela doble y recorta dos cuadrados de 6x6cm, también recorta una tira de 6cm de ancho por 26cms de largo, después coloca el dibujo sobre el papel de calcar y transfiere remarcando la carita de la perrita.
Con un pincel rellena los ojos con pintura marrón, en el centro con pintura negra y luego con un palito de madera pinta un punto blanca en cada ojo y deja secar, después pinta la naríz y boca.
Ahora comienza a coser uniendo la tira larga a el cuadrado de tela por todo el contorno, parte superior y cierras la tira larga uniendo los extremos.
Paso 2:

- Ahora cose el otro cuadrado en la parte inferior, deja un lado sin coser y voltea por allí el cubo.
- Rellena bien y cose para cerrar totalmente el cubo.
- Recorta dos rectángulos y redondea uno de los extremos para dar forma a las orejitas.
Paso 3:

Cose las orejas por los contornos y deja la parte recta abierta para voltear.
Luego hilvana y hala el hilo para fruncir y cose a cada lado.
Arma dos lacitos y cose o pega arriba de cada oreja.
Ahora haz un nudo en el hilo de ratón o cordón y luego recorta al largo de tu preferencia y cose o pega en la parte trasera de la perrita.
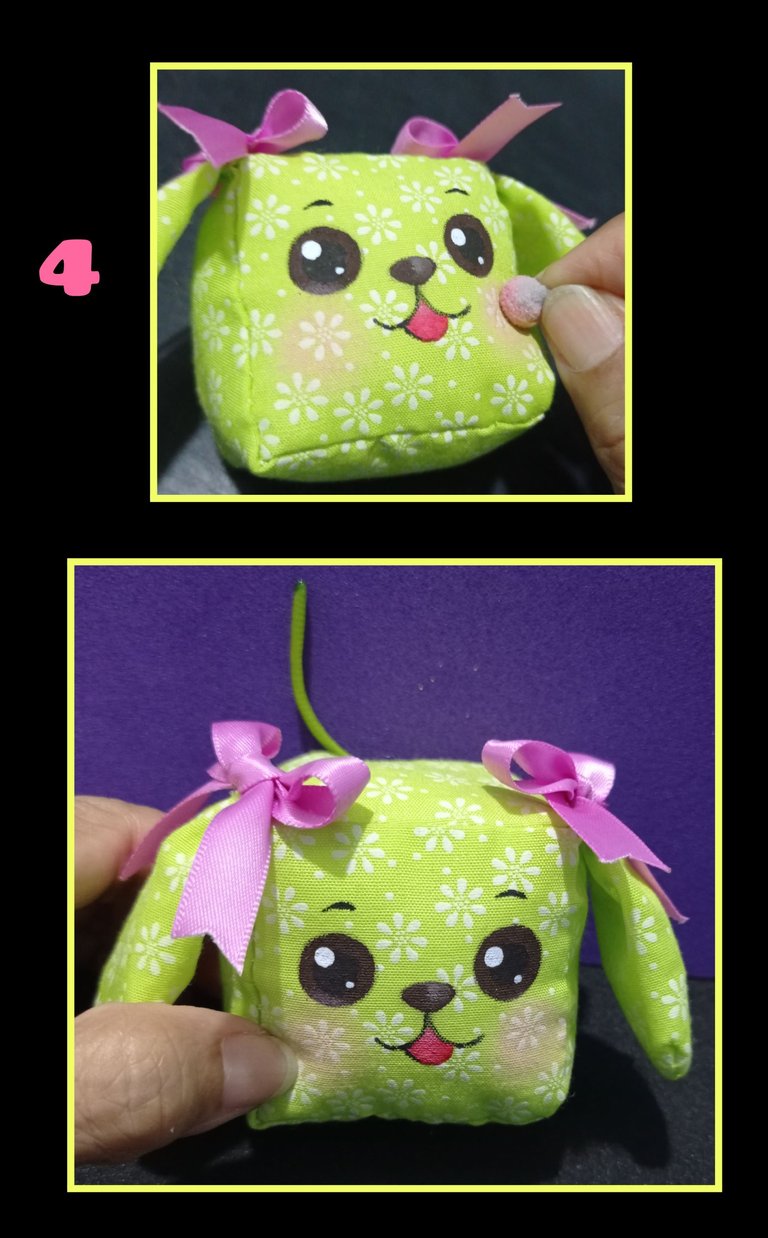
Paso 4:

Fuente:https://es.pinterest.com/pin/4503668371952774/
- Por último con una bolita de algodón dale color a los cacheticos de la perrita, así quedará listo nuestro alfiletero.
Entonces ahora te muestro unas fotos con el proyecto ya terminado.

Mira que lindo, práctico, útil y fácil es de realizar!


Ahora quiero despedirme no sin antes agradecer tu visita y si es de tu agrado comentar, me encantará responder tu atención y apoyo. Ingles: Good evening dear creators and friends who visit me today. To make it you will need the following materials: Piece of fabric, mouse tail. Now join me in the process, you'll see it's easy. Step 1: Draw and cut out a square on paper or cardboard, then fix with pins on the double fabric and cut out two squares of 6x6cm, also cut out a strip of 6cm wide by 26cms long, then place the drawing on the tracing paper and transfer outlining the face of the little dog. With a brush fill the eyes with brown paint, in the center with black paint and then with a wooden stick paint a white dot in each eye and let dry, then paint the nose and mouth. Now start sewing by attaching the long strip to the fabric square all around, top and close the long strip by attaching the ends. Step 2: Step 3: Sew the ears along the contours and leave the straight part open for turning. Then baste and pull the yarn to gather and sew on each side. Assemble two bows and sew or glue on top of each ear. Now tie a knot in the mouse yarn or cord and then trim to the length of your choice and sew or glue to the back of the dog. Step 4: Source: https://es.pinterest.com/pin/4503668371952774/ ******* So now I show you some pictures with the finished project. Look how cute, practical, useful and easy it is to make! Now I want to say goodbye not before thanking you for your visit and if you like to comment, I will be happy to answer your attention and support.
Editada con Etiquetas HTML
Fotos capturadas con mi Redmi Note 9.
Editadas con GridArt.
Hasta mi próximo tutorial.


Thread, needle and pins
Stuffing, ribbon
Paints, brushes
Pencil, scissors and mold.
Charcoal or tracing paper.


Edited with HTML Tags
Photos captured with my Redmi Note 9.
Edited with GridArt.
Until my next tutorial.


