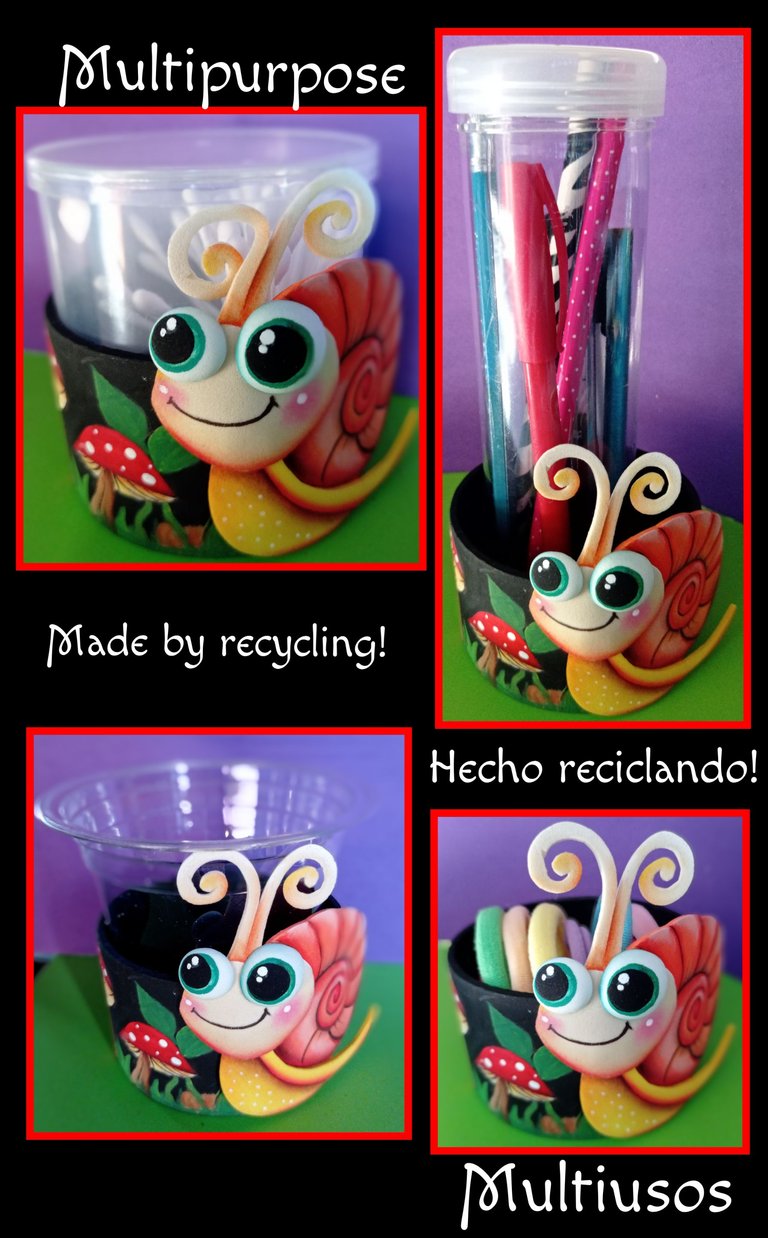
Hola, hola mi querida comunidad de creadores y amigos que hoy me visitan.
Sean todos bienvenidos a mi Blog.
Acompáñame y aprende como hacerlo!
Para esto vas a necesitar:
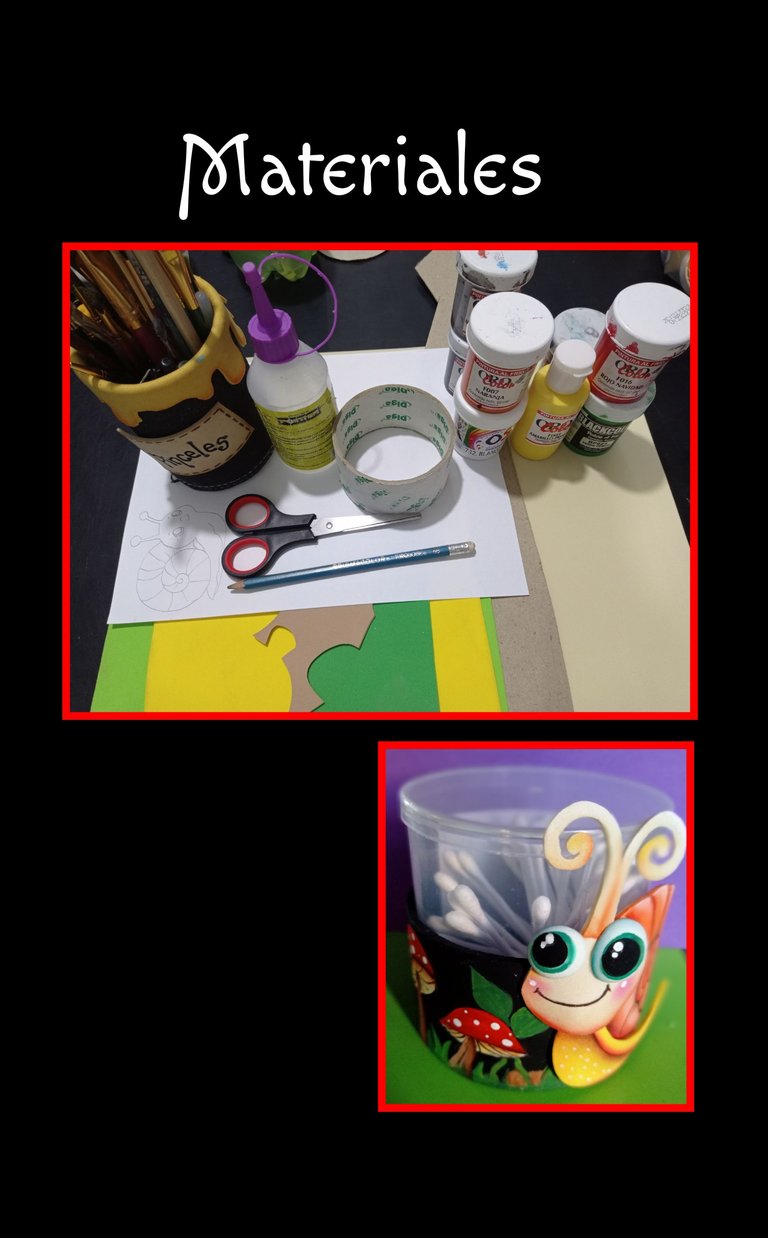
| Tubo de cinta adhesiva | Pinturas y pinceles |
|---|---|
| Foami de colores | Dibujo o impresión |
| Tijera y lápiz | Silicón y tiza |
| Cartón | Plancha eléctrica |
Comencemos:
Paso 1
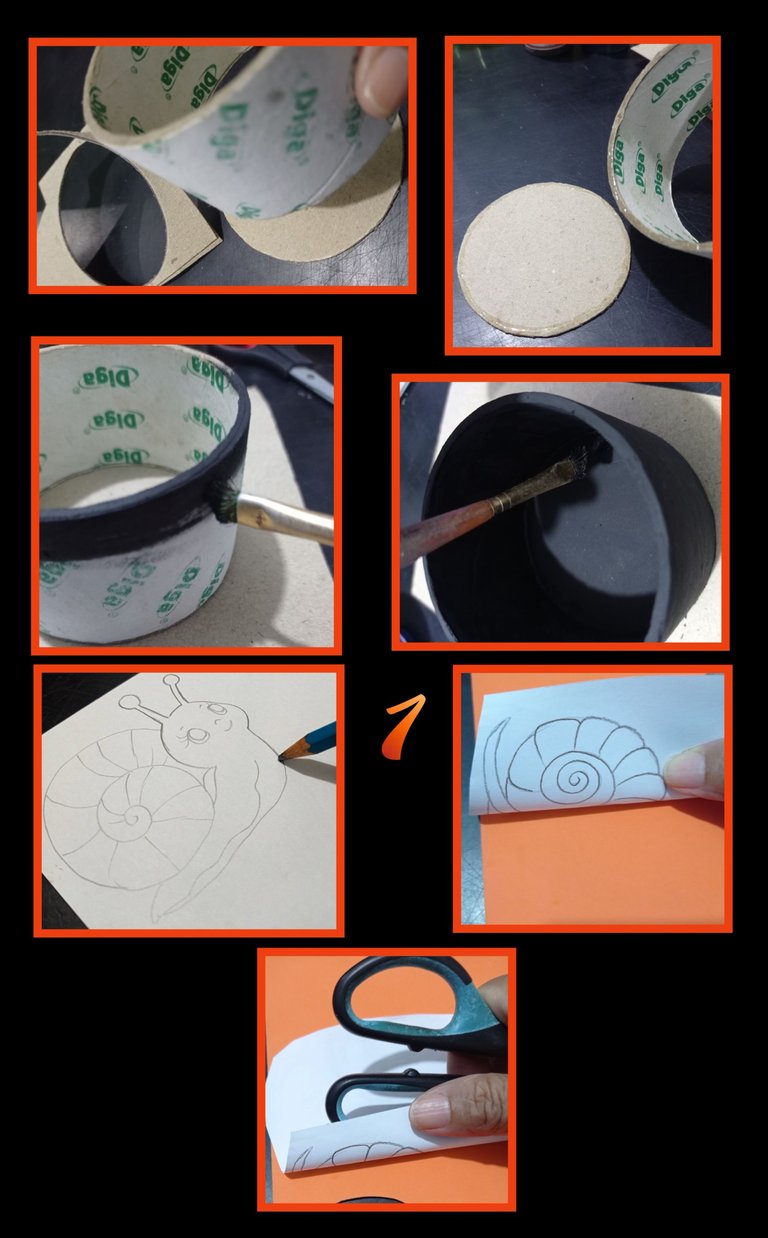
- Primero haremos la base, coloca el tubo de la cinta adhesiva sobre el cartón, marca todo el contorno de la circunferencia y recorta, luego aplica silicón a la orilla del círculo y del tubo de cartón y pega.
- Luego aplica una capa de pintura negra dejando secar 5 minutos y después aplica la segunda capa y deja secar.
- Ahora remarca el dibujo del caracol con un lápiz de mina blanda y luego coloca el dibujo sobre el foami y comienza a frotar para transferir el dibujo, así harás con cada pieza que
vayas a transferir y recorta.
Paso 2
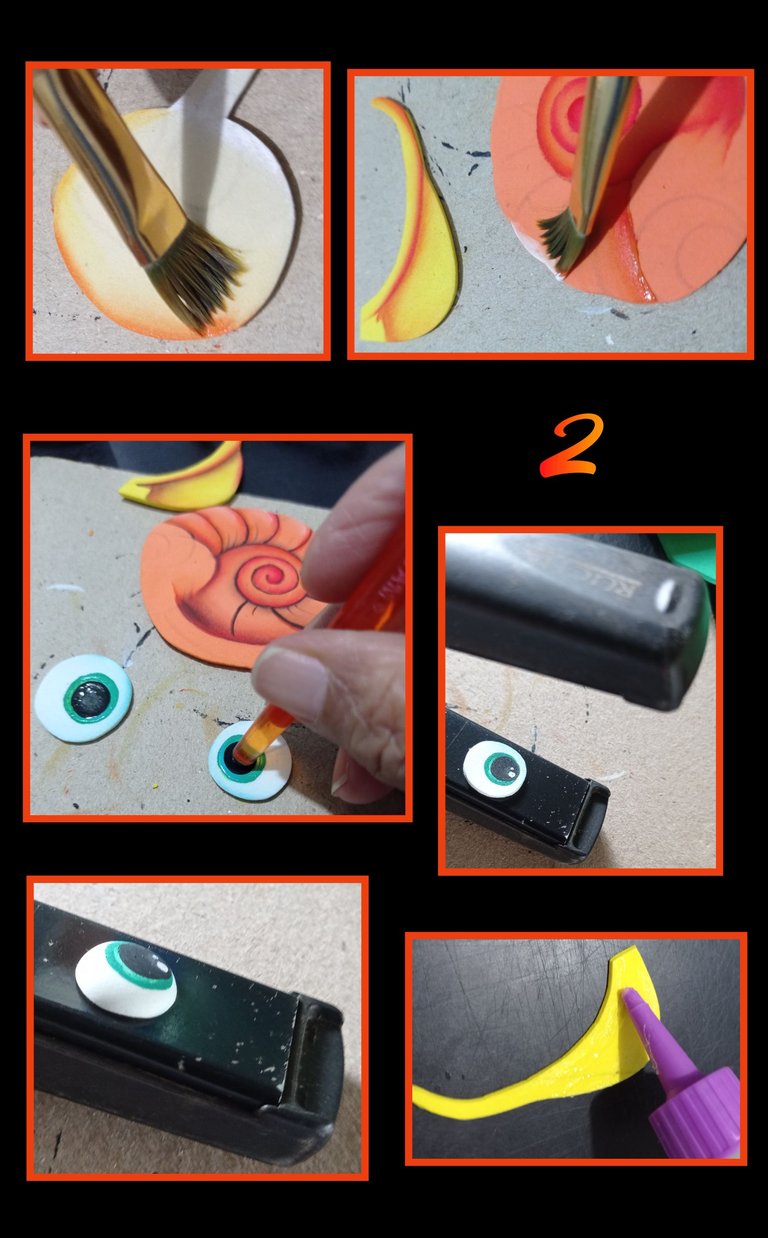
- Ahora humedece un pincel en agua y quita el exceso, después moja la punta en el color deseado y comienza a pasar por todo el contorno de las piezas y deja secar, luego en la parte de arriba de la concha del caracol aplica pintura blanca.
- Después con un pincel fino o marcador repasa las líneas marcadas, para pintar los ojos moja la parte trasera de un pincel grueso con pintura azul y haz movimientos circulares hasta rellenar al tamaño deseado o marcado y deja secar, luego moja en pintura negra y pinta el centro, igualmente deja secar y pon un punto de luz con pintura blanco.
- Aparte calienta la plancha y coloca los ojos para termoformar.
- Y comienza a aplicar silicón a las piezas para armar el caracol.
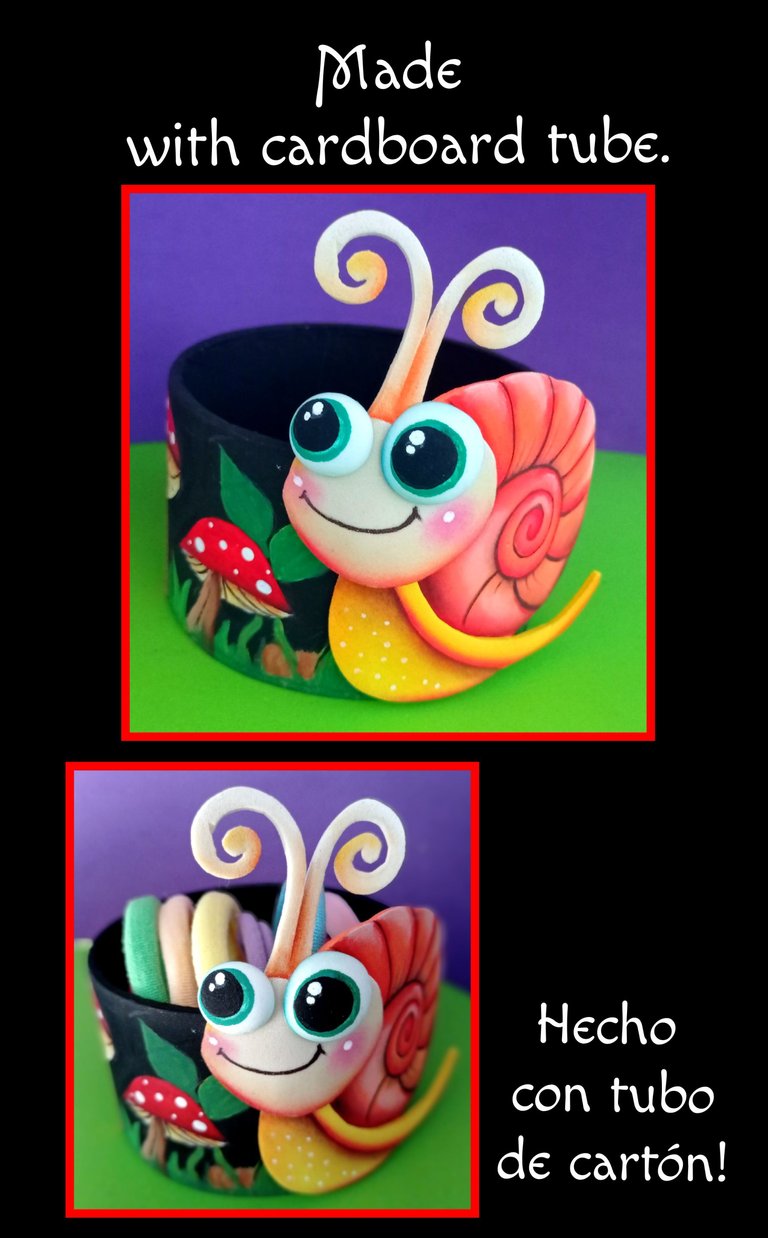
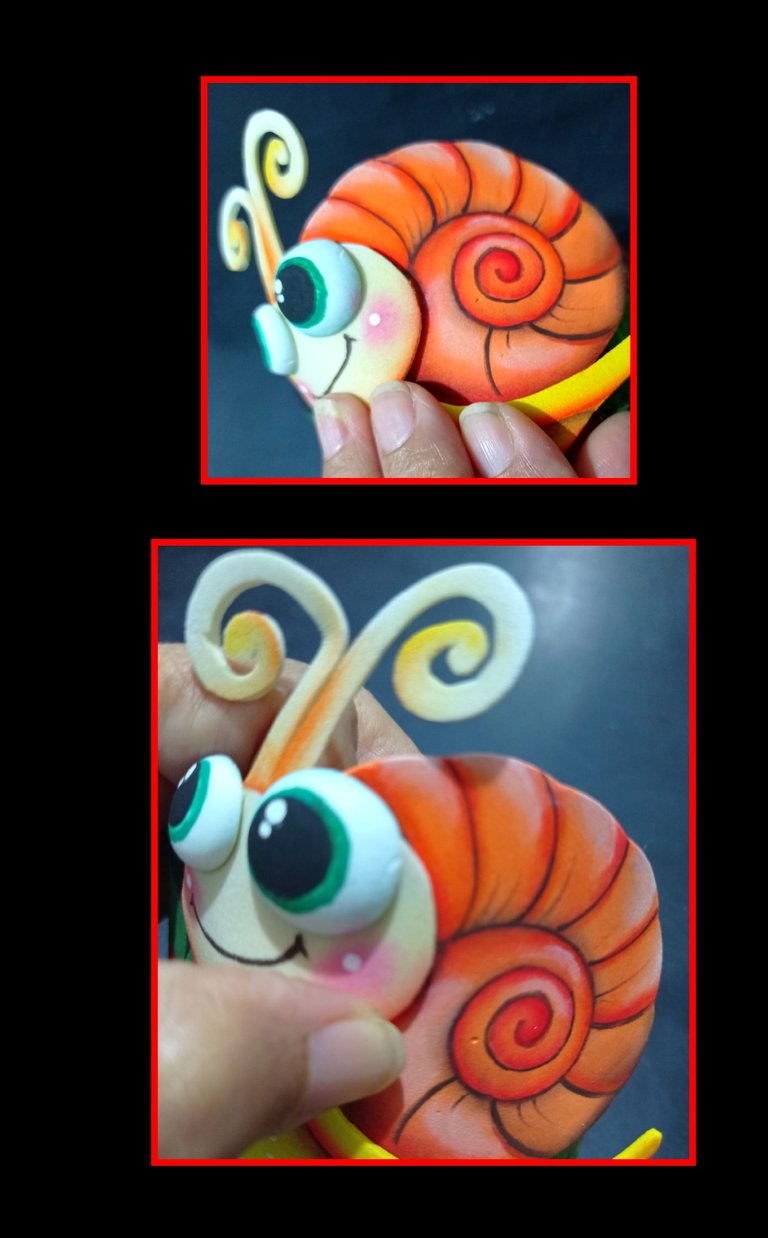
Así quedará!
Paso 3
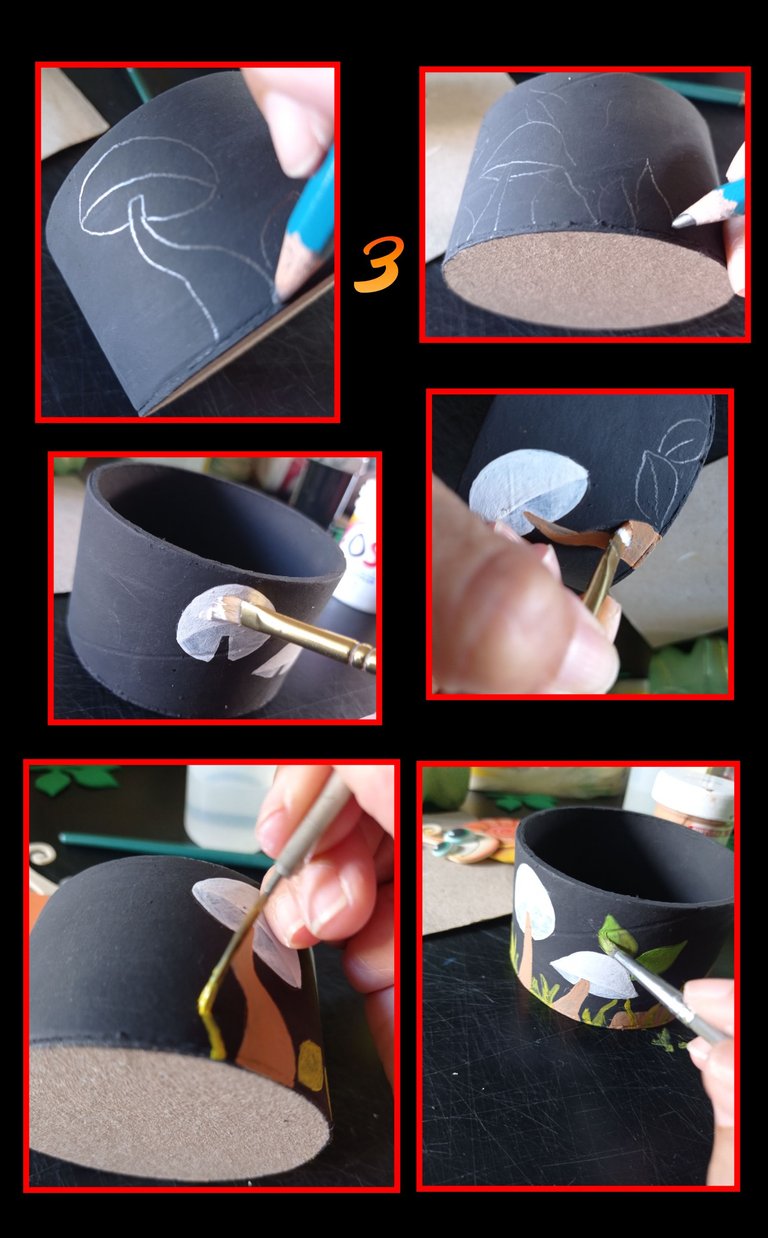
- Ahora dibuja con el lapiz sobre el cilindro unos hongos y arbustos o flores si es tu gusto, es cuestión de tu imaginación.
Si no sabes dibujar, puedes calcar o imprimir un dibujo y transferir. - Hecho el dibujo, comienza a aplicar una capa de pintura blanca sobre las imagenes, luego aplica otra mano de pintura blanca y pinta los tallos y hojas con pintura amarilla.
Paso 4:
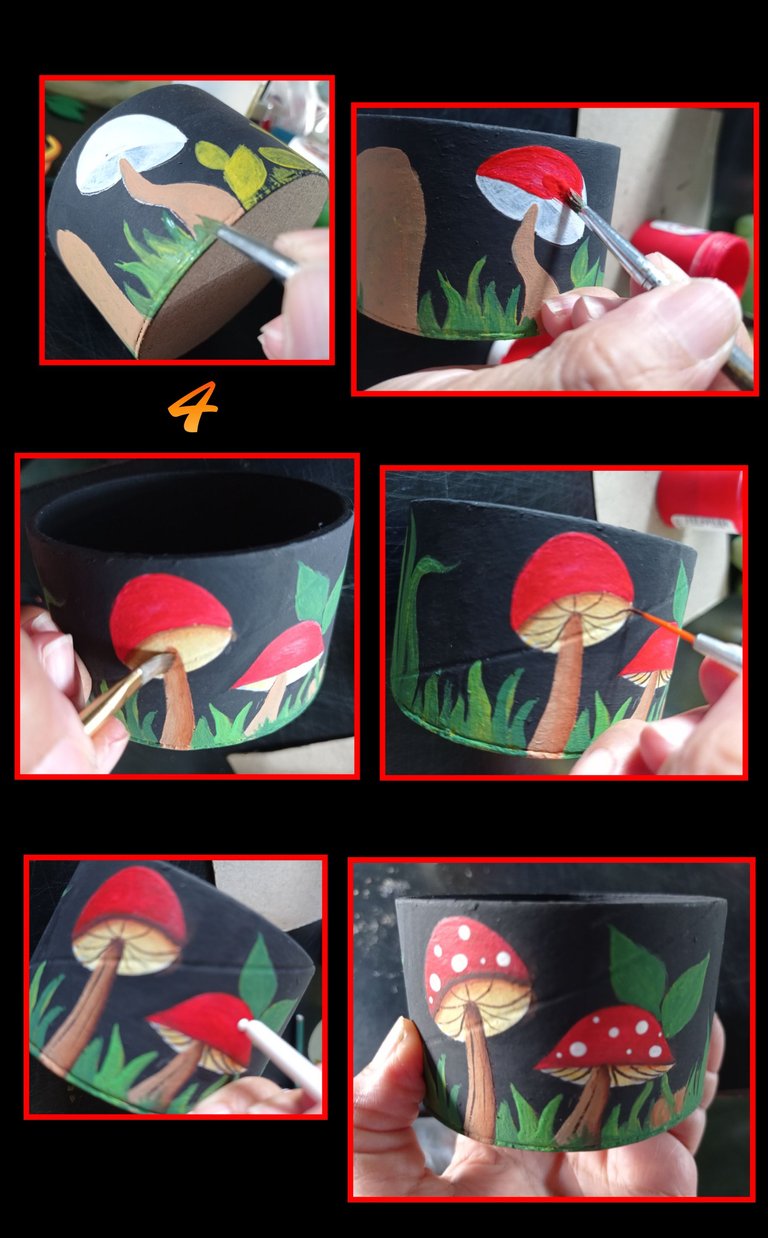
- Con un pincel fino, comienza a pintar el arbusto y hojas con verde, después con pintura roja pinta los hongos y así sigue rellenando tu dibujo, luego con un pincel fino o marcador, haz las líneas delgadas y pon puntos blancos en los hongos y deja secar.
Paso 5:
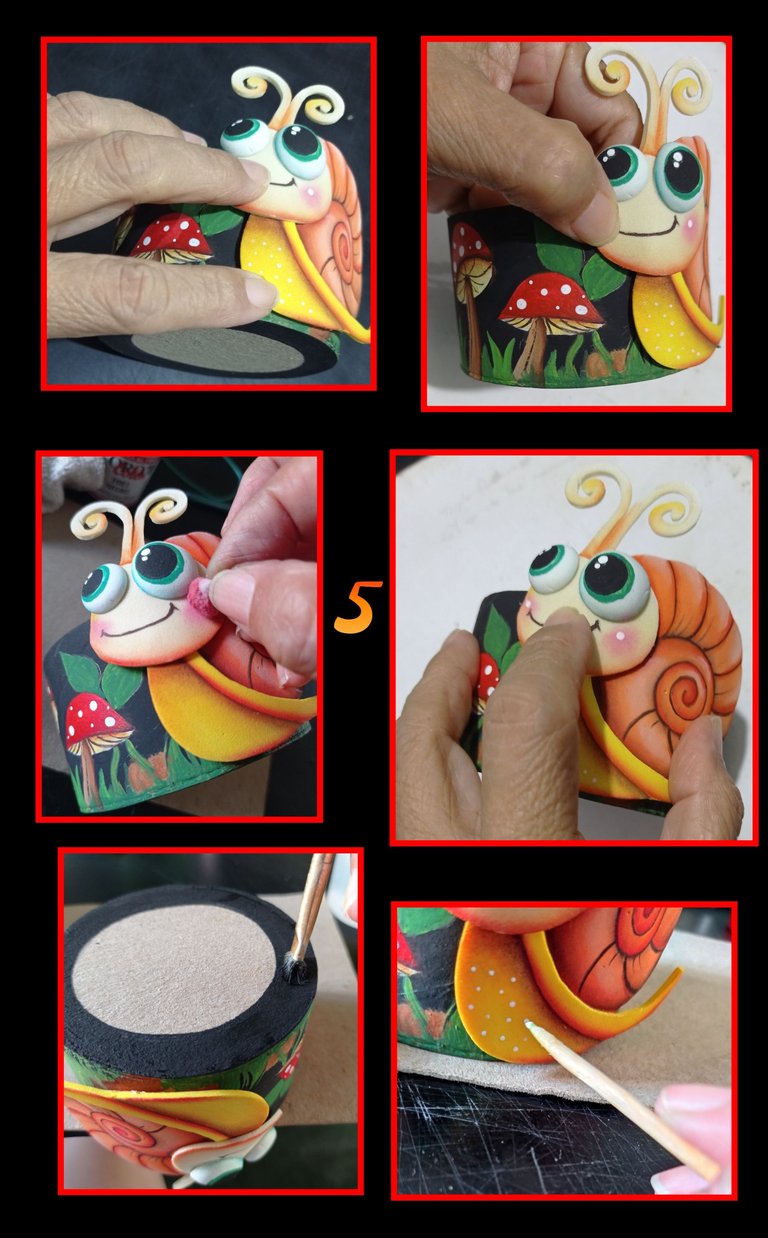
- Aplica silicón en la parte trasera del caracolito y pega haciendo presión hasta que seque, luego con un algodoncito con tiza pinta las mejillas.
- Luego en la parte inferior del cilindro pinta de negro para quitar cualquier detalle, recuerda siempre debes tratar de que tu trabajo quede muy bien rematado y por último pinta muchos puntitos en el cuerpo del caracol y deja secar.
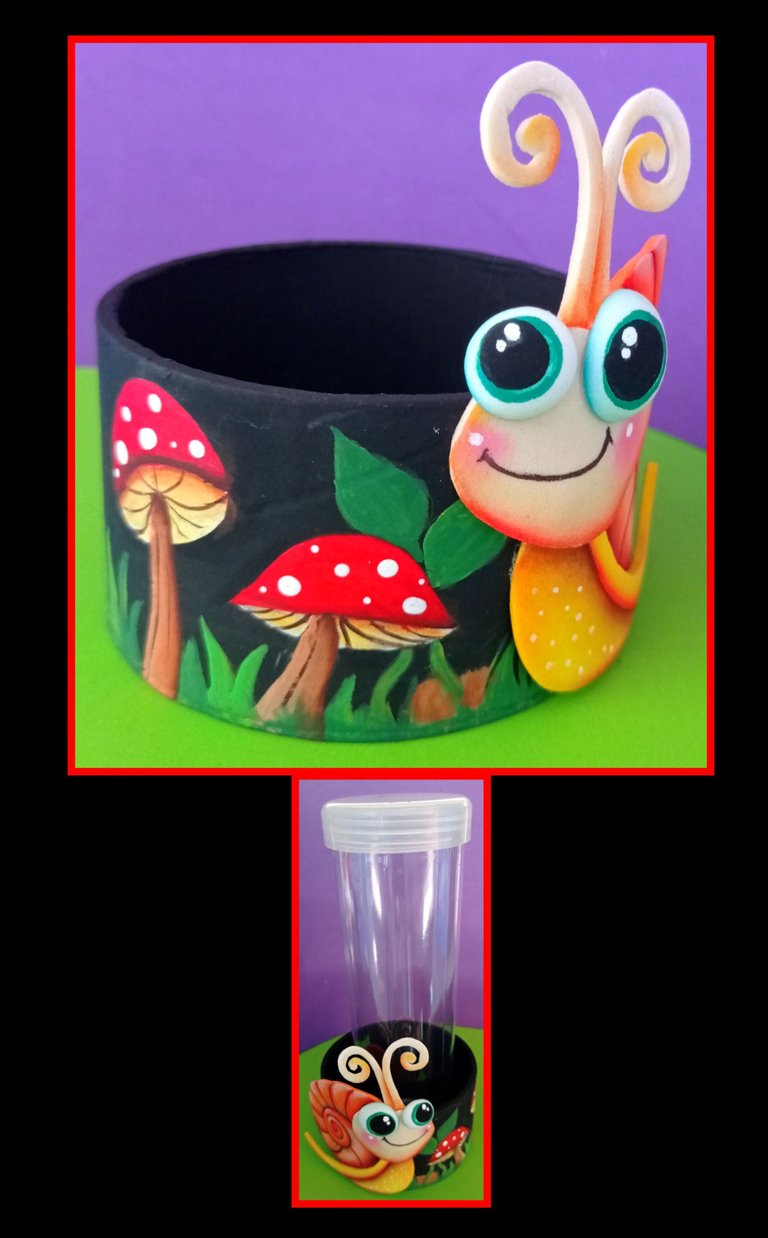
Ahora te mostraré como quedó este lindo cilindro multiuso que tu también podrás pintar o decorar con impresiones a tu gusto.
Fuente:
https://es.pinterest.com/pin/476255729362074259/

Hasta mi próximo tutorial, espero sea de tu agrado y sirva de guía para su elaboración.
Recuerda que reciclar es importante y muy beneficioso para todos.
English:

Hello, hello my dear community of creators and friends who visit me today.
Welcome to my Blog.
Join me and learn how to do it!
For this you will need:

| Tube of masking tape | Paints and paintbrushes |
|---|---|
| Foami colors | Drawing or printing |
| Scissors and pencil | Silicone and chalk |
| Cardboard | Electric iron |
Let's get started:
Step 1

- First we will make the base, place the adhesive tape tube on the cardboard, mark all the contour of the circumference and cut out, then apply silicone to the edge of the circle and the cardboard tube and glue.
- Then apply a coat of black paint and let it dry for 5 minutes, then apply the second coat and let it dry.
- Now outline the drawing of the snail with a soft lead pencil and then place the drawing on the foami and start rubbing to transfer the drawing, this is how you will do with each piece you are going to transfer and cut out.
you are going to transfer and cut out.
Step 2

- Now wet a brush in water and remove the excess, then dip the tip in the desired color and begin to pass around the contour of the pieces and let dry, then on top of the shell of the snail apply white paint.
- Then with a fine brush or marker go over the marked lines, to paint the eyes wet the back of a thick brush with blue paint and make circular movements to fill the desired size or marked and let dry, then dip in black paint and paint the center, also let dry and put a point of light with white paint.
- Apart heat the iron and place the eyes to thermoform.
- And start applying silicone to the pieces to assemble the snail.
This is how it will look!

Step 3

- Now draw with the pencil on the cylinder some mushrooms and bushes or flowers if you like, it's a matter of your imagination.
If you do not know how to draw, you can trace or print a drawing and transfer. - Once the drawing is done, start applying a coat of white paint over the images, then apply another coat of white paint and paint the stems and leaves with yellow paint.
Step 4

- With a fine brush, start painting the bush and leaves with green, then with red paint paint the mushrooms and so continue filling your drawing, then with a fine brush or marker, make thin lines and put white dots on the mushrooms and let dry.
Step 5.

- Apply silicone on the back of the snail and glue with pressure until dry, then with a cotton ball with chalk paint the cheeks.
- Then on the bottom of the cylinder paint black to remove any details, remember to always try to finish your work very well and finally paint many dots on the body of the snail and let dry.
Now I will show you how this nice multipurpose cylinder turned out and you can also paint or decorate it with prints to your liking.

Source:
https://es.pinterest.com/pin/476255729362074259/

Until my next tutorial, I hope it will be to your liking and serve as a guide for its elaboration.
Remember that recycling is important and very beneficial for everyone.

